Learning Raspbian (2015)
Chapter 3. Starting Raspbian
This chapter will run you through how to set up your Raspberry Pi, start Raspbian for the first time, and configure your camera if you have one.
In this chapter, we will cover the following topics:
· The different types of Raspberry Pi
· Plugging in your Raspberry Pi
· Booting your Raspberry Pi for the first time
· The Raspberry Pi Software Configuration Tool
· Finishing up
· Troubleshooting common problems
By the end of this chapter, you should have your Raspberry Pi up and running.
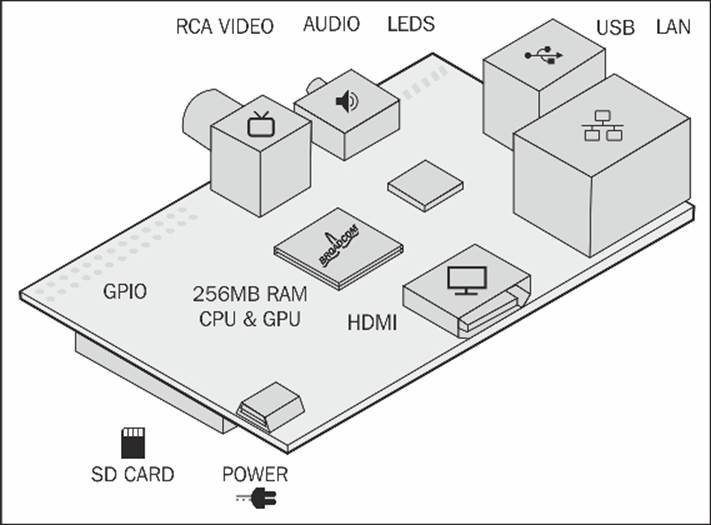
Raspberry Pi Model A and Raspberry Pi Model B
The Raspberry Pi A and Raspberry Pi B models are the original versions of Raspberry Pi:
Raspberry Pi A+
Raspberry Pi A+ is the latest version of Raspberry Pi. Raspberry Pi A+ has a couple of differences from the previous version of Model A. The following are the major differences:
· Raspberry Pi A+ uses a micro SD card
· It has a larger, 40-pin I/O connector
· You now need an adaptor cable if you want to use the AV output to connect your Raspberry Pi A+ to a TV.
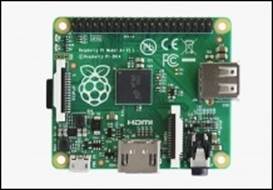
The Raspberry Pi A+ is shown below:
Raspberry Pi B+
The Raspberry Pi B+ is the other latest update of Raspberry Pi. Raspberry Pi B+ has a couple of differences from previous versions. These are the major differences:
· Raspberry Pi B+ uses a micro SD card
· It has a larger, 40-pin I/O connector
· You now need an adaptor cable if you want to use the AV output to connect your Raspberry Pi B+ to a TV
· Raspberry Pi B+ has a total of four USB ports instead of two
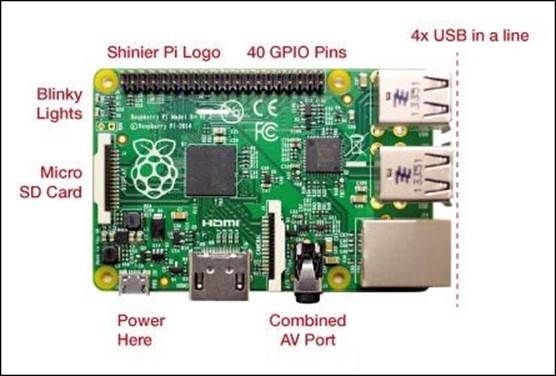
The Raspberry Pi B+ is shown below:
Plugging in your Raspberry Pi
It is really easy to plug in your Raspberry Pi and get it up and running. You will need a couple of things, as follows:
· Power supply
· Monitor
· Keyboard and mouse
· SD card
· Network connection
Let's go through these in detail.
Power supply
Raspberry Pi is really easy to power. It runs on a standard 5V micro USB supply. If you have a mobile phone charger with micro USB, then you should be able to use this in order to run your Raspberry Pi. You can also use a micro USB cable that is plugged into a USB phone charger.
We recommend that you use a dedicated micro USB power supply rather than a USB cable for maximum reliability. These will be available at the retailer from who you bought your Raspberry Pi.
It is important that the power supply be capable of supplying at least 1 amp. Anything less than this and you might run into intermittent resets and other problems.
Monitor
To make the most of your Raspberry Pi, you need a monitor. Raspberry Pi supports two different types of monitors:
· HDMI: This is a modern connector that supports the sending of both high-definition video and audio through one cable. All modern TVs and more and more computer monitors support HDMI.
· AV: This is an older standard that lets you connect your Raspberry Pi to an older TV. Both Raspberry Pi A and B have a standard AV connector at the side. If you have a Raspberry Pi A+ or B+ you can see that the AV connector is now built into the headphones connector, and you will need to buy an adaptor to be able to connect to your TV.
When you connect your Raspberry Pi to your monitor, it is important to make sure that you select the input on your monitor as the input you are using.
It is important to remember that you don't need a monitor to operate a Raspberry Pi once you have it up and running. It is, however, quite difficult to initially configure your Raspberry Pi without one.
Keyboard and mouse
A Raspberry Pi supports almost all USB keyboards and mouse. If you have a Raspberry Pi A or B, these will take both the USB ports that you have. Unless you have a Raspberry Pi B+ with four USB ports, we highly recommend that you plug a USB hub into your Raspberry Pi so that you have a few extra USB ports that you can use. You can check whether your keyboard and mouse are supported by going to http://elinux.org/RPi_USB_Keyboards.
SD card
You have already prepared an SD card in the previous chapter with Raspbian on it. You will need to plug this SD card into the Raspberry Pi. Make sure that you don't unplug the SD card while the Raspberry Pi is running.
Network connection
To be able to make the most of your Raspberry Pi, you will need a connection to the Internet. Raspberry Pi B and B+ both come with an Ethernet connector with which you can plug your Raspberry Pi into your router. To connect your Raspberry Pi to the Internet using Wi-Fi, you will need a USB to Wi-Fi adaptor. If you want to connect a Raspberry Pi A or A+ to the Internet using Wi-Fi, you will need to use a powered USB hub.
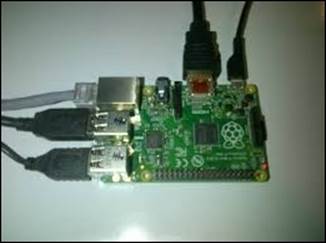
Plugging in your Raspberry Pi
Booting your Raspberry Pi for the first time
Now that you have everything ready, it is time to turn on your Raspberry Pi. The first thing that you need to do is make sure that your monitor is set to the correct input. This is important if you want to use HDMI, because if your Raspberry Pi doesn't detect an HDMI monitor during the boot process, it will automatically use the default AV out.
The bootloader
When you power on your Raspberry Pi, you will see the Raspberry Pi boot screen.

The Raspberry Pi bootloader
If you see this, it means that all the bootloader files on your SD card have been found and the appropriate monitor has successfully been detected. If you don't see this, then make sure that all the cables are plugged in, your monitor or TV is on the correct input, and you have imaged the SD card correctly.
The Linux kernel
The next step in the boot process is the initialization of the Linux kernel. The Linux kernel is contained inside the kernel.img file on your SD card.
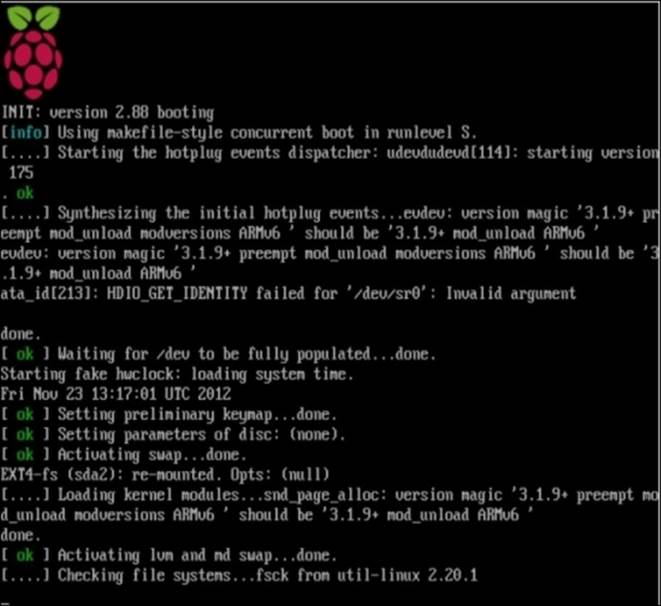
Booting Raspbian
You will see a screen similar to the preceding screenshot as your Raspberry Pi boots up. The first boot process will take a bit longer than subsequent boots. As this is the first time that your Raspberry Pi has booted up, it will automatically load the Raspberry Pi Software Configuration Tool.
You can use this tool to configure different parts of your Raspberry Pi.
The Raspberry Pi Software Configuration Tool
The Raspberry Pi Soft ware Configuration Tool is designed to be an easy and intuitive way to set up your Raspberry Pi. It is automatically launched when your Raspberry Pi is powered on for the first time.

The Raspberry Pi Software Configuration Tool
The Raspberry Pi Software Configuration Tool is extremely easy to use. To move between menus, use the arrow keys and the Tab button. To select a menu, simply press the Enter key.
You can run the Raspberry Pi Software Configuration Tool whenever you want by running the following command:
raspi-config
Setting up the Raspberry Pi
Now that your Raspberry Pi has launched the Raspberry Pi Software Configuration Tool, it is time to use it to get your Raspberry Pi up and running.
Resizing the root filesystem of your Raspberry Pi
The first thing that you need to do is expand the filesystem of your Raspberry Pi to the full size of your SD card. If you don't do this, you won't be able to use the rest of the storage on your SD card.
To do this, make sure that the Expand Filesystem option is selected. Now, simply press the Enter key. Your root partition that stores the Raspbian operating system will now be enlarged to the size of the SD card. You will then see the following menu:
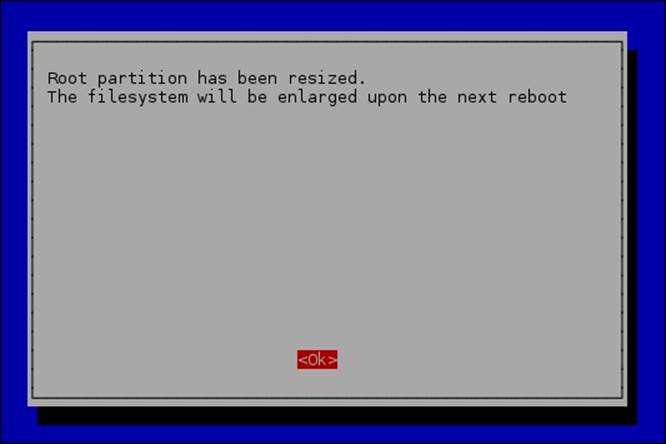
This message indicates that you have successfully resized your root partition
Changing the default password for the Raspberry Pi
The default user password for Raspbian is pi. This is not very secure and you might want to change this to something else. The Raspberry Pi Software Configuration Tool makes it extremely easy to do this.
1. Select the Change User Password option and then press Enter.
2. Now, you will see the first step to changing your password. When you are ready, press <ok>:
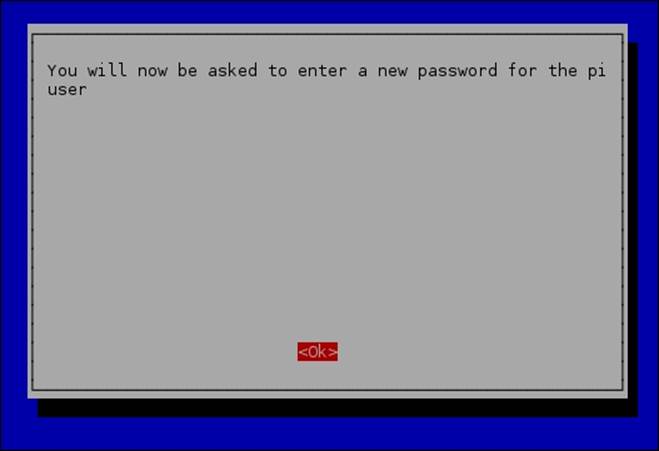
The first step to changing your password
3. You will then be prompted to enter your password. You won't see anything appearing as you type.
4. When you have finished entering your password, press Enter; type it again and press Enter. Make sure that you don't forget your password, as you will need it to install any new software onto your Raspberry Pi.
![]()
Changing the password
Enable boot to Desktop/Scratch
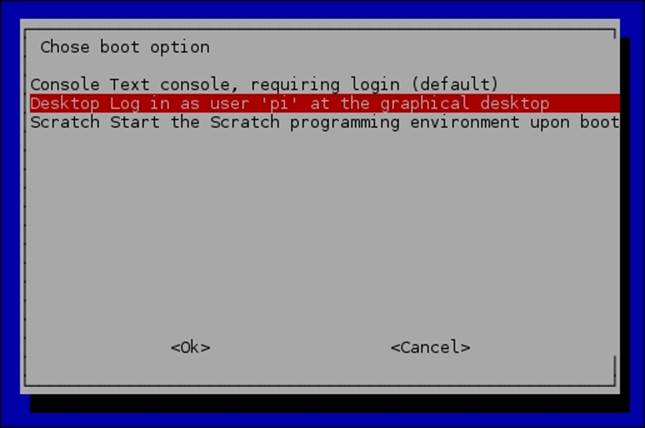
Raspbian has several different interfaces that you can make use of in your Raspberry Pi, such as a graphical desktop environment, Command Prompt, and the programming language called Scratch.
We recommend that you select the Desktop Login option so that you can make use of the graphical interface that is included in Raspbian. You can use Command Prompt and the Scratch language from the graphical interface. The default option is to use Command Prompt when your Raspberry Pi boots up.
Internationalisation Options
By default, Raspbian is configured for use in the United Kingdom. For those who aren't in the United Kingdom, you need to configure Raspbian to use the correct time zone, keyboard layout, and regional settings.
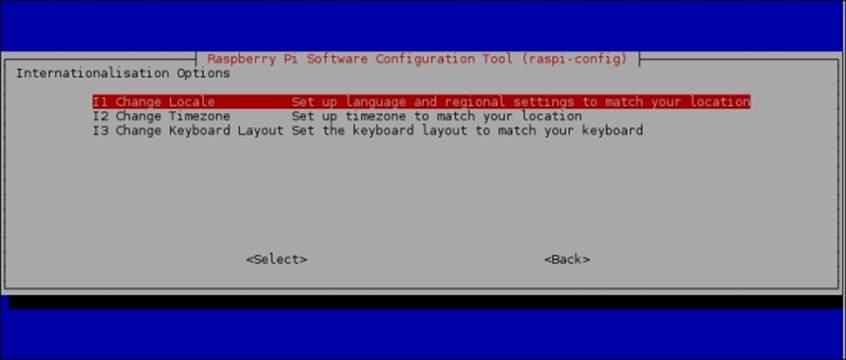
Internationalisation options in the Raspberry Pi Software Configuration Tool
Adding your locale
A locale is used to define which language Raspbian will use to display dates, numbers, currencies and so on. By default, the locale setting for your Raspberry Pi is the United Kingdom.
It is really easy to change the locale to your own country. To do this, select the Change Locale option.
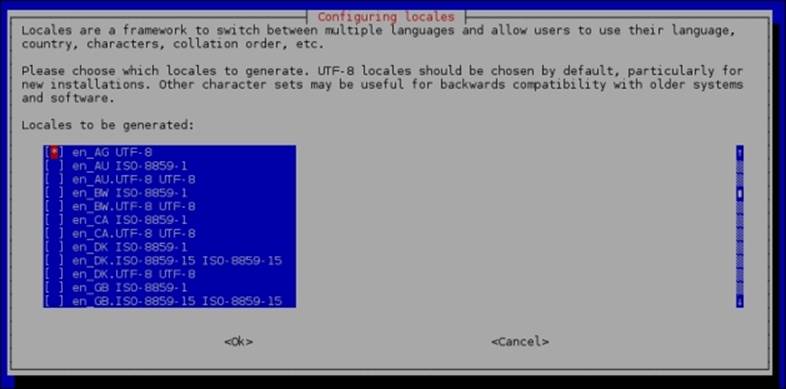
Selecting your locale
You can select multiple locales for your Raspberry Pi. In Australia, we would select the en_AU locale. If you were in the United States, you would select en_US.
Selecting your time zone
The Raspberry Pi Software Configuration Tool also makes it easy to select your time zone. By default, this is set to UTC. If you want the correct time to be displayed on your Raspberry Pi, you need to change your time zone.
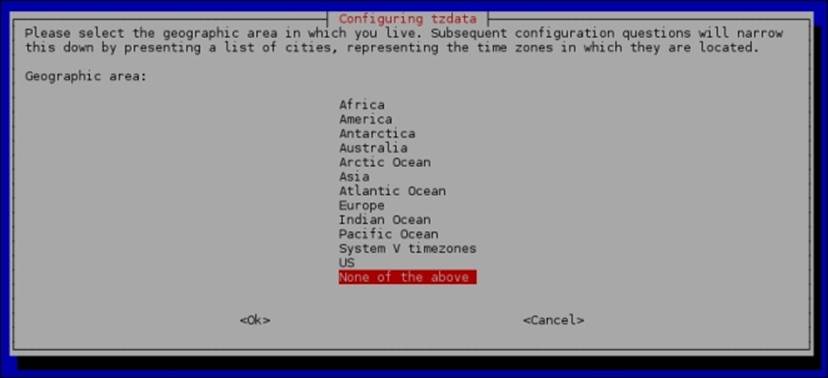
Selecting the time zone
To choose your time zone, select the region of the world you are in and press Enter. You can then select the city nearest to you and press Enter.
Changing your keyboard
By default, Raspbian expects you to use a keyboard designed for use in the United Kingdom. If you don't use a United Kingdom keyboard, many of the keys on your keyboard won't work as expected.
In order to tell Raspbian to use the correct keyboard, select Change Keyboard Layout.
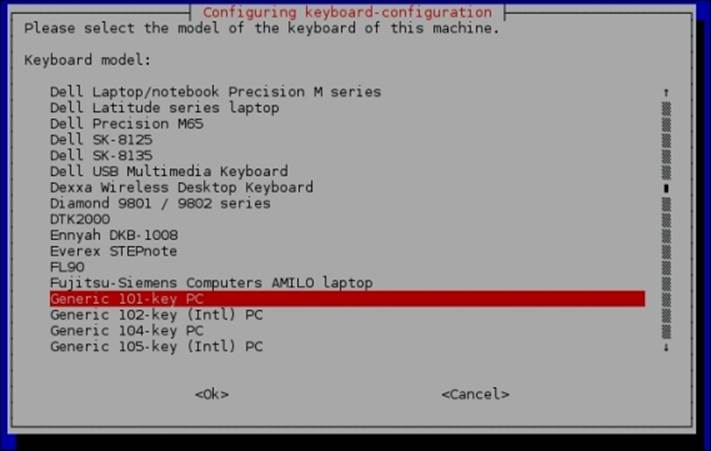
Selecting the keyboard
If your keyboard isn't listed, go to the Generic 101-key PC keyboard option and press Enter. Depending on your location, you should be able to find a generic keyboard that will work for your country. For example, in the Unites States or Australia we would select anEnglish (US) keyboard.
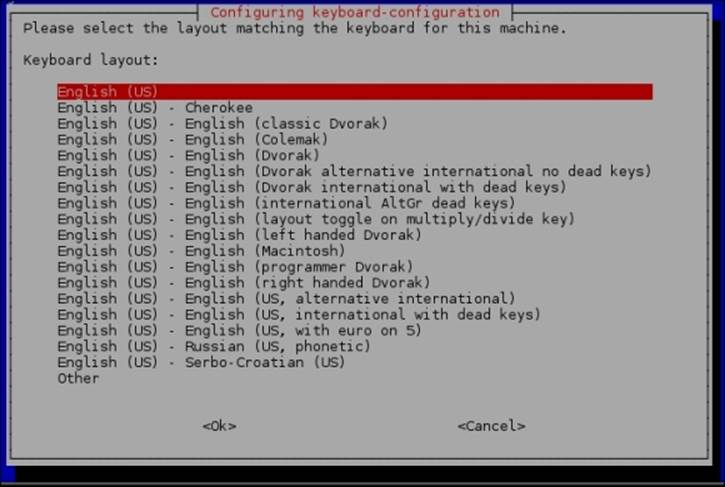
Selecting the default keyboard layout
After you've selected the keyboard, you will be asked which key you want to use as an AltGr key. An AltGr key is used in some languages to provide additional characters that aren't on the keyboard.
It is generally safe to select The default for the keyboard layout option.
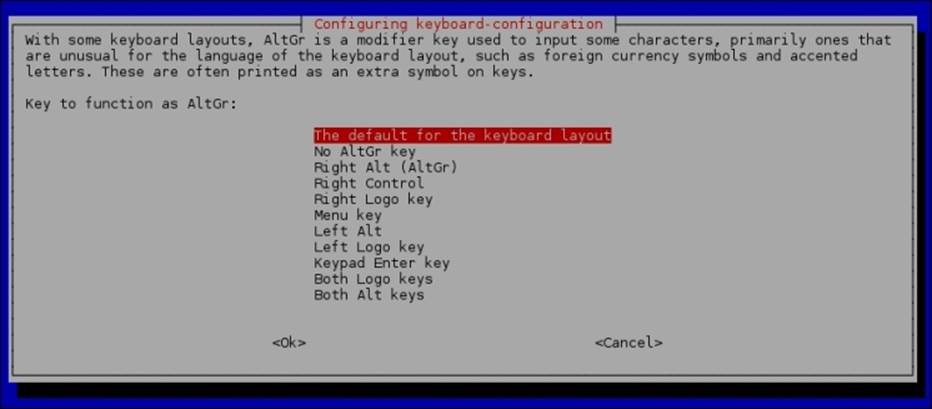
Selecting the AltGr key
The final step to configuring your keyboard is to select which key you would like to use as the Compose key.
A Compose key lets your Raspberry Pi interpret a combination of keys as a single key press. This isn't normally needed, and it is safe to select the default option of No compose key.
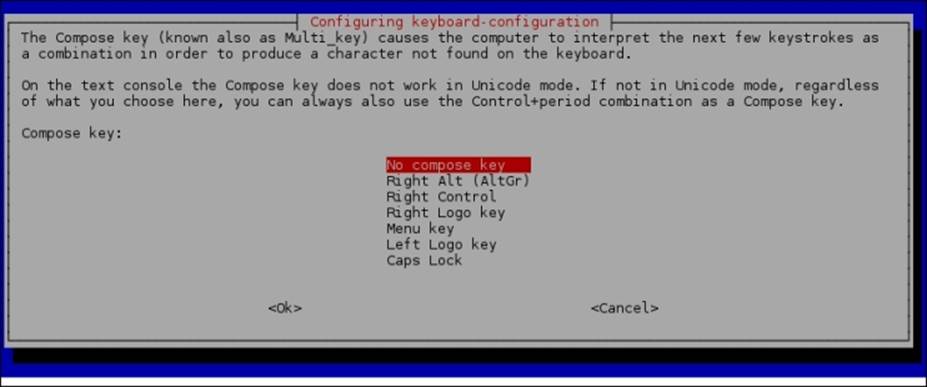
Selecting the default compose key
Enabling the Raspberry Pi camera
Raspberry Pi can be equipped with a camera. By default, it is disabled unless you have connected a camera and want to use it. To enable your Raspberry Pi camera, select the <Enable> option in the Raspberry Pi software configuration
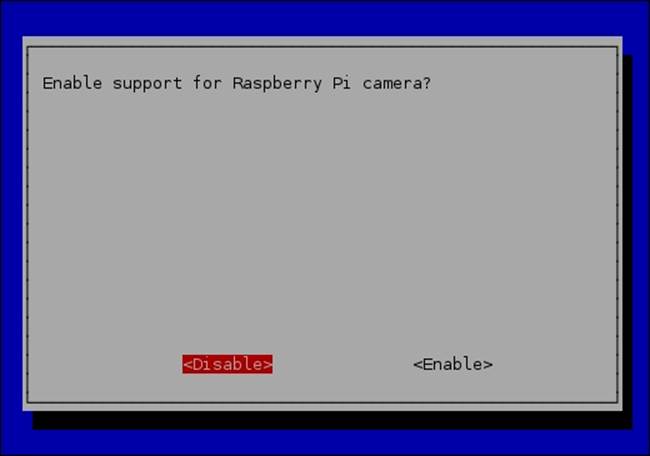
Enabling your Raspberry Pi camera
Adding to Rastrack
Rastrack is a not-for-profit website that maps many of the Raspberry Pis around the world. If you want to include your Raspberry Pi on the map, select Add to Rastrack and enter your e-mail address.
Note
You can see where some of the other Raspberry Pi boards are in the world by going to http://rastrack.co.uk/.
Enabling SSH
One other useful customization that you can do in the Raspberry Pi Software Configuration Tool is to enable the SSH server. SSH is a secure protocol that, among other things, allows you to access Command Prompt of your Raspberry Pi remotely.
You can enable SSH by selecting Advanced Options in the Raspberry Pi Software Configuration Tool. Once there, select A4 (SSH) and press Enter. Select Enable SSH and you are done. This enables you to remotely access your Raspberry Pi using an SSH client, such as PuTTY and to copy files to your Raspberry Pi.
Finishing up
Now that you have customized your Raspberry Pi, it is time to start using your Raspberry Pi. To do this, you need to exit the Raspberry Pi Software Configuration Tool by selecting Finish. You will be asked to reboot your Raspberry Pi. Select Yes and your Raspberry Pi will reboot and load the graphical interface, which is ready to go. Remember that you can always rerun the Raspberry Pi Software Configuration Tool by running the following command:
sudo raspi-config
Common problems
The most common problems that people face with their Raspberry Pi come down to the power supply they are using. If your Raspberry Pi is behaving strangely, then we recommend that you try a different power supply. A good quality supply is recommended as the Raspberry Pi is susceptible to electrical noise.
It is also a good idea to check whether you have imaged your SD card correctly. It is OK to image the SD card again.
Another common problem that people have when they are setting up their Raspberry Pi for the first time is they select the wrong input on their monitor. When a Raspberry Pi boots, if it cannot find an HDMI monitor attached, it will automatically use the component output. The easiest way to stop this from happening is to make sure that the input on your monitor or TV is set to the correct input before your Raspberry Pi is turned on.
Summary
This chapter walked you through how to set up your Raspberry Pi and configure Raspbian for your region and keyboard. You also learned some of the potential problems that you might experience when you are setting up your Raspberry Pi.
In the next chapter, we will cover the Raspbian desktop environment.
All materials on the site are licensed Creative Commons Attribution-Sharealike 3.0 Unported CC BY-SA 3.0 & GNU Free Documentation License (GFDL)
If you are the copyright holder of any material contained on our site and intend to remove it, please contact our site administrator for approval.
© 2016-2026 All site design rights belong to S.Y.A.