Learning Raspbian (2015)
Chapter 4. An Introduction to the Raspbian Desktop
Now that you have got your Raspberry Pi set up and Raspbian configured, it is time to start using Raspbian on your Raspberry Pi! The Raspbian desktop is a simple, customizable, and easy-to-use desktop environment. This chapter will run you through how to customize it and some of the applications that are included with it.
We will cover the following topics in this chapter:
· The Raspbian desktop
· An introduction to the Linux filesystem
· A tour of the Raspbian desktop
· Virtual desktops
· Network management with Raspbian
· Customizing your Raspbian desktop
· Preinstalled software
· File management in Xfce
The Raspbian desktop
The Raspbian desktop is very similar to many other desktop environments, such as the Windows desktop. Raspbian is packed with heaps of educational and programming tools out of the box.
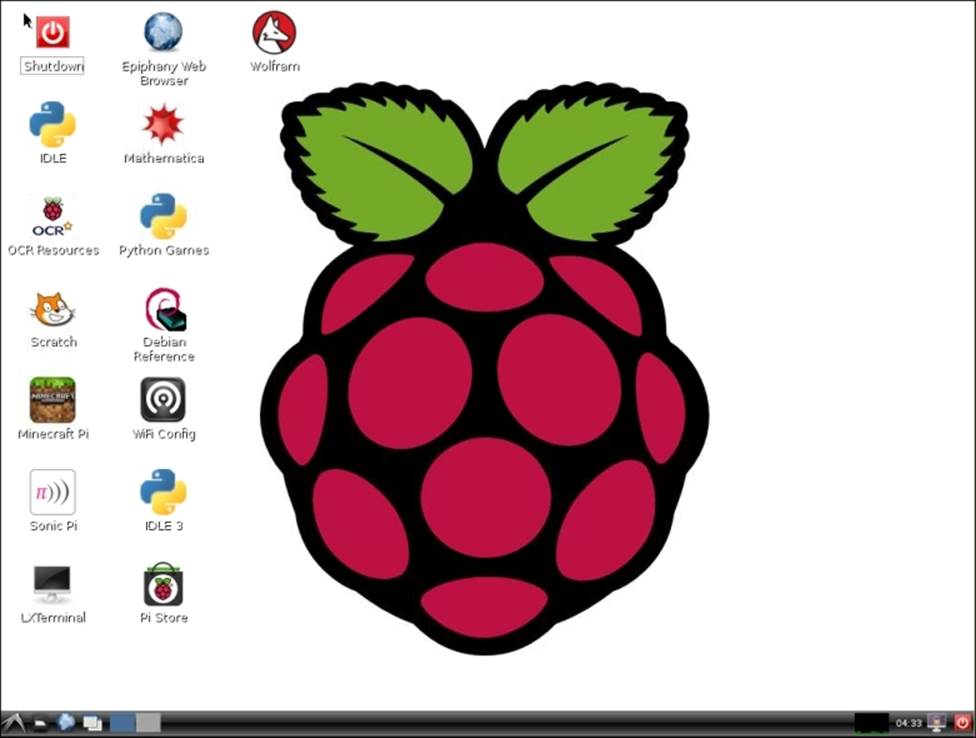
The Raspbian desktop
To be able to make the most of the desktop environment, you need to have a computer mouse connected to your Raspberry.
The Raspbian filesystem
Before we go any further, it is important to get a good understanding of how files and storage are organized on a Linux-based operating system such as Raspbian.
It won't take you long if you are used to using Windows to realize that all your files are organized differently. Gone are the drive letters that you used to access all the different storage attached to your computer. Linux, like its cousins Unix and Berkeley Software Distribution (BSD), from which Mac OS X is derived, organizes everything within a filesystem hierarchy.
This filesystem hierarchy starts from one place, the root directory: /. Every file and device in Linux is contained within this single hierarchy.
An example of how this works is the /media folder. By default, if you plug a USB drive into your Raspberry Pi, Raspbian will automatically create a folder inside /media. This folder will represent the contents of your USB drive. If you have more than one storage device attached, they will all appear in /media.
A simple way to think about this is described in the Linux Documentation Project (http://www.tldp.org/):
"On a UNIX system, everything is a file; if something is not a file, it is a process."
There are many different directories in a modern Linux distribution such as Raspbian that are required for it to operate. These are detailed in the following table:
|
Directory |
Description |
|
/ |
The root of the Linux filesystem. |
|
/bin |
This contains programs required to boot and use Raspbian. |
|
/dev |
All the devices attached to our Raspberry Pi are available here. The devices are represented as special files, for example sda1 and null. |
|
/etc |
This contains the configuration files for all the different software packages. |
|
/home |
Every user in the system has a folder in /home. This helps you keep each user's folders together. |
|
/lib |
Software libraries contain shared code that is shared between multiple applications. These files end in .so and are stored in this folder. |
|
/mnt and /media |
Any other filesystems that are attached to the Raspberry Pi are available inside these folders. |
|
/opt |
Software that is not installed by default with Raspbian will often be installed in this folder. |
|
/proc |
All the files inside the /proc folder are special files that allow access to various statistics and configurations in the Linux kernel. |
|
/sbin |
Any software applications that are used by system administrators to manage the system are stored inside this folder. |
|
/tmp |
Any temporary files that are used in the running of Raspbian are normally stored in /tmp. These files are normally deleted on reboot. |
|
/usr |
Any application that a normal user would install or use are installed inside this folder with their libraries and documentation. |
|
/var |
/var contains all the logs and other files that are constantly changing on your Raspberry Pi. |
|
/root |
This folder is similar to the /home, but only contains files for the root user. |
|
/boot |
This folder contains the configuration files that your Raspberry Pi uses to boot. |
A tour of the Raspbian desktop
There are several parts that make up the Raspbian desktop. These are the desktop, bottom panel, main menu, and panel items.
The desktop
The desktop is the main part of the screen that you see when you aren't running any programs. By default, the background image is the Raspberry Pi logo, but you will be able to change this to anything you want.
The desktop also contains all the desktop icons. The icons can be selected and dragged around the desktop. These icons start various programs when double-clicked and the icons can be moved around.
The Raspbian desktop
The bottom panel
At the bottom of the Xfce desktop, there is the taskbar. The taskbar displays all the open programs that you are running. It also contains the main menu and many panel items.
![]()
The bottom panel
On the left and right-hand sides of the bottom panel, there are several different panel items. The panel items perform various functions, such as opening a web browser or minimizing all Windows.
![]()
Some panel items
The default panel items perform the following tasks:
|
Icon |
Task |
|
|
This opens a file manager |
|
|
This opens the default web browser |
|
|
This minimizes all the windows on the screen |
|
|
This helps you switch between virtual desktops |
The main menu
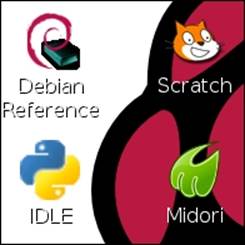
In the bottom-left corner of the screen is the main menu. This menu contains many of the different programs that are preinstalled in Raspbian. These programs are split into different categories, as shown in the following screenshot The main menu is very similar to the Start menu in Microsoft Windows.

The main menu
Panel items
Panel items are small, interactive displays and buttons that show you important information without having to open a program.
By default, Raspbian includes four panel items in the bottom-right corner of the screen. These are as follows:
· CPU usage indicator
· Clock
· Screen lock button
· Power button
We can see some default panel items in the following screenshot:
![]()
Virtual desktops
Virtual desktops are really interesting additions to Xfce that aren't available by default on Windows or Mac OS X.
Note
Mac OS X includes Spaces (multiple desktops), however it is disabled by default. You are able to get virtual desktops in Windows using third party software such as VirtualWin.
Virtual desktops are basically like other virtual screens where you can switch back and forth between your open programs. You are able to lay out all your open programs on different virtual desktops, and then go back and forth between these virtual desktops by clicking on the virtual desktop panel item. Each of these desktops can have different backgrounds and panels. You are able to move between Windows using the ALT + TAB keys on the keyboard.
Two Raspbian desktops
You can create as many virtual desktops as you want using the Openbox Configuration Manager. These desktops can have names so you can keep track of where all your applications are.
Network management with Raspbian
To make the most of your Raspberry Pi, it needs to be connected to the Internet. You can do this in two ways: using an Ethernet cable or by Wi-Fi. Raspbian does a good job of automatically configuring its network settings for you, but sometimes you need to give it a helping hand.
Unfortunately, Raspbian doesn't include a graphical interface that lets you configure your network connections. You are able to configure your network interfaces manually using a text editor, or you can install a graphical interface to do this.
Connecting your Raspberry Pi to an Ethernet network
The Raspberry Pi Model B and Model B+ have an onboard Ethernet port. By default, Raspbian is configured to automatically get an IP address from a DHCP server on your network.
Sometimes, you might want to manually assign an IP address to your Raspberry Pi. This is done by editing a file called interfaces. To edit this file, you need to open up a console. The exact steps to do this are given in Chapter 6, The Console The command you need to run is as follows:
sudo nano /etc/network/interfaces
This will launch the nano text editor. The interfaces file, by default, will contain the following:
auto lo
iface lo inet loopback
iface eth0 inet dhcp
allow-hotplug wlan0
iface wlan0 inet manual
wpa-roam /etc/wpa_supplicant/wpa_supplicant.conf
iface default inet dhcp
An Ethernet port in Linux is identified by the eth prefix. The Ethernet port in your Raspberry Pi is called eth0. The interfaces file contains a section that configures the IP address. You will see that it is set by default to DHCP. This is where you can assign your IP address. To do this, change the iface line to the following lines:
auto eth0
iface eth0 inet static
address 192.168.2.6
netmask 255.255.255.0
gateway 192.168.2.1
You can see where you are able to enter your own network configuration. Once you have made the changes, press CTRL + x to exit nano, followed by y to save your changes.
To apply the changes you have made, run the following command:
sudo service networking restart
If there are any problems with your configuration, you will be notified so that you can correct them.
Connecting your Raspberry Pi to a Wi-Fi network
Raspbian supports many wireless dongles out of the box. This makes it really easy to access the Internet wirelessly from your Raspberry Pi.
You can find a list of Wi-Fi dongles that are tested and will definitely work with your Raspberry Pi at http://elinux.org/RPi_VerifiedPeripherals.
Connecting your Wi-Fi dongle to your Raspberry Pi
It is a good idea to plug in a Wi-Fi dongle into your Raspberry Pi; this should be done when the Raspberry Pi is off. The reason for this is that the power supply in the Raspberry Pi can sometimes have problems when USB devices are plugged in.
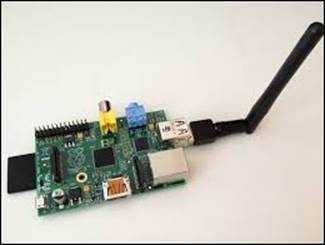
A Raspberry Pi B with a USB Wi-Fi dongle
Connecting to a wireless network
After you plug in your supported Wi-Fi dongle, it will be automatically detected and ready for use. Before you can go any further, you need to open the WiFi Config tool. The tool can be found on the Raspberry Pi desktop. After opening the tool, you will see the following window:
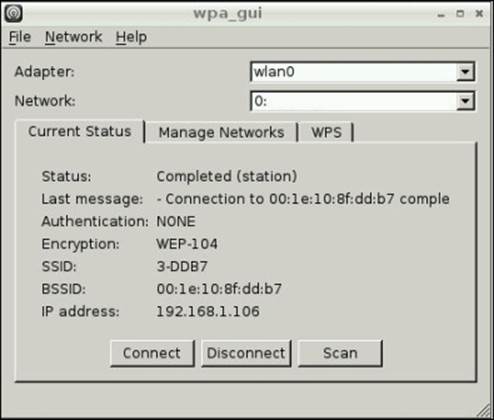
The WiFi Config tool
The WiFi Config tool is an easy-to-use program to connect your Raspberry Pi to your wireless network.
To connect to your wireless network, perform the following steps:
1. Click on Scan as shown in the following screenshot. This will list all the wireless networks within range of your Raspberry Pi. Simply double-click on your network in the list.
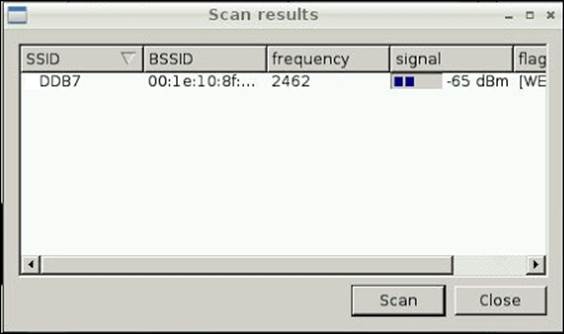
Scan results in the WiFi Config tool
2. If you have security enabled on your Wi-Fi network (it is highly recommended that you do), you will be asked to enter your wireless key.
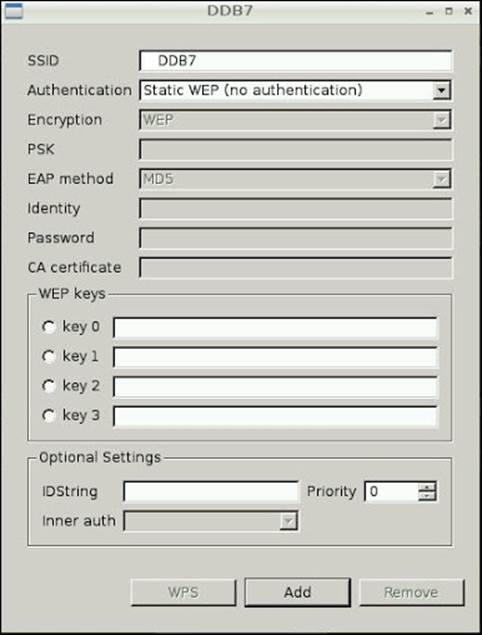
The wireless network configuration settings
3. After entering your key, click on Add. You will return to the main Wireless Config Window. Simply click on your Wi-Fi network and select Connect.
Tip
Did you know that WEP Wi-Fi encryption was broken in 2001, and the WEP key can now be discovered by someone with a Raspberry Pi within minutes?
Customizing your Raspbian desktop
Xfce can be customized in many different ways. This allows you to personalize the desktop environment to look the way you want it.
Changing your display resolution
The first thing that you should check when Raspbian boots to the desktop is whether the resolution your Raspberry Pi is using is suitable for your monitor. Raspbian attempts to select the correct resolution on your TV or monitor to make sure that everything looks like it should, but sometimes it is unable to do this correctly. You will be able to recognize that the resolution is wrong if the image on the screen looks blurry or doesn't fit properly.
You can change the resolution to suit your monitor using the Monitor Settings application in the preferences section.
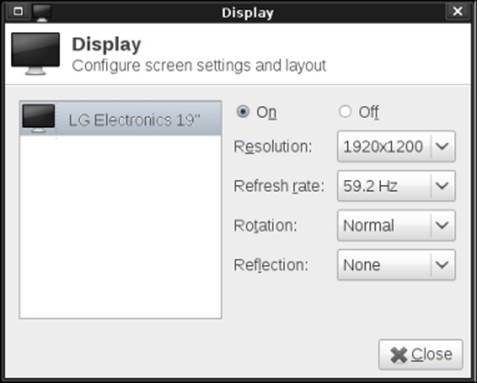
Monitor settings
It might take a few goes to find the best resolution for your monitor or TV, but it is definitely worth it! You are also able to customize the refresh rate of your monitor if you still have problems getting the display looking right.
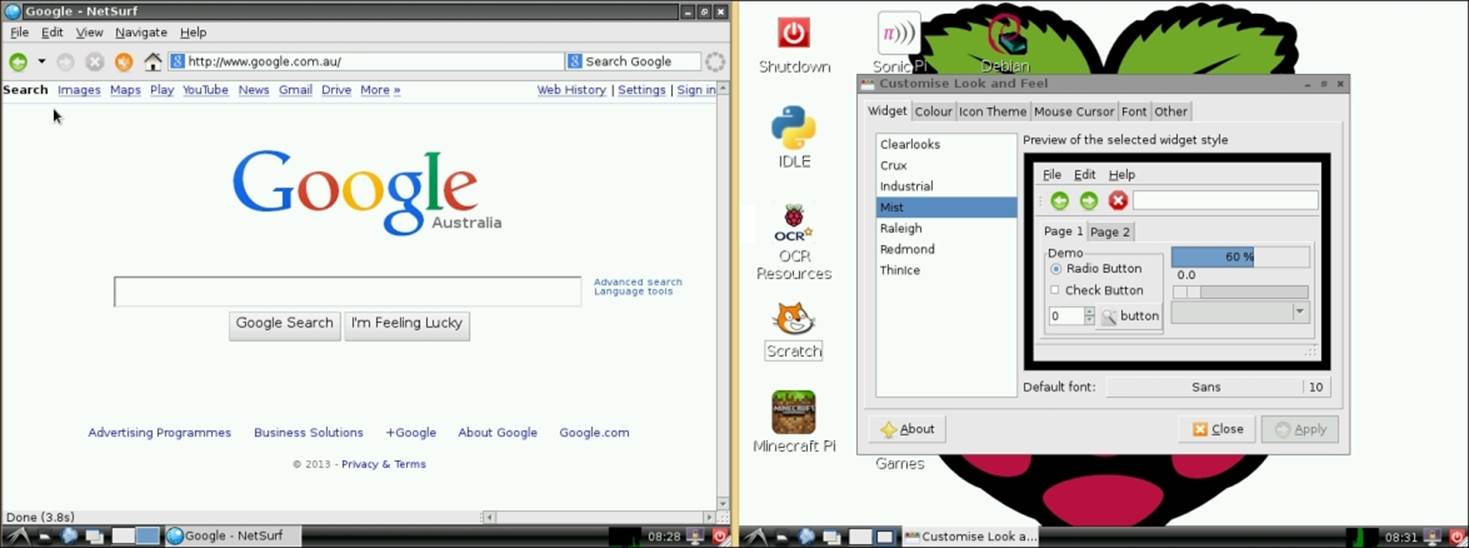
Customizing the look and feel of your desktop
Almost every part of the Raspbian desktop can be customized, from creating extra panels to changing the default colors and fonts.
To get started, click on the main menu and inside the preferences sub menu you will see Customise Look and Feel. In this window, you are able to change almost everything from the default styles, colors, icons, and fonts to many other things.
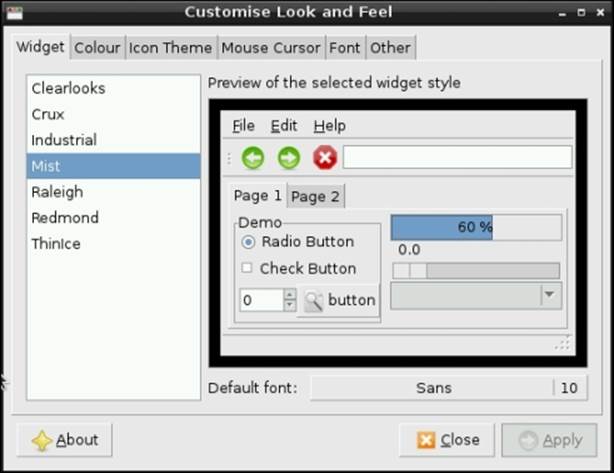
Customise look and feel dialog
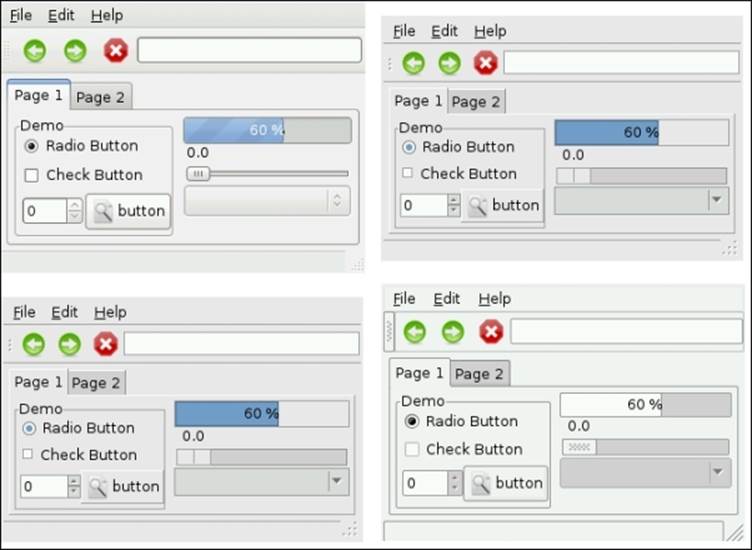
One of the easiest things to customize is the style of the different UI elements. There are many different styles that you can choose from:
Openbox Configuration Manager
Openbox is the default Windows manager that is bundled with Raspbian. A Windows manager is responsible for the placement and appearance of Windows in a desktop environment.
You can also customize your desktop using Openbox Configuration Manager, which is found in Preferences.
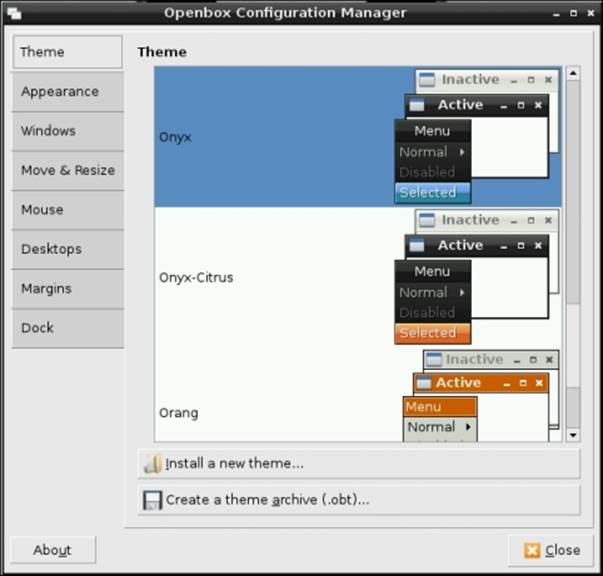
The Openbox Configuration Manager
You can install any themes designed for Openbox on your Raspberry Pi. There are many different themes preinstalled that you can choose from, or you can download many themes from the Internet. One such website that you can download themes from ishttp://box-look.org/.
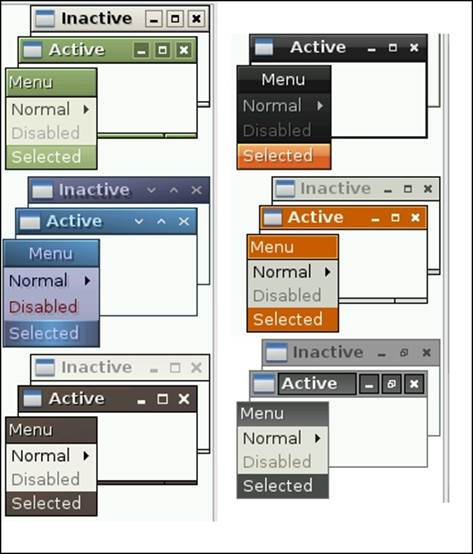
Examples of the different Openbox themes
Many other parts of the Raspberry Pi desktop can be customized using the Openbox Configuration Manager, ranging from how the titles of all the windows are displayed to how you resize the windows.
The best way to see all the ways in which you can customize your desktop is to have a play!
Changing the default background picture
The desktop background of your Raspberry Pi can be easily customized. To do this, simply right-click on an empty spot on your desktop to bring up a menu:

The desktop context menu
From the menu, select Desktop Preferences; this will bring up the Desktop Preferences menu.
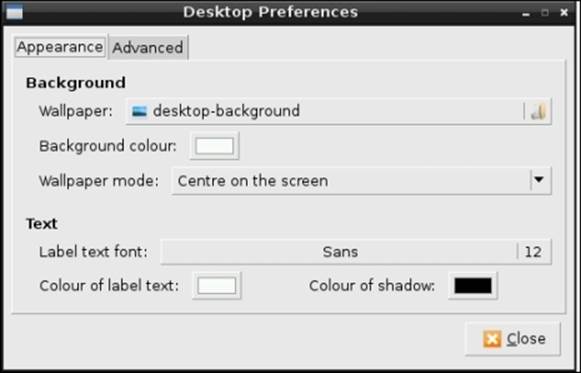
The desktop preferences dialog
The desktop preferences menu lets you customize all sorts of things on the desktop. To change the default image that you see on the background, simply click on the select box labeled Wallpaper, and choose the picture you want. There are several pictures included in Raspbian to get you started, and you are able to get more from other places on the Internet.
You can change the background color on the desktop, and you can also view how the background image is displayed by changing the Wallpaper mode and Background color.
Customizing your panels
Panels are a really nice feature of Xfce. Panels can be added to any part of the screen, and they can contain any number of panel items, which can be anything from a button to a graph.
![]()
A customized panel
Adding a new panel
By default, you have one panel at the bottom of the screen. You are able to add as many of these as you want in any position. Be careful before you add too many, as too many panels can slow down your Raspberry Pi!
To add a panel, right-click on an empty spot on a panel that you already have and select Create New Panel. The corresponding dialog will appear.
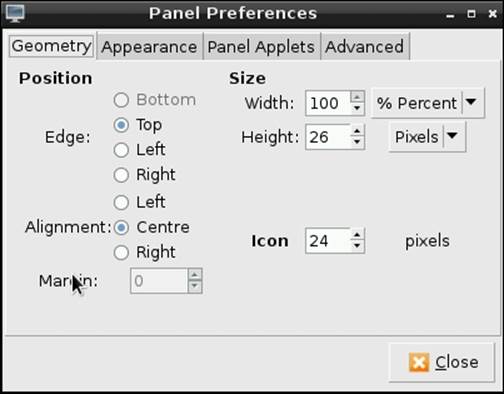
The create panel dialog box
From here, you can configure almost any aspect of your new panel, including its position, width, and appearance. You can also add panel items. When you click on Close, your new panel will appear, ready for you to add panel items to.
You can customize the size and shape of the existing panels by right-clicking on the panel that you want to resize and selecting Panel settings. This will bring up the same preceding dialog.
Adding and removing panel items
By default, there are only a few panel items on the main panel. There are almost twenty other types of panel items available by default in Xfce. It is really easy to add some of these to your panels.
To do this, right-click on the panel that you want to add the panel items to and select Add / Remove Panel Items.
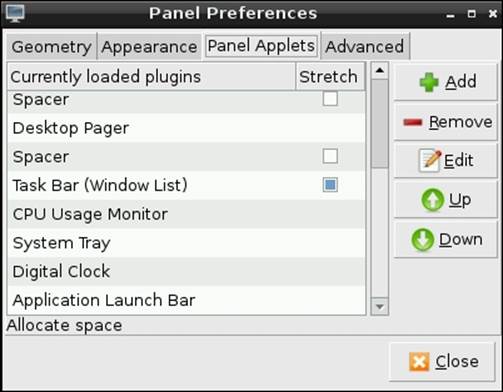
Adding panel items
Some of the widgets that you are able to add include a volume control, custom menu, and a spacer to help you lay out all the panel items that you have.
Preinstalled software
There are hundreds of free pieces of software installed by default with Raspbian. These include a calculator, web browsers, programming tools, and serious scientific applications.
You will find all the applications either on your desktop or in the main menu.
Web browsers
There are three web browsers installed by default with Raspbian. These are Epiphany, Dillo, and Netsurf. Each of these web browsers are designed for different purposes. It is also possible to install a version of Firefox onto your Raspberry Pi called Ice Weasel. This will be covered in Chapter 6, The Console.
Epiphany
Epiphany (now called Web) is a free, easy-to-use web browser that has a clean and minimalistic user interface. It uses the WebkitGTK+ rendering engine, similar to what is used in many other web browsers such as Safari and Google Chrome.
It is a fast, fully-fledged web browser with support for JavaScript and all modern web standards. It is highly recommended as your first choice of web browser on your Raspberry Pi.
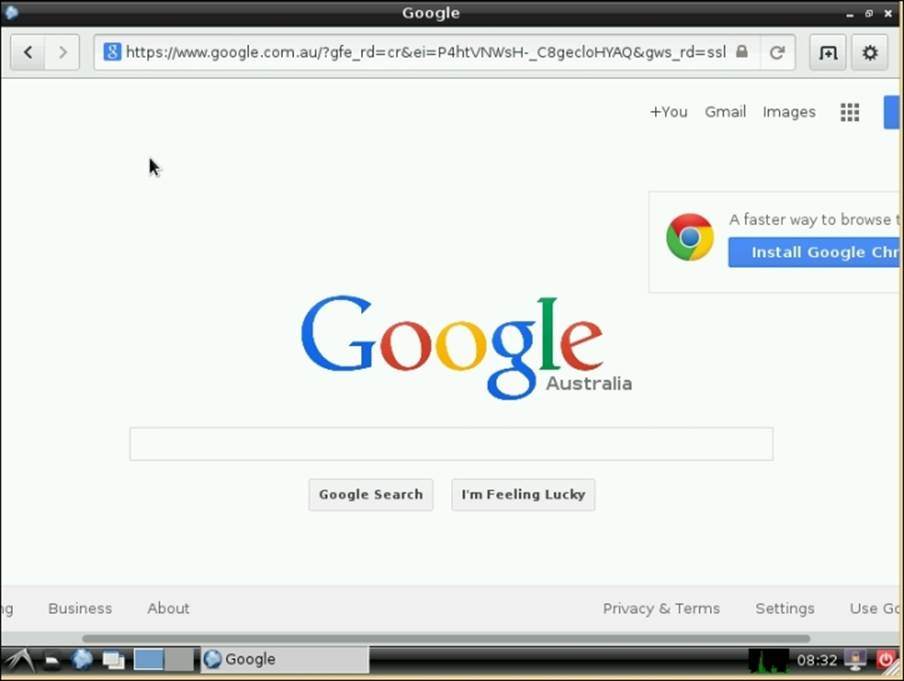
The Epiphany web browser
Dillo
Dillo is a small, fast, minimalistic web browser designed for older, slower computers or embedded devices such as the Raspberry Pi that have a limited amount of memory and processing power.
Dillo does not support JavaScript or any other type of scripting. Because of this, it has trouble browsing most modern websites. It is, however, the fastest web browser on the Raspberry Pi and is highly recommended for browsing older websites.
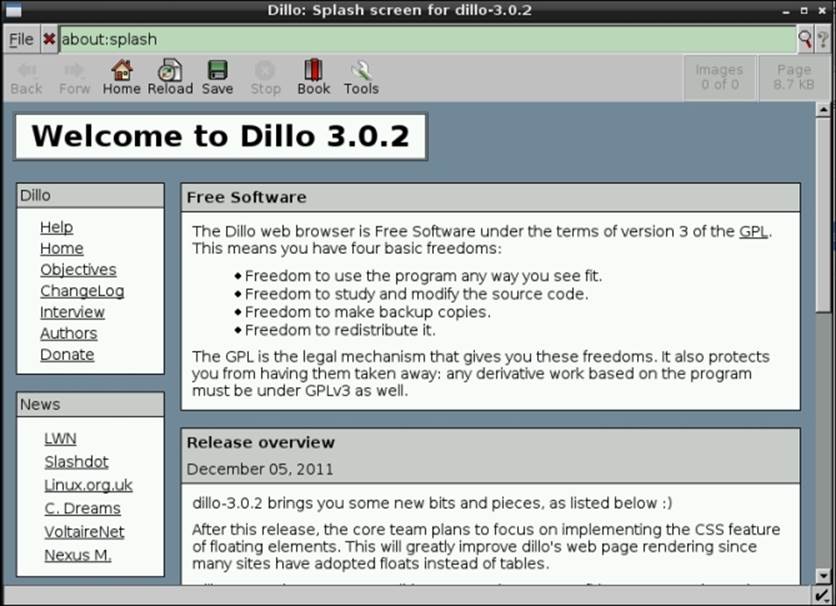
The Dillo web browser
Netsurf
Netsurf is another interesting web browser that has been included in Raspbian. Netsurf is unique, as it uses its own rendering engine called bespoke.
Netsurf was originally developed to run on RiscOS but has since been ported to many other older platforms such as AmigaOS and Haiku. Netsurf also has another interesting feature: it can be run without any other graphical support software such as X11. This makes it ideally suited for an extremely secure web kiosk.
Unfortunately, Netsurf does not support JavaScript, making it unsuitable for browsing modern websites. Plans to fix this issue are in place for version 4.
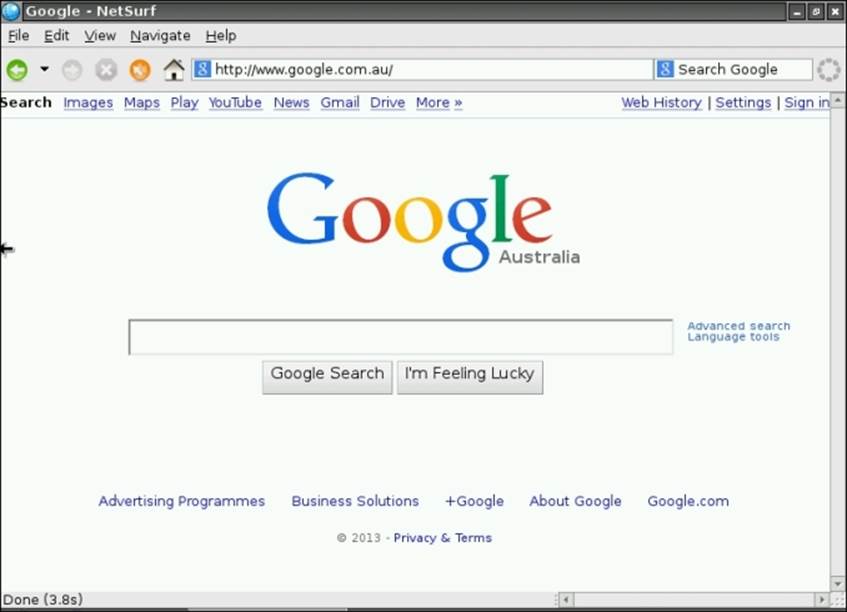
The Netsurf web browser
LXTerminal
LXTerminal is the default terminal emulator that is included with Xfce. LXTerminal allows you to run console applications inside the graphical environment of Xfce and acts as a bridge between you and your Raspberry Pi, similar to what Xfce does. We will discuss using LXTerminal in more detail in the following chapters.
Multiple instances of LXTerminal can be run, which allow you to run several terminal applications at the same time. These instances can be in their own windows or in a tab.
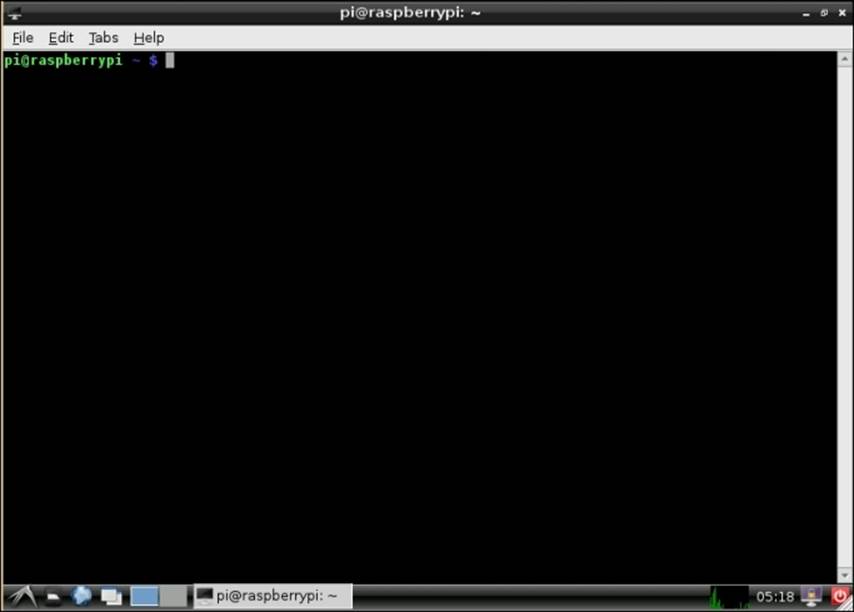
LXTerminal
Sonic Pi
Sonic Pi is one of the most exciting packages included in Raspbian. It is a free sound synthesizer that allows the user to create sound effects using a programming language. Sonic Pi has already been used to create many amazing sound effects. You can expect to hear more about it in the future!
It is designed for teachers, with extensive classroom trials to make it really easy to teach and use. You can hear Sonic Pi in action by going to http://sonic-pi.net/.
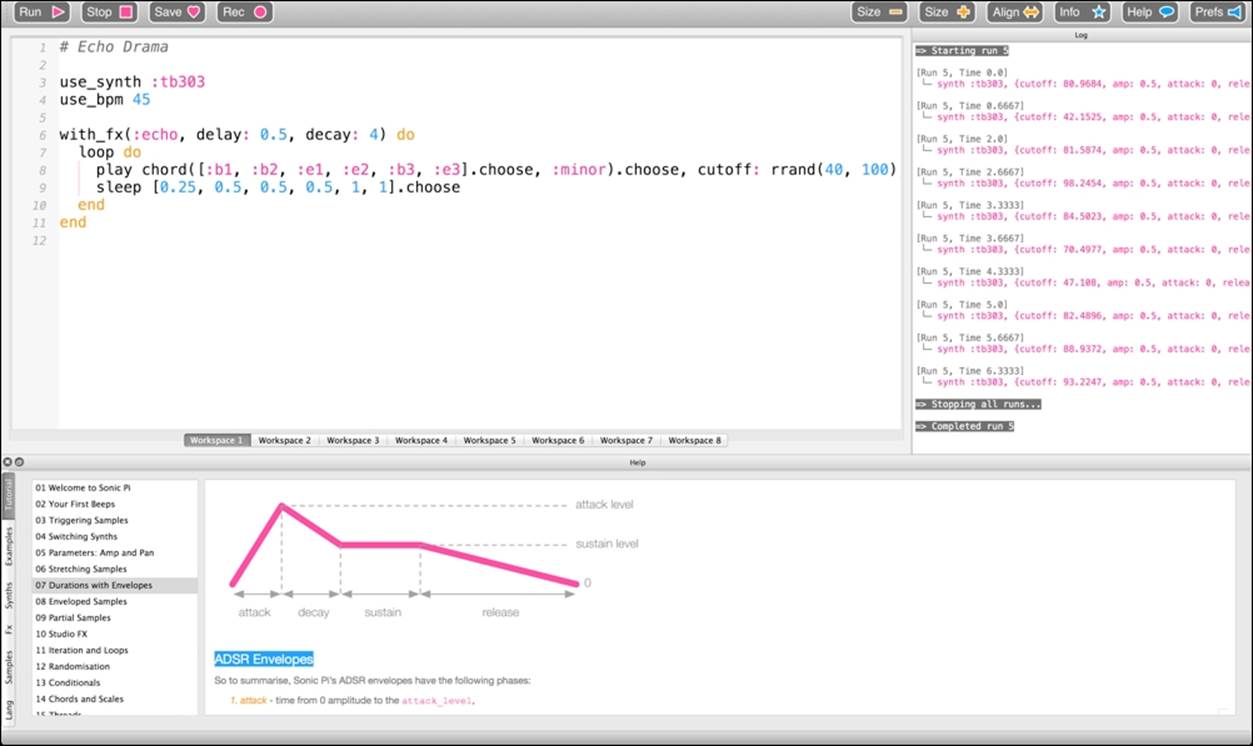
Sonic Pi in action
Debian Reference
As previously discussed, Raspbian is based on the Debian operating system. The Debian Reference application that is preinstalled on your Raspberry Pi is an excellent reference guide to almost every part of the operating system. The Debian Reference opens up in a web browser and is many hundreds of pages long. It is freely distributed and is well worth a read.
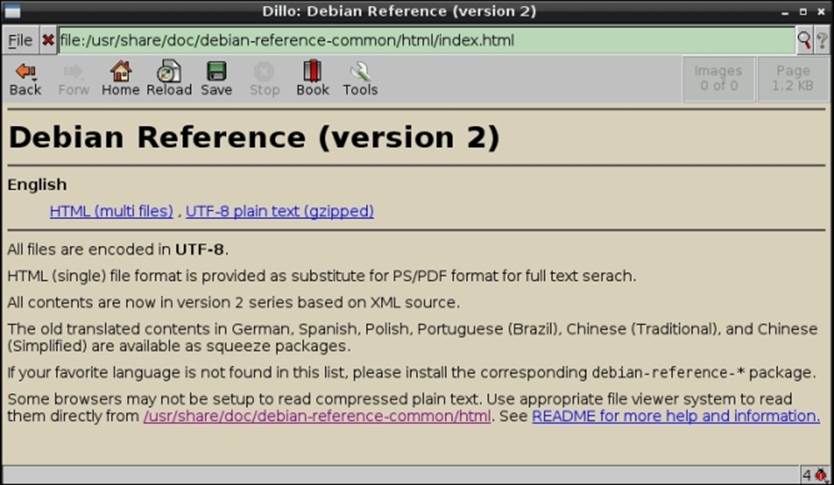
The Debian Reference
Integrated Development Environment
IDLE (Integrated Development Environment) is a simple Python development tool designed for programming in Python. Python is an easy-to-learn, highly readable, and general purpose programming language. Raspbian also includes IDLE 3, a version of IDLE that supports the newer Python 3 programming language.
IDLE incorporates an editor, a debugger, and a Python shell all in one easy-to-use application. The IDLE editor has built-in syntax highlighting, auto completion, and smart indenting. It integrates with the Python debugger to allow quick and easy debugging.
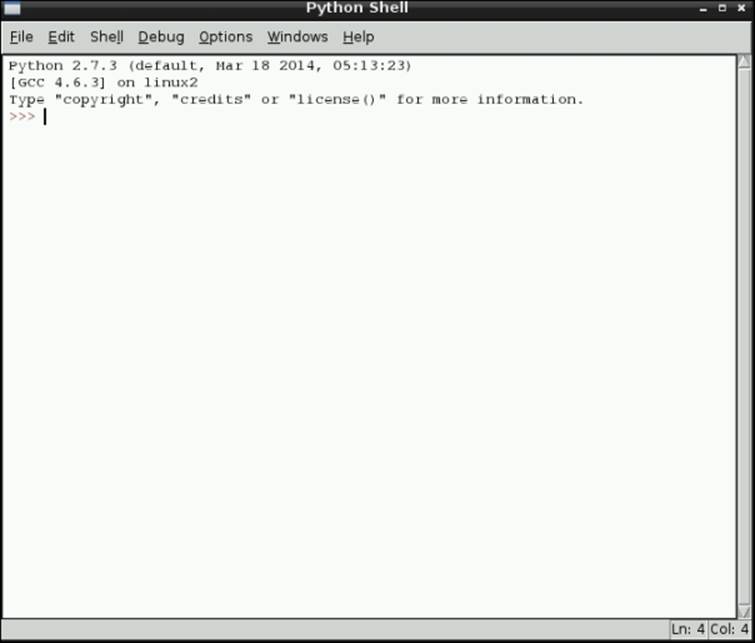
The IDLE shell
A nice bonus is that Raspbian includes many excellent games that are written in Python; you can find them at /home/pi/python_games. Simply open them up in IDLE and click on run.
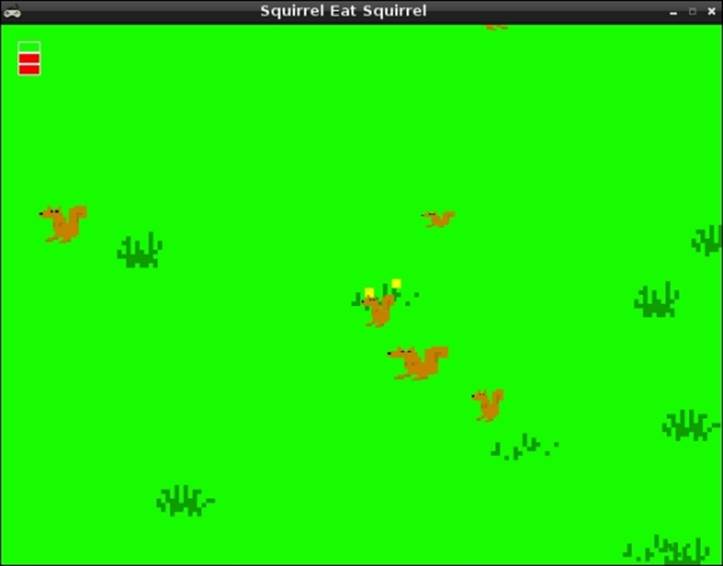
The Python game Squirrel eat Squirrel
Scratch
Continuing with the focus on education by the Raspberry Pi Foundation, Scratch is another exciting application included in Raspbian. Scratch was created by MIT Lifelong Kindergarten group in 2006.
Scratch is an easy-to-use program with a graphical programming language that allows you to create animations and games. It is an event-driven programming language that is based around sprites (a sprite is an image). The sprites can move and respond to events.
The sprites can be drawn using the built-in drawing program or imported into Scratch from any image.
Programming in Scratch is very visual. All the commands that control the sprites are dragged into the script and arranged in the desired order. The script is then run with the results being shown immediately.
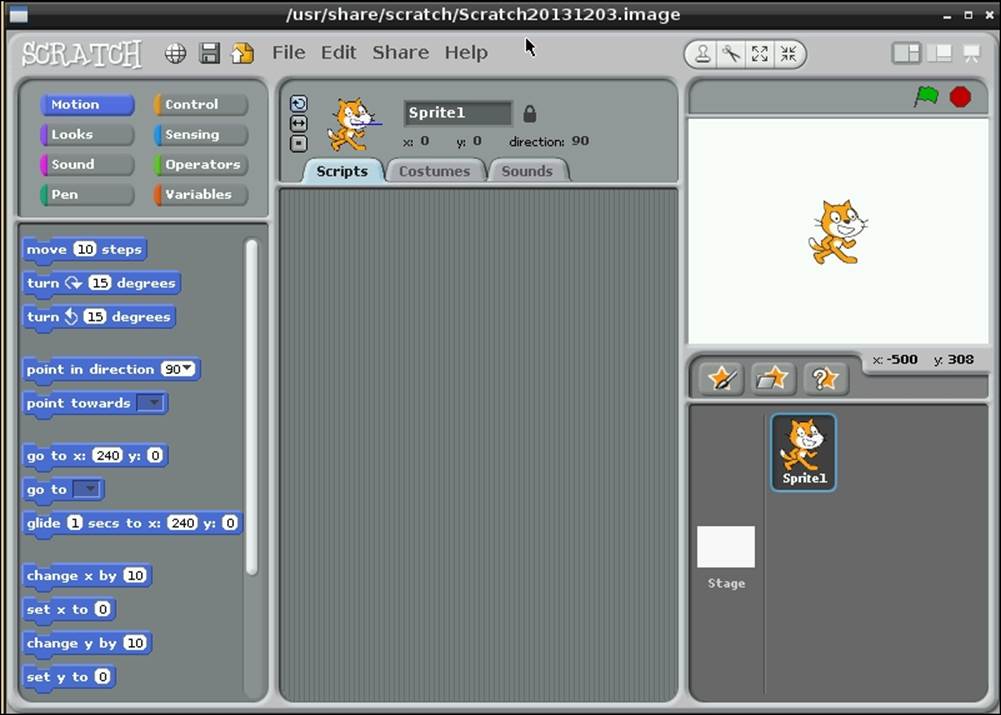
The Scratch main window
Raspbian includes many example projects as a starting point to create your first animation on your way. Over 7 million projects have been created in Scratch and uploaded to the Scratch website to be shared with other Scratch users!
You can find more information about Scratch by navigating to http://scratch.mit.edu/.
Minecraft Pi
Minecraft was created by the Swedish company Mojang in 2006 and is one of the best-selling games of all time.
Minecraft is a sandbox independent video game that was originally created by a Swedish programmer, Markus Persson. It was later published by the Swedish company Mojang. In 2014, Microsoft bought Mojang for $2.5 billion.
The aim of Minecraft is to break and move blocks. The blocks can be arranged into many different shapes. One user has even created an exact replica of the starship enterprise.

The Minecraft Raspberry Pi logo
Minecraft is available on almost every platform, including Xbox, PlayStation, iOS, Android, Raspberry Pi, and many more. It is installed by default on Raspbian.
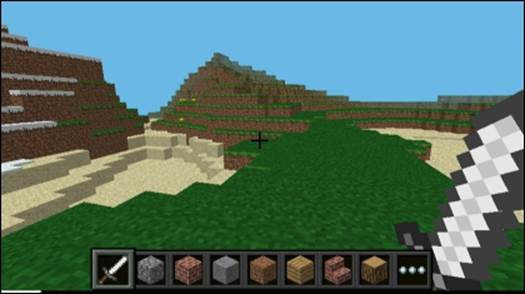
Minecraft in Action
Pi Store
With the success of the Raspberry Pi, the Raspberry Pi Foundation wanted to have a central place for applications, games, tutorials, and tools that have been created by the Raspberry Pi. In December 2012, the Raspberry Pi Foundation created the Raspberry Pi Store.
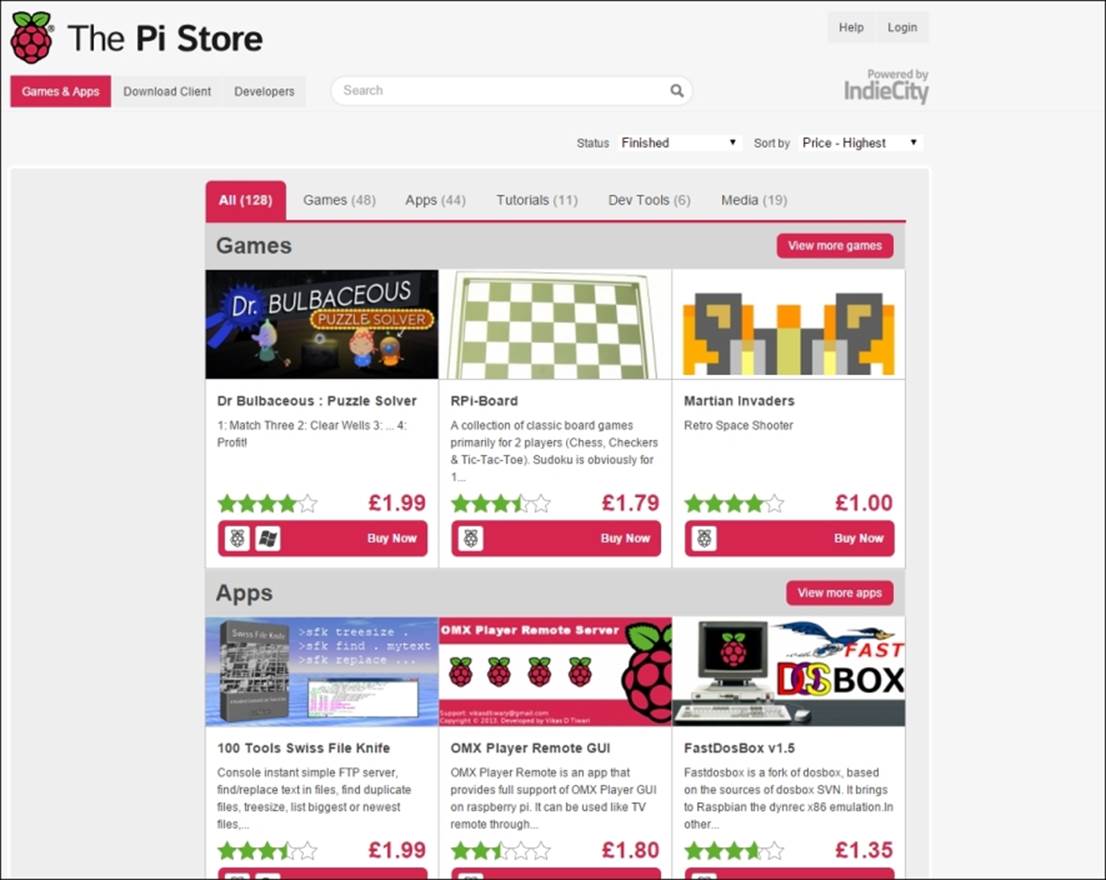
With the Raspberry Pi Store, you have access to a huge collection of free and commercial software for your Raspberry Pi. This includes applications that are available in the store ranging from games and development tools to tutorials.
Mathematica
Mathematica is a software platform designed for scientific, engineering, and mathematical computations and includes its programming language Wolfram.. Mathematica is heavily used in education. Mathematica is a commercial product, but the Raspberry Pi Foundation worked with Wolfram Research, the company that developed Mathematica, to get it bundled with Raspbian. This is only the second time that it has been bundled; the first time was in 1988 where it was bundled with the NeXT Computer developed by Steve Jobs.
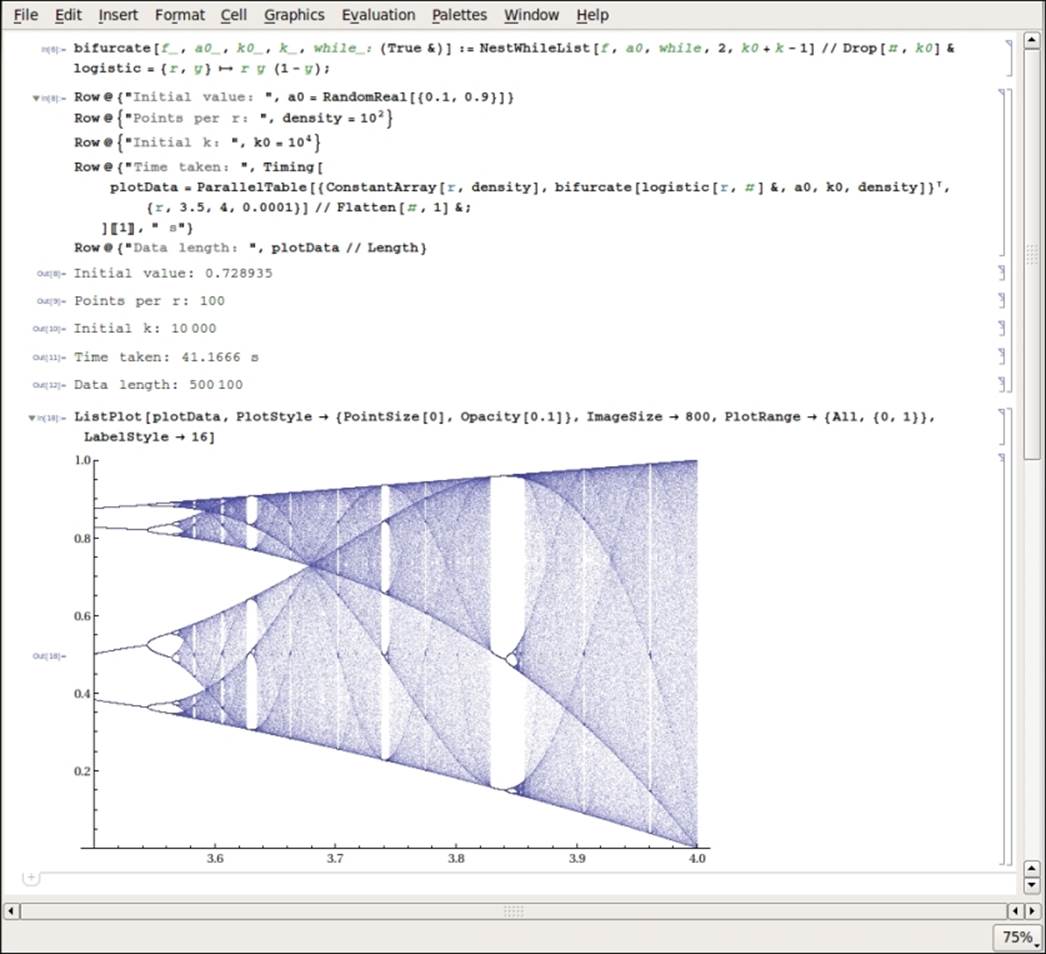
Mathematica
Mathematica includes many different features, including implementation of many different algorithms, different data visualizations, and numerical operations. It is used by almost all Fortune 500 companies and major universities. It has been an important tool used in scientific, technical, and business advancement. It has been a critical tool used by many noble prize winning scientists.
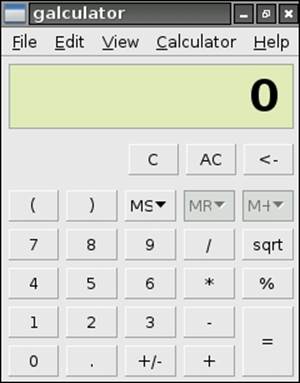
Other software included with Raspbian
There are many other pieces of software included with Raspbian that we haven't discussed here. These range from a calculator to a simple text editor and image viewer. The following is an example of a built-in calculator:
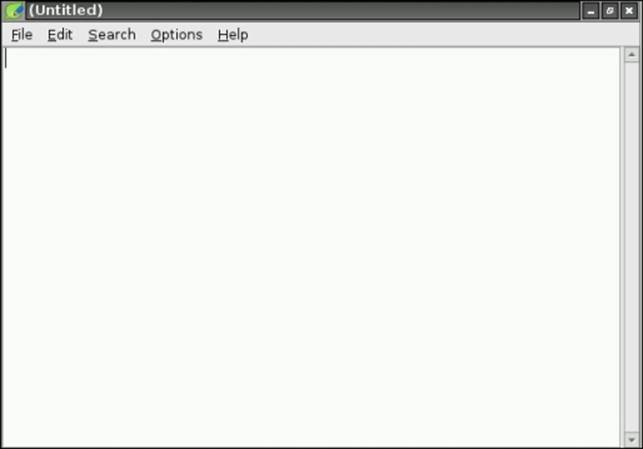
The following is an example of Leafpad – one of Raspbian's text editors:
File management in Xfce
Xfce comes with a built-in file manager. You are able to use it to browse all the storage devices attached to your Raspberry Pi. You are also able to perform various different file management action, such as copying and moving files.
You can launch the file manager using either the file manager panel item or find it in the main menu.
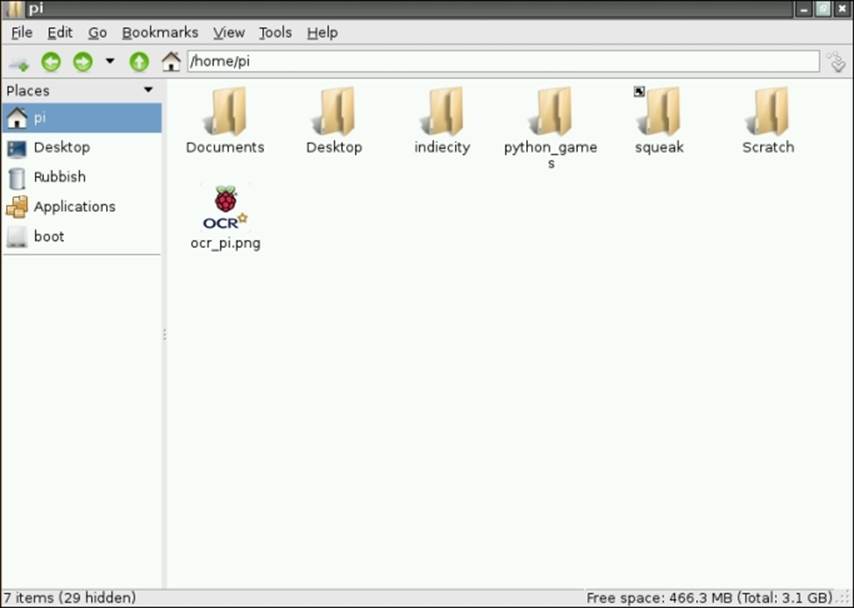
The Xfce file manager
Any additional storage that you attach to your device will appear in the Places menu to the left for easy access. You can also use the file manager to let you access files stored on another server. This is done using the Network Drives menu in the Go section.
The desktop of your Raspberry Pi is just another folder on your Raspberry Pi. As such, you are able to customize the icons on it by deleting or removing them. You can also create new folders and files that are stored on the desktop for easy locating.
Summary
The Raspbian desktop is a simple, easy-to-use desktop environment. It is quite different from the typical Windows and Mac OS X desktop environments, but as you have discovered it is really powerful and easy to use.
The best way to learn about the Raspbian desktop is to start exploring. Remember that if you break something, all you have to do is re-image your card and you are ready to go again!
All materials on the site are licensed Creative Commons Attribution-Sharealike 3.0 Unported CC BY-SA 3.0 & GNU Free Documentation License (GFDL)
If you are the copyright holder of any material contained on our site and intend to remove it, please contact our site administrator for approval.
© 2016-2026 All site design rights belong to S.Y.A.