HTML5, 20 Lessons to Successful Web Development (2015)
PART III Advanced HTML5
LESSON 20 Working with Microdata, Web Workers, and Web Applications

To view the accompanying video for this lesson, please visit mhprofessional.com/nixonhtml5/.
HTML5 is an extension of HTML that is proceeding gradually. Many of its tags and features have already been implemented by the major browsers, while, as you’ve seen, others are only partially developed on some browsers.
So I have reserved the final lesson in this course for discussion of the remaining advanced HTML5 features, some of which have yet to be fully (or even properly) implemented, but are going to turn out extremely powerful when they become available, and some of which it may benefit you to start using already.
I show you how they work (or are planned to work), although aspects of some parts of the implementation could develop or be improved over time, as HTML5 is really more of a bundling of a group of unrelated features that developers want to add to HTML.
Microdata
The first of these features is called microdata, which is a subset of HTML designed for making a document have meaning to machines by providing metadata, just as it has meaning to a reader of the document.
What it does is make available the following new tag attributes: itemscope, itemtype, itemid, itemref, and itemprop. Using them you will be able to clearly define the properties of an item such as a book, providing a range of information that a computer can use to understand, for example, its authors, publishers, contents, and so on.
Here’s how HTML code looks that incorporates microdata, and Figure 20-1 shows how this HTML displays:
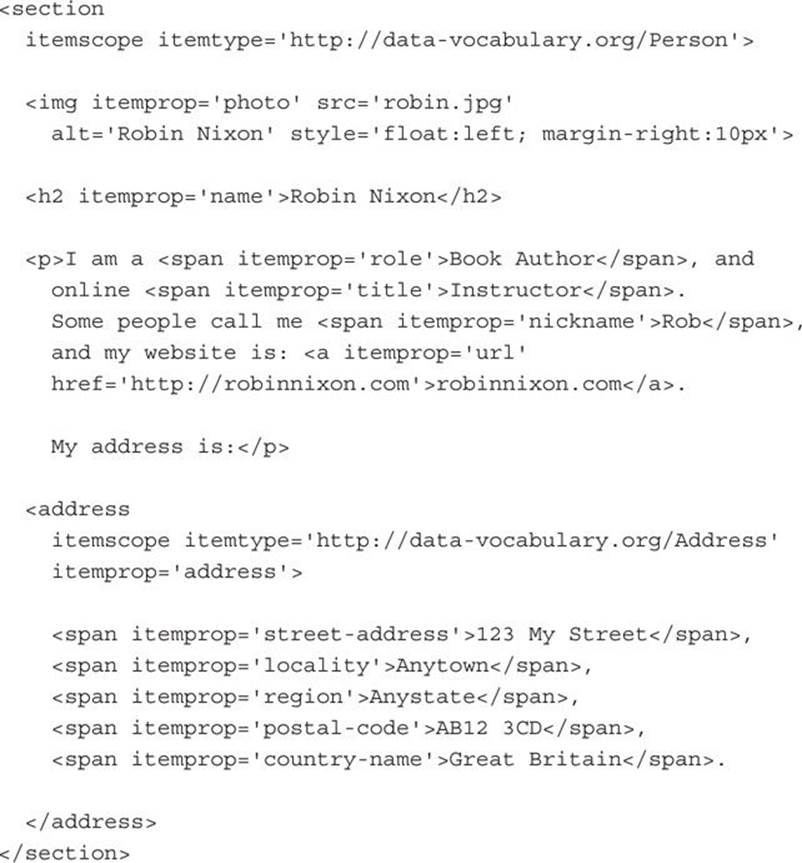
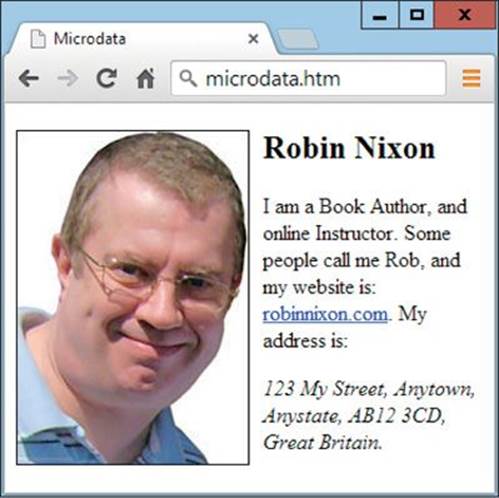
FIGURE 20-1 Packed with microdata, the HTML displays quite normally.
As you might expect, the adding of microdata has done nothing to alter the format of the HTML in any way. But it has provided a wealth of information to any browsers or search engines that can read the microdata and understand what it represents.
If you study the example code, you’ll see a couple of references to URLs at the data-vocabulary.org web server. That’s because this is where all the information you need for using microdata can be found, and from which you can choose the microdata types to use in your HTML. I strongly recommend you check it out, especially since that website is now saying that schema.org is likely to supersede it.
The in-browser DOM (Document Object Model) functions for managing microdata appear not to have been implemented yet by many major browser publishers.
When the API is incorporated into the major browsers, the microdata scripts will be able to use the microdata to expose information to the user, for example offering it in a form that can be used by other applications. Very likely there will also be mouseover and other information revealed when mousing over text that has microdata attached. So from that point of view there’s not a lot of reason to use microdata; not yet, anyway.
Because the API will use the function getItems(), you can test whether a browser supports it or not using the following code, which pops up a message telling you:
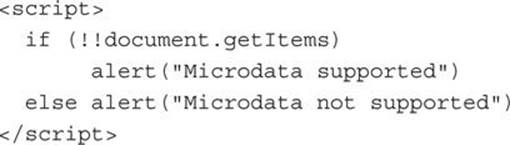
The specs for microdata are available at tinyurl.com/microdataspecs, so take a look if you want to know what to expect, and how to use the getItems() function when browsers start to support it.

The first big users of microdata will actually be the search engines, and it has been reported that some microdata information is already turning up in Google’s index. Therefore you do have a very good reason to start using microdata immediately, because anything you can do to legitimately improve your website rankings in the search engines is important to implement.
Web Workers
Normally, to achieve background processing in JavaScript, you need to set up a timer that is called repeatedly, supplying slices of processor time to one or more functions, and these functions must then quickly do a small piece of work and return, in order to not slow down the browser and make it seem sluggish.
Web workers, however, provide a standard way for browsers to run multiple JavaScript threads in the background that can pass messages to each other, in much the same manner as the threads running in an operating system. You simply call up a new worker script, which will sit there in the background waiting for messages to be sent to it, which it will then act upon.
The aim of this is to achieve a speed increase of two to three times over regular background JavaScripts, although getting to grips with programming them is likely to require a longer rather than shorter learning curve.
Here’s how to find out if a browser supports web workers:
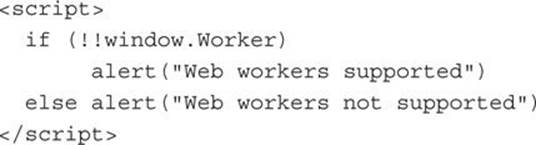
This script simply alerts you as to whether or not web workers are supported by the browser you are using. Once you have determined that the browser will use them, then you can run code such as the following, which calculates prime numbers in the background:
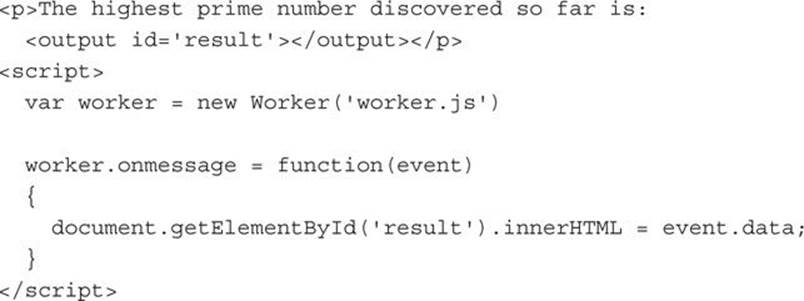
This script displays some text and creates an element with the id of result into which the highest prime number found so far is continuously written. This is achieved by creating the new object called worker by calling the Worker() function, passing it the name of an external JavaScript file called worker.js (explained shortly).
The onmessage event of the worker object is then attached to by an anonymous function. This triggers only when there is a new message to display, and the code that is called copies the data in event.data into the innerHTML property of the result element. After the code exits, it will not be called again until another message is ready to display.
The code that does the prime number calculation is saved separately in the worker.js, and looks like this:
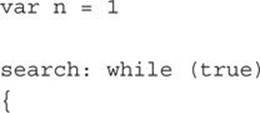
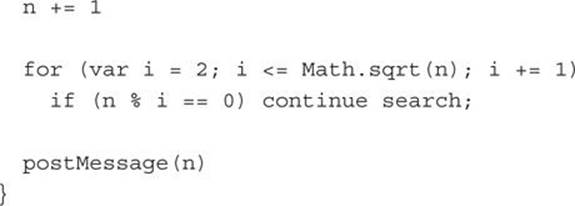
This is a simple iterative piece of code that increases the value of n, starting from 1. After each increase, all values of 2 up to the square root of n are tested to see if they are a factor of n. If any of them is, then n cannot be prime and so the continue keyword forces execution to go back to the start of the search: loop to see if n+1 is prime, and so on.
But if n is found to have no factors, then it is prime and the continue keyword is not encountered, so program flow drops through to the postMessage() call, which posts the value n, creating an onmessage event on the worker object in the preceding code. The result of running this code is a line of text at the top of the browser that continuously updates and looks like this:
The highest prime number discovered so far is: 42737
Working together, an HTML page and associated JavaScript file can work away in the background performing all manner of tasks, something which was achievable in the past only by manually creating events to run the code a few instructions at a time before returning to allow the web page to have some processor cycles, after which the event is then created to let the program code run a few more cycles, and so on.
As you might imagine, the old way is rather tricky and can be cumbersome. It can also mess with smooth animations on your web page if you don’t get the event timings and time sharing exactly right. But with web workers, you can forget all about these things and simply place your background code into its own file, and just ensure that the code calls the postMessage() function whenever it has something to say.
For full details on the web worker specifications, you can check out the official website at tinyurl.com/webworkerspecs.
Offline Web Applications
The idea of offline web applications is that once you visit a website, the website tells your browser about all the files it uses so that the browser can download them all and you can then run the web application locally, even without an Internet connection.
Offline web applications require a web server to set up with the correct MIME types (originally known as Multipurpose Internet Mail Extensions, but the word Mail has since been replaced with Media), in order for a browser that understands offline web applications to make use of the feature and fetch the files it needs.
If you are using a web server that is not Apache, consult your manuals for how to add the text/cache-manifest MIME type in order for your server to send the manifest file using the correct type. Otherwise, there’s a neat shortcut you can use, which is to create a file called .htaccess in the same folder as the files to be made available offline, with the following contents:
AddType text/cache-manifest .appcache
On Windows (at least in Windows Explorer), you cannot create a filename that starts with a period, so, if needed, call the file something like a.htaccess and then rename it to .htaccess after uploading it. On some FTP programs the file will then seem to disappear because it becomes a system file.
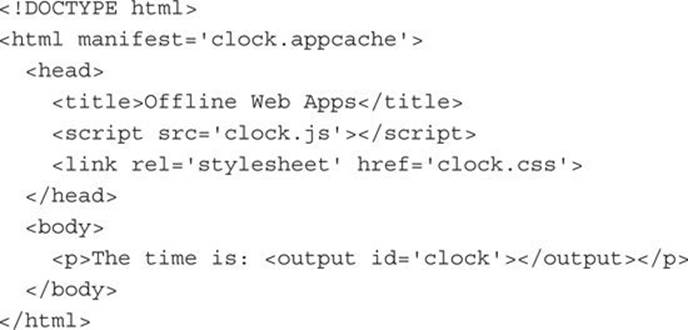
Here’s how offline apps work. You start with a manifest file that contains all the files you’d like to offer for offline use, like the following, which is saved with the filename clock.appcache:
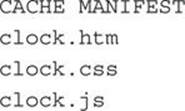
The three files detailed in the manifest are then as follows, starting with clock.htm:
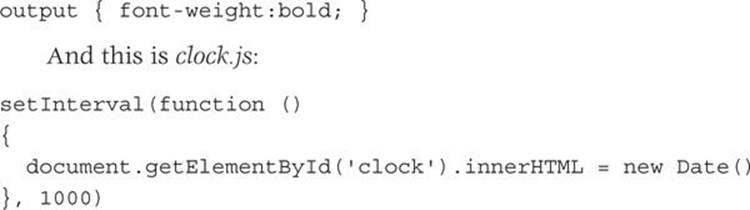
Here’s clock.css:
Thanks to the manifest, all these files will be downloaded and made available for use offline to use in any environment. Between them, they create a simple clock that looks like Figure 20-2.
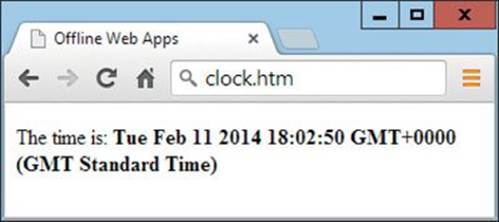
FIGURE 20-2 The clock web app running in Google Chrome
The code that does the work is in the clock.js file. It sets up a regular interval with setInterval() such that the code within it is called every 1,000 milliseconds (or once a second). This code simply copies the date into the innerHTML property of the output element.
For full details on the specifications for offline web applications, you can check out the official website at tinyurl.com/offlinewebapps.
Drag and Drop
You can support dragging and dropping of objects on a web page by setting up event handlers for the ondragstart, ondragover, and ondrop events, as follows:
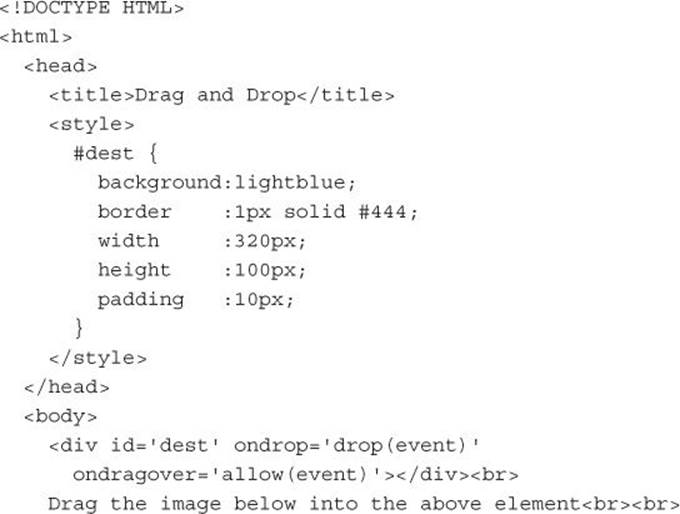
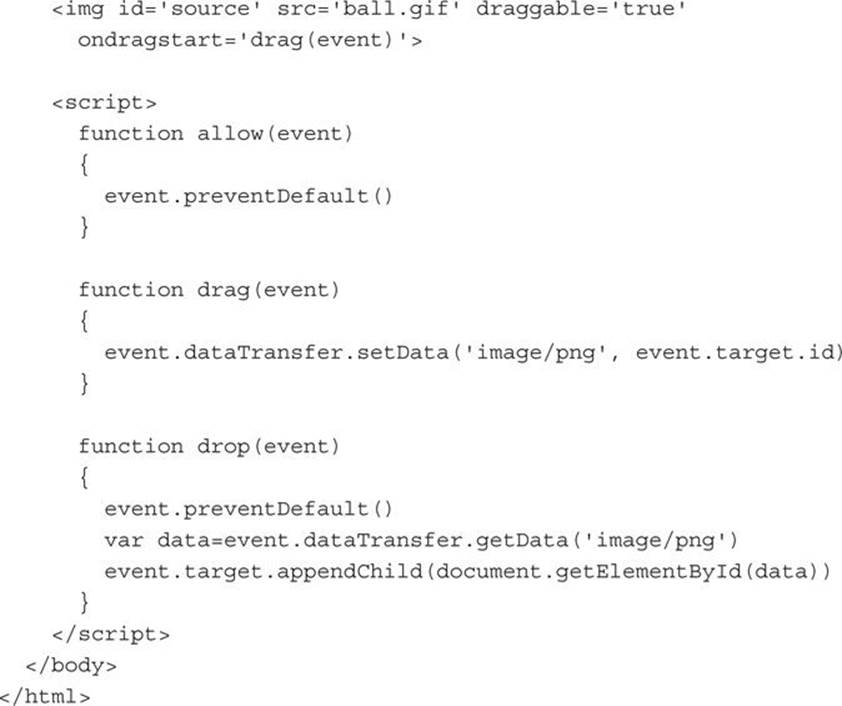
In the <body> of this example, a <div> element is created, and its ondrop and ondragover events have the event handler functions drop and allow attached to them. After this there’s some text, and then an image is displayed, which has its draggable property set to true, and the functiondrag is attached to its ondragstart event.
In the <script> section, the allow event handler function simply prevents the default action of dragging (which is to disallow it) from occurring, while the drag event handler function calls the setData method of the dataTransfer object of the event, passing it the MIME type image/pngand the target.id of the event (which is the object being dragged). The dataTransfer object holds the data that is being dragged during a drag-and-drop operation.
Finally, the drop event handler function also intercepts its default action so that dropping is allowed, then it fetches the contents of the object being dragged from the dataTransfer object, passing it the mime type of the object. Then the dropped data is appended to the target using itsappendChild method.
When you load this example into a browser, you can drag and drop the image into the <div> element, as shown in Figure 20-3.
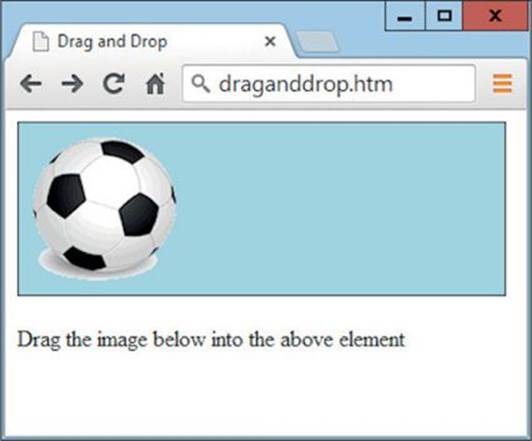
FIGURE 20-3 An image has been dragged and dropped.
Other HTML5 Tags
There are a number of other new HTML5 tags that have not yet been implemented in any browser (or have poor or limited support), and which I therefore won’t detail (particularly since their specs could change).
But, for the sake of completeness, these tags are: <article>, <aside>, <details>, <figcaption>, <figure>, <footer>, <header>, <hgroup>, <keygen>, <mark>, <menuitem>, <meter>, <nav>, <output>, <progress>, <rp>, <rt>, <ruby>, <section>, <summary>, <time>, and <wbr>. You can get more information on these and all other HTML5 tags at the following URL: http://whatwg.org/html.
Summary
Congratulations! You’ve just completed this course on HTML5. Thanks for taking it! I hope you’ve enjoyed the process and have learned plenty of useful things from this course but, before you go, you may be interested in visiting my website at robinnixon.com to see my other books and courses, which cover both web technology and motivational and personal improvement topics.
If you feel so motivated, I would be very grateful for any review of this book you choose to leave at your preferred online website. And thanks once again for taking the course!
Self-Test Questions
Test how much you have learned in this lesson with these questions. If you don’t know an answer, go back and reread the relevant section until your knowledge is complete. You can find the answers in the appendix.
1. What is the purpose of microdata?
2. What are two of the attributes used to denote microdata?
3. What do web workers do?
4. How do you create a new web worker?
5. How can you receive messages from a web worker?
6. What are offline web applications?
7. What MIME time is required by offline web applications for the manifest file?
8. To which events should you attach in order to implement drag and drop in a document?
9. What is the purpose of calling the preventDefault() function?
10. Which two functions handle the passing of dragged-and-dropped items?
All materials on the site are licensed Creative Commons Attribution-Sharealike 3.0 Unported CC BY-SA 3.0 & GNU Free Documentation License (GFDL)
If you are the copyright holder of any material contained on our site and intend to remove it, please contact our site administrator for approval.
© 2016-2026 All site design rights belong to S.Y.A.