HTML5, 20 Lessons to Successful Web Development (2015)
PART I Basic HTML
LESSON 3 The HTML Document Body

To view the accompanying video for this lesson, please visit mhprofessional.com/nixonhtml5/.
Having introduced you to HTML and explained the different sections it requires, in this lesson I start to look more closely at the body section of an HTML document, which resides within <body> and </body> tags.
The <body> section of HTML is where you place all the elements that the web browser should display. At its simplest you can place plain text in this section and the browser will display it for you. However, no matter how many spaces, paragraph returns, or other characters you place within this text, browsers will ignore them and just display the text in one long string. So let’s look at how you can format this text to start making it look much more interesting.
Inserting Comments
To start with, let’s kick off with comments, probably the simplest type of HTML formatting, and something you place in a document to be seen only in the source, and which is not displayed by the browser. To do this you place your comment between the opening <!-- and closing -->markers or tags.
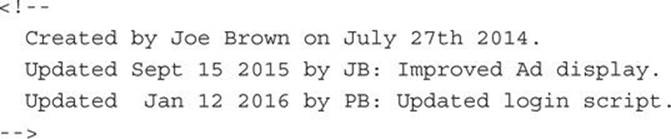
Comments are useful for detailing the author of a document and explaining how a document develops. To allow this, comments may be as long as you like and include as many lines as you wish. They close only when the --> tag is encountered, so the following is an example of a legal comment string:
You can also use comments to temporarily remove sections of HTML that you don’t want to display, perhaps because you are highly organized and have written something in advance of a product release, so that you only need to uncomment it on release day. Comments are also useful for hiding sections from displaying so you can concentrate on debugging only those sections that you may be having a problem with.

Although I have waited until this lesson to discuss comments, you should know that you can apply them to any section of HTML, not just the body of a document. This means you can comment out sections in the head or even an entire <html> … </html> section if you wish. Also, you should remember that comments may not contain pairs of hyphen characters within them, nor can they end with a hyphen, as this may confuse the browser’s HTML parser.
The HTML 4.01 Tags
HTML 4.01 (HTML4 for short) supports almost 100 different elements (also called tags), but since this is a book on HTML5, I will not go into all of them in detail. Rather, in this lesson I concentrate on some of the different types of HTML4 tags and how you use them, and then briefly list the less frequently used ones and the attributes they have.
This includes various text formatting tags, for headings, paragraphs, text emphasis, and lists. Then there are the tags for changing text and background colors and font faces, as well as tags for embedding media such as images, creating hyperlinks, building tables and forms, and much more. So you will get a good grounding in HTML4 before moving on to the new features in HTML5.
The <div> and <span> Tags
The <div> and <span> tags were created to help with combining elements into groups. Their main purpose is to enable the contained elements to be manipulated as a group from style sheets. The <div> tag creates what is called a block element in that by default its width stretches all the way to the browser’s right-hand edge, forcing any following elements onto the next line. Therefore all <div> elements have four sides and are rectangular.
On the other hand, the <span> tag creates an inline element that flows with the text, and it is therefore particularly suited for applying styles to sections of text. Although this book doesn’t teach CSS, style sheets are inextricably entwined with HTML and so, from time to time, I may employ either <div> or <span> tags with suitable CSS styling where standard HTML does not provide the solution required.
You use the tags as follows:

The main practical difference between the two that you will usually notice is that <div> elements by default force a line break before and after them, whereas <span> elements do not. You will see how to add CSS styles to them in the “Text Emphasis” section, a little further on.
Simply think of each of these two types of elements as invisible containers in which text and/or other elements are placed, and which can be styled with CSS. Remember that <div> elements are rectangular, while <span> elements go with the flow of text, line by line along and down the screen.
Headings
Let’s now look at some of the commonly used tags, those for formatting text, starting with headings. To specify headings in HTML documents, you must enclose them in any one of six different pairs of tags, from <h1> to <h6>, and their counterpart closing tags </h1> to </h6>. The <h1>heading is the largest, and <h6> is the smallest. Headings are also generally formatted in bold to help them stand out from the body even more.
Here are examples of each heading type, and the result of using them is shown in Figure 3-1:
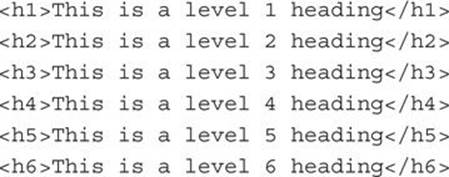

FIGURE 3-1 The six types of HTML headings

Interestingly, the fifth- and sixth-level headings are by default displayed smaller than standard body text. However, most writers will agree that if you need to go any deeper than four levels, you are probably overcomplicating the subject and should consider reworking your content. For this and the previously mentioned reason of small size, I rarely use <h5> and <h6>.
Once you have split a web document with suitable headings inserted in appropriate places using these tags, it is much easier for your readers to comprehend and quickly read it. This is because it is easier on the eye with more whitespace, and each separate topic has its own heading, making it easier to focus in on what interests the reader.
Paragraphs
Each of your paragraphs should be enclosed within <p> and </p> tags so that web browsers know how to handle them. By default it will ensure the correct spacing between each paragraph and, with the addition of CSS, you can further modify styling by, for example, indenting the first line of each, or by choosing ragged or full justification, and so on.
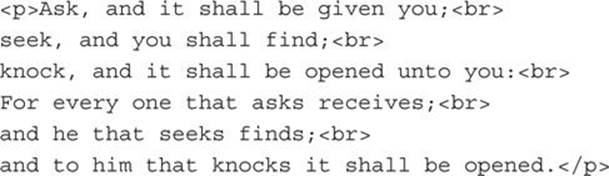
Here is an example of a simple paragraph taken from Matthew 7:7-8 in the Bible (I prefer to use the Bible, Shakespeare, Dickens, and so on, rather than using Lorem Ipsum text), and formatted as an HTML paragraph:

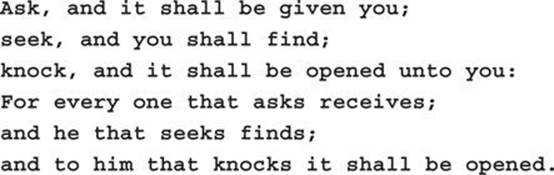
This paragraph will display as a single line that wraps around only when the text encounters the edge of its containing element. So, for example, it might display like the following ragged justified text:

Line Breaks
What a line break does is interrupt the default flow of text from left to right and then down to the next line (or right to left if that option has been enabled, either with CSS or by modifying the <html> tag like this: <html dir=′rtl′>), so that the next element displayed is forced to the start of the next line. Sometimes you have a reason for sending a line break to the browser before the end of a paragraph. This is done using the <br> tag which, you will notice, is empty (void) and has no end tag.
Even though in HTML5 the value supplied to dir can be either uppercase (for example RTL) or lowercase (for example rtl), because XHTML doesn’t support uppercase, you should stick with the lowercase style so that your content can be easily repurposed as XHTML (such as in an RSS feed).
So, if you need to make sure some text (or any sequence of HTML elements) displays exactly the way you want, you can force its formatting, for example, as with the following reformatting of the quotation from Matthew:
This HTML will display as follows—as long as its containing element is wide enough:
Whatever is next in your HTML to be displayed, whether an image, a video, or some text, the <br> will always force it down to continue on the next line. There is also a special case of this tag, which is used to clear any temporary left or right alignment. For example, it is possible to display an image with left alignment so that text flows down along its right-hand side (there’s more on how to do this later in the section “Displaying Images” in Lesson 4). But if you have insufficient text to fill in all the space to the right of the picture before the next paragraph or heading, then that would also appear beside it.
In such cases you can use the <br> tag to clear any alignment and force further text (or other elements) to appear not just down a line, but under the image or other object around which the text has been flowing. There are three versions of the tag to do this, for clearing left alignment, right alignment, and all alignments respectively, as follows:
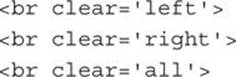
The clear attribute is not part of HTML5 (even though your browser may still support it), and so you are recommended to create this type of alignment using CSS instead, since there is a good chance that this attribute will stop working sometime soon.
Text Emphasis
There are many different ways you can change the emphasis of text in HTML, each with an accompanying tag. For example you can bold, italicize, underline, and strike through text, and you can also display text in superscript or subscript.
Following are the most common HTML tags you will use for this, the results of using which you can see in Figure 3-2. Some of these tags are obsolete in HTML5, which means that they have been removed from HTML5. However, the practicality of billions of web pages already employing them means that support for them in browsers is unlikely to end, otherwise too many websites would break. Even so, you should avoid using obsolete elements in new documents.
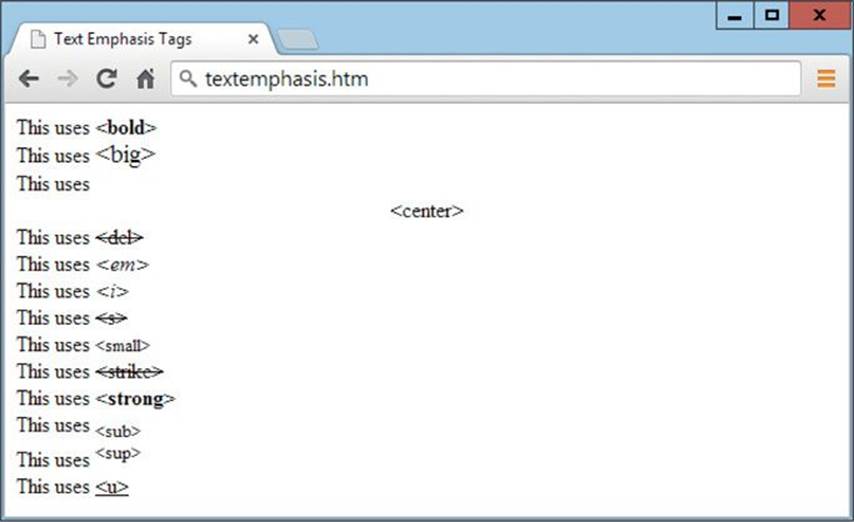
FIGURE 3-2 The text emphasis tags and how they display
<b>…</b>
Text within these tags will appear in bold face. This is the same as using the <strong> tag, but it is possible to style this tag differently than <strong> with CSS. HTML5 considers there to be a semantic difference between these tags, though, in that <b> should be used only for formatting in bold.
<big> … </big> (Obsolete)
Text within these tags will be bigger than that outside. This tag is obsolete in HTML5.
<center> … </center> (Obsolete)
Text within these tags will appear centered. However, these tags are obsolete in HTML5 and you are recommended to use CSS in their place. Note how in Figure 3-2 you can see that by using this tag, if the text within it is not already at the start of a line, then a line break will automatically be issued first. A line break is also issued after closing this tag, so beware of adding one yourself, which would result in a double line break.
<del> … </del>
Text within these tags will appear with a strikethrough line through it. This is the same as using the <s> and <strike> tags (although <strike> is obsolete in HTML5). It is possible to style this tag differently than <s> and <strike> with CSS. In HTML5 <del> represents a removal from the document.
<em> … </em>
Normally text within these tags is displayed in italics, and so it is the same as using <i>, but it is possible to style this tag differently than <i> using CSS. In HTML5, <em> is meant for adding emphasis to text (it just happens to italicize by default).
<i> … </i>
Text within these tags will appear in italics. This is the same as using the <em> tag, but it is possible to style this tag differently than <em> with CSS. The <i> tag should be used only for italicizing in HTML5.
<s> … </s>
Text within these tags will appear with a strikethrough line through it. These tags were deprecated in HTML4 but restored in HTML5, and are the same as using <strike> (which is now obsolete in HTML5). The <s> tag is similar to the <del> tag, but in HTML5 it is intended for indicating something that is no longer accurate or relevant.
<small> … </small>
Text within these tags will be shown smaller than that outside.
<strike> … </strike> (Obsolete)
The same as <s>, although it is obsolete in HTML5, and so either <s> or <del> is recommended instead. It is possible to style this tag differently than <s> and <del> using CSS.
<strong> … </strong>
Normally text within these tags is displayed in bold face, and so it is the same as using <b>, but it is possible to style this tag differently than <b> using CSS. In HTML5 <strong> is intended for text that is especially important, such as a key point to learn.
<sub> … </sub>
Text within these tags will appear subscripted.
<sup> … </sup>
Text within these tags will appear superscripted.
<u> … </u>
Text within these tags will appear underlined. This tag was deprecated in HTML4 but restored in HTML5, and is intended to represent text that should be stylistically different from normal text, such as misspelled words.
When you wish to create emphasis, it is often best to use CSS. One way is to add the CSS inline, as with the following example, which creates italic and strikethrough text:

An even better way is to separate the styling from the content by creating a class containing a rule, and then applying the class. Doing so in detail is beyond the scope of this book, but the following snippet shows one way of doing this using a period symbol in front of the class names in the <style> section:
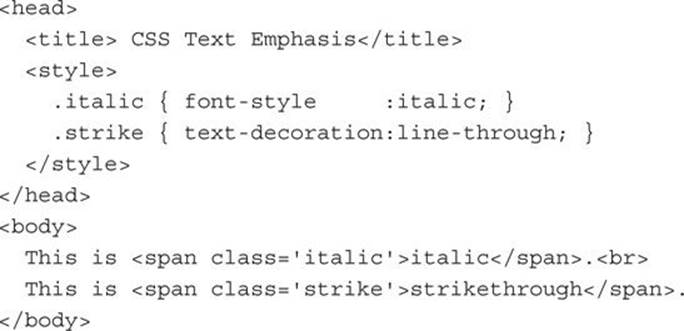
Figure 3-3 shows the preceding example being displayed in a web browser.
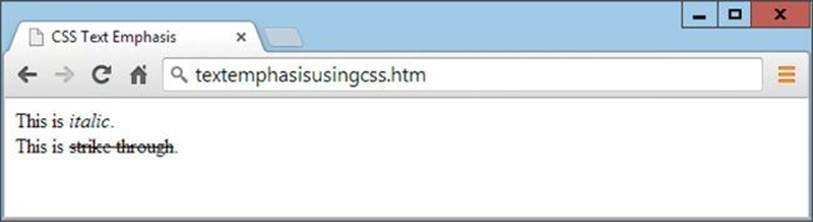
FIGURE 3-3 Using CSS to create text emphasis
Summary
Armed with the tags you have learned so far, you can already create some quite impressive HTML documents, but in the following lesson I add even more tools to your kit by showing how to change font face and color, and embed images in your documents.
Self-Test Questions
Test how much you have learned in this lesson with these questions. If you don’t know an answer, go back and reread the relevant section until your knowledge is complete. You can find the answers in the appendix.
1. How can you place a comment in an HTML document?
2. What is the difference between a <div> and a <span> element?
3. What are the six pairs of tags you can use to create different levels of headings?
4. Which tags do you use to denote the start and end of a paragraph?
5. How can you issue a line break in an HTML document?
6. How can you format HTML text in bold without using CSS?
7. Which HTML tag can be used for displaying italic text?
8. What is one way to display text in italics with CSS?
9. How can you make an element display as line-through using CSS?
10. What does the term deprecated mean?
All materials on the site are licensed Creative Commons Attribution-Sharealike 3.0 Unported CC BY-SA 3.0 & GNU Free Documentation License (GFDL)
If you are the copyright holder of any material contained on our site and intend to remove it, please contact our site administrator for approval.
© 2016-2026 All site design rights belong to S.Y.A.