HTML5, 20 Lessons to Successful Web Development (2015)
PART II HTML5 and the Canvas
LESSON 8 What’s New in HTML5

To view the accompanying video for this lesson, please visit mhprofessional.com/nixonhtml5/.
HTML5 is a specification that’s still under development (because a number of HTML5 features are still only sparsely implemented in some major browsers) even though the final draft was submitted in 2013. Therefore it’s important for you to know about all the tags (both current and future), and how they work on various platforms and browsers, so that you will know just what you can do with HTML5 right now, and also what might become available to you in the future.
But what exactly is HTML5? Is it a new standard different from the previous 4.01 version? Surprisingly, the answer is no, because HTML5 is simply a loose collection of enhancements that have been (or will be) made to the HTML 4.01 specification, covering a wide range of differing areas; it has simply been found convenient to label these additions as HTML5.
This is why I made sure that you had a thorough grounding in HTML 4.01 before beginning this section, because that means that you now actually already have over 75 percent of the full HTML5 specification under your belt. Now you’ll start to look at the remaining 25 percent or so that constitutes the HTML5 enhancements.

When an older browser comes across an HTML5 tag that it doesn’t recognize, the tag will simply be ignored, in the same way as if you use made-up tag names such as <newtagname> and </newtagname>. However, any text or HTML between such tags is displayed. This ensures that backward compatibility is retained for users with older browsers.
The Canvas
The <canvas> element was introduced by Apple to the Webkit rendering engine (the power behind the default iOS and Android web browsers, and also used by Safari, Opera, and Chrome), to provide a means of drawing graphics from within a web page, without having to load a plug-in such as Java or Flash. It was later standardized and has since been adopted by Opera and Gecko-based browsers, as used in the Mozilla Firefox browser, and is also included in Google Chrome and Microsoft Internet Explorer 9.
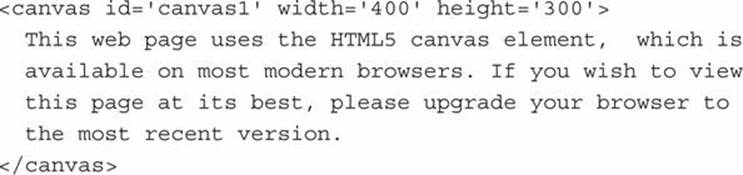
A canvas is a region within a web page that can be drawn on using JavaScript. As there can be more than one canvas in a web page, it is necessary to provide an ID for each so that the drawing commands know which canvas they should apply to. So, to create a canvas, you use HTML such as the following, which creates a 400×300-pixel canvas with the ID canvas1:
This is a book on HTML5. However, many HTML5 features can only be accessed using JavaScript. Therefore in these lessons I provide illustrations of how to perform certain functions and give examples in JavaScript, but I do not teach the JavaScript language itself. You will be able to use and modify the examples since they are simple and clearly explained, but if you wish to achieve more complex results in JavaScript and other web development technologies, you may wish to read my other books in this series of 20 Lessons to Successful Web Development on CSS, JavaScript, and PHP.
Older browsers that do not recognize the <canvas> tag will ignore it and simply display the text between the opening and closing tag, which, in this instance, provides information to users about upgrading their browser.
The great thing about the HTML5 canvas is that you can now draw anything you like in a web browser, in a similar way to using a plug-in such as Flash, but using simple HTML and JavaScript syntax. This makes your web pages far more dynamic and able to display on a wider range of operating systems and devices. For example, the iOS infrastructure does not support Flash on iPhones and iPads, but does support the HTML5 canvas.
In Figure 8-1 I have created a 400×300-pixel canvas and drawn a square in its center using the following combination of HTML and JavaScript:

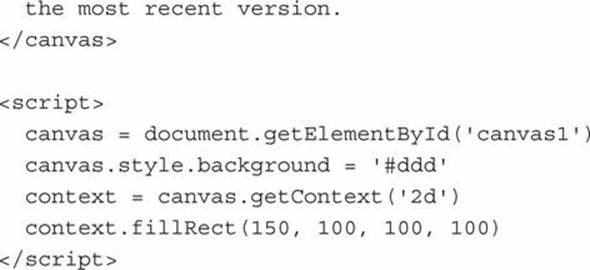
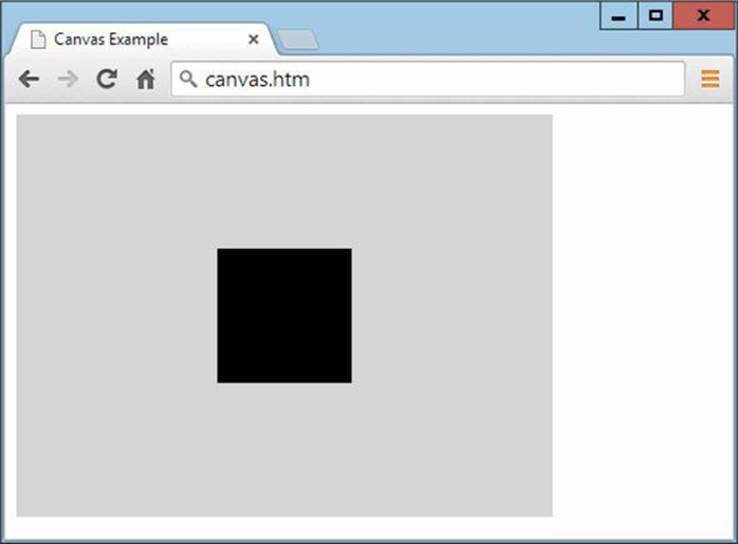
FIGURE 8-1 A 100×100-pixel square in a 400×300-pixel canvas
The first part of this example is a repeat of the HTML snippet that creates the <canvas>, and the four lines within the <script> and </script> tags do the work of placing the square on the canvas. Let’s look at them in turn, starting with:
canvas = document.getElementById(′canvas1′)
This creates a JavaScript object (an element capable of holding different types of information), which refers to the canvas1 canvas. In the following line the background of the canvas is set to a light gray color (#ddd) by altering its CSS style property:
canvas.style.background = ′#ddd′
Next it is necessary to decide the way in which the canvas is to be accessed. For example, in the future it will be possible to access a canvas using 3D, which will make it possible to write professional-looking games. But for now 2D is the only option available, and that is what I have used, as follows:
context = canvas.getContext(′2d′)
Finally, a square is drawn on the canvas by using the context and the JavaScript function fillRect(). The square has its top-left corner at 150 pixels in by 100 down and has a width and height that are both 100 pixels:
context.fillRect(150, 100, 100, 100)
As you can see, even if you are not a JavaScript programmer, this is relatively straightforward, and will become more so when I explain the canvas element in more detail in Lessons 9 and 10. In the meantime, Figure 8-2 shows the addition of a circle and some text to the canvas, achieved using the following extra statements added into the <script> section of the example:

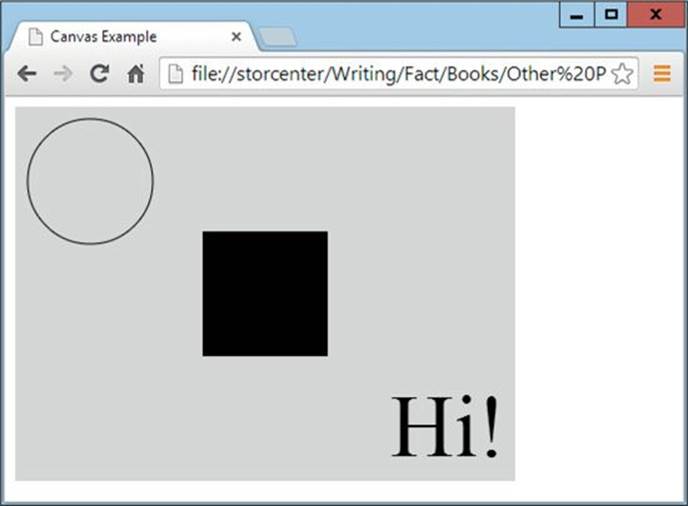
FIGURE 8-2 A circle and some text have been added to the canvas.
Geolocation
Geolocation is a technology that is used to determine the location of a computer or mobile device, which can be returned to the web server in order to provide relevant information. For example, a local map can be displayed, or details of local stores such as restaurants or gas stations can be provided.
Geolocation can also be used to help improve web connectivity by notifying you of nearby Wi-Fi access points, or to alert you of the proximity of friends, acquaintances, or colleagues.
Different methods are used to obtain your location, starting with your IP (Internet Protocol) address, which can reveal which country you are in, and programs that do this can often get very close to your locality. There’s nothing you can normally do about this because all websites need to know your IP address in order to send you data. However, there are third-party services that will act as a proxy for you, replacing your IP address with theirs when communicating with a web server.
With HTML5 geolocation, if Wi-Fi is enabled on your computer, it is also possible to send more precise location information by scanning your locally accessible Wi-Fi hotspots to pinpoint your location, using databases containing millions of hotspot names and MAC (Media Access Control) addresses, along with their locations.
Also, if you are using a mobile device, triangulation of the mobile antenna masts you can connect to reveals your location quite accurately. Finally, if your computer has GPS (Global Positioning System) functionality, this can reveal your exact location to within just a few feet, as long as your device is in range of the GPS satellites that orbit the earth.
In Figure 8-3 permission has been granted by the user to return the geolocation data of a device at the location 40.689167, -74.044444, which is a point close to the Statue of Liberty in New York City, USA.
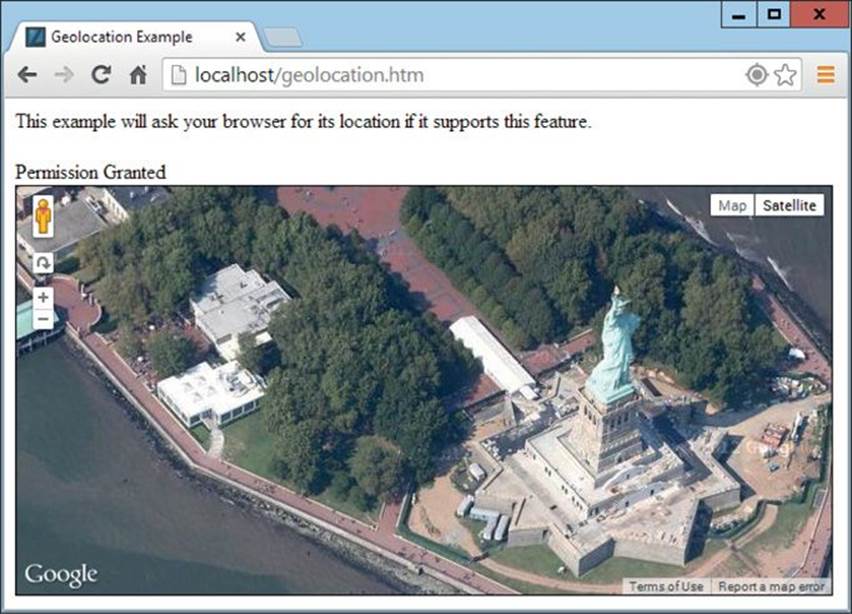
FIGURE 8-3 A map is displayed as a result of returning geolocation data.
Geolocation is explained in greater depth in Lesson 15, and JavaScript code is supplied, which you can use without needing to learn the entire language.
Forms
Forms have been provided with a number of new enhancements in HTML5, and in my view they are long overdue (and still only partially supported by some browsers).
To start with, you can now place <input> tags outside of <form> and </form> tags as long as the new form attribute is used to identify the form ID to which the input refers. Similarly, you can change the method (either Get or Post) of a form with the new formmethod attribute.
There are also enhancements letting you change the encoding type of a form, or create or override the new formnovalidate attribute. You can also use the formaction attribute to change the action (destination) of a form, and you can use formtarget to change the target frame, tab, or window. At the same time, it is now possible to change the height and width of the image type of the <input> tag using height and width attributes.
Two particularly handy new attributes are autocomplete and autofocus. The former allows previously entered values for a field to be offered as suggested values, while the latter is used to tell the browser to automatically focus on a particular form field ready for input. This is what happens when you go to a search engine such as Google (see Figure 8-4), where you can begin to enter your search immediately. In the good old days before the use of these tags and JavaScript, you had to click in a field first before it would obtain focus, and you would not be offered suggestions as you typed.
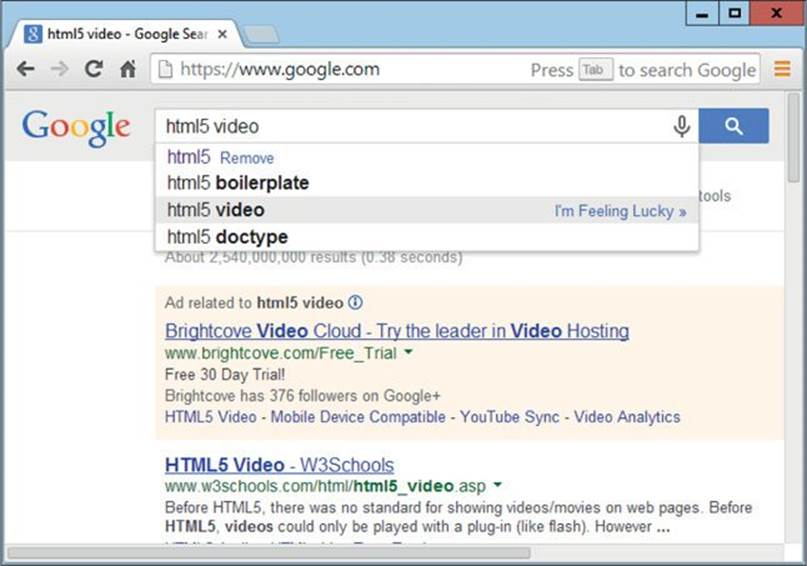
FIGURE 8-4 Google supports autofocus and autocompletion.
Data lists can also now be included in a form such that you can create a list of labels and values to which you assign an ID. Then you can use that ID as the value for the new list attribute to easily offer a selection of choices to an input. This is especially useful when you wish to use the same list more than once as it avoids unnecessarily duplicating it.
New min, max, and step attributes have also been added for inputs that contain numbers or dates, and there’s a new multiple attribute with which you can allow an <input> tag to accept multiple values. This is especially useful, for example, when selecting groups of files to upload to a server.
Pattern matching is now supported in forms via the new pattern attribute, the placeholder attribute lets you display some hint text in a field that disappears once the field is selected, and you can use the required attribute to tell a form that a field must be completed.
Several new values are now supported for the type attribute, including color, date, month, time, week, number, range, tel, url, and email. These allow the browser to check such input fields for proper syntax and sensible data being entered. There’s also a powerful search type value, which enables a field to provide search suggestions in a similar fashion to the instant results that appear when entering a request into the Google search engine.
All these values and more are fully detailed in Lesson 16.
Local Storage
Before HTML5, the only way that data could be stored on a local device was via the use of cookies, which are small bundles of data generally used to help retain the contents of a shopping basket, or more controversially, by advertising websites to track your browsing.
But it has long been realized that the web could be significantly sped up if a local data store were made available that could be used, for example, for storing longer documents as you edit them, prior to them being sent to the server for safekeeping. With HTML5 this is possible, and even large chunks of data (up to 5MB per website) can be stored locally, but only if the user agrees to it, so you retain full control.
What’s more, on some browsers local storage can be accessed like a database using Web SQL, providing the possibility of creating advanced local web apps for handling data such as your music collection, or personal exercising and dieting, and so on.
Lesson 17 fully explains what you can and can’t do with local storage.
Audio and Video
Possibly the most interesting and popular enhancements in HTML5 (other than the canvas) are the ability to now play audio and video directly from within HTML, with no need to embed Flash or any other type of object as a player.
To do this, the new tags <audio> and <video> have been provided, but how to use them is still a bit up in the air as it can depend on the browser and operating system being used. In addition there has been a big hoo-ha going on about the use of the H.264 video codec (the software algorithm used to compress all the video data down to a manageable size for the Internet), which is not free for products that encode or decode the video (such as browsers), although it is free for end users.
Because of this, different browsers support different codecs, but there are workarounds and tweaks you can employ to ensure that just about all your users can play HTML5 audio and video, and all of this is explained in Lessons 18 and 19.
The <embed> Tag
While on the subject of embedding objects (such as video players) in a web page, the <embed> tag, which was officially deprecated in HTML 4.01, has now been restored and made official again. Therefore, for example, you can officially use code such as the following to play a YouTube video in a non-HTML5 browser using Flash:
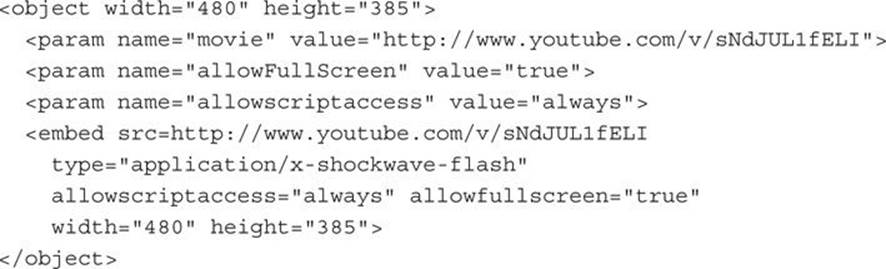
Code such as this can be inserted between <video> and </video> tags so that browsers that do not recognize them will use Flash to display a video, as shown in Figure 8-5.
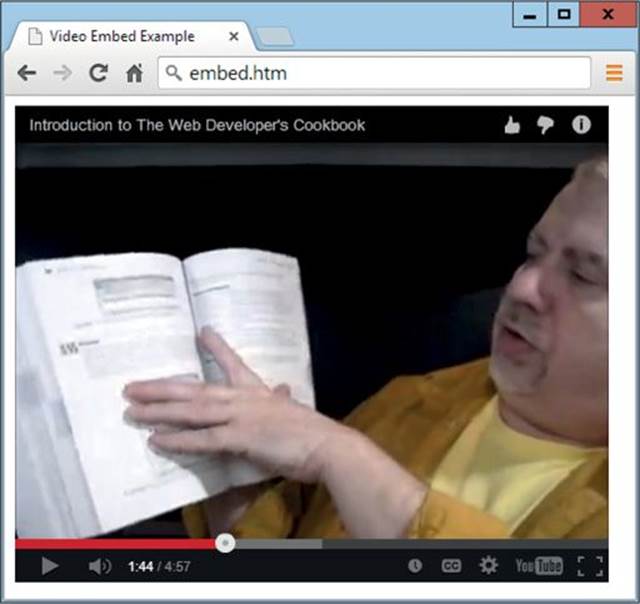
FIGURE 8-5 Embedding a YouTube Flash video
Microdata
Microdata is a subset of HTML designed for making a document have meaning to machines by providing metadata, just as it has meaning to a reader of the document.
What it does is make available the following new tag attributes: itemscope, itemtype, itemid, itemref, and itemprop. Using them you will be able to clearly define the properties of an item such as a book, providing a range of information that a computer can use to understand, for example, its authors, publishers, contents, and so on. Further information on microdata is in Lesson 20.
Web Workers
Normally, to achieve background processing in JavaScript, you need to set up a timer that is constantly called, supplying slices of processor time to one or more functions, and these functions must then quickly do a small piece of work and return, in order to not slow down the browser and make it seem sluggish.
Web workers are not yet widely implemented but will provide a standard way for browsers to run multiple JavaScript threads in the background that can pass messages to each other, in much the same manner as the threads running in an operating system. You will simply call up a new worker script, which will sit there in the background waiting for messages to be sent to it, which it will then act upon.
On the whole the aim of this is to achieve a speed increase of two to three times over regular background JavaScripts, although getting to grips with programming them is likely to require a steeper learning curve. Lesson 20 discusses web workers in more detail.
Web Applications
The idea of offline web applications is that once you visit a website, it tells your browser about all the files it uses so that the browser can download them all and you can then run the web application locally, even without an Internet connection.
There is a complication with web applications in that they require a web server to set up with the correct MIME types (originally known as Multipurpose Internet Mail Extensions, but the word Mail has since been replaced with Media), in order for a browser that understands web applications to make use of the feature and fetch the files it needs. Lesson 20 goes into web applications in greater detail.
Still to Come
There are a number of other new HTML5 tags that have not yet been implemented in any browser, and which I therefore won’t detail (particularly since their specs could change).
But, for the sake of completeness, these tags are: <article>, <aside>, <details>, <figcaption>, <figure>, <footer>, <header>, <hgroup>, <keygen>, <mark>, <menuitem>, <meter>, <nav>, <output>, <progress>, <rp>, <rt>, <ruby>, <section>, <summary>, <time>, and <wbr>. You can get more information on these and all other HTML5 tags at dev.w3.org/html5/markup.
Summary
This lesson has introduced you to all the new goodies in HTML5. In the following lessons I will explain each of these main areas in depth so that you can begin to use the tags that have been widely supported in your own web pages, and will be prepared to also include the lesser-supported ones as browsers pick them up.
Self-Test Questions
Test how much you have learned in this lesson with these questions. If you don’t know an answer, go back and reread the relevant section until your knowledge is complete. You can find the answers in the appendix.
1. Which tag is used to create an HTML5 canvas?
2. What happens with the canvas in non-HTML5 compatible browsers?
3. Which JavaScript function is used to fetch an object with which to access an element such as a canvas?
4. What does the acronym GPS stand for?
5. Which new HTML5 technology is superior to cookies?
6. Which two new tags have been added to HTML5 to handle multimedia?
7. What HTML tag is used to allow fallback to Flash for playing media?
8. What new HTML5 technology helps provide additional information about the contents of a document?
9. Which new HTML5 technology lets the programmer offload background JavaScript tasks to be handled by the web browser?
10. What did the acronym MIME stand for, and what does it stand for nowadays?
All materials on the site are licensed Creative Commons Attribution-Sharealike 3.0 Unported CC BY-SA 3.0 & GNU Free Documentation License (GFDL)
If you are the copyright holder of any material contained on our site and intend to remove it, please contact our site administrator for approval.
© 2016-2026 All site design rights belong to S.Y.A.