JUMP START HTML5 (2014)
Chapter 5 Basics: Multimedia, Audio and Video
Perhaps the biggest change in HTML5 is its multimedia capabilities. HTML5 brings with it native audio and video, and almost replaces the plugins of the old web. I say "almost" because browser vendors have yet to agree on a default format for web audio and video.
We’ll talk about cross-browser support later in this chapter. First let’s look at the bare minimum necessary to add video to your web page: a video tag and a src attribute.
<video src="path_to_file.video"></video>
In HTML5, that closing tag is required. If you’re using XHTML syntax, you can self-close it instead like so: <video src="path_to_file.video" />. The audio element is almost the same. All that’s required is the opening audio tag, a src attribute and a closing </audio> tag.
<audio src="path_to_file.audio"></audio>
Again, if we were using XHTML5 syntax, we could self-close our tag instead: <audio src="path_to_file.audio" />.
Adding Controls
Unfortunately, as shown in Figure 5.1, our snippet from above won’t do anything besides add the media file. We won’t be able to play our video, because it will be stuck at the first frame. We won’t even know that there’s audio on the page.

Figure 5.1. An example of a video element without controls in Firefox. Image from Big Buck Bunny by the Blender Foundation.
What we need are some controls: perhaps a play button and a scrubbable progress bar. We might also want a timer that reveals how much of the media has played, and a volume control. Luckily for us, browsers have these built-in to their audio and video support. We can activate them by adding the controls attribute.
<video src="path_to_file.video" controls>
The controls attribute tells the browser that we want playback controls to be available for this media instance. In most browsers, this means the user will see a play and pause button, elapsed time indicator, and volume control, as shown in Figure 5.2. The player may also include a button that allows the user to toggle between full-screen and original size. What these default controls look like depends on the browser.
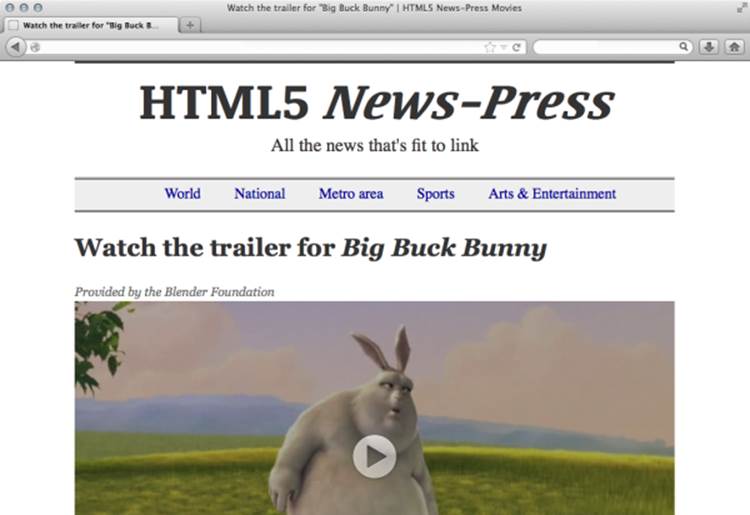
Figure 5.2. An example of a video element with controls in Firefox. Image from Big Buck Bunny by the Blender Foundation.
controls is another example of an empty attribute. We could also use controls="true" or controls="controls" if we were using XML syntax. Adding the controls attribute, regardless of its value, will make the controls visible. Using controls=false will not hide them.
Autoplaying and Looping Media
Perhaps we want to use a short video clip as a background element. We might want to create an "art installation" experience in which a video plays and re-plays automatically. Not a problem. We can do this by adding the autoplay and loop attributes to our video or audio tag.
<video src="path_to_file.video" autoplay loop></video>
<audio src="path_to_file.audio" autoplay loop></audio>
With autoplay, our media will begin as soon as the browser has received enough data to start playback. When the audio or video ends, loop tells the browser to re-start the media file from the beginning.
Note: Use autoplay with Caution
Some audio and video can be embarrassingly bad or just embarrassing if heard. Do your audience a favor: silence auto-playing media with the muted attribute.
<video src="annoying.video" autoplay loop muted></video>
Video-only Attributes
Although most attributes that apply to the video tag also apply to audio, a few—related to visual display—do not:
· height: Sets the height of the video player.
· width: Sets the width of the video player.
· poster: Specifies an image to display prior to video playback.
Place Holding with poster
A poster image acts as a placeholder for a video. It’s typically a still image from the video, though it could be a company logo, title screen, icon, or some other image. Once the page loads, visitors will see the poster image until the video begins playback.
To add a poster image, add a poster attribute. Set its value to the path of an image. Most image formats work for poster images, although Internet Explorer sometimes struggles with SVG files.
<video src="path_to_file.video" poster="path_to_poster_image.jpg">
</video>
Be careful with the size of your poster image. Ideally, it should be the same dimensions as your video. Initially the video player dimensions will match the poster image dimensions. Then browser will resize the player once it has determined the intrinsic height and width of the video. Setting an explicit height and width for your video player prevents this resizing.
Controlling Video Dimensions
Whether you use a poster image or not, explicitly setting the height and width of your player prevents the browser from having to redraw the page once the video loads. One way to do this, of course, is to include the height and width attributes with the video tag. Both attributes accept percentages, which are useful when building a responsive or fluid layout.
<video src="path_to_file.video" poster="path_to_poster_image.jpg"
↵width="100%" height="100%"></video>
You may also set the height and width of the video player using CSS.
video {
width: 960px;
height: 540px;
}
In this example, we’ve used pixels. For responsive layouts, you may prefer to use viewport percentage units: vh and vw. Any valid CSS length unit outlined in the CSS Values and Units Module Level 3 is acceptable. Using CSS to set the video player’s dimensions will override any width andheight attributes applied to the element itself.
Bandwidth Use and Playback Responsiveness
Most browsers download a portion of an audio or video file as the page loads. Typically this snippet of media contains the file’s metadata, such as duration and dimensions, and a few seconds of the playable data. When the user initiates playback, the browser makes a second request for the rest of the file.
Each of these requests places an additional demand on the server, whether or not your visitor interacts with the media file. You can change this behavior with the preload attribute. Set it to one of three possible values:
· metadata tells the browser that it’s okay to download a portion of the file.
· auto tells the browser that it’s okay to download as much of the video as it wants.
· none tells the browser not to download anything until the user requests it.
Using preload="auto" provides the fastest playback for the user. Browsers will download as much of the resource as it needs to provide consistent playback. For shorter clips, that could be the entire file.
With preload="none", users could experience a significant lag between pressing the play control and media playback. However, this option will lead most browsers to download the least amount of data.
Note: Set Explicit Video Height and Width When Using preload="none"
With preload="none", you may want to set an explicit width and height either in the video element itself, or using CSS. Otherwise, you may trigger a page reflow when the video loads and begins to play.
Using preload="metadata" is a bit of a compromise between auto and none. In most browsers, there won’t be a lag between the user requesting playback and the action, as you often get with preload="none". But because the browser pre-loads a smaller portion of the media file, playback may not instantaneous as with preload="auto".
Cross-browser Audio and Video
This almost sounds to good to be true, doesn’t it? Native audio and video without a plug-in! Not so fast. There is one thing is holding us back: file format support. Browser vendors disagree about whether there should be a default multimedia codec, and if so, which one.
Apple and Microsoft have decided to support H.264/MPEG-4 video and MPEG-3 audio in their browsers (Safari and Internet Explorer, respectively). H.264 is a proprietary, high-definition format for displaying video, usually within an MPEG-4 container. MPEG-3 is an audio compression format. Because these formats are proprietary, browser developers must pay licensing fees if they’d like to add support for these formats to their software.
Mozilla and Opera are opposed H.264 and MPEG-3 largely because of those royalty fees. Instead their browsers (Firefox and Opera) support open source codecs such as Ogg Theora and WebM. Firefox does support H.264 and MPEG-3 for mobile devices, but not for desktop and laptops. Internet Explorer supports also other codecs if the user has installed them. Google Chrome, to its credit, supports all of the above.
The Great Codec Divide means that cross-browser video requires one of two approaches:
1. Encode only an H.264 version of the video and use a Flash video container as a fallback to serve the video to browsers that don’t support H.264 natively.
2. Encode the video in multiple formats, and let the browser choose which to play.
The first option is best if you need to support older browsers. Internet Explorer 8, for example, lacks support for audio and video. JavaScript libraries such as Video.js and audio.js use this strategy.
The second option is better if you do not need to support older browsers. It will work for desktop and mobile device browsers. We’ll use this approach here.
Note: Transcoding Software
To transcode videos from one format to another, try FFMpeg, a command-line tool, or Miro Video Converter. Both are free and open source, with Mac OS X, Windows, and Linux builds available.
Using Multiple Video or Audio Files
To offer multiple file formats, we need to use the source element: one <source> tag for each file format. Attributes such as autoplay, loop, and controls should still be a part of the <video> or <audio> tag. But our src attribute must move to our <source> tags.
<audio controls>
<source src="path_to_mpeg3_file.mp3">
<source src="path_to_ogg_file.ogg">
</audio>
We can optionally add a type attribute to each source tag. At the very least, type should contain a valid MIME type. But it may also include a codec as shown below.
<audio controls>
<source src="mpeg3_file.mp3" type="audio/mpeg">
<source src="ogg_vorbis_file.ogg" type="audio/ogg; codecs=vorbis">
<source src="ogg_flac_file.oga" type="audio/ogg; codecs=flac">
</audio>
Warning: preload=none on Safari
Using preload=none with multiple sources may prevent Safari from downloading the correct file. Safari 6.0.5 will ignore any file besides the first one when preload=none. Even if the user presses play, Safari will not load another video source. Avoid this by listing a Safari-compatible source first. Otherwise set the value of preload to metadata or auto.
Each browser will download the first available file that it's capable of playing.
All materials on the site are licensed Creative Commons Attribution-Sharealike 3.0 Unported CC BY-SA 3.0 & GNU Free Documentation License (GFDL)
If you are the copyright holder of any material contained on our site and intend to remove it, please contact our site administrator for approval.
© 2016-2026 All site design rights belong to S.Y.A.