Custom SharePoint Solutions with HTML and JavaScript: For SharePoint 2013 and SharePoint Online (2015)
1. Setting Up Your Environment
Brandon Atkinson1
(1)
VA, US
Setting up your environment properly will give you all the tools needed to build your custom solutions. A lot of what you will need is already built into SharePoint and is ready to use. However, you will also want to download and install some extra tools that will make your life easier. These tools include:
· SharePoint Online Developer Site
· SharePoint Designer
· Visual Studio Express
· Various browsers and developer tools
· jQuery
· Implementing jQuery in your SharePoint environment
If this list looks daunting, don’t be concerned. In this chapter we’ll explore each of the items in detail to get you familiar with them and what they are used for. In addition, we’ll take a look at creating your own SharePoint Online environment to use as a development area and show you how to implement jQuery in that environment.
If you’ve been developing SharePoint solutions already and even just doing web development, you’ll most likely already have these installed. This chapter will be geared more toward the business user or those newer to front-end development. So if you’re a seasoned developer, you can skim this chapter to ensure you have everything you need. No matter who you are, at the end of this chapter you will be fully prepared to start the journey of building custom solutions in SharePoint!
SharePoint Online Developer Site
It goes without saying that being able to build custom SharePoint solutions is a wasted skill without somewhere to build them! Some of you will already have an environment to use for development. This may be a SharePoint Online environment that your business uses for their intranet, or perhaps a SharePoint 2013 on-premise environment. It may be that you’re looking to learn SharePoint development for the first time and you have nowhere to work. In any case, you have plenty of options available to you and we’ll explore those here.
Note
The options explored in this section will focus on SharePoint Online and Office 365. If you have SharePoint installed on-premises, you can easily create a new site to work in. Even if you have SharePoint at your fingertips at work, you may still want your own environment to work in so that the options here will still apply.
Microsoft has made it very easy to get started with front-end development on the latest versions of SharePoint. You can sign up for an Office 365 Developer Site at the following URL: http://msdn.microsoft.com/en-us/library/office/fp179924(v=office.15).aspx . Figure 1-1 shows the page and the various options for signing up.
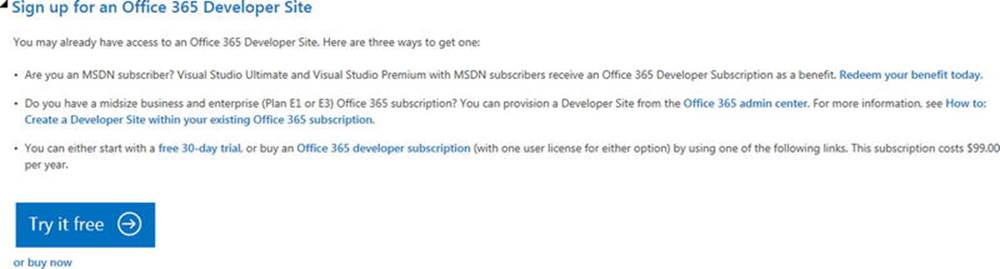
Figure 1-1.
Office 365 Developer Site sign-up options on the Microsoft site
As you can see, there are three options for creating a developer site:
· MSDN subscriber - If you or your company subscribes to MSDN, you can create a developer site for free as part of that benefit. A lot of companies with dedicated developers on staff have MSDN subscriptions, or you may have one on your own. In either case, simply click the link titled “Redeem your benefit today” to get started.
If you’re a business user, it may be worth looking into this option as well. If your company has an MSDN subscription, you could either request a license or have someone in IT create the site for you and provide access.
· Office 365 subscriber - Businesses that already subscribe to an E3 or E4 Office 365 Plan can provision a developer site right from the Office 365 admin center. These subscription levels allow for creating a new private site collection using a special site template for developers.
For full details and a walk-through of creating a Developer Site, visit the following URL: http://msdn.microsoft.com/en-us/library/office/jj692554(v=office.15).aspx .
· 30-day trial or developer subscription - Microsoft also allows you a 30-day trial of Office 365 if you wanted or needed to have your own environment. This is a great option, as it gives you a good amount of time to explore Office 365 and SharePoint Online, as well as to test your development skills in an environment that is all yours.
You can also upgrade the trial to an annual subscription, at any time, for $99.00 USD. This is a great option, even if you have SharePoint at your business. It gives you a perfect area— away from any production sites—where you can build your custom solutions. At $99 a year, it offers a low-cost option to build solutions that can be easily migrated to a production environment.
No matter your situation, you can easily obtain an environment where you can develop your custom SharePoint solutions. Now that we’ve covered where and how to obtain your SharePoint environment, let’s explore some of the tools we’ll be using in this book.
Note
All of the examples and screenshots in this book will be taken from a SharePoint Online environment, which is the latest version of SharePoint available.
SharePoint Designer
If you’ve used SharePoint in the past, then you’ve probably used SharePoint Designer as well. It’s a free tool provided by Microsoft and a staple workhorse when it comes to SharePoint. It allows you to perform a wide range of tasks—from branding, to connecting, to external databases, building lists, and more. For this book, Designer honestly does not play a huge role, but it will be key in helping us implement jQuery in SharePoint. This is at the end of this chapter. For now, let’s just download Designer.
You can download SharePoint Designer at the following URL: http://www.microsoft.com/en-us/download/details.aspx?id=35491 . Figure 1-2 shows the page at the Microsoft Download Center site where you can download Designer.
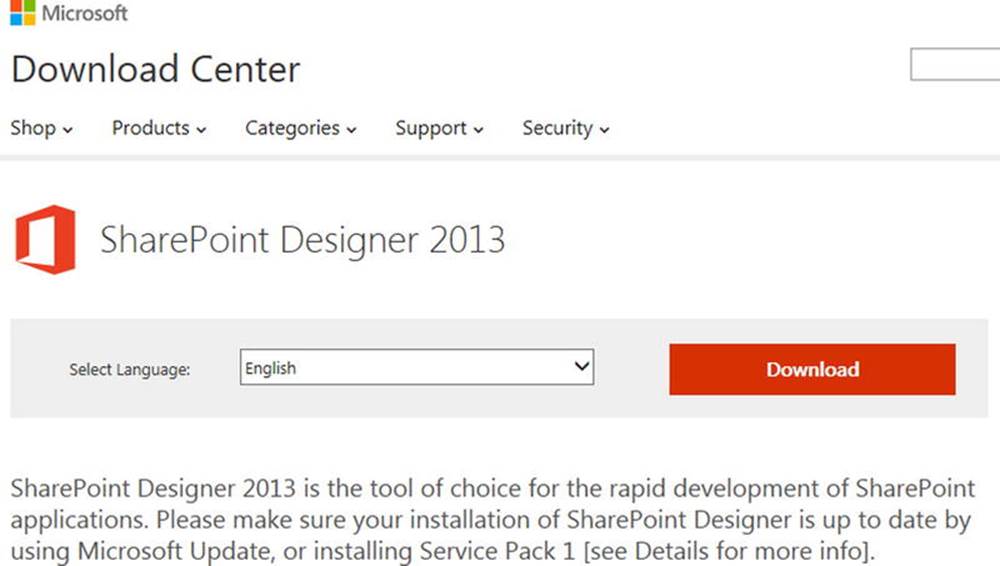
Figure 1-2.
SharePoint Designer download page on the Microsoft site
For now, you can simply download and install Designer; we’ll get to using it later on. Even though we don’t dive deeply into Designer in this book, you will find it a useful tool when working with SharePoint. As I stated before, it has a wide range of capabilities and can assist you with many tasks. Designer works with both SharePoint Online and on-premises environments.
Visual Studio Express
If you’re not a developer, then you may not have heard of Visual Studio Express; and if you have, it probably seems like an overwhelming program for code jockeys. In a way, it is, but it’s a powerful tool that we’ll be using to write our HTML and JavaScript. It’s also free and provided by Microsoft.
Visual Studio is an integrated development environment, or IDE for short. This is a fancy way of saying “a program that allows you to write code.” For this book, all of our examples will be in HTML and JavaScript. One of the nice things about HTML and JavaScript is that they are simply text files with special extensions: .html and .js. To that end, all you really need to create and edit these files is Notepad. However, while Notepad may seem friendly and unimposing, it is in no way your friend when it comes to writing code. Visual Studio Express provides all the tools you need—and will even let you know when it detects something is wrong. Notepad can’t do that!
Visual Studio comes in a lot of different versions, depending on how technical your need is. The Express edition is a fully featured version and will more than meet the needs of this book. You can download Visual Studio Express at the following URL: http://www.visualstudio.com/en-us/products/visual-studio-express-vs.aspx . Figure 1-3 shows the download page at the Visual Studio site.
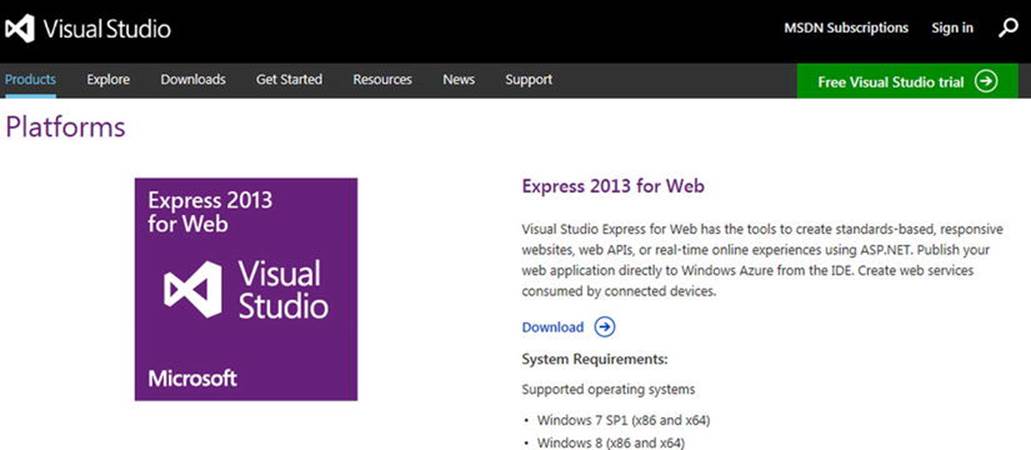
Figure 1-3.
Visual Studio Express download page on the Microsoft site
Visual Studio Express comes in multiple editions, including Web, Windows, and more. Express for Web is a perfect version for building solutions using HTML and JavaScript.
Browsers and Developer Tools
When it comes to working with SharePoint as an end user, the obvious browser choice is Internet Explorer. While SharePoint works excellently with other browsers, such as Firefox and Chrome, Internet Explorer is clearly the Microsoft-recommended browser and what SharePoint is most likely to be friendly with. That being said, this book is all about building custom solutions using HTML and JavaScript, and you will find that most modern browsers act and perform the same. Before we talk about browsers, let’s discuss developer tools.
Developer tools is a generic term, meaning the tools used to help develop, debug, and otherwise know what’s going on with the HTML, JavaScript, and CSS that is in your browser. These can also be called developer toolbars, browser tools, or may go by an entirely different name altogether, like Firebug. No matter the tool, they all perform the same function, which is to help you develop your solutions. In just about every browser, all you need to do to launch the developer tools is hit the F12 key on your keyboard, as shown in Figure 1-4 in Internet Explorer.
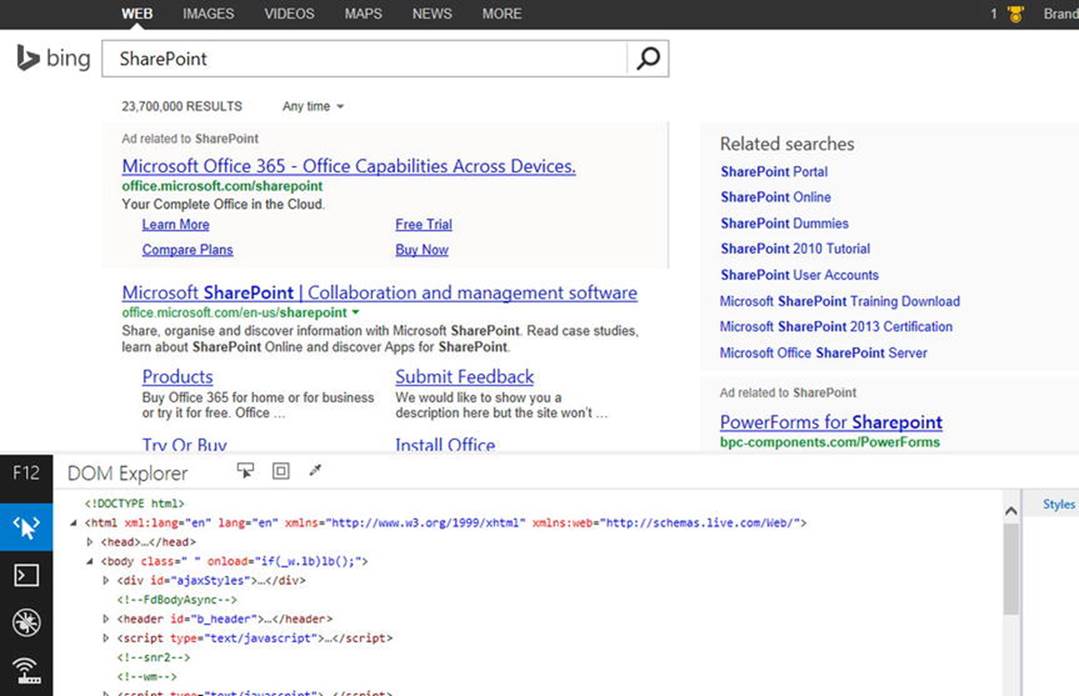
Figure 1-4.
Developer tools launched in Internet Explorer after hitting F12
As you can see in Figure 1-4, these tools provide a lot of insight into what is going on in the browser. Immediately you can see the HTML that is generating the page, along with any CSS styling that has been applied. Using the menu on the left side of the tools, you can also look at what JavaScripts were loaded on the page, and even view the code inside them. You can take it one step further and actually set “breakpoints” in the JavaScript to pause its execution so that you can see what is happening when those scripts are working. This is an invaluable tool in your front-end development efforts and it will be used often.
Figure 1-5 shows the developer tools open in Google Chrome. Again, pressing F12 is all that is needed to open the tools. As with Internet Explorer, you immediately see the HTML and styles applied to the page.

Figure 1-5.
Developer tools launched in Google Chrome after hitting F12
In Chrome, the menu options run across the top of the tools screen and provide similar functionality. You can close developer tools the same way you open them, by pressing F12. You should download several browsers and get a feel for their tools. Every developer has his or her preferences for browsers and tools; mine are Firefox and Firebug, and we’ll be using these for this book.
I’ll go on record and say that I think Internet Explorer is a fantastic browser, at least the latest version is. It has come a long way over the years and is finally on par with some of the newer kids on the block. The developer tools in Internet Explorer are very good, but I prefer using Firebug in Firefox over all the rest. Firebug is an Add-on in Firefox that performs just like the tools in the other browsers, but in my opinion it organizes the content in a friendlier manner and is easier to use. You should definitely find your preference and use the browser/tools that work best for you. All the examples in this book will use Firebug, but you are not limited to those tools.
To install Firebug, download the Firefox browser at the following URL: https://www.mozilla.org/firefox/ . Once installed, click the menu icon in the top-right corner. Figure 1-6 shows the menu open and the Add-ons option highlighted.
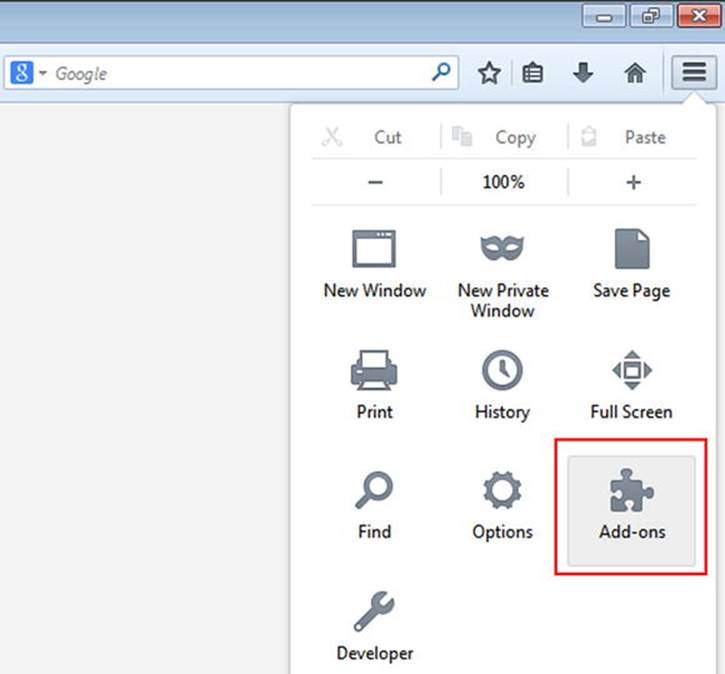
Figure 1-6.
The Add-ons menu option in the Firefox menu
Clicking the Add-ons option will open the Add-ons Manager page in a new tab. This page allows you to manage all your Add-ons and search for new ones. Type firebug in the search box at the top-right of the screen, and then click the magnifying glass icon. Figure 1-7 shows the search box after typing into it.

Figure 1-7.
Search box on the Add-ons Manager page before searching
The search results bring back any Add-ons matching your request, and Firebug should be at the top of the list. Click the Install button shown in Figure 1-8 to add Firebug to Firefox.
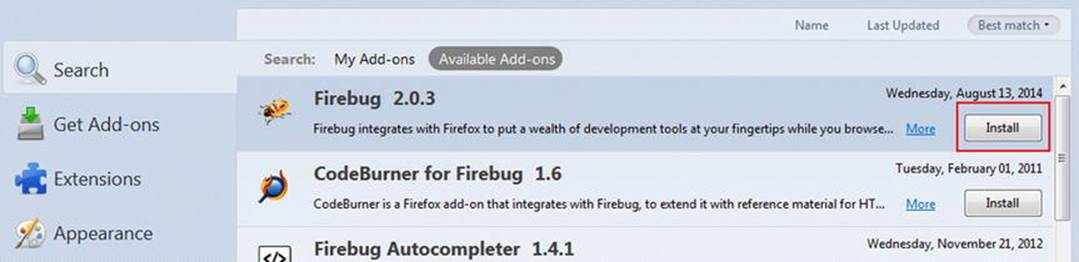
Figure 1-8.
Clicking the Install button will install Firebug in Firefox
Once the download and installation are complete, Firefox will now display a “bug” icon next to the menu in the top-right corner. Figure 1-9 highlights the Firebug icon.
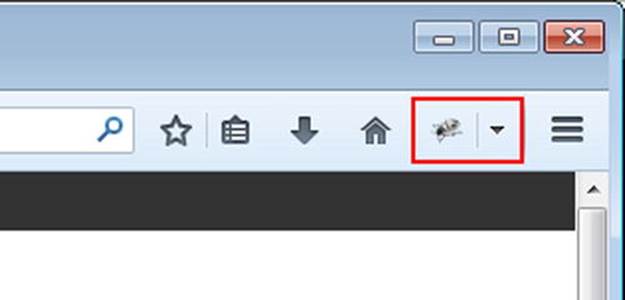
Figure 1-9.
Firebug icon is present once the installation is complete
Now that Firebug has been installed, you can open it the same way you open developer tools in other browsers—by hitting the F12 key on your keyboard. You can also click the Firebug icon to open it as well, as shown in Figure 1-10.
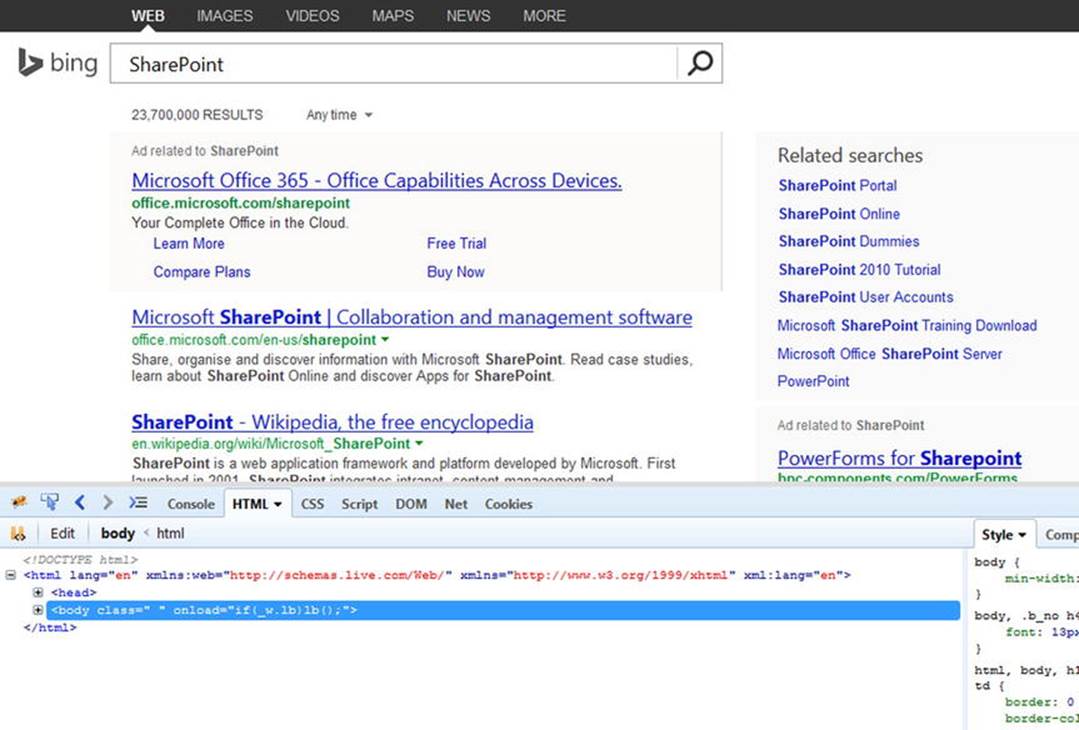
Figure 1-10.
Firebug toggled open by clicking F12
As you can see in Figure 1-10, Firebug looks and acts a lot like the developer tools available in other browsers. Again, it’s your personal preference as to which tools you ultimately decide to use. All the examples in this book will use Firefox and Firebug.
jQuery
If you’ve done any JavaScript work in the past, you’ve probably felt a bit frustrated from time to time. JavaScript is a great framework for front-end development. It’s fast and you can build useful code with it in no time. But it can be difficult to work with, hard to debug at times, and appear intimidating to newcomers. jQuery came along and changed all that.
jQuery is a framework that works along with JavaScript to make writing front-end code easier and faster. jQuery bills itself as the “write less, do more” framework—and you will find that this is the case. It has quickly become a standard for JavaScript development, and a lot of the examples in this book will utilize jQuery in some way. If you’ve never used it before, don’t worry: we’ll start slow and get you up to speed.
Note
If you are new to jQuery, there is a great “getting started” guide on the jQuery web site at http://learn.jquery.com/about-jquery/how-jquery-works/ . There is also Beginning jQuery by Jack Franklin (Apress, 2013), a great resource for those of you who are getting started (seewww.apress.com/9781430249320 ).
Now, let’s do a quick jQuery exercise to get you familiar with how it works. One of the main benefits of jQuery is being able to easily select HTML elements on the page. The two main ways you can do this are by using an element’s ID or its CSS class. Figure 1-11 shows the jQuery home page ( jquery.com ) in Firefox with Firebug open. We’ll use jQuery’s site for this exercise, since they will definitely have it loaded already!
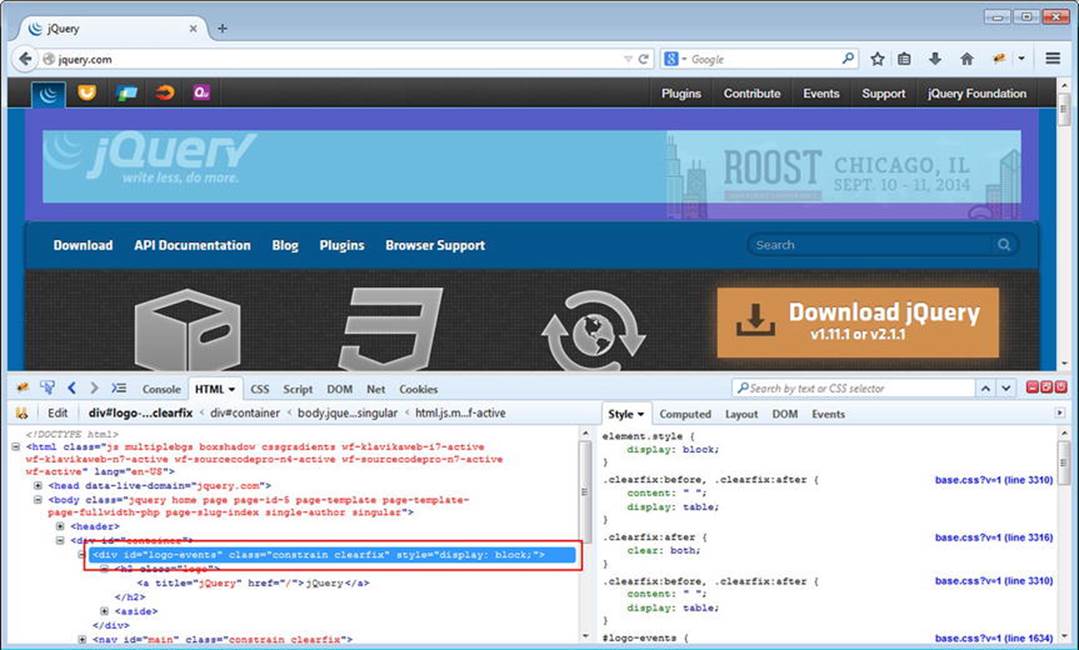
Figure 1-11.
The jQuery home page in Firefox with Firebug open. Hovering over an HTML section with the mouse will highlight it on the page
We’ve expanded the HTML in Firebug and located the logo in the top left of the page. As you hover over the HTML with your mouse, Firebug will highlight the sections in the browser so that you can easily see it. On this page, the logo is inside a DIV element with an ID of "logo-events". Since this element has an ID, it can easily be targeted with jQuery. In Firebug, click the tab titled Script to activate it, as shown in Figure 1-12.
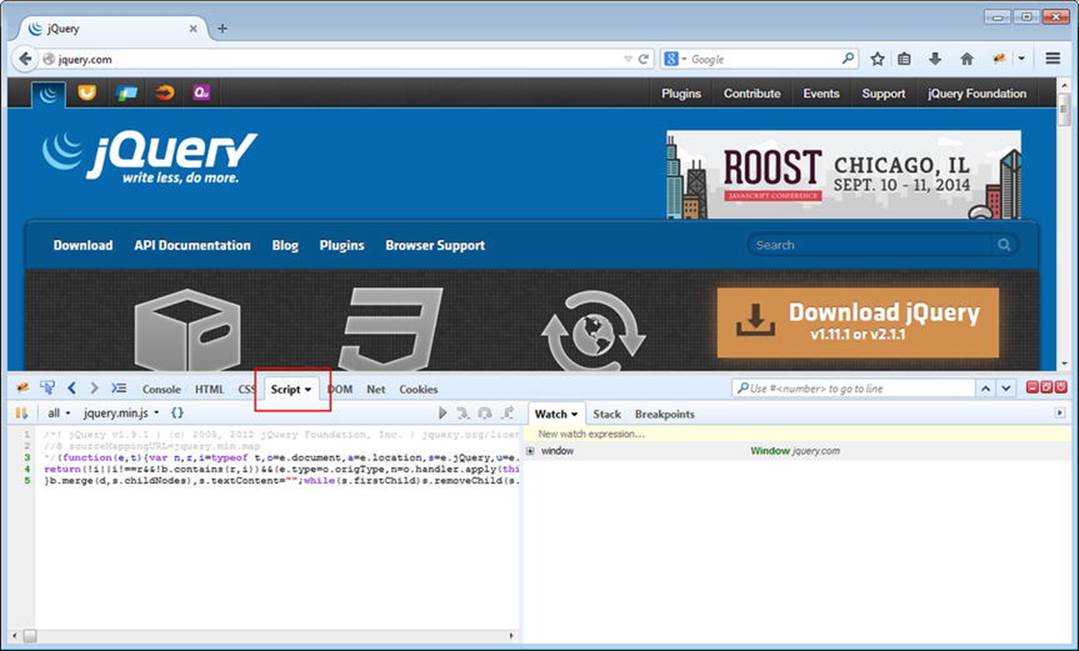
Figure 1-12.
Scripts tab activated in Firebug
In the Scripts tab there are two main areas where you will work with your front-end code. The left panel shows the current script that you are inspecting. There is a drop-down above it, where you can see and select all the current JavaScript files that are loaded on this page. We’ll explore this in more detail later on. The right panel has more tabs, but the main one is the Watch tab. In this tab we can run on-demand JavaScript commands right in the browser using the “New watch expression” textbox. This area will be extremely useful when writing front-end code.
Click inside the “New watch expression” textbox, type the following line, and then hit Enter:
$("#logo-events")
Figure 1-13 shows the output of running this line of code.
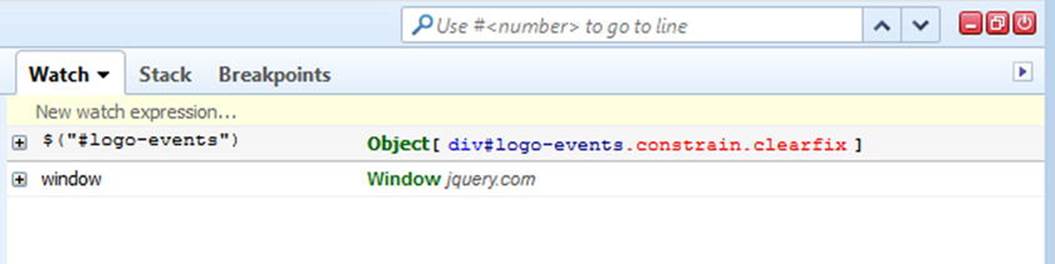
Figure 1-13.
Output of running the jQuery command in the Watch tab
As you can see, the result is an Object, and inside the brackets you can see "div#logo-events", which means that jQuery successfully found the element that you were looking for. Let’s take a moment to look at what happened here and how jQuery works. We can break the structure of the jQuery command like this:
· $ - This is a shorthand symbol for invoking jQuery. All jQuery commands will start with this symbol. You can think of it as asking jQuery to go do something for you. In this case, we are saying, “jQuery go find the element with this ID.” The $ is always followed by (), which enclose the element that you are looking for.
· # - This is a shorthand symbol for telling jQuery that you are looking for something by its ID. Any text following the # should be a valid ID on an HTML element and will only return one item, because HTML elements cannot share IDs.
· . - The period is shorthand for telling jQuery that you are looking for something by its CSS class. So if you have 10 DIVs in your HTML that all share the same CSS class of "red-box", you could find them all by using the following command: $(".red-box"). It has the exact same structure as an ID command, just with a . instead of a $. The . is always followed by (), which enclose the element that you are looking for.
Now that we have found the DIV that contains the logo, we can start to use jQuery on it and manipulate the HTML on the page. Click inside the “New watch expression” textbox, type the following line, and then hit Enter:
$("#logo-events").hide("slow")
You will see the logo area slowly disappear from the browser window. You can bring it back by using the following command:
$("#logo-events").show("slow")
These are very simple examples, but should show the power that jQuery can easily bring to your code. We’ll be using jQuery throughout this book, so you’ll see more examples and get more familiar with using it as you progress. For now, let’s get jQuery implemented in our SharePoint environment so that it’s ready to use.
Implementing jQuery in Your SharePoint Environment Using SharePoint Designer
For some of you, jQuery is already implemented in SharePoint. This may have been done to support prior development. However, if you are starting out or just signed up for a trial of SharePoint Online, you’ll need to implement jQuery for the examples in this book. Implementing jQuery is actually very easy and straightforward, and in this section we’ll look at how to do this using SharePoint Designer.
Note
There are a number of different ways to implement jQuery in your environment. These include custom code deployments to inject it onto all pages, placing Content Editor Webparts on the certain pages, and more. We will be using SharePoint Designer, as it offers a quick and easy way to get jQuery into SharePoint.
Obtaining jQuery
Before we can implement jQuery, we first need to either reference the jQuery code or download a copy and physically upload it to SharePoint. In this section, we’ll be using a content delivery network (CDN) to reference jQuery. A CDN is basically a publicly available server where content resides that you can use on your sites. jQuery operates a CDN that you can reference at https://code.jquery.com . Many other companies also operate CDNs that host jQuery, including Microsoft and Google.
The benefits of using a CDN are many. The biggest benefit is speed, as there are many sites using the same CDN on the Web. If your users have already visited one of those sites, then jQuery is probably already loaded into their browsers, so your pages will load faster. The other big benefit is that you do not have to worry about downloading and storing the code directly. In either case, the decision to use a CDN on a production site should be discussed with your IT department. In our case, it will work out just fine and you should feel comfortable using it in a development environment.
To reference jQuery from the CDN, we will use the following line of code:
<script src="//code.jquery.com/jquery-1.11.0.min.js"></script>
This is a basic HTML script tag that will load jQuery version 1.11 from the jQuery CDN. You’ll notice that there is no HTTP or HTTPS in the URL. This is removed so that the script will work the same in either a nonsecure or secure URL. Now let’s look at how to place this into SharePoint.
Team Site Template
Now that we know how we’re implementing jQuery, we’ll need to do it! We’ll look at two options: a Team Site and a Publishing Site. They differ slightly, so let’s look at a Team Site first. Launch SharePoint Designer and click the Open Site icon, as shown in Figure 1-14.
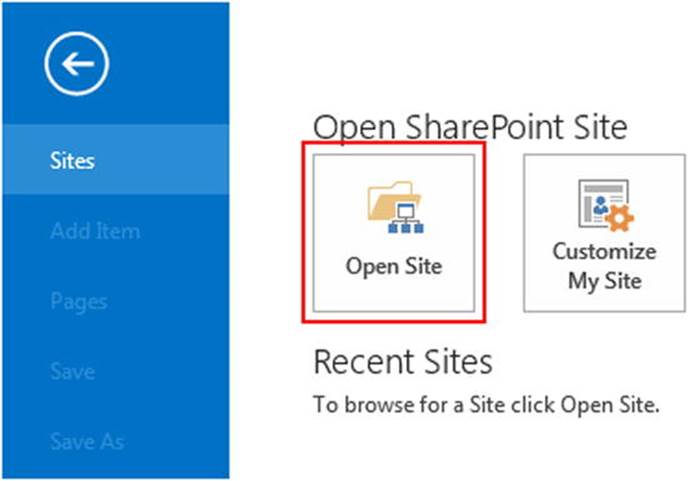
Figure 1-14.
The home screen in SharePoint Designer with an Open Site icon
Clicking this button will launch the Open Site dialog, where you will need to specify the URL to your SharePoint site collection. You can open specific site collections or you can open the root site by typing in the base URL for your SharePoint environment. If you’re using SharePoint online, the URL for your root site will look something like https://YOURSITENAME.sharepoint.com .
Figure 1-15 shows the Open Site dialog. You’ll type the URL in the textbox labeled “Site name” and then click Open. You’ll be presented with another dialog to enter your credentials before Designer opens the site.
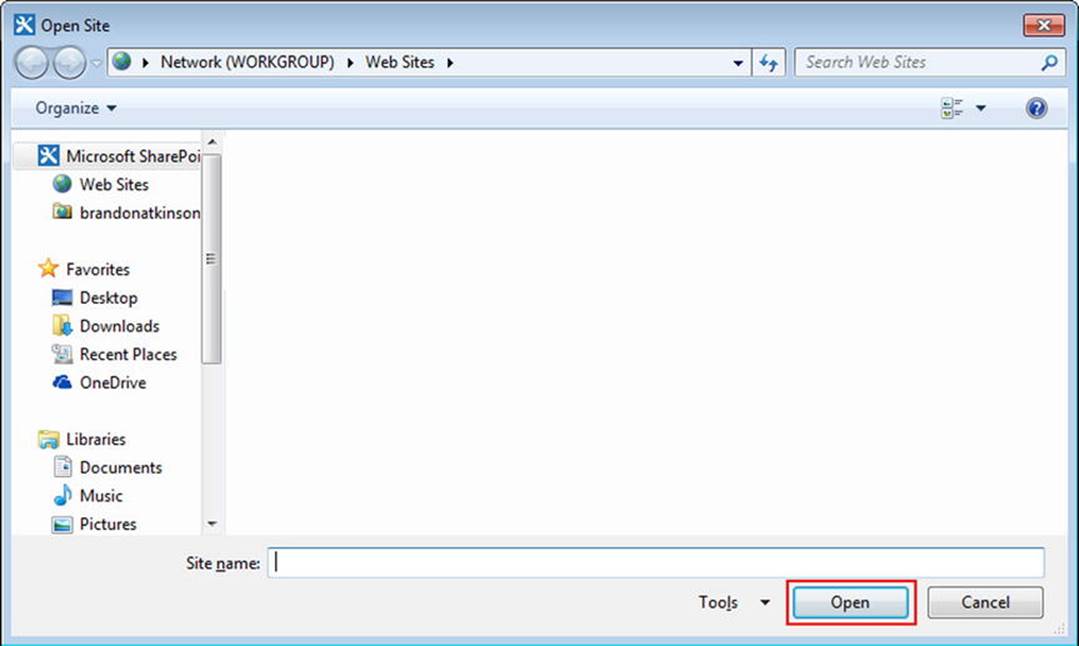
Figure 1-15.
Open Site dialog where you supply the URL to your SharePoint site
Once you’ve supplied your credentials and have been authenticated, SharePoint Designer will open and give you a view into your site. If you’ve never used Designer before, take a moment to look around; you may be impressed by the level of information available to you. Designer gives you insights into all your lists and libraries, workflows, external content types, and a lot more. It’s a very useful tool—especially in SharePoint Online, where you do not have access to a server.
Note
SharePoint Designer is a very powerful tool that can very easily change your SharePoint environment. If you are new to this tool, take care when navigating around and only make changes that you know will not be harmful to your environment.
Once you’ve become familiar with Designer, click the Master Pages link in the left-hand navigation, as shown in Figure 1-16. This area not only displays all the master pages in SharePoint, but also other layouts, including Search Results, Display Templates, and more. We’ll come back to this area later in the book, but for now, highlight the seattle.master file. Once this file is highlighted, click Edit File from the Ribbon.
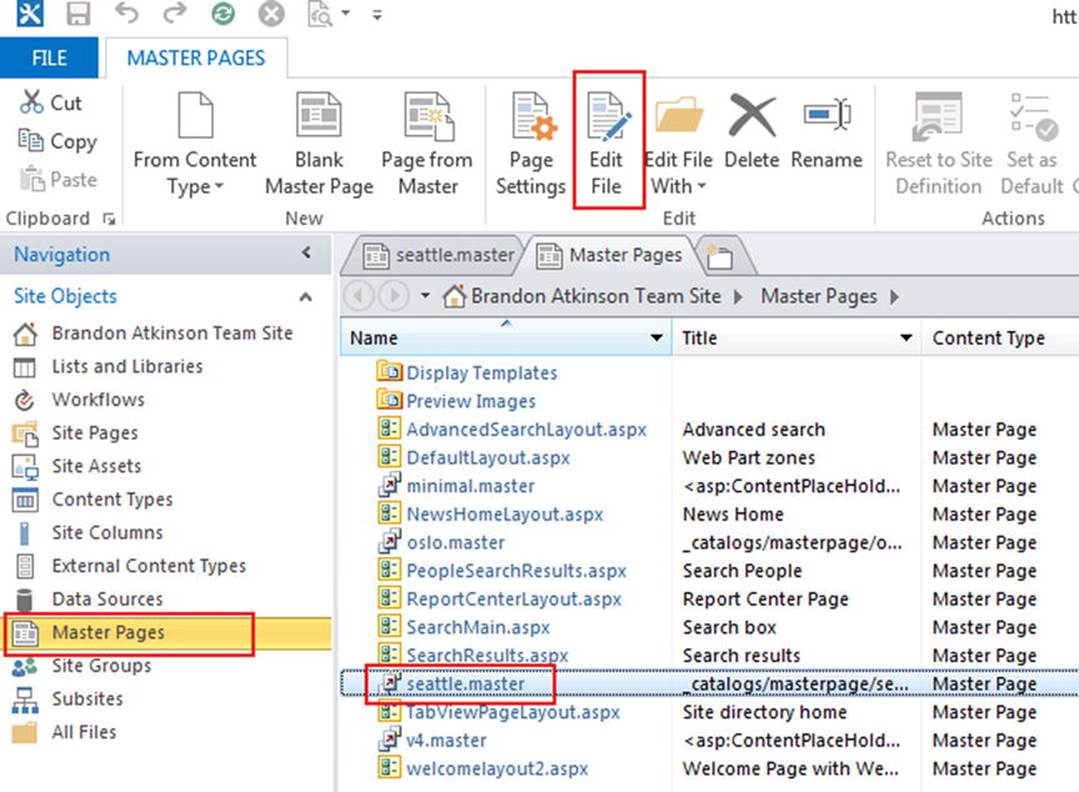
Figure 1-16.
The Master Pages tab in SharePoint Designer. Once you highlight the seattle.master file, click Edit File in the Ribbon
If you’re new to development, the next screen may look intimidating but it’s not. Once you’re editing the seattle.master file, you’ll see all the ASP.NET code that renders your SharePoint pages. Well, almost. This file is responsible for the common parts of your SharePoint pages, like the logo, Ribbon, navigation, and more. Although there is a lot here, we only need to add in our jQuery reference—and then get out!
We’ll place our line of code in right near the top of the page, just before the closing </head> tag, as shown in Figure 1-17.
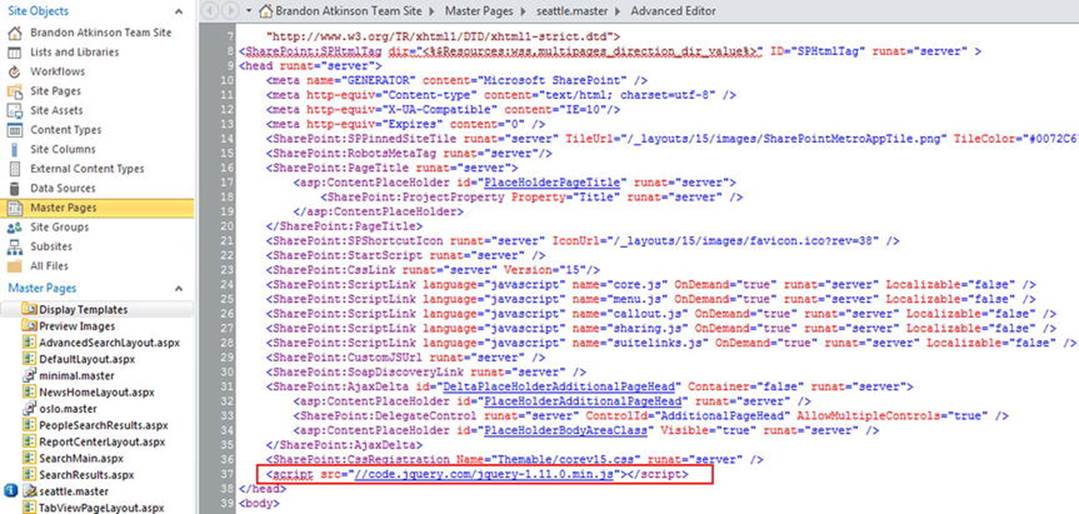
Figure 1-17.
jQuery reference added the Seattle master page
As you can see in Figure 1-17, we place the jQuery reference right before the closing </head> tag, which is right above the opening <body> tag. It will basically be the last script referenced in the master page in the Head area. Once that is in place, click the Save icon at the top left of the screen to save the changes. This will automatically publish the change to your SharePoint environment.
Once the changes are saved, launch a browser and navigate to your site. Figure 1-18 shows the SharePoint environment with Firebug open. Inspecting the HTML, we can see that the jQuery reference is now in the master page and available to all pages in SharePoint.
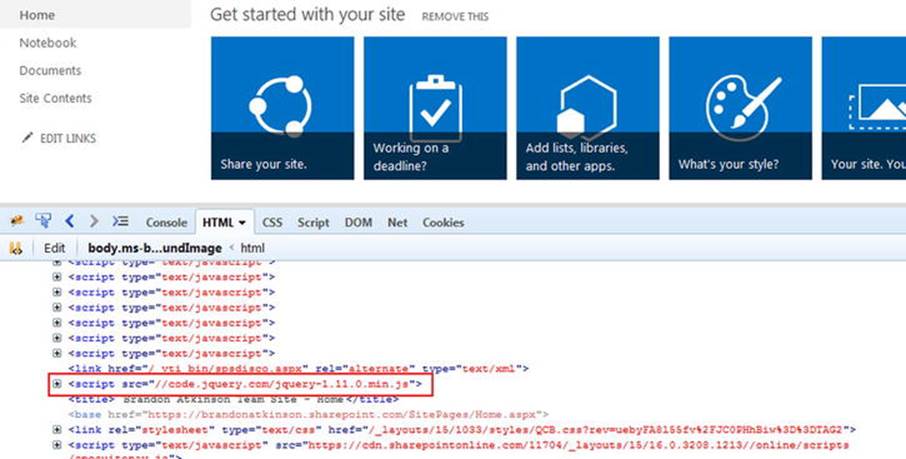
Figure 1-18.
Inspecting your SharePoint environment with Firebug to ensure the jQuery reference is in place
Note
Generally speaking, modifying the out-of-the-box master pages in SharePoint is not a good idea. The biggest reason for this is since they are out-of-the-box, if an update or new release comes along and your SharePoint Online is upgraded, you run a high risk of your changes being lost. The best practice is to make a copy of the master page you want to modify and change that one. This way, updates will not overwrite your changes.
Publishing Site Template
Publishing Sites act quite differently when it comes to modifying master pages. With SharePoint 2013 came the Design Manager, which allows you to upload an HTML file that will be converted to a master page for you. This is great for users who want to upload a custom design and totally change the look of their site. We just need to inject jQuery, however, so we’ll need to complete a few extra steps.
Open SharePoint Designer and click the Master Pages link in the left-hand navigation. The first thing you’ll notice is a lot more files than in a Team Site. All the extra files come along with a Publishing Site, so you can pretty much ignore them all for now. Locate the seattle.master file and you’ll notice it has an accompanying HTML file, as shown in Figure 1-19.
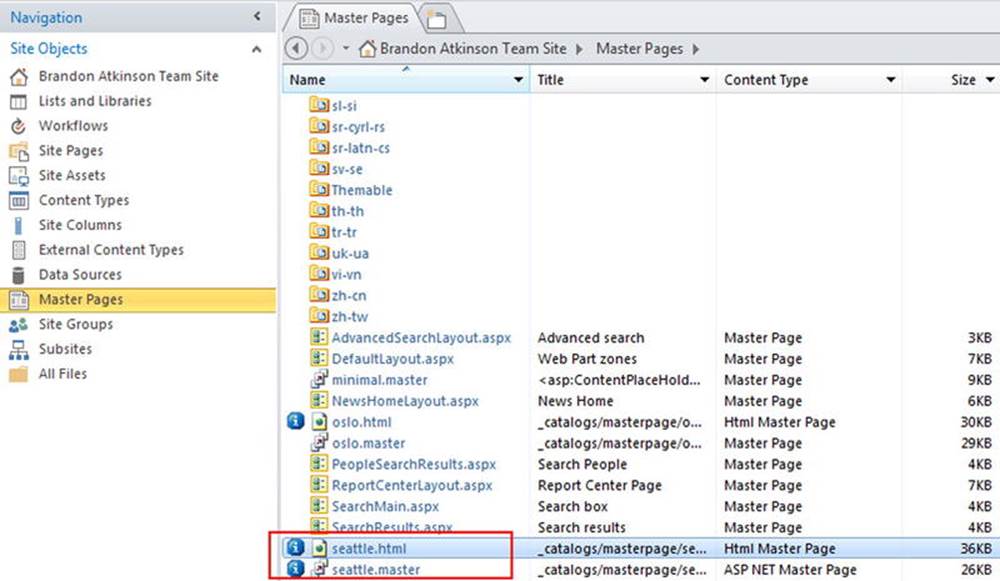
Figure 1-19.
Master Pages in SharePoint Designer on a Publishing Site template
In this model, you can only edit the HTML file. Once you make an edit to the HTML file and save it, the changes are converted and saved into the master page file. The first thing we need to do is make a copy of the seattle.html file, since this is the one we can actually edit. Highlight theseattle.html file and from the Ribbon, click the Copy button. The Paste button will become active. Click Paste. A copy of seattle.html will be created, as shown in Figure 1-20.
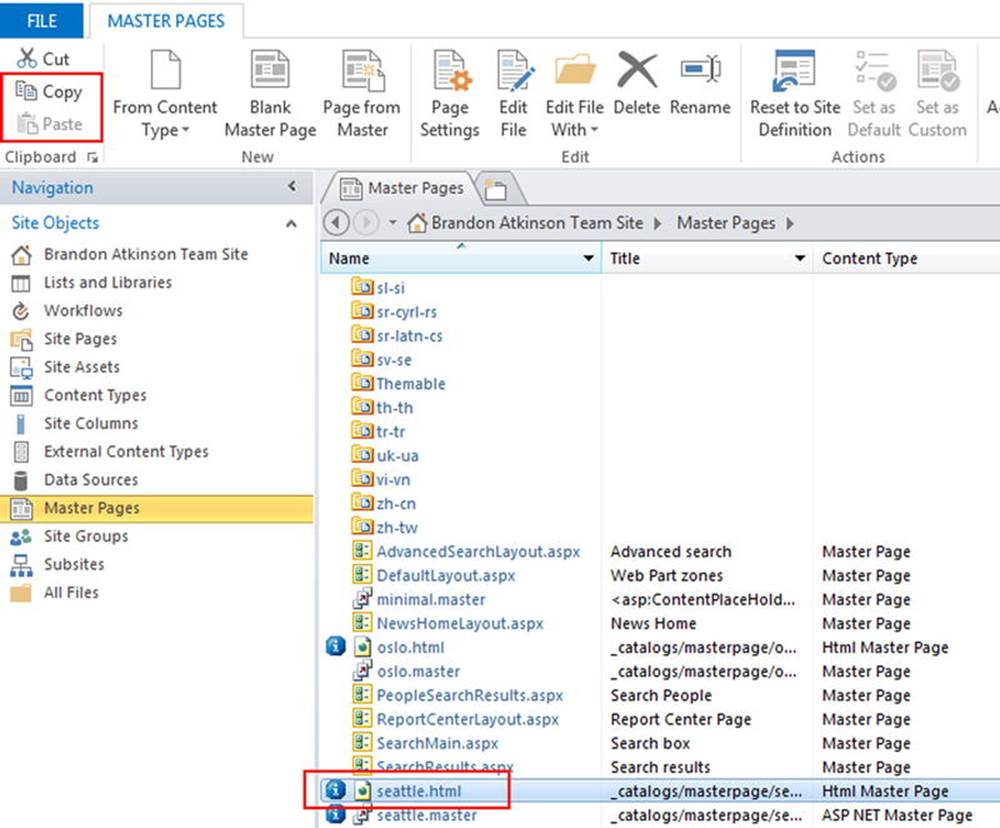
Figure 1-20.
Copy and Paste buttons in the Ribbon
Once you make a copy of the file, it will be pasted in with a default name of seattle_copy(1).html. For most people, this is just not an acceptable name! You can right-click the new file and choose Rename from the context menu, as shown in Figure 1-21.
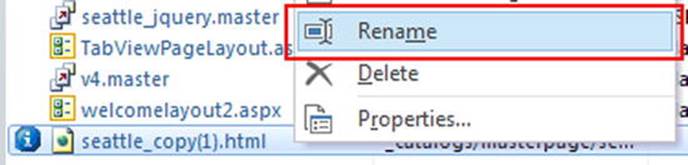
Figure 1-21.
The Rename option from the context menu
We’ll rename the file seattle_jquery.html and then click Enter. Since the HTML files are linked to a master page by the same name, you will be prompted by Designer before you can rename the new file. Figure 1-22 shows the prompt you will see during the rename.
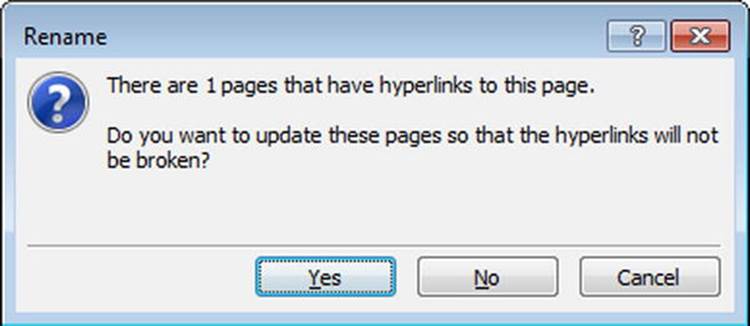
Figure 1-22.
The Rename prompt when renaming the copied HTML file
After the rename, you will now have a seattle_jquery.html and a seattle_jquery.master file. Highlight the new seattle_jquery.html file and click Edit File from the Ribbon. As with the Team Site master page, we’ll insert the following line to reference jQuery:
<script src="//code.jquery.com/jquery-1.11.0.min.js"></script>
We’ll place it in a different location this time, as shown in Figure 1-23. It will be added just below the META tags, right after some out-of-the-box SharePoint tags.
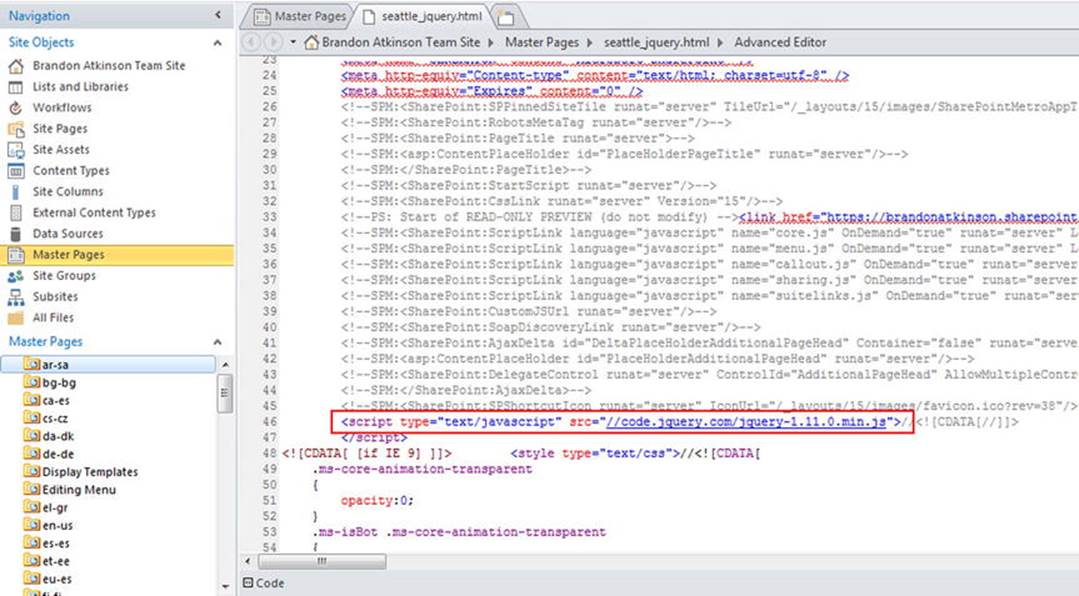
Figure 1-23.
Adding the jQuery line to the new master page file
Once the jQuery reference has been added, click Save, which will save and publish the file. It will also generate a new seattle_jquery.master file with the changes. Now that we have the reference added and all the files have been updated, we need to set this new master page as the default so that our site uses it. Highlight seattle_jquery.master and click Set as Default in the Ribbon, as shown in Figure 1-24.
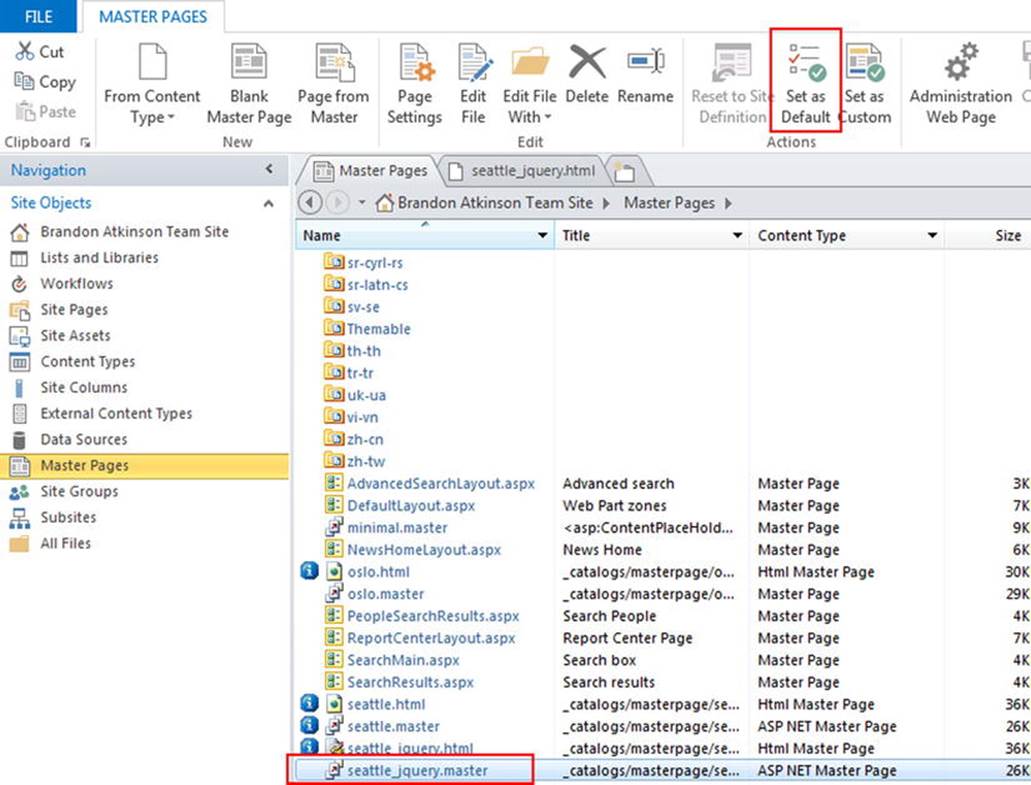
Figure 1-24.
Setting the new master page as the default
Now that the new master page has been created and set as the default, we’ll check to ensure the jQuery reference has been set correctly. Navigate to the site where the Publishing Site template is being used. Figure 1-25 shows the SharePoint environment with Firebug open. Inspecting the HTML, we can see that the jQuery reference is now in the master page and available to all pages in SharePoint.
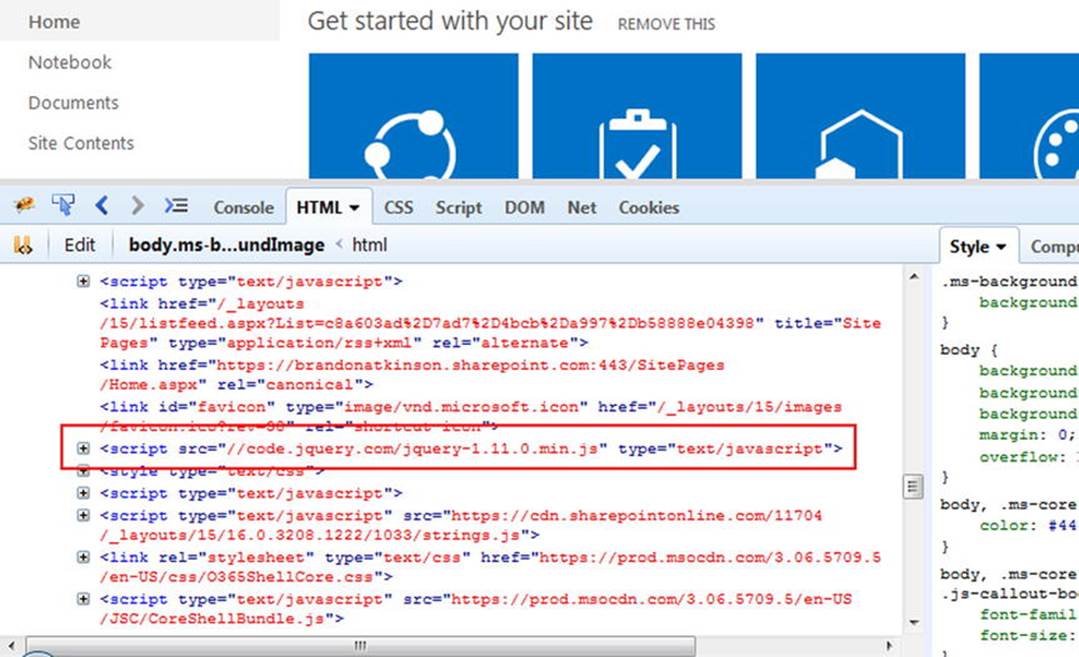
Figure 1-25.
jQuery reference in the new master page
Any child site created from the parent site using the publishing template will automatically inherit this new master page. This is the preferred way to add a reference to jQuery in the master page. Making a copy of the file ensures that your changes will stay in place if an update is applied to SharePoint.
Summary
In this chapter, we looked at all the various components you’ll need to do front-end development in this book. If you’re already developing solutions, you probably had most—if not all—of these components installed before you picked up this book. If you’re new to front-end development, you probably installed some new programs! By now you should have everything you need to begin creating your own custom solutions. The great thing about these components is that outside of SharePoint Online and Designer, all these can be used for many other projects. If you find that you like front-end development, you can use these tools for a wide range of projects!
In the next chapter, we’ll explore the differences between server-side and front-end development. We’ll also look at some of the components that SharePoint provides that allow for this type of development. You’ll see some code and get prepared for further chapters!
© Brandon Atkinson 2015
Brandon AtkinsonCustom SharePoint Solutions with HTML and JavaScript10.1007/978-1-4842-0544-0_2
All materials on the site are licensed Creative Commons Attribution-Sharealike 3.0 Unported CC BY-SA 3.0 & GNU Free Documentation License (GFDL)
If you are the copyright holder of any material contained on our site and intend to remove it, please contact our site administrator for approval.
© 2016-2025 All site design rights belong to S.Y.A.