D3 on AngularJS: Create Dynamic Visualizations with AngularJS (2014)
Dynamic visualizations
As we saw in the last chapter, directives are a great tool for making our visualizations self contained and reusable across different parts of our project or different projects entirely. Another great advantage to using Angular and its directives for data visualization is Angular’s support for automatic two way data binding. That sounds like a mouth full but it’s a actually a simple idea. It just means that Angular takes care of updating the DOM whenever data changes. Similarly, it automatically updates our data when the DOM changes. All we need to specify is the relationship between our data and DOM elements. The big advantage to all of this is that we’ll get to write a lot less code. The disadvantage is that we’ll have to spend the effort to wrap our heads around this new way of thinking about data binding as well as develop a strong understanding of what all Angular is doing automatically for us.
For the first half of this chapter we’ll be working from simple toy examples that illustrate the fundamentals. In the second part, we’ll walk through using these new concepts to make dynamic data visualizations.
Two way data binding
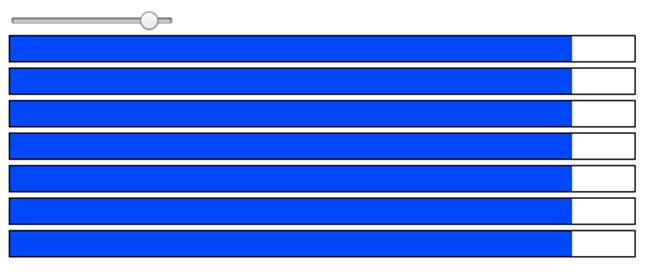
To illustrate and motivate the advantages of two way data binding, we’ll start off with a very simple example. Here, several range <input> sliders are all bound to the same data model. When we drag one, all the others are updated automatically. This saves us the trouble of having to manually set up event listeners on all of the sliders as well as taking care of updating their values. It might help to think of Angular as having written all that code for us.
1 <body ng-app>
2 <input type="range" ng-model="ourRangeValue">
3 <input type="range" ng-model="ourRangeValue">
4 <input type="range" ng-model="ourRangeValue">
5 <input type="range" ng-model="ourRangeValue">
6 </body>

|
|
Live version: http://jsbin.com/tobuq/1/edit |

The scope
All of this automatic updating happens for variables on what’s called the “scope”. In the example above, the ng-model directive creates a variable on the scope called ourRangeValue and handles updating the value of the <input> range slider anytime ourRangeValue changes. The scope works a lot like the DOM tree. If we create a new scope on a DOM element, all of the child elements will have access to the variables on that new scope. When we told Angular the root of our app was the <body> tag it also created a default scope on the <body> tag that any inner elements can access. This is the scope the ourRangeValue is created on. This top level scope is called the “root scope”.
There’s a few ways new scopes get created but we can’t simply just create a new scope on its own. The simplest way to create a new scope is to first create a “controller”. Controllers are normally used to modify scope variables programmatically in JavaScript. Whenever we create and use a new controller, a new scope is also created for it. Working from our previous example, lets see what it looks like to create and use a controller to create new scopes.
We first need to create a module to put our controller on.
1 var app = angular.module('myApp', []);
Next, we’ll create a controller called ‘HelloController’ that just creates a variable on its new scope called ourRangeValue.
1 app.controller('HelloController', function($scope){
2 $scope.ourRangeValue = 50;
3 });
To use it, we need to remember to use our module in the <body> tags ng-app.
1 <body ng-app="myApp">
Next, we’ll use our new controller twice using ng-controller="HelloController" on a <div> tag. Now the scopes inside the <div> will inherit from the new controllers created for each HelloController.
1 <body ng-app="myApp">
2 <div ng-controller="HelloController">
3 <input type="range" ng-model="ourRangeValue">
4 <input type="range" ng-model="ourRangeValue">
5 </div>
6 <div ng-controller="HelloController">
7 <input type="range" ng-model="ourRangeValue">
8 <input type="range" ng-model="ourRangeValue">
9 </div>
10 </body>
|
|
Live version: http://jsbin.com/hite/1/edit |
Two scopes were created inside our apps root scope. One for the first HelloController and another one for the second. ourRangeValue will be a different property on each of these two inner scopes. This has the effect of binding the first two range slides to the value of ourRangeValue on the first scope and the second two range sliders to the value of ourRangeValue on the second scope.
Inner scopes inherit from their outer scopes. This means that if the ourRangeValue wasn’t found on the HelloController scope, its outer scope would have been checked for a property named ourRangeValue and so on until the root scope was checked.
Scope inheritance
ng-init is used to initialize properties on the scope of the current element. In the following example, a property called foobar on the root scope is given the value 50. (The HelloController is unchanged from the previous examples.) We might expect that all of the range sliders would now be bound to the same foobar element in the outer scope but they are not. Instead, a new foobar property is created on each of the inner HelloController scopes.
1 <body ng-app="myApp" ng-init="foobar=50">
2 <div ng-controller="HelloController">
3 <input type="range" ng-model="foobar">
4 <input type="range" ng-model="foobar">
5 </div>
6 <div ng-controller="HelloController">
7 <input type="range" ng-model="foobar">
8 <input type="range" ng-model="foobar">
9 </div>
10 </body>
|
|
Live version: http://jsbin.com/vibon/1/edit |
This can be somewhat unexpected behavior but makes sense when considering that scope inheritance works the same as regular JavaScript inheritance. The following snippet illustrates what’s happening inside of Angular.
1 var rootScope = { foobar: 50 };
2 var scope1 = Object.create(rootScope); // scope1 inherits from rootScope
3 var scope2 = Object.create(rootScope); // scope2 inherits from rootScope
4 // scope1.foobar is 50
5 // scope2.foobar is 50
6 rootScope.foobar = 100; // changing `rootScope.foobar` works as expected
7 // scope1.foobar is 100
8 // scope2.foobar is 100
9 scope1.foobar = 2; // but assigning a value to `foobar` creates a new
10 // property on the child scope which shadows `rootScope.foobar`.
11 // rootScope.foobar is 100 instead of 2
|
|
If this is still somewhat confusing, a longer form review of JavaScript prototype chaining and inheritance may be helpful. We recommend this blog post by Sebastian Porto |

One way to fix this is to use another object as a wrapper to prevent shadowing properties of the parent scope. In this way, we’re never assigning a new value to the foobar property.
1 var rootScope = { foobar: { value: 50 } };
2 var scope1 = Object.create(rootScope); // scope1 inherits from rootScope
3 var scope2 = Object.create(rootScope); // scope2 inherits from rootScope
4 // scope1.foobar.value is 50
5 // scope2.foobar.value is 50
6 rootScope.foobar.value = 100;
7 // scope1.foobar.value is 100
8 // scope2.foobar.value is 100
9 scope1.foobar.value = 2;
10 // rootScope.foobar.value is 2
Using this knowledge of scope inheritance, let’s update the previous example.
1 <body ng-app="myApp" ng-init="foobar = { value: 50 }">
2 <div ng-controller="HelloController">
3 <input type="range" ng-model="foobar.value">
4 <input type="range" ng-model="foobar.value">
5 </div>
6 <div ng-controller="HelloController">
7 <input type="range" ng-model="foobar.value">
8 <input type="range" ng-model="foobar.value">
9 </div>
10 </body>
|
|
Live version: http://jsbin.com/finijaru/1/edit |
Now whenever an <input> range slider is adjusted, the same root scope foobar.value property is updated and shared across all of the inner controller scopes.
Making visualizations dynamic with $watch
scope.$watch
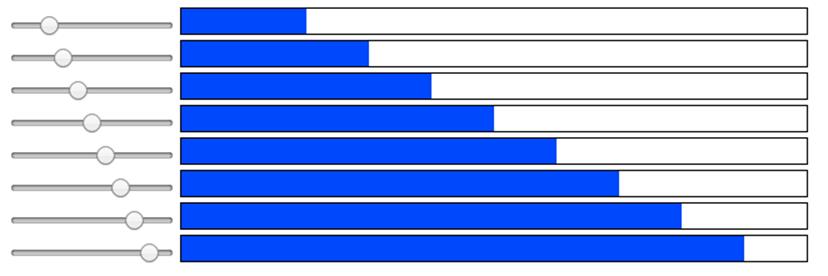
Using Angular’s built-in directives makes it easy to do simple things like binding the changes of a range slider to another but for complicated visualizations, we’ll need to create our own directives that watch for changes on the scope and update their contents in response to these changes. Let’s walk through a simple example of a visualization directive that updates its contents in response to changes to its data. Specifically we’ll create a <progress-bar> directive. Its progress scope property will be a number that represents the loading bars progression from 0 to 100 percent. Whenever this progress property changes, we’ll need to update the progress bar <rect>.
To allow for this type of task, scope objects have a function called $watch() that we’ll pass two arguments. The first argument is the scope variable we’d like to watch, the second is the function that should be called whenever a change is detected on that property. For our <progress-bar>directive this might look the following:
1 scope.$watch('progress', function(progress){
2 rect.attr({x: 0, y: 0, width: width * progress / 100, height: height });
3 });

|
|
Live version: http://jsbin.com/vagiq/3/edit |
Every time the slider is dragged, the ng-model directive on the range slider updates the scope variable progress. Then, the scope.$watch('progress', ...) callback is called in the progres-bar directive.
This might not feel very “automatic”. We still have to manually watch for changes to the scope when we’re building our own directives. The advantage is that our directive can now be placed into other places and all of this “wiring up” will happen automatically. For example, we could copy and paste our directive a few times and watch as changes to the range slider updates all of the progress bars.
|
|
Live version: http://jsbin.com/hadi/1/edit |
Or we could create an array of progresses and use an ng-repeat to create several slider and progress bars for each.
|
|
Live version: http://jsbin.com/manon/1/edit |
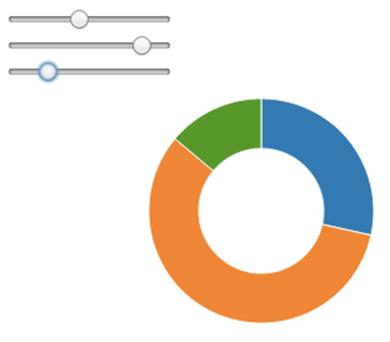
Let’s make a dynamic donut chart
Now that we understand how we can make directives that update dynamically, let’s work through a more complicated example of a dynamically updating visualization. We’ll take the donut chart directive from the previous chapter and make it dynamic so that we can change its data and the visualization will update accordingly.
|
|
Live version: http://jsbin.com/yili/6/edit |
To start off, we first need to be able to modify the data the chart is displaying. Three <input> range sliders will do the trick but we could have used any method to update the data. The directive doesn’t know or care how its data gets modified.
1 <body ng-app="myApp" ng-init="chart=[10, 20, 30]">
2 <input type="range" ng-model="chart[0]">
3 <br>
4 <input type="range" ng-model="chart[1]">
5 <br>
6 <input type="range" ng-model="chart[2]">
7 <br>
8 <donut-chart data="chart"></donut-chart>
9 </body>
|
|
Live version: http://jsbin.com/waqep/1/edit |
The directive doesn’t update yet because it’s not watching for changes to its data scope variable. To fix that, we’ll just use the $watch function like before.
1 scope.$watch('data', function(data){
2 console.log("an element within `data` changed!");
3 console.log(data);
4 }, true);
|
|
Live version: http://jsbin.com/waqep/3/edit |
One important difference is that we’re now giving $watch an extra third variable true. This tells $watch to also watch for changes within data itself. Otherwise, changing the first element of data by doing data[0]=45 would not trigger the $watch callback because data is still the same array after the change. It just has a different value for its first element.
|
|
$watch callbacks will not be fired for changes to the elements of arrays unless you pass true as the third argument. Otherwise, the $watch callback will only fire if the array being watched becomes an entirely new array. |
The last step is to update the arc <path> tags when the data changes since they are the only part of our visualization that depend on the data. Since we’ll be updating the arcs in the $watch we need to give the <path> arc selector a name to refer to later. We also don’t need to set the arcs dproperty anywhere expect when the data changes in the $watch.
1 var arcs = g.selectAll('path').data(pie(data))
2 .enter().append('path')
3 .style('stroke', 'white')
4 .attr('fill', function(d, i){ return color(i) });
5
6 scope.$watch('data', function(){
7 arcs.data(pie(data)).attr('d', arc);
8 }, true);
|
|
Live version: http://jsbin.com/jiqoz/1/edit |
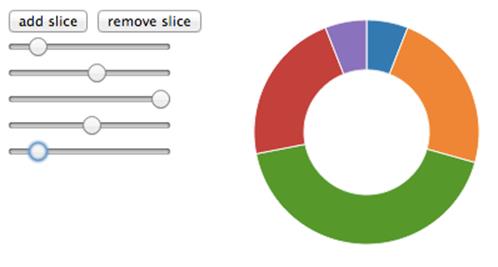
Our Donut chart is lookin’ good! But it always has to have the same number of slices as it started with. It would be better if we could instead add or remove elements from the chart array and have the donut chart appropriately add or remove slices. We can do this by having our $watch be responsible for adding or removing the necessary arc <path> tags and combination with d3’s .enter() .exit() selections. If some of this syntax is still a bit unclear, refer back to chapter 2 for a refresher on how selections work in D3.
1 var arcs = g.selectAll('path');
2 scope.$watch('data', function(data){
3 arcs = arcs.data(pie(data));
4 arcs.exit().remove(); // remove path tags that no longer have data
5 arcs.enter().append('path') // or add path tags if there's more data
6 .style('stroke', 'white')
7 .attr('fill', function(d, i){ return color(i) });
8 arcs.attr('d', arc); // update all the `<path>` tags
9 }, true);
Next, we need somewhat to increase or decrease the elements in chart. For this, we can use two buttons, one for adding elements to chart, another for removing elements.
1 <body ng-app="myApp" ng-init="chart=[10, 20, 30]">
2 <button ng-click="chart.push(50)">add slice</button>
3 <button ng-click="chart.pop()">remove slice</button>
4 <!-- ... -->
5 </body>
We also need some way to add the <input> range sliders for each slice (or element) in the chart array. For this, we can use an ng-repeat.
1 <input type="range" ng-model="slice" ng-repeat="slice in chart">
However, when you run this code, you’ll notice a problem. Angular throws an error:
Error: [ngRepeat:dupes] Duplicates in a repeater are not allowed. Use ‘track by’ expression to specify unique keys. Repeater: slice in chart, Duplicate key: number:20
|
|
Live version: http://jsbin.com/leco/1/edit |
What Angular is telling us is that every element in an ng-repeat needs to be unique. However, we can tell Angular to use the elements index within the array instead to determine uniqueness by adding track by $index after slice in chart.
1 <input type="range"
2 ng-model="slice" ng-repeat="slice in chart track by $index">
Adding this stops any errors from being through and adding or removing slices seems to work but dragging a slider has no effect on the visualization. The chart array is not being modified by the slider values. This is another reincarnation of scope inheritance we mentioned earlier in this chapter. ng-repeat creates a new scope for each <input> tag. And when a range value gets updated, its updating its slice property which isn’t shared with its parent.
|
|
Live version: http://jsbin.com/wadev/1/edit |
We can fix it the same way as before by using a wrapper object. Doing so, we can safely modify its properties without having to worry about shadowing properties from the parent scope.
1 <body ng-app="myApp" ng-init="chart=[{value: 10}, {value: 20}, {value: 30}]">
2 <donut-chart data="chart" style="float:right"></donut-chart>
3 <button ng-click="chart.push({value: 10})">add slice</button>
4 <button ng-click="chart.pop()">remove slice</button>
5 <input type="range" ng-model="slice.value"
6 ng-repeat="slice in chart track by $index">
Our directive now has to be updated so that it can access the slice value of each object in the data array. Because the pie layout is the only thing that uses data directly, we can give pie a value accessor and it will take care of plucking the pie chart value out of each object in the data array.
1 pie.value(function(d){ return d.value; });
|
|
Live version: h |
All materials on the site are licensed Creative Commons Attribution-Sharealike 3.0 Unported CC BY-SA 3.0 & GNU Free Documentation License (GFDL)
If you are the copyright holder of any material contained on our site and intend to remove it, please contact our site administrator for approval.
© 2016-2026 All site design rights belong to S.Y.A.