Building Web Apps with Ember.js (2014)
Chapter 2. The Basics
In this chapter, we’ll start out with the traditional “Hello, world!” then backtrack to see all the work Ember did for us under the covers. We’ll also take a look at what tools and software you’ll need to get started.
Hello, World Wide Web
If you haven’t already, head to emberjs.com in your browser. Click the big, orange—at the time of this writing—“Download the starter kit” link. While it’s downloading, bookmark the Guides link in the navigation bar at the top of the page. It may not be the absolute best place to start, but the guide linked there is an excellent second or third lesson on Ember. The Getting Started video on the first page, though, is definitely worth your time and makes as good a starting point as it does a refresher.
Once that starter kit has downloaded, take a look at the contents. You should see:
css (folder)
normalize.css
As the maker explains, “Normalize.css makes browsers render all elements more consistently and in line with modern standards. It precisely targets only the styles that need normalizing.”
style.css
A place for you to put your style declarations.
index.html
A nice HTML file set up for you with all the JavaScript and stylesheets correctly imported and a couple example templates in place.
js (folder)
libs (folder)
Contains Ember, jQuery, and Handlebars.
app.js
This is where your application will live.
Go ahead and open up the index.html file—on any modern platform I can think of, this is as easy as double-clicking/tapping the file, no web server required—and ensure that your browser is able to render the page. If you’re having any trouble at this point, it’s likely that you have an unusual setting selected in your browser, such as disabling JavaScript. You should see something like Figure 2-1.
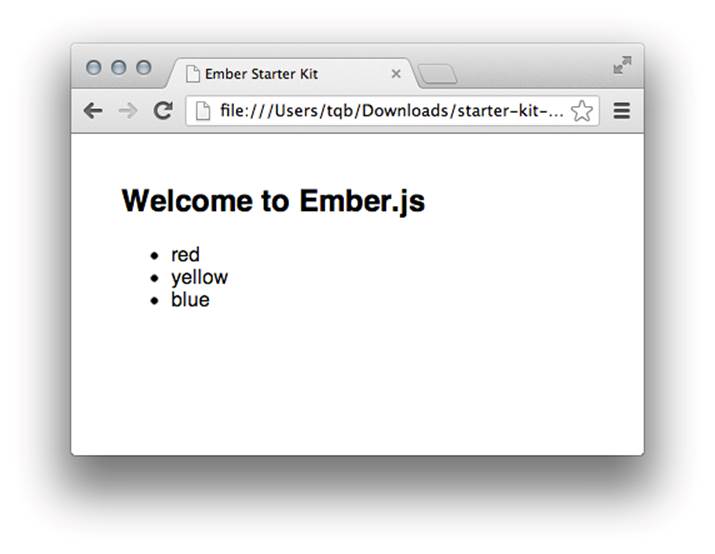
Figure 2-1. The Ember starter kit
Now open the index.html file in your favorite development editor. Inside the body tag you’ll find your first (and second, actually) Handlebars template. We’ll come back to that in a bit. For now, let’s just take note of a few things about the two templates on the page. First, notice that they’re contained within script tags with the type text/x-handlebars. That type differs from the usual text/javascript, and it tells the browser not to try to interpret the contents as JavaScript; so while the contents of these script tags will live on the page and be accessible from JavaScript, they will not be executed or rendered by the browser, at least not until you do it yourself, or until Ember and Handlebars do it for you.
Notice that in each template you see mostly plain old HTML, such as the h2 tag in the first template and ul tag in the second. You’ll also see examples of some Handlebars directives: outlet in the first template, and lots of fun things in the second. Handlebars will replace these with plain HTML before putting them into the body tag of your document.
Keep that HTML file open, and now also open the app.js file. The page we loaded a moment ago may not look like much, but consider what’s happening:
1. An HTML page with no literal content in its body tag is loaded.
2. Then, a JavaScript framework comes along, instantiates an application, a router, a route, and a model explicitly, as well as a couple controllers and views implicitly.
3. Then, it loads a couple templates that were embedded within the HTML page.
4. And finally, it processes those templates, interpolating model data and rendering all of it to the page.
What’s more, as we’ll see later, the templates are “live.” If you were to pop into the console in your browser and change the contents of the model to include “green,” you’d see a new list item added immediately to the page. Likewise, if you removed “blue,” it would immediately disappear. And you didn’t even have to write an event handler.
But we’re a little ahead of ourselves. Let’s see how minimal Ember can get. Before we start monkeying with our starter kit, though, we’ll want to talk a little bit about web servers. If you know your way around an Apache or Nginx .conf file, go ahead and fire up your server of choice and skip the next subsection. If you’re new to web servers, don’t worry: there’s a simple option.
SimpleHTTPServer: Just Like It Says on the Tin
“But why do we need a web server?” you might be thinking. “Can’t I just keep double-clicking the index.html file like I have been so far?”
You absolutely could, but you’ll quickly run into caching troubles. You’ll find yourself editing your project and hitting refresh in your browser but not seeing any changes. This is because your browser is caching the requests for index.html, style.css, app.js, and the rest. You can keep making changes, but the browser is going to keep loading its old copy, until it decides, of mostly its own accord, to refresh its copy. A good web server will intermediate for you, letting the browser know it’s got a newer version of the file than the browser has.
Python offers a handy web server for development purposes that will aggressively monitor your files for changes. If you’re on a Mac (10.2 or later), you already have Python installed. If you’re on Windows, you can download a click-through installer that will have you running in minutes.
Directions for the installation and configuration of Python could be its own, potentially short, assuredly profitless book. Again, if you’re using a Mac, there’s a very good chance it’s already installed, as OS X has included it by default for several versions now. If you’re running Windows, the YouTube video “How to Install Python on Windows 7” may be of use.
If you get as far as installing Python on any computer but a Mac, you’ve already discovered your system’s command line. If you’re on a Mac and you’ve never used the Terminal application before, you can refer to the Treehouse article, “Introduction to the Mac OS X Command Line”.
From a command line in a Python-enabled environment, calling python -m SimpleHTTPServer from any directory will start up a web server with that directory as its root. If you have, for instance, a file there named index.html, you can then go to http://localhost:8000 in your browser and see that HTML file rendered. If the “localhost” or “:8000” parts are new to you, check out the following sidebar.
NOTE
python -m SimpleHTTPServer is no longer supported in Python 3. It has been merged into http.server, with the command python -m http.server.
HTTP://LOCALWHOSIT:WHATNOW?
If you’re new to the networking aspect of web development, it can be overwhelming. Getting myriad devices with different physical connections—from modems (yes, they are still in use in some places) to Ethernet to WiFi to LTE—running all manner of platforms and software—from Windows to Mac OS X to iOS to Java to machine code—to all talk to one another via one protocol is one of the greatest accomplishments of human history, if you ask us. Part of getting them to be able to talk to one another is giving each of them a unique address—something like a phone number—called an Internet Protocol (IP) address. A given device can have anywhere from zero to dozens of them. Typically you’ll have a few.
Some IP addresses are dummy addresses that allow you to talk to yourself, in a manner of speaking. The address 127.0.0.1 is a special address reserved for just that: calling up your own computer. If you’re running a web server with common configuration, putting that address into a browser will result in loading content right off your own device. Just as phone numbers can include an extension—some extra address information that indicates a specific phone line within a location that all shares the same main line, IP addresses can specify a port. You’ll see them tacked onto the end of an IP address with a colon, like this: 127.0.0.1:80. If you don’t specify a port, the default port 80 is implied, so 127.0.0.1 is actually the same as 127.0.0.1:80. It’s a lot like calling a main phone number and getting the front desk; port 80 is the “main” page of your site.
Now, we obviously got away from just using IP addresses to navigate the Web; we use uniform resource locators (URLs). Special servers somewhere between your computer and the server you’re trying to reach intercept your request for “google.com” and translate that into a request for an IP address (74.125.225.231, in the case of Google). Within your own operating system (more than likely) is a similar mechanism that will translate a request for “localhost” into a request for 127.0.0.1. Try it as soon as you’re sure you have a server running. Type http://localhost into the address bar of your browser.
With both URLs and “localhost” you can still specify a port, too, such as “google.com:80” or “localhost:8000.”
Data Binding
Now that we know our changes will show up, go ahead and comment out all lines but the first line in app.js and reload the page. You should still see “Welcome to Ember.js” but no longer see the list of colors. Take a moment and look at what remains in both your HTML and JS files. There’s not much there, and yet quite a bit is still happening in your browser. Don’t forget that the h2 tag with “Welcome to Ember.js” isn’t actually in your HTML content but is “hidden” from the renderer in a script tag that isn’t actually being interpreted as a script tag.
So with one line of JavaScript remaining, you still have an application that’s doing all that impressive stuff we outlined six paragraphs back. See for yourself; comment out that first line of JavaScript and see the empty page as a result. With just that one line in place, we’re not explicitly defining a router or route anymore (we don’t know what those are, yet, but they sound awfully important), but Ember is still creating them for us, for the mere price of instantiating an Ember Application object defined in a single line of code. For more on the Ember router and routes, stay tuned for additional details in Chapter 5.
OK, let’s start tinkering to get an introduction to data binding. First, let’s add a second line that creates an ill-advised (don’t do this in production) global variable, like this:
App.model = ['red', 'yellow', 'blue'];
Now change what should be line 18 or so in your HTML from this:
{{#each item in model}}
to this:
{{#each item in App.model}}
Reload your browser, and you should see what you saw the first time you loaded it: the welcome message and the list of colors. Now fire up your console (if that’s an unfamiliar concept, watch this video series) and execute this JavaScript:
App.set('model',['red','yellow','blue','green']);
As soon as you hit Enter, a new li tag was added to the page with the contents green. If you’ve ever had to write the kind of code that makes such real-time synchronization—or binding—possible, you’re probably impressed, maybe even relieved.
Let’s see it work in the other direction. In your index.html file, replace what should be line 12 or so with this:
<h2>Welcome to {{view Ember.TextField valueBinding="App.name"}}</h2>
There’s some new stuff there, but for now let’s just say that this tells Ember to render an input tag whose value attribute will be bound to App.name. This input field and the App.name variable will “watch” each other, notifying each other of changes in their values and updating their own copy when they observe a change. Speaking of, we need to create that App.name object. Add the following as the third line of app.js:
App.name = "Tom Waits";
Reload the page, and you’ll see an input form field within our h2 tag, pre-populated with “Tom Waits.” If we pop open the console and change App.name like we did a moment ago with App.set('name','A new value'), you would see the value of this input tag immediately change. This time, though, see what happens if you edit the contents of that input tag. Go ahead; click into the form field and change it to something like “Susan Tedeschi.” Now, in your console, execute this code to see the current contents of the App.name property:
App.get('name');
The console’s response should be “Susan Tedeschi” or whatever you entered into your input tag. You just edited a property of the model within your route (and, again, we don’t even know what that is, yet, but we will soon enough), right from the comfort of a web form! This is two-way data binding, and it’s one of the main reasons to use Ember. Throughout your application development, you can skip worrying about synchronizing changes between model properties and view entities. Ember’s got it covered.
But Where’s All the Code?
We’ve already seen a lot of functionality, and we’ve barely written any code. What’s more, we haven’t even seen much code. A lot of frameworks offer generators that will automatically generate whole swaths of your project for you, based on conventions. Ruby on Rails is famous for this feature, generating models, views, controllers, and even database records for you with a single command at the terminal. The result of this command, though, is a project folder full of new files—your new models, views, controllers, and so on. Ember is different.
When you fire up an Ember Application object, Ember will immediately search your code for implementations of an ApplicationRoute, an ApplicationController, and either a template with the attribute data-template-name="application" or the first template on the page with no data-template-name specified. As we demonstrated earlier, if it doesn’t find those first two things—your own class definitions for a route and a controller—it will create default instances. What we haven’t mentioned is that this happens in memory. No files are generated.
The bad news is that this makes it a little more difficult to inspect these objects and learn the innards of Ember. This is certainly still possible, in more ways than one, but it’s not as easy as opening up generated files the way you would in a Ruby on Rails application. The good news is that when a new version of Ember is released, you don’t have to update dozens or hundreds of files on your web server, at least not to incorporate the changes to Ember itself. You can simply swap in the new ember-x-x-x.js file, and the next time you fire up your app, it will be running in a brand-new Ember environment. This doesn’t mean you won’t have any work to do, necessarily. If the Ember API changes, you’ll definitely have to modify your classes to reflect those changes.
Uh, What’s a Router?
We just threw some terms at you from out of nowhere, didn’t we? (In case you’re curious, the hardest part of writing this book was figuring out whether to start with the chicken or the egg.) We talked a bit in Chapter 1 about models, views, and controllers. Many web-application frameworks add another pillar to that trio, called a router. In the old days, when we were young, we used web servers that simply responded to URL requests—someone visiting a particular URL that was within your domain—by associating them with folder structures. So, for instance, everything after the first forward slash in the URL could be easily translated to folders on your server’s hard drive: http://www.somethingclever.com/folder/inner-folder/index.html would tell your web server to go to the root of your web documents folder and locate a folder named folder, an inner-folder folder within that and, finally, a file named index.html.
When you’re building a web application, though, you’re not typically dealing with folders full of static files. You could be dealing with a single HTML file—thus the “single-page apps” craze. We do, however, want to continue to use unique URLs to capture specific states or entry points to our applications. So, whatever it was that existed in our old web servers, like Apache, that could turn http://blahblahblah.com/stuff/index.html into a reference to C:\docroot\stuff\index.html will need to be rebuilt in our fancy, new JavaScript applications. That thing, in fact, is called a router.
In your routers, and you will be writing plenty of them, you will declare nearly every URL to which you wish your application to respond. If you don’t declare a URL, your application will not know how or even that it should respond to a request for that resource. We’ll look at how exactly you do that later.
You might be wondering how everything can fit in a router. After all, if some form of the logic for how to respond to every single URL for your application is all stored in the router, it must be possible to very quickly have a router that is thousands of lines of code long. Doesn’t sound like it would scale well, does it? No, it wouldn’t. This is why the router mostly just associates URLs with routes. Routes store the logic necessary to get your application to—and from—the state represented by the URL. So, for now, whenever you see “router” and “routes,” just think, “the stuff that translates URLs to application states and back.”
Pretty important stuff. I’m kind of surprised that people don’t call frameworks like Ember MVRC, for model-view-router-controller.
Ember in Action
Let’s restore our starter kit code to “factory settings”; delete lines 2 and 3 and uncomment the original code that came with the starter kit. Your app.js file should now look just like it did when you downloaded it:
App = Ember.Application.create();
App.Router.map(function() {
// put your routes here
});
App.IndexRoute = Ember.Route.extend({
model: function() {
return ['red', 'yellow', 'blue'];
}
});
Be sure to change your index.html file back to its original state to match. You can always download a new copy of the starter kit if you’ve lost track (or revert your changes—you are using source control, right?).
Let’s step through what happens when you load http://localhost:8000 in your browser:
1. The HTML page loads, which loads and executes your app.js file.
2. app.js instantiates an Ember Application.
3. When the Application starts up, it immediately looks to see if you’ve written your own ApplicationRoute, loading it if there is one, and loading its own either way (your class, if you wrote one, extends the default class).
4. The Application does the same load-yours-too-if-you-wrote-one routine with ApplicationController.
5. If you’ve defined your own ApplicationRoute—and defined any event hooks within that should be fired (such as an activate definition)—they will now be fired.
6. Ember then looks for an application template in your HTML and sets it up with ApplicationController as its controller, which we’ll see later becomes the conduit through which data flows into your templates, replacing placeholders with live data.
7. Because we are at the root URL of your application (given that no route in particular is specified), Ember will now locate and instantiate the IndexRoute you specified in app.js.
8. Ember will now identify that you didn’t specify an IndexController and will instantiate one for you. We’ll go into more detail about this later, but Ember has some choices to make about what kind of default controller will be most useful. Because you defined a model inIndexRoute that is an array, Ember will instantiate an ArrayController as your IndexController.
9. Ember will find the template named index in the HTML document and render it to the outlet helper in our application template (we’ll cover what helpers and that funny outlet thing are in the next chapter).
This may be something like the 73rd time we’ve said this, but keep in mind, this all happened with 11 lines of code, and almost the exact same thing happened when there was just one line of code. This highlights the mantra we mentioned in Chapter 1. Nearly the same thing happens with one line of code as with 11 because we only defined one thing—our model—that wasn’t a default object/feature. In the words of the Ember.js guides, “Because this pattern is so common, it is the default for…” And because it is the default, you don’t even have to write that code out.
One more example, and then we’ll start in earnest on dissecting Ember. We’re going to cover a lot of things very quickly that we haven’t actually discussed, yet, so don’t worry if you see terms you don’t know. We’ll get there. This is a brisk walk through the way Ember works, which we’ll then do again very slowly.
Let’s say you clicked into the address bar right now, changing the address to http://localhost:8000/examples/1. Pop quiz: what would Ember do?
You’re right. It’s a trick question. Ember would do nothing, because you’ve loaded a page that doesn’t exist. You’d see an error message from the Python SimpleHTTPServer (Figure 2-2).
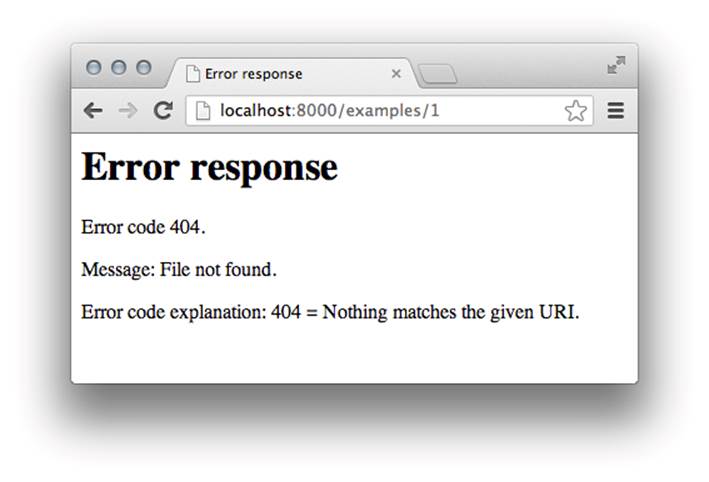
Figure 2-2. Error message from the Python SimpleHTTPServer
Important lesson, hopefully learned: by default, you have to use a hash in your route URLs. The URL we just tried is one that specifies a file in a folder which can be served by a traditional web server. We only have one file, so our URLs aren’t actually pointing at separate files or folders. When you insert a hash into a URL, the web server stops trying to interpret the URL as a file/folder structure at the point of the hash. You can put anything you like after that hash, and the server will not try to locate a file by that name. The page will, though, get the whole URL, and Ember knows how to turn the rest of that URL—the stuff beyond the hash—into a route.
So a good URL would be http://localhost:8000/#/examples/1. Loading that URL at this point will net you a blank browser window, because we haven’t defined the route, but let’s go through what Ember will look for:
1. First, all of the stuff in the previous list like this, and then:
2. Because of the /examples, Ember will look for a route named ExamplesRoute.
3. Ember will look for or create an ExamplesController.
4. Ember will call the model function of ExamplesRoute, passing it the last portion of your URL, looking a bit like this, were you to define an ExamplesRoute:
5. model: function(params) {
6. return App.Example.find(params.example_id);
}
7. Ember can now retrieve your model data and populate a template named examples in your HTML, rendering it to the outlet helper in your application template.
Stop me if you’ve heard this one, but because this pattern is so common, it is the default for route handlers, meaning the model function we just wrote isn’t necessary, unless you’re doing something other than what’s written previously.
For the record, you can’t actually execute this little thought experiment without a good bit more code than we actually wrote out here. Don’t worry; we’ll get there. This exercise was about seeing the naming conventions a few times, getting a feel for how Ember locates/creates things for you, and walking through the life cycle.
Wrapping Things Up
So, that was a whirlwind tour through an Ember bootstrap sequence. Don’t worry if it didn’t all make sense. It wasn’t meant to, yet. Think of it as the first day of a trip to a foreign country. You’re jet-lagged and circling the town center in a cheesy tour bus, noting places to which you’d like to return over the next week between narcoleptic retreats and bleary-eyed gazes at nothing in particular.
Go get some coffee, take a nap, or run around the block and come back for the next chapter.
All materials on the site are licensed Creative Commons Attribution-Sharealike 3.0 Unported CC BY-SA 3.0 & GNU Free Documentation License (GFDL)
If you are the copyright holder of any material contained on our site and intend to remove it, please contact our site administrator for approval.
© 2016-2026 All site design rights belong to S.Y.A.