Building Web Apps with Ember.js (2014)
Chapter 3. Ember Boilerplate and Workflow
Now that we have a firm grasp of the basics of Ember applications, it is time to begin setting up a professional workflow. This is an important step in the process but isn’t absolutely necessary. That being said, if you are interested in saving valuable time, creating a maintainable codebase, and preparing for testing, then it is recommended to do some initial work in setting up your development environment. You will thank us later.
At the time of this writing, and with the Ember 1.0 release, there are a number of tools available to manage boilerplate and workflow of Ember applications. Until tooling and workflow are a part of core, this will remain a bit confusing when choosing best practices. In the end, developer workflow and the tools used to manage it are highly subjective, a matter of preference, and controversial. We will take a neutral stance here by presenting only the facts.
Currently, there are four projects that provide varying degrees of functionality into workflow management and boilerplate-code creation:
Yeoman’s Ember Generator
Yeoman, a collection of tools, provides an Ember application generator and individual subgenerators for models, views, and controllers.
Ember Tools
A project created and maintained by Ryan Florence. The Ember community has stated that Ember Tools will be merged with Ember App Kit into core in the future. Ember Tools uses Browserify, a project by James Halliday that provides the capability to compile Node.js-style modules for use in the browser, to manage the JavaScript dependencies. You can also generate individual models, views, and controllers with Ember Tools.
Ember App Kit
In the notes provided in the Ember 1.0 release, the Ember team stated: “EAK will eventually become the core of official Ember Tools.”
Currently an alternative to Yeoman, Ember App Kit is another toolset that you can use as a starting point for your project. At the time of this writing, EAK does take some manual setup. By cloning the project from GitHub and wiping out the existing Git history, Ember App Kit provides a vanilla boilerplate application that includes an integrated Grunt task runner along with Grunt tasks, such as JSHint, QUnit, and the Testem test runner. EAK also provides support for ECMAScript 6 modules through the inclusion of the ES6 Module Transpiler. ECMAScript 6 modules are coming in the next JavaScript version, but EAK allows you to get a head start by providing the necessary namespacing to keep your Ember classes out of global scope.
EAK also ships with boilerplace for setting up stub APIs so that you can use Ember Data’s RESTAdapter instead of the FixtureAdapter. This will make more sense in Chapter 7, when these topics are covered.
Again, in Chapter 8, you will see more of EAK when we go into more detail on the specifics of developing a backend for your application.
And finally, in Chapter 10, we will explore the specifics of the out-of-the box EAK testing setup. To follow along, checkout this EAK specific repo.
Ember Rails
Ember Rails is a Ruby gem that provides support for Active Model Serializers, production copies of Ember, Ember Data, and handlebars, and integration with the Rails Asset Pipeline. More on Ember Rails is availble in Chapter 9.
Ember CLI
Ember CLI promises to replace Ember Tools and Ember App Kit in the future, as the official toolset for building Ember applications. At the time of this writing, it is not recommended to use for serious applications. The documentation states: “Although potentially exciting, this is still a work in progress project, so use at your own risk.”
Overall, Ember CLI is focused on improving developer productivity in a number of ways, such as modules, built-in testing, and dependency management.
Perhaps one of the most exciting features of Ember CLI is that it uses Broccoli as an asset pipeline instead of Grunt’s watch task. The advantage is that it rebuilds individual files instead of the entire Grunt project, therefore significantly decreasing build times.
Like Ember App Kit, it also uses the ES6 Module Transpiler, which turns ES6 module syntax into AMD modules.
To keep the scope of this text limited, we decided that at the time of writing the most complete solution for rapid prototyping was Yeoman. That being said, for Chapters 4–6, we will leverage Yeoman to build a prototype of our application.
In Chapters 7–10, we will introduce Ember App Kit and ember-rails gem for more specific, production-related use cases and topics.
Git
First, let’s cover version control.
We will be using Git for version control of the source code included within this book. We will also be using Github, the popular web-based hosting service for open source software development projects. Here, we will manage the source code of our demo application, RocknRollCall.
Also, as you will see later in this chapter, we will be setting up our application using the best combination of these tools. To get started, check out the GitHub repo for the RockNRollCall application (see Figure 3-1).
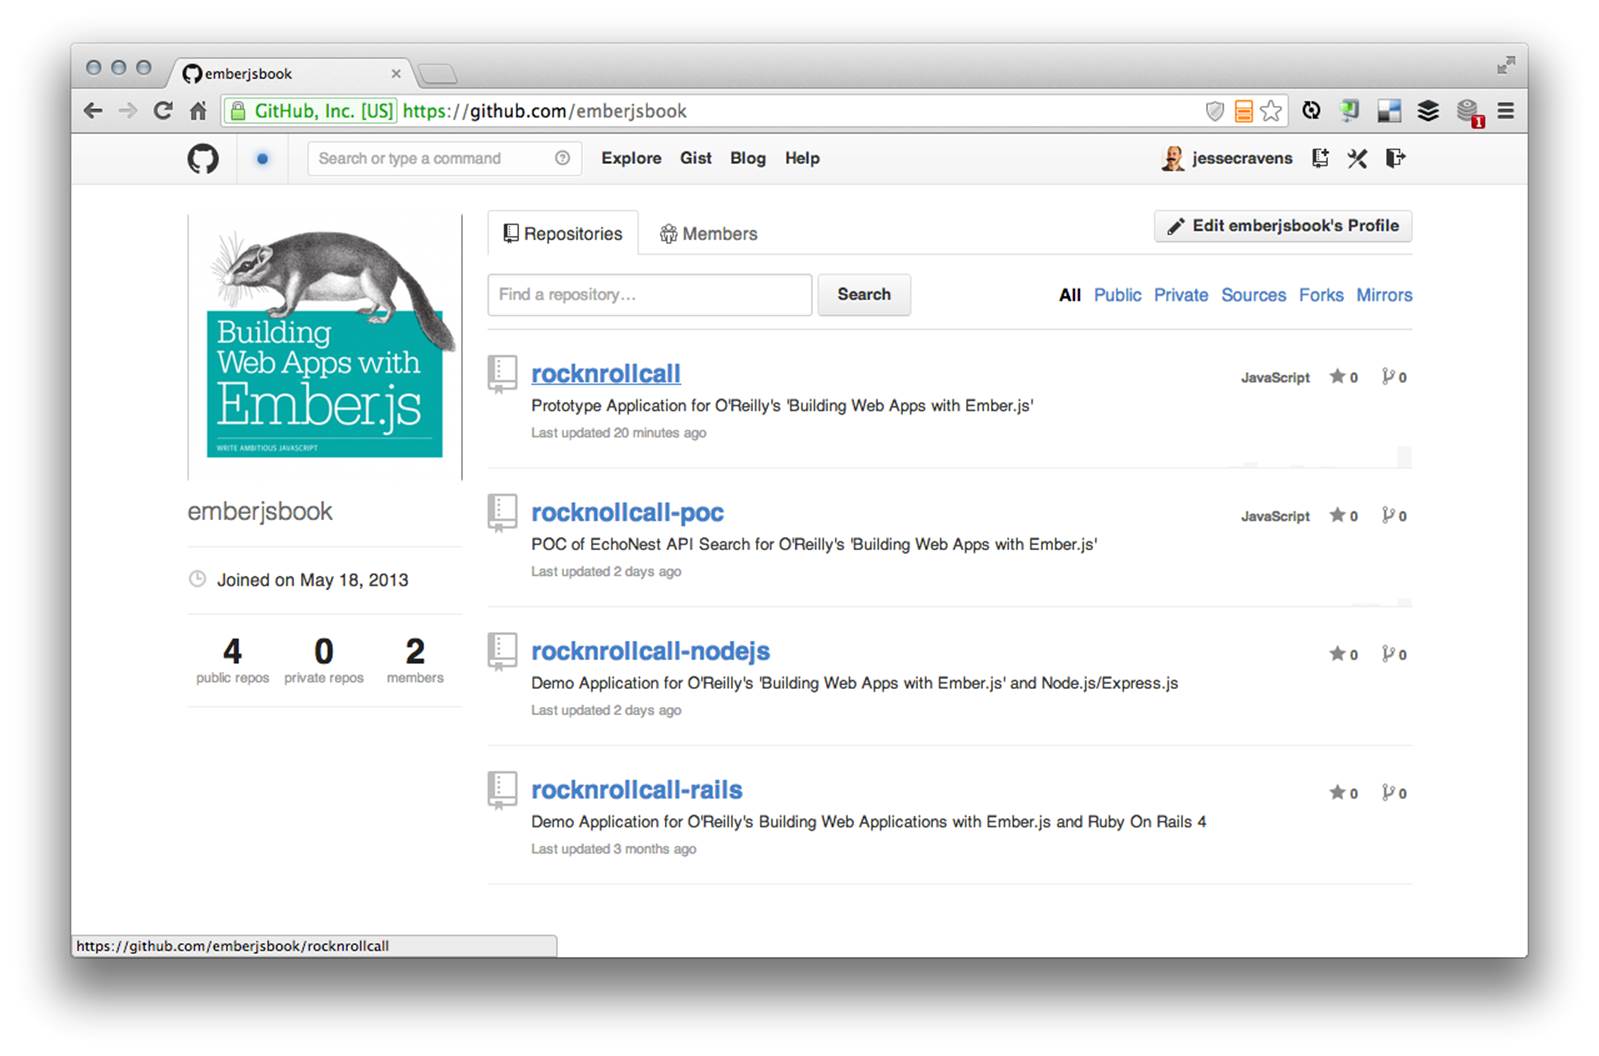
Figure 3-1. The RocknRollCall application source code
View the commit log on the master branch to follow along as we build our application throughout the remainder of the book.
GitHub also provides social-networking functionality, such as feeds, followers, and the social-network graph to display how developers work on their versions of a repository. If you would like to follow updates, create an account (if you don’t already have one), and click the Watch button at the top right of the repository page.
A complete overview of Git is out of the scope of this text, but if you are new to Git, here are a few resources to help you get started:
§ Version Control with Git by Jon Loeliger and Matthew McCullough (O’Reilly, 2009)
§ Git Pocket Guide by Richard E. Silverman (O’Reilly, 2013)
If you are creating the application from scratch, as you follow along, begin by making a directory:
$ mkdir rocknrollcall-yeoman
Then:
$ cd rocknrollcall-yeoman
After that, initialize a new local Git repository:
$ git init
Or you can obtain the entire application by simply cloning it from our remote GitHub repository:
$ git clone https://github.com/emberjsbook/rocknrollcall-yeoman.git
What Is Yeoman?
Yeoman is a bundle of web development tools that helps developers manage an efficient workflow, reduce manual boilerplate, and manage complexity. The Yeoman toolset consists of three tools: an application generator or scaffolding tool named Yo, Grunt.js as an integrated build tool, and Bower to manage application dependencies like the JavaScript and CSS libraries included in your project.
Installing Yeoman
To get started, we need to install Node.js. To install Node.js, follow the guides on the project download page.
Included with Node.js is NPM (Node Package Manager). With NPM, we can install the three tools just described by using the following command:
$ npm install -g yo grunt-cli bower
There you have it. Now let’s check our install by simply typing the following:
$ yo
After a brief offer to provide anonymous feedback, you will be prompted to make a decision. For now, you can choose “Get me out of here!” No worries, we will come back to this later:
[?] ==========================================================================
We're constantly looking for ways to make yo better!
May we anonymously report usage statistics to improve the tool over time?
More info: https://github.com/yeoman/insight & http://yeoman.io
==========================================================================: No
[?] What would you like to do? (Use arrow keys)
Install a generator
Find some help
❯ Get me out of here!
Using Yo’s Ember Application Generator
Yo reduces the amount of time it takes to get started by generating boilerplate code for you. Yo also generates your Grunt configuration and relevant Grunt tasks that are recommended by the community. Also, as you will see, when we use the Ember generator, all of the tasks considered to be important are included in the interactive command prompts.
Now, let’s get to our first order of business, generating an application.
Installing Dependencies
We have a few dependencies we must install as well before we get started.
Ruby
Before you use the generators, we will need to ensure that Ruby is installed (version 1.9.3 or higher). If you are on a Mac OS X, you should have Ruby by default. If you are on anything else, you will need to install Ruby.
You can check for the location and version of Ruby like this:
$ which ruby
/usr/bin/ruby
$ ruby -v
ruby 2.0.0p247 (2013-06-27 revision 41674) [universal.x86_64-darwin13]
Compass
Compass is an open source authoring framework for the Sass CSS preprocessor. You will need Compass to run the Ember generators and compile Sass to CSS. To install:
$ gem install compass
Because we already installed Node.js and NPM, we can issue the following command to install a Grunt plug-in that contains a Compass Grunt task. The Ember generator will call this behind the scenes.
Install the Generator
Now that we have Yeoman and all of our generator dependencies installed, we can begin to install the actual Ember generator. To get a sense of context, let’s first take a look at all the generators available to us. Open a terminal and type the following:
$ npm search yeoman-generator
Be patient; this may take some time. Eventually, you should see something like the following results:
$ npm search yeoman-generator
npm WARN Building the local index for the first time, please be patient
npm http GET https://registry.npmjs.org/-/all
NAME DESCRIPTION AUTHOR DATE VERSION KEYWORDS
calaxa calaxa ====== =apathetic 2013-05-14 09:11 0.0.1 yeoman-generator sass compa
ft-wp Front-Trends Wordpress generator =hubertburdach 2013-03-30 21:08 0.0.1 yeoman-generator web
generator-admo A generator for Yeoman =drubin 2014-02-04 09:07 0.9.5 yeoman-generator admo Digit
generator-android Yeoman generator for Android =groupsky 2014-01-17 09:03 0.1.0 yeoman-generator android sc
generator-angular-js Yeoman generator for AngularJS =doboy 2013-11-24 10:02 1.0.1 yeoman-generator scaffold f
... and so on.
At the time of writing, there are literally hundreds of generators written by the community for Yeoman, including everything from Android to Angular. But today, we are interested in Ember.js.
Now open up a new terminal and summon Yo:
$ yo
You should then see the following prompt:
[?] What would you like to do? (Use arrow keys)
❯ Update your generators
Install a generator
Find some help
Get me out of here!
Obviously, we should choose “Install a generator.” Next, we are presented with a prompt to search against NPM. So we will enter “ember” as our keyword. At the time of writing, you can see the Ember-related generators available in the repository:
[?] Search NPM for generators: ember
[?] Here's what I found. Install one? (Use arrow keys)
❯ generator-ember
generator-ember-jade-zurb
generator-ember-jade-zurb-express
generator-ember-laravel
generator-ember-less
generator-ember-rk
generator-jhipster-ember
Search again
Return home
Hit Enter and Yo will download and install all of the dependencies and inform us that the installation is complete:
I just installed your generator by running:
npm install -g generator-ember
Running the Generator
Now we are ready to run the generator, and we are presented with another prompt:
[?] What would you like to do? (Use arrow keys)
❯ Run the Ember generator (0.8.3)
Run the Mocha generator (0.1.3)
Update your generators
Install a generator
Find some help
Get me out of here!
Choose “Run the Ember generator (0.8.3)” (note that the version may update by the time you read this). Again, Yo presents us with a number of questions:
_-----_
| |
|--(o)--| .--------------------------.
`---------´ | Welcome to Yeoman, |
( _´U`_ ) | ladies and gentlemen! |
/___A___\ '__________________________'
| ~ |
__'.___.'__
´ ` |° ´ Y `
Would you like to include Twitter Bootstrap for Sass? (Y/n)
As we dont wan’t to spend time on styling our application within the scope of this book, we will select Yes. Now, we will see a number of logs that indicate that our files are being created:
create .gitignore
create .gitattributes
create .bowerrc
create bower.json
create package.json
create .jshintrc
create .editorconfig
create Gruntfile.js
create app/templates/application.hbs
create app/templates/index.hbs
create app/index.html
create app/styles/style.scss
create app/scripts/app.js
invoke mocha:app
create test/index.html
create test/lib/chai.js
create test/lib/expect.js
create test/lib/mocha/mocha.css
create test/lib/mocha/mocha.js
create test/spec/test.js
I’m all done. Running bower install & npm install for you to install the required dependencies. If this fails, try running the command yourself.
Now you should see a long list of logs. Here is a abbreviated example:
npm WARN package.json static-projects@0.0.0 No README.md file found!
npm http GET https://registry.npmjs.org/grunt
npm http GET https://registry.npmjs.org/grunt-contrib-copy
npm http GET https://registry.npmjs.org/grunt-contrib-concat
...
Let’s now explore the filesystem to better understand what was created for us (Figure 3-2). Notice the three top-level directories: app, node_modules, and test. The app directory contains all of your application files, node_modules contains your application dependencies, and test contains your test files and the configuration files, such as .bowerrc, .gitignore, .jshintrc, Gruntfile.js, and package.json. These files manage the different levels of configuration within your application and development environment.

Figure 3-2. The generated Ember filesystem
HTML
Also take a look at the index.html file within the app directory—a significant amount of boilerplate code has been generated: the HTML5 doctype, the Ember.js dependencies (in the correct load order), and the build comments used by Gruntfile.js to replace (or remove) references to nonoptimized scripts or stylesheets within HTML files:
<!doctype html>
<html>
<head>
<meta charset="utf-8">
<title>Yeoman Ember Starter Kit</title>
<!-- build:css styles/main.css -->
<link rel="stylesheet" href="styles/style.css">
<!-- endbuild -->
</head>
<body>
<!-- build:js(app) scripts/components.js -->
<script src="bower_components/jquery/jquery.js"></script>
<script src="bower_components/handlebars/handlebars.runtime.js">
</script>
<script src="@@ember"></script>
<script src="@@ember_data"></script>
<!-- endbuild -->
<!-- build:js(.tmp) scripts/templates.js -->
<script src="scripts/compiled-templates.js"></script>
<!-- endbuild -->
<!-- build:js(.tmp) scripts/main.js -->
<script src="scripts/combined-scripts.js"></script>
<!-- endbuild -->
<!-- build:js scripts/plugins.js -->
<script src="bower_components/bootstrap-sass/js/affix.js"></script>
<script src="bower_components/bootstrap-sass/js/alert.js"></script>
<script src="bower_components/bootstrap-sass/js/dropdown.js"></script>
<script src="bower_components/bootstrap-sass/js/tooltip.js"></script>
<script src="bower_components/bootstrap-sass/js/modal.js"></script>
<script src="bower_components/bootstrap-sass/js/transition.js"></script>
<script src="bower_components/bootstrap-sass/js/button.js"></script>
<script src="bower_components/bootstrap-sass/js/popover.js"></script>
<script src="bower_components/bootstrap-sass/js/carousel.js"></script>
<script src="bower_components/bootstrap-sass/js/scrollspy.js"></script>
<script src="bower_components/bootstrap-sass/js/collapse.js"></script>
<script src="bower_components/bootstrap-sass/js/tab.js"></script>
<!-- endbuild -->
</body>
</html>
A couple of really important things to notice are the scripts/compiled-templates.js and scripts/combined-scripts.js files wrapped in the build directives mentioned previously. Stay tuned; these files will be generated during our Grunt build later in our workflow.
Basic Ember application
A basic Ember.js application was generated for us, in app/scripts/app.js. The application uses a require syntax to include other application dependencies (for more on require and JavaScript modularity, read Why Web Modules?):
var Rocknrollcall = window.Rocknrollcall = Ember.Application.create();
/* Order and include as you please. */
require('scripts/controllers/*');
require('scripts/store');
require('scripts/models/*');
require('scripts/routes/*');
require('scripts/views/*');
require('scripts/router');
This modularity is a primary advantage of using a tool like Yeoman. If you were wondering why we didn’t just download the starter kit, the answer is: we could have. We would have received very similar starter code all in one file, as we explored in Chapter 2:
RocknrollcallYeoman.ApplicationRoute = Ember.Route.extend({
// admittedly, this should be in IndexRoute and not in the
// top level ApplicationRoute; we're in transition... :-)
model: function () {
return ['red', 'yellow', 'blue'];
}
});
If you explore the required scripts (controllers, store, models, routes, views, and router), you will see that all of the same functionality has been modularized out into separate files. This is a well-known, software design best practice known as the separation of concerns. This is a great example as to why we are using Yeoman to help us manage our code. Keep reading—there are more examples later.
Using Bower
Much like Linux package managers, Bower manages your JavaScript libraries as packages, exposing versions to a CLI (command-line interface). Bower helps do dependency resolution so you get the exact right interoperable versions of all your libraries. This means that if one of your dependencies is redundant with a dependency of another, multiple versions of the script will not be included. For example, Ember.js is dependent on jQuery, but if you include another library that is dependent on jQuery, only one version will be loaded.
A bower.json file, similar to a Ruby Gemfile or Node.js package.json, is used to declare the dependencies used within a particular project:
{
"name": "rocknrollcall-yeoman",
"version": "0.0.0",
"dependencies": {
"ember": "1.3.2",
"handlebars": "1.2.1",
"ember-data": "1.0.0-beta.5",
"ember-localstorage-adapter": "latest",
"bootstrap-sass": "~3.0.0",
"d3": "latest"
},
"devDependencies": {
"ember-mocha-adapter": "0.1.2"
}
}
At this point, you may be tempted to run your favorite local development server to deliver this application to your browser, like we did in Chapter 2. Just wait, however: among other things, Yeoman is going to help you with that as well.
Grunt
So all of that was great so far, but now for the real time saver, Grunt.js. Grunt is a task runner that allows you to automate all of the tasks that you normally have to worry about on your own or with separate toolsets.
In the beginning of this book, we talked about efficiently building applications for production. Grunt is one of the core toolsets that enable this for us, by providing tasks that can do the following:
§ Watch processes such as LiveReload
§ Auto-compile CoffeeScript, Compass, and Sass
§ Auto-lint
§ Benchmark image optimization
§ Generate an app cache manifest
§ Minify and concatenate static resources
§ Run a built-in preview server.
Gruntfile.js is the main configuration of your specific task setup. An entire book could be dedicated to Grunt.
For now, we will describe the general pattern of the setup. Gruntfile.js is fairly lengthy, so by breaking it down into digestable pieces, these are the core basics. The following methods are invoked from within the file:
grunt.initConfig
The initConfig method provides the configuration for each of the tasks we register later in grunt.registerTask().
For example, here is the basic config for one of our favorite tasks, jshint:
grunt.initConfig({
yeoman: yeomanConfig,
jshint: {
options: {
jshintrc: '.jshintrc',
reporter: require('jshint-stylish')
},
all: [
'Gruntfile.js',
'<%= yeoman.app %>/scripts/{,*/}*.js',
'!<%= yeoman.app %>/scripts/vendor/*',
'test/spec/{,*/}*.js'
]
},
});
grunt.loadNpmTasks
Before we register our tasks, we then need to load them as Node.js modules. This require declaration runs the load-grunt-tasks task that loads all the other tasks in the directory:
require('load-grunt-tasks')(grunt);
Now that the dependencies are available, the Yeoman-generated Gruntfile includes the register calls for each task:
grunt.registerTask('default', [
'jshint'
]);
Build, Run, Test
Finally, here are the Grunt-provided commands you can use to build, run, and test your application via the command line.
First, make sure you are in the directory of your application to run the following commands.
If you want to just build the application, you can run:
$ grunt
Next, if we want to also view the app, we can run the preview server while watching changes to directories:
$ grunt serve
This should fire up the application and run it in your web browser on http://localhost:9000 (Figure 3-3).
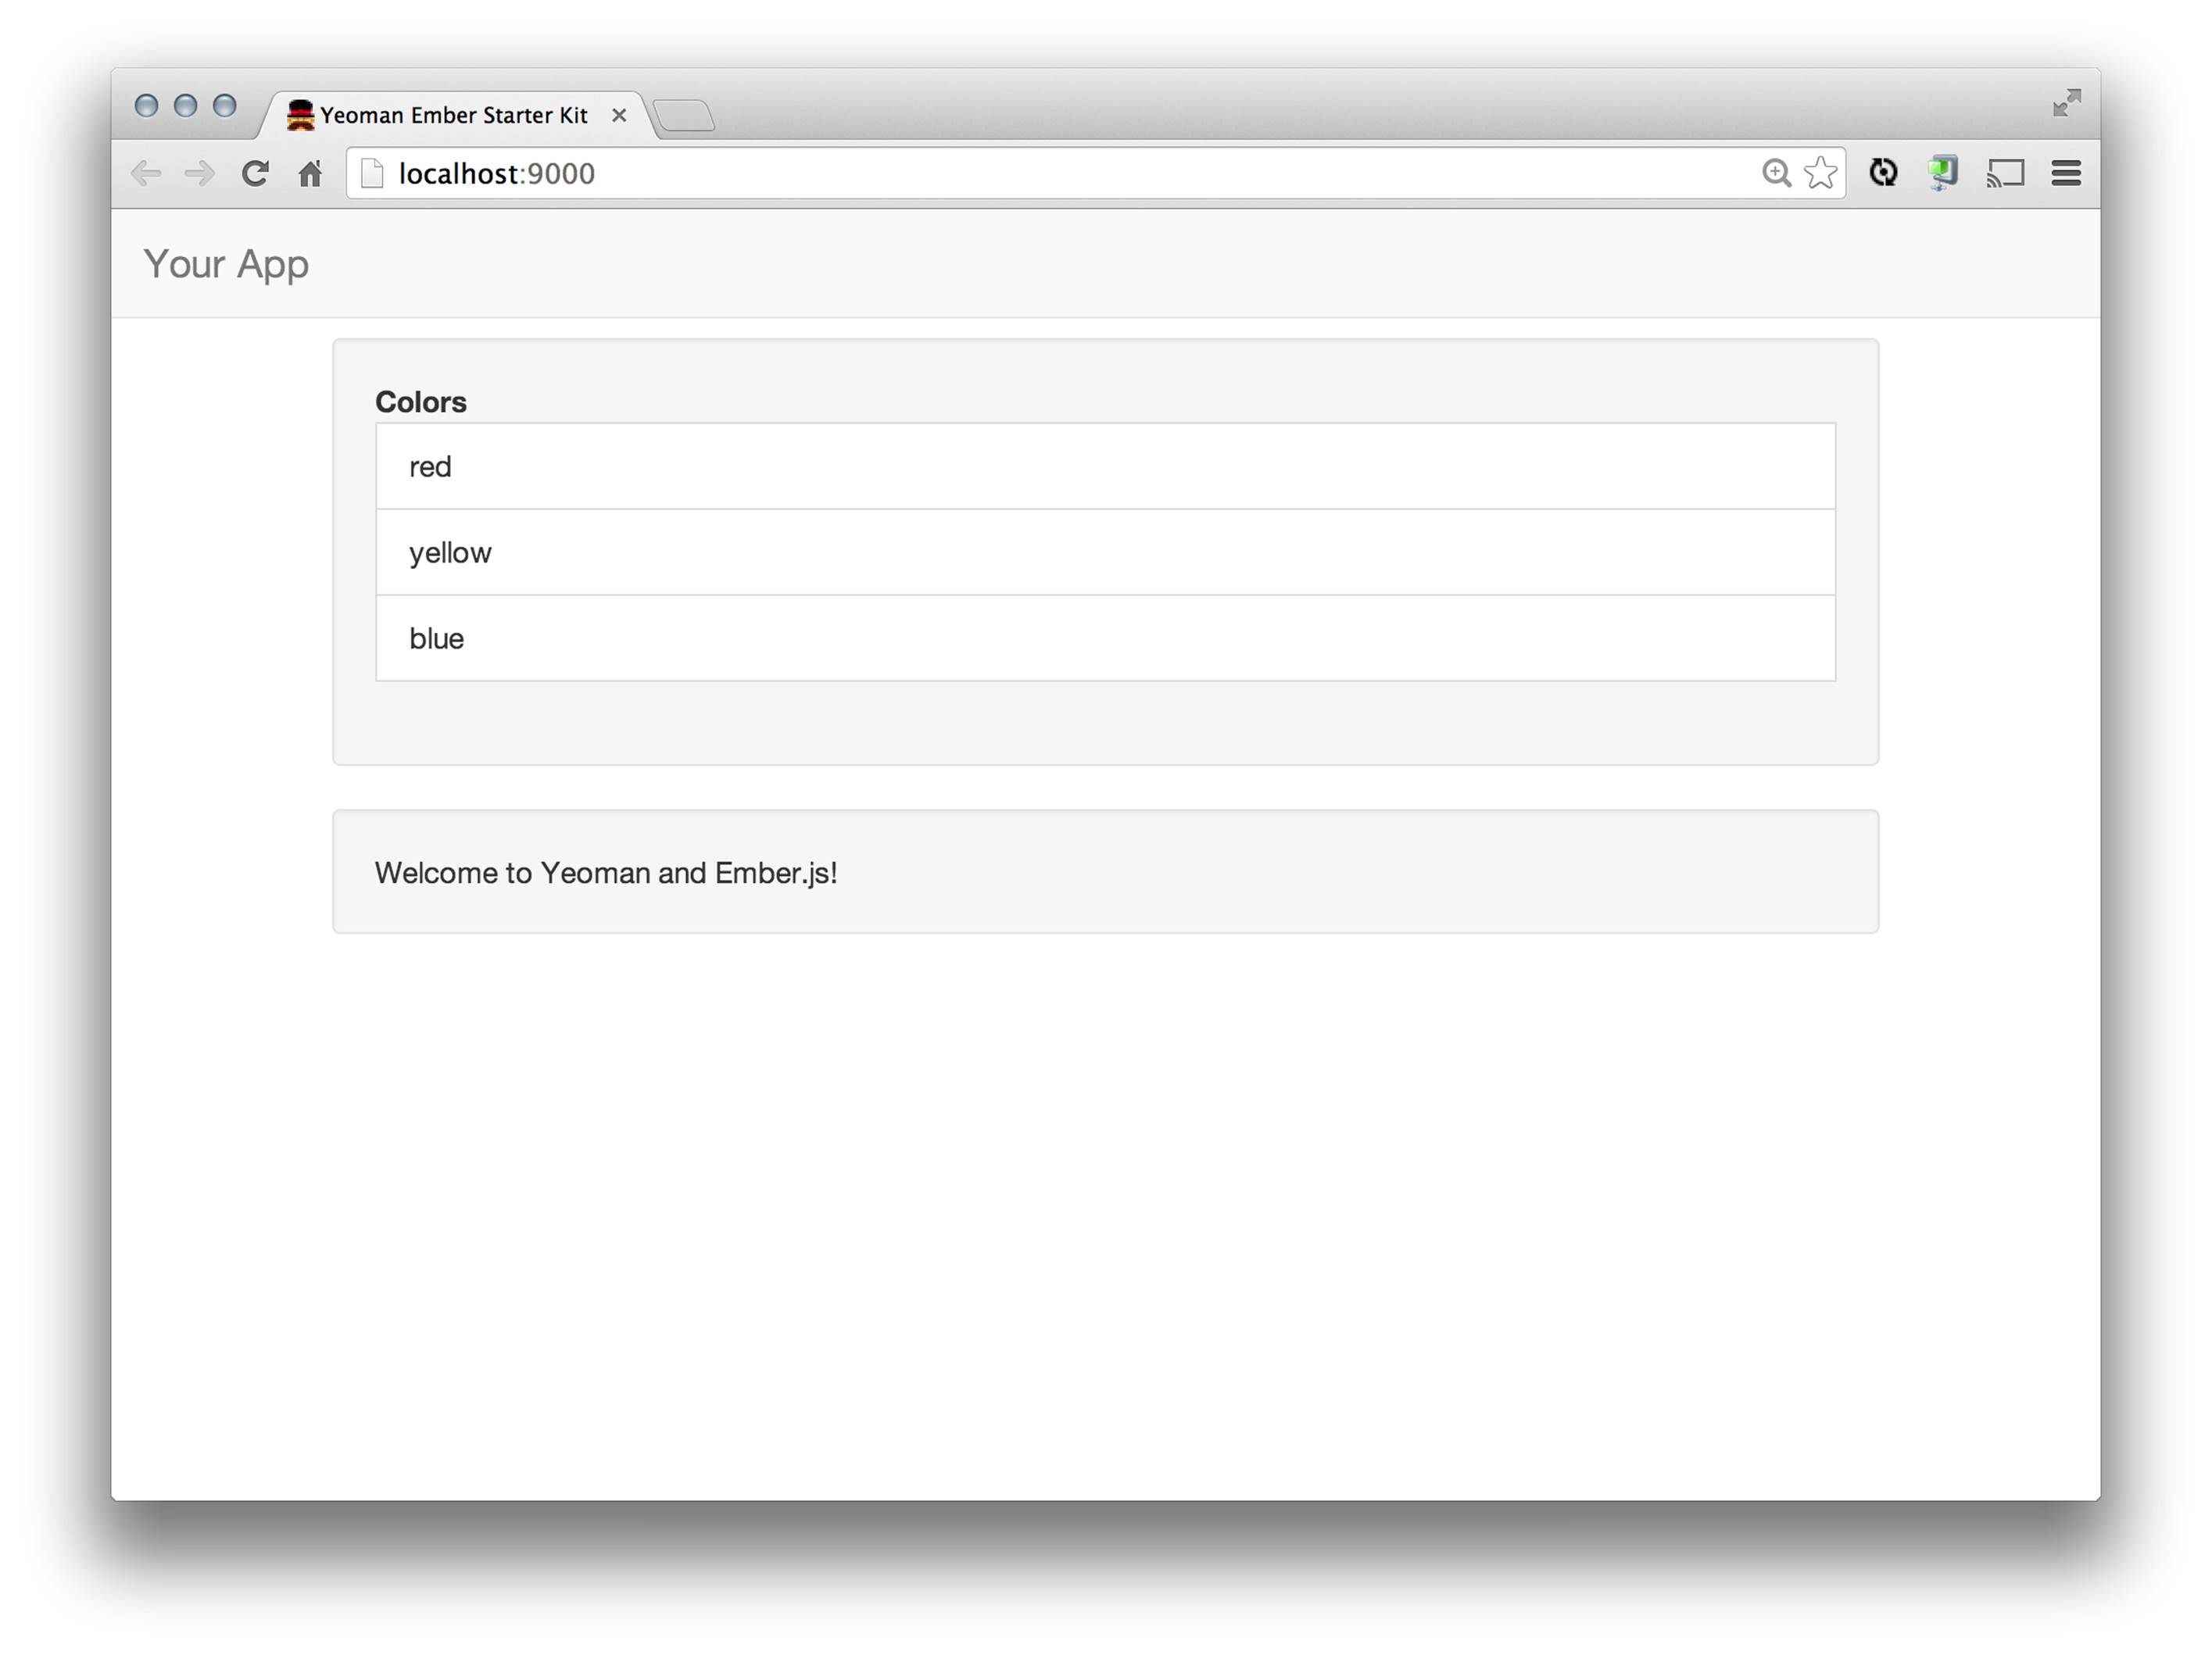
Figure 3-3. Ember Starter Application with the Yeoman Ember Generator
Finally, you should see the following output from Grunt in the console:
$ grunt serve
Running "serve" task
Running "clean:server" (clean) task
Cleaning .tmp...OK
Running "replace:app" (replace) task
Replace app/index.html -> .tmp/index.html
Running "concurrent:server" (concurrent) task
Running "emberTemplates:dist" (emberTemplates) task
File ".tmp/scripts/compiled-templates.js" created.
Done, without errors.
Running "compass:server" (compass) task
directory .tmp/styles/
create .tmp/styles/style.css (1.932s)
Compilation took 1.935s
Done, without errors.
Running "neuter:app" (neuter) task
Running "copy:fonts" (copy) task
Copied 4 files
Running "connect:livereload" (connect) task
Started connect web server on localhost:9000.
Running "open:server" (open) task
Running "watch" task
Waiting...
Later, in Chapter 10, you will see that we can also run tests from Grunt.
For now, you can get a small taste of testing, from the one Mocha test included in app/test/spec/test.js:
(function () {
'use strict';
describe('Give it some context', function () {
describe('maybe a bit more context here', function () {
it('should run here few assertions', function () {
});
});
});
})();
Run the following:
$ grunt test
You should see this output from our Mocha tests:
Running "mocha:all" (mocha) task
Testing: http://localhost:9000/index.html
․
1 passing (104ms)
>> 1 passed! (0.10s)
If you were building your own application as you followed along, then this will complete our basic Yeoman-generated and managed application.
Then add all of your changes to update the index using the current content found in the working tree. This stages the changes for the next commit:
$ git add .
Now commit these changes with a friendly message:
$ git commit -m "Initial commit"
That’s it. Now, that we have a generated-application structure and an initial codebase complete with package management and a task runner, let’s explore some more tooling: subgenerators.
Debugging with the Ember Inspector for Chrome and Firefox
The Ember Inspector is a plug-in that aids developers in the debugging of Ember applications. Currently, the tools are limited to Chrome and Firefox. To obtain the plug-in for Chrome developer tools, go to the download page (Figure 3-4).
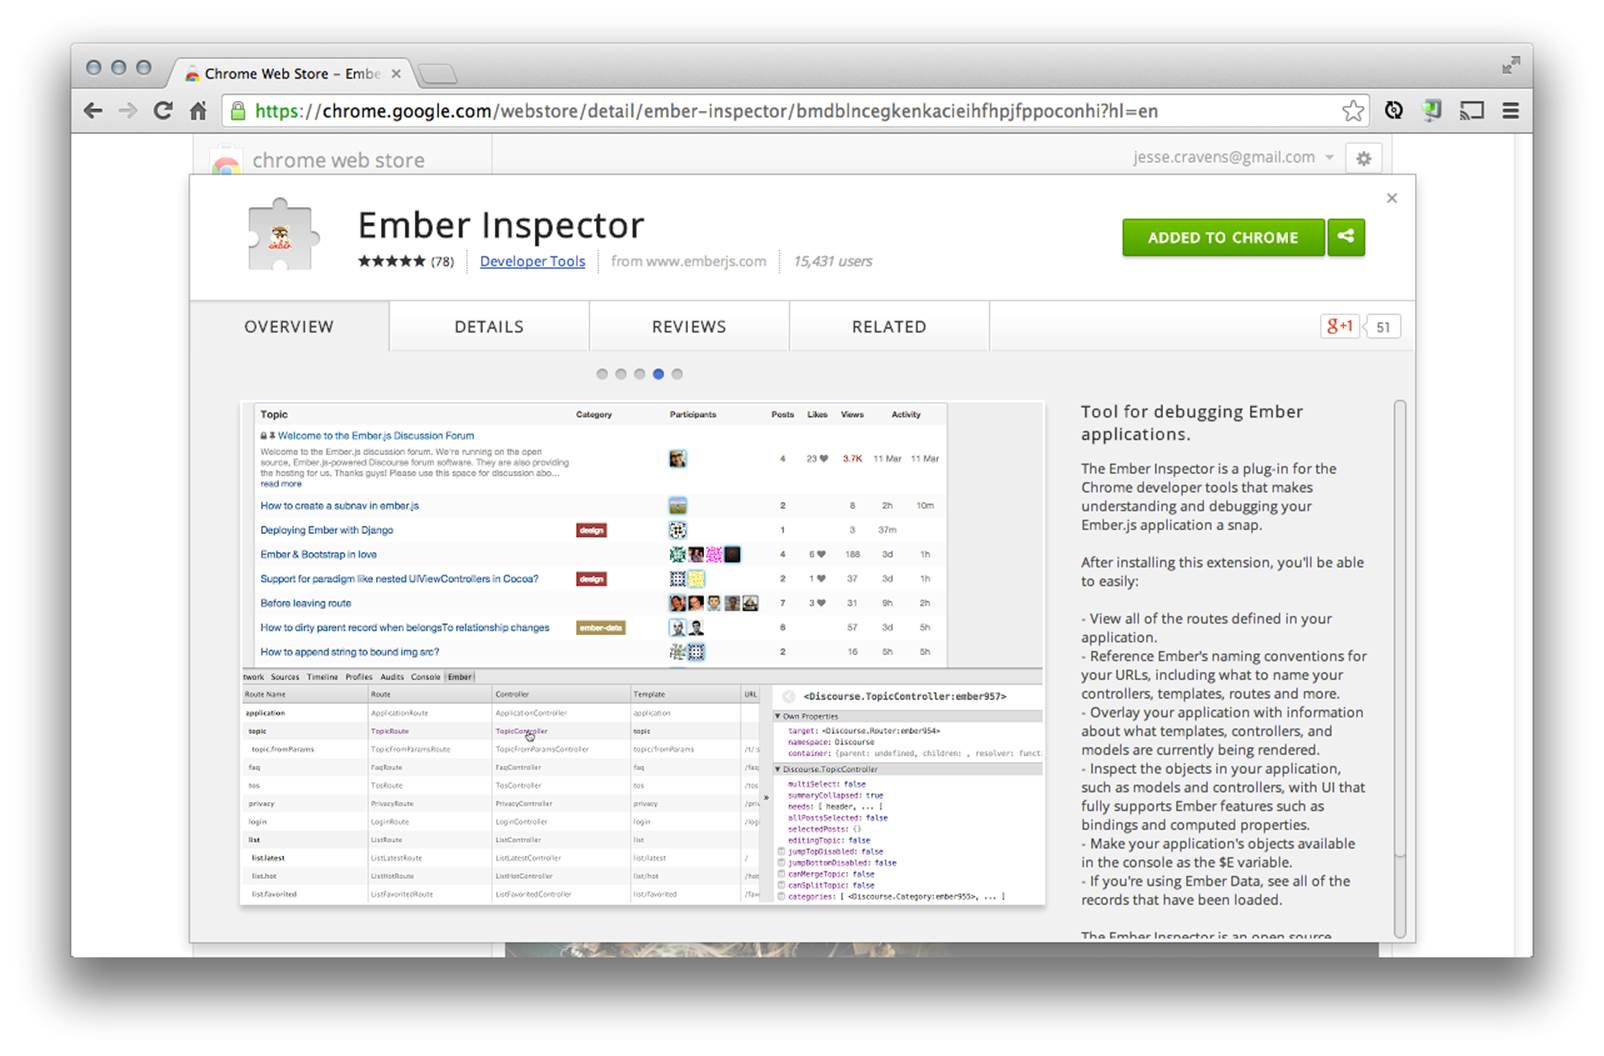
Figure 3-4. Ember Inspector extension for Google Chrome
And for Firefox, go to this download page (Figure 3-5).

Figure 3-5. Ember Inspector add-on for Mozilla Firefox
Follow the individual browser’s installation instructions, and we should be ready to begin debugging our Ember application. First, let’s start with all of the routes defined in our application.
Because we haven’t yet built our application, we can clone the finished application to demonstrate.
Make a new directory and migrate into it:
$ mkidr demo-inspector && cd demo-inspector
Then clone the finished repo:
$ git clone https://github.com/emberjsbook/rocknrollcall-yeoman.git
Now, use Grunt to serve up the application:
$ grunt serve
You now have the full functioning application within the demo-inspector directory. Once you are finished with our walkthrough of the inspector’s features, you can move back to the original directory by:
$ cd ..
One of the most powerful aspects of the Ember Inspector is that it provides a built-in reference to all of Ember’s naming conventions, as you can see in Figure 3-6.
Ember’s Naming Conventions
If you just want to learn more about Ember’s naming conventions and how they work, see the API documentation for Ember.DefaultResolver or the Ember Guides Concepts - Naming Conventions section.
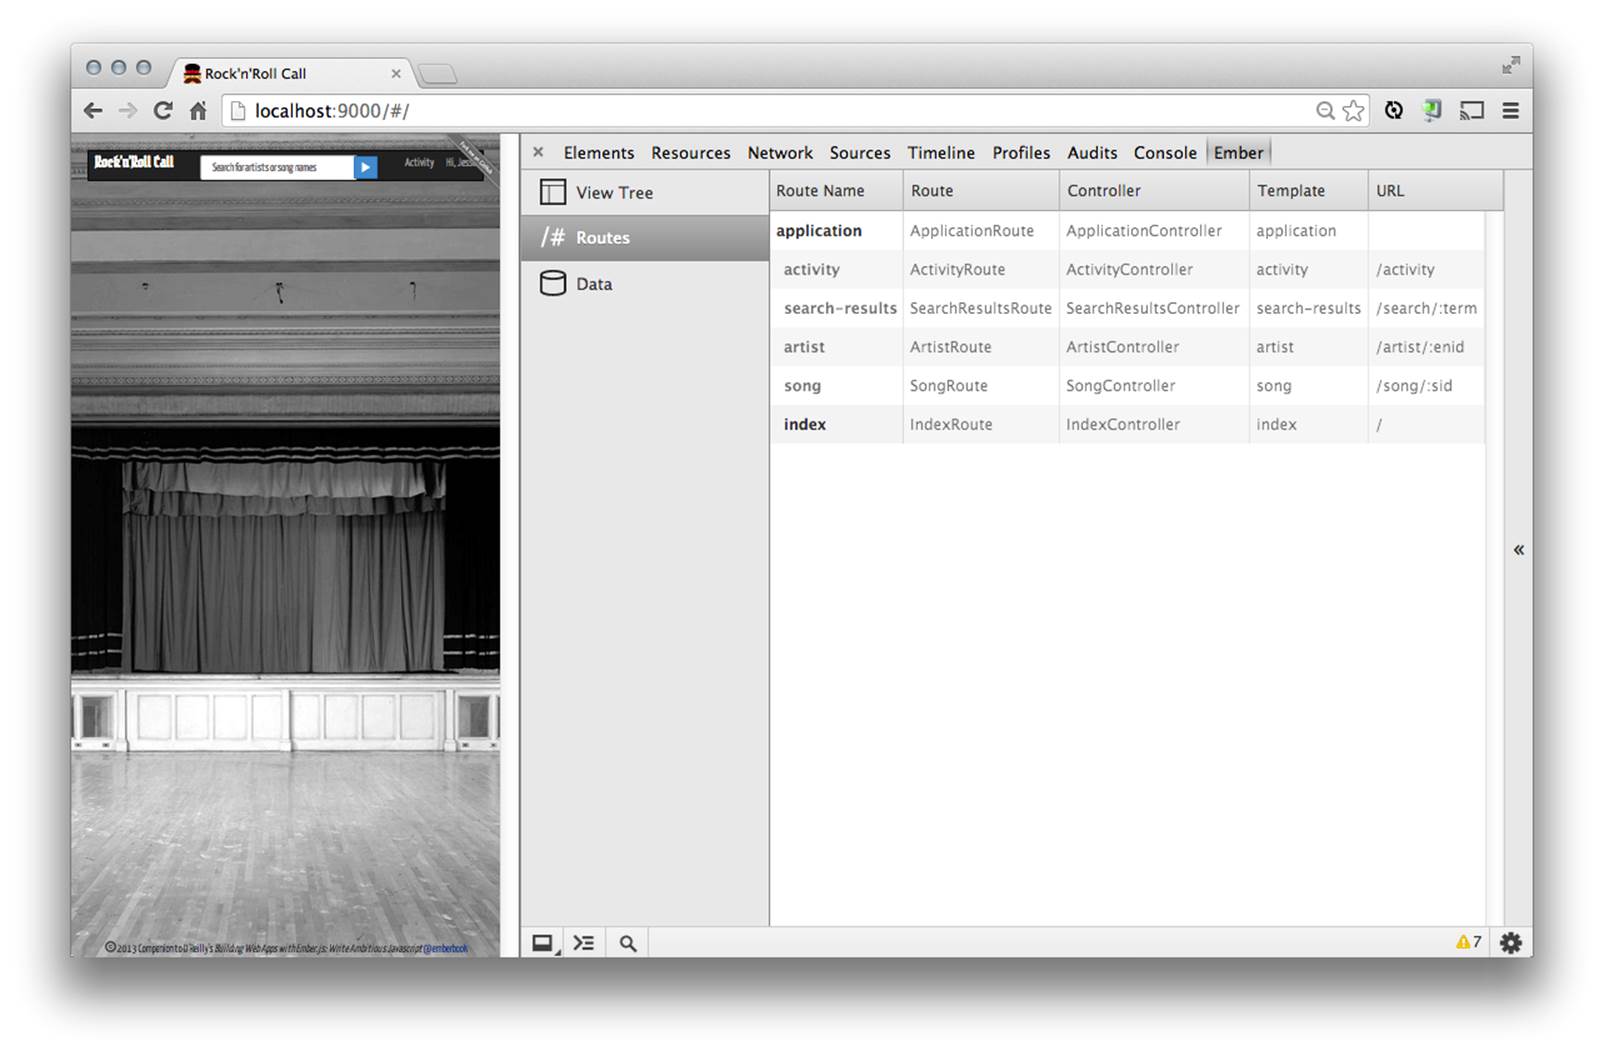
Figure 3-6. Ember Inspector: naming conventions
Also, once you have a number of routes and controllers within your application, you can view them and all of their respective properties individually. Figure 3-7 shows an example of inspecting a route’s properties.
Then, inspect the View Tree tab and an overlay appears with the templates, controllers, and models associated to the current “state” of the rendered application, as shown in Figure 3-8. This is especially helpful when trying to determine if you have access to the correct model within a template.
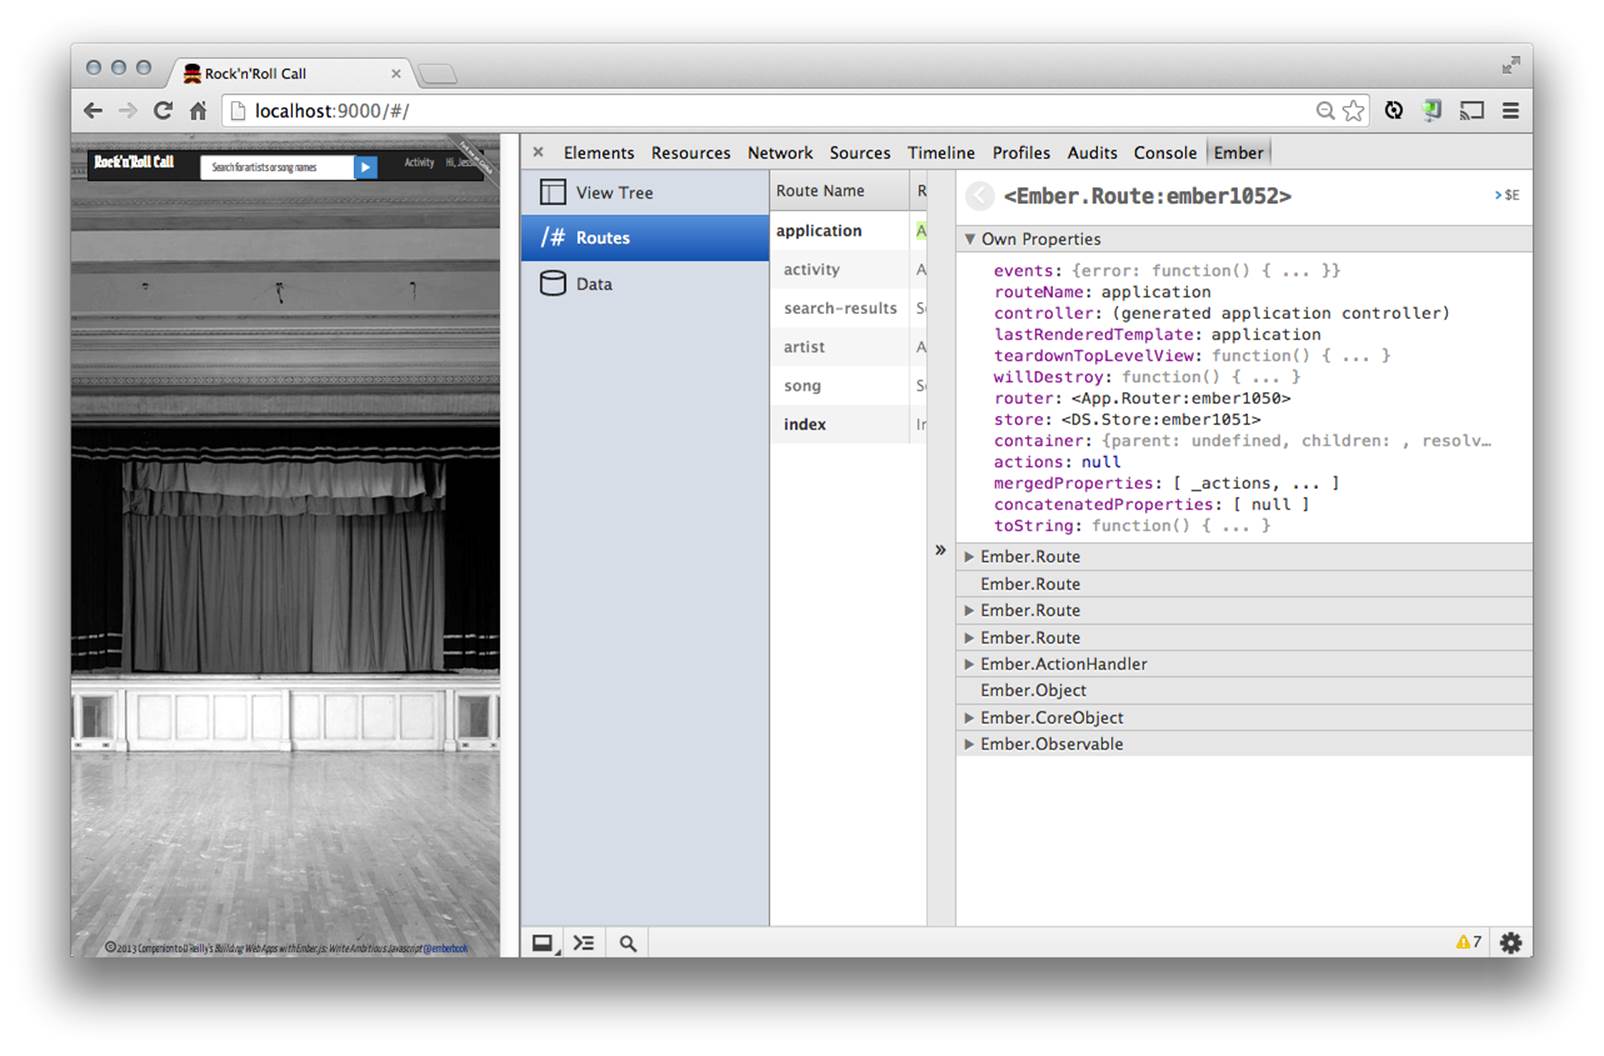
Figure 3-7. Ember Inspector: inspecting a route’s properties
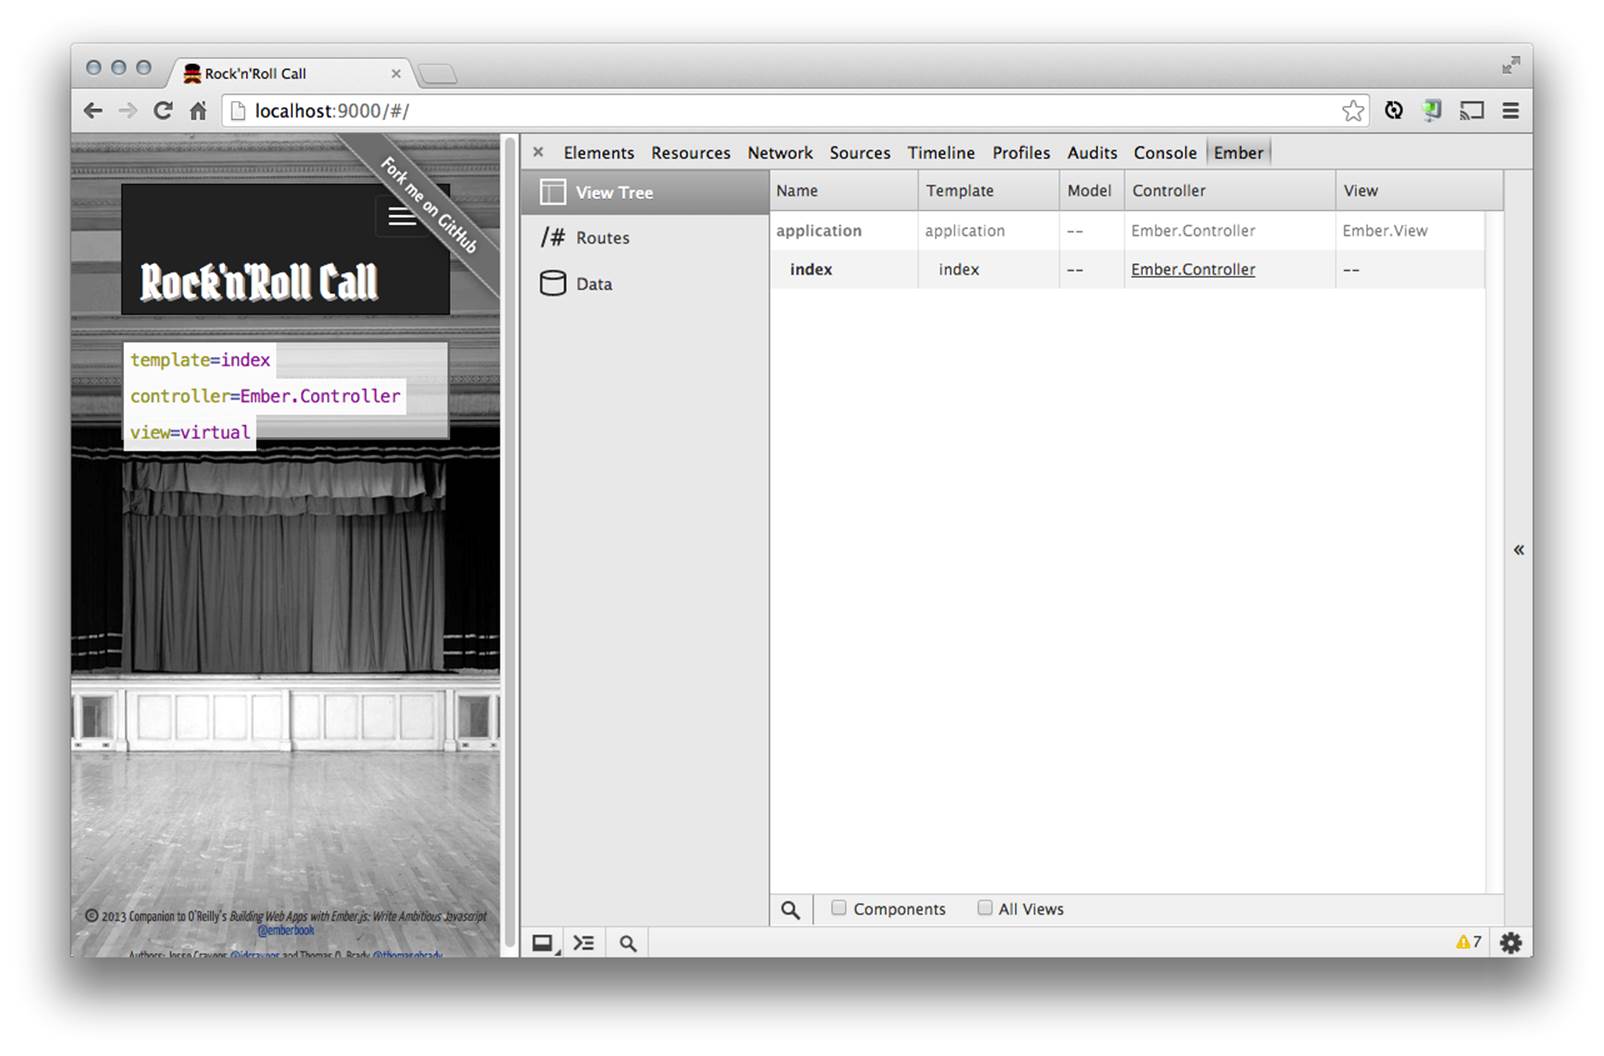
Figure 3-8. Ember Inspector: inspecting the View Tree
The Ember Inspector also helps greatly with your data layer. If Ember Data is installed, you will notice a Data tab. Click here, and view a current snapshot of all of the records currently stored in Ember Data, shown in Figure 3-9.
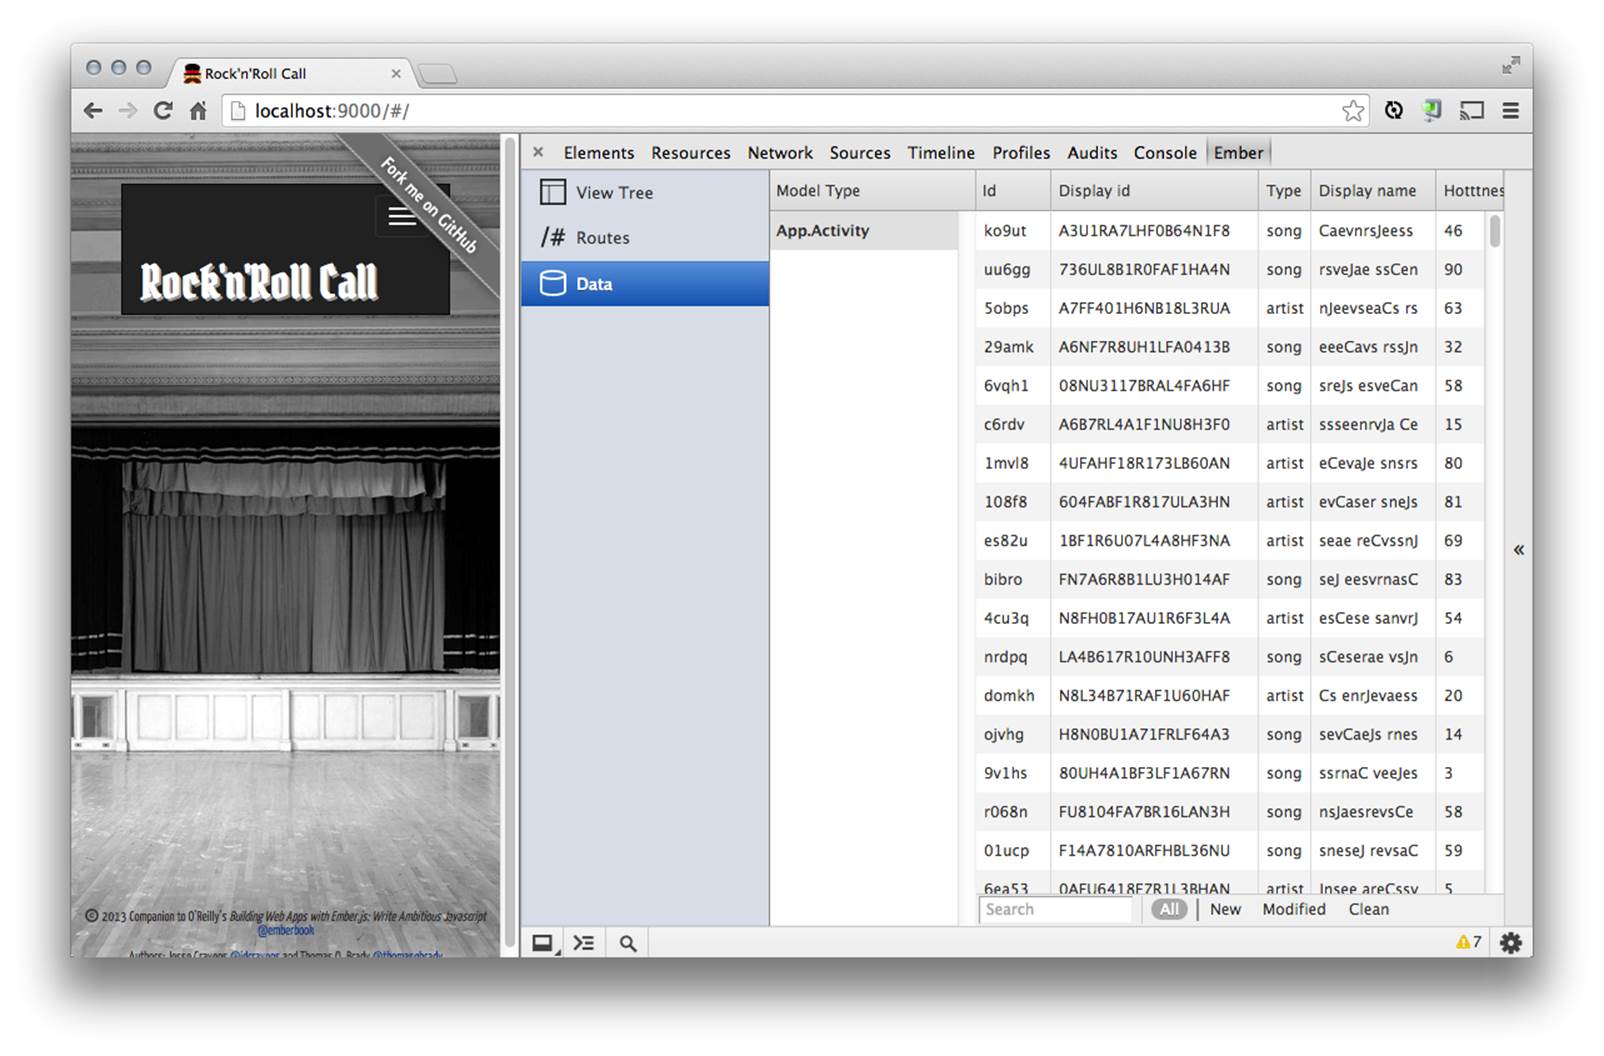
Figure 3-9. Ember Inspector: inspecting data
And finally, you can log out your application’s objects to the console as the $E variable, shown in Figure 3-10.
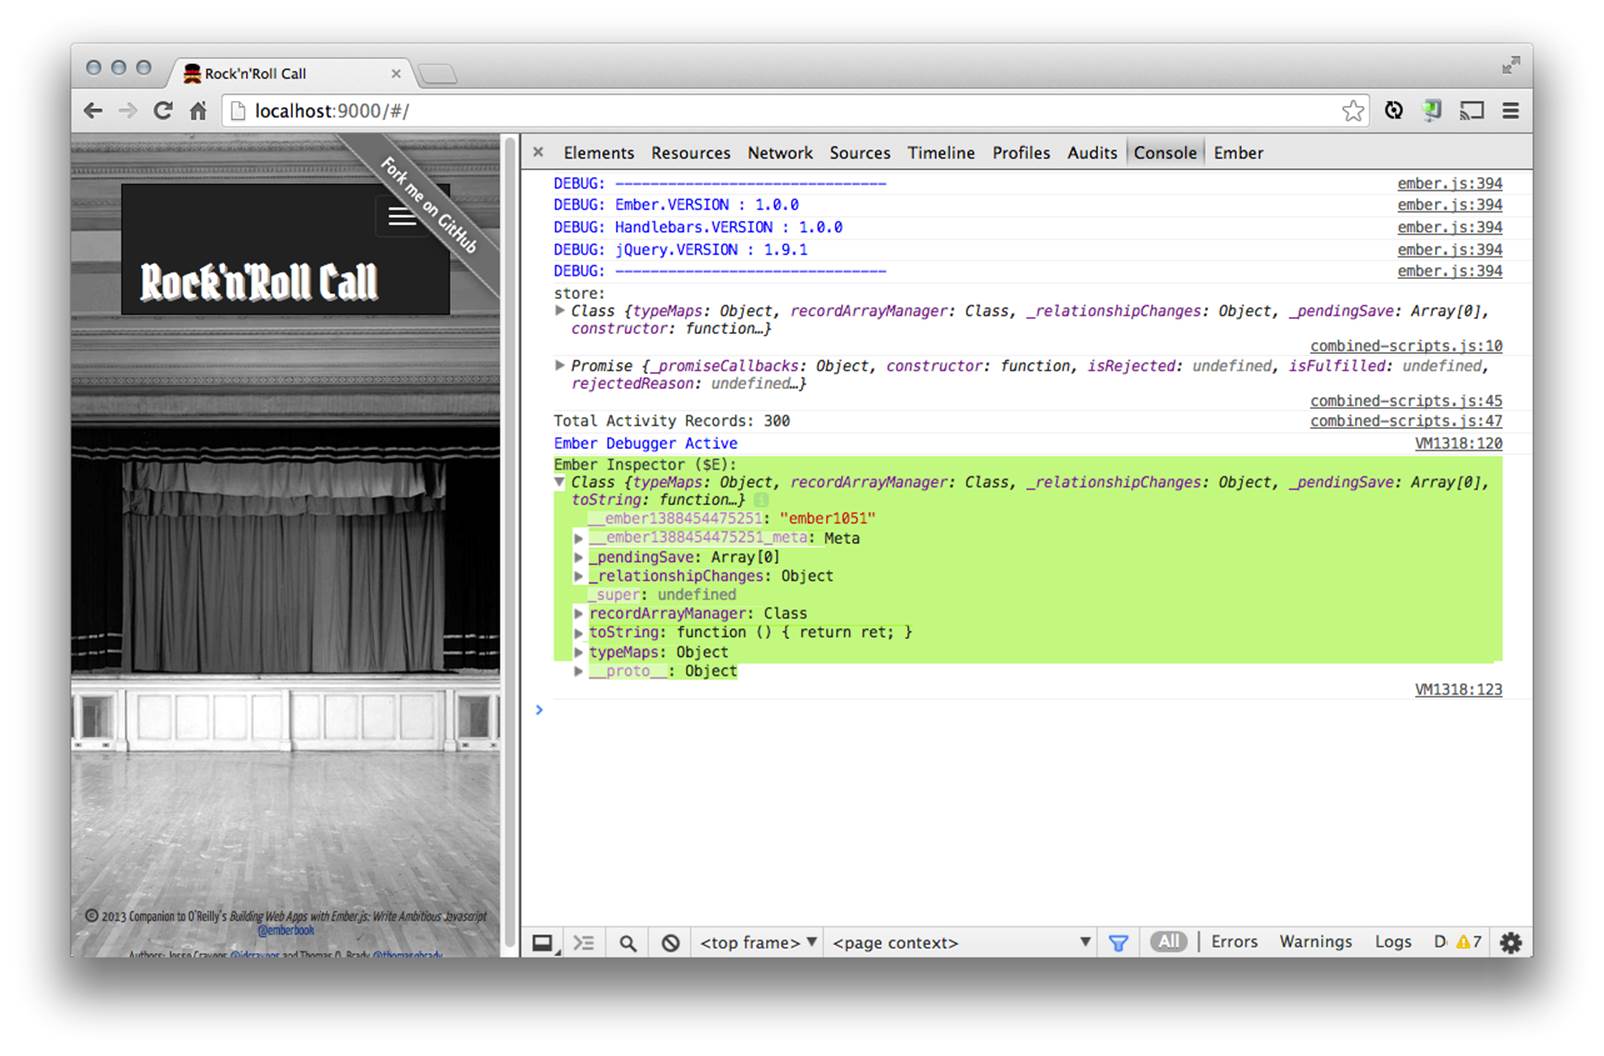
Figure 3-10. Ember Inspector: inspecting the application object
Wrapping Things Up
In Chapter 4, we will begin the early design phase: we’ll begin to architect our solution by thinking through and diagramming the various states of the application and creating fake data. In parallel, we can also start building the first evolution of our application’s Handlebars templates. If we are working with a team, we can also hand this task off to anyone that can write HTML/CSS while we begin to build the application logic.
All materials on the site are licensed Creative Commons Attribution-Sharealike 3.0 Unported CC BY-SA 3.0 & GNU Free Documentation License (GFDL)
If you are the copyright holder of any material contained on our site and intend to remove it, please contact our site administrator for approval.
© 2016-2026 All site design rights belong to S.Y.A.