Enyo: Up and Running (2015)
Chapter 7. Deploying
So now you’re a budding Enyo developer looking to deploy your app to all the supported platforms. The only question you have is: how? In this chapter we’ll explore the tools and techniques you’ll need to structure your apps and deploy them to various targets. At this point, we’ll need to set up a “real” development environment, since we can’t deploy apps by directing users to a page on jsFiddle.
For this chapter you should follow the Bootplate environment setup guide in Appendix A. Bootplate is a ready-to-use template that includes tools for easy deployment. Even if you ultimately choose a different structure for your app, you may still be able to apply some of these tools.
Bootplate App Structure
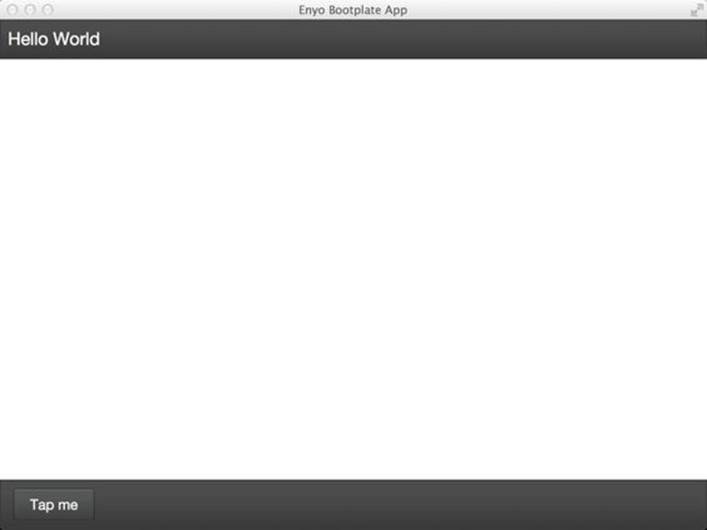
It’s worth taking a few moments to discuss how an Enyo Bootplate app is structured. Until now, all of our samples have been run on jsFiddle and have consisted of, at most, three files. We haven’t had to concern ourselves with where the Enyo framework files are coming from or how to add assets. Here’s the Bootplate directory structure:
debug.html
index.html
assets/
build/
deploy/
enyo/
lib/
source/
tools/
There are some additional files included but these are the most important. debug.html is the file to load during debugging. It includes non-minified versions of Enyo and the libraries. index.html will load a deployed version of the app that has been minified (compressed). If a non-minified build of the application is not available, index.html will redirect to debug.html. The assets directory is a place to store images, fonts and other assets your app requires. The build directory contains the minified source of your app, including Enyo and the libraries. These files are loaded byindex.html. The deploy directory contains a ready-to-deploy version of your application. These directories (deploy and build) are generated by the deployment scripts located in the tools directory. The enyo directory contains the framework source for Enyo, while the lib directory contains the various Enyo libraries needed for the app
The most interesting directory is the source directory. Within it will live the files you create to breathe life into your app. The source directory structure looks like this:
app.js
package.js
data/
data.js
package.js
style/
main.less
package.js
Theme.less
views/
package.js
views.js
app.js contains the source for the Application object that forms the base of the app. This file can be used to set the initial view and instantiate any global models. package.js is part of a system that tells Enyo what source and stylesheets to load. Inside package.js is a call to enyo.depends(). Each line in the call adds either a file or directory to the app. Each directory specified should have its own package.js. This system makes it so that reusable components can be easily added to a project simply by adding the directory and including it in package.js.
The data directory is useful for defining models and collections needed by the app. The style directory contains main.less, which is where the app’s CSS is specified. The Theme.less file allows for overriding the UI library’s styles and is discussed in Chapter 6.
views contains source for the UI of your application. This is where you will define the controls and components that make up your application. A simple app may only need to modify views.js, while a more complex app will have many files or directories.
Don’t be too constrained by the directories Enyo provides. Feel free to add more; just be sure to modify package.js to include all of your files and directories.
Web Targets
One of the simplest ways to deploy Enyo is to host it on a server and serve the apps embedded into a web page. Although all our examples have shown rendering Enyo objects into the document body, it is possible to render them into any element on the page (by setting the renderTargetproperty of the Application kind to the id of the element). For web deployment, simply copy the Enyo library and app source code up to a directory on your server and include them in your HTML source.
Bootplate makes this process easy by including a Grunt deploy task. For more on using Grunt with Bootplate see Using Grunt. If you are not using Grunt, Bootplate includes a deploy script that packages all the files and minimizes the source. For Windows, this script is called deploy.bat; for Mac and Linux, it’s called deploy.sh.
Deploying speeds up loading and combines everything into the deploy directory. Once deployed, simply transfer the files from the deploy directory to your destination (e.g., a web host). Keep in mind, though, that deployed, minified code is much tougher to debug than unminified code.
Desktop Targets
JavaScript apps might not seem like the best choice when targeting the desktop; however, many of the features that make it great for creating Web apps also make it good for creating desktop apps. Particularly with Node.js for communicating with the system, a browser engine for displaying a user interface, and, of course, Enyo to simplify writing the app, you can quickly bring up a cross-platform desktop app without having to learn the nuances of each platform.
Two projects have brought together the Chromium browser with Node.js: Atom Shell and node-webkit. To demonstrate how a desktop JavaScript app looks, we’ll use Atom Shell along with the default Bootplate app. First, download the appropriate version of Atom Shell for your system fromthe releases page and unzip it to a directory on your computer.
Create a new directory to house the Atom Shell project. Copy the sample package.json and main.js files from the Atom Shell quick-start guide into the directory. You can modify either file to your liking.
Next, execute the deploy script of a Bootplate project to create the minified project files. Copy the files from the deploy directory into your Atom Shell project directory. You can now test the app by executing the Atom Shell binary (follow the directions in the quick-start guide). To create a distributable app, follow the directions in the application distribution guide.
A completed project directory is available on GitHub.
Smart Devices
One of the most interesting places for apps these days is on smartphones, tablets, smart TVs and other such devices. Enyo is perfectly suited to this environment. Enyo itself doesn’t provide any kinds that give direct access to the hardware components of these devices, and not all device features have an HTML-standard method for access. However, Cordova, an Apache open source project, handles direct access to these features on many devices and provides a method for creating natively installable apps.
Enyo supports Cordova events natively and has a library called enyo-cordova available on GitHub. For more information on Cordova support with Enyo, please see Making Use of Cordova’s Native Functions.
There are two ways to create apps using Cordova: by using the online PhoneGap Build tool or by downloading the Cordova library. We’ll look briefly at both options.
PhoneGap Build
One of the simplest ways to get started with deploying mobile apps is to use Adobe PhoneGap Build. PhoneGap Build is a web-based tool for packaging cross-platform JavaScript apps. Among other things, it allows you to create installable apps for multiple targets quickly and easily.
PhoneGap requires that its JavaScript library be loaded in index.html. To do this, add the PhoneGap script tag just before the line that loads the Enyo source, as follows:
...
<!-- js -->
<script src="phonegap.js"></script>
<script src="build/enyo.js" charset="utf-8"></script>
...
After registering for a PhoneGap build account, you can pull projects directly from GitHub or, for private (as opposed to public, open source) projects, upload a .zip file. It is very easy to zip the contents of the deploy directory and upload it to PhoneGap Build. For some platforms, you will need to supply developer credentials before you have an installable app. Additionally, you’ll want to set up app icons and other metadata needed by the various mobile stores.
If you want to test PhoneGap build, use the following repository link to create a test package: https://github.com/Enyo-UpAndRunning/phonegap-build-sample.git.
If you use Bootplate and a GitHub-based PhoneGap build, you will either need to have a separate repository for the deployed files (as in the preceding sample) or you will need to commit your deployed source along with your app and use a .pgbomit file to omit all the unminified source from being included in your final application.
Local Cordova Builds
PhoneGap Build is easy to use but it doesn’t give you a lot of flexibility. Installing Cordova locally gives you much finer-grained control, as well as access to the build tools available on your platform of choice. In general, you will want to start with a shell app appropriate for the platform you wish to deploy on and then copy the deploy files to the www directory. Be careful to ensure that you load cordova.js, or your app may not work correctly.
The Enyo Yeoman generator includes an option to create a full Cordova project, including the Cordova command-line tools. To create a new Cordova project, use the following command:
yo enyo --cordova myProject
For more information on getting started with Cordova, visit the Cordova site.
webOS Smart TVs
LG has made it easy to deploy Enyo applications to webOS Smart TVs. Included in the SDK (see Appendix A) are command-line tools for creating, packaging, testing, and deploying apps. The ares-package command uses the Bootplate deploy script to minify an app and then it creates a deployable package. The following command packages the app in the current directory:
ares-package .
To install the app to the emulator or a TV, use the ares-install tool. To deploy a sample app created by the ares-generate tool to the emulator, issue the following command:
ares-install --device emulator com.example.sample_0.0.1_all.ipk
For more information about developing for webOS TVs, visit the webOS TV for developers site.
Summary
You should now be familiar with some of the ways to package and deploy Enyo apps. Using this knowledge, you can deploy your apps on various platforms and know that your apps will work.
All materials on the site are licensed Creative Commons Attribution-Sharealike 3.0 Unported CC BY-SA 3.0 & GNU Free Documentation License (GFDL)
If you are the copyright holder of any material contained on our site and intend to remove it, please contact our site administrator for approval.
© 2016-2026 All site design rights belong to S.Y.A.