Web Development with jQuery (2015)
Part I. The jQuery API
Chapter 2. Selecting and Filtering
This chapter talks about jQuery's sophisticated implementation of the Selectors API, which provides the ability to select elements in the DOM using CSS selectors. jQuery's Selectors API allows you to select one or more elements from the DOM using a selector; then either you can use that result set, or you can pass those elements on to be filtered down to a more specific result set.
If you've never heard of a selector before, then I recommend that you have a look at my book Beginning CSS: Cascading Style Sheets for Web Design, 3rd Edition, which has extensive coverage of selectors.
In CSS, you can apply style to one or more elements by writing a style sheet. You choose which elements to style based on the syntax that appears in the first part of a CSS rule, before the first curly brace, which is known as the selector. Here is a sample CSS selector:
div#exampleFormWrapper form#exampleSummaryDialog {
display: block;
position: absolute;
z-index: 1;
top: 22px;
left: 301px;
right: 0;
bottom: 24px;
width: auto;
margin: 0;
border: none;
border-bottom: 1px solid rgb(180, 180, 180);
}
Using markup and CSS, you can assign id and class names to elements, and you can control the presentational aspects of elements specifically using selectors. In jQuery, the concept of selectors as applied to CSS is also applied to the concept of the Document Object Model (DOM). In the DOM, you have available to you every element that exists in the markup of your document, and you can traverse the DOM and select the elements you want to work with using selectors, just like you use in your CSS style sheets.
After you select elements from the DOM, you can apply behavior to them. You can listen to events and make something happen when a user clicks an element, for example. You can make something happen when the user's mouse cursor comes over or leaves an element. Basically, you can make your web documents look and behave more like desktop applications. You are no longer limited to static content as you are with markup and CSS alone—you can apply behavior as well.
This chapter describes how to use jQuery's Selectors API to retrieve elements from a document, in addition to providing some practical examples of usage. It also describes how you can chain calls in jQuery. One use for this is filtering a selection, which you would do to reduce a larger selection of elements down to a smaller selection. Finally, it discusses how jQuery's Event API works in relation to the W3C's Event API and Microsoft's event model as it was implemented up to IE8. IE9 and newer all have support for the standard W3C event model, in addition to Microsoft's older, proprietary event model.
The Origin of the Selectors API
The concept of a Selectors API was first dreamed up by Dean Edwards, a JavaScript guru who first created a Selectors API in JavaScript in a free, open-source package he called cssQuery. Not long after Dean pioneered the idea and produced a working, proof-of-concept implementation of that idea, it was taken up and expanded upon by John Resig (and other JavaScript framework authors, mutually exclusive to John's efforts) and implemented in his jQuery framework. This led to some back-and-forth collaboration and competition between Dean, John, and other JavaScript framework authors, which resulted in much-needed performance boosts in these ad-hoc implementations, which at their conception were quite slow in some scenarios.
Not long after Dean came up with the concept of a Selectors API, W3C members and editors Anne van Kesteren and Lachlan Hunt drafted it into a specification for the W3C. The official W3C Selectors API involves two methods, one for selecting a single element called document.querySelector() and one for selecting multiple elements called document.querySelectorAll().
NOTE The names for the official API were under considerable debate for quite some time because no browser makers could agree on the names used. The names were finally put to a vote, with these names being the ones decided on. The controversy surrounding the names was not without merit, as this API is quite possibly the most important change to JavaScript that will have a lasting impact for years to come. It's important in that, in one fell swoop, it replaces methods likedocument.getElementById, document.all, and document.getElementsByTagName, which are no longer needed—because these methods let you use selector syntax, you can select by id, by tag name, by class name, or by context, via whatever selectors the browser already supports for CSS.
document.querySelector and document.querySelectorAll are both implemented natively in Chrome, Safari, Firefox, and IE (back to IE8).
The great thing about jQuery and other JavaScript frameworks is that they had their own versions of the Selectors API already implemented prior to its native inclusion in browsers, which allows them to use the native implementation, if it is available. Using the native implementation makes selecting elements screamingly fast. Otherwise, if the user has an older browser, the framework can fall back on its own, slower, JavaScript-based implementation. This means that when using a JavaScript framework like jQuery, the Selectors API is ubiquitously available across all platforms it supports. jQuery 1.9 supports IE back to version 6 and should be used if you need compatibility with the older versions of IE, in addition to all other popular browsers, of course. jQuery 2.0 drops support for the older versions of Internet Explorer and supports only IE9 onward. jQuery 1.9 keeps support for those legacy browsers and the way legacy browsers do things. jQuery 2.0 is a clean break with the past and supports only the newer versions of browsers with excellent support for standards.
Using the Selectors API
Using the Selectors API in jQuery is easy. As explained in Chapter 1, “Introduction to jQuery,” everything that you want to do with jQuery originates from a single, simply named object called $ (a single dollar sign). You can also use “jQuery” in place of the dollar sign, but from here on throughout this book, I will use only the dollar sign, and I will refer to it either as “the dollar sign object” or “the dollar sign method,” depending on context, because it is really both a method and an object at the same time.
The dollar sign is both a method and an object because it can be used like a function call, but it also has member properties and methods that you can call. The dollar sign is named after a single dollar sign for one reason only, and that is to reduce the amount of code that you have to write.
Here's a simple example of how you would use this method with a selector to add a click behavior to a collection of links. Basically, the object of the following code is to force the links to open in a new window, instead of using the target attribute, which can sometimes be left out when content is managed, and because of this it's easy to abstract away its use by putting in a little JavaScript that follows a few rules that most companies tend to want when it comes to the question of when to open a link in a new window.
Say that you have a markup document that looks like this. (You can try this example for yourself; it's available as Example 2-1 in the book's download materials.)
<!DOCTYPE HTML>
<html xmlns="http://www.w3.org/1999/xhtml">
<head>
<meta http-equiv="content-type"
content="application/xhtml+xml; charset=utf-8" />
<meta http-equiv="content-language" content="en-us" />
<title>Links</title>
<script type='text/javascript' src='../jQuery.js'></script>
<script type='text/javascript' src='Example 2-1.js'></script>
<link type='text/css' href='Example 2-1.css' rel='stylesheet' />
</head>
<body>
<ul id="exampleFavoriteLinks">
<li><a href="http://www.wrox.com/">Wrox</a></li>
<li><a href="http://www.daringfireball.com/">Daring Fireball</a></li>
<li><a href="http://www.apple.com/">Apple</a></li>
<li><a href="http://www.jquery.com/">jQuery</a></li>
<li><a href="Example 2-2.html">Example 2-2</a></li>
<li><a href="Example 2-3.html">Example 2-3</a></li>
</ul>
</body>
</html>
In the preceding markup document, you have a simple unordered list that contains six links. You take that markup and put it with the following CSS:
body {
font: 16px Helvetica, Arial, sans-serif;
}
ul {
list-style: none;
margin: 10px;
padding: 10px;
border: 1px solid green;
}
a {
text-decoration: none;
color: green;
}
a:hover {
text-decoration: underline;
}
The preceding CSS document does little more than make that list look a little prettier—it neither adds to or takes away from the example.
Finally, you add the following JavaScript document to the markup:
$(document).ready(
function()
{
$('a').click(
function(event)
{
var node = $(this);
var target = node.attr('target');
var href = node.attr('href');
if (target === undefined && href !== undefined)
{
switch (true)
{
case href.indexOf('http://') !== -1:
case href.indexOf('https://') !== -1:
case href.indexOf('.pdf') !== -1:
{
node.attr('target', '_blank')
.addClass('exampleLinkAutoTarget');
break;
}
}
}
}
)
}
);
The preceding code, all put together, should look something like what you see in Figure 2.1.
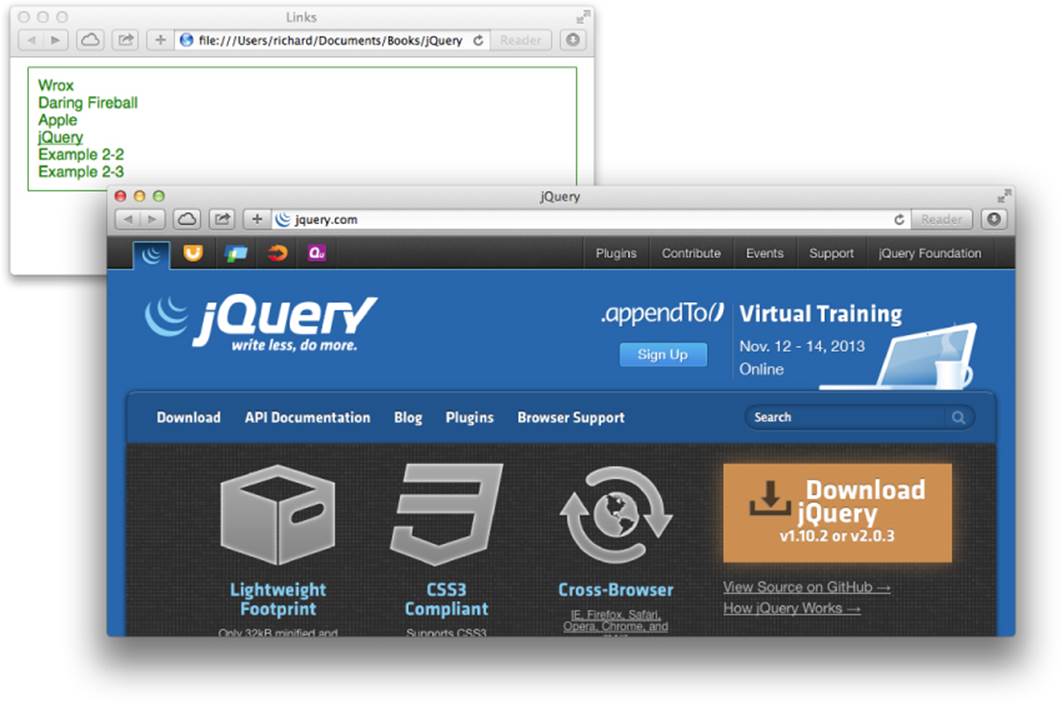
Figure 2.1
When you click a link to an external website in the example, you see those links open in a new window or tab, depending on how you have your browser's preferences set up to handle new windows.
In the preceding example, you use JavaScript to force the links in the <ul> element with the id name exampleFavoriteLinks to open in a new window or tab. To do this, in the JavaScript, you wrote a bit of jQuery that is executed at the document ready event.
$(document).ready(
function()
{
As I touched on briefly in Chapter 1, jQuery provides its own event called ready, which is fired as soon as the DOM has finished loading, which is different from the onload or load event in that with the load event, you have to wait for all the images to load too before that event will fire. Most of the time, you don't need to wait so long; you just want to start working with the document and adding behavior as soon as the DOM has finished loading. That's what the first line of code does.
Now that the DOM is loaded, you want to add behaviors to the document using script. The first item is an example of jQuery's Selectors API in action: it is a function call to the dollar sign method that uses a selector that picks up all <a> elements.
$('a')
When those <a> elements are selected, you more than likely want to do something with them. In this example, you add a click event to each of the <a> elements that you selected. The click event is added via a click method that is unique to jQuery:
$('a').click(
function(event)
{
What you see here is an example of how jQuery lets you chain methods together. First, you selected a bunch of <a> elements; now, you're applying a click event directly to each of those <a> elements via a new method called click() that's chained to the end of your selection.
Within the click() method, you are passing a single anonymous (that is, nameless) function (these are also called closures or lambda functions) that contains the instructions that you want to be executed when each <a> element is clicked by a user.
function(event)
{
var node = $(this);
var target = node.attr('target');
var href = node.attr('href');
if (target === undefined && href !== undefined)
{
switch (true)
{
case href.indexOf('http://') !== -1:
case href.indexOf('https://') !== -1:
case href.indexOf('.pdf') !== -1:
{
node.attr('target', '_blank')
.addClass('exampleLinkAutoTarget');
break;
}
}
}
}
The anonymous function contains one argument, event, which represents the event object. The event object is just like what you would use with the standard W3C Event API, and Internet Explorer 8 and earlier using jQuery 1.9; this event object is automatically patched by jQuery so that older versions of IE support the same standard event model that all the other browsers do. IE9 and later have all this functionality built in and no longer need the patches.
The next line takes this and wraps it in a call to jQuery. By default, events are set up so that this references the element the event is attached to. When an event occurs, jQuery leaves this default behavior in place, so by default, you're working with traditional JavaScript within the event callback function. To work with jQuery again, you have to explicitly say that you want to work with jQuery, and one way to do that is to simply wrap this in a call to jQuery.
var node = $(this);
If you had not wrapped this in a call to jQuery, the subsequent call to attr(), a jQuery function, would have failed.
The next line verifies whether the <a> element has a target attribute or an href attribute. If no target attribute is set, the call to attr('target') will return undefined, and likewise for the href attribute.
if (target === undefined && href !== undefined)
Next, after it is determined that there is no target attribute and there is an href attribute, the value of the href attribute is examined to see whether a new window should be opened when the link is clicked. This is done with a switch statement. Switching on true will cause the program to execute the first case statement where the expression placed beside the case statement evaluates true, and that is the case if the value of href contains the following:
· http://, a non-secure web link to a third-party website
· https://, a secure web link to a third-party website
Or if the link contains the .pdf document extension.
With these rules and some additional logic put in place throughout your website, it becomes possible to fish out links to third-party websites and to PDF documents and to make those particular links open in a new window. This works if all the links on your website are written as relative or absolute links without the host name portion of the URL—for example http://www.example.com/, which is the hostname portion of the URL. If some links might contain your own hostname, then you would need to rewrite the logic presented here to filter out those links so that links within your website won't trigger false positives and open in a new window. You learn how to do that in the next section.
This is a simple but practical explanation of one possible way to use the Selectors API, to select all the links on a given page. But what if you want to filter out some of the selected elements based on other criteria, or what if you want to narrow a selection based on elements further down the tree? This is discussed in the next section.
Filtering a Selection
jQuery is innovative in the way that it returns itself, by default, for every method call to it where it makes sense. After you make a selection, that selection is returned as the context of an object that can call upon any other jQuery method and that jQuery method can take the previous selection and do something more with it. You can do this with virtually any language, which is to say, create an object and have the methods of that object return the object itself.
In this section you take a look at the various methods that jQuery provides for modifying a selection in the context of another selection.
Working Within the Context of a Selection
This section introduces a few of jQuery's methods: find(), each(), is(), and val(). This discussion begins with a method used to search for other elements in the context of an existing selection called find(). As I present to you an example of one way you might use thefind() method, you also see in the same example each(), is(), and val(). I provide you with a detailed introduction to each(), is(), and val() later in this section in the context of the explanation for Example 2-2 because I could not begin a discussion about find()without also introducing these other methods. However, to start this leg of your journey into jQuery, you have a look at the find() method, how you might use it, and more important, some techniques you'll want to employ and some behavior you'll want to avoid when you make use of it.
jQuery's find() method enables you to perform a selection within a selection. Another way of saying this is that it lets you search within the context of a selection. A selection, as you have already seen, can contain one element or many elements. Most of the methods that jQuery provides are done with the consistent assumption that a selection can contain just one or many elements. find() is no different; it can be used with a selection containing one or more elements, and it operates to search within the context of every element present in a selection. So, if you have a selection containing just one <form> element, and you use find() on that selection, you'll be looking within just that one <form> element. If you have a selection containing multiple <form> elements, and you use find(), find() will be carried out in the context of each of the <form> elements present in the original selection. So, the first takeaway from using find() is that it can be carried out with selections large and small, and using it can become large and unwieldy quickly.
You use find() if you know that an element (or a collection of elements) contains another element (or collection of elements) somewhere down the DOM tree starting with the pivot of that initial selection. The key thing to remember when turning to find() in your toolbox is that you don't know how far down the tree this additional element or collection of elements might be. For example, if you know that your second selection will be children or siblings of your initial selection, you're better off using the jQuery methodschildren() or siblings() because they're faster for that situation.
find() is a bit of a blunt instrument; it works well and can even be fairly efficient to very efficient depending on the scenario in which it is used, but it is one of the most general-purpose methods of filtering a selection that jQuery provides. Because the DOM can be either large and very complex, or very small and simple, when selecting elements using the jQuery Selectors API in general, without yet even contemplating the best uses of the find() method, it is best to take a step back and remember a few basic things to keep your scripts fast, optimized, and ready to deal with any scenario. First, remember to construct your documents with appropriate and strategically placed unique id names. Id names are meant to be unique; class names are not meant to be unique. Because id names are meant to be unique, if you create a document with unique id names, the browser can use an efficient index to look up any element by the id name in the DOM. Therefore, when you do a selection using jQuery, the fastest possible selection that you can make is one that involves the use of an id name.
Of course, the concept of having unique id names is not something the browser can enforce; you must enforce this when you create your documents. If you don't consciously consider this, the browser will happily allow you to create multiple elements with the same id name. If you do create multiple elements with the same id name, you miss out on the benefits of optimizations that involve narrowing the scope of possible elements in a selection by using the id name as an initial selector. If you use unique id names, then similarly to a database, the browser can build a fast index to access those elements in the DOM. Because it can find those elements quickly, applications built on top of optimizations using id names can also be much quicker.
Think of the DOM like a database table. Even if you aren't familiar with relational databases (like MySQL, SQL Lite, Postgres SQL, or Microsoft SQL Server), the analogy is helpful to understand a little something about how computers organize information for efficient lookup. Like this book, if you want to locate information about a particular topic quickly, your best bet is going to be the book's index section. It has information broken down by topics and phrases, sorted alphabetically, and provides a listing of pages those topics or phrases appear on. Relational databases work much the same way; they contain a warehouse of information, but they need indexes of their own to find information quickly. A relational database has a collection of physical locations on the hard disk, and indexes, just like with physical books, help provide a way of looking up that information quickly. The document object model is no different. It is a collection of HTML elements, and those elements each have attributes that can be used to organize that data. The DOM is also organized like a tree; it has a root element, <html>, and from there it branches, adding children and children of children until the entire DOM is mapped. So, when you provide extra metadata like id and class names, you are providing a way to identify those elements in the DOM, using both JavaScript and CSS. Of course, you don't have to always use id or class names. Sometimes you can use just the name of the element itself to identify the element, and sometimes you need only a handful of class or id names to meaningfully organize your document in a way that makes it easy to style with CSS or program with JavaScript. You can also identify elements using HTML attributes, which is more common in my experience, with elements such as <input> elements, where you might want to apply style based on whether an element is a text input or a password input. And now with HTML5, we have a dozen or so possible types of inputs.
When it comes to the DOM, however, it is best to design your dynamic, interactive applications in the most efficient way possible, and more often than not, that starts with a selection involving an id name. The second most efficient way to select an element will be using class names. Class names differ from id names in that class names can be applied to many elements. Elements with the same class name should share some common characteristics. You should be essentially saying that elements with the same class name are the same, but they appear multiple times in your document. One example might be a class name that applies to an element that serves as a container for labels for input elements. You might have many such labels in your document, and each label will have the same characteristics in terms of its look and feel. You might have a few variations on the look and feel to accommodate edge cases in the visual layout. For those edge cases you might invent a few new class names that can modify the base look and feel for those situations.
Whatever the situation you are creating an application to accommodate, your id and class names should be designed to aid in both efficient styling with CSS and efficient lookup using the DOM in JavaScript. You want your application to find these elements as quickly as possible, using the least amount of additional metadata that is necessary. This will feel like a statement that is at odds with itself, and in some ways it is. You don't want to be too liberal in creating and assigning id and class names because that will make your document more bulky. When it comes to bandwidth, you want to create a document that is the smallest it can be, while also being as programmatically efficient and optimized as it can be. jQuery is just a tool that enables you to access the DOM, and it allows you lots of ways to interact with the DOM. However, it is up to you as the program's architect to make that application efficient, organized, and well designed so that it loads and executes as quickly as possible. In terms of web applications, it is always important to show the user some content as fast as possible. A few seconds can mean the difference between users delighting in and using your website and web applications, or users pressing the back button and taking their attention elsewhere.
The first of many filtering and traversal methods that you examine in this chapter is a method called find(). Its purpose is to look within an existing selection to find other elements in that selection. Those elements can be children of the element, or elements, that you selected or far-off descendants deep down the DOM tree from that initial selection. The initial selection can be one or many elements, and find() will look inside each of them to locate the additional element or elements that you are looking for. As mentioned in the opening for this section, a great thing about jQuery is that it never assumes (whenever practical and possible) that you want to work with only a single element. If you select several elements, it will work with several elements at once. If you select a single element, it will work with only that one element, but it will treat that one element as an array containing one element.
If you examine the object that a jQuery selection returns, you'll always see an array, and that is always the case for jQuery methods that are meant to return something related to a selection. When you aren't working with a selection, but are instead using a method that is meant to return a string or some other data, for example, the HTML source or text source of an element, or the value of an attribute—in those situations, jQuery takes the first element of the selection, if the selection contains multiple elements, and it gives you what you are asking for in the context of that first element. So, you must be proactive and take into account what a selection might return and assume that most of the time, your selection could possibly return multiple elements.
As already stated, it is best to start with a selection that is as narrow as possible so that the browser can quickly locate that element in the DOM. Example 2-2 presents you with a simplified and to-the-point overview of one way you might use find() to locate elements within the context of an existing selection. As with most of the examples present in this book, you can try out the example by manually typing it into a text editor, or you can obtain the example's source code with the book's free downloadable materials available fromwww.wrox.com/go/webdevwithjquery. This example begins with Example 2-2.html:
<!DOCTYPE HTML>
<html xmlns="http://www.w3.org/1999/xhtml">
<head>
<meta http-equiv="content-type"
content="application/xhtml+xml; charset=utf-8" />
<meta http-equiv="content-language" content="en-us" />
<title>Contact Form</title>
<script type='text/javascript' src='../jQuery.js'></script>
<script type='text/javascript' src='Example 2-2.js'></script>
<link type='text/css' href='Example 2-2.css' rel='stylesheet' />
</head>
<body>
<form id='contactNewsletterForm' method='get'
action='Example 2-2 Submitted.html'>
<div>
<label for='contactFirstName'>First Name:</label>
<input type='text'
id='contactFirstName'
name='contactFirstName'
size='25'
maxlength='50'
required='required' />
</div>
<div>
<label for='contactLastName'>Last Name:</label>
<input type='text'
id='contactLastName'
name='contactLastName'
size='25'
maxlength='50'
required='required' />
</div>
<div>
<input type='checkbox'
id='contactNewsletter'
name='contactNewsletter'
value='1' />
<label for='contactNewsletter'>
Subscribe to newsletter?
</label>
</div>
<div>
<input type='submit'
id='contactNewsletterFormSubmit'
name='contactNewsletterFormSubmit'
value='Go' />
</div>
</form>
</body>
</html>
The preceding markup contains a simple newsletter sign-up form. It is combined with the following CSS, Example 2-2.css:
body {
font: 16px Helvetica, Arial, sans-serif;
}
form#contactNewsletterForm {
margin: 10px;
padding: 10px;
border: 1px solid black;
background: yellow;
}
form#contactNewsletterForm div {
padding: 5px;
}
The following JavaScript, Example 2-2.js, is used to validate that required input has been provided in the text input fields, and it disables the submit button upon pressing it, which prevents the user from pressing the submit button multiple times in the event that the action of submitting the form takes longer than desired.
var contactNewsletterForm = {
ready : function()
{
$('input#contactNewsletterFormSubmit').click(
function(event)
{
var input = $(this);
input.attr('disabled', true);
if (!contactNewsletterForm.validate())
{
alert("Please provide both your first and last name");
input.removeAttr('disabled');
event.preventDefault();
}
else
{
$('form#contactNewsletterForm').submit();
}
}
);
},
validate : function()
{
var hasRequiredValues = true;
$('form#contactNewsletterForm').find('input, select, textarea').each(
function()
{
var node = $(this);
if (node.is('[required]'))
{
var value = node.val();
if (!value)
{
hasRequiredValues = false;
return false;
}
}
}
);
return hasRequiredValues;
}
};
$(document).ready(
function()
{
contactNewsletterForm.ready();
}
);
This form is then submitted to the following HTML page, called Example 2-2 Submitted.html, which just confirms that the form was submitted. In the real world, this HTML form would more than likely go to a server-side program that would also validate input and actually perform the action of signing up the user for the newsletter. For this simplified example, you omit that part of the process and focus only on the client-side components.
<!DOCTYPE HTML>
<html xmlns="http://www.w3.org/1999/xhtml">
<head>
<meta http-equiv="content-type"
content="application/xhtml+xml; charset=utf-8" />
<meta http-equiv="content-language" content="en-us" />
<title>Contact Form</title>
<script type='text/javascript' src='../jQuery.js'></script>
<script type='text/javascript' src='Example 2-2.js'></script>
<link type='text/css' href='Example 2-2.css' rel='stylesheet' />
</head>
<body>
<p>
Thank you for submitting the form.
</p>
</body>
</html>
The source code in the preceding examples results in the output that you see in Figure 2.2.
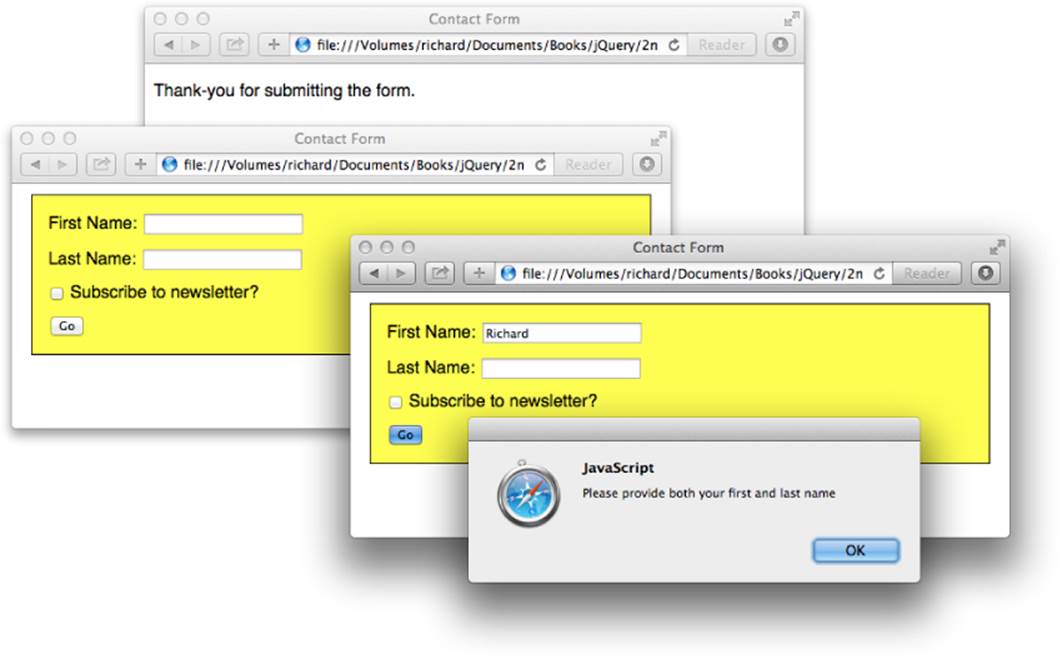
Figure 2.2
In Example 2-2, you see one way you might use the find() method, to validate input for a simple newsletter sign-up form. The text inputs in the HTML form use the HTML5 required attribute to indicate that they are required fields; some browsers with support for HTML5 fields and attributes will already prevent the user from submitting the form without required input. The JavaScript that you implement with this example provides a little more functionality; however, it also prevents the form from being submitted multiple times. In Example 2-2.js, you create a simple JavaScript object literal; this is one way of creating a simple JavaScript custom object. An object called contactNewsletterForm is created, which contains the logic necessary for your newsletter sign-up form. It contains two methods, one called ready() and one called validate(). The ready() method is executed when the document's DOMContentLoaded event has fired, which as you already know is mapped to the jQuery event with the much simpler name of ready. So, as soon as the DOM has loaded, this event will be called, and you can do things with the DOM. contactNewsletterForm.ready() attaches a single event to the submit button. It does this by first selecting the <input> with an id selector, input#contactNewsletterFormSubmit, and then it calls the method click() to attach an onclick event to that <input> element. This allows you to intercept and control what happens when the user clicks the submit button.
ready : function()
{
$('input#contactNewsletterFormSubmit').click(
function(event)
{
var input = $(this);
input.attr('disabled', true);
if (!contactNewsletterForm.validate())
{
alert("Please provide both your first and last name");
input.removeAttr('disabled');
event.preventDefault();
}
else
{
$('form#contactNewsletterForm').submit();
}
}
);
},
Within the function that is attached to the click event of the submit button, the first thing you do is create a variable called input with a call to jQuery with the special this keyword as its first and only argument. As mentioned earlier in this chapter, when an event is called, this refers to the element the event occurred on, but this is not jQuery-enabled. To make it jQuery-capable, all you have to do is to call jQuery with this as the argument. This is how you enable any element in the JavaScript DOM to be jQuery-enabled, not just the special this keyword in the context of events.
var input = $(this);
Next, you disable the submit button so that the user cannot become impatient and click it repeatedly, sending multiple requests to join your newsletter to your server.
input.attr('disabled', true);
Another way of setting the disabled attribute is to call the attr() method like this:
input.attr('disabled', 'disabled');
And you might prefer this method because it is also technically the way that XHTML says that boolean HTML attributes should be done. But jQuery supports doing this either way, by passing a boolean true or false or by passing the value disabled. Likewise, to disable the disabled attribute, you can either pass false in a call, such as attr('disabled', false), or you can remove the attribute all together by calling removeAttr('disabled').
In the next line you make a call to contactNewsletterForm.validate() to see if the form validates. This method returns a boolean value that indicates either yes, all the required fields have been provided, or no, there is missing data.
if (!contactNewsletterForm.validate())
{
If all the required data has not been provided, then users sees an alert() message, asking them to provide both their first and last names.
alert("Please provide both your first and last name");
Then the submit button is re-enabled so that users can attempt to submit the form again.
input.removeAttr('disabled');
I do this by removing the disabled attribute, but as mentioned before you can also call attr('disabled', false) and this provides the same functionality. Finally, the preventDefault() method is called on the event object to prevent the default action of the submit button, which is to submit the form.
event.preventDefault();
If, however, all the data has been provided, then the form is submitted by calling submit() on the <form> element. You might wonder why this is necessary. Because event.preventDefault() is supposed to prevent the default action, wouldn't not calling it allow the default action? In this case, it would not because the default action is also prevented by disabling the submit button by enabling the disabled attribute, and because the button has been disabled, you now have to explicitly submit the form.
}
else
{
$('form#contactNewsletterForm').submit();
}
Next, you examine what happens inside the validate() method. First, you set up a variable that keeps track of whether the required fields have been provided. You start off by assuming that the user did provide every required field by assigning true to the variablehasRequiredValues. Then you make a selection, and you select the <form> element with the id name contactNewsletterForm. As presented earlier in this section, it's good to establish a context for your selections, as this can speed up selections tremendously. In this case, this newsletter sign-up form could be part of a much larger document. You don't want to make the mistake of assuming that your code will or will not be part of a much larger document; it's better to always plan for the most flexible approach possible. Your client or employer might change its mind and decide that it wants to move a form, or include a form, to or within places that you hadn't anticipated when you first built your form. In these situations, it's best to have flexible programming that can adapt to changes quickly and seamlessly. Part of providing the best foundation for flexible (and reusable) programming like this is to establish good naming conventions, as discussed back in Chapter 1. Don't choose names that are too simple and could easily conflict with other features. You may be annoyed by the verbosity of the names, but you will be pleased with the ease with which you can move and integrate features within your website or web-based application.
validate : function()
{
var hasRequiredValues = true;
$('form#contactNewsletterForm').find('input, select, textarea').each(
function()
{
var node = $(this);
if (node.is('[required]'))
{
var value = node.val();
if (!value)
{
hasRequiredValues = false;
return false;
}
}
}
);
return hasRequiredValues;
}
};
So, begin by selecting the form because it has an established id name; it is a pivot point for quickly making other selections. You look inside your <form> element for other elements. In this case you search for <input>, <select>, or <textarea> elements; these are all the possible elements that can be contained inside a form where the user can provide or select data (setting aside, of course, the potential for custom input elements). You might notice that your newsletter form has no <textarea> or <select> elements, and you might be asking yourself, why do I need to look for elements that don't exist? In this case, you're being proactive and simply planning ahead for potential future changes to the form. In addition, your form needs may grow and you might need to rework or adapt this programming logic so that it handles validation for any form you might create by creating a new, reusable form validation component. One way you can plan ahead is to think about how your validation script might be applied, and that includes planning for fields that might not be there yet.
Iterating a Selection with each() and Testing for a Condition with is()
Now that you have selected the various input fields in the context of the <form> element, you use the each() method to iterate over all the elements matching the selection that you made with find(). each() is similar to writing a for loop, or a while loop; it's used to iterate over an array or object. In the context of this example, each() is used to iterate over a selection. In this example, you first select a <form> element, and then you select four <input> elements using the find() method. Now you need to examine each <input> element individually and see whether the user provided data to the input elements that you have designated as required elements. each() is what you use to examine each element, individually. It executes a callback function for each element in the selection. In the context of this example, that means that the function provided to each() is executed four times, one for each of the four <input> elements matched in the call to find().
$('form#contactNewsletterForm').find('input, select, textarea').each(
Like events, elements are passed to each() in the form of the JavaScript keyword: this. In addition to the keyword this, there is also an alternative way that you can access an element within the function that you provide to each(), and that is by specifying two arguments for the function. The first argument tells you where you are in the collection; it's a counter offset from zero. The second argument is the value or object that you're working with, and it provides the same data that is provided in this. The following code snippet modifies Example 2-2 so that it specifies these two optional arguments:
$('form#contactNewsletterForm').find('input, select, textarea').each(
function(counter, element)
{
Also like events, the elements passed to each() in the form of this are not jQuery-enabled by default. So, the first thing you do inside the anonymous function that is executed for each element matched via the each() method is to create a variable with a reference to the element that is jQuery-enabled. In this case you create a variable called node, which is an easy generic name to use. You could have just as easily called the variable input, or something else more specific.
var node = $(this);
Now that you have a jQuery-enabled reference to the element, you look for the presence of the HTML5 required attribute to see if the field is required, and you do that with a call to the jQuery method is(). In the context of any jQuery selection, is() tells you whether any of the elements in the selection match a selector that you provide to is(). In the context of this selection, you have a single element in that selection, thanks to each(), and that selection is assigned to the variable node. The selection will be one of the four matched<input> elements, going from top to bottom. So the first element each() that comes across is the <input> with the id name contactFirstName, the second element will be the <input> with the id name contactLastName, the third will be the check box, and the last element thateach() will operate on is the submit button. The call to is() contains an attribute selector: [required]. Using is(), you are asking, does the element match this selector? Another way of asking this question is does the element match the selector:input[required=”required”] (if the element is an <input> element, of course). And is() will return a boolean value telling you whether the element matches the selector you've provided.
if (node.is('[required]'))
{
In the context of this example, you just want to know whether the element is required, and that is done by using is() to ask whether the element has the required attribute. Because the required attribute is a boolean attribute and its only possible value is required, or to not exist at all, then the simplest way of asking if the element is required is by using the attribute selector [required].
is() can be used to ask any question of an element or collection of elements that can be expressed as a selector. When it comes to multiple elements being present in a selection, the question that you ask using is() is true if it matches any of the elements in the selection. If the selector matches only a single element, but not the other elements, the result is still true. The result is only false if it matches none of the elements present in the selection.
If the element has the required attribute, the expression node.is(‘[required']) will return true, and the program will then examine the value of the input. The value of the input is retrieved with a call to val(), another jQuery method that does some behind-the-scenes work to make it a lot easier to fetch the value of a field, automatically adjusting its logic based on the type of input field that you are working with. It returns the value of the value attribute in the case of an <input> element (no matter the type); it retrieves the selected<option>'s value attribute in the case of a <select> element; and it retrieves the text content of a <textarea> element.
if (node.is('[required]'))
{
var value = node.val();
if (!value)
{
hasRequiredValues = false;
return false;
}
}
Next, you do a simple boolean expression on the value to determine whether there is one. If the expression evaluates to false, there is no value, and the variable you set up to keep track of whether all the provided values were provided, hasRequiredValues, is assigned the value false, and then you return false to break out of subsequent each() iterations.
Within the function that you provide to each(), returning true is the same as writing the keyword continue; iteration proceeds to the next element or item, so if you were on the first element, iteration immediately proceeds to the second element. And returning false from the function is the same as writing the break keyword in a for, while, or switch loop, and iteration stops completely. In the context of this example, if you're on the first <input> element when this happens, then the function is never executed for the second, third, or fourth elements.
Finally, after you have examined each <input> element, the function validate() returns the value of the hasRequiredValues variable, letting your click event know definitively whether all the required values have been provided.
return hasRequiredValues;
In this section, you got to know jQuery a little better with some in-depth explanations of and an example using the methods find(), each(), is(), and val(). The next section continues along the lines of examples of how to traverse the DOM using jQuery with an introduction to the jQuery methods that allow you to move about the DOM.
Working with an Element's Relatives
jQuery provides you with a comprehensive DOM traversal package. You can easily move from an element to its siblings, its parent or ancestors and as its children and its descendants. In this section, you see an example that introduces how to do all this, as well as how to limit a selection to an element based on its numeric offset position in the selection and how to limit a selection's scope by providing a selector that filters your selection based on what you don't want in the selection. The discussion presented in this section encompasses the following methods of jQuery's API:
· parent() and parents() are used to select an element's parent or ancestors.
· children() is used to select an element's immediate children.
· siblings() is used to select all of an element's surrounding sibling elements.
· prev() is used to select an element's immediate preceding sibling.
· next() is used to select an element's immediate following sibling.
· prevAll() is used to select all siblings coming before an element.
· nextAll() is used to select all siblings coming after an element.
· not() is used to remove elements from a selection using a selector.
· eq() is used to zero in on a single element in a selection by providing its offset position within the selection offset from zero.
You can also go up the DOM tree and select parent or ancestor elements. When programming, the need to go up the DOM tree typically arises because you are in a situation in which you have multiples of something in an application. For example, say you have multiple calendars in an application. This could happen because you provide navigation to move from month to month, and instead of deleting each month and building a new one, you keep each month in the application and move between them as needed. If you click on a day within a month, you might also need to know which month that click occurred in which, so you travel up the DOM from the selected day to discover which month the click occurred on. This isn't the only scenario you might want to select a parent or ancestor. You might also run into this situation when you receive an event on an ambiguous or generic element, and you want to get to an element that provides more meta information, class, id name, or other data.
The need to select children() is usually similar to the need to use the find() method introduced earlier in this chapter. The decision of which to use is based on whether you know if an element is a child, or if it is further down the DOM tree. Using children() if an element is a child provides you with some performance benefits. If the browser knows that you want to look only in the pool of immediate children, then that makes finding that element fast. However, using find(), you're potentially asking the browser to examine every descendant element.
jQuery provides no less than five methods for discovering and working with an element's siblings. Whether you need to move to the next sibling element, previous sibling element, find all preceding or all succeeding sibling elements, or all siblings all together, there's a method that matches the situation.
All jQuery's traversal methods share the characteristic of providing a selector to a traversal method to limit traversal to elements that match the provided selector.
Each of the methods introduced here are presented in the following example. If you have downloaded the book's supplemental materials, you'll find this example in the Chapter 2 folder named Example 2-3.
<!DOCTYPE HTML>
<html xmlns="http://www.w3.org/1999/xhtml">
<head>
<meta http-equiv="content-type"
content="application/xhtml+xml; charset=utf-8" />
<meta http-equiv="content-language" content="en-us" />
<title>November 2013</title>
<script type='text/javascript' src='../jQuery.js'></script>
<script type='text/javascript' src='Example 2-3.js'></script>
<link type='text/css' href='Example 2-3.css' rel='stylesheet' />
</head>
<body>
<table class="calendarMonth" data-year="2013" data-month="11">
<thead>
<tr class="calendarHeading">
<th colspan="7">
<span class="calendarMonth">November</span>
<span class="calendarDay"></span>
<span class="calendarYear">2013</span>
</th>
</tr>
<tr class="calendarWeekdays">
<th>Sunday</th>
<th>Monday</th>
<th>Tuesday</th>
<th>Wednesday</th>
<th>Thursday</th>
<th>Friday</th>
<th>Saturday</th>
</tr>
</thead>
<tbody>
<tr>
<td class="calendarLastMonth">27</td>
<td class="calendarLastMonth">28</td>
<td class="calendarLastMonth">29</td>
<td class="calendarLastMonth">30</td>
<td class="calendarLastMonth calendarLastMonthLastDay">31</td>
<td class="calendarFirstDay">1</td>
<td>2</td>
</tr>
<tr>
<td>3</td>
<td>4</td>
<td>5</td>
<td>6</td>
<td>7</td>
<td>8</td>
<td>9</td>
</tr>
<tr>
<td>10</td>
<td>11</td>
<td>12</td>
<td>13</td>
<td>14</td>
<td>15</td>
<td>16</td>
</tr>
<tr>
<td>17</td>
<td>18</td>
<td>19</td>
<td class="calendarToday">20</td>
<td>21</td>
<td>22</td>
<td>23</td>
</tr>
<tr>
<td>24</td>
<td>25</td>
<td>26</td>
<td>27</td>
<td>28</td>
<td>29</td>
<td class="calendarLastDay">30</td>
</tr>
<tr>
<td colspan="7" class="calendarEmptyWeek"></td>
</tr>
</tbody>
</table>
</body>
</html>
The preceding HTML joins up with the following style sheet:
html,
body {
width: 100%;
height: 100%;
}
body {
font: 14px Helvetica, Arial, sans-serif;
margin: 0;
padding: 0;
color: rgb(128, 128, 128);
}
table.calendarMonth {
table-layout: fixed;
width: 100%;
height: 100%;
border-collapse: collapse;
empty-cells: show;
}
table.calendarMonth tbody {
user-select: none;
-webkit-user-select: none;
-moz-user-select: none;
-ms-user-select: none;
}
table.calendarMonth th {
font-weight: 200;
border: 1px solid rgb(224, 224, 224);
padding: 10px;
}
tr.calendarHeading th {
font: 24px Helvetica, Arial, sans-serif;
}
table.calendarMonth td {
border: 1px solid rgb(224, 224, 224);
vertical-align: top;
padding: 10px;
}
td.calendarLastMonth,
td.calendarNextMonth {
color: rgb(204, 204, 204);
background: rgb(244, 244, 244);
}
td.calendarDaySelected {
background: yellow;
}
tr.calendarWeekSelected {
background: lightyellow;
}
td.calendarToday {
background: gold;
}
Finally, you apply the following JavaScript, which provides you with an introduction to some of jQuery's various methods that allow you to traverse the DOM, as well as change and manipulate selections.
$(document).ready(
function()
{
var today = $('td.calendarToday');
var setUpThisWeek = function()
{
$('table.calendarMonth td').removeClass(
'calendarYesterday ' +
'calendarTomorrow ' +
'calendarEarlierThisWeek ' +
'calendarLaterThisWeek ' +
'calendarThisWeek'
);
var yesterday = today.prev('td');
// If today occurs at the beginning of the week, look in the
// preceding row for yesterday.
if (!yesterday.length)
{
var lastWeek = today.parent('tr').prev('tr');
if (lastWeek.length)
{
yesterday = lastWeek.children('td').eq(6);
}
}
// If today occurs in the first cell of the first row of the
// calendar, yesterday won't be present in this month.
if (yesterday.length)
{
yesterday.addClass('calendarYesterday');
}
var tomorrow = today.next('td');
// If today occurs at the end of the week, look in the
// proceeding row for tommorrow.
if (!tomorrow.length)
{
var nextWeek = today.parent('tr').next('tr');
if (nextWeek.length)
{
tomorrow = nextWeek.children('td').eq(0);
}
}
// If today occurs in the last cell of the last row of
// the calendar, tomorrow won't be present in this month.
if (tomorrow.length)
{
tomorrow.addClass('calendarTommorow');
}
var laterThisWeek = today.nextAll('td');
if (laterThisWeek.length)
{
laterThisWeek.addClass('calendarLaterThisWeek');
}
var earlierThisWeek = today.prevAll('td');
if (earlierThisWeek.length)
{
earlierThisWeek.addClass('calendarEarlierThisWeek');
}
today.siblings('td')
.addClass('calendarThisWeek');
};
var selectedDay = null;
$('table.calendarMonth td')
.not('td.calendarLastMonth, td.calendarNextMonth')
.click(
function()
{
if (selectedDay && selectedDay.length)
{
selectedDay
.removeClass('calendarDaySelected')
.parent('tr')
.removeClass('calendarWeekSelected');
}
var day = $(this);
selectedDay = day;
selectedDay
.addClass('calendarDaySelected')
.parent('tr')
.addClass('calendarWeekSelected');
day.parents('table.calendarMonth')
.find('span.calendarDay')
.text(day.text() + ', ');
}
)
.dblclick(
function()
{
today.removeClass('calendarToday');
today = $(this);
today.addClass('calendarToday');
setUpThisWeek();
}
);
setUpThisWeek();
}
);
When you load the calendar that you created in Example 2-3 into a browser, you get the results that you see in Figure 2.3.
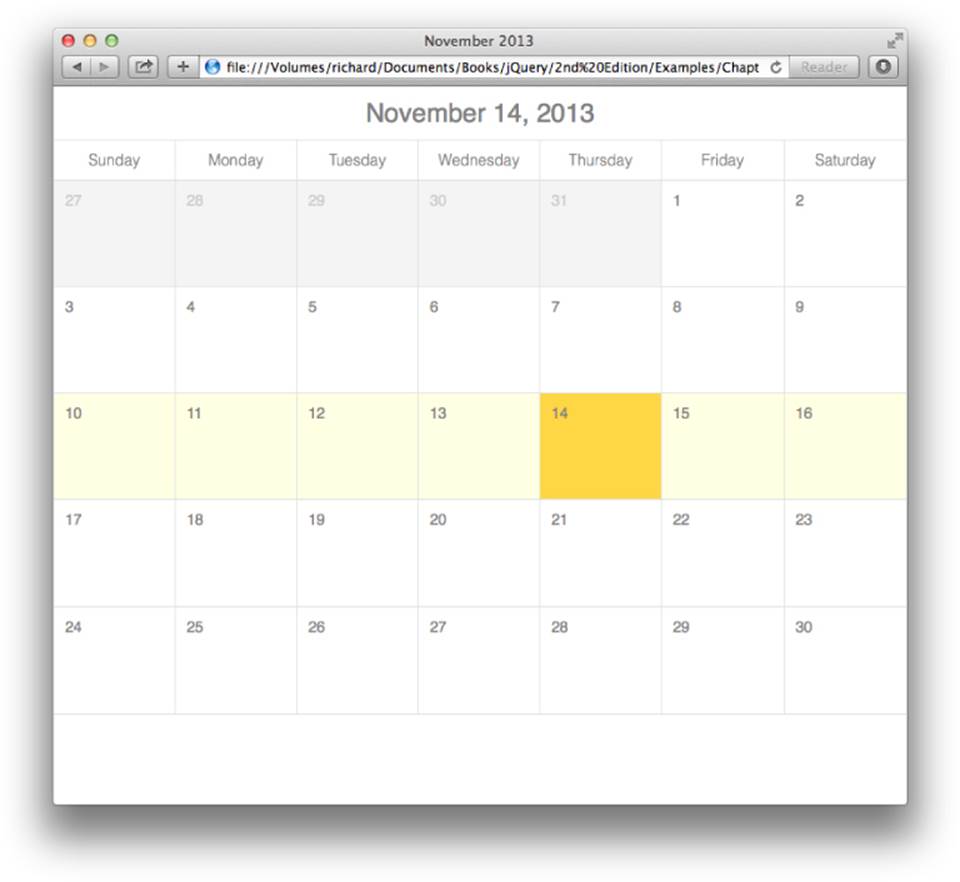
Figure 2.3
Example 2-3 packs several concepts together to provide a more realistic example of how you might use jQuery's traversal methods. Like all previous examples, you start with the DOMContentReady event.
$(document).ready(
function()
{
The first thing you do when the document is ready is set up a variable to contain a reference to today, which contains the <td> element with the class name calendarToday.
var today = $('td.calendarToday');
This example uses all class names because the calendar concept is one in which you might expect to have multiple months loaded into the same document at once.
Next, you create a reusable function that sets up some metadata, mostly as an intellectual exercise. The metadata that you create provides a demonstration of jQuery's various methods for working with siblings as well as children, and the eq() method, which allows you to narrow a selection to a single element based on its position offset from zero. Because the method is created inside the function that executes when the document is ready, this method is available from within all the other functions that you create inside theready() function. The same is true of the variable you created just previous to this called today.
var setUpThisWeek = function()
{
The first thing you do in the function setUpThisWeek is to remove all the class names that are applied later in this same function. You do this by selecting the <td> elements inside of the <table> with class name calendarMonth, and then calling jQuery's removeClass()method. removeClass() can take a single class name or several. If you provide more than one, you simply separate each individual class name with a single space, just as you would if you were specifying class names using the HTML class attribute. This, in turn, removes any of the specified class names if they are present.
$('table.calendarMonth td').removeClass(
'calendarYesterday ' +
'calendarTomorrow ' +
'calendarEarlierThisWeek ' +
'calendarLaterThisWeek ' +
'calendarThisWeek'
);
Next, you create a variable that will contain a reference to yesterday, and that variable is called yesterday. To capture which day is considered yesterday, you start with the day considered today, which you captured previously. Then you move backward a single table cell to the previous day using jQuery's prev() method, which selects the element immediately preceding the element (or elements) referenced by the current selection. In this case, you are working only with a single element, but as with everything else jQuery can do, it will happily allow you to work with multiple elements at the same time. If the selection had contained multiple elements, prev() would work on them all, and it would provide you with a new selection that would provide all preceding adjacent elements. You also provide a selector to prev(), which would limit the adjacent preceding element to a <td> element. In the context of this example, you could easily have left off that selector and you would have the same result. I have included it for two reasons: the first to provide an example of what it means to provide a selector to these methods, the second to make the code a little more intuitive and easier to follow. Because 'td' is specified as the selector, that gives you as a programmer a cue about what the code is doing and what it's operating on.
var yesterday = today.prev('td');
If you're writing a real calendar application, you need to take into account every possible situation regarding where today might occur. It could happen at the beginning of a row or the end of a row. If today occurs at the beginning of a row, then there will be no adjacent <td> element preceding the <td> element representing today. In this case the previous assignment to yesterday will be an empty array, and it will have no length. This is how you check for the existence of a selection in jQuery. If a selection results in nothing, jQuery will return an empty array, and you can then check the length property to see if anything were selected.
if (!yesterday.length)
{
If there were no adjacent preceding element, you need to move to the previous row. To do that, you start with the <td> representing today, and then you move up the DOM from there to that element's parent element using jQuery's parent() method, which will be a<tr> element. When you arrive at the <tr> element, you move backward in the DOM to the preceding <tr> element. You then look at that <tr> element's children elements using jQuery's children() method, which will, of course, all be <td> elements. You then limit the selection of <td> elements to the very last one using the eq() method. Because we're counting from zero, and there are 7 days in a week, that will make the last <td> element the sixth in the selection. Like last time, you provide selectors to the parent(), children(), andprev() methods just to provide more context and information in your programming.
var lastWeek = today.parent('tr').prev('tr');
if (lastWeek.length)
{
yesterday = lastWeek.children('td').eq(6);
}
}
It is still possible that there is no <td> element representing yesterday because today could be the first of the month and thus could occur as the first child of the first <tr> element. So, another check for length ensures that a <td> element has been selected to represent yesterday. When it is determined that a <td> element for yesterday exists, it is assigned the class name calendarYesterday.
if (yesterday.length)
{
yesterday.addClass('calendarYesterday');
}
Now that you have figured out which, if any, <td> element will represent yesterday, the next step is figuring out which <td> element will represent tomorrow. This time you move forward a <td> element by using jQuery's next() method on the selection representing today, and this will reference the adjacent following <td> element. Any selection is assigned to a variable called tomorrow.
var tomorrow = today.next('td');
As with yesterday, you are not certain that there is a <td> element that is adjacent and following the <td> element representing today, so again you check the length property to see if a selection were made.
if (!tomorrow.length)
{
If there is no <td> element, you again move up the DOM to the parent <tr> element from the <td> element representing today, and you proceed to the next <tr> element using next(). Then you look at that <tr> element's children via children() (if there is a next row in the first place), and you limit the selection to the first <td> element of that row by calling eq(0). Zero, this time, represents the first child <td> element.
var nextWeek = today.parent('tr').next('tr');
if (nextWeek.length)
{
tomorrow = nextWeek.children('td').eq(0);
}
}
When you have determined which element, if any, represents tomorrow, you check to see if you have a selection, and if you do, you add the class name calendarTomorrow to that <td> element.
if (tomorrow.length)
{
tomorrow.addClass('calendarTommorow');
}
The next exercise is to identify all days after today, which will represent later this week. That is done by calling nextAll() on the selection representing today, which brings back a selection of <td> elements, all of which are siblings to the <td> element representing today, but all occur after today.
var laterThisWeek = today.nextAll('td');
if (laterThisWeek.length)
{
If there is a selection of <td> elements, those <td> elements all receive the class name calendarLaterThisWeek.
laterThisWeek.addClass('calendarLaterThisWeek');
}
Then, you do the same thing to identify <td> elements that will qualify for the phrase earlier this week. To identify those elements, you call prevAll() on today to select all <td> elements preceding the <td> element representing today.
var earlierThisWeek = today.prevAll('td');
if (earlierThisWeek.length)
{
If there are <td> elements assigned to the variable earlierThisWeek, those <td> elements each receive the class name calendarEarlierThisWeek.
earlierThisWeek.addClass('calendarEarlierThisWeek');
}
Finally, you identify all sibling elements of the <td> element representing today using jQuery's siblings() method, and those elements are all given the class name calendarThisWeek.
today.siblings('td')
.addClass('calendarThisWeek');
};
The exercise of sibling discovery that you underwent with the method setUpThisWeek() can be explored using a tool like Web Inspector in Safari or Chrome, Firebug in Firefox, and Developer Tools in IE. Pictured in Figure 2.4 is Web Inspector in Safari, which shows the class names that you assigned for each <td> element representing a day or collection of days in the week surrounding the <td> element that represents today.
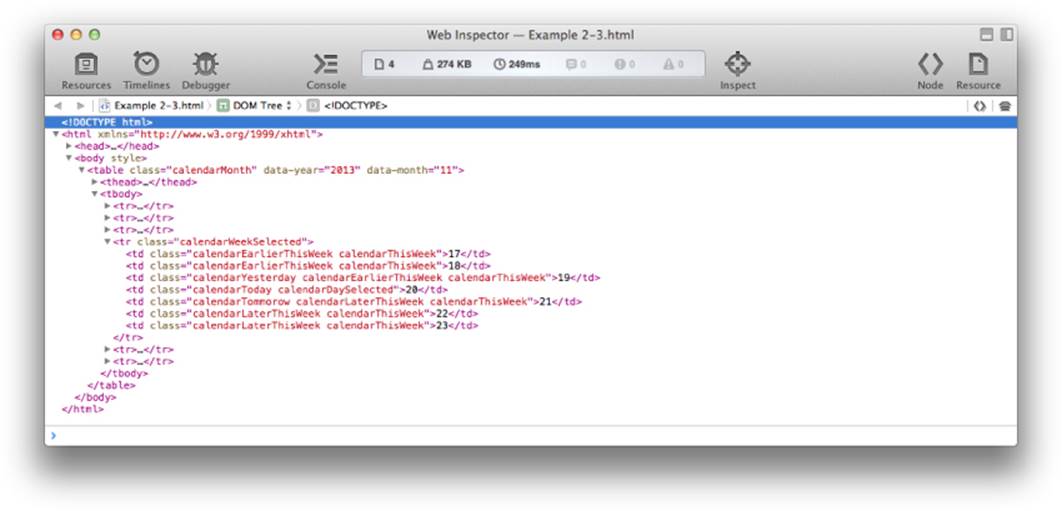
Figure 2.4
The next hunk of code defines some interactivity with the calendar:
· Selecting a day in the calendar
· Selecting the week that day occurs within
· Setting the selected day in date format in the calendar heading
· Changing the day that represents today
The first thing you do is to create a new variable that will keep track of the selected day. This variable is created outside the function that fires when you click each day, so that it can persist and remain present between click events. And that variable is calledselectedDay.
var selectedDay = null;
You then make a selection that starts out with all the <td> elements that are present in the <table> representing the month.
$('table.calendarMonth td')
That selection is then narrowed to exclude the <td> elements that represent the remaining days of last month, or the beginning days of next month, even though this particular example has none of the days of the following month included because it ends evenly, filling all seven of the child spots within the last <tr> element. These <td> elements are excluded from the selection by using jQuery's not() method. The not() method takes an existing selection and subtracts from it using a selector.
The not() method can also take the results of another jQuery selection, such as
.not($('td.calendarLastMonth, td.calendarNextMonth'))
It can also use direct DOM element objects, such as those returned from JavaScript methods such as document.getElementById(). Finally, you can also use a callback function, which would return one of the preceding, a jQuery selection, or a direct DOM element object reference. This same thing is true of many jQuery API methods; where it makes sense and is possible, you can often use a jQuery selection, which is an array of elements returned from jQuery, a direct DOM object reference, or a callback function.
.not('td.calendarLastMonth, td.calendarNextMonth')
Having now excluded the elements you don't want selectable in the current month, the remaining <td> elements each receive an onclick event via click() and jQuery's event API, which I cover in more detail in Chapter 3, “Events.”
.click(
function()
{
When a click occurs, the first thing that you do is to use the selectedDay variable that you created to keep track of the selected day. You first see if you have stored a selection in this variable by checking the length property. If you have stored a selection, that selection is used to remove the class name calendarDaySelected from the last <td> element that was given this class name, and you remove the class name calendarWeekSelected from the last <tr> element to have received that class name. This ensures that only one <td> element has that class name with any given click, and is the only selected day, and that element's parent <tr> element is the only <tr> element to be the selected week. Sans this logic, you would potentially be selecting many <td> and many <tr> elements as the selected day and week, respectively.
if (selectedDay && selectedDay.length)
{
selectedDay
.removeClass('calendarDaySelected')
.parent('tr')
.removeClass('calendarWeekSelected');
}
Following the selected day logic, you assign a variable called day with $(this), which is the element currently experiencing the click event made jQuery-able.
var day = $(this);
The day is then assigned to selectedDay, where it will persist and remain until the next click event occurs.
selectedDay = day;
The selected day then receives the class name calendarDaySelected, and then its parent <tr> element also receives the class name calendarWeekSelected.
selectedDay
.addClass('calendarDaySelected')
.parent('tr')
.addClass('calendarWeekSelected');
Then you travel up the DOM from the selected day all the way to the <td> element's ancestor <table> element. You go from there to find the <span> with class name calendarDay, which is then assigned text content. That in turn places the selected day in the calendar header in date format, for example, November 23, 2013. The call to day.text() returns the text content of the selected day; in this case this is the number representing the day of the month, and that is appended to a string containing a comma and a space. Theparents() method is used to go from an element to that element's parent or ancestor, allowing you to go all the way up the DOM tree to the root <html> element. The selector that you provide to parents() tells the parents() method what element or elements you want to include as you travel up the DOM tree. If you were to also include the jQuery proprietary :first pseudo-class in that selector, such as, table.calendarMonth:first, this would also trigger the parents() method to halt the search when it comes to the first element that matches the provided selector, and it would therefore also provide you with better performance than the selector that I used, which causes jQuery to examine the entire DOM ancestry so that it is sure it has matched every possible element.
day.parents('table.calendarMonth')
.find('span.calendarDay')
.text(day.text() + ', ');
}
)
The next event that you create is a double-click event using jQuery's dblclick() method. Creating this event enables you to change the day that is considered to be today.
.dblclick(
function()
{
To change the element considered to be today, you first remove the class name calendarToday from the present <td> element with that moniker. You assign the double-clicked <td> element to today. You add the class name calendarToday to the new element.
today.removeClass('calendarToday');
today = $(this);
today.addClass('calendarToday');
Then you call setUpThisWeek() again to recalculate which days are considered yesterday, tomorrow, earlier this week, later this week, and this week.
setUpThisWeek();
}
);
Finally, the last thing that you do within the anonymous function assigned to the ready() event is to call setUpThisWeek(), which sets up the week relative to the element considered today when the document is initially loaded.
setUpThisWeek();
The last concepts presented in this chapter are just some notes about two additional methods that jQuery provides. In my own experience, I haven't had a cause to use these methods often, but they may be useful to you. Those two methods are slice() and add().
Slicing a Selection
The slice() method is similar to the eq() method; it selects a subset of a selection based on the offset position of elements in a selection. It does this using one or two arguments. If you provide just one argument, you provide the starting point for the slice. Take the following example of the places of Middle Earth:
<!DOCTYPE HTML>
<html xmlns="http://www.w3.org/1999/xhtml">
<head>
<meta http-equiv="content-type"
content="application/xhtml+xml; charset=utf-8" />
<meta http-equiv="content-language" content="en-us" />
<title>Places in Middle-Earth</title>
</head>
<body>
<ul>
<li>The Shire</li>
<li>Fangorn Forest</li>
<li>Rohan</li>
<li>Gondor</li>
<li>Mordor</li>
</ul>
</body>
</html>
Using $('li').slice(1), the argument 1 indicates where the slice begins, so slice(1) would include all elements from <li>Fangorn Forest</li> to <li>Mordor</li>. Therefore, using a single argument, counting from zero, your selection includes that element onward.
When supplying two arguments, the first argument is the offset position of the first element you'd like to include in the resulting selection counting from zero, and the second argument is the offset position of the last element you'd like to include in the resulting selection, also offset from zero. This creates a new selection where the elements in that selection include a range of elements starting with that first element and ending with the last element. So, slice(0, 2) would start with element number zero and end with element number 1. The selection goes from 0–2, but it does not include element #2 itself. So, this selection will include <li>The Shire</li> and <li>Fangorn Forest</li>.
Adding to a Selection
Finally, I introduce you to the add() method. The add() method is the inverse to the not() method, and it is used to add to an existing selection. The following HTML, again, represents places in Middle Earth:
<!DOCTYPE HTML>
<html xmlns="http://www.w3.org/1999/xhtml">
<head>
<meta http-equiv="content-type"
content="application/xhtml+xml; charset=utf-8" />
<meta http-equiv="content-language" content="en-us" />
<title>Places in Middle-Earth</title>
</head>
<body>
<ul id='middleEarthPlaces'>
<li>The Shire</li>
<li>Fangorn Forest</li>
<li>Rohan</li>
<li>Gondor</li>
<li>Mordor</li>
</ul>
<ul id='middleEarthMorePlaces'>
<li>Osgiliath</li>
<li>Minas Tirith</li>
<li>Mirkwood Forest</li>
</ul>
</body>
</html>
A simple demonstration of the add() method is to make an initial selection, such as $('ul#middleEarthPlaces li'), which selects all the <li> elements in the first <ul> element. Then you can add to that selection with a class like this:
$('ul#middleEarthPlaces li').add('ul#middleEarthMorePlaces li');
The resulting selection now includes all the <li> elements present in the document because you first selected the <li> elements in the first <ul> element, and then you added to that selection the <li> elements of the second <ul> element.
Like the not() method, you can add elements to a selection using the result of a jQuery selection, just like this:
$('ul#middleEarthPlaces li').add($('ul#middleEarthMorePlaces li'));
You can also use direct DOM object references, like this:
$('ul#middleEarthPlaces li').add(
document.getElementById('middleEarthMorePlaces').childNodes
);
And you can use callback functions that return either jQuery selections or direct DOM object references:
$('ul#middleEarthPlaces li').add(
function()
{
return document.getElementById('middleEarthMorePlaces').childNodes;
}
);
The add() method allows you to add elements to a selection using any of these methods. In Chapter 4, “Manipulating Content and Attributes,” you'll learn how you can even use a string containing HTML to add to a selection.
NOTE Appendix C, “Selecting, Traversing, and Filtering,” provides a reference for all jQuery's selection and filtering methods.
Summary
In this chapter, you've seen some examples that give you a comprehensive overview of jQuery's selection and filtering abilities. You learned how jQuery provides ridiculously fine-grained control over selecting elements from the DOM, so fine-grained that you'll often find that there are multiple ways to achieve the same results.
jQuery's selection and filtering methods go much further than what you get with JavaScript alone, which more often than not would take several lines of code to come to the same level of control over a selection.
jQuery harnesses the power, ease, familiarity, and convenience of selectors to help you get anywhere in the DOM you want to go. The selector syntax, you'll find, is the same as what you're used to using with CSS; jQuery even supports a few extensions of its own. SeeAppendix B, “jQuery Selectors,” for a full listing of selector syntax supported by jQuery.
jQuery's filtering methods let you select descendants using the find() method, ancestors using the parents() method, and siblings using the siblings(), prev(), prevAll(), next(), and nextAll() methods. You can add elements using the add() method or exclude elements using the not() method. And you can also get even more specific using the slice() and eq() methods. See Appendix C for a full list of methods related to selection and filtering.
Exercises
1. What other client-side technology does jQuery have a lot in common with in terms of its fine-grained control over the selection of elements from the markup source?
2. If you wanted to select an element from the DOM using jQuery based on an ancestral relationship, which method would you use?
3. If you want to swap an element's position in the DOM with its preceding sibling, what jQuery method would help with that application?
4. If you have selected an element and want to select one of that element's descendants from the DOM, what methods does jQuery provide that would give you the results you seek?
5. If you made a selection but later wanted to remove one or more elements from that selection, what jQuery method would you use?
6. If you wanted to select only a single element from a broader selection, what jQuery method would you use?
7. List all the methods that jQuery provides for working with sibling elements.
8. How would you add elements to a selection using jQuery?
All materials on the site are licensed Creative Commons Attribution-Sharealike 3.0 Unported CC BY-SA 3.0 & GNU Free Documentation License (GFDL)
If you are the copyright holder of any material contained on our site and intend to remove it, please contact our site administrator for approval.
© 2016-2026 All site design rights belong to S.Y.A.