Web Development with jQuery (2015)
Part I. The jQuery API
Chapter 6. CSS
When working with CSS from JavaScript, a few minor points of verbosity and inconsistency exist where jQuery can lend a helping hand. jQuery makes it easier to manipulate CSS from JavaScript. jQuery's approach enables you to define styles for multiple CSS properties at once, or one CSS property at a time. But instead of setting CSS properties one element at a time, you can set the style on one or many elements at once.
As mentioned in Chapter 4, “Manipulating Content and Attributes,” and in Chapter 1, “Introduction to jQuery,” it's generally good practice to avoid mixing style (CSS) with behavior (JavaScript) and structure (HTML). You want to keep CSS, JavaScript, and HTML partitioned as cleanly as possible into their respective documents.
In some cases, however, it is unavoidable to bring presentation into your JavaScript programming; for example, it may have already been done the wrong or more-difficult-to-maintain way long before you ever arrived. In these cases, the style changes dynamically in such a way that it is impractical and unreasonable to keep CSS only in a style sheet and not directly modify style with JavaScript programming. This chapter covers the methods that jQuery exposes that enable you to work with style-sheet properties and values.
Working with CSS Properties
Instead of messing around with the style property as you may be used to doing with traditional JavaScript, when you want to access style information or modify style information with jQuery, you use jQuery's css() method. You can use the css() method in three different ways:
· To return a property's value from the first element matched in a selection
· To set a property's value on one or more elements
· To set multiple properties on one or more elements
When you simply want to get a property's value for an element, this is what you do:
var backgroundColor = $('div').css('backgroundColor');
Note that because you are accessing the property through JavaScript as a string, you have the option of either using camelCase or specifying the property name with a hyphen, as it is done in a style sheet. This is also valid:
var backgroundColor = $('div').css('background-color');
After you make a selection, you call the css() method chained to the selection with the property that you want the value for. The snippet of code here returns the backgroundColor for the first <div> element of the selection, so if there are five <div> elements present in a document, the preceding code would return the background-color for the first one.
If you want to retrieve multiple properties, you specify an array of properties to retrieve, and an object of property/value pairs are retrieved from the element.
var properties = $('div').css([
'background-color',
'color',
'padding',
'box-shadow'
]);
The preceding example returns an object containing the specified properties. Remember, you can always dump the content of a variable to the JavaScript console using the console.log() method, if you want to know what value a variable contains.
If you want to set the value of a single property, that's done like this:
$('div').css('background-color', 'lightblue');
In the preceding example, the background-color of all <div> elements in the document is set to lightblue.
Setting multiple properties for multiple elements can be done like this:
$('div').css({
backgroundColor : 'lightblue',
border : '1px solid lightgrey',
padding : '5px'
});
Or this:
$('div').css({
'background-color' : 'lightblue',
border : '1px solid lightgrey',
padding : '5px'
});
An object literal with key, value pairs is passed to the css() method. In the preceding example, the background-color is set to lightblue, the border is set to 1px solid lightgrey, and the padding is set to 5px for all the <div> elements in the document. You can use hyphenated property names like this as well, but you must place quotes around any property names that contain hyphens.
jQuery's Pseudo-Classes
In CSS the pseudo-class marks a condition or state. For example, the :hover pseudo-class is for styling an element when the mouse cursor comes over the element. The styles that you specify for the :hover state are only in effect while the mouse cursor resides above an element. jQuery adds a few pseudo-classes that make more sense in the JavaScript world than in the CSS world.
Some pseudo-classes that jQuery provides are not feasible in CSS. For example, jQuery's :parent pseudo-class moves a selection from one or more elements to the parent element(s) of that/those element(s). This cannot be done in CSS because of the incremental rendering rule. A style sheet must be applied as it is downloaded to a DOM that is being created as it may also be downloading. Because of the incremental rendering rule, which is part of what can make a browser appear to load a page blazingly fast, having to step backward in the DOM poses a technical challenge similar to reversing the flow of a river. If everything is built to flow in one direction, from the bottom up, going from the top to the bottom introduces hurdles, obstacles, and potential glitches. For this reason, the W3C's CSS working group has been resistant to introduce any type of parent or ancestor selector.
In JavaScript, however, there are no such limitations. You're most likely already waiting for the DOM and, by extension, the associated style sheets to be loaded before you do things with the document.
NOTE All of jQuery's pseudo-class extensions, in addition to the various types of standard selectors supported by jQuery, are documented in Appendix B, “CSS Selectors Supported by jQuery.”
Obtaining Outer Dimensions
In traditional JavaScript, when you want to get the width of an element—which includes the CSS width, in addition to border width and padding width—you use the property offsetWidth. Using jQuery, this information is available when you call the methodouterWidth(), which provides the offsetWidth of the first element in a selection. This gives you a pixel measurement including width, border, and padding. Likewise, the outerHeight() method does the same with height; it includes CSS height, padding height, and border height.
NOTE You can also ask for margin length to be included in the return value by setting the first argument to outerWidth() or outerHeight() to true.
To demonstrate how you would use the css(), outerWidth(), and outerHeight() methods, the following example, Example 6-1, shows you how to make a custom context menu that leverages these methods to set a custom context menu's position within the document. The context menu is the menu your browser provides when you click the right button on a three-button mouse, use the two-finger tap gesture on a Mac, or hold down the [Ctrl] key and click also on a Mac. Given the various operating system differences in producing a context menu, the action of producing a context menu will hereafter be referred to as a contextual click. This menu pops up at the location of your mouse cursor. You begin with the following XHTML.
<!DOCTYPE HTML>
<html lang='en'>
<head>
<meta http-equiv='X-UA-Compatible' content='IE=Edge' />
<meta charset='utf-8' />
<title>Context Menu Example</title>
<script src='../jQuery.js'></script>
<script src='../jQueryUI.js'></script>
<script src='Example 6-1.js'></script>
<link href='Example 6-1.css' rel='stylesheet' />
</head>
<body>
<h4>Context Menu Example</h4>
<div id='contextMenu'>
</div>
</body>
</html>
The preceding markup is styled with the following style sheet:
body {
font: 12px "Lucida Grande", Arial, sans-serif;
color: rgb(50, 50, 50);
margin: 0;
padding: 0 10px;
}
div#contextMenu {
width: 150px;
height: 150px;
background: yellowgreen;
border: 1px solid gold;
padding: 10px;
position: absolute;
left: 0;
right: 0;
display: none;
}
The following JavaScript defines the behavior that enables the context menu to function:
$(document).ready(
function()
{
var contextMenuOn = false;
$(document).on(
'contextmenu',
function(event)
{
event.preventDefault();
var contextMenu = $('div#contextMenu');
contextMenu.show();
// The following bit gets the dimensions of the viewport
// Thanks to quirksmode.org
var vpx, vpy;
if (self.innerHeight)
{
// all except Explorer
vpx = self.innerWidth;
vpy = self.innerHeight;
}
else if (document.documentElement &&
document.documentElement.clientHeight)
{
// Explorer 6 Strict Mode
vpx = document.documentElement.clientWidth;
vpy = document.documentElement.clientHeight;
}
else if (document.body)
{
// other Explorers
vpx = document.body.clientWidth;
vpy = document.body.clientHeight;
}
// Reset offset values to their defaults
contextMenu.css({
top : 'auto',
right : 'auto',
bottom : 'auto',
left : 'auto'
});
// If the height or width of the context menu is greater than
// the amount of pixels from the point of click to the right or
// bottom edge of the viewport adjust the offset accordingly
if (contextMenu.outerHeight() > (vpy - event.pageY))
{
contextMenu.css('bottom', (vpy - event.pageY) + 'px');
}
else
{
contextMenu.css('top', event.pageY + 'px');
}
if (contextMenu.outerWidth() > (vpx - event.pageX))
{
contextMenu.css('right', (vpx - event.pageX) + 'px');
}
else
{
contextMenu.css('left', event.pageX + 'px');
}
}
);
$('div#contextMenu').hover(
function()
{
contextMenuOn = true;
},
function()
{
contextMenuOn = false;
}
);
$(document).mousedown(
function()
{
if (!contextMenuOn)
{
$('div#contextMenu').hide();
}
}
);
}
);
The preceding example produces output similar to Figure 6.1.
NOTE Remember: You can download all the book's examples for free from www.wrox.com/go/webdevwithjquery
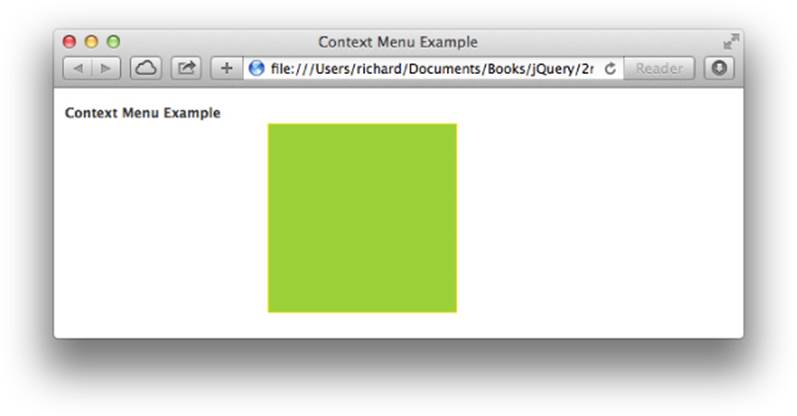
Figure 6.1
Before we explain the concepts in this example, consider this. Although replacing the context menu that your browser provides can be used to provide useful functionality that can go much further in making your web-based applications look and feel like desktop applications, you should be cautious about the scenarios that you choose to invoke custom context menu functionality. The context menu is also heavily used by browser users to do simple things like navigate forward or backward from their present location, to reload the current page, or to do other useful tasks associated with using the browser. But if your web application recklessly takes control of the context menu, you risk alienating or annoying your user base because your application prevents the user from accessing and interacting with his browser in the way he normally would. In addition, disabling the browser's context menu will not prevent users from seeing your application's source code because you can still go to the browser's main menu and click the View Source option.
More savvy users can bypass JavaScript by disabling it or even directly access your source code through other means, such as via your browser's cache or by accessing the source code from your website directly from a command line or script. If you're considering disabling the context menu for this purpose, you may want to reconsider publishing your web application for public consumption because this method of preventing access to your website's source code is ineffective and is subject to numerous workarounds. Remember, content you place on the web is, by design, made to be publicly consumed and transportable to browsers of all kinds residing on platforms of all kinds. The key thing to keep in mind is that rendering your markup and executing your JavaScript is entirely optional.
That said, the preceding example takes a <div> with perfectly square dimensions that takes the place of your browser's default context menu. When you do a contextual click on the document (anywhere in the browser window), the <div> acting as the replacement context menu appears and is positioned based on where the click occurred.
First, you set up the event that fires when the user accesses the context menu. This is done using jQuery's on() method because jQuery does not provide a contextmenu() method. It should also be noted that contextmenu events can be disabled in Firefox; they are enabled by default.
The following code thus far disables the browser's default context menu when the user tries to access the context menu with the mouse cursor within the document window:
$(document).on(
'contextmenu',
function(event)
{
event.preventDefault();
Next, the <div> element that acts as the context menu is selected and assigned to the contextMenu variable, and that <div> element is made visible with jQuery's show() method.
var contextMenu = $('div#contextMenu');
contextMenu.show();
When you create your own context menu, you want to have the position of your context menu change depending on where in the browser window the context menu is accessed. If the user accesses the context menu close to the left and top sides of the window, you want your context menu to position itself from the left and the top. If the user accesses the context menu from the right and bottom of the window, then you want the context menu to intelligently reposition from the right and bottom and do this without any part of the context menu being obstructed.
To make the context menu so that it dynamically repositions itself depending on where it is accessed, you need to do a little bit of math. The first bits of data that you need to do that math are the dimensions of the viewport. Use the dimensions of the viewport to help determine how the context menu should be positioned relative to the place where the user accesses it. Getting the viewport's dimensions, unfortunately, is one of those fringe areas in which different browsers implement different methods of doing the same thing, and jQuery doesn't provide a neat, unified method of patching over this particular difference. This is less of a nuisance today because recent versions of Internet Explorer have come more in line with the defined standards. The following code intelligently obtains the viewport's dimensions depending on the browser's implementation:
// The following bit gets the dimensions of the viewport
// Thanks to quirksmode.org
var vpx, vpy;
if (self.innerHeight)
{
// all except Explorer
vpx = self.innerWidth;
vpy = self.innerHeight;
}
else if (document.documentElement &&
document.documentElement.clientHeight)
{
// Explorer 6 Strict Mode
vpx = document.documentElement.clientWidth;
vpy = document.documentElement.clientHeight;
}
else if (document.body)
{
// other Explorers
vpx = document.body.clientWidth;
vpy = document.body.clientHeight;
}
// Reset offset values to their defaults
contextMenu.css({
top : 'auto',
right : 'auto',
bottom : 'auto',
left : 'auto'
});
Before you actually position the context menu, you need to reset your context menu's offset positions to the defaults. All four offsets have to be reset because the next portion of code will set at least two of the offset properties to the correct values, and the two that are set can vary depending on where the user accesses the context menu. You don't, for example, want the positions you set the last time the user accessed the context menu to persist to this time because that may create a conflict. To reset each offset position, you use jQuery's css() method to set the top, right, bottom, and left offset properties back to each property's default value, auto.
// Reset offset values to their defaults
contextMenu.css({
top : 'auto',
right : 'auto',
bottom : 'auto',
left : 'auto'
});
Now you're ready to mathematically determine the proper position for the context menu. To get the right position, you want to know if the outerHeight() of the <div> element you're using for the menu exceeds the browser's viewport height (specified in the vpyvariable) minus the vertical point of the mouse cursor's position (provided in event.pageY), relative to the document. If the outerHeight() is bigger than this calculation, it means that the menu should be positioned from the bottom, rather than from the top; otherwise, the menu would be clipped.
// If the height or width of the context menu is greater than
// the amount of pixels from the point of click to the right
// or bottom edge of the viewport adjust the offset accordingly
if (contextMenu.outerHeight() > (vpy - event.pageY))
{
contextMenu.css('bottom', (vpy - event.pageY) + 'px');
}
else
{
contextMenu.css('top', event.pageY + 'px');
}
The same calculation is done for the horizontal portion. If the outerWidth() of the menu is greater than the width of the viewport (specified in the vpx variable) minus the horizontal coordinate of the mouse cursor's position (provided in event.pageX), relative to the document, the menu should be positioned from the right, rather than the left; otherwise, the menu would be clipped horizontally.
if (contextMenu.outerWidth() > (vpx - event.pageX))
{
contextMenu.css('right', (vpx - event.pageX) + 'px');
}
else
{
contextMenu.css('left', event.pageX + 'px');
}
That's all there is to positioning the context menu correctly based on where the user clicks in the document. The additional code handles revealing and hiding the context menu at the right moments. At the beginning of the document, you declare the following variable:
var contextMenuOn = false;
The preceding variable is used to track whether the user's mouse cursor is over the context menu when it is active. When the user's mouse cursor leaves the context menu, this variable is set to false; when the user's mouse cursor is present, this variable is set to true. This boolean value is then used to toggle the menu off when the user clicks an area outside the context menu and keeps the menu active when the user clicks the menu itself.
The following code handles the part that sets the contextMenuOn variable to either true or false via passing two event handlers to jQuery's hover() method:
$('div#contextMenu').hover(
function()
{
contextMenuOn = true;
},
function()
{
contextMenuOn = false;
}
);
Then the following code hides the menu when the user clicks anywhere outside the menu because the variable is false in that case and keeps the menu on when the user actually clicks the menu.
$(document).mousedown(
function()
{
if (!contextMenuOn)
{
$('div#contextMenu').hide();
}
}
);
jQuery's API as it relates to CSS is documented in Appendix B and Appendix H.
Summary
In this chapter, you learned how to get the value of an element's CSS property using jQuery's css() method. You also learned how to manipulate an element's style using the same css() method, which can be done by passing a property and value to the css() method as two separate strings, or by passing an object literal with one or more property, value pairs.
jQuery provides the offsetHeight and offsetWidth properties by calling the methods outerHeight() or outerWidth(). These methods return an element's pixel width or height, including padding and borders. You can also specifically add margin to the value returned by these methods.
Finally, these methods were reiterated with a real-world-oriented example that shows you how to replace the browser's default context menu with your own. In this situation, you want to use jQuery's css() method to set CSS property values, rather than a style sheet, because the values set are set dynamically.
Exercises
1. What script would you use if you want to obtain the value of the color property for a <div> element using jQuery?
2. If you want to set the background color of a web page using jQuery, what code would you use?
3. If you need to set padding, a margin, and a border on a set of <div> elements using jQuery, what would the code look like?
4. What is the jQuery method that returns an element's pixel width including border and padding dimensions called?
5. If you wanted to obtain a <div> element's pixel height including a border, padding, and margins using jQuery, what would the code look like?
All materials on the site are licensed Creative Commons Attribution-Sharealike 3.0 Unported CC BY-SA 3.0 & GNU Free Documentation License (GFDL)
If you are the copyright holder of any material contained on our site and intend to remove it, please contact our site administrator for approval.
© 2016-2025 All site design rights belong to S.Y.A.