MEAN Machine - A beginner's practical guide to the JavaScript stack (2015)
Starting Node
Let’s look at how we can start to build out our Node applications. We’ll go through basic Node configuration, installing npm packages, and creating a simple app.
Configuration (package.json)
Node applications are configured within a file called package.json. You will need a package.json file for each project you create.
This file is where you configure the name of your project, versions, repository, author, and the all important dependencies.
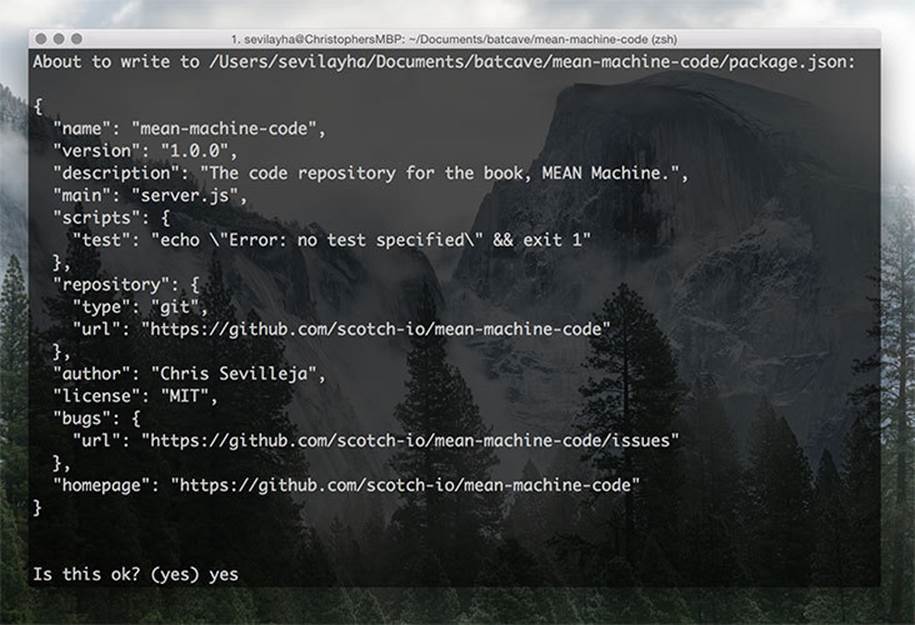
Here is a sample package.json file:
1 {
2 "name": "mean-machine-code",
3 "version": "1.0.0",
4 "description": "The code repository for the book, MEAN Machine.",
5 "main": "server.js",
6 "repository": {
7 "type": "git",
8 "url": "https://github.com/scotch-io/mean-machine-code"
9 },
10 "dependencies": {
11 "express": "latest",
12 "mongoose": "latest"
13 },
14 "author": "Chris Sevilleja & Holly Lloyd",
15 "license": "MIT",
16 "homepage": "https://github.com/scotch-io/mean-machine-code"
17 }
That seems overwhelming at first, but if you take it line by line, you can see that a lot of the attributes created here make it easier for other developers to jump into the project. We’ll look through all these different parts later in the book, but here’s a very simple package.json with only the required parts.
1 {
2 "name": "mean-machine-code",
3 "main": "server.js"
4 }
These are the most basic required attributes.
main tells Node which file to use when we want to start our applications. We’ll name that file server.js for all of our applications and that will be where we start our applications.
For more of the attributes that can be specified in our package.json files, here are the package.json docs.
Initialize Node App
The package.json file is how we will start every application. It can be hard to remember exactly what goes into a package.json file, so npm has created an easy to remember command that let’s you build out your package.json file quickly and easily. That command is npm init.
Let’s create a sample project and test out the npm init command.
1. Create a folder: mkdir awesome-test
2. Jump into that folder: cd awesome-test
3. Start our Node project: npm init
It will give you a few options that you can leave as default or customize as you wish. For now, you can leave everything default except for the main (entry point) file. Ours will be called server.js.
You can see that our new package.json file is built and we have our first Node project!
NPM Init
Since we have a package.json file now, we can go into our command line and type node server.js to start up this Node app! It will just throw an error since we haven’t created the server.js file that we want to use to begin our Node application. Not very encouraging to see an error on our first time starting a Node server! Let’s change that and make an application that does something.
Creating a Very Simple Node App
Open up your package.json file and delete everything except those basic requirements:
1 {
2 "name": "awesome-test",
3 "main": "server.js"
4 }
Now we will need to create the server.js file. The only thing we will do here is console.log out some information. console.log() is the way we dump information to our console. We’re going to use it to send a message when we start up our Node app.
Here is our server.js file’s contents.
1 console.log('ITS MY FIRST NODE APP! OH AND I GUESS HELLO WORLD');
Now we can start up our Node application by going into our command line and typing: node server.js
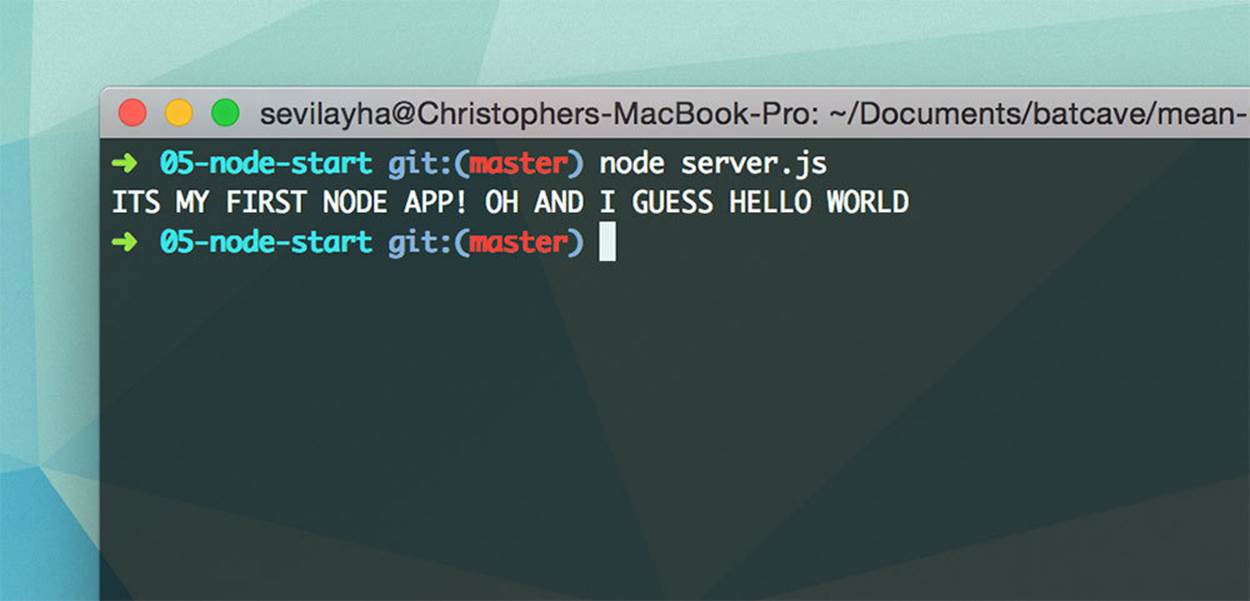
node server.js
Starting a Node Application
To start a Node application, you just go into the command line and type:
node server.js
server.js is what we defined to be our main file in package.json so that’s the file we will specify when starting. Our server will now be stopped since all we did was console.log(), but in the future, if you would like to stop your Node server, you can just type ‘ctrl c’.

Tip
Restarting a Node Application on File Changes
By default, the node server.js command will start up our application, but it won’t restart when file changes are made. This can become tedious when we are developing since we will have to shut down and restart every time we make a change.
Luckily there is an npm package that will watch for file changes and restart our server when changes are detected. This package is called nodemon and to install it, just go into your command line and type: npm install -g nodemon. The -g modifier means that this package will be installed globally for your system. Now, instead of using node server.js, we are able to use:
nodemon server.js
Again, if you’re getting the error that nodemon command isn’t found you’ll have to edit your PATH in environment variables. A quick way to do this is type ‘npm config get prefix’. This will show you the path to npm. To add this to your PATH variable type in
‘set PATH %PATH%;c:\whateverthepathis’ where ‘whateverthepathis’ is the result of npm config get prefix
You will probably have to restart your computer but after that you’re ready to go!
Feel free to go into your server.js file and make changes. Then watch the magic happen when application restarts itself!

nodemon server.js
For the rest of this book, we will reference nodemon when we want to start a server. It’s just the easier option when developing.
We’ve now configured a real simple Node app and started it up from our command line. We’re one step closer to building full blown Node applications that are ready to show off to the world.
Packages
Packages extend the functionality of our application. Like we talked about in our earlier Primers section, even one of the 4 main parts of the MEAN stack, Express, is a Node package.
Let’s look at how we can add and install packages. Once we’ve talked about getting packages into our application, we will move on to using the other components of the MEAN stack.
Installing Packages
The package.json file is where we have defined our application name and the main file to start our application. This is also where we will define the packages that are needed.
There are two ways we can add packages to our project: writing them directly into package.json and installing via the command line. Both of these ways will add the packages we need to the dependencies section of package.json.
Method 1. Writing Packages Directly into Package.json
Here is a package.json file that we have added the Express dependency to.
1 {
2 "name": "packages-install",
3 "main": "server.js",
4 "dependencies": {
5 "express": "~4.8.6"
6 }
7 }
Just like that, we now have Express set as a package for our application and have two parts of the MEAN stack! (_E_N)

Note: npm Version Numbers
You may be wondering what that tilde (~) is doing next to the version number of Express. npm uses semantic versioning when declaring package versions. This means that the tilde will pull in the version that is reasonably close to the one you specified. In this example, only versions of Express that are greater than 4.8.6 and less than 4.9 will be installed.
The three numbers each stand for a different portion of that version. For example, in express 4.8.6 the 4 represents a major version, 8 represents minor version, and 6 represents a patch. Usually bug fixes will be categorized as a patch and shouldn’t break anything. A minor version update will add new features, but still not break your previous code. And a major update might break existing code, which might make you want to pull your hair out as some of you may already know.
Using this type of versioning is good practice because we ensure that only the version we specify will be pulled into our project. We will be able to grab bug fixes up to the 4.9 version, but not any major changes that would come with the 5.0 version.
If we revisit this application in the future and use npm install, we know exactly what version of Express we are using and that we won’t break our app by bringing in any newer versions since we made this project.
Method 2. Adding Packages from the Command Line
The second way to add packages to our application is to use the npm shortcuts from the command line. This is often times the easier and better route since npm can automatically save the package to your package.json file. And here’s the cool part: it will add the right version number! If you write packages into package.json you’ll have to dig around online to find the right version number. This method makes life much easier.
Here is the command to install express and the --save modifier will add it to package.json.
npm install express --save
You’ll notice that the above command grabs the express package and installs it into a new folder called node_modules. This is where packages live inside Node projects. This command installs only the packages that we call specifically (express in this case).
Installing All Packages
Method 2 will install packages for us. Method 1 will add the packages to your package.json, but it won’t install them just yet. To install all the packages inside the dependencies attribute of package.json to the node_modules folder, just type:
npm install
That will look at the dependencies we need and pull them into our application in the node_modules.
Installing Multiple Packages
npm also comes with a handy way to install multiple packages. Just type in all the packages you want into one npm install command and they will be brought into the project.
npm install express mongoose passport --save
This is a simple and easy way to bring in the packages needed.
Recap
Now when we want to start up a new Node project, we just need to run two commands in the folder we want to create the project:
1. npm init
2. Fill out the fields necessary when prompted to create your package.json file.
3. npm install express --save
Just like that we have everything we need to set up our application!
Let’s move forward and dig into using Express and Node to set up the foundation of our MEAN stack apps.
All materials on the site are licensed Creative Commons Attribution-Sharealike 3.0 Unported CC BY-SA 3.0 & GNU Free Documentation License (GFDL)
If you are the copyright holder of any material contained on our site and intend to remove it, please contact our site administrator for approval.
© 2016-2026 All site design rights belong to S.Y.A.