MEAN Machine - A beginner's practical guide to the JavaScript stack (2015)
Using MongoDB
MongoDB has been touted as an easy to use database that provides high performance and availability. We’ve already spoken on the virtues of MongoDB in the Primers section of the book (Chapter 3).
In this chapter, we will talk about installing MongoDB and using it locally so that we are able to use it for future applications.

MongoDB
In addition to installing MongoDB locally, we will create a database on a hosted solution like Modulus.io or mongolab.
Mongolab
To reiterate the benefits of MongoDB in a stack like the MEAN stack, the document-oriented storage allows us to make development easier across the entire stack. Since we are using JSON style documents in our database, they can be used the same way all the way from the database (MongoDB) to the server (Node.js) to the front-end (AngularJS).
Let’s get to the installation and simple usage of MongoDB.
Installing MongoDB Locally
There are a few steps to know when using MongoDB locally. This process is the same for the different OSes, although the small details of each step may be different. The main steps are:
1. Install MongoDB
2. Create a folder (with proper permissions) to store database data
3. Start the MongoDB service
4. Connect or use in an application after the service is started
Let’s get to the installation procedures for Mac and Windows (Linux instructions can be found at the MongoDB docs), and then we will move onto some basic commands that can be used within MongoDB.
Mac Installation
The default folder when [installing on a Mac] will be /data/db. This is where everything will be stored and you must make sure that you have permissions to this folder so that MongoDB can write to it.
We can install on Macs using either Homebrew or manually. We’ll be focusing on Homebrew for this article.
1 // update your packages
2 $ brew update
3
4
5 // install mongoDB
6 $ brew install mongodb
Make sure that everything works by running:
1 $ mongod
This will start the MongoDB service and you should see waiting for connections on port 27017. If you see an error about permissions, make sure you change the permissions on your /data/db folder so that you have the proper permissions.
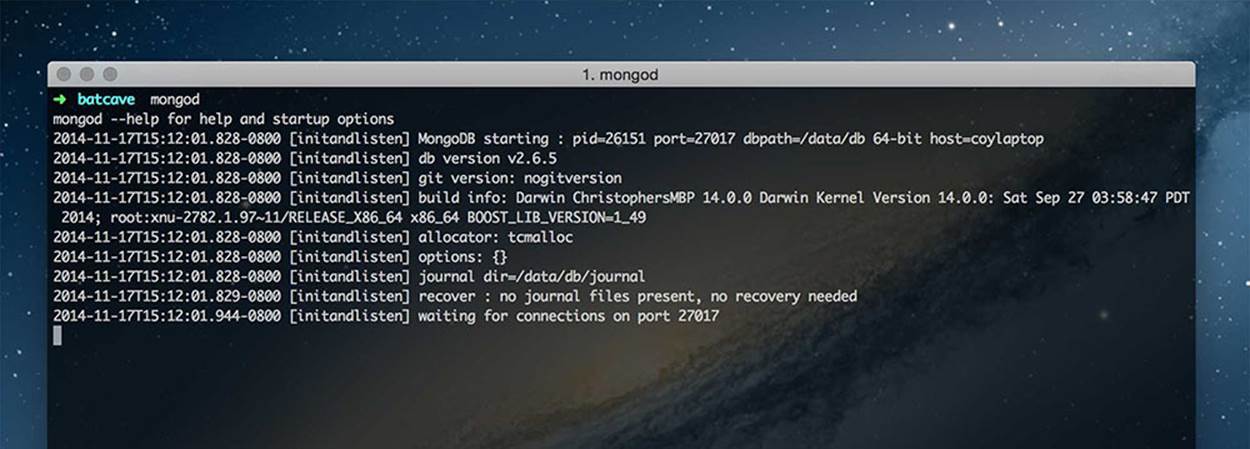
Starting MongoDB Service
Now that the MongoDB service has started, we can connect to it using:
mongo
Make sure that you run this command in a separate terminal so that we are sure the service is still running.
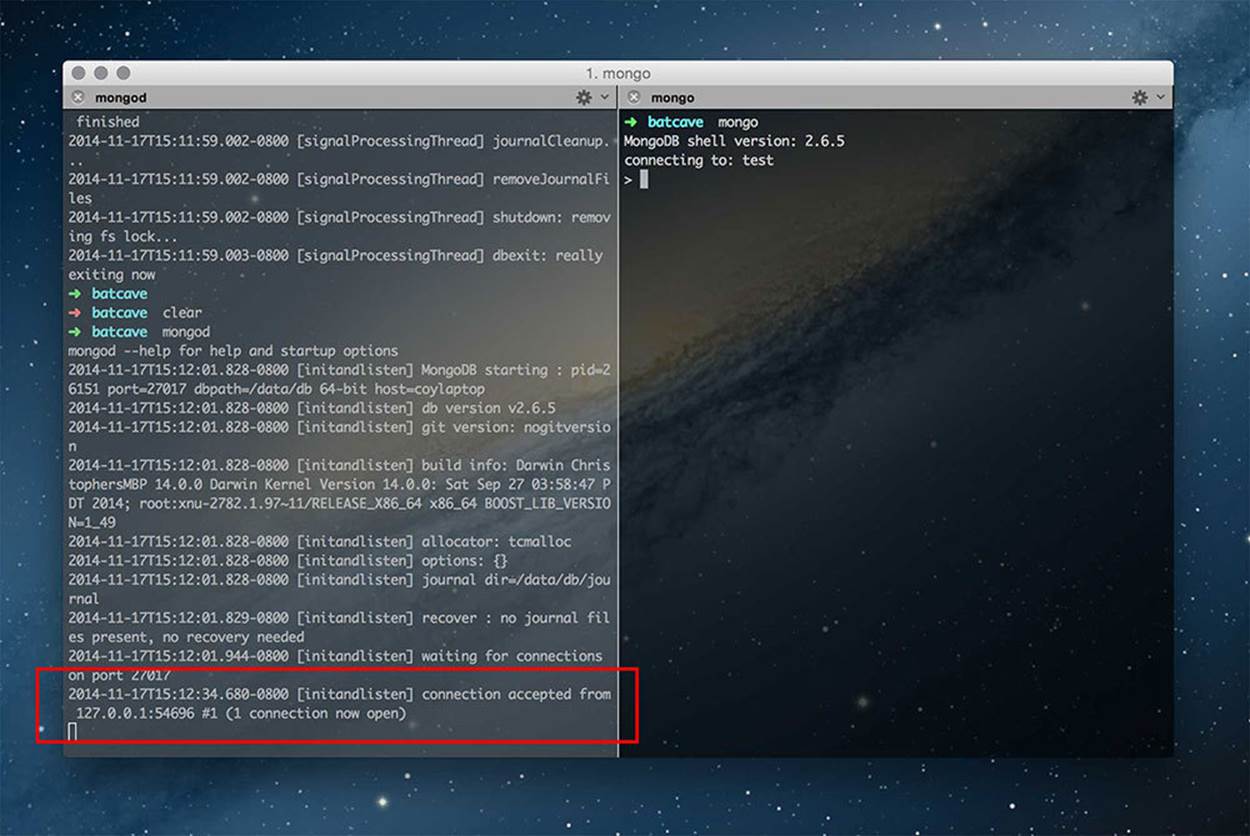
Connecting to MongoDB
You will see the connection happen on the terminal where the service is started. Go ahead and skip past this next section on Windows installation and we’ll get to using MongoDB with simple commands.
Windows Installation
Windows setup is fairly straightforward. Start by downloading MongoDB here. Once that downloads, you’re going to want to add the path to the MongoDB executable (usually the Program Files folder) to your environment variables so that you can run Mongo without explicitly typing the full path every single time.
Open up your Environment Variables and enter the path to the bin folder where you installed MongoDB (we are using C:\Program Files\MongoDB 2.6 Standard\bin). If you already have something in your PATH variable, you can add a semi-colon and insert the new path right after.
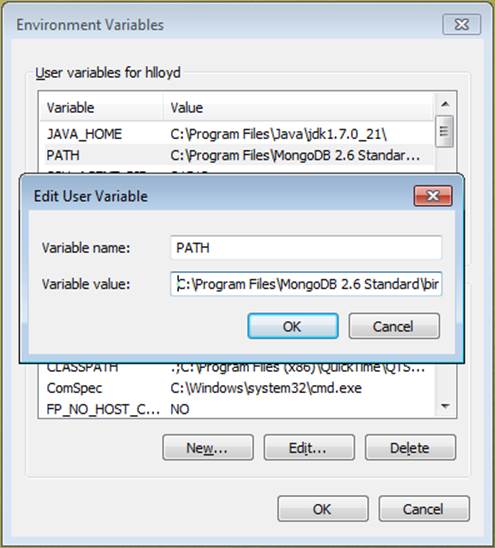
MongoDB Environment Variable
Now you should be able to run:
mongod
in your command line. One common error you may get is dbpath (\data\db) does not exist. If you receive this error, go ahead and create this path inside of your C directory ‘C:\data\db’. This is where all your data will be stored.
If you would like to specify a path different than the default data/db, you can pass in a path like so:
mongod --dbpath path/to/folder
Once you create the path, start up mongo with ‘mongod’ and you should see “waiting for connections on port 27017”. If you didn’t create the PATH just navigate to the where your saved your executable, something like “C:Program FilesMongodb\bin" and startup your mongo connection with ‘mongod.exe’.
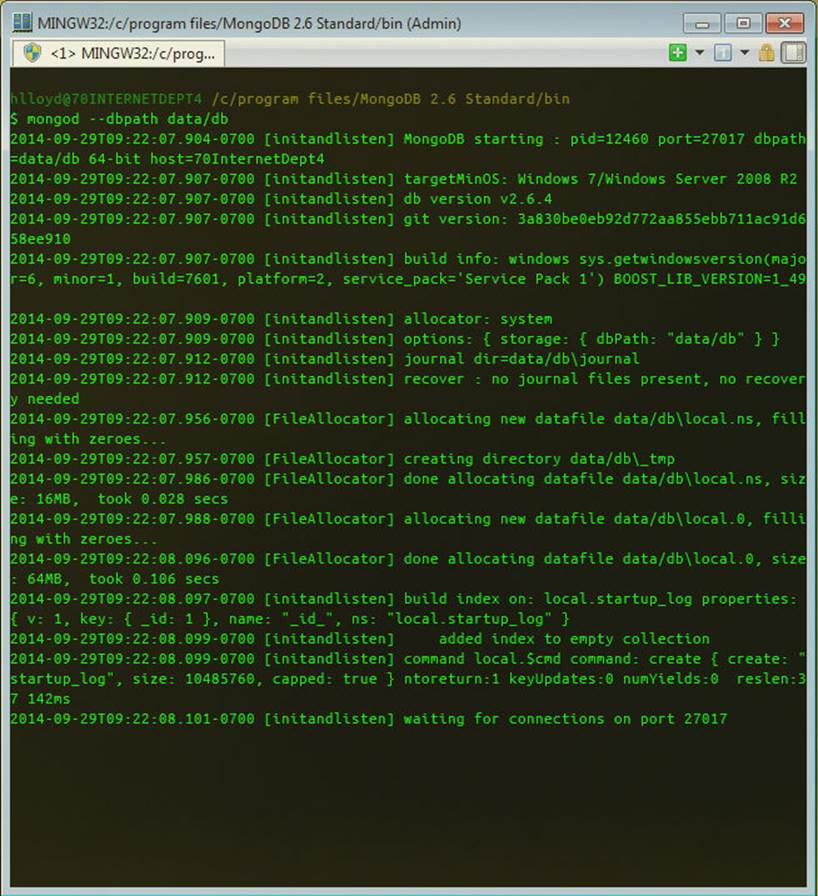
Starting MongoDB
Now we will be able to connect to our database and run some commands! Important: Make sure you leave mongo running in that console and open up a new one to test out these commands.
Common Database Commands
Queries in a document database system may be a little different than what you’re used to. Rather than making a query for items in tables, we’re going to be querying collections of documents.
Since everything is stored in JSON style documents, our syntax will be similar to how we would query our information in our applications.
Once we have connected to our MongoDB instance using mongod and mongo, we can start viewing the available databases and using them. Here are the common commands.
List All Databases
1 $ show databases
Creating a Database
MongoDB will not create a database unless you insert information into that database.
The trick is you don’t have to worry about explicitly creating a database! You can just use a database (even if it’s not created), create a collection and document, and everything will automatically be made for you!
We’ll look at creating collections and documents in the CRUD Commands section.
Show Current Database
1 $ db
Select a Database
1 $ use db_name
Now that we have the database basics, let’s get to the main CRUD commands.
CRUD Commands
By using the following commands, we can get familiar with MongoDB commands. These commands will be similar to how we will handle CRUD operations in our Node.js applications.
Create
1 // save one user
2 $ db.users.save({ name: 'Chris' });
3
4 // save multiple users
5 $ db.users.save([{ name: 'Chris'}, { name: 'Holly' }]);
By saving a document into the users collection of the database you are currently in, you have successfully created both the database and collection if they did not already exist.
Read
1 // show all users
2 $ db.users.find();
3
4 // find a specific user
5 $ db.users.find({ name: 'Holly' });
Update
1 db.users.update({ name: 'Holly' }, { name: 'Holly Lloyd' });
Delete
1 // remove all
2 db.users.remove({});
3
4 // remove one
5 db.users.remove({ name: 'Holly' });
This is just a quick overview of the types of commands you can run. The MongoDB docs are quite comprehensive and provide a great deal of detail for those that want to dive deeper.
MongoDB also provides a great interactive tutorial for you to walk through the above commands.
GUI Tool: Robomongo
While it’s easy enough to use our command line to get into our MongoDB databases, there’s also a GUI for those that are inclined.
Go ahead and download Robomongo and fire it up.
Creating a connection to our database is very easy. Just set the address to localhost and the port to 27017. Name your connection anything you want.
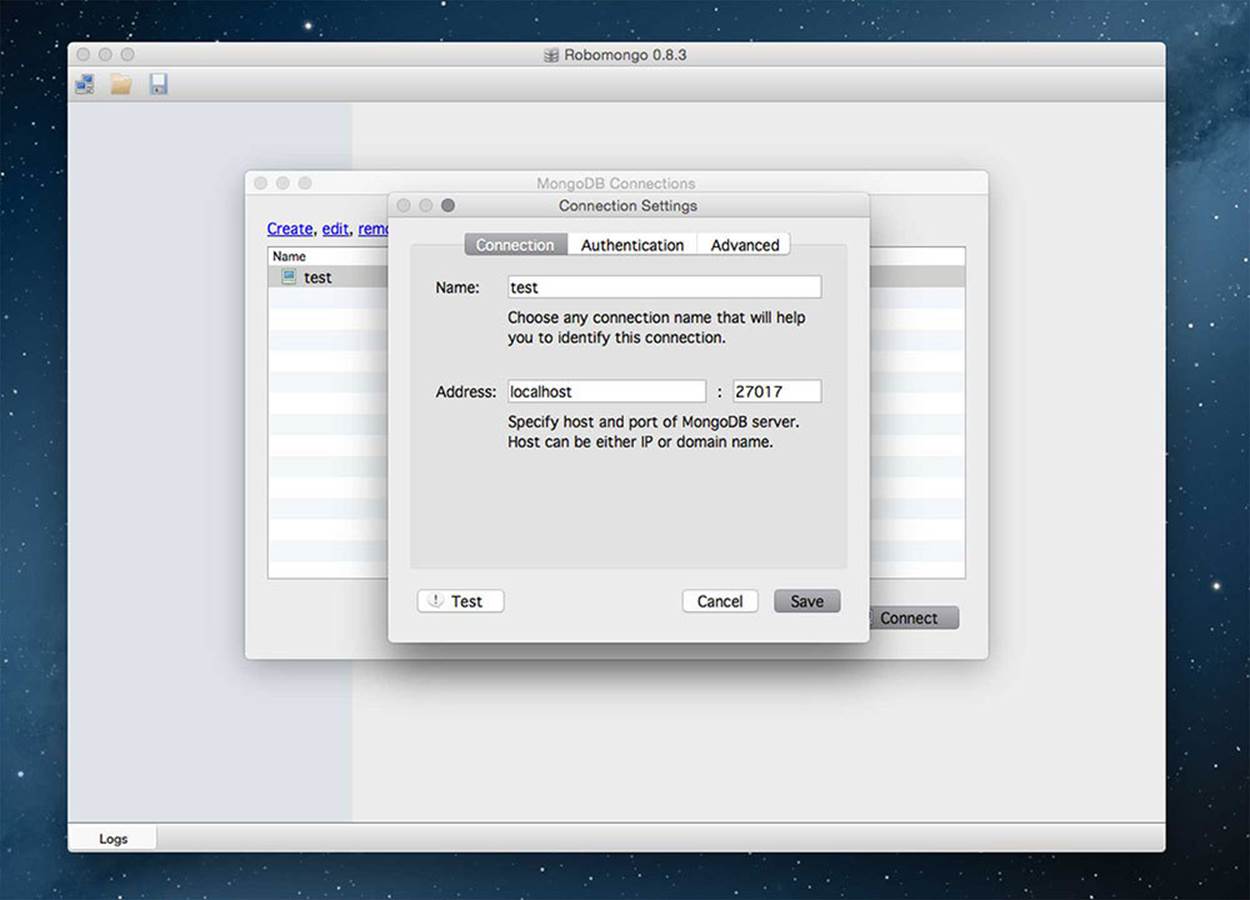
Robomongo Connect
Then once you connect, you have access to all the databases and their respective collections! You now have a GUI to handle database operations and you can even open a shell to get down and dirty with the commands we discussed earlier.
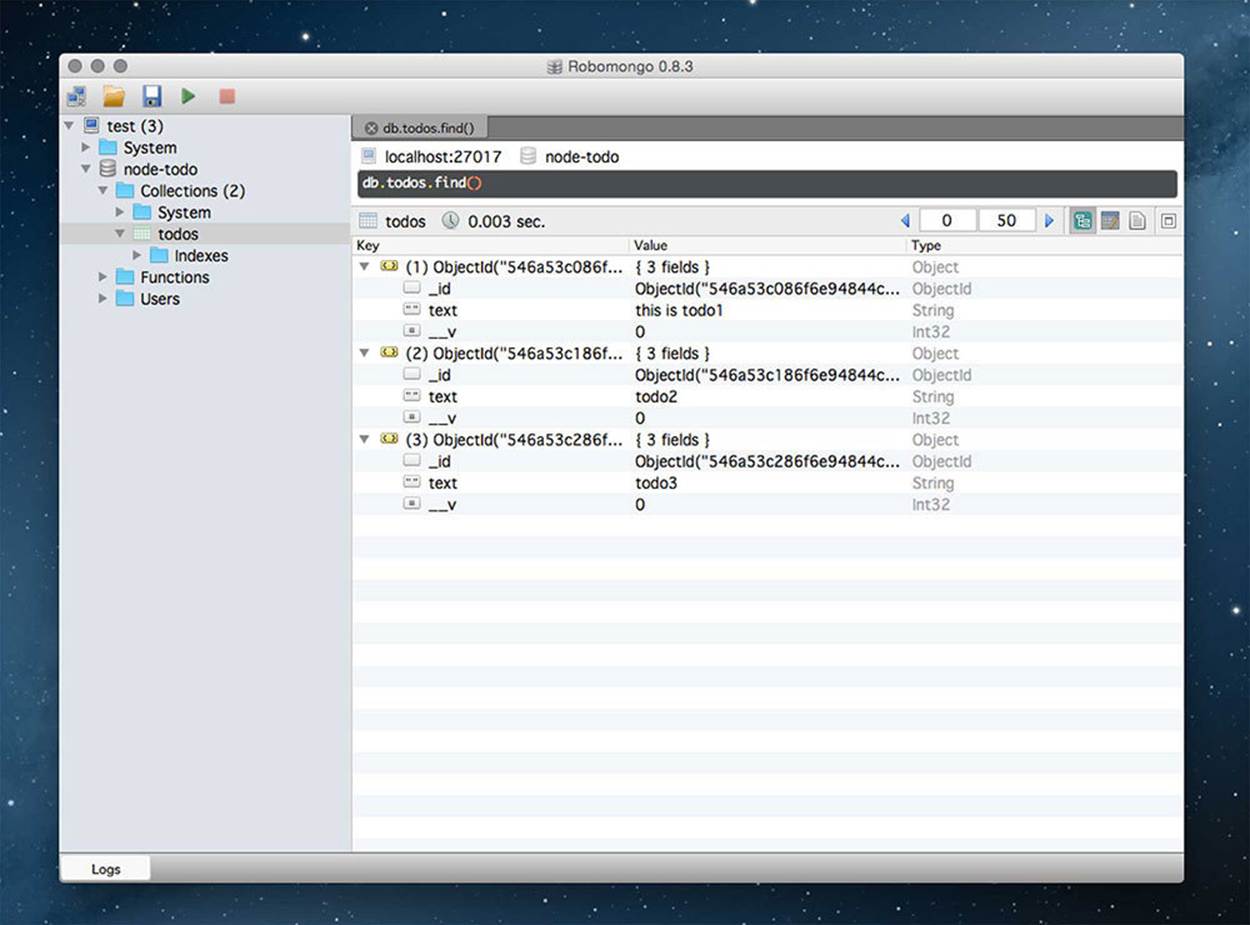
Robomongo Connect to Database
Using MongoDB in a Node.js Application
As you can see, using a local instance of MongoDB is a pretty straightforward process. Moving forward, feel free to either use a local instance of MongoDB or a hosted one (modulus.io or mongolab.com).
Either way, we will use mongooseJS, the Node package for working with MongoDB.
All you have to do is configure mongoose to connect to a local database. This is a simple process since we don’t even need to create the database. If we ware working with a local MongoDB, we just have to make sure that MongoDB is started up by running the command:
1 $ mongod
Connecting to a MongoDB Database Using Mongoose
Connecting to a database is a very simple process. Here’s some sample code to connect to a database in Node.
1 // grab the packages we need
2 var mongoose = require('mongoose');
3
4 mongoose.connect('mongodb://localhost/db_name');
That’s it! Once we start saving things into our database, that database named db_name will automatically be created.
Now that we have an understanding of MongoDB and using it, let’s implement CRUD and use MongoDB with mongooseJS inside of a Node.js application.
We’re going to be building a Node.js API next.
All materials on the site are licensed Creative Commons Attribution-Sharealike 3.0 Unported CC BY-SA 3.0 & GNU Free Documentation License (GFDL)
If you are the copyright holder of any material contained on our site and intend to remove it, please contact our site administrator for approval.
© 2016-2026 All site design rights belong to S.Y.A.