Java 8 Recipes, 2th Edition (2014)
CHAPTER 17. JavaFX on the Web
JavaFX provides new capabilities to interoperate with HTML5. The underlying web page–rendering engine in JavaFX is the popular open-source API called Webkit. Webkit is also used in Google’s Chrome and Apple’s Safari browsers. HTML5 content consists of JavaScript, CSS, Scalable Vector Graphics (SVG), and new HTML element tags. The relationship between JavaFX and HTML5 is important because they complement one another by drawing from each of their individual strengths. For instance, JavaFX’s rich client APIs coupled with HTML5’s rich web content create a user experience resembling a web application with the characteristics of desktop software. This new breed of applications is called Rich Client Applications.
This chapter covers the following topics:
· Embedding JavaFX applications in an HTML web page
· Displaying HTML5 content
· Manipulating HTML5 content with Java code
· Responding to HTML events
· Displaying content from the database
JavaFX does not replace HTML5, or the other way around. Rather, they complement each other, and this chapter contains recipes that demonstrate the strengths of using these two technologies together.
17-1. Embedding JavaFX Applications in a Web Page
Problem
You want to incorporate JavaFX applications into web pages.
Solution
Create a Hello World application using the NetBeans IDE 8.0 or later by using its new project wizard to create an application to run in a browser. Here are steps to follow to create a Hello World JavaFX application that is embedded in an HTML web page:
![]() Note For in-depth JavaFX deployment strategies, refer to Oracle’s deploying JavaFX applications at http://docs.oracle.com/javafx/2/deployment/deployment_toolkit.htm.
Note For in-depth JavaFX deployment strategies, refer to Oracle’s deploying JavaFX applications at http://docs.oracle.com/javafx/2/deployment/deployment_toolkit.htm.
Here are the steps for running the new project wizard:
1. Select New Project from the File menu in NetBeans IDE version 8 or later.
2. Select JavaFX in the Categories section under Choose Project, as shown in Figure 17-1. Next, select JavaFX Application under Projects. Then click Next to proceed.
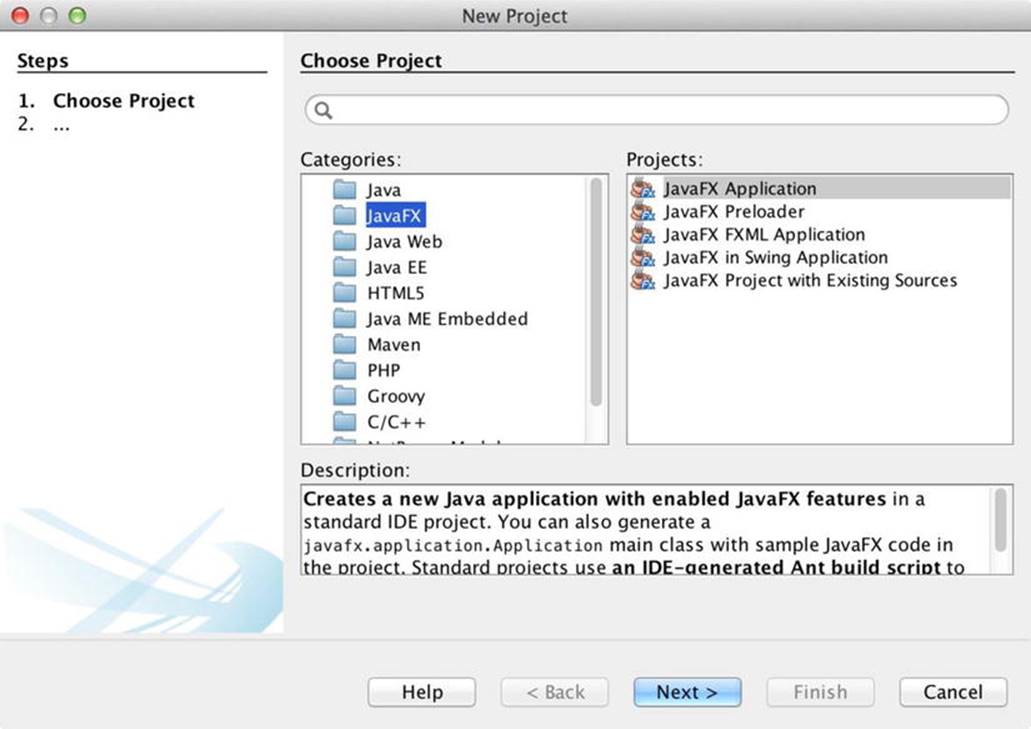
Figure 17-1. The New Project dialog box
3. Create a project by specifying a name and selecting the check box to allow the wizard to generate a main class called MyJavaFXApp.java. Figure 17-2 shows the New JavaFX Application window, where you specify the project name and location. When you are finished, click the Finish button.
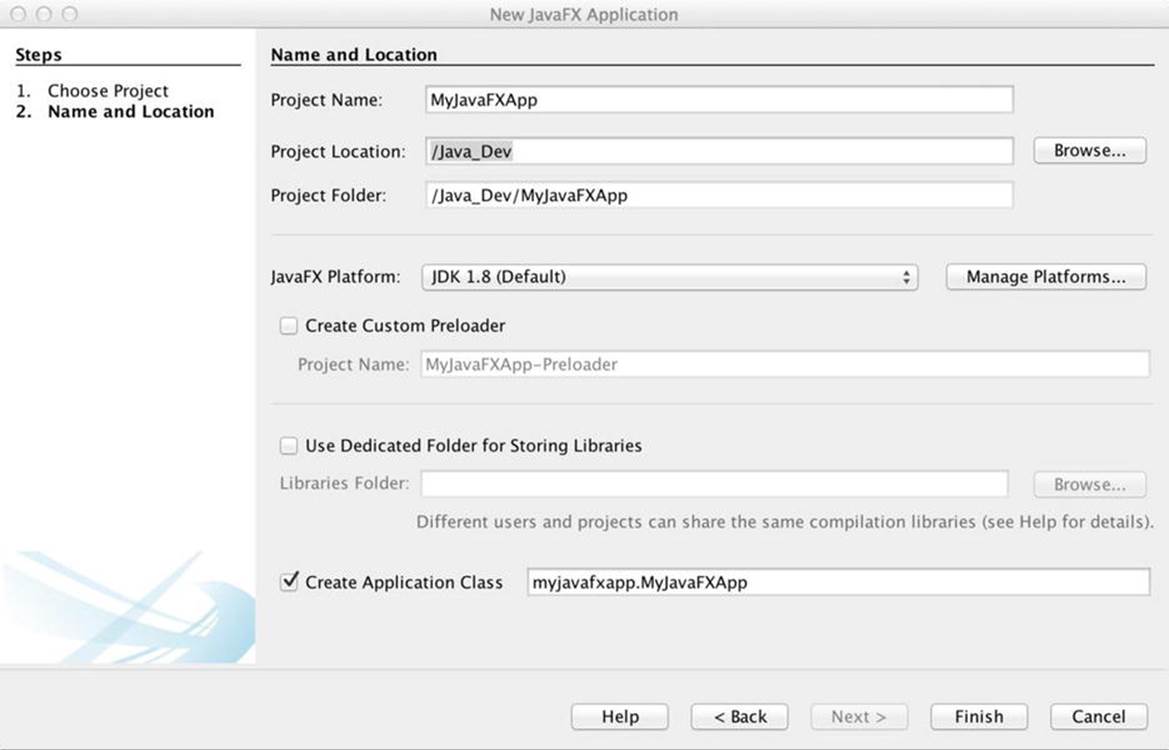
Figure 17-2. The New JavaFX Application dialog box, where you specify the project’s name and location
4. Once your new project has been created, modify the project’s properties and select browser deployment. To modify the properties, right-click the project and select Properties via the popup menu. Figure 17-3 shows the project created with a main JavaFX file namedMyJavaFXApp.java.
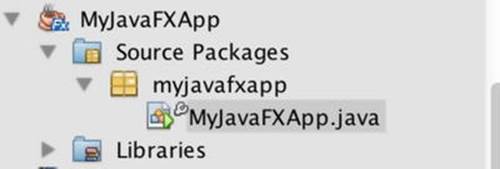
Figure 17-3. The MyJavaFXApp.java project
5. Go into the project’s properties, as shown in Figure 17-4. Select Sources in the Categories area. Next, adjust the Source/Binary Format option to point to JDK 8 if it doesn’t already.
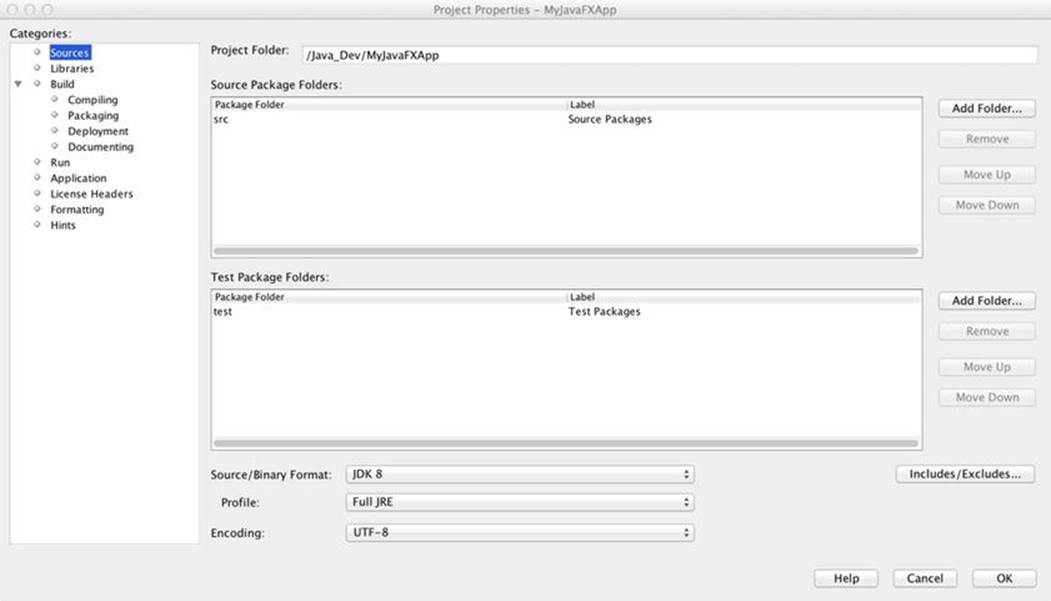
Figure 17-4. Project Properties—MyJavaFXApp window
6. Select the Run option in the Categories list shown in Figure 17-5. Select the In Browser radio button. Then click the OK button.
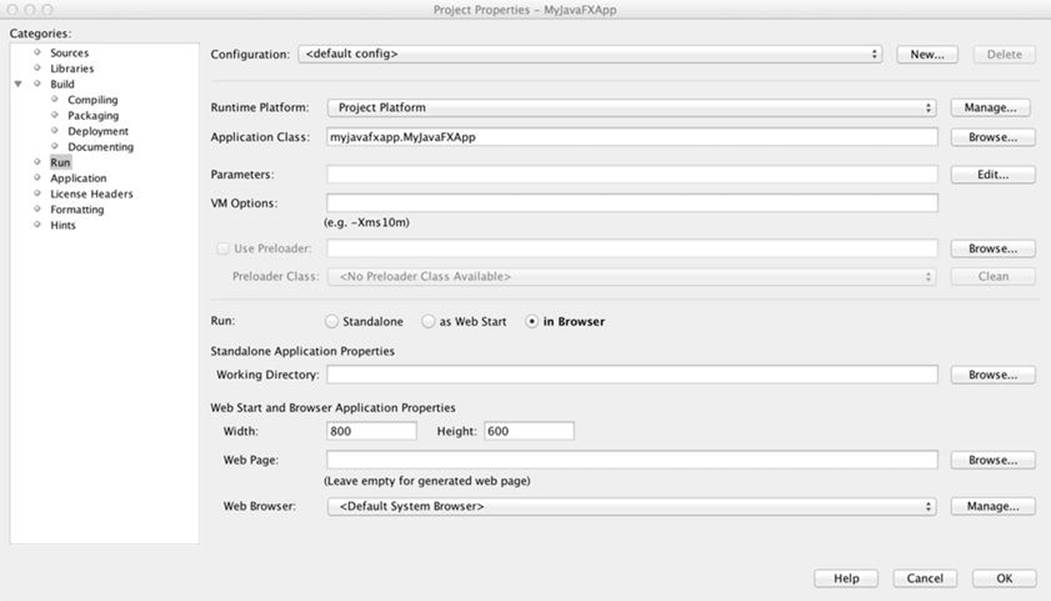
Figure 17-5. Setting up the Run in Browser option
7. Run and test the project by clicking the Run button on the toolbar or by pressing the F6 key. Figure 17-6 depicts the resulting Hello World application running in a browser.
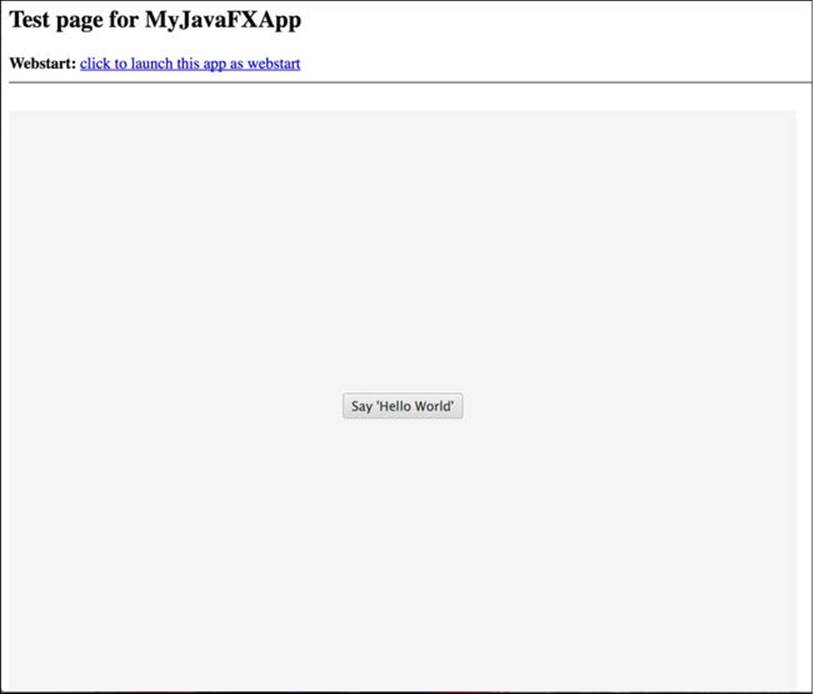
Figure 17-6. The MyJavaFXApp Hello World application running inside a browser
How It Works
The easiest way to create an embedded JavaFX application inside an HTML page is to use an IDE such as NetBeans. Although there are different deployment strategies, such as the Webstart and Standalone modes, here you use the NetBeans new project wizard to deploy a local web page containing your JavaFX application in your browser. For in-depth JavaFX deployment strategies, refer to Oracle’s Deploying JavaFX applications at http://docs.oracle.com/javafx/2/deployment/deployment_toolkit.htm.
The following code is generated by this solution. Notice the JavaFX classes being used, for example, the Stage, Group, and Scene classes.
![]() Note You can drag the imports and code from another code file into the body of this new main project class, and then change the name on the class definition line, as appropriate.
Note You can drag the imports and code from another code file into the body of this new main project class, and then change the name on the class definition line, as appropriate.
NetBeans IDE generated the following sources after choosing to create a new JavaFX application for deployment via a browser:
package org.java8recipes.chapter17.recipe17_01;
import javafx.application.Application;
import javafx.event.ActionEvent;
import javafx.scene.Group;
import javafx.scene.Scene;
import javafx.scene.control.Button;
import javafx.stage.Stage;
/**
*
* @author cdea
* Update: Juneau
*/
public class MyJavaFXApp extends Application {
/**
* @param args the command line arguments
*/
public static void main(String[] args) {
Application.launch(args);
}
@Override
public void start(Stage primaryStage) {
primaryStage.setTitle("Hello World");
Group root = new Group();
Scene scene = new Scene(root, 300, 250);
Button btn = new Button();
btn.setLayoutX(100);
btn.setLayoutY(80);
btn.setText("Hello World");
btn.setOnAction((ActionEvent event) -> {
System.out.println("Hello World");
});
root.getChildren().add(btn);
primaryStage.setScene(scene);
primaryStage.show();
}
}
In step 1, you initiate a new project (shown in Figure 17-6). In step 2, you select the standard JavaFX application to be created. After selecting the project type, you specify the name of the project. Make sure you click the Create Application Class check box to allow the wizard to generate the MyJavaFXApp Java file. Once you have clicked Finish, your newly created application will appear in the Projects tab. Next, you change the project’s properties.
In step 5 you change two categories—Sources and Run. In the Sources category, make sure the Source/Binary Format is set to JDK 1.8. After updating the Sources category, you determine how the project will run (step 6) through the Run category. After you select the In Browser radio button, notice the Width and Height options below the working directory field. To use your own custom web page, click the Browse button to select an existing HTML file. In this recipe, you can leave this area blank to allow the wizard to generate a generic HTML page. Assuming that you are done with your settings, you click OK to close the Project Properties window.
Lastly, you run your embedded JavaFX web application (step 7). To run your application, make sure the project is set as the main project by selecting Run ![]() Set Main Project
Set Main Project ![]() MyJavaFXApp. Once you initiate a run, your browser will launch, containing a generic web page with your JavaFX application. You’ll also notice that a convenient link allows you to launch the application as a Webstart application (not embedded).
MyJavaFXApp. Once you initiate a run, your browser will launch, containing a generic web page with your JavaFX application. You’ll also notice that a convenient link allows you to launch the application as a Webstart application (not embedded).
![]() Note Applets (Java applications that are embedded in the browser) are not the preferred way of deploying JavaFX applications, but they are covered in this recipe for completeness. To learn about the different options for packaging and deploying JavaFX applications, refer to the online guide at http://docs.oracle.com/javafx/2/deployment/jfxpub-deployment.htm.
Note Applets (Java applications that are embedded in the browser) are not the preferred way of deploying JavaFX applications, but they are covered in this recipe for completeness. To learn about the different options for packaging and deploying JavaFX applications, refer to the online guide at http://docs.oracle.com/javafx/2/deployment/jfxpub-deployment.htm.
17-2. Loading Scalable Vector Graphics File Content
Problem
You want to embed HTML5 content in the form of a Scalable Vector Graphics (SVG) file into a JavaFX application.
Solution
Create a JavaFX based-application containing an analog clock that was created as an SVG file. Use JavaFX’s WebView API to render HTML5 content in your application.
The following source code is a JavaFX application that displays an animated analog clock. The application will load an SVG file named clock3.svg and display the contents onto the JavaFX Scene graph:
package org.java8recipes.chapter17.recipe17_02;
import java.net.URL;
import javafx.application.Application;
import javafx.scene.Scene;
import javafx.scene.paint.Color;
import javafx.scene.web.WebView;
import javafx.stage.Stage;
/**
*
* @author cdea
*/
public class DisplayHtml5Content extends Application {
private Scene scene;
@Override public void start(Stage stage) {
// create the scene
stage.setTitle("Chapter 17-2 Display Html5 Content");
final WebView browser = new WebView();
URL url = getClass().getResource("clock3.svg");
browser.getEngine().load(url.toExternalForm());
scene = new Scene(browser,590,400, Color.rgb(0, 0, 0, .80));
stage.setScene(scene);
stage.show();
}
public static void main(String[] args){
Application.launch(args);
}
}
This JavaFX code will load and render HTML5 content. Assuming that you have a designer who has provided content such as HTML5, it will be your job to render assets in JavaFX. The following code represents an SVG file named clock3.svg that is predominantly generated by the powerful tool called Inkscape, which is an illustrator tool capable of generating SVG. In the following code, notice hand-coded JavaScript code (inside the CDATA tag) that will position the second, minute, and hour hands of the clock based on the current time of day. Because all the logic (from setting the time to animating the hands) is inside this file, things are self-contained, which means any HTML5-capable viewer can display the file’s contents. So when you’re debugging, you can easily render content in any HTML5-compliant browser. Later in this chapter, you will see JavaFX code that can interact with HTML5 content.
Shown here is a pared-down version of the SVG analog clock. (To obtain the file’s source code, download the code from the book’s website.) This is an SVG analog clock created in Inkscape (clock3.svg):
<svg
xmlns:dc="http://purl.org/dc/elements/1.1/"
xmlns:cc="http://creativecommons.org/ns#"
xmlns:rdf="http://www.w3.org/1999/02/22-rdf-syntax-ns#"
xmlns:svg="http://www.w3.org/2000/svg"
xmlns="http://www.w3.org/2000/svg"
xmlns:xlink="http://www.w3.org/1999/xlink"
xmlns:sodipodi="http://sodipodi.sourceforge.net/DTD/sodipodi-0.dtd"
xmlns:inkscape="http://www.inkscape.org/namespaces/inkscape"
width="300"
height="250"
id="svg4171"
version="1.1"
inkscape:version="0.48.1 "
sodipodi:docname="clock3.svg" onload="updateTime()">
<script>
<![CDATA[
var xmlns="http://www.w3.org/2000/svg"
function updateTime()
{
var date = new Date()
var hr = parseInt(date.getHours())
if (hr > 12) {
hr = hr - 12;
}
var min = parseInt(date.getMinutes())
var sec = parseInt(date.getSeconds())
var pi=180
var secondAngle = sec * 6 + pi
var minuteAngle = ( min + sec / 60 ) * 6 + pi
var hourAngle = (hr + min / 60 + sec /3600) * 30 + pi
moveHands(secondAngle, minuteAngle, hourAngle)
}
function moveHands(secondAngle, minuteAngle, hourAngle) {
var secondHand = document.getElementById("secondHand")
var minuteHand = document.getElementById("minuteHand")
var hourHand = document.getElementById("hourHand")
secondHand.setAttribute("transform","rotate("+ secondAngle + ")")
minuteHand.setAttribute("transform","rotate("+ minuteAngle +")")
hourHand.setAttribute("transform","rotate("+ hourAngle + ")")
}
]]>
</script>
<defs id="defs4173">
... // beginning of SVG code
... // Main clock code
<g id="hands" transform="translate(108,100)">
<g id="minuteHand">
<line stroke-width="3.59497285" y2="50" stroke-linecap="round" stroke="#00fff6" opacity=".9" />
<animateTransform attributeName="transform" type="rotate" repeatCount="indefinite" dur="60min" by="360" />
</g>
<g id="hourHand">
<line stroke-width="5" y2="30" stroke-linecap="round" stroke="#ffcb00" opacity=".9" />
<animateTransform attributeName="transform" type="rotate" repeatCount="indefinite" dur="12h" by="360" />
</g>
<g id="secondHand">
<line stroke-width="2" y1="-20" y2="70" stroke-linecap="round" stroke="red"/>
<animateTransform attributeName="transform" type="rotate" repeatCount="indefinite" dur="60s" by="360" />
</g>
</g>
... // The rest of the Clock code: shiney glare, black button cover (center) on top of arms
</svg>
Figure 17-7 depicts a JavaFX application that renders the SVG file clock3.svg displaying an analog clock.
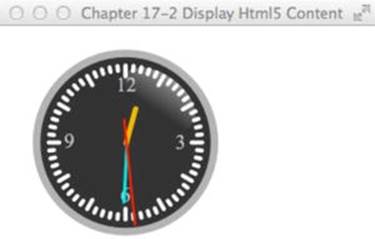
Figure 17-7. Analog clock
How It Works
In this recipe, you’ll create an analog clock application that will take existing HTML5 content to be rendered onto the JavaFX Scene graph. HTML5 allows SVG content to be displayed in browsers. SVG is similar to JavaFX’s Scene graph, in which nodes can be scaled to different sizes while preserving details. To manipulate SVG or any HTML5 elements, this example uses the JavaScript language. Depicted in Figure 17-7 is a JavaFX application displaying an animated analog clock. To learn more about SVG, visithttp://www.w3schools.com/svg/default.asp. Before running this example, make sure the clock3.svg file is located in the build path. In NetBeans you may need to perform a clean and build before running the application that will copy the resource (clock3.svg) to the build path. You may also want to manually copy the clock3.svg file to reside in the build path where the DisplayHtml5Content.class file is located if you are running application on the command line.
You will undoubtedly work with a designer who has used popular tools to generate web content that’s wired to an application’s functions. To create an analog clock, Carl Dea enlisted his daughter, who is quite proficient with the Open Source tool Inkscape. Although Inkscape was used to generate the content for this recipe, I will not go into details regarding the tool because it is beyond the scope of this book. To learn more about Inkscape, visit http://www.inkscape.org for tutorials and demos. To model the designer and developer workflow, she created a cool looking clock and I added JavaScript/SVG code to move the clock’s hour, minute, and second hands. Inkscape allows you to create shapes, text, and effects to generate amazing illustrations. Because SVG files are considered HTML5 content, you can display SVG drawings inside of an HTML5-capable browser. In this scenario, the example displays the analog clock in JavaFX’s WebView node. You can think of a WebView node as a mini-browser capable of loading and displaying URLs. When it’s loading an URL you will notice the call to getEngine().load(), where thegetEngine() method returns an instance of the javafx.scene.web.WebEngine object. So, the WebView object is implicitly creating one javafx.scene.web.WebEngine object instance per WebView object. Shown here is the JavaFX’s WebEngine object loading theclock3.svg file:
final WebView browser = new WebView();
URL url = getClass().getResource("clock3.svg");
browser.getEngine().load(url.toExternalForm());
You are probably wondering why the JavaFX source code is so short. This is because its job is to instantiate an instance of a javafx.scene.web.WebView that instantiates a javafx.scene.web.WebEngine class and passes an URL. After that, the WebEngine object does all the work by rendering HTML5 content just like any browser. The same code could be written as follows:
final WebView browser = new WebView();
WebEngine engine = browser.getEngine();
URL url = getClass().getResource("clock3.svg");
engine.load(url.toExternalForm());
When rendering the content, notice that the clock’s arms move or animate; for example, the second hand rotates clockwise. Before animating the clock, you have to set the clock’s initial position by calling the JavaScript updateTime() function via the onload attribute on the entire SVG document (located on the root svg element). Once the clock’s arms are set, you add SVG code to draw and animate by using the line and animate transform elements, respectively. Shown here is the SVG code snippet that animates the second hand:
<g id="secondHand">
<line stroke-width="2" y1="-20" y2="70" stroke-linecap="round" stroke="red"/>
<animateTransform attributeName="transform" type="rotate" repeatCount="indefinite" dur="60s" by="360" />
</g>
On a final note, if you want to create a clock like the one depicted in this recipe, visit http://screencasters.heathenx.org/blog to learn about all things Inkscape. Another impressive and beautiful display of custom controls that focuses on gauges and dials is the Steel Series by Gerrit Grunwald. To be totally amazed, visit his blog at http://harmoniccode.blogspot.com.
17-3. Manipulating HTML5 Content with Java Code
Problem
You want to generate HTML5 content via Java code and display it in your JavaFX application.
Solution
Implement a solution that formulates HTML5 content in string format. Once you’ve created the desired HTML5 content, you’ll display it using a WebView node. This example creates a weather application that fetches data from Yahoo!’s weather service. The following code implements a weather application that retrieves Yahoo!’s weather information to be rendered as HTML in a JavaFX application:
package org.java8recipes.chapter17.recipe17_03;
import javafx.animation.KeyFrame;
import javafx.animation.KeyValue;
import javafx.animation.Timeline;
import javafx.application.Application;
import javafx.beans.property.IntegerProperty;
import javafx.beans.property.SimpleIntegerProperty;
import javafx.beans.value.ObservableValue;
import javafx.concurrent.Worker.State;
import javafx.scene.Group;
import javafx.scene.Scene;
import javafx.scene.web.WebEngine;
import javafx.scene.web.WebView;
import javafx.stage.Stage;
import javafx.util.Duration;
import org.w3c.dom.Document;
import org.w3c.dom.NodeList;
/**
* Recipe 17-3: Manipulating HTML5 Content
* @author cdea
* Updated: J Juneau
*/
public class ManipulatingHtmlContent extends Application {
String url = "http://weather.yahooapis.com/forecastrss?p=USMD0033&u=f";
int refreshCountdown = 60;
@Override public void start(Stage stage) {
// create the scene
stage.setTitle("Chapter 17-3 Manipulating HTML5 content");
Group root = new Group();
Scene scene = new Scene(root, 460, 340);
final WebEngine webEngine = new WebEngine(url);
StringBuilder template = new StringBuilder();
template.append("<head>\n")
.append("<style type=\"text/css\">body {background-color:#b4c8ee;}</style>\n")
.append("</head>\n")
.append("<body id='weather_background'>");
final String fullHtml = template.toString();
final WebView webView = new WebView();
IntegerProperty countDown = new SimpleIntegerProperty(refreshCountdown);
countDown.addListener((ObservableValue<? extends Number> observable, Number oldValue,
Number newValue) -> {
webView.getEngine().executeScript("document.getElementById('countdown').innerHTML = 'Seconds till
refresh: " + newValue + "'");
if (newValue.intValue() == 0) {
webEngine.reload();
}
});
final Timeline timeToRefresh = new Timeline();
timeToRefresh.getKeyFrames().addAll(
new KeyFrame(Duration.ZERO, new KeyValue(countDown, refreshCountdown)),
new KeyFrame(Duration.seconds(refreshCountdown), new KeyValue(countDown, 0))
);
webEngine.getLoadWorker().stateProperty().addListener((ObservableValue<? extends State>
observable, State oldValue, State newValue) -> {
System.out.println("done!" + newValue.toString());
if (newValue != State.SUCCEEDED) {
return;
}
// request 200 OK
Weather weather = parse(webEngine.getDocument());
StringBuilder locationText = new StringBuilder();
locationText.append("<b>")
.append(weather.city)
.append(", ")
.append(weather.region)
.append(" ")
.append(weather.country)
.append("</b><br />\n");
String timeOfWeatherTextDiv = "<b id=\"timeOfWeatherText\">" + weather.dateTimeStr +
"</b><br />\n";
String countdownText = "<b id=\"countdown\"></b><br />\n";
webView.getEngine().loadContent(fullHtml + locationText.toString() +
timeOfWeatherTextDiv +
countdownText +
weather.htmlDescription);
System.out.println(fullHtml + locationText.toString() +
timeOfWeatherTextDiv +
countdownText +
weather.htmlDescription);
timeToRefresh.playFromStart();
});
root.getChildren().addAll(webView);
stage.setScene(scene);
stage.show();
}
public static void main(String[] args){
Application.launch(args);
}
private static String obtainAttribute(NodeList nodeList, String attribute) {
String attr = nodeList
.item(0)
.getAttributes()
.getNamedItem(attribute)
.getNodeValue();
return attr;
}
private static Weather parse(Document doc) {
NodeList currWeatherLocation = doc.getElementsByTagNameNS("http://xml.weather.yahoo.com/ns/ rss/1.0", "location");
Weather weather = new Weather();
weather.city = obtainAttribute(currWeatherLocation, "city");
weather.region = obtainAttribute(currWeatherLocation, "region");
weather.country = obtainAttribute(currWeatherLocation, "country");
NodeList currWeatherCondition = doc.getElementsByTagNameNS("http://xml.weather.yahoo.com/ns/
rss/1.0", "condition");
weather.dateTimeStr = obtainAttribute(currWeatherCondition, "date");
weather.currentWeatherText = obtainAttribute(currWeatherCondition, "text");
weather.temperature = obtainAttribute(currWeatherCondition, "temp");
String forcast = doc.getElementsByTagName("description")
.item(1)
.getTextContent();
weather.htmlDescription = forcast;
return weather;
}
}
class Weather {
String dateTimeStr;
String city;
String region;
String country;
String currentWeatherText;
String temperature;
String htmlDescription;
}
Figure 17-8 depicts the weather application that fetches data from the Yahoo! weather service. In the third line of the displayed text, you’ll notice that Seconds till refresh: 31 is a countdown in seconds until the next time weather information will be retrieved. The actual manipulation of HTML content occurs here.
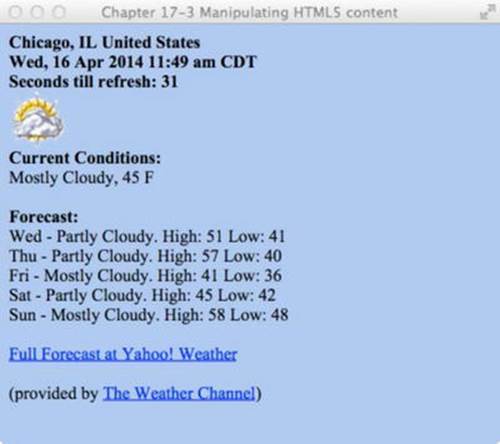
Figure 17-8. Weather application
The following shows the HTML that is rendered onto the WebView node:
<head>
<style type="text/css">body {background-color:#b4c8ee;}</style>
</head>
<body id='weather_background'><b>Chicago, IL United States</b><br />
<b id="timeOfWeatherText">Wed, 16 Apr 2014 11:49 am CDT</b><br />
<b id="countdown"></b><br />
<img src="http://l.yimg.com/a/i/us/we/52/28.gif"/><br />
<b>Current Conditions:</b><br />Mostly Cloudy, 45 F<BR />
<BR /><b>Forecast:</b><BR />Wed - Partly Cloudy. High: 51 Low: 41<br />Thu - Partly Cloudy. High: 57 Low: 40<br />Fri - Mostly Cloudy. High: 41 Low: 36<br />Sat - Partly Cloudy. High: 45 Low: 42<br />Sun - Mostly Cloudy. High: 58 Low: 48<br />
<br />
<a href="http://us.rd.yahoo.com/dailynews/rss/weather/Chicago__IL/*http://weather.yahoo.com/
forecast/USIL0225_f.html">Full Forecast at Yahoo! Weather</a><BR/><BR/>
(provided by <a href="http://www.weather.com" >The Weather Channel</a>)<br/>
How It Works
In this recipe, you parse an RSS feed and construct an HTML string within the JavaFX application, and then display the HTML via a WebView. The JavaFX application can retrieve XML information from Yahoo!’s weather service via an URL using a WOEID (location ID) to target a specific location. Once the XML is parsed, the HTML content is assembled and rendered onto JavaFX’s WebView node. The WebView object instance is a graph node capable of rendering and retrieving XML or any HTML5 content. The application will also display a countdown in seconds until the next retrieval from the weather service.
When accessing weather information for your area through Yahoo!’s weather service, you need to obtain a location ID (WOEID) or the URL to the RSS feed associated with your city. Before I explain the code line by line, consider these steps for obtaining the RSS feed URL for your local weather forecasts.
1. Open your browser to http://weather.yahoo.com/.
2. Enter a city or ZIP code and press the Go button.
3. Copy the number located at the trailing end of the URL in the browser’s address bar. That is the location’s WOEID.
4. Insert the WOEID into http://weather.yahooapis.com/forecastrss?w=WOEID&u=f.
When creating the ManipulatingHtmlContent class for this example, you need two instance variables: url and refreshCountdown. The url variable will be assigned to the RSS URL web address from step 4. The refreshCountdown variable of type int is assigned the value of 60 to denote the time in seconds until a refresh or another retrieval of the weather information takes place.
Like all the JavaFX examples inside of the start() method, you begin by creating the Scene object for the initial main content region. Next, you create a javafx.scene.web.WebEngine instance by passing in the url into the constructor. The WebEngine object will asynchronously load the web content from Yahoo!’s weather service. Later you will learn about the callback method responsible for handling the content when the web content is done loading. The following code line creates and loads an URL web address using a WebEngine object:
final WebEngine webEngine = new WebEngine(url);
After you create a WebEngine object, you’ll create an HTML document that will act as a template when the web content is successfully loaded. Although the code contains HTML markup tags in Java code, which violates the principles of the separation of concerns, this example inlines the HTML by concatenating string values for brevity. To maintain proper MVC-style separation, you may want to create a separate file containing your HTML content with substitution sections for data that will change over time. The code snippet that follows is the start of the creation of a template used to display weather information:
StringBuilder template = new StringBuilder();
template.append("<head>\n")
.append("<style type=\"text/css\">body {background-color:#b4c8ee;}</style>\n")
.append("</head>\n")
.append("<body id='weather_background'>");
Once you have created the web page by concatenating strings, you create a WebView object instance, which is a displayable graph node that will be responsible for rendering the web page. Remember in Recipe 17-2 you learned that a WebView has its own instance of a WebEngine. Knowing this fact, you only use the WebView node to render the assembled HTML web page, not to retrieve the XML weather information via an URL. In other words, the WebEngine object is responsible for retrieving the XML from Yahoo!’s weather service to be parsed and then fed into the WebView object to be displayed as HTML. The following code snippet instantiates a WebView graph node that is responsible for rendering the HTML5 content:
final WebView webView = new WebView();
The countdown timer in the example refreshes the weather information being displayed in the application window. First, you instantiate an IntegerProperty variable, called countdown, to hold the number of seconds until the next refresh time. Second, you add a change listener (ChangeListener) to update the HTML content dynamically using JavaFX’s capability to execute JavaScript. The change listener also determines whether the countdown has reached zero. If so, it invokes the webEngine’s (WebEngine) reload() method to refresh or retrieve the weather information again. The following code creates an IntegerProperty value to update the countdown text using the executeScript() method:
IntegerProperty countDown = new SimpleIntegerProperty(refreshCountdown);
countDown.addListener((ObservableValue<? extends Number> observable,
Number oldValue, Number newValue) -> {
webView.getEngine().executeScript(
"document.getElementById('countdown').innerHTML = 'Seconds till refresh: "
+ newValue + "'");
if (newValue.intValue() == 0) {
webEngine.reload();
}
}); // addListener()
After the ChangeListener is implemented using a lambda expression, a TimeLine object is created to change the countdown variable, which will trigger the ChangeListener to update the HTML text depicting the seconds until refresh. The following code implements aTimeLine object that updates the countDown variable:
final Timeline timeToRefresh = new Timeline();
timeToRefresh.getKeyFrames().addAll(
new KeyFrame(Duration.ZERO, new KeyValue(countDown, refreshCountdown)),
new KeyFrame(Duration.seconds(refreshCountdown), new KeyValue(countDown, 0))
);
The rest of the code creates a ChangeListener that responds to State.SUCCEEDED. Once the webEngine (WebEngine) has finished retrieving the XML, the change listener (ChangeListener) is responsible for parsing and rendering the assembled web page into theWebView node. The following code parses and displays the weather data by calling the loadContent() method on the WebView’s WebEngine instance:
if (newValue != State.SUCCEEDED) {
return;
}
Weather weather = parse(webEngine.getDocument());
...// the rest of the inlined HTML
String countdownText = "<b id=\"countdown\"></b><br />\n";
webView.getEngine().loadContent(fullHtml + location.toString() +
timeOfWeatherTextDiv +
countdownText +
weather.htmlDescription);
To parse the XML returned by the webEngine’s getDocument() method, the org.w3c.dom.Document object is interrogated. For convenience, I created a parse() method to walk the DOM to obtain weather data and return it as a Weather object. See the Javadocs and Yahoo!’s RSS XML schema for more information on data elements returned from a weather service.
17-4. Responding to HTML Events
Problem
You want to manipulate HTML5 content with Java code.
Solution
You’ll add a Panic button to your weather application that will simulate an e-mail notification. You’ll also add a Calm Down button to retract the warning message.
The following code implements the weather application with additional buttons to warn about and then disregard impending stormy weather:
@Override public void start(Stage stage) {
... // template building
This code adds HTML buttons with their onclick attributes set to invoke the JavaScript alert function via buttons:
template.append("<body id='weather_background'>");
template.append("<form>\n");
template.append(" <input type=\"button\" onclick=\"alert('warning')\" value=\"Panic Button\" />\n");
template.append(" <input type=\"button\" onclick=\"alert('unwarning')\" value=\"Calm down\" />\n");
template.append("</form>\n");
The following code is added to the start() method to create the warning message. The opacity is set to zero to be invisible:
// calls the createMessage() method to build warning message
final Text warningMessage = createMessage(Color.RED, "warning: ");
warningMessage.setOpacity(0);
... // Countdown code
Continuing inside the start() method, this code section is added to update the warning message after the weather information is retrieved successfully:
webEngine.getLoadWorker().stateProperty().addListener(
(ObservableValue<? extends State> observable,
State oldValue, State newValue) -> {
System.out.println("done!" + newValue.toString());
if (newValue != State.SUCCEEDED) {
return;
}
Weather weather = parse(webEngine.getDocument());
warningMessage.setText("Warning: " + weather.currentWeatherText +
"\nTemp: " + weather.temperature + "\n E-mailed others");
... // the rest of changed() method
}); // end of addListener method
This code sets the OnAlert property, which is an event handler that responds when the Panic or Calm Down buttons are pressed:
webView.getEngine().setOnAlert((WebEvent<String> evt) -> {
warningMessage.setOpacity("warning".equalsIgnoreCase(evt.getData()) ? 1d : 0d);
});
You add the following code as a private method that is responsible for creating a text node (javafx.scene.text.Text). It is used as the warning message when the user presses the Panic button:
private Text createMessage(Color color, String message) {
DropShadow dShadow = new DropShadow();
dShadow.setOffsetX(3.5f);
dShadow.setOffsetY(3.5f);
Text textMessage = new Text();
textMessage.setText(message);
textMessage.setX(100);
textMessage.setY(50);
textMessage.setStrokeWidth(2);
textMessage.setStroke(Color.WHITE);
textMessage.setEffect(dShadow);
textMessage.setFill(color);
textMessage.setFont(Font.font(null, FontWeight.BOLD, 35));
textMessage.setTranslateY(50);
return textMessage;
}
} // end of the RespondingToHtmlEvents class
Figure 17-9 shows the weather application displaying a warning message after a user has pressed the Panic button. To remove the warning message, you can press the Calm Down button.
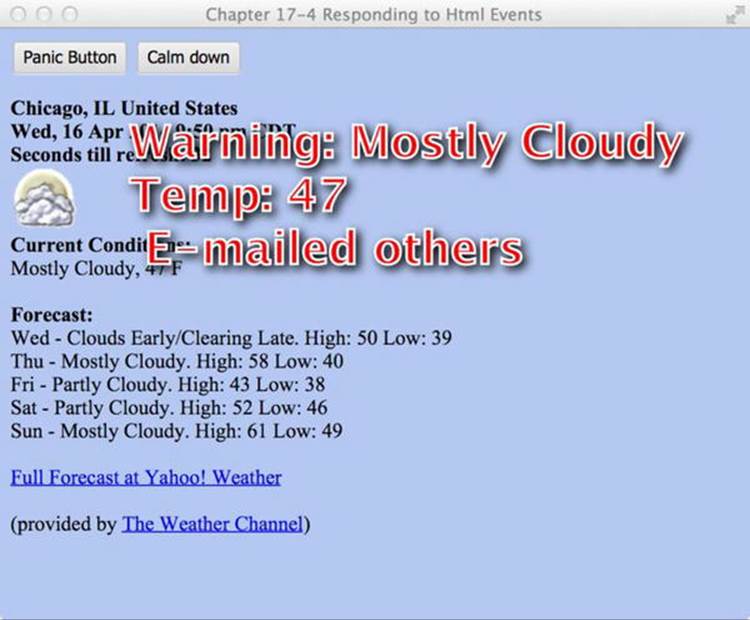
Figure 17-9. Weather application displaying a warning message
How It Works
The example in this recipe adds features to the weather application (from Recipe 17-3) that respond to HTML events. The application is similar to the previous recipe, except that it contains HTML buttons on the web page to be rendered onto the WebView node. The first button is the Panic button that, when pressed, displays a warning message stating the current weather condition and a simulated e-mail notification. To retract the warning message, you added a Calm Down button.
![]() Note Because the code is so similar to the previous recipe, I point out only the additions to the source code without going into great detail.
Note Because the code is so similar to the previous recipe, I point out only the additions to the source code without going into great detail.
To add the buttons, you use the HTML tag <input type=”button”...>, with an onclick attribute set to use JavaScript’s alert() function to notify JavaFX of an alert event. Shown here are the two buttons added to the web page:
StringBuilder template = new StringBuilder();
...// Header part of HTML Web page
template.append("<form>\n");
template.append(" <input type=\"button\" onclick=\"alert('warning')\" value=\"Panic Button\" />\n");
template.append(" <input type=\"button\" onclick=\"alert('unwarning')\" value=\"Calm down\" />\n");
template.append("</form>\n");
When the web page renders, the buttons can be clicked, invoking the onclick attribute that will call JavaScript’s alert() function containing the string message. When the alert() function is invoked, the web page’s owning parent (the webView’s WebEngine instance) is notified of the alert via the WebEngine’s OnAlert attribute. To respond to JavaScript’s alerts, an event handler (lambda expression) is added. It responds to the WebEvent objects. The handle() method simply shows and hides the warning message by toggling the opacity of thewarningMessage node (javafx.scene.text.Text). The following code snippet toggles the opacity of the warning message based on comparing the event’s data (evt.getData()) that contains the string passed in from the JavaScript’s alert() function. So, if the message is"warning", the warningMessage opacity is set to 1; otherwise, it’s set to 0 (both of type double).
webView.getEngine().setOnAlert(new EventHandler<WebEvent<String>>(){
public void handle(WebEvent<String> evt) {
warningMessage.setOpacity("warning".equalsIgnoreCase(evt.getData()) ? 1d : 0d);
}
});
Please see the Javadocs for additional HTML web events (WebEvent).
17-5. Displaying Content from the Database
Problem
You want to display database content in a JavaFX WebView node.
Solution
Create a JavaFX RSS reader. The RSS feed URLs will be stored in a database to be later retrieved. Listed here are the main classes used in this recipe:
· javafx.scene.control.Hyperlink
· javafx.scene.web.WebEngine
· javafx.scene.web.WebView
· org.w3c.dom.Document
· org.w3c.dom.Node
· org.w3c.dom.NodeList
This recipe uses an embedded database called Derby from the Apache group at http://www.apache.org. As a requirement, you need to download the Derby software (it is included with NetBeans IDE). To download the latest version of the software, visithttp://db.apache.org/derby/derby_downloads.html. Once it’s downloaded, you can unzip or untar it into a directory. To compile and run this recipe, you need to update the class path in your IDE or environment variable to point to Derby libraries (derby.jar andderbytools.jar). When running the example code, you can type a valid RSS URL into the text field and then press the Enter key to load your new RSS headlines. The headline news will then be listed in the upper-right frame region. Then you can choose a headline news article to read fully by clicking on a view button beneath it.
The following code implements an RSS reader in JavaFX:
package org.java8recipes.chapter17.recipe17_05;
import java.util.*;
import javafx.application.Application;
import javafx.beans.value.*;
import javafx.collections.ObservableList;
import javafx.concurrent.Worker.State;
import javafx.event.*;
import javafx.geometry.*;
import javafx.scene.*;
import javafx.scene.control.*;
import javafx.scene.input.*;
import javafx.scene.layout.*;
import javafx.scene.paint.Color;
import javafx.scene.web.*;
import javafx.stage.Stage;
import org.w3c.dom.Document;
import org.w3c.dom.Node;
import org.w3c.dom.NodeList;
/**
* Display Contents From Database
* @author cdea
*/
public class DisplayContentsFromDatabase extends Application {
@Override public void start(Stage stage) {
Group root = new Group();
Scene scene = new Scene(root, 640, 480, Color.WHITE);
final Map<String, Hyperlink> hyperLinksMap = new TreeMap<>();
final WebView newsBrief = new WebView(); // upper right
final WebEngine webEngine = new WebEngine();
final WebView websiteView = new WebView(); // lower right
webEngine.getLoadWorker().stateProperty().addListener(
(ObservableValue<? extends State> observable,
State oldValue, State newValue) -> {
if (newValue != State.SUCCEEDED) {
return;
}
RssFeed rssFeed = parse(webEngine.getDocument(), webEngine.getLocation());
hyperLinksMap.get(webEngine.getLocation()).setText(rssFeed.channelTitle);
// print feed info:
StringBuilder rssSource = new StringBuilder();
rssSource.append("<head>\n")
.append("</head>\n")
.append("<body>\n");
rssSource.append("<b>")
.append(rssFeed.channelTitle)
.append(" (")
.append(rssFeed.news.size())
.append(")")
.append("</b><br />\n");
StringBuilder htmlArticleSb = new StringBuilder();
for (NewsArticle article:rssFeed.news) {
htmlArticleSb.append("<hr />\n")
.append("<b>\n")
.append(article.title)
.append("</b><br />")
.append(article.pubDate)
.append("<br />")
.append(article.description)
.append("<br />\n")
.append("<input type=\"button\" onclick=\"alert('")
.append(article.link)
.append("')\" value=\"View\" />\n");
}
String content = rssSource.toString() + "<form>\n" + htmlArticleSb.toString() + "</form></body>\n";
System.out.println(content);
newsBrief.getEngine().loadContent(content);
// write to disk if not already.
DBUtils.saveRssFeed(rssFeed);
}); // end of webEngine addListener()
newsBrief.getEngine().setOnAlert((WebEvent<String> evt) -> {
websiteView.getEngine().load(evt.getData());
}); // end of newsBrief setOnAlert()
// Left and right split pane
SplitPane splitPane = new SplitPane();
splitPane.prefWidthProperty().bind(scene.widthProperty());
splitPane.prefHeightProperty().bind(scene.heightProperty());
final VBox leftArea = new VBox(10);
final TextField urlField = new TextField();
urlField.setOnAction((ActionEvent ae) -> {
String url = urlField.getText();
final Hyperlink jfxHyperLink = createHyperLink(url, webEngine);
hyperLinksMap.put(url, jfxHyperLink);
HBox rowBox = new HBox(20);
rowBox.getChildren().add(jfxHyperLink);
leftArea.getChildren().add(rowBox);
webEngine.load(url);
urlField.setText("");
}); // end of urlField setOnAction()
leftArea.getChildren().add(urlField);
List<RssFeed> rssFeeds = DBUtils.loadFeeds();
rssFeeds.stream().map((feed) -> {
HBox rowBox = new HBox(20);
final Hyperlink jfxHyperLink = new Hyperlink(feed.channelTitle);
jfxHyperLink.setUserData(feed);
final String location = feed.link;
hyperLinksMap.put(feed.link, jfxHyperLink);
jfxHyperLink.setOnAction((ActionEvent evt) -> {
webEngine.load(location);
});
rowBox.getChildren().add(jfxHyperLink);
return rowBox;
}).forEach((rowBox) -> {
leftArea.getChildren().add(rowBox);
});
// Dragging over surface
scene.setOnDragOver((DragEvent event) -> {
Dragboard db = event.getDragboard();
if (db.hasUrl()) {
event.acceptTransferModes(TransferMode.COPY);
} else {
event.consume();
}
}); // end of scene.setOnDragOver()
// Dropping over surface
scene.setOnDragDropped((DragEvent event) -> {
Dragboard db = event.getDragboard();
boolean success = false;
HBox rowBox = new HBox(20);
if (db.hasUrl()) {
if (!hyperLinksMap.containsKey(db.getUrl())) {
final Hyperlink jfxHyperLink = createHyperLink(db.getUrl(), webEngine);
hyperLinksMap.put(db.getUrl(), jfxHyperLink);
rowBox.getChildren().add(jfxHyperLink);
leftArea.getChildren().add(rowBox);
}
webEngine.load(db.getUrl());
}
event.setDropCompleted(success);
event.consume();
}); // end of scene.setOnDragDropped()
leftArea.setAlignment(Pos.TOP_LEFT);
// Upper and lower split pane
SplitPane splitPane2 = new SplitPane();
splitPane2.setOrientation(Orientation.VERTICAL);
splitPane2.prefWidthProperty().bind(scene.widthProperty());
splitPane2.prefHeightProperty().bind(scene.heightProperty());
HBox centerArea = new HBox();
centerArea.getChildren().add(newsBrief);
HBox rightArea = new HBox();
rightArea.getChildren().add(websiteView);
splitPane2.getItems().add(centerArea);
splitPane2.getItems().add(rightArea);
// add left area
splitPane.getItems().add(leftArea);
// add right area
splitPane.getItems().add(splitPane2);
newsBrief.prefWidthProperty().bind(scene.widthProperty());
websiteView.prefWidthProperty().bind(scene.widthProperty());
// evenly position divider
ObservableList<SplitPane.Divider> dividers = splitPane.getDividers();
for (int i = 0; i < dividers.size(); i++) {
dividers.get(i).setPosition((i + 1.0) / 3);
}
HBox hbox = new HBox();
hbox.getChildren().add(splitPane);
root.getChildren().add(hbox);
stage.setScene(scene);
stage.show();
} // end of start()
private static RssFeed parse(Document doc, String location) {
RssFeed rssFeed = new RssFeed();
rssFeed.link = location;
rssFeed.channelTitle = doc.getElementsByTagName("title")
.item(0)
.getTextContent();
NodeList items = doc.getElementsByTagName("item");
for (int i=0; i<items.getLength(); i++){
Map<String, String> childElements = new HashMap<>();
NewsArticle article = new NewsArticle();
for (int j=0; j<items.item(i).getChildNodes().getLength(); j++) {
Node node = items.item(i).getChildNodes().item(j);
childElements.put(node.getNodeName().toLowerCase(), node.getTextContent());
}
article.title = childElements.get("title");
article.description = childElements.get("description");
article.link = childElements.get("link");
article.pubDate = childElements.get("pubdate");
rssFeed.news.add(article);
}
return rssFeed;
} // end of parse()
private Hyperlink createHyperLink(String url, final WebEngine webEngine) {
final Hyperlink jfxHyperLink = new Hyperlink("Loading News...");
RssFeed aFeed = new RssFeed();
aFeed.link = url;
jfxHyperLink.setUserData(aFeed);
jfxHyperLink.setOnAction((ActionEvent evt) -> {
RssFeed rssFeed = (RssFeed)jfxHyperLink.getUserData();
webEngine.load(rssFeed.link);
});
return jfxHyperLink;
} // end of createHyperLink()
public static void main(String[] args){
DBUtils.setupDb();
Application.launch(args);
}
}
class RssFeed {
int id;
String channelTitle = "News...";
String link;
List<NewsArticle> news = new ArrayList<>();
public String toString() {
return "RssFeed{" + "id=" + id + ", channelTitle=" + channelTitle + ", link=" + link + ",
news=" + news + '}';
}
public RssFeed() {
}
public RssFeed(String title, String link) {
this.channelTitle = title;
this.link = link;
}
}
class NewsArticle {
String title;
String description;
String link;
String pubDate;
public String toString() {
return "NewsArticle{" + "title=" + title + ", description=" + description + ", link=" +
link + ", pubDate=" + pubDate + ", enclosure=" + '}';
}
}
The following code is an excerpt from DBUtils.java. It shows the saveRssFeed() method responsible for persisting RSS feeds:
public static int saveRssFeed(RssFeed rssFeed) {
int pk = rssFeed.link.hashCode();
loadDriver();
Connection conn = null;
ArrayList statements = new ArrayList();
PreparedStatement psInsert = null;
Statement s = null;
ResultSet rs = null;
try {
// database name
String dbName = "demoDB";
conn = DriverManager.getConnection(protocol + dbName
+ ";create=true", props);
rs = conn.createStatement().executeQuery("select count(id) from rssFeed where id = "
+ rssFeed.link.hashCode());
rs.next();
int count = rs.getInt(1);
if (count == 0) {
// handle transaction
conn.setAutoCommit(false);
s = conn.createStatement();
statements.add(s);
psInsert = conn.prepareStatement("insert into rssFeed values (?, ?, ?)");
statements.add(psInsert);
psInsert.setInt(1, pk);
String escapeTitle = rssFeed.channelTitle.replaceAll("\'", "''");
psInsert.setString(2, escapeTitle);
psInsert.setString(3, rssFeed.link);
psInsert.executeUpdate();
conn.commit();
System.out.println("Inserted " + rssFeed.channelTitle + " " + rssFeed.link);
System.out.println("Committed the transaction");
}
shutdown();
} catch (SQLException sqle) {
sqle.printStackTrace();
} finally {
// release all open resources to avoid unnecessary memory usage
// ResultSet
close(rs);
// Statements and PreparedStatements
int i = 0;
while (!statements.isEmpty()) {
// PreparedStatement extend Statement
Statement st = (Statement) statements.remove(i);
close(st);
}
//Connection
close(conn);
}
return pk;
}
In Figure 17-10, the JavaFX reader displays three frames. The left column shows a text field at the top to allow the user to enter new URLs and RSS feed sources as hyperlinks. The upper-right frame contains the headline, an excerpt of the article, and a view button that renders the article’s web page in the bottom frame (lower-right region).
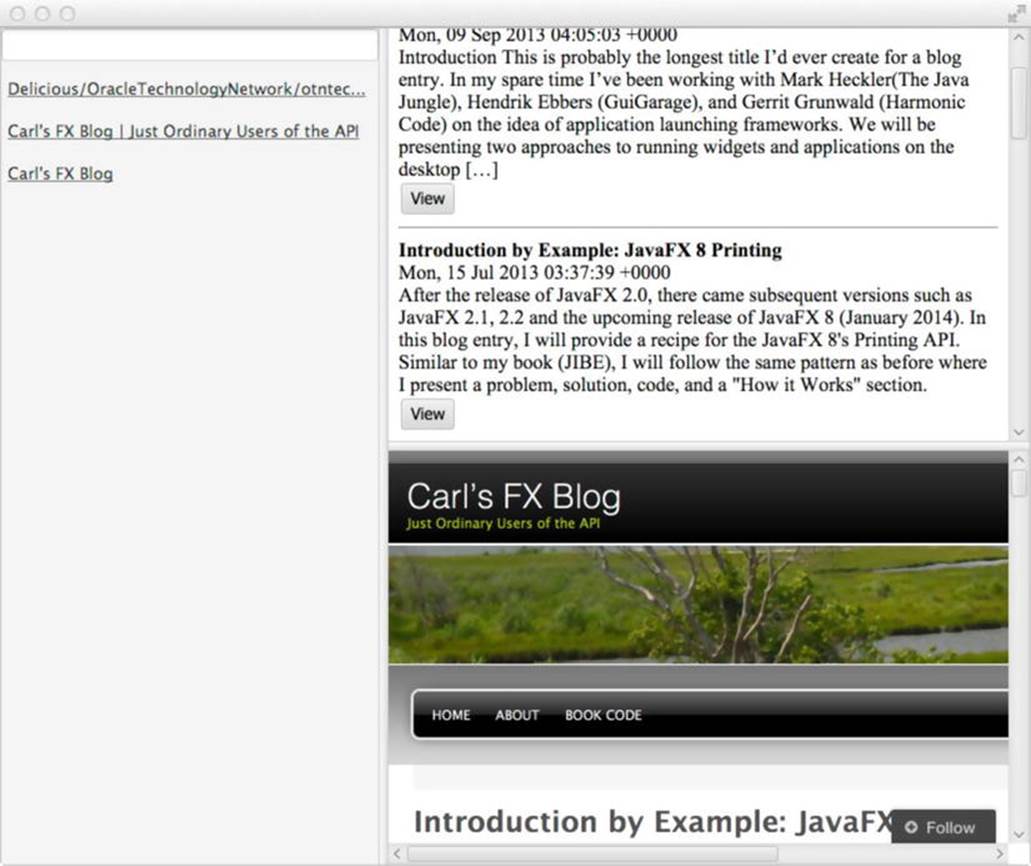
Figure 17-10. JavaFX RSS reader
Shown here is an example of the HTML output to be rendered in the new headlines region (upper-right frame). You will also see the HTML view button that’s responsible for notifying the application to load and render the article in the lower-right frame region:
<head>
</head>
<body>
<b>Carl's FX Blog (10)</b><br />
<form>
<hr />
<b>
JavaFX Forms Framework Part 2</b><br />Mon, 03 Aug 2009 18:36:02 +0000<br />Introduction This is the second installment of a series of blog entries relating to a proof of concept for a JavaFX Forms Framework. Before I specify the requirements and a simple design of the FXForms Framework, I want to follow up on comments about tough issues relating to enterprise application development and JavaFX. If you recall [...]<img alt="" border="0" src="http://stats.wordpress.com/b.gif?host=carlfx.wordpress.com&blog=6443320&post=339&subd=carlfx&ref=&feed=1" width="1" height="1" /><br />
<input type="button" onclick="alert('http://carlfx.wordpress.com/2009/08/03/javafx-forms-framework-part-2/')" value="View" />
... // the rest of the headlines
</form></body>
How It Works
To create an RSS reader, you need to store feed locations for later reading. When adding a new RSS feed, you will want to locate the little orange iconic button and drag the URL address line into your JavaFX RSS reader application. I find that the drag option works on my Firefox browser. However, if dragging doesn’t work for you, I’ve provided a text field to allow you to cut and paste the URL. Once you enter the URL, press Enter to initiate the headline news loading process. For example, you can visit Google’s technology news RSS athttp://news.google.com/news?pz=1&cf=all&ned=us&hl=en&topic=tc&output=rss.
Figure 17-11 depicts the orange RSS icon in the upper left.
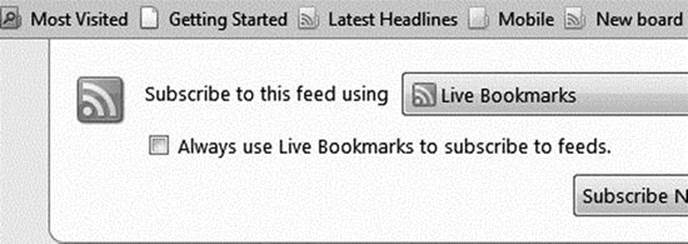
Figure 17-11. The RSS icon
Once the URL is accepted via drag-and-drop or via the text field, the JavaFX RSS reader application will save the URL location to a database. The RSS application consists of three frame regions: the RSS feed title column (left), headline news (upper right), and the website view (lower right). To display the news headlines, click the hyperlinks to the left. To show the entire article in the lower-right frame, click the View button below the headline in the upper-right frame. Before running the code, the application will require the JAR libraries derby.jar andderbytools.jar to be included in your project class path. These libraries allow you to save RSS URLs to an embedded JDBC database.
Similar to what you did in Recipe 17-3, you retrieve news information from the Internet. The RSS retrieved will be using version 2.0. RSS is an XML standard that provides really simple syndication, thus the acronym. Now enough with the acronyms; let’s jump into the code, shall we?
In the start() method, you create a 640 by 480 white scene display area. Next, you create a map (TreeMap) containing Hyperlink objects as values and keys representing the URL location (String) to the RSS feed. As before when displaying HTML content, you need to createWebViews. Here you create two WebViews and one WebEngine. The two WebViews will render HTML for the news headline frame region and the viewing of the entire article region (lower right). The single WebEngine is responsible for retrieving the RSS feed when the user clicks the left frame region containing the RSS hyperlinks.
To support the feature that allows the user to enter an RSS feed, you need to create a text field that can save and render the headline news. The following code snippet saves an RSS URL and adds an address as a new hyperlink to the list of feeds.
final VBox leftArea = new VBox(10);
final TextField urlField = new TextField();
urlField.setOnAction((ActionEvent ae) -> {
String url = urlField.getText();
final Hyperlink jfxHyperLink = createHyperLink(url, webEngine);
hyperLinksMap.put(url, jfxHyperLink);
HBox rowBox = new HBox(20);
rowBox.getChildren().add(jfxHyperLink);
leftArea.getChildren().add(rowBox);
webEngine.load(url);
urlField.setText("");
});// end of urlField setOnAction()
After the user clicks on a hyperlink the news retrieval is initiated. Once a successful retrieve has occurred on the webEngine (WebEngine) object, you need to add a ChangeListener instance to respond when the state property changes to State.SUCCEEDED. With a valid state of State.SUCCEEDED, you begin to parse the XML DOM returned from the WebEngine’s getDocument() method. Again, I provided a convenience method called parse() to interrogate the Document object representing the RSS news information.
RssFeed rssFeed = parse(webEngine.getDocument(), webEngine.getLocation());
Next, you create an HTML page that will list the channel tile and the number of total news headlines returned. After creating the HTML to display the RSS channel title and the number of articles, you iterate over all the news headlines to build record sets or rows. Each row will contain an HTML button labeled View to notify the WebEngine object of an alert containing the article’s URL. When the WebEngine object is notified, the OnAlert property will contain an event handler to render the entire article in the frame in the lower-right split region. After the web page is assembled, you call the newsBrief object’s getEngine().loadContent() method to render the page. Once it’s rendered, you save the URL RSS feed (RssFeed) object to the database by invoking the DBUtils.saveRssFeed(rssFeed). As a convenience, thesaveRssFeed() method will check for duplicates and not save them. The following code loads the web page to be rendered and saves the newly added rssFeed URL:
newsBrief.getEngine().loadContent(content);
// write to disk if not already.
DBUtils.saveRssFeed(rssFeed);
As in the previous recipes, you will be responding to HTML WebEvents when the new headline View button is pressed, which calls a JavaScript’s alert() function. The following code snippet handles a web event (WebEvent) containing the URL that links to the entire article viewed in the lower-right region:
newsBrief.getEngine().setOnAlert((WebEvent<String> evt) -> {
websiteView.getEngine().load(evt.getData());
}); // end of newsBrief setOnAlert()
When creating the headlines region (upper right), which contains the HTML buttons to render the article’s web page, notice the alert() function containing the URL to be loaded and rendered in the lower split frame region. The following code is an example of the HTML generated for an headline news containing a View button that can notify the web engine’s OnAlert web event (WebEvent).
<input type="button" onclick="alert('http://carlfx.wordpress.com/2009/08/03/javafx-forms-framework-part-2/')" value="View" />
One last thing to point out is that the RSS application is missing some features. One feature that comes to mind is the ability to delete individual RSS hyperlinks from the left column region. A workaround is to remove all links by deleting the database on the file system. Because Derby is an embedded database, you can delete the directory containing the database. The JavaFX RSS application will re-create an empty database if one doesn’t exist. Hopefully, you can add new features to enhance this fun and useful application.
Summary
JavaFX works well within the context of web applications. In this chapter, we looked at a few different ways to combine the realm of web applications and client applications with the convergence of HTML and JavaFX. JavaFX 8 has been tailored for easy integration with HTML5, so we looked at how to interact with HTML5 from JavaFX, and vice versa. We also looked at the retrieval and display of database information in a JavaFX application, as well as embedding other rich client content, such as SVG.
All materials on the site are licensed Creative Commons Attribution-Sharealike 3.0 Unported CC BY-SA 3.0 & GNU Free Documentation License (GFDL)
If you are the copyright holder of any material contained on our site and intend to remove it, please contact our site administrator for approval.
© 2016-2026 All site design rights belong to S.Y.A.