Java 8 Recipes, 2th Edition (2014)
CHAPTER 2. New Features of Java 8
Java 8 has introduced a magnitude of new features, making it one of the most significant releases of Java in years. This chapter covers a handful of the new features of Java 8 and includes short examples of each. These recipes are meant to provide a brief overview of the some new features in Java 8 and to get you up and running quickly using them. This is by no means a comprehensive list of the new features that were introduced in Java 8, but more of a precursor of what to expect throughout this book. At the end of each recipe, you’re directed to the chapter in this book, or to an another resource, that covers the topic in more detail.
Java Language Enhancements
The release of Java 8 introduced a number of new features to the language, making it more productive, easier to manage, and more efficient. This section covers some of these new features via a variety of recipes.
2-1. Passing Functionality as a Method Argument
Problem
You want to write an action for a JavaFX button without generating an anonymous inner class.
Solution
Utilize a lambda expression to incorporate the action functionality using compact, inline syntax. The following JavaFX application contains a button that utilizes a lambda expression to encapsulate the functionality of the button, rather than an anonymous inner class.
public class Recipe_02_01 extends Application {
final Group root = new Group();
/**
* @param args the command-line arguments
*/
public static void main(String[] args) {
Application.launch(args);
}
@Override
public void start(Stage primaryStage) {
primaryStage.setTitle("Hello Lambda");
Scene scene = new Scene(root, 300, 250);
Button btn = new Button();
Label message = new Label();
btn.setLayoutX(60);
btn.setLayoutY(80);
btn.setText("Invoke Lambda Expression");
btn.setOnAction((event) -> {
message.setText("Lambda expression invoked!");
});
root.getChildren().add(btn);
message.setLayoutX(300/2 - 90);
message.setLayoutY(30);
root.getChildren().add(message);
primaryStage.setScene(scene);
primaryStage.show();
}
}
This JavaFX application produces a simple application that looks like Figure 2-1. When you press the button, the ActionListener, which is a lambda expression, is invoked.
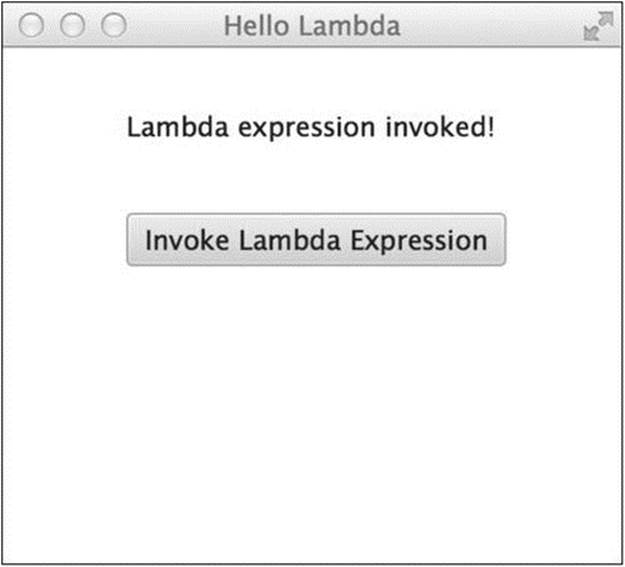
Figure 2-1. Lambda expression as a button action listener
How It Works
Lambda expressions are one of the new features of Java 8 that will have a tremendous impact on productivity and business logic. Lambda expressions are anonymous blocks of code that accept zero or more parameters, encapsulate a series of statements or an expression, and return a result. They are analogous to closures from other languages, being anonymous functions that can be passed into other code as needed.
The syntax of a lambda expression includes an argument list, a new character to the language known as the “arrow token” (->), and a body. The following model represents the structure of a lambda expression:
(argument list) -> { body }
The argument list for a lambda expression can include zero or more arguments. If there are no arguments, then an empty set of parentheses can be used. If there is only one argument, then no parentheses are required. Each argument in the list can include an optional type specification. If the type of the argument is not specified, then the type is derived from the current context.
Lambda expressions are built on functional interfaces, which are simply Java interfaces containing a single abstract method. Simply put, the lambda expression itself is an anonymous inner class that implements a functional interface, which can then be assigned to a variable and invoked. This recipe is merely a primer for lambda expressions; to learn more about them, refer to Chapter 6.
2-2. Calling On an Existing Method from a Lambda Expression
Problem
You are using a lambda expression to call on a single existing method that implements a functional interface, and you’d like to shorten the length of the code required to perform this method call. Moreover, you want to be able to pass the method functionality as an argument.
Solution
Utilize a method reference to call on a single existing method that implements a functional interface. In the following example, a pool calculation class implements a functional interface in order to obtain the calculated volume of a pool. The functional interface Volume is as follows:
public interface Volume {
double calculateVolume();
}
The PoolCalculator class implements Volume, as it contains an implementation for the calculateVolume() method. Therefore, that method can be called on via a method reference and assigned to a variable, which can then be passed as an argument as needed. The following code shows the PoolCalculator class.
public class PoolCalculator implements Volume {
private double width;
private double length;
private double minDepth;
private double maxDepth;
public PoolCalculator(){}
public PoolCalculator(double width,
double length,
double minDepth,
double maxDepth){
this.width = width;
this.length = length;
this.minDepth = minDepth;
this.maxDepth = maxDepth;
}
/**
* @return the width
*/
public double getWidth() {
return width;
}
/**
* @param width the width to set
*/
public void setWidth(double width) {
this.width = width;
}
/**
* @return the length
*/
public double getLength() {
return length;
}
/**
* @param length the length to set
*/
public void setLength(double length) {
this.length = length;
}
/**
* Calculate the volume
* @return
*/
public double calculateVolume(){
double avgDepth = (minDepth+maxDepth)/2;
return avgDepth * length * width;
}
/**
* Returns the number of gallons for a given Volume
* @param vol
* @return
*/
public double calculateGallons(Volume vol){
return 7.48 * vol.calculateVolume();
}
/**
* @return the minDepth
*/
public double getMinDepth() {
return minDepth;
}
/**
* @param minDepth the minDepth to set
*/
public void setMinDepth(double minDepth) {
this.minDepth = minDepth;
}
/**
* @return the maxDepth
*/
public double getMaxDepth() {
return maxDepth;
}
/**
* @param maxDepth the maxDepth to set
*/
public void setMaxDepth(double maxDepth) {
this.maxDepth = maxDepth;
}
}
A method reference can now be used to assign the functionality of the calculateVolume() method to a variable. In the following code, the method reference is assigned to a variable identified as volume, and then the volume variable is passed to the calculateGallons()method.
PoolCalculator calculator = new PoolCalculator();
calculator.setLength(32);
calculator.setWidth(16);
calculator.setMinDepth(4);
calculator.setMaxDepth(8);
Volume volume = calculator::calculateVolume;
double poolVolume = volume.calculateVolume();
System.out.println("Volume of the pool is: " + poolVolume + " cubic feet");
System.out.println("Gallons in the pool: " + calculator.calculateGallons(volume));
Here is the result of running this code:
Volume of the pool is: 3072.0 cubic feet
Gallons in the pool: 22978.56
How It Works
Lambda expressions allow you to encapsulate functionality and assign to a variable for later use, if desired. Believe it or not, there is a simplified variation of a lambda expression referred to as a method reference. If a class contains a method that is derived from the implementation of a functional interface, then that method can be obtained or “captured” and assigned to a variable for later use. The concept being that the method contains functionality that can be assigned to a variable of the same type as the functional interface.
In the example for this recipe, a functional interface identified as Volume contains a single abstract method, calculateVolume(). The PoolCalculator class implements the Volume interface, as it contains an implementation of the calculateVolume() method. To capture this method via a method reference, you can use the following syntax on an instance of the PoolCalculator class:
poolCalculator::calculateVolume
The double colon operator is used to indicate a method reference. In this example, a reference to an instance method of a specific object is used. However there are various types of method references; to learn more about them refer to Chapter 6.
2-3. Providing a Default Method Implementation in an Interface
Problem
You want to add a new method to an existing interface without breaking backward compatibility with other code.
Solution
Develop a default method (a.k.a. defender method) within the interface so that any classes implementing the interface are not required to provide an implementation of the new method. To do so, add the new default keyword to the interface declaration and provide a method implementation. The following interface Volume includes a default method implementation for the calculateVolume method:
public interface Volume {
/**
* Calculate pool volume given depth values and measurement values. For
* a pool with variable depth, the minDepth should be depthValues[0], and
* the maxDepth should be passed as depthValues[1].
*
* This interface can accept multiple measurement values, but it expects
* measurementValues[0] == length, or measurementValues[0] == radius
* measurementValues[1] == width
* @param depthValues
* @param measurementValues
* @return
*/
default double calculateVolume(Double[] depthValues, Double[] measurementValues) {
double length, width, radius, minDepth, maxDepth, avgDepth = 0;
if(depthValues.length > 1){
minDepth = depthValues[0];
maxDepth = depthValues[1];
avgDepth = (minDepth + maxDepth)/2;
} else if (depthValues.length == 1){
avgDepth = depthValues[0];
}
if(measurementValues.length > 1){
length = measurementValues[0];
width = measurementValues[1];
radius = 0;
} else {
length = 0;
width = 0;
radius = measurementValues[0];
}
if (radius == 0){
return length * width * avgDepth;
} else {
return (radius * radius) * 3.14 * avgDepth;
}
};
}
Any class implementing this interface can now use this default method implementation or provide its own implementation, much like an abstract class.
How It Works
A standard Java interface consists of method declarations that do not contain a body. Classes implement Java interfaces, and in doing so they provide implementations for the method declarations of the interface. Java interfaces are an important part of object orientation, as they abstract implementation details and provide a facade to extend functionality. In Java 8, interfaces have been changed to allow default method implementations. A default method is a method declaration and implementation, and it is denoted with the default keyword preceding the declaration. Any class that extends an interface containing a default method can choose to implement and override the default implementation or simply use the default implementation.
You may wonder why this functionality was provided in Java 8. Why not simply use abstract classes, rather than default methods? Default methods were added in order to provide a way to change interfaces without breaking backward compatibility. Many interfaces needed to be changed to accommodate Java 8 API updates, and in doing so, these interfaces would possibly break functionality of code that was written for prior releases of Java. By adding default methods to interfaces, engineers were able to add new functionality to existing interfaces without breaking the code that relied on those interfaces. To learn more about default methods, refer to Recipe 5-7.
2-4. Applying the Same Annotation Multiple Times in a Declaration or Type Use
Problem
You want to apply the same annotation more than once to a specified declaration or type.
Solution
The same annotation can be applied to a declaration or type more than once, given that each annotation is marked as @Repeatable. In the following code, the @Repeatable annotation is used to develop an annotation that can be repeated, rather than grouped together as in previous releases of Java. In this situation, an annotation named Role is being created, and it will be used to signify a role for an annotated class or method.
@Repeatable(value=Roles.class)
public @interface Role {
String name() default "AUTHOR";
}
The Role annotation uses the Roles annotation when used more than one time on a specification. The Roles annotation simply generates an array of Role annotations. The code for Roles is as follows:
public @interface Roles {
Role[] value();
}
Now, if you want to assign two different roles to a particular method, you can use the following syntax:
@Role(name="AUTHOR")
@Role(name="REVIEWER")
public void assignWork(){
...
}
How It Works
Repeating annotations are a handy new feature of Java 8, as they allow you to assign multiple versions of an annotation to a single field, method, or class. To perform the same assignment in previous releases, you had to enclose the two @Role annotations within a @Roles group, as follows:
@Roles({
@Role(name="AUTHOR"),
@Role(name="REVIEWER")
)}
To develop a repeatable annotation, an enclosing container annotation must be created with a field that is used to hold multiple instances of the annotation. In the recipe example, the Roles annotation is used for holding multiple Role annotations in a repeatable situation. Each of theRole annotations is added to the Role[] array that is declared within the Roles annotation.
Date-Time API
A new Date-Time API has been introduced in Java 8 and it was developed under JSR 310. The Date-Time API uses the calendar defined in ISO-8601 as the default calendar. Therefore, the calendar is based on the Gregorian calendar system, and in this chapter, you learn how to work with date, time, and time zone data. The Date-Time API adheres to several design principles in an effort to be clear, fluent, immutable, and extensible. The API uses a clear language that is concise and very well defined. It is also very fluent, so code dealing with date-time data is easy to read and understand.
This introduction provides a few brief examples of the new API to get your feet wet. To learn about the API in more detail, refer to Chapter 4.
2-5. Incorporating the Current Date and Time
Problem
You want to obtain the current date and time for use in your application.
Solution
Utilize the new Date-Time API to retrieve the current date and time. The following code demonstrates how to do so.
LocalDate localDate = LocalDate.now();
LocalTime localTime = LocalTime.now();
How It Works
The Date-Time API makes it easy to obtain the current date and time, each as separate entities. To do so, you import the java.time.LocalDate and java.time.LocalTime classes and call upon their static now() methods to retrieve instances of the local date and time, respectively. Both the LocalDate and the LocalTime classes cannot be instantiated, as they are immutable and thread-safe. To learn more, refer to Recipe 4-7.
2-6. Obtaining a Date from a Specified String
Problem
You want to obtain a LocalDate object, given a specified string of text that contains a date.
Solution
Utilize a DateTimeFormatter to set the format of the specified string of text and then call on the LocalDate.parse() method, passing the string of text as the first argument and the formatter as the second. The following lines of code demonstrate this process.
DateTimeFormatter formatter = DateTimeFormatter.ofPattern("MM/dd/yyyy");
LocalDate yearStart = LocalDate.parse("01/01/2014", formatter);
How It Works
The LocalDate object contains several utility methods that can be used to manipulate a date. One such method is parse(), which accepts two arguments, a string-based date and a DateTimeFormatter object that specifies the format of the first argument. This method obtains an instance of LocalDate from the text string, and it returns a DateTimeParseException if the text cannot be parsed due to incorrect formatting.
The ability to obtain a date from a specified string is only one of the nice features of the new Date-Time API. To learn about more new features, refer to Chapter 4.
2-7. Performing Date-Time Calculations
Problem
You want to add a number of days or subtract a number of weeks from a given date or time.
Solution
Utilize the built-in utility methods in the LocalDate and LocalTime objects to perform the required calculation. The following code obtains the current date and time and performs some basic calculations on them.
LocalDate myDate = LocalDate.now();
LocalTime myTime = LocalTime.now();
LocalDate datePlusDays = myDate.plusDays(15);
System.out.println("Today Plus 15 Days: " + datePlusDays);
LocalDate datePlusWeeks = myDate.plusWeeks(8);
System.out.println("Today Plus 8 weeks: " + datePlusWeeks);
LocalTime timePlusHours = myTime.plusHours(5);
LocalTime timeMinusMin = myTime.minusMinutes(30);
System.out.println("Time Plus 5 Hours: " + timePlusHours);
System.out.println("Time Minus 30 Minutes: " + timeMinusMin);
How It Works
The Date-Time API makes it easy to perform calculations on dates and times. The LocalDate and LocalTime objects have calculation methods built right in, so there is no more worrying about converting to different types of objects in order to perform calculations. The Date-Time API also allows easy access to the current date or time by enabling you to invoke the now() method on either of those objects.
Streams API
Collections play an integral role in many Java applications. The release of Java 8 introduced the Streams API, which changes the way that collections of data can be used, making solutions more productive and maintainable. The Streams API allows you to traverse over a collection of elements and perform aggregate operations, pipeline two or more operations, perform parallel execution, and more. This section provides a glimpse of the Streams API. To learn more, refer to Recipe 7-8.
2-8. Iterating Over a Collection of Data
Problem
Your application contains a list of objects and you want to iterate over that list and print out a field for each object.
Solution
Utilize the new Java Streams API to iterate over the list of data and perform a task for each element. In the following lines of code, a list is populated with sample data. It is then iterated by generating a stream, and then each element is printed to the command-line using a lambda expression.
List<String> myList = new ArrayList();
// Populate the list
for(int x = 0; x <= 10; x++){
myList.add("Test " + x);
}
// Print each element within the list
myList.stream().forEach((value)->{
System.out.println(value);
});
Results:
Test 0
Test 1
Test 2
Test 3
Test 4
Test 5
Test 6
Test 7
Test 8
Test 9
Test 10
How It Works
The new Streams API enhances the usability of Java Collection types, making it easy to iterate and perform tasks against each element in the collection. In the solution to this recipe, an array of strings is generated, and then a stream is created from the array. Using the stream, each element of the array is printed to the command-line via the forEach() terminal operation. The Streams API allows the compiler to determine the best way to iterate over a collection (internal iteration). A stream is a sequence of object references that can be generated on all collection types. The Streams API makes it possible to perform a sequence of aggregate operations on those object references and return a result or apply the changes to the objects inline. This is otherwise known as a pipeline. The pseudocode for generating and using a stream is as follows:
Collection -> (Stream) -> (Zero or More Intermediate Operations) -> (Terminal Operation)
For more information on this outstanding new feature of Java 8, refer to Recipe 7-8.
JavaFX
JavaFX has undergone a massive overhaul with the release of Java 8. For starters, it is now included with Java 8 SE, so there is no longer a need to download it separately. Multiple new components have been added to the platform, including a DatePicker and new SwingNode for embedding Swing inside of JavaFX. There is also better embedded support for deployment on platforms such as the Raspberry Pi. Other new features include WebView enhancements, printing support, rich text support, and the list goes on.
This section covers just a few of the new features for JavaFX 8. To learn more, refer to Chapters 14–17, which are dedicated to JavaFX.
2-9. Embedding Swing in JavaFX
Problem
You want to embed some standard Java Swing code into a JavaFX application.
Solution
Use a SwingNode to embed the Swing content into the application. In the following simple JavaFX application, a front-end is created with JavaFX, and a Swing JLabel component is embedded in it.
public class Recipe02_09 extends Application {
@Override
public void start(Stage primaryStage) throws Exception {
final SwingNode swingNode = new SwingNode();
createSwingContent(swingNode);
StackPane pane = new StackPane();
pane.getChildren().add(swingNode);
primaryStage.setScene(new Scene(pane, 100, 50));
primaryStage.show();
}
private void createSwingContent(final SwingNode swingNode) {
SwingUtilities.invokeLater(() -> {
swingNode.setContent(new JLabel("Hello Swing"));
});
}
/**
* @param args the command-line arguments
*/
public static void main(String[] args) {
launch(args);
}
}
The resulting application looks like Figure 2-2.

Figure 2-2. Using SwingNode to embed a JLabel
How It Works
Swing was once the preferred means for developing graphical user interfaces and desktop applications for the Java platform. Swing is part of the Java Foundation Classes (JFC), a grouping of features for developing graphical user interfaces. The Swing API consists of a multitude of components (JComponent classes), event handling classes, look and feel classes, and so forth. The API is quite capable of developing highly sophisticated applications. However, the API is so immense that it can be difficult to learn, and technology has evolved in a way such that many of the Swing classes and features have become outdated. That being said, JavaFX has become the preferred API for developing modern graphical user interfaces and desktop applications for the Java platform. As such, many developers need a way to meld the two APIs together in order to transition. Even applications written entirely in JavaFX can benefit from the use of some Swing components. The javafx.embed.swing.SwingNode class makes it possible to embed a JComponent instance into a JavaFX application with little effort, by passing the JComponent to the SwingNode setContent() method. The content is repainted automatically and all events are forwarded to the JComponent instance without user intervention.
In the example to this recipe, a Swing JLabel component is embedded into a JavaFX application by passing the Swing component to the SwingNode setContent() method. The Swing content should run on the Event Dispatch Thread (EDT), so any Swing access should be made on the EDT. That said, a new thread is created using SwingUtilities.invokeLater, and a lambda expression encapsulates the Runnable that is used to set the Swing content.
To learn more about using SwingNode in your applications, and to see a more substantial example, refer to Recipe 14-18.
2-10. Adding a DatePicker
Problem
You want to add a component to your JavaFX application that will allow you to select a calendar date.
Solution
Utilize the new JavaFX DatePicker component. In the following example, a DatePicker component is used to select a date and display it in a label.
public class Recipe02_10 extends Application {
private Label dateLabel;
private DatePicker datePicker;
@Override
public void start(Stage primaryStage) throws Exception {
dateLabel = new Label("Select a date using the widget");
datePicker = new DatePicker(LocalDate.now());
datePicker.setOnAction(event -> {
dateLabel.setText("The selected date is: " + datePicker.getValue());
});
FlowPane flow = new FlowPane();
flow.setPadding(new Insets(5, 5, 5, 5));
flow.getChildren().add(dateLabel);
flow.getChildren().add(datePicker);
primaryStage.setScene(new Scene(flow, 300, 100));
primaryStage.show();
}
/**
* @param args the command-line arguments
*/
public static void main(String[] args) {
launch(args);
}
}
The resulting application looks like that in Figure 2-3.
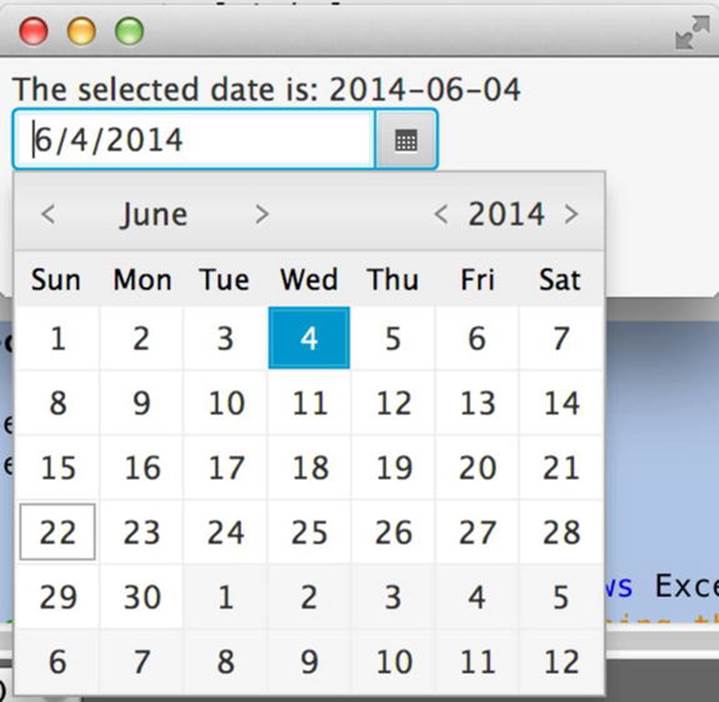
Figure 2-3. The JavaFX DatePicker component in action
How It Works
For a number of years, the JavaFX platform did not have a standard DatePicker component. The DatePicker component, new to JavaFX 8, fills that void by providing developers with a way to select a date from a given calendar. The DatePicker component goes hand-in-hand with the Date-Time API, which enables easy date selection and date calculations.
The DatePicker includes a Month selector, Year selector, and Day selector. To add the component to your application, import javafx.scene.control.DatePicker and create a new instance of the component. By default, if no date is passed into the component it will display a blank text box. The constructor for the component allows you to pass in a LocalDate object upon initialization, as shown in the example.
The DatePicker is very extensible, as it provides the ability for customization. For instance, the weeks of the year can be set using the setShowWeekNumbers() method, and the chronology can be set using the setChronology() method. The following code shows the same example from the solution, but this time the DatePicker has been customized to show the week numbers and use Japanese chronology.
public void start(Stage primaryStage) throws Exception {
dateLabel = new Label("Select a date using the widget");
datePicker = new DatePicker(LocalDate.now());
datePicker.setOnAction(event -> {
dateLabel.setText("The selected date is: " + datePicker.getValue());
});
datePicker.setShowWeekNumbers(true);
datePicker.setChronology(JapaneseChronology.INSTANCE);
FlowPane flow = new FlowPane();
flow.setPadding(new Insets(5, 5, 5, 5));
flow.getChildren().add(dateLabel);
flow.getChildren().add(datePicker);
primaryStage.setScene(new Scene(flow, 300, 100));
primaryStage.show();
}
The result looks like Figure 2-4.
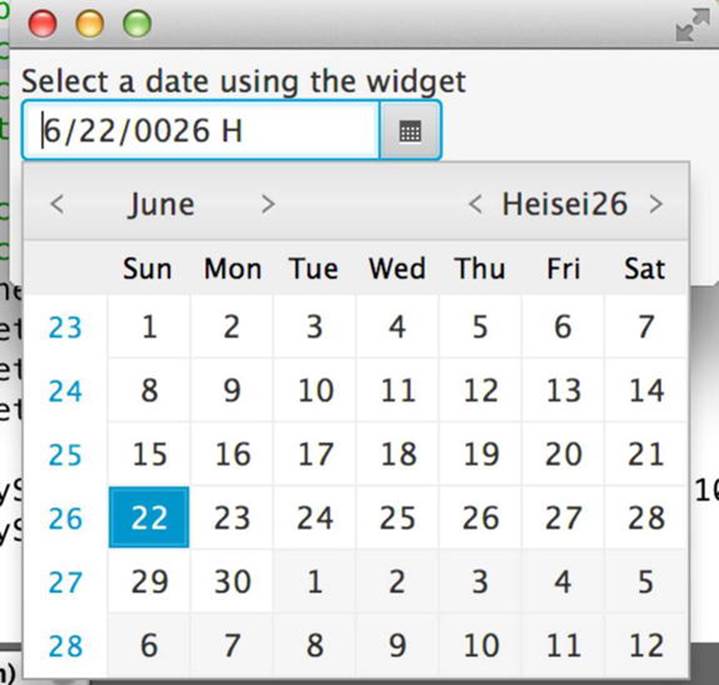
Figure 2-4. Customized DatePicker
For more information about the new DatePicker, refer to the online documentation at http://docs.oracle.com/javase/8/javafx/user-interface-tutorial/date-picker.htm.
2-11. Printing from JavaFX
Problem
You want to provide the ability to print from within your JavaFX application.
Solution
Utilize the JavaFX Print API, new to JavaFX 8, to print designated nodes and to construct sophisticated print dialogs. The following class uses the new Print API to print the TextArea component when a print button is selected.
public class Recipe02_11 extends Application {
@Override
public void start(Stage primaryStage) throws Exception {
TextArea ta = new TextArea();
ta.setWrapText(true);
final Printer selectedPrinter = Printer.getDefaultPrinter();
Button printButton = new Button("Print");
printButton.setOnAction((ActionEvent event) -> {
print(ta, selectedPrinter);
});
FlowPane pane = new FlowPane();
pane.getChildren().add(ta);
pane.getChildren().add(printButton);
primaryStage.setScene(new Scene(pane, 500, 300));
primaryStage.show();
}
public void print(final Node node, Printer printer) {
PrinterJob job = PrinterJob.createPrinterJob();
job.setPrinter(printer);
if (job != null) {
boolean success = job.printPage(node);
if (success) {
job.endJob();
}
}
}
public static void main(String[] args){
launch(args);
}
}
The constructed application looks like Figure 2-5.

Figure 2-5. A simple application using the Print API
In this application, the TextArea component is sent to the operating system’s default printer when you press the Print button.
How It Works
In releases of JavaFX prior to JavaFX 8, there was no standard API for printing portions of an application stage. In JavaFX 8, a Print API has been added to standardize the way in which printing features are handled. The API also makes it easy to enable applications with printing functionality using very little code. The API is quite large, as it contains a number of classes, but it is very straightforward and easy to use.
In this example, a TextArea node is constructed, and then it is sent to a printer when the button is clicked. The button in the application is bound to a method, which is identified as print(). The print() method accepts a JavaFX node as the first argument and a Printer as the second argument. The Printer argument is the printer that represents the destination. To obtain the default operating system printer, issue the following command, as shown in the example:
Printer.getDefaultPrinter();
A PrinterJob must be constructed before the JavaFX node can be sent to it, and to do so, you call upon the PrinterJob.createPrinterJob() method. Once the PrinterJob instance is created, you set the destination printer by passing the Printer argument to thejob.setPrinter() method. Finally, call the job.printPage() method, passing the node to be printed.
To learn more about using the Print API, and to see a more detailed example, refer to Recipe 14-17.
Scripting
The Java platform has had support for embedding and/or executing JavaScript files since the release of Java 1.6, and the JavaScript engine was Rhino. The Rhino engine served us well for years, but now an updated JavaScript engine named Nashorn has entered the scene. The Nashorn engine brings with it many updates, including support for the ECMAScript-262 Edition 5.1 language specification, a new command-line utility for interactive interpretation or JavaScript file execution, and full access to the JavaFX 8 API.
This chapter provides a couple of examples to get started using Nashorn. For more information, see Chapter 18, which is dedicated to the new JavaScript engine.
2-12. Embedding JavaScript in Your Java Application
Problem
You want to utilize JavaScript to implement a portion of your Java application.
Solution
Utilize the Nashorn engine to embed JavaScript in a Java application. The following example executes inline JavaScript by executing a Nashorn ScriptEngine.
public class Recipe02_12 {
public static void loadInlineJs() {
ScriptEngineManager sem = new ScriptEngineManager();
ScriptEngine nashorn = sem.getEngineByName("nashorn");
try {
nashorn.eval("print('This is being printed with JavaScript');");
} catch (ScriptException ex) {
Logger.getLogger(Recipe02_12.class.getName()).log(Level.SEVERE, null, ex);
}
}
public static void main(String[] main) {
loadInlineJs();
}
}
How It Works
Nashorn is a new JavaScript engine that has been included in Java 8. To execute JavaScript within a Java application, you invoke an instance of the Nashorn engine, passing it to the engine inline or external JavaScript. In this recipe, the Nashorn engine is obtained by calling on theScriptEngineManager and passing "nashorn" as the argument. After obtaining the Nashorn engine, you are ready to invoke a JavaScript file or evaluate inline JavaScript code by calling on the engine’s eval() method. In this example, a JavaScript print() statement is passed to the engine.
For more information on using the new Nashorn engine, refer to Chapter 18.
2-13. Executing JavaScript from the Command-Line
Problem
You want to execute JavaScript via the command-line.
Solution
Invoke the jjs tool, which comes as part of Java 8. To execute a JavaScript file, invoke the jjs tool from the command-line, and then pass the fully qualified name (path included if not in CLASSPATH) of a JavaScript file to execute. For example, to execute helloNashorn.js, you use the following command:
jjs /src/org/java8recipes/chapter18/js/helloNashorn.js
Hello Nashorn!
How It Works
The jjs command-line tool is new in Java 8. The tool is used to execute JavaScript inline or from a JavaScript file. When using the tool inline, you can execute JavaScript interactively and receive immediate feedback. The tool can execute one or more .js files with arguments or without.
To learn more about the jjs tool and see a more in-depth example, refer to Recipe 18-2.
Summary
This chapter provided a brief overview of some Java 8 new features, although it barely scratched the surface of what Java 8 has to offer. The remainder of this book covers recipes that include solutions utilizing pre-existing Java features, as well as new features introduced in this latest release. As mentioned throughout this chapter, some of the features covered here are covered in more detail in later recipes. There are also many new features that were not covered in this chapter, so get ready to delve into the world of Java.
All materials on the site are licensed Creative Commons Attribution-Sharealike 3.0 Unported CC BY-SA 3.0 & GNU Free Documentation License (GFDL)
If you are the copyright holder of any material contained on our site and intend to remove it, please contact our site administrator for approval.
© 2016-2026 All site design rights belong to S.Y.A.