PROFESSIONAL JAVA FOR WEB APPLICATIONS (2014)
Part I Creating Enterprise Applications
Chapter 3 Writing Your First Servlet
IN THIS CHAPTER
· Creating a Servlet class
· Configuring a Servlet for deployment
· Understanding doGet(), doPost() and other methods
· Using parameters and accepting form submissions
· Configuring your application using init parameters
· Uploading files from a form
· Making your application safe for multithreading
WROX.COM CODE DOWNLOADS FOR THIS CHAPTER
You can find the wrox.com code downloads for this chapter at www.wrox.com/go/projavaforwebapps on the Download Code tab. The code for this chapter is divided into the following major examples:
· Hello-World Project
· Hello-User Project
· Customer-Support-v1 Project
NEW MAVEN DEPENDENCIES FOR THIS CHAPTER
In this chapter, you’ll need your first Maven dependency, shown in the following code. You’ll use this dependency for every chapter throughout the rest of the book.
<dependency>
<groupId>javax.servlet</groupId>
<artifactId>javax.servlet-api</artifactId>
<version>3.1.0</version>
<scope>provided</scope>
</dependency>
In the last chapter, you became familiar with application servers and web containers and learned how to run, deploy to, and debug Apache Tomcat 8.0 from your Java IDE. In this chapter, you begin building web applications by first exploring the world of Servlets. Throughout this chapter and the rest of the book, you’ll continually change and improve these applications, deploying them to Tomcat for testing and debugging.
CREATING A SERVLET CLASS
In the Java Platform, Enterprise Edition, a Servlet is what receives and responds to requests from the end user. The Java EE API specification defines a Servlet as follows:
A Servlet is a small Java program that runs within a Web server. Servlets receive and respond to requests from Web clients, usually across HTTP, the HyperText Transfer Protocol.
http://docs.oracle.com/javaee/7/api/javax/servlet/Servlet.html
Servlets are the core classes in any web application, the only classes that either perform the work of responding to requests or delegate that work to some other part of the application. Unless some filter prematurely terminates a request (discussed in Chapter 9), every request to your application goes through some Servlet. The web container in which you run your application will have one or more built-in Servlets. These Servlets handle serving JavaServer Pages, displaying directory listings (if you have them enabled) and accessing static resources, such as HTML pages and graphics. You won’t need to worry about these Servlets yet (in some cases, ever). In this chapter, you learn how to write and configure the custom Servlets that make up your application.
Every Servlet implements the javax.servlet.Servlet interface, but usually not directly. Servlet is a simple interface, containing methods for initializing and destroying the Servlet and servicing requests. However, the service method will be called for any request of any type, even if it is not an HTTP request (theoretically, assuming your web container supports such a request). As an example, in the future it’s possible that new Servlets could be added to Java EE to support File Transfer Protocol (FTP). For that reason, there are various Servlet classes that you can extend instead. As of Java EE 7, the only Servlet protocol currently supported is HTTP.
What to Extend
In almost all cases, Servlets inherit from javax.servlet.GenericServlet. GenericServlet is still a protocol-independent Servlet with the lone, abstract service method, but it contains several helper methods for logging and getting information about the application and Servlet configuration (more on that later in the section “Configuring a Servlet for Deployment”).
For responding to HTTP-specific requests, javax.servlet.http.HttpServlet extends GenericServlet and implements the service method to accept only HTTP requests. Then, it provides empty implementations for methods corresponding to each HTTP method type, as illustrated in Table 3-1.
TABLE 3.1: Empty Implementations for HTTP Method Types
|
METHOD |
SERVLET METHOD |
PURPOSE |
|
GET |
doGet() |
Retrieves the resource at the specified URL |
|
HEAD |
doHead() |
Identical to GET, except only the headers are returned |
|
POST |
doPost() |
Typically used for web form submission |
|
PUT |
doPut() |
Stores the supplied entity at the URL |
|
DELETE |
doDelete() |
Deletes the resource identified by the URL |
|
OPTIONS |
doOptions() |
Returns which HTTP methods are allowed |
|
TRACE |
doTrace() |
Used for diagnostic purposes |
NOTE Most web programmers are familiar with the GET and POST methods and use them the majority of the time. If you are not familiar with the various HTTP methods or would like to learn more, now is the time to clickhttp://www.w3.org/Protocols/rfc2616/rfc2616-sec9.html to see the RFC-2616 specification section on method definitions.
With no exceptions in this book, your Servlets will always extend HttpServlet. It provides all the tools you need to selectively accept and respond to different types of HTTP requests, and its methods accept javax.servlet.http.HttpServletRequest andjavax.servlet.http.HttpServletResponse arguments instead of javax.servlet.ServletRequest and javax.servlet.ServletResponse so that you have easy access to HTTP-specific attributes of the requests your Servlet services. You should begin by creating a new, empty Servlet that extends HttpServlet:
package com.wrox;
import javax.servlet.http.HttpServlet;
public class HelloServlet extends HttpServlet
{
}
NOTE In order for this code to compile, you need to have the Java EE Servlet API library on your compile classpath. This is where the Maven artifact listed on the first page of this chapter comes into play. In each chapter you will need the listed Maven artifacts in order to compile any examples in that chapter.
In this form, your Servlet is already prepared to accept any HTTP request and respond to it with a 405 Method Not Allowed error. This is how you control which HTTP methods your Servlet responds to: Any HTTP Servlet methods you do not override will be responded to with an HTTP status 405. A Servlet that does not handle any requests is, of course, not very useful, so override the doGet method to add support for the HTTP method GET:
package com.wrox;
import javax.servlet.ServletException;
import javax.servlet.http.HttpServlet;
import javax.servlet.http.HttpServletRequest;
import javax.servlet.http.HttpServletResponse;
import java.io.IOException;
public class HelloServlet extends HttpServlet
{
@Override
protected void doGet(HttpServletRequest request, HttpServletResponse response)
throws ServletException, IOException
{
response.getWriter().println("Hello, World!");
}
}
Now your Servlet is equipped to respond to GET requests and return the plain text response “Hello, World!” in the response body. The code in this example is fairly straightforward. Calling getWriter on the response parameter returns a java.io.PrintWriter, a common Java class used for writing text to an output stream. Next, the code calls the println method on the PrintWriter to write the text “Hello, World!” to the output stream. Notice that you don’t have to worry about any of the details of the raw HTTP request or response. The web container takes care of interpreting the request and reading the headers and parameters from the socket. After your method returns, it takes care of formatting the response headers and body and writing them back to the socket.
NOTE Notice that you did not call the close method on the PrintWriter that you obtained from the response. Generally speaking, in Java you only need to close resources that you create. The web container created this resource, so it is responsible for closing it. Even if you had assigned the instance to a local variable and called several methods on it, this would still be the case.
You obviously could do a lot more in this doGet method, such as using request parameters, and you haven’t taken a look at the other methods yet. Rest assured, you’ll get to both soon.
Using the Initializer and Destroyer
While you get your first Servlet up and running, you should probably know about the init and destroy methods. When a web container first starts a Servlet, it calls that Servlet’s init method. This is sometimes, though not always, when the application is deployed. (You learn how to control this in the next section.) Later when the web container shuts down the Servlet, it calls the Servlet’s destroy method. These methods are not the same as the Java constructor and finalizer, and they are not called at the same time as the constructor and finalizer. Normally, these methods do nothing, but you can override them to perform some action:
@Override
public void init() throws ServletException
{
System.out.println("Servlet " + this.getServletName() + " has started.");
}
@Override
public void destroy()
{
System.out.println("Servlet " + this.getServletName() + " has stopped.");
}
NOTE You should know that another init method accepts a single argument of type javax.servlet.ServletConfig. This method is specified in the Servlet interface, but GenericServlet takes care of implementing this method for you and then calls the no-argument overload of init overridden in the previous code example. In this way, you do not have to call super.init(servletConig) from your own init method implementation.
Although you can override the original method, you shouldn’t do so because if you forgot to call the super method, the Servlet might not initialize correctly. If you need to access the ServletConfig, it’s much easier to just call the getServletConfigmethod. You learn more about the ServletConfig class throughout Parts I and II of this book.
You can do many things with these two methods. More important, init is called after the Servlet is constructed but before it can respond to the first request. Unlike when the constructor is called, when init is called all the properties have been set on the Servlet, giving you access to the ServletConfig and javax.servlet.ServletContext objects. (You learn what to do with these in the “Configuring your Application Using Init Parameters” section.) So, you may use this method to read a properties file or connect to a database using JDBC, for example. The init method is called when the Servlet starts. If the Servlet is configured to start automatically when the web application is deployed and started, that is when it is called. Otherwise, it is not called until the first request for that Servlet is received.
Likewise, destroy is called immediately after the Servlet can no longer accept any requests. This typically happens either when the web application is stopped or undeployed or when the web container shuts down. Because it is called immediately upon undeployment or shutdown, you do not have to wait for garage collection to trigger the finalizer before cleaning up resources such as temporary files or disconnecting from databases no longer in use. This is particularly important because if your application is undeployed but the server continues running, it may be several minutes or even hours before garbage collection runs. If you clean up your resources in the finalizer instead of the destroy method, this could result in your application undeploying partially or failing to undeploy. Thus, you should always use the destroy method to clean up resources held by your Servlet between requests.
The previous code example uses the init and destroy methods to log when the Servlet starts and stops, respectively. When you run your application in the next section, these log messages appear in the output window of your IDE’s debugger. Later in this chapter you put these methods to better use.
CONFIGURING A SERVLET FOR DEPLOYMENT
Now that you have created your Servlet, it’s time to put it in action. Although you have a working class that can respond to HTTP GET requests with a clever greeting, you have not written instructions for the web container to deploy the Servlet with the application. Chapter 1 introduced you to the deployment descriptor (web.xml) and the structure of a web application, and in Chapter 2 you learned how to deploy and debug an application using your IDE. In this section, you create the web.xml file in your WEB-INF directory and configure your Servlet for deployment. You then deploy the application using your IDE and see that greeting in your browser. Finally, you put some breakpoints in your code and examine when certain methods are called.
Adding the Servlet to the Descriptor
As you’ve learned, the deployment descriptor instructs the web container how the application should be deployed. Specifically, it defines all the listeners, Servlets, and filters that should deploy with the application and the settings the application should use to do this. First, take a look at a (mostly) empty web.xml file:
<?xml version="1.0" encoding="UTF-8"?>
<web-app xmlns="http://xmlns.jcp.org/xml/ns/javaee"
xmlns:xsi="http://www.w3.org/2001/XMLSchema-instance"
xsi:schemaLocation="http://xmlns.jcp.org/xml/ns/javaee
http://xmlns.jcp.org/xml/ns/javaee/web-app_3_1.xsd"
version="3.1">
<display-name>Hello World Application</display-name>
</web-app>
WARNING If you have worked with deployment descriptors in previous Java EE versions, this might look slightly unfamiliar to you. This is because the XML schema URIs for web.xml and other configuration files have changed since Java EE 6. You must use the new URIs for your application to be Java EE 7 compliant.
In the previous example, the code in bold indicates to the application server what the name of the application is. On the Tomcat manager screen that lists all the installed applications, the name between the <display-name> tags appears beside your application. Theversion attribute in the opening <web-app> tag indicates which Servlet API version the application is written for — in this case, version 3.1.
Now you need to tell the web container to create an instance of the Servlet you wrote earlier, so you must add a Servlet tag to the descriptor file between the beginning and ending <web-app> tags:
<servlet>
<servlet-name>helloServlet</servlet-name>
<servlet-class>com.wrox.HelloServlet</servlet-class>
</servlet>
Earlier in the chapter, you learned about the Servlet init method and when it would normally be called. In this example, the init method is called when the first request arrives for the Servlet after the web application starts. Normally, this is sufficient for most uses. However, if the init method does many things, Servlet startup might become a time-intensive process, and this could make the first request to that Servlet take several seconds or even several minutes! Obviously, this is not desirable. A simple tweak to the servlet configuration can make the servlet start up immediately when the web application starts:
<servlet>
<servlet-name>helloServlet</servlet-name>
<servlet-class>com.wrox.HelloServlet</servlet-class>
<load-on-startup>1</load-on-startup>
</servlet>
The emboldened code instructs the web container to start the Servlet as soon as the web application starts. If multiple Servlet configurations contain this tag, they start up in the order of the values within the tags, with the previously used value “1” coming first and higher numbers later. If two or more Servlets have the same value in the <load-on-startup> tag, those conflicting Servlets start in the order they appear in the descriptor file, still after other Servlets with lower numbers and before other Servlets with higher numbers.
Mapping the Servlet to a URL
You have instructed the application server to start the Servlet but have not yet told it what URL requests the Servlet should respond to. This is a simple matter:
<servlet-mapping>
<servlet-name>helloServlet</servlet-name>
<url-pattern>/greeting</url-pattern>
</servlet-mapping>
With this configuration, all requests to the application-relative URL /greeting are handled by the helloServlet. (Notice that the <servlet-name> tags within the <servlet> and <servlet-mapping> tags match each other. This is how the web container associates the two.) If the application is deployed at http://www.example.net, the Servlet responds to requests directed to the URL http://www.example.net/greeting. Of course, you are not limited to this one mapping. You could map several URLs to the same Servlet:
<servlet-mapping>
<servlet-name>helloServlet</servlet-name>
<url-pattern>/greeting</url-pattern>
<url-pattern>/salutation</url-pattern>
<url-pattern>/wazzup</url-pattern>
</servlet-mapping>
In this case, all three URLs act as aliases for the same logical endpoint: the helloServlet. Why, you might ask, do you need to give a Servlet instance a name and then map a request to the name of that instance? Why can’t you just map the URL directly to the Servlet class? Well, what if you have two different store Servlets in an online shopping application, for example? Those stores might have identical logic but connect to different databases. This can be achieved simply:
<servlet>
<servlet-name>oddsStore</servlet-name>
<servlet-class>com.wrox.StoreServlet</servlet-class>
</servlet>
<servlet>
<servlet-name>endsStore</servlet-name>
<servlet-class>com.wrox.StoreServlet</servlet-class>
</servlet>
<servlet-mapping>
<servlet-name>oddsStore</servlet-name>
<url-pattern>/odds</url-pattern>
</servlet-mapping>
<servlet-mapping>
<servlet-name>endsStore</servlet-name>
<url-pattern>/ends</url-pattern>
</servlet-mapping>
Now you have two instances of the same Servlet class, but they have different names and are mapped to different URLs. Two examples ago, you had three URLs all pointing to the same Servlet instance. However, in this example you have two different Servlet instances. You might wonder how the two different instances know which stores they are. A quick call to this.getServletName() from anywhere in the servlet code returns either “oddsStore” or “endsStore” depending on which instance it is. Recall that you used this method earlier when you were logging calls to the initializer and the destroyer.
Rewinding a bit, you now have the simple, completed web.xml descriptor file:
<?xml version="1.0" encoding="UTF-8"?>
<web-app xmlns="http://xmlns.jcp.org/xml/ns/javaee"
xmlns:xsi="http://www.w3.org/2001/XMLSchema-instance"
xsi:schemaLocation="http://xmlns.jcp.org/xml/ns/javaee
http://xmlns.jcp.org/xml/ns/javaee/web-app_3_1.xsd"
version="3.1">
<display-name>Hello World Application</display-name>
<servlet>
<servlet-name>helloServlet</servlet-name>
<servlet-class>com.wrox.HelloServlet</servlet-class>
</servlet>
<servlet-mapping>
<servlet-name>helloServlet</servlet-name>
<url-pattern>/greeting</url-pattern>
</servlet-mapping>
</web-app>
Running and Debugging Your Servlet
After it’s saved, compile your application and check to make sure you have an IDE run configuration set up to run your project in your local Tomcat 8.0 instance. (If you don’t remember how to do this, refer back to Chapter 2). The application should deploy to/hello-world. You can also just download the Hello-World IDE project from the wrox.com code download site — it is already configured to deploy properly. When this is done, follow these steps:
1. Click the debug icon in your IDE to start the web container in debug mode. Your IDE deploys your application to the web container after it starts.
2. Open your favorite web browser and navigate to http://localhost:8080/hello-world/greeting. You should now see the screen in Figure 3-1.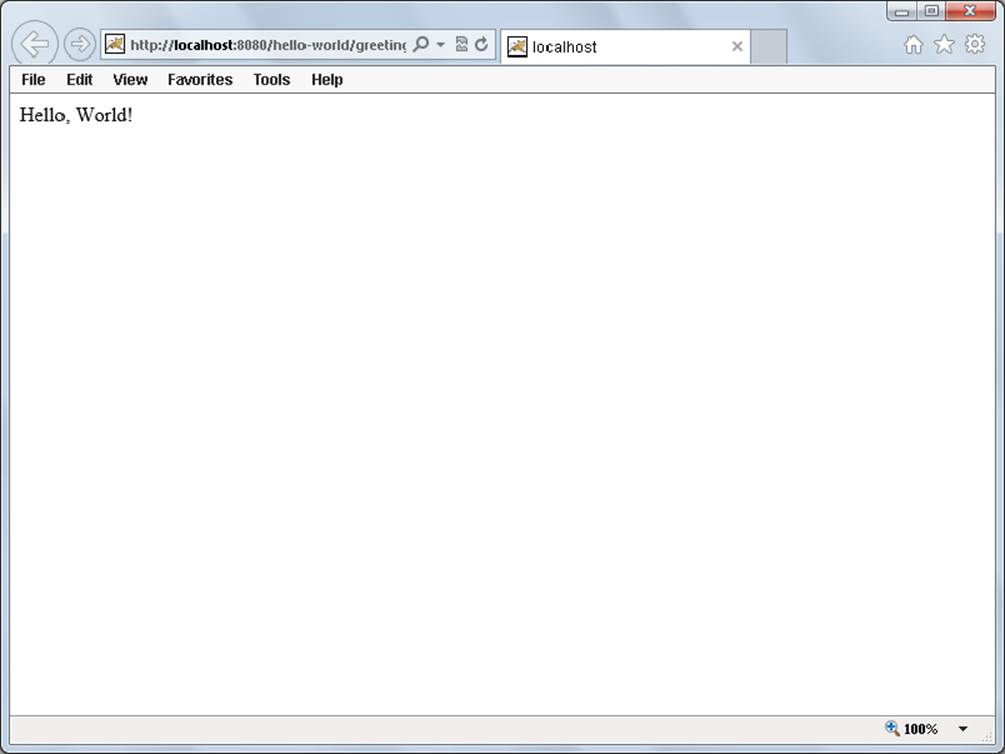
FIGURE 3-1
3. A good way to understand what happened is to place some breakpoints in the HelloServlet and run this experiment again. You should stop your debugger (which shuts down Tomcat) so that you can hit a breakpoint in the initializer as well. Place breakpoints in the single lines of code in the doGet, init, and destroy methods of your Servlet; then restart your debugger. After Tomcat starts and your application deploys, you will notice that you did not hit any breakpoints yet (because <load-on-startup> is not present in the deployment descriptor).
4. Refresh the greeting page in your browser and you should hit the breakpoint in the init method of your IDE. This means that Tomcat has activated the just-in-time initialization of your Servlet: It was not initialized until the first request came in.
5. Just like it would if the init method were taking a long time to complete, the request from your browser remains on hold until you continue your debugger, so do that now. You should immediately hit the breakpoint in the doGet method. Now the Servlet services the request, but your browser still waits on a response.
6. Continue your debugger a second time, and now the response is sent to your browser.
At this point, you can press the Refresh button on your browser as many times as you like, and you will hit the breakpoint only in the doGet method. The init method is not called again until some action destroys the Servlet (for example, Tomcat shutting down) and then it starts again. Up until this point, you have not yet hit the breakpoint in the destroy method. You want to do that now, but unfortunately, if you stop Tomcat from your IDE, it detaches the debugger before the breakpoint is hit, so you need to stop Tomcat from the command line. To do this, follow these steps:
1. Open up a command prompt and change your current directory to the Tomcat home directory (C:\Program Files\Apache Software Foundation\Tomcat 8.0 on a Windows machine, remember).
2. Type the command bin\shutdown.bat (or bin/shutdown.sh if you are not running Windows) and press Enter.
3. In your IDE window, you should immediately hit the breakpoint in the destroy method. Tomcat does not completely shut down until you continue your debugger.
As mentioned earlier, you can change the configuration of your Servlet so that it is initialized when the application starts. Try that now.
1. Update your Servlet declaration in the deployment descriptor to add the code in bold in the following example:
2. <servlet>
3. <servlet-name>helloServlet</servlet-name>
4. <servlet-class>com.wrox.HelloServlet</servlet-class>
5. <load-on-startup>1</load-on-startup>
</servlet>
6. With the breakpoints still in place in your Servlet, start your debugger again. You should immediately hit the breakpoint in the init method before you make the first request to the Servlet.
7. Continue the debugger and then refresh your browser. Now you should hit the breakpoint only in the doGet method; the Servlet was initialized on application startup and does not need to be initialized again.
Now that you have created your first Servlet and are familiar with the life cycle of a Servlet, you are encouraged to experiment with different method calls on the Servlet and on the request and response parameters in the doGet method. In the next section, you exploredoGet, doPost, and other methods further to better understand HttpServletRequest and HttpServletResponse.
NOTE You should consult (and bookmark) the API documentation for Java EE 7 located at http://docs.oracle.com/javaee/7/api/ for information on the available methods and their purposes.
UNDERSTANDING DOGET(), DOPOST(), AND OTHER METHODS
In the previous section you learned about the doGet method and other methods that map to the various HTTP request methods. But what exactly can you do in these methods? More important, what should you do in these methods? The short answers to these questions are “just about anything” and “not very much,” respectively. This section explores some of the things you can do and how to do them.
What Should Happen during the service Method Execution?
The Servlet class’s service method, as you learned earlier, services all incoming requests. Ultimately, it must parse and handle the data on the incoming request based on the protocol in use and then return a protocol-acceptable response to the client. If the servicemethod returns without sending response data back to the socket, the client will likely observe a network error, such as “connection reset.” In the HTTP protocol specifically, the service method should understand the headers and parameters that the client sends and then return a proper HTTP response that at least includes the minimum HTTP headers (even if the response body itself is empty). In reality, the implementation of this is complex (and involves many steps) and may differ from web container to web container.
The beauty of extending HttpServlet is that you don’t have to worry about any of these details. Although the reality is that the service method must do many things before responding to the user, the developer using HttpServlet must do little. Actually, in the Hello-World project you used in the last two sections, if you remove the single line of code from the doGet method and run the application, everything still works fine! A properly structured HTTP response with zero-length content returns to the client. The only requirement is that you override the doGet method (or doPost or doPut or whatever you want to support); you don’t need to put anything in it. But how useful is this, really?
The answer to that is “not at all.” Just because you can return an empty response doesn’t mean you should. This is where HttpServletRequest and HttpServletResponse come in. These parameters in the various methods defined by HttpServlet enable you to read parameters passed from the client, accept files uploaded from a posted form, read the raw data contained in the request body (for doing things such as handling PUT requests or accepting JSON request bodies), read request headers and manipulate response headers, and write response content back to the client. These are some of the many things that you can do when servicing a request, and in reality you usually should do one or more of these things.
Using HttpServletRequest
The HttpServletRequest interface is an extension of ServletRequest that provides additional HTTP protocol-specific information about a received request. It specifies dozens of methods that you can use to obtain details about an HTTP request. It also permits you to set request attributes (different from request parameters).
NOTE You’ll learn about request attributes and the inspection of authentication details in the next chapter. This book does not cover the details of every method (for that, you can consult the API documentation) but covers the most important features.
Getting Request Parameters
Perhaps the most important capability of HttpServletRequest, and one you explore through examples in the next section, is to retrieve request parameters passed by the client. Request parameters come in two different forms: via query parameters (also called URI parameters), or in an application/x-www-form-urlencoded or multipart/form-data encoded request body (typically called post variables or form variables). Query parameters are supported with all request methods and are contained in the first line of data in an HTTP request, as in the following example:
GET /index.jsp?productId=9781118656464&category=Books HTTP/1.1
NOTE Technically speaking, the RFC specification for the HTTP protocol does not disallow query parameters in any of the HTTP methods. However, many web servers ignore query parameters passed to DELETE, TRACE, and OPTIONS, and the usefulness of query parameters in such requests is questionable. So, it is best to not rely on query parameters for these types of requests. This book does not cover all the rules and intricacies of the HTTP protocol. That exercise is left up to you.
In this example, there are two query parameters contained in the request: productId, which has this book’s ISBN as its value, and category, which has the value Books. These same parameters could also be passed in the request body as post variables. Post variables can, as the name implies, be included only in POST requests. Consider the following example:
POST /index.jsp?returnTo=productPage HTTP/1.1
Host: www.example.com
Content-Length: 48
Content-Type: application/x-www-form-urlencoded
addToCart&productId=9781118656464&category=Books
This POST request has post variables (instructing the website to add this book to the cart) and query parameters (instructing the website to return to the product page when the task is complete). Although there is a difference in the delivery of these two types of parameters, they are essentially the same, and they convey essentially the same information. The Servlet API does not differentiate between the two types of parameters. A call to any of the parameter-related methods on a request object returns parameters whether they were delivered as query parameters or post variables.
The getParameter method returns a single value for a parameter. If the parameter has multiple values, getParameter returns the first value, whereas getParameterValues returns an array of values for a parameter. If the parameter has only one value, this method returns an array with one element in it. The getParameterMap method returns a java.util.Map<String, String[]> containing all the parameter names mapped to their values, whereas the getParameterNames method returns an enumeration of the names of all the available parameters; both are useful for iterating over all the request parameters.
WARNING The first time you call getParameter, getParameterMap, getParameterNames, or getParameterValues on a request object, the web container determines whether the request contains post variables, and if it does it reads and parses those post variables by obtaining the request’s InputStream. The InputStream of a request can be read only once. If you call getInputStream or getReader on a request containing post variables and then later attempt to retrieve parameters in that request, the attempt to retrieve the parameters results in an IllegalStateException. Likewise, if you retrieve parameters on a request containing post variables and then later call getInputStream or getReader, the call to getInputStream or getReader fails with anIllegalStateException.
Simply put, any time you anticipate that a request may contain post variables, it’s best to use only the parameter methods and leave getInputStream and getReader alone.
Determining Information about the Request Content
Several methods are available to help determine the type, length, and encoding of the content of the HTTP request. The getContentType method returns the MIME content type of the request, such as application/x-www-form-urlencoded, application/json, text/plain, orapplication/zip, to name a few. A MIME content type describes that the data it marks contains some type. For example, ZIP archives files have a MIME content type of application/zip to indicate that they contain ZIP archive data.
The getContentLength and getContentLengthLong methods both return the number of bytes in the request body (the content length), with the latter method being useful for requests whose content might exceed 2 gigabytes (unusual, but not impossible). ThegetCharacterEncoding method returns the character encoding (such as UTF-8 or ISO-8859-1) of the request contents whenever the request contains character-type content. (text/plain, application/json, and application/x-www-form-urlencoded are some examples of character-type MIME content types.) Although these methods can come in handy in many situations, none of them are necessary if you get post variables from the request body using the parameter methods.
NOTE The Servlet 3.1 specification in Java EE 7 is the first version that supports the getContentLengthLong method. Before this version, you had to call getHeader("Content-Length") and convert the returned String to a long for requests that could be larger than 2,147,483,647 bytes.
Reading the Contents of a Request
The methods getInputStream, which returns a javax.servlet.ServletInputStream, and getReader, which returns a java.io.BufferedReader, can both be used to read the contents of the request. Which one is best completely depends on the context in which the request contents are being read. If the contents are expected to be character-encoded data, such as UTF-8 or ISO-8859-1 text, using the BufferedReader is typically the easiest route to take because it lets you easily read char data. If, however, the request data is binary in nature, you must use the ServletInputStream so that you can access the request content in byte format. You should never use them both on the same request. After a call to either method, a call to the other will fail with an IllegalStateException. Remember the preceding warning, and do not use these methods on a request with post variables.
Getting Request Characteristics Such as URL, URI, and Headers
There are many request characteristics that you may need to know about, such as the URL or URI the request was made with. These are easy to obtain from the request object:
· getRequestURL: Returns the entire URL that the client used to make the request, including protocol (http or https), server name, port number, and server path but not including the query string. So, in a request to http://www.example.org/application/index.jsp?category=Books, getRequestURL returns http://www.example.org/application/index.jsp.
· getRequestURI: This is slightly different from getRequestURL in that it returns only the server path part of the URL; using the previous example, that would be /application/index.jsp.
· getServletPath: Similar to getRequestURI, this returns even less of the URL. If the request is /hello-world/greeting?foo=world, the application is deployed as /hello-world on Tomcat, and the servlet-mappings are /greeting, /salutation, and /wazzup, getServletPathreturns only the part of the URL used to match the servlet mapping: /greeting.
· getHeader: Returns the value of a header with the given name. The case of the header does not have to match the case of the string passed into the method, so getHeader("content-type") can match the Content-Type header. If there are multiple headers with the same name, this returns only the first value. In such cases, you would want to use the getHeaders method to return an enumeration of all the values.
· getHeaderNames: Returns an enumeration of the names of all the headers in the request — a great way to iterate over the available headers.
· getIntHeader: If you have a particular header that you know is always a number, you can call this to return the value already converted to a number. It throws a NumberFormatException if the header cannot be converted to an integer.
· getDateHeader: You can call this to return the (millisecond) Unix timestamp-equivalent of a header value that represents a valid timestamp. It throws an IllegalArgumentException if the header value is not recognized as a date.
Sessions and Cookies
The getSession and getCookies methods are mentioned only long enough to tell you that this chapter doesn’t cover them, but they are both important citizens in the HttpServletRequest realm. You can learn more about these is Chapter 5.
Using HttpServletResponse
As the HttpServletRequest interface extends ServletRequest and provides access to the HTTP protocol-specific properties of a request, the HttpServletResponse interface extends ServletResponse and provides access to the HTTP protocol-specific properties of a response. You use the response object to do things such as set response headers, write to the response body, redirect the request, set the HTTP status code, and send cookies back to the client. Again, the most common features of this object are covered here.
Writing to the Response Body
The most common thing you’ll do with a response object, and something you have already done with a response object, is write content to the response body. This might be HTML to display in a browser, an image that the browser is retrieving, or the contents of a file that the client is downloading. It could be plain text or binary data. It might be just a few bytes long or it could be gigabytes long.
The getOutputStream method, which returns a javax.servlet.ServletOutputStream, and the getWriter method, which returns a java.io.PrintWriter, both enable you to write data to the response. Like their counterparts in HttpServletRequest, you would probably want to use the PrintWriter for returning HTML or some other character-encoded text to the client because this makes it easy to write encoded Strings and chars to the response. However, for sending binary data back, you must use the ServletOutputStream to send the response bytes. Also, you should never use both getOutputStream and getWriter in the same response. After a call to one, a call to the other will fail with an IllegalStateException.
While you’re writing to the response body, it might be necessary to set the content type or encoding. You can do this with setContentType and setCharacterEncoding. You may call these methods as many times as you like; the last call to the method is the one that matters. However, if you plan to call setContentType and setCharacterEncoding along with getWriter, you must call setContentType and setCharacterEncoding before getWriter so that the returned writer is configured for the correct character encoding. Calls made aftergetWriter are ignored. If you do not call setContentType and setCharacterEncoding before calling getWriter, the returned writer uses the container’s default encoding.
At your disposal, you also have the setContentLength and setContentLengthLong methods. In almost all cases, these do not need to be called. The web container sets the Content-Length header as it finalizes your response, and it is safest to let it do so.
NOTE The Servlet 3.1 specification in Java EE 7 is the first version that supports the setContentLengthLong method. Before this version, you had to call setHeader("Content-Length", Long.toString(length)) for responses that could be larger than 2,147,483,647 bytes.
Setting Headers and Other Response Properties
Serving as counterparts to methods in HttpServletRequest, you can call setHeader, setIntHeader, and setDateHeader to set nearly any header value you desire. If the existing response headers already include a header with the name you are setting, the value of that header will be overridden. To avoid this, you can instead use addHeader, addIntHeader, or addDateHeader. These versions do not override existing header values, but instead add additional values for the given headers. You can also call getHeader, getHeaders getHeaderNames, and containsHeader to investigate which headers have already been set on the response.
In addition, you can use:
· setStatus: To set the HTTP response status code
· getStatus: To determine what the current status of the response is
· sendError: To set the status code, indicate an optional error message to write to the response data, direct the web container to provide an error page to the client, and clear the buffer
· sendRedirect: To redirect the client to a different URL
This section covered most of the things you can do while servicing an HTTP request in your Servlet and noted important details and cautions where necessary. In the past several sections you have used the Hello-World project to demonstrate working with Servlets. In the next section, you move on to a slightly more complex example.
USING PARAMETERS AND ACCEPTING FORM SUBMISSIONS
In this section, you make your Hello-World project a little more dynamic by accepting parameters and form submissions. You also explore annotation configuration and temporarily forego the deployment descriptor. For the examples in this section, you can follow along in the completed Hello-User project, or you can simply incorporate the changes into your existing project as they are covered.
Several changes have been made to the project. The first thing you should notice is that the doGet method is much more complex now:
private static final String DEFAULT_USER = "Guest";
@Override
protected void doGet(HttpServletRequest request, HttpServletResponse response)
throws ServletException, IOException
{
String user = request.getParameter("user");
if(user == null)
user = HelloServlet.DEFAULT_USER;
response.setContentType("text/html");
response.setCharacterEncoding("UTF-8");
PrintWriter writer = response.getWriter();
writer.append("<!DOCTYPE html>\r\n")
.append("<html>\r\n")
.append(" <head>\r\n")
.append(" <title>Hello User Application</title>\r\n")
.append(" </head>\r\n")
.append(" <body>\r\n")
.append(" Hello, ").append(user).append("!<br/><br/>\r\n")
.append(" <form action=\"greeting\" method=\"POST\">\r\n")
.append(" Enter your name:<br/>\r\n")
.append(" <input type=\"text\" name=\"user\"/><br/>\r\n")
.append(" <input type=\"submit\" value=\"Submit\"/>\r\n")
.append(" </form>\r\n")
.append(" </body>\r\n")
.append("</html>\r\n");
}
The code in bold is new. It is doing a little logic now:
· It tests if the user parameter is included in the request and, if it is not, it uses the DEFAULT_USER constant instead.
· It sets the content type of the response to text/html and the character encoding to UTF-8.
· It gets a PrintWriter from the response and writes out a compliant HTML5 document (note the HTML5 DOCTYPE), including the greeting (now directed at a particular user) and a form for supplying your username.
You might wonder how the doGet method can receive the form submission when the method type for the form is set to POST. This is handled with the simple doPost implementation, which is also new:
@Override
protected void doPost(HttpServletRequest request, HttpServletResponse response)
throws ServletException, IOException
{
this.doGet(request, response);
}
This implementation simply delegates to the doGet method. Either a query parameter or a post variable named user can trigger the greeting to change.
The last thing you should notice is the annotation just above the Servlet declaration:
@WebServlet(
name = "helloServlet",
urlPatterns = {"/greeting", "/salutation", "/wazzup"},
loadOnStartup = 1
)
public class HelloServlet extends HttpServlet
{
...
}
NOTE You’ll notice that the class imports have been left off of the newest HelloServlet code example. As your code gets more complex, the imports can begin to take up many dozens of lines of code. This is too much to print in this book efficiently. A good IDE, like the one you use for this book, can recognize the class names and suggest the imports for you, taking the hard work out of your hands. With few exceptions, import and package statements are omitted from the rest of the examples in this book. New classes will be in the com.wrox package unless otherwise stated.
If you also take a look at the deployment descriptor, you’ll notice that the Servlet declaration and mapping were removed from the web.xml file. (Or if you made these changes to the existing project, you should remove everything in the deployment descriptor except for the <display-name> tag.) The annotation in the previous example replaces the XML that you wrote in your previous project and adds a little bit more.
You still get an instance of HelloServlet named helloServlet; it still starts when the application starts; and it is still mapped to the /greeting URL. It is also now mapped to the /salutation and /wazzup URLs. As you can tell, this is a much more direct and concise approach to instantiating and mapping servlets. However, it has some drawbacks, which are pointed out throughout the rest of the chapter. For now, compile your project and start Tomcat in your debugger; then go to http://localhost:8080/hello-world/greeting in your browser. You should see a screen as shown in Figure 3-2.
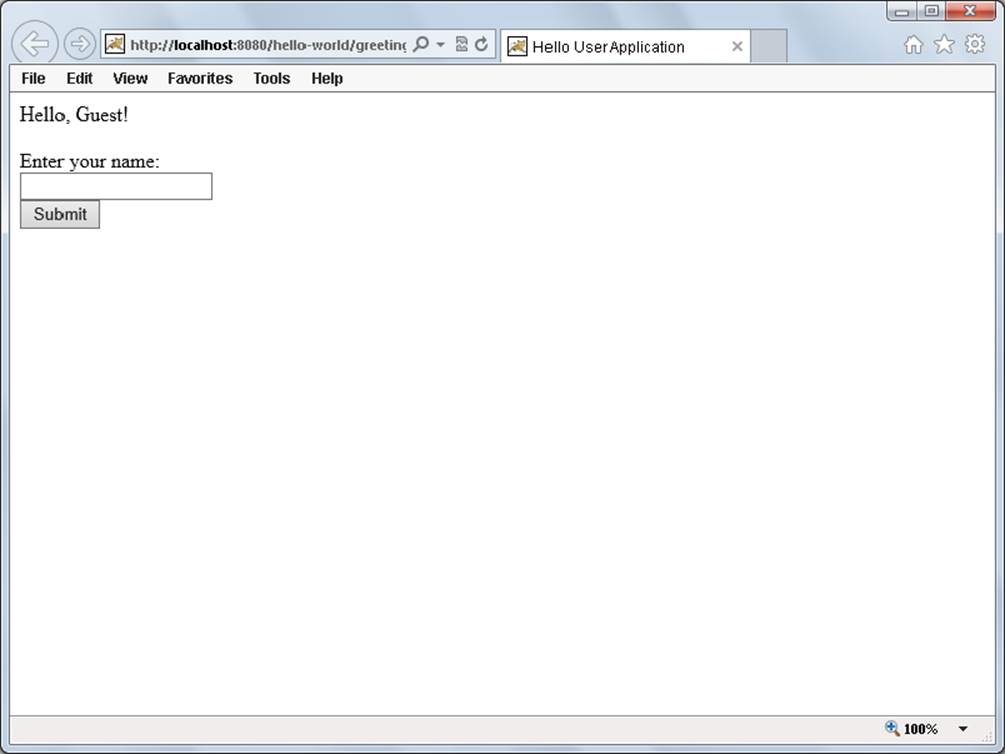
FIGURE 3-2
To understand what this Servlet can do, first add the query string user=Allison to the URL so that it is http://localhost:8080/hello-world/greeting?user=Allison. The screen should now change and, instead of saying “Hello, Guest!” it should say “Hello, Allison!” In this case the request was serviced by the doGet method, which found the user query parameter and output it to the screen.
You can confirm this by placing breakpoints in doGet and doPost and refreshing the page. Now, type your name in the form field on the screen and click the Submit button. If you examine the URL in the address bar, it does not have any query parameters. Instead, your name was included in the request as a post variable, and when the doPost method serviced the request and delegated to the doGet method, the call to getParameter retrieved the post variable, resulting in your name displaying on the screen. Hitting the breakpoints will confirm that this has happened.
Remember from the previous section that single parameter values are not the only thing your Servlets can accept. You can also accept multiple parameter values. The most common example of this is a set of related check boxes, where the user is permitted to check one or more values. Refer to the code Listing 3-1, the MultiValueParameterServlet, mapped to /checkboxes. Compile and run this code in Tomcat using your debugger and navigate your browser to http://localhost:8080/hello-world/checkboxes. The doGet method in this Servlet prints out a simple form with five check boxes. The user can select any number of these check boxes and click Submit, which is serviced by the doPost method. This method retrieves all the fruit values and lists them on the screen using an unordered list. Try this out by selecting various combinations of check boxes and clicking Submit.
LISTING 3-1: MultiValueParameterServlet.java
@WebServlet(
name = "multiValueParameterServlet",
urlPatterns = {"/checkboxes"}
)
public class MultiValueParameterServlet extends HttpServlet
{
@Override
protected void doGet(HttpServletRequest request, HttpServletResponse response)
throws ServletException, IOException
{
response.setContentType("text/html");
response.setCharacterEncoding("UTF-8");
PrintWriter writer = response.getWriter();
writer.append("<!DOCTYPE html>\r\n")
.append("<html>\r\n")
.append(" <head>\r\n")
.append(" <title>Hello User Application</title>\r\n")
.append(" </head>\r\n")
.append(" <body>\r\n")
.append(" <form action=\"checkboxes\" method=\"POST\">\r\n")
.append("Select the fruits you like to eat:<br/>\r\n")
.append("<input type=\"checkbox\" name=\"fruit\" value=\"Banana\"/>")
.append(" Banana<br/>\r\n")
.append("<input type=\"checkbox\" name=\"fruit\" value=\"Apple\"/>")
.append(" Apple<br/>\r\n")
.append("<input type=\"checkbox\" name=\"fruit\" value=\"Orange\"/>")
.append(" Orange<br/>\r\n")
.append("<input type=\"checkbox\" name=\"fruit\" value=\"Guava\"/>")
.append(" Guava<br/>\r\n")
.append("<input type=\"checkbox\" name=\"fruit\" value=\"Kiwi\"/>")
.append(" Kiwi<br/>\r\n")
.append("<input type=\"submit\" value=\"Submit\"/>\r\n")
.append(" </form>")
.append(" </body>\r\n")
.append("</html>\r\n");
}
@Override
protected void doPost(HttpServletRequest request, HttpServletResponse response)
throws ServletException, IOException
{
String[] fruits = request.getParameterValues("fruit");
response.setContentType("text/html");
response.setCharacterEncoding("UTF-8");
PrintWriter writer = response.getWriter();
writer.append("<!DOCTYPE html>\r\n")
.append("<html>\r\n")
.append(" <head>\r\n")
.append(" <title>Hello User Application</title>\r\n")
.append(" </head>\r\n")
.append(" <body>\r\n")
.append(" <h2>Your Selections</h2>\r\n");
if(fruits == null)
writer.append(" You did not select any fruits.\r\n");
else
{
writer.append(" <ul>\r\n");
for(String fruit : fruits)
{
writer.append(" <li>").append(fruit).append("</li>\r\n");
}
writer.append(" </ul>\r\n");
}
writer.append(" </body>\r\n")
.append("</html>\r\n");
}
}
This section has shown you the various ways that you can use request parameters within your Servlet methods. You have explored query parameters and post variables, along with single-value and multivalve parameters. In the next section you learn about various ways to configure your application using init parameters.
CONFIGURING YOUR APPLICATION USING INIT PARAMETERS
When writing a Java web application, the need will inevitably arise to provide ways of configuring your application and the Servlets within it. There are many ways to do that using numerous technologies, and you explore a few of those in this book. The simplest means of configuring your application, through context initialization parameters (usually shortened to init parameters) and Servlet init parameters, is covered in this section. These parameters can be put to any number of uses, from defining connection information for communicating with a relational database, to providing an e-mail address to send store order alerts to. They are defined at application startup and cannot change without restarting the application.
Using Context Init Parameters
Earlier you emptied the deployment descriptor file and replaced your Servlet declaration and mappings with annotations on the actual classes. Although this is one thing (added in the Servlet 3.0 specification in Java EE 6) that you can do without the deployment descriptor, several things still require the deployment descriptor. Context init parameters are one such feature. You declare context init parameters using the <context-param> tag within the web.xml file. The following code example shows two context init parameters added to the deployment descriptor:
<context-param>
<param-name>settingOne</param-name>
<param-value>foo</param-value>
</context-param>
<context-param>
<param-name>settingTwo</param-name>
<param-value>bar</param-value>
</context-param>
This creates two context init parameters: settingOne having a value of foo and settingTwo having a value of bar. You can easily obtain and use these parameter values from anywhere in your Servlet code. The ContextParameterServlet demonstrates this ability:
@WebServlet(
name = "contextParameterServlet",
urlPatterns = {"/contextParameters"}
)
public class ContextParameterServlet extends HttpServlet
{
@Override
protected void doGet(HttpServletRequest request, HttpServletResponse response)
throws ServletException, IOException
{
ServletContext c = this.getServletContext();
PrintWriter writer = response.getWriter();
writer.append("settingOne: ").append(c.getInitParameter("settingOne"))
.append(", settingTwo: ").append(c.getInitParameter("settingTwo"));
}
}
If you compile, debug, and navigate to http://localhost:8080/hello-world/contextParameters, you can see these parameters listed on the screen. Every Servlet in your application shares these init parameters, and their values are the same across all servlets. There may be cases, however, in which you need a setting that applies to only a single Servlet. For this purpose you would use Servlet init parameters.
NOTE It should be noted that as of Servlet 3.0 you can call the setInitParameter method on the ServletContext as an alternative to defining context init parameters using <context-param>. However, this method can only be called within thecontextInitialized method of a javax.servlet.ServletContextListener (which you learn about in Chapter 9) or the onStartup method of a javax.servlet.ServletContainerInitializer (which you learn about in Chapter 12). Even so, changing the values would require recompiling your application, so XML is usually the best option for context init parameters.
Using Servlet Init Parameters
Consider the code for the ServletParameterServlet class. You may immediately notice that it is not annotated with @WebServlet. Don’t worry; you learn why in a minute. The code is otherwise nearly identical to the ContextParameterServlet. Instead of getting your init parameters from the ServletContext object, you obtain them from the ServletConfig object:
public class ServletParameterServlet extends HttpServlet
{
@Override
protected void doGet(HttpServletRequest request, HttpServletResponse response)
throws ServletException, IOException
{
ServletConfig c = this.getServletConfig();
PrintWriter writer = response.getWriter();
writer.append("database: ").append(c.getInitParameter("database"))
.append(", server: ").append(c.getInitParameter("server"));
}
}
Of course, just having the Servlet code isn’t enough. The following XML added to the deployment descriptor declares and maps the servlet and also does a little bit more:
<servlet>
<servlet-name>servletParameterServlet</servlet-name>
<servlet-class>com.wrox.ServletParameterServlet</servlet-class>
<init-param>
<param-name>database</param-name>
<param-value>CustomerSupport</param-value>
</init-param>
<init-param>
<param-name>server</param-name>
<param-value>10.0.12.5</param-value>
</init-param>
</servlet>
<servlet-mapping>
<servlet-name>servletParameterServlet</servlet-name>
<url-pattern>/servletParameters</url-pattern>
</servlet-mapping>
The <init-param> tag, like the <context-param> tag for the Servlet context, creates an init parameter specific to this Servlet. If you compile, debug, and navigate to http://localhost:8080/hello-world/servletParameters, you can see the database and server parameters specified in the deployment descriptor. So why, you might ask, can’t you use annotations for this like you can for the rest of the Servlet mapping? Well, technically you can. You can achieve the same result as in the previous code by removing the initialization and mapping from the deployment descriptor and adding this annotation to the Servlet declaration:
@WebServlet(
name = "servletParameterServlet",
urlPatterns = {"/servletParameters"},
initParams = {
@WebInitParam(name = "database", value = "CustomerSupport"),
@WebInitParam(name = "server", value = "10.0.12.5")
}
)
public class ServletParameterServlet extends HttpServlet
{
...
}
The drawback to doing this, however, is that the values of the Servlet init parameters can no longer be changed without recompiling the application. Sure, there may be settings that you wouldn’t want to change without recompiling the application, but at that point why not just make them class constants? The advantage of putting Servlet init parameters in the deployment descriptor is that a server administrator needs to change only a few lines of XML and restart the deployed application to effect the change. If such settings contain connection information for a relational database, the last thing you want to do is to recompile the application to change the IP address of the database server!
The next section introduces a new feature of HttpServletRequests added in the Servlet 3.0 specification and a new example application that you improve upon throughout the rest of the book.
THE DRAWBACKS OF @CONFIG
As mentioned earlier there are advantages and disadvantages to using annotation-based configuration (often simply called @Config) in your web application. The primary advantage is the lack of XML and the direct, concise annotation language used to configure your application. However, there are numerous drawbacks to this approach as well.
One example of this is the inability to create multiple instances of a single Servlet class. You saw earlier in the chapter how such a pattern might be used. This is impossible using annotations and can be accomplished only using XML configuration or programmatic Java configuration.
In Chapter 9, you learn about filters and why it’s important to carefully construct the order the filters execute in. You can make filters execute in a specific order when declaring them using XML configuration or programmatic Java configuration. If you declare your filters using @javax.servlet.annotation.WebFilter, however, it is impossible to make them execute in a specific order (something many feel is a glaring oversight in the Servlet 3.0 and 3.1 specifications). Unless your application has only one filter, @WebFilter is virtually useless.
There are many smaller things that still require the XML deployment descriptor to accomplish, such as defining error-handling pages, configuring JSP settings, and providing a list of welcome pages. Thankfully, you can mix-and-match XML, annotation, and programmatic Java, and configuration, so you can use each when it’s most convenient. Throughout this book, you use all three techniques.
UPLOADING FILES FROM A FORM
Uploading files to Java EE Servlets has nearly always been possible, but it used to require considerable effort. The task was so complex that Apache Commons made an entire project, called Commons FileUpload, to handle all the work. Thus, what seemed to be the simple requirement of accepting file upload submissions required introducing a third-party dependency in your application. Servlet 3.0 in Java EE 6 changed all that when it introduced the multipart configuration options for Servlets and the getPart and getPartsmethods in HttpServletRequest.
You can use this feature as a launching point for your interchapter example application: the Customer Support project. Although each chapter has smaller examples to demonstrate specific points, each chapter also includes a new version of the Customer Support project that incorporates the new topics learned in that chapter.
Introducing the Customer Support Project
The setup is a global website serving customers around the world for Multinational Widget Corporation. Your product managers have been tasked with adding an interactive customer support application to the company’s website. It should enable users to post questions or support tickets and enable employees to respond to those inquiries. Support tickets and comments alike should contain file attachments. For urgent matters, customers should enter a chat window with a dedicated support representative. And, to top it all off, because this is Multinational Widget Corporation, the entire application should be localizable in as many languages as the company decides to translate. That’s not asking much, right?
Oh, yea. It needs to be really secure, too.
Obviously you can’t tackle this all at once, especially with how little you’ve learned so far, so for each chapter you either tackle a small feature or improve upon code written in the chapter before. For the rest of this chapter, refer to the Customer-Support-v1 project. The project is relatively simple right now. It consists of three pages, handled by doGet: a list of tickets, a page to create tickets, and a page to view a ticket. It also has the capability of downloading a file attached to a ticket and of accepting a POST request to create a new ticket. Although the code is not complex and consists largely of concepts you have already covered in this chapter, there is too much to print it all here. You need to follow along in the code downloaded from the website.
Configuring the Servlet for File Uploads
In the project you can find a Ticket class, an Attachment class, and the TicketServlet class. The Ticket and Attachment classes are simple POJOs — plain old Java objects. The TicketServlet does all the hard work at this time, so start by looking at its declaration and fields:
@WebServlet(
name = "ticketServlet",
urlPatterns = {"/tickets"},
loadOnStartup = 1
)
@MultipartConfig(
fileSizeThreshold = 5_242_880, //5MB
maxFileSize = 20_971_520L, //20MB
maxRequestSize = 41_943_040L //40MB
)
public class TicketServlet extends HttpServlet
{
private volatile int TICKET_ID_SEQUENCE = 1;
private Map<Integer, Ticket> ticketDatabase = new LinkedHashMap<>();
...
}
Already you should see some things you recognize and some things you don’t. The @MultipartConfig annotation instructs the web container to provide file upload support for this servlet. It has several important attributes you should look at. The first, which is not shown here, is location. This instructs the web container in which directory to store temporary files if it needs to. In most cases, however, it is sufficient to omit this field and let the application server use its default temporary directory. The fileSizeThreshold tells the web container how big the file has to be before it is written to the temporary directory.
In this example, uploaded files smaller than 5 megabytes are kept in memory until the request completes and then they become eligible for garbage. After a file exceeds 5 megabytes, the container instead stores it in location (or default) until the request completes, after which it deletes the file from disk. The last two parameters, maxFileSize and maxRequestSize, place limits on uploaded files: maxFileSize in this example prohibits an uploaded file from exceeding 20 megabytes, whereas maxRequestSize prohibits the total size of a request from exceeding 40 megabytes, regardless of the number of file uploads it contains. That’s really all there is to it. The Servlet is now configured to accept file uploads.
NOTE As with configuring Servlet init parameters using annotations, the multipart configuration parameters in the previous example cannot be changed without recompiling the application. If you anticipate server administrators’ needing to customize these settings without recompiling the application, you need to use the deployment descriptor instead of @WebServlet and @MultipartConfig. Within the <servlet> tag you can place a <multipart-config> tag, and within that you can use the<location>, <file-size-threshold>, <max-file-size>, and <max-request-size> tags.
You may also notice that the “ticket database” isn’t a database at all (Or is it? It’s a medium for storing data, no?), but rather a simple hash map. Eventually in Part III of this book you back your application with a relational database. For now, however, you want to get the user interface right and understand the business requirements so that product management at Multinational Widget Corporation is happy. After that, you can worry about persisting your data.
Now that you understand what you’ve seen so far, take a look at the doGet implementation:
@Override
protected void doGet(HttpServletRequest request, HttpServletResponse response)
throws ServletException, IOException
{
String action = request.getParameter("action");
if(action == null)
action = "list";
switch(action)
{
case "create":
this.showTicketForm(response);
break;
case "view":
this.viewTicket(request, response);
break;
case "download":
this.downloadAttachment(request, response);
break;
case "download":
default:
this.listTickets(response);
break;
}
}
There’s too much to do to put everything in the doGet method; before long, you could have a method that spans hundreds of lines. In this example, the doGet method uses a primitive action/executor pattern: The action is passed in through a request parameter, and the doGet method sends the request to an executor (method) based on that action. The doPost method is similar:
@Override
protected void doPost(HttpServletRequest request, HttpServletResponse response)
throws ServletException, IOException
{
String action = request.getParameter("action");
if(action == null)
action = "list";
switch(action)
{
case "create":
this.createTicket(request, response);
break;
case "download":
default:
response.sendRedirect("tickets");
break;
}
}
One new thing you can notice in doPost is the use of the redirect method. You learned about this method a few sections ago. In this case, if the client performs a POST with a missing or invalid action parameter, his browser is redirected to the page that lists tickets. Most of the methods in this class are nothing new: use of parameters, use of the PrintWriter to output content to the client’s browser, and so on. Not all the code can fit in this book, but there are some new features used here that you should look at. The following example is a snippet of the downloadAttachment method, only the part that contains something new you haven’t seen yet:
response.setHeader("Content-Disposition",
"attachment; filename=" + attachment.getName());
response.setContentType("application/octet-stream");
ServletOutputStream stream = response.getOutputStream();
stream.write(attachment.getContents());
This simple bit of code is responsible for handing off the file download to the client’s browser. The Content-Disposition header, as set, forces the browser to ask the client to save or download the file instead of just opening the file inline in the browser. The content type is a generic, binary content type that keeps the data from having some kind of character encoding applied to it. (A more correct implementation would know the attachment’s actual MIME content type and use that value, but that task is outside the scope of this book.) Finally, the ServletOutputStream is used to write the file contents to the response. This may not be the most efficient way to write the file contents to the response because it may suffer memory issues for large files. If you anticipate permitting large file downloads, you shouldn’t store files in-memory, and you should copy the bytes from a file’s InputStream to the ResponseOutputStream. You should then flush the ResponseOutputStream frequently so that bytes are continuously streaming back to the user’s browser instead of buffering in memory. The exercise of improving this code is left up to you.
Accepting a File Upload
Lastly, take a look at the createTicket method and the method that it uses, processAttachment, in Listing 3-2. These methods are particularly important because they deal with handling a file upload — something you have not done yet. The processAttachment method gets the InputStream from the multipart request and copies it to the Attachment object. It uses the getSubmittedFileName method added in Servlet 3.1 to identify the original file name before it was uploaded. The createTicket method uses this method and other request parameters to populate the Ticket object and add it to the database.
LISTING 3-2: Part of TicketServlet.java
private void createTicket(HttpServletRequest request,
HttpServletResponse response)
throws ServletException, IOException
{
Ticket ticket = new Ticket();
ticket.setCustomerName(request.getParameter("customerName"));
ticket.setSubject(request.getParameter("subject"));
ticket.setBody(request.getParameter("body"));
Part filePart = request.getPart("file1");
if(filePart != null)
{
Attachment attachment = this.processAttachment(filePart);
if(attachment != null)
ticket.addAttachment(attachment);
}
int id;
synchronized(this)
{
id = this.TICKET_ID_SEQUENCE++;
this.ticketDatabase.put(id, ticket);
}
response.sendRedirect("tickets?action=view&ticketId=" + id);
}
private Attachment processAttachment(Part filePart)
throws IOException
{
InputStream inputStream = filePart.getInputStream();
ByteArrayOutputStream outputStream = new ByteArrayOutputStream();
int read;
final byte[] bytes = new byte[1024];
while((read = inputStream.read(bytes)) != -1)
{
outputStream.write(bytes, 0, read);
}
Attachment attachment = new Attachment();
attachment.setName(filePart.getSubmittedFileName());
attachment.setContents(outputStream.toByteArray());
return attachment;
}
One thing you may notice in the createTicket method is the use of a synchronized block to lock access to the ticket database. You explore this a little more in the next and final section of the chapter.
MAKING YOUR APPLICATION SAFE FOR MULTITHREADING
Web applications are, by nature, multithreaded applications. At any given time, zero, one, or a thousand people may be using your web application simultaneously, and your code must anticipate and account for this. There are dozens of different facets to this topic, and entire books have been written about multithreading and managing concurrency in applications. Obviously, this book cannot possibly cover all the important multithreading discussions. However, you should know two things above all else when considering concurrency in your web applications.
Understanding Requests, Threads, and Method Execution
Every web container is, of course, slightly different. But in the Java EE world, generally speaking, a web container contains some type of thread pool, possibly called the connector pool or executor pool.
When the container receives a request, it looks for an available thread in the pool. If it does not find an available thread and the thread pool has already reached its maximum size, the request enters a queue — first in first out — and waits for an available thread. (Typically, there is also a higher limit, called the acceptCount setting in Tomcat, which defines the maximum number of connections that can be queued before the container starts rejecting connections.) Once a thread is available, the container borrows the thread from the pool and hands the request off to be handled by the thread. At this point, the thread is no longer available for any other incoming requests. In a normal request, the thread and request will be linked throughout the life of the request. As long as the request is processed by your code, that thread will be dedicated to the request. Only when the request has completed and the content of your response has been written back to the client will the thread be free from the request and return to the pool to service another request.
Creating and destroying threads includes a lot of overhead that can slow an application down, so employing a pool of reusable threads in this manner eliminates this overhead and improves performance.
The thread pool has a configurable size that determines how many connections can be serviced at once. Although this is not a discussion of the techniques and practices of managing application servers, hardware limitations place a practical limit on the size of this pool, after which increasing the pool size achieves no performance gains (and often can hurt performance). The default maximum pool size in Tomcat is 200 threads, and this number can be increased or decreased. You must understand this because it means that, in a worst-case scenario, 200 different threads (or more, if you increase the number) could be executing the same method in your code on the same instance of that code simultaneously. Therefore, you should consider the way that code functions so that simultaneous executions of the code in multiple threads do not result in exceptional behavior.
NOTE On the subject of requests and threads, there are circumstances during which a thread may not be devoted to a request for the entire life of the request. Servlet 3.0 in Java EE 6 added the concept of asynchronous request contexts. Essentially, when your Servlet services a request, it can call ServletRequest’s startAsync method. This returns a javax.servlet.AsyncContext object in which that request resides. Your Servlet can then return from the Servlet’s service method without responding to the request, and the thread will be returned to the pool. The request does not close, but instead stays open, unanswered. Later, when some event occurs, your application can retrieve the response object from the AsyncContext and use it to send a response to the client. You learn more about using asynchronous request contexts in Chapter 9. This approach is often employed for a technique called long polling, something that Chapter 10 discusses.
Protecting Shared Resources
The most typical complication when coding for a multithreaded application is the access of shared resources. Objects and variables created during the execution of a method are safe as long as that method is executing — other threads do not have access to them. However, static and instance variables in a Servlet, for example, could be accessed by multiple threads simultaneously (remember: in the worst case, even 200 threads simultaneously). It’s important to synchronize access to these shared resources to keep their contents from becoming corrupt and possibly causing errors in your application.
You can employ a few techniques to protect shared resources from these problems. Consider the first line of code in the TicketServlet:
private volatile int TICKET_ID_SEQUENCE = 1;
In Java, it is sometimes possible for one thread to read the previous value of a variable even after the value has been changed in another thread. This can cause consistency issues in some circumstances. The volatile keyword in this case establishes a happens-before relationship for all future reads of the variable and guarantees that other threads will always see the latest value of the variable.
Next, recall the synchronized block of code in the createTicket method from Listing 3-2:
synchronized(this)
{
id = this.TICKET_ID_SEQUENCE++;
this.ticketDatabase.put(id, ticket);
}
Two things are happening in this block of code: the TICKED_ID_SEQUENCE is incremented and its value retrieved, and the Ticket is inserted into the hash map of tickets. Both of these variables are instance variables of the Servlet, meaning multiple threads may have access to them simultaneously. Putting these actions within the synchronized block guarantees that no other thread can execute these two lines of code at the same time. The thread currently executing this block of code has exclusive access to execute the block until it completes. Of course, care should always be taken when using synchronized code blocks or methods because incorrect application of synchronization can result in a deadlock, a problem beyond the scope of this book.
WARNING One final thing to keep in mind when writing your Servlet methods: Never store request or response objects in static or instance variables. Just don’t do it. There is no maybe — it will cause problems for you. Any objects and resources that belong to a request should exist only as local variables and method arguments.
SUMMARY
In this chapter, you were introduced to the Servlet interface and GenericServlet and HttpServlet abstract classes, along with the HttpServletRequest and HttpServletResponse interfaces. You learned how to service incoming requests and respond to them appropriately using the request and response objects. You experimented with the deployment descriptor and explored how to configure Servlets using web.xml and annotations. You also discovered one of the most important tasks when dealing with HTTP requests: handling request parameters, including query parameters and post variables, and accepting file uploads through form submissions. You were introduced to context and Servlet init parameters and how to use them to configure your application. Finally, you learned about request threads and thread pools and why multithreading considerations are so important in web application programming.
At this point, you should have a firm grasp on the basics of creating and using Servlets in your web application. One of the major inconveniences you may have noticed during this chapter is the complexity and cumbersomeness of writing simple HTML to the response. In the next chapter you explore the answer to this problem and how it makes life much easier in the Java EE world: JavaServer Pages.
All materials on the site are licensed Creative Commons Attribution-Sharealike 3.0 Unported CC BY-SA 3.0 & GNU Free Documentation License (GFDL)
If you are the copyright holder of any material contained on our site and intend to remove it, please contact our site administrator for approval.
© 2016-2026 All site design rights belong to S.Y.A.