PROFESSIONAL JAVA FOR WEB APPLICATIONS (2014)
Part I Creating Enterprise Applications
Chapter 7 Using the Java Standard Tag Library
IN THIS CHAPTER
· Understanding JSP tags and the JSTL
· How to implement the Core tag library (C namespace)
· How to use the Formatting tag library (FMT namespace)
· How to use the Database Access tag library (SQL namespace)
· How to use the XML Processing tag library (XML namespace)
· Swapping Java code with JSP tags
WROX.COM CODE DOWNLOADS FOR THIS CHAPTER
You can find the wrox.com code downloads for this chapter at http://www.wrox.com/go/projavaforwebapps on the Download Code tab. The code for this chapter is divided into the following major examples:
· Address-Book Project
· Address-Book-i18n Project
· Customer-Support-v5 Project
NEW MAVEN DEPENDENCIES FOR THIS CHAPTER
There are no new Maven dependencies for this chapter. Continue to use the Maven dependencies introduced in all previous chapters.
INTRODUCING JSP TAGS AND THE JSTL
Up to this point it has been absolutely necessary to use Java to do certain things in JSPs. The ability to add Java to your JSPs is convenient to be sure, but remember that your UI developers, accustomed to HTML, JavaScript, and CSS, will likely not write Java code. Your goal is to have Java-free JSPs, but so far you do not have the tools to do that yet. The Expression Language was helpful in replacing some Java code, but you experienced in the last chapter how much you still have to rely on Java code even using EL. In fact, you really haven’t even tapped in to the power of EL yet because you are still too limited by having to use Java code.
You have already seen a small sampling of JSP tags and the JSTL in previous chapters with the <c:url> and <c:redirect> tags. This was simply unavoidable because the alternatives were too unfriendly to even show you. However, these tags were mentioned only in passing, and the details of them and the JSTL were left to this chapter. You also saw part of the JSTL when you explored the JSTL function library (with the fn namespace) in the previous chapter, but this was necessary because it is really a function library, not a tag library, and it is meant exclusively for use in EL expressions. You can’t use the JSTL function library outside of EL expressions. In this chapter you learn about the concept of JSP tags and the JSTL in detail, and you finally replace the unsightly Java code in your JSPs with a combination of JSP tags and EL expressions.
Working with Tags
JSP tags are a special syntax of the JavaServer Pages technology that looks like any normal HTML or XML tag. JSP tags are also called actions because that’s what they do. A JSP tag performs some action, such as creating or restricting output. The JSP and JSTL specifications refer almost exclusively to actions, but this book calls them tags. Because they are outside of the scope of any standard HTML-specified tag, JSP tags require an XML namespace to be referenced correctly. However, writing XML can be a very tedious and unforgiving task, as you saw with the brief introduction to JSP Documents (.jspx) in Chapter 4. In particular, the need to adhere to a strict XML document syntax is sometimes difficult even for seasoned programmers. Thus the idea of the JSP tag syntax includes some shortcuts to make writing JSPs easier. The first of these shortcuts is the taglib directive, which you explored in Chapter 4 and have used since then.
<%@ taglib prefix="c" uri="http://java.sun.com/jsp/jstl/core" %>
<%@ taglib prefix="fn" uri="http://java.sun.com/jsp/jstl/functions" %>
This directive is an alternative to the XMLNS technique for referencing XML namespaces in XML documents:
<jsp:root xmlns="http://www.w3.org/1999/xhtml" version="2.0"
xmlns:jsp="http://java.sun.com/JSP/Page"
xmlns:c="http://java.sun.com/jsp/jstl/core"
xmlns:fn="http://java.sun.com/jsp/jstl/functions">
The use of this directive prevents XML document parsers from parsing your JSP, but it also prevents you from having to worry about XML standards compliance (the other important shortcut). Instead, the JSP engine in your web container understands the special JSP syntax and knows how to parse it, and (these days) all major Java IDEs also understand the JSP syntax and can alert you to syntax errors and other issues in your JSP.
The prefix attribute in a taglib directive (or the XML namespace) represents the namespace with which the tag library is referenced throughout the JSP page. The tag prefix is suggested in the Tag Library Descriptor file (TLD) for that tag library but is declared in thetaglib directive using the prefix attribute. Thus the prefix can be whatever you set it to in the prefix attribute, but generally developers stick to using the prefix suggested in the TLD to prevent confusion among other developers.
The uri attribute indicates the URI defined in the TLD for that tag library. This is how the JSP parser locates the appropriate TLD for the referenced tag library: It finds the TLD containing the same URI.
NOTE The URI is a naming convention, not actually the location of the TLD (and not a real URL). In fact, in most cases navigating to the URI in your browser can result in a 404 Not Found or similar error. The TLDs you use are included with your application in some fashion, whether in the container, in your application’s JAR files, or in your application’s WEB-INF directory. The URI is merely a technique for uniquely identifying a TLD so that the tags you use can be correctly associated with the appropriate TLD.
When the JSP parser encounters a taglib directive, it locates the TLD file for that tag library, using the URI, by looking for it in a variety of locations. These locations are indicated in the JSP specification as follows, in order from highest to lowest precedence:
1. If the container is a Java EE-compliant container, the parser looks for any matching TLD files that are part of the Java EE specification, including the JSP tag library, the Java Standard Tag Library, and any JavaServer Faces libraries.
2. It then checks explicit <taglib> declarations within the <jsp-config> section of the deployment descriptor.
3. If the parser still hasn’t located a matching TLD file, it checks any TLD files contained within the META-INF directory of any JAR files placed in your application’s /WEB-INF/lib directory, or any TLD files placed in your application’s /WEB-INF directory or in any subdirectories of /WEB-INF, recursively.
4. Finally, the parser checks any other TLD files that ship as part of the web container or application server. (These are usually custom to the web container, and as such using them ties your application specifically to that web container and makes it non-portable.)
An explicit <taglib> declaration is normally not needed unless the TLD you are referencing does not contain a URI (legal, but unusual), it is not located within one of the other locations previously listed (something you can avoid by putting it in the right place), or you need to override a TLD with a conflicting URI supplied in some third-party JAR file that you don’t have control over (a more likely but still unusual scenario). Explicit <taglib> declarations look like this:
<jsp-config>
...
<taglib>
<taglib-uri>http://www.example.org/xmlns/jsp/custom</taglib-uri>
<taglib-location>/tld/custom.tld</taglib-location>
</taglib>
...
</jsp-config>
In this example the <taglib-uri> value http://www.example.org/xmlns/jsp/custom would be compared against the taglib directive uri attribute. If they matched, it would use the TLD specified (/tld/custom.tld), relative to the root of the web application. Notice this configuration does not specify a prefix. This is because it is not a tag library declaration, like the taglib directive. It’s simply a map telling the container where the TLD file for the specified tag library URI lives. The use of explicit <taglib> declarations is almost universally avoidable, so you will not use them in any examples in this book.
After a taglib directive is correctly configured to resolve to the appropriate TLD, you can use the tags within that library in your JSP. All JSP tags follow the same basic syntax:
<prefix:tagname[ attribute=value[ attribute=value[ ...]]] />
<prefix:tagname[ attribute=value[ attribute=value[ ...]]]>
content
</prefix:tagname>
In this syntactic notation, prefix denotes the JSP tag library prefix, also known as the namespace (which is the standard XML nomenclature). tagname is the name of the tag as defined in the TLD. Attribute values are quoted with either single quotes (’) or double quotes (") but are never unquoted. Two attributes in the same tag can use different quoting styles, but if an attribute value starts with a single quote, it must end with a single quote, and if it starts with a double quote, it must end with a double quote. There must be white space between attributes, but in a self-closing tag, the white space before the /> is optional. All JSP tags must either be valid XML self-closing tags (<prefix:tagname />) or they must have matching closing tags (<prefix:tagname></prefix:tagname>). Non-XML self-closing tags without matching closing tags (<prefix:tagname>) are syntax errors.
When you write a JSP, note that one tag library is already implicitly included for use in all your JSPs. This is the JSP tag library (prefix jsp), and you do not need to place a taglib directive in a JSP to use it. (In a JSP document, however, you do need to add an XMLNS declaration for the jsp tag library.) You have already seen uses of tags in the JSP tag library in previous chapters, such as <jsp:include>, <jsp:forward>, <jsp:plugin>, <jsp:useBean>, and so on. You have also seen how the JSP tag library can be used in JSP Documents with <jsp:root>, <jsp:directive>, <jsp:declaration>, <jsp:scriptlet>, and <jsp:expression>. All these tags are already available to you in any JSP you write.
Remember from Chapter 2 that there are full, Java EE-compliant application servers, and then there are more limited Java EE web containers. Application servers implement the entire Java EE specification, whereas web containers implement the Servlet and JSP specifications — and maybe a handful of other specifications that the creators of the web container thought important. Most web containers also implement the EL specification because it used to be part of the JSP specification and today remains inextricably linked to the JSP specification. All web containers support using tag libraries with JSPs because this support is part of the JSP specification. However, some web containers do not implement the Java Standard Tag Library (JSTL) specification, because the specific tag libraries in the JSTL are easily decoupled from the generic concept of tag libraries. Tomcat has historically been one of these web containers, and to this day, it does not implement the JSTL. However, this does not mean that you cannot use JSTL in applications you plan on deploying in Tomcat!
NOTE Tomcat implements the Servlet API, JSP, Expression Language, and WebSocket API implementations. Other web containers may implement more or fewer specifications, and this may vary from one version to the next. Be sure to consult the documentation for your particular web container to determine which specifications it supports.
Recall from Chapter 4 that you added three new Maven dependencies to your example code. One of these was the JSP API, which simply enables you to compile against the JSP features in your IDE. Another dependency is for the Servlet API. These Maven dependencies have “provided” scope because Tomcat already includes the JSP API library, and as such you do not need to include it in your deployed application. The other two dependencies you added were the JSTL API (the interfaces, abstract classes, and tag descriptions for the JSTL) and the JSTL implementation provided by GlassFish (the JSTL TLD, concrete classes, and implementations of the interfaces). If Tomcat provided a JSTL implementation, you still would need JSTL Maven dependencies, but they would have “provided” scope. Because Tomcat does not provide a JSTL implementation, these libraries are in “compile” scope so that they deploy with your application. This enables you to use JSTL in your application despite Tomcat’s lack of a JSTL implementation.
There are five tag libraries in the Java Standard Tag Library specification:
· Core (c)
· Formatting (fmt)
· Functions (fn)
· SQL (sql)
· XML (x)
You already learned about the Functions library in Chapter 6 while you were exploring the Expression Language. The rest of this chapter is devoted to using the other four libraries and also touches on why using the XML and SQL libraries is generally discouraged. For reference, you can view the TLD documentation for Java EE 5’s JSTL 1.1 at http://docs.oracle.com/javaee/5/jstl/1.1/docs/tlddocs/. Unfortunately, there is no public documentation for Java EE 6’s JSTL 1.2, but the changes between these versions were very minor. No new tags were added — just clarifications in the specification. There was no new JSTL version in Java EE 7.
USING THE CORE TAG LIBRARY (C NAMESPACE)
The Core tag library, as the name implies, contains nearly all the core functionality you need to replace the Java code in your JSPs. This includes tools for conditional programming, looping and iterating, and outputting content. When you work on the Customer Support application at the end of this chapter, you will find that almost every line of Java code is replaced with some tag from the Core library. You have already seen a couple of tags from the Core library, so you should be familiar with its taglib directive:
<%@ taglib prefix="c" uri="http://java.sun.com/jsp/jstl/core" %>
There are many tags in the Core library, none of them unimportant. However, some of them are more commonly used than others, and you learn about them first.
<c:out>
The <c:out> tag is probably the most commonly used (and sometimes the most misunderstood) tag in the Core tag library. Its purpose is to assist in the outputting of content to your JSPs. You might immediately wonder how this is different from simply using an EL expression to output content. Perhaps more confusing is that <c:out> is almost always used with one or more EL expressions!
<c:out value="${someVariable}" />
Although in this case <c:out> may very well be equivalent to simply writing ${someVariable}, there are some differences. First, in this case, the use of <c:out> is actually equivalent to ${fn:escapeXml(someVariable)}. This is because, by default, <c:out> escapes reserved XML characters (<, >, ', ", and &) just like fn:escapeXml does. You can disable this behavior by setting the escapeXml attribute to false:
<c:out value="${someVariable}" escapeXml="false" />
However, in most cases you would never want to do this. The default escaping of reserved XML characters helps protect your site from cross-site scripting and various injection attacks, and also helps prevent unexpected special characters from breaking the functionality of your site. There is also the default attribute, which specifies a default value if the one provided in the value attribute is null.
<c:out value="${someVariable}" default="Value not specified." />
The default attribute can also contain an EL expression. (Any attribute in almost any tag can, for that matter.)
<c:out value="${someVariable}" default="${someOtherValue}" />
Instead of the default attribute, you could use nested contents and achieve the same thing. This enables you to use HTML tags, JavaScript, and other JSP tags to generate the default value.
<c:out value="${someVariable}">default value</c:out>
Finally, note how the value attribute works. Normally, the value specified by the EL expression in the value attribute is coerced to a String and that String is written to the output. However, if the EL expression returns a java.io.Reader, the contents of that reader are read and then written to the output.
<c:url>
The <c:url> tag properly encodes URLs, and rewrites them if necessary to add the session ID, and can also output URLs in your JSP. (In the examples in this book, session IDs in URLs are disabled to prevent session fixation attacks, so you will not see URL rewriting with this tag in action.) The tag accomplishes this behavior together with the <c:param> tag, which specifies query parameters to include in the URL. If the URL is a relative URL, the tag prepends the URL with the context path for your application so that the browser receives the correct absolute URL. Consider the following use of the <c:url> tag:
<c:url value="http://www.example.net/content/news/today.html" />
Because this URL is an absolute URL and contains no spaces or other special characters to encode, it is not changed in any way. Using the <c:url> tag for such a purpose is really pointless. However, if you had query parameters that you need to include in the URL, that would be a different story.
<c:url value="http://www.example.net/content/news/today.jsp">
<c:param name="story" value="${storyId}" />
<c:param name="seo" value="${seoString}" />
</c:url>
In this case the <c:url> tag will properly form and encode the query string. The story parameter might not be a problem, but the seo parameter (likely a search engine optimization string) could contain spaces, question marks, ampersands, and other special characters, all of which are encoded to ensure that they do not corrupt the URL. Where the <c:url> tag is probably most helpful, however, is in the encoding of relative URLs.
Consider that your application is deployed to http://www.example.org/forums/ and you place the following link tag in your HTML:
<a href="/view.jsp?forumId=12">Product Forum</a>
When a user clicked that link, they would be taken to http://www.example.org/view.jsp?forumId=12. You probably meant for that URL to be relative to the forum application, not the entire website. You could easily change your link to point to /forums/view.jsp?forumId=12, but what if you write a forums application that anyone can download and use on their website. You don’t know whether they’re going to deploy the application to /forums, /discussion, /boards, or even just /. This is where the <c:url> tag shines.
<a href="<c:url value="/view.jsp">
<c:param name="forumId" value="12" />
</c:url>">Product Forum</a>
Notice that the <c:url> tag here is actually embedded within the attribute of an HTML tag. This is completely legal and quite common. The <c:url> tag gets parsed and replaced when the JSP engine renders your JSP, and it treats everything that isn’t special JSP syntax as plain text. If your application is deployed to /forums, the resulting link points to /forums/view.jsp?forumId=12. If it’s deployed to /boards, it’ll be /boards/view.jsp?forumId=12. This saves you the trouble of worrying about what context path your application is deployed to. Of course, it’s possible that you really wanted the URL to go back to the root of the site. Or maybe you needed it to go to some other deployed application. This is easily accomplished, too, by adding the context attribute to the tag.
<c:url value="/index.html" context="/"/>
<c:url value="/item.jsp?itemId=15" context="/store" />
The first tag produces a URL going to the root context, /index.html. The second tag produces a URL going to the /store context, /store/item.jsp?itemId=15.
By default, the <c:url> tag outputs the resulting URL to the response. If you have a URL you are going to use multiple times on the page, you can save the resulting URL to a scoped variable instead:
<c:url value="/index.jsp" var="homepageUrl" />
<c:url value="/index.jsp" var="homepageUrl" scope="request" />
The var attribute specifies the name of the EL variable to create and save the resulting URL to. By default it is saved to the page scope (remember the four EL variable scopes: page, request, session, and application), which is normally sufficient. If for some reason you need to save it to a different scope, you can use the scope attribute to explicitly specify the scope. Notice that the value of var is a plain string, not an EL expression. Although an EL expression can work here, it is useless that way. You are telling the JSP the name of the attribute you want created in the scope, so it should always be a plain string value.
The first tag in the previous example creates a homepageUrl attribute in the page scope. The second tag creates the same attribute, but in the request scope instead. Regardless of which scope you save the URL to, you can then reference the URL later in the page with (in this example) ${homepageUrl}.
<a href="${homepageUrl}">Home</a>
For maximum safety, flexibility, and portability, it is recommended that all URLs in JSPs get encoded with <c:url> unless the URL is an external URL with no query parameters. Even in that case, using <c:url> is still legal and even encouraged in case the URL contains special characters that need encoding.
<c:if>
It is likely obvious to you that the <c:if> tag is a conditional tag for controlling when certain content in rendered. Using the <c:if> tag is quite straightforward:
<c:if test="${something == somethingElse}">
execute only if test is true
</c:if>
The test attribute specifies a condition that must evaluate to true for the nested content within the <c:if> tag to be evaluated. If test evaluates to false, everything within the tag is ignored. If you have some complex condition that you want to test only once but use multiple times on the page, you can save it to a variable using the var attribute (and optionally specify a different scope):
<c:if test="${someComplexExpressionIsTrue}" var="itWasTrue" />
...
<c:if test="${itWasTrue}">
do something
</c:if>
...
<c:if test="${itWasTrue}">
do something else
</c:if>
You might immediately wonder if there is a <c:else> to accompany <c:if>. There is not. <c:if> is meant for simple, all-or-nothing conditional blocks. For more complex if/else-if/else logic, you need something more powerful than <c:if>.
<c:choose>, <c:when>, and <c:otherwise>
The <c:choose>, <c:when>, and <c:otherwise> tags are the more powerful counterpart to the <c:if> tag and provide more complex if/else-if/else logic. The <c:choose> tag acts as a frame to indicate the beginnings and end of the complex conditional block. It has no attributes and may contain only white space, <c:when>, and <c:otherwise> nested within. There must be at least one and may be unlimited <c:when> tags within a <c:choose>, and all the <c:when> tags must come before the <c:otherwise> tag. <c:when> has one attribute,test, which indicates the condition that must evaluate to true for the content within that <c:when> to execute. Any content or other JSP tags may be nested within <c:when>. Only one <c:when> tag will have its contents evaluated: The first one whose test is true. The<c:choose> short-circuits to the end after a <c:when> tag has evaluated to true.
There may be at most one (optional) <c:otherwise> tag, and it must be the last tag within <c:choose>. It has no attributes, may contain any nested content, and always has its contents executed if and only if none of the <c:when> tags within the same <c:choose> evaluate to true.
<c:choose>
<c:when test="${something}">
"if"
</c:when>
<c:when test="${somethingElse}">
"else if"
</c:when>
...
<c:otherwise>
"else"
</c:otherwise>
</c:choose>
From the previous code, you can see that the first <c:when> is like the initial if in Java. It is evaluated first, and if it’s true everything within it is executed and everything else is ignored. The second <c:when> and all other <c:when>s are analogous to else if. They are tested only if every <c:when> before them evaluate to false. The <c:otherwise> tag is like the final else: the backup case that is always evaluated when everything else fails. Of course, your <c:choose> could have just one <c:when> and nothing else:
<c:choose>
<c:when test="${something}">
"if"
</c:when>
</c:choose>
However, in this case it’s much easier to just write <c:if test="${something}">...</c:if>. When complexity is required, <c:choose> can manage it. When your if needs no elses, <c:if> is probably the way to go.
<c:forEach>
The <c:forEach> tag is used for iteration and repeats its nested body content some fixed number of times or while iterating over some collection or array of objects. It can act like a standard Java for loop or a Java for-each loop depending on which attributes you use. For example, say you want to replace the following Java loop with a <c:forEach>:
for(int i = 0; i < 100; i++)
{
out.println("Line " + i + "<br />");
}
The equivalent <c:forEach> tag is as follows:
<c:forEach var="i" begin="0" end="100">
Line ${i}<br />
</c:forEach>
In this case, every number between 0 and 100 prints to the screen. The begin attribute must be at least 0. If end is less than begin, the loop never executes. You can also increment i by more than 1, if you want to, using the step attribute (which must be greater than or equal to 1):
<c:forEach var="i" begin="0" end="100" step="3">
Line ${i}<br />
</c:forEach>
In this case, every third number between 0 and 100 prints to the screen.
Using <c:forEach> to iterate over some collection of objects is a matter of utilizing different attributes.
<c:forEach items="${users}" var="user">
${user.lastName}, ${user.firstName}<br />
</c:forEach>
The expression within items must evaluate to some Collection, Map, Iterator, Enumeration, object array, or primitive array. If items is a Map, the Map.Entrys are iterated by calling the entrySet method. If items is an Iterator or Enumeration, remember that you cannot rewind these types to the beginning after iteration begins, so you can only iterate over them once. If items is null, no iteration is performed, just as if the collection were empty. This does not cause a NullPointerException. If you have some other class that implementsIterable but is not one of these types, you can use it by calling the iterator method on the object (items="${object.iterator()}"). The var attribute specifies the name of the variable to which each element should be assigned for each loop iteration. The previous example is equivalent to the following Java for-each loop:
for(User user : users)
{
out.println(user.getLastName() + ", " + user.getFirstName() + "<br />");
}
You can skip collections elements in <c:forEach> using the step attribute, just like you would for iterating over numbers. You can also use the begin attribute to begin iteration at the specified index (inclusive) and the end attribute to end iteration at the specified index (inclusive). This is useful to implement paging of a collection of objects, for example.
Finally, whether you use <c:forEach> as a for loop of numbers or a for-each loop over a collection of objects, you can use the varStatus attribute to make a variable available within the loop containing the current status of the iteration.
<c:forEach items="${users}" var="user" varStatus="status">
${status.begin}
${status.end}
${status.step}
${status.count}
${status.current}
${status.index}
${status.first}
${status.last}
</c:forEach>
In this example the status variable encapsulates the status of the current iteration. The properties of this status object (an instance of javax.servlet.jsp.jstl.core.LoopTagStatus) follow:
· begin — Contains the value of the begin attribute from the loop tag.
· end — Contains the value of the end attribute from the loop tag.
· step — Contains the value of the step attribute from the loop tag.
· index — Returns the current index from the iteration. This value increases by step for each iteration.
· count — Returns the count of the number of iterations performed so far (including the current iteration). This value increases by 1 for each iteration, even if step is greater than 1. The value starts at 1 with the first iteration and is never equal to status.index.
· current — This contains the current item from the iteration. If you also use the var attribute to export the item as a variable, this is the same as that. In the previous example, status.current equals user.
· first — This is true if the current iteration is the very first iteration (if status.count is equal to 1). Otherwise it is false.
· last — This is true if the current iteration is the very last iteration. Otherwise it is false.
One final thing to consider when using <c:forEach> is the impact of EL deferred syntax (#{}). If you intend to use some tag within the loop that requires deferred syntax in an attribute, and you want to use the variable created as specified in var within that deferred syntax, you must also use deferred syntax for the EL expression in <c:forEach>’s items attribute. Otherwise, the deferred syntax referencing the element variable will not work.
<c:forTokens>
The <c:forTokens> tag is nearly identical to the <c:forEach> tag. It contains many of the same attributes (var, varStatus, begin, end, and step) that behave in the same way as their <c:forEach> counterparts when operating in a for-each loop over a collection of objects. The major difference with <c:forTokens> is that the items attribute accepts a String, not a collection, and the additional delims attribute specifies one or more characters with which to split the String into tokens. The tag, then, loops over those tokens.
<c:forTokens items="This,is,a,cool,tag." delims="," var="word">
${word}<br />
</c:forTokens>
<c:redirect>
You have already seen the <c:redirect> tag in use in the index.jsp files of many of the sample projects. This tag redirects the user to another URL, just as the name implies. After adding the HTTP Location header to the response and changing the HTTP response status code, it aborts execution of the JSP. Because it changes response headers, <c:redirect> must be called before the response has started streaming back to the client. Otherwise, it is not successful in redirecting the client, and the client instead receives a truncated response (with everything after the <c:redirect> tag in the JSP missing). <c:redirect> follows the same rules as <c:url> regarding URL encoding, rewriting for session IDs, and adding query parameters using nested <c:param> tags. The following examples are all possible uses of the <c:redirect> tag; however, this is certainly not an exhaustive example.
<c:redirect url="http://www.example.com/" />
<c:redirect url="/tickets">
<c:param name="action" value="view" />
<c:param name="ticketId" value="${ticketId}" />
</c:redirect>
<c:redirect url="/browse" context="/store" />
<c:import>
The <c:import> tag is a particularly interesting action that enables the retrieval of the contents of the resource at a particular URL. Those contents can then be inlined to the response, saved to a String variable, or saved to a Reader variable. As with <c:url> and<c:redirect>, the URL can be for the local context, for another context, or for an external site and is properly encoded and rewritten when necessary. Nested <c:param> tags can also specify query parameters to encode into the URL. The var attribute specifies the name of the String variable to which the content should be saved, and the scope attribute can specify the scope of the String variable. The varReader attribute specifies the name of the Reader variable that should be made available for reading the content.
If you use varReader to export a Reader variable, you cannot use <c:param>, and you must use the Reader within the nested content of the <c:import> tag. The Reader variable will not be available after the closing </c:import> tag. (This ensures that the JSP engine has the opportunity to close the Reader.)
You should never use var and varReader together; doing so will result in an exception. With neither the var nor the varReader attributes specified, the content of the resource at the URL is inlined in the JSP. The following examples demonstrate some of the ways that you can use <c:import>.
<c:import url="/copyright.jsp" />
<c:import url="/ad.jsp" context="/store" var="advertisement" scope="request">
<c:param name="category" value="${forumCategory}" />
</c:import>
<c:import url="http://www.example.com/embeddedPlayer.do?video=f8ETe9238MNTte"
varReader="player" charEncoding="UTF-8">
<wrox:writeVideoPlugin reader="${player}" />
</c:import>
The first example inlines the contents from the application’s local copyright.jsp in the page. The second saves the contents of ad.jsp?category=${forumCategory} to a String named advertisement in the request scope, properly encoding the category query parameter. The third fetches some external resource and exports it as a Reader object named player. The imaginary <wrox:writeVideoPlugin> tag then uses player in some way that is unimportant here.
Notice also the use of the charEncoding attribute. Chances are you will never use this attribute. However, if the target resource does not return a Content-Type header (very unusual) and the content type is something other than ISO-8859-1, you need to specify what the character encoding is by specifying the charEncoding attribute.
<c:set> and <c:remove>
You can use the <c:set> tag to set the value of a new or existing scope variable and use its counterpart, <c:remove>, to remove a variable from scope.
<c:set var="myVariable" value="Hello, World!" />
...
${myVariable}
...
<c:remove var="myVariable" scope="page" />
<c:set var="complexVariable" scope="request">
nested content including other JSP tags
</c:set>
...
${complexVariable}
...
<c:remove var="complexVariable" scope="request" />
As with most other tags that expose scope variables, you can use the scope attribute to specify what scope the variable is defined in. (The default is page scope.) Be careful with <c:remove> because its scope attribute does not work the same: If you do not specify scope, all attributes with matching names in all scopes are removed. This is probably not what you want to happen, so you should always use the scope attribute.
In addition to the uses previously shown, you can also use <c:set> to change the value of a property on a bean.
<c:set target="${someObject}" property="propertyName" value="Hello, World!" />
<c:set target="${someObject}" property="propertyName">
nested content including other JSP tags
</c:set>
When used in this manner, the target attribute should always be an EL expression that evaluates to either a Map or some other bean with mutator methods (“setters”) that are used to set property values. The previous examples are both equivalent to callingsomeObject.setPropertyName(...) for a bean or someObject.put("propertyName", ...) for a Map in Java code.
Putting Core Library Tags to Use
To get a feel for how the Core tag library works, this section creates an application that lists out contacts in an address book. You can create the address book from scratch or follow along with the Address-Book project available on the wrox.com code download site. Create the standard application with a deployment descriptor containing the standard JSP and session configurations you used in Chapter 6. The index.jsp welcome file should redirect to the /list servlet using the <c:redirect> tag:
<c:redirect url="/list" />
The base JSP page /WEB-INF/jsp/base.jsp should contain taglib directives for the Core and Function libraries from the JSTL:
<%@ taglib prefix="c" uri="http://java.sun.com/jsp/jstl/core" %>
<%@ taglib prefix="fn" uri="http://java.sun.com/jsp/jstl/functions" %>
You need something to list, so start by creating a simple Contact POJO with basic information you would find in an address book. Notice in the following code sample that Contact uses the new Java 8 Date and Time API and implements Comparable so that it can be sorted appropriately. The mutator and accessor methods and contents of the constructor have been omitted for brevity.
public class Contact implements Comparable<Contact>
{
private String firstName;
private String lastName;
private String phoneNumber;
private String address;
private MonthDay birthday;
private Instant dateCreated;
public Contact() { }
public Contact(String firstName, String lastName, String phoneNumber,
String address, MonthDay birthday,
Instant dateCreated) { ... }
...
@Override
public int compareTo(Contact other)
{
int last = lastName.compareTo(other.lastName);
if(last == 0)
return firstName.compareTo(other.firstName);
return last;
}
}
The ListServlet in Listing 7-1 responds to requests; it contains a static Set of contacts that serves as a database of sorts and is prepopulated with a handful of contacts. The doGet method adds an empty contacts Set to a request attribute if the empty parameter is present, or the static Set if the parameter is not present, and then redirects to the /WEB-INF/jsp/view/list.jsp file found in Listing 7-2.
Notice in list.jsp the use of <c:choose>, <c:when>, and <c:otherwise> to display a message if the address book is empty and otherwise execute the code to loop over the list. <c:forEach> performs this task, and <c:out> ensures that the String values are properly escaped so that they do not contain XML characters. Finally, the <c:if> tag makes sure that the birthday displays only if it is not null.
LISTING 7-1: ListServlet.java
@WebServlet(
name = "listServlet",
urlPatterns = "/list"
)
public class ListServlet extends HttpServlet
{
private static final SortedSet<Contact> contacts = new TreeSet<>();
static {
contacts.add(new Contact("Jane", "Sanders", "555-1593", "394 E 22nd Ave",
MonthDay.of(Month.JANUARY, 5),
Instant.parse("2013-02-01T15:22:23-06:00")
));
contacts.add(new Contact( "John", "Smith", "555-0712", "315 Maple St",
null, Instant.parse("2012-10-15T09:31:17-06:00")
));
contacts.add(new Contact("Scott", "Johnson", "555-9834", "424 Oak Dr",
MonthDay.of(Month.NOVEMBER, 17),
Instant.parse("2013-04-04T19:45:01-06:00")
));
}
@Override
protected void doGet(HttpServletRequest request, HttpServletResponse response)
throws ServletException, IOException
{
if(request.getParameter("empty") != null)
request.setAttribute("contacts", Collections.<Contact>emptySet());
else
request.setAttribute("contacts", contacts);
request.getRequestDispatcher("/WEB-INF/jsp/view/list.jsp")
.forward(request, response);
}
}
LISTING 7-2: list.jsp
<%--@elvariable id="contacts" type="java.util.Set<com.wrox.Contact>"--%>
<!DOCTYPE html>
<html>
<head>
<title>Address Book</title>
</head>
<body>
<h2>Address Book Contacts</h2>
<c:choose>
<c:when test="${fn:length(contacts) == 0}">
<i>There are no contacts in the address book.</i>
</c:when>
<c:otherwise>
<c:forEach items="${contacts}" var="contact">
<b>
<c:out value="${contact.lastName}, ${contact.firstName}" />
</b><br />
<c:out value="${contact.address}" /><br />
<c:out value="${contact.phoneNumber}" /><br />
<c:if test="${contact.birthday != null}">
Birthday: ${contact.birthday}<br />
</c:if>
Created: ${contact.dateCreated}<br /><br />
</c:forEach>
</c:otherwise>
</c:choose>
</body>
</html>
Compile and debug your project and navigate to http://localhost:8080/address-book/list?empty in your browser. You should see the message that there are no contacts in the address book, meaning that the <c:when> test evaluated to true. Now take the emptyparameter off the URL, and you should see a screen like that in Figure 7-1. For the most part this looks okay, but the dates are not formatted in a friendly manner, and there is no support for alternative languages. In the next section you learn more about implementing these.
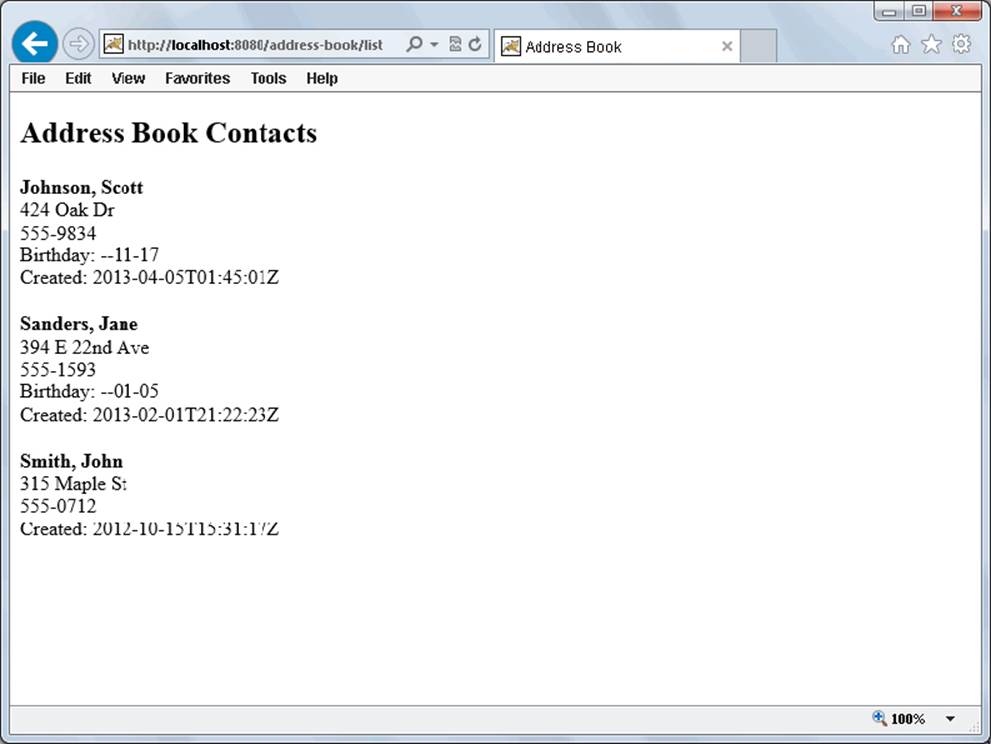
FIGURE 7-1
USING THE INTERNATIONALIZATION AND FORMATTING TAG LIBRARY (FMT NAMESPACE)
If you intend to create enterprise Java applications for deployment on the web and target large, international audiences, you will ultimately need to localize your application to particular regions of the world. This is achieved through internationalization (often abbreviated i18n), which is the process of designing an application so that it can adapt to different regions, languages, and cultures without redesigning or rewriting the application for new regions.
After an application is internationalized, you can utilize the internationalization framework to localize the application by adding support for the target regions, languages, and cultures. Often the terms localization (often abbreviated L10n) and internationalization are confused, which is understandable considering that they are so interrelated. One handy way to remember the difference is, “First you internationalize through architecture, and then you localize through translation.”
Internationalization and Localization Components
There are three components to internationalization and localization:
· Text must be translatable and translated so that users who speak and understand other languages can use your application.
· Dates, times, and numbers (including currencies and percentages) must be formatted correctly for different locales. For example, 12,934.52 in the United States is actually 12 934,52 in France and 12.934,52 in Germany.
· Prices must be convertible so that they can display in a local currency to match the client’s region of the world.
Often, the conversion of currencies is omitted — and for good reason. Displaying prices in different currencies to users can be extremely challenging, inaccurate, and out of date, and today most business financial institutions provide mechanisms for converting your currency to the user’s currency during checkout. In many cases it is perfectly sufficient to simply display prices in U.S. dollars. Due to the complexities of this topic, this book does not cover currency conversion.
The JSTL provides a tag library that supports both internationalization and localization efforts in your applications: the Internationalization and Formatting library, whose prefix is fmt. In this section you learn about how to use and configure the Formatting library to internationalize your application so that you can later localize it. You often see the term locale, which is an identifier representing a specific region, culture, and/or political area. Locales always contain a two-letter lowercase language code as specified by ISO 639-1. You can view a list of all these codes by clicking http://www.loc.gov/standards/iso639-2/php/code_list.php. This page displays 2-letter ISO 639-1 and 3-letter ISO 639-2 codes. You will only use the 2-letter codes for this book.
For languages where the language code is too ambiguous (Mexican Spanish is slightly different from Spanish in Spain, for example) the locale can optionally contain a two-letter uppercase country code as specified by ISO 3166-1, which you can view by clickinghttp://www.iso.org/iso/home/standards/country_codes/iso-3166-1_decoding_table.htm.
In a locale code, the language code always comes first. If a country code is specified, it comes next, with an underscore separating the language and country codes. Occasionally, a locale is also associated with a variant, which is not included as part of the locale code. You do not usually need to worry about variants, but for more information on them, you should see the API documentation for the java.util.Locale class. Locale is used to represent locales in Java and the JSTL.
The Internationalization and Formatting tag library is divided into two main categories:
· Tags that support internationalization (i18n tags)
· Tags that support date, time, and number formatting (formatting tags)
I18n tags have a sense of resource bundles, which define locale-specific objects. Resource bundles consist of keys that correspond to entries in the bundle and are defined using an arbitrary basename of the developer’s choosing with the locale code appended to the basename to form the full resource bundle name. A given key typically has entries in every resource bundle, one for each language and country supported. In this section you learn first about all the i18n tags and then the formatting tags.
The taglib directive for the Internationalization and Formatting library follows:
<%@ taglib prefix="fmt" uri="http://java.sun.com/jsp/jstl/fmt" %>
NOTE One of the traditional complaints about the JSTL Internationalization and Formatting tag library is that it is more difficult to use than it should be. However, this is sometimes also seen as a matter of personal preference, with other developers thinking the JSTL support for i18n and localization is quite adequate. A lot of this depends on your particular needs, and in Chapter 15 you will use Spring Framework i18n tools to explore internationalization more thoroughly and understand your other options.
<fmt:message>
Perhaps the i18n tag that you will use the most (maybe the only i18n tag you will ever use), <fmt:message> resolves a localized message in a resource bundle and then either inlines that message on the page or saves it to an EL variable. The required key attribute specifies the key of the localization message to resolve in the resource bundle. You use the optional bundle attribute to indicate which localization context, created with <fmt:setBundle>, should be used for locating the key. This overrides the default bundle. The optional var attribute specifies an EL variable to save the localized message to, and the corresponding scope attribute can control which scope the variable goes in. Localization messages can also be parameterized using the <fmt:param> tag nested within the<fmt:message> tag. Say your application had one resource bundle translated for two languages — U.S. English (en_US) and Mexican Spanish (es_MX) — and each translation contained an entry for the localization message store.greeting. The English value forstore.greeting might look like this:
store.greeting=There are {0} products in the store.
The Spanish value is similar, except that it is translated:
store.greeting=Hay {0} productos en la tienda.
The {0} token in each message indicates a placeholder that some parameter should replace. Placeholders are zero-based but they do not have to appear in numerical order within the message. Some languages use very different word orders, meaning a parameter may need to be replaced at different places in different languages. Placeholders can also be duplicated when desirable — you may want to insert the same parameter into a message multiple times. Within your JSP, you reference the localization message using the following code.
<fmt:message key="store.greeting">
<fmt:param value="${numberOfProducts}" />
</fmt:message>
If numberOfProducts were 63, users would see the following output depending on their selected locale:
English: There are 63 products in the store.
Spanish: Hay 63 productos en la tienda.
The nested <fmt:param> tags correspond to the placeholders in order starting from 0. So the first <fmt:param> tag specifies a value for {0}, the second for {1}, and so on, regardless of what order the placeholders actually appear in the localized message. (Messages do not need to have placeholders in them, and you can use <fmt:message> without <fmt:param>. If a message does contain a placeholder and no <fmt:param> is specified for it, the placeholder is left as-is in the message.) Instead of the value attribute, you can specify the parameter value by placing it within the <fmt:param> opening and closing tags.
<fmt:message key="store.greeting">
<fmt:param>${numberOfProducts}</fmt:param>
</fmt:message>
You should also note that the key attribute isn’t strictly required; rather, the message key is. There is an alternative way of specifying the message key without using the key attribute:
<fmt:message>some.message.key</fmt:message>
<fmt:message>
store.greeting
<fmt:param value="${numberOfProducts}" />
</fmt:message>
Although this method is supported, it is rarely used, and many IDEs do not validate message keys unless they are placed within the key attribute. In this book, message keys are always specified in the key attribute.
NOTE If you ever see a <fmt:message> replaced with ??????, this means you failed to validly specify a message key (either with the key attribute or in the tag body). If some message (such as store.greeting) is ever replaced with ???<key>??? (such as ???store.greeting???), this means that the message key could not be found in the configured resource bundle.
<fmt:setLocale>
The <fmt:setLocale> tag sets the locale used to resolve resource bundle messages for i18n and formatting. The value attribute specifies the locale and can be either a String locale code (such as en_US) or an EL expression evaluating to an instance of Locale. If value is a locale code, the variant attribute can also be specified to indicate a variant of the locale. The locale is saved to an EL variable with the name javax.servlet.jsp.jstl.fmt.locale and becomes the default locale in the specified scope (which defaults to page scope). If you use this tag, it should come before any other i18n or formatting tags to ensure that the correct locale is used. However, you should not normally need the <fmt:setLocale> tag. Internationalized applications typically have a mechanism (such as loading saved locale settings from a user account) by which the locale is automatically set before the request ever gets forwarded to a JSP. You explore this further in Chapter 15.
<fmt:setLocale value="en_US" />
<fmt:setLocale value="${locale}" />
<fmt:bundle> and <fmt:setBundle>
I18n tags in JSTL rely on a localization context to inform them of the current resource bundle and locale. You can use <fmt:setLocale> and other techniques to specify the locale in the current localization context. <fmt:bundle> and <fmt:setBundle> are two ways to indicate the resource bundle that should be used. When an i18n tag needs to know its localization context, it looks in several places, using the first specified localization context it finds in this order of precedence:
· If the bundle attribute of the <fmt:message> tag is specified, it uses that value with preference over all other bundles that might apply to the tag.
· If the i18n tag is nested with a <fmt:bundle> tag, it uses this bundle (unless overridden by the bundle attribute on <fmt:message>).
· If the default localization context is specified using the context init parameter or EL variable named javax.servlet.jsp.jstl.fmt.localizationContext, it uses that bundle. You learn how to specify this later in this section.
Although the <fmt:bundle> tag creates an ad-hoc localization context that affects only the nested tags within, <fmt:setBundle> exports a localization context to an EL variable that i18n tags can later use by referencing the bundle variable in the bundle attribute. The name of the exported variable is specified in the var attribute and has the scope specified in scope (which defaults to page scope). If you do not specify var, the localization context is saved to the EL variable named javax.servlet.jsp.jstl.fmt.localizationContext and becomes the default localization context for that scope. The following example demonstrates the precedence of bundle definitions.
<fmt:setBundle basename="Errors" var="errorsBundle" />
<fmt:bundle basename="Titles">
<fmt:message key="titles.homepage" />
<fmt:message key="errors.notFound" bundle="${errorsBundle}" />
</fmt:bundle>
<fmt:message key="others.greeting" />
The basename attribute indicates the base name of the resource bundle — that is, the beginning of the resource bundle file, before the locale code is appended to it. The <fmt:message> tag outputting the titles.homepage message will use the Titles bundle defined by the<fmt:bundle> tag within which it is nested, whereas the errors.notFound message will resolve using the Errors bundle defined in the <fmt:setBundle> tag. Finally, the others.greeting message will resolve using the default localization context.
As with <fmt:setLocale>, you will rarely (if ever) use the <fmt:bundle> and <fmt:setBundle> tags. There are tools that make managing this easier, and they are discussed later in this section and more in depth in Chapter 15.
<fmt:requestEncoding>
The <fmt:requestEncoding> tag sets the character encoding for the current request using the var attribute so that request parameters are correctly decoded with the character encoding appropriate to the given locale. You do not need to use this tag and do not see it used in this book for two reasons:
· Your Java servlets process request parameters before any <fmt:requestEncoding> tag has a chance to change the request character encoding.
· All modern browsers include a Content-Type request header with a character encoding for any requests whose encoding differs from ISO-8859-1. They all also use the character encoding returned by the last response from the site the request is sent to. This eliminates the need to manually set the request character encoding.
This tag is a legacy tag that originates from an era where the encoding of request attributes was rarely known and had to be guessed. The developer could make an educated guess about the encoding based on the selected language. Today, because of the behavior of modern browsers, the need to do this has gone away.
<fmt:timeZone> and <fmt:setTimeZone>
The formatting tags that handle dates and times need a locale and a time zone to function properly. The locale comes from the localization context, which you read about earlier in the discussion about <fmt:bundle> and <fmt:setBundle>, and is determined using the same rules defined in that section. However, the idea of a time zone, while sometimes correlated to the region or language specified in the locale, is not strictly tied to the locale. Someone from the United States may visit Tokyo, for example, and want to use your application in English with standard U.S. date and time formatting while seeing the dates and times in Tokyo time. For this reason and many others, time zones and locales are separate in Java and in the JSTL. Formatting tags that require time zones resolve the time zone to use with the given strategy, in order of precedence:
· If a date and time formatting tag has a value specified for its timeZone attribute, use that value with preference over all other time zones.
· If the tag is nested within a <fmt:timeZone> tag, use the time zone specified by <fmt:timeZone>.
· If the context init parameter or EL variable named javax.servlet.jsp.jstl.fmt.timeZone is specified, use that time zone.
· Otherwise, use the time zone provided by the container (typically the JVM time zone, the time zone of the underlying operating system).
The <fmt:timeZone> tag is the time zone analog to the <fmt:bundle> action. It creates an ad-hoc time zone scope within which any nested tags use the given time zone. Its only attribute is value, which can be an EL expression evaluating to a java.util.TimeZone, or to aString matching any legal time zone ID as specified in the IANA Time Zone Database. You can learn about these IDs on the IANA website or in the API documentation for TimeZone. If value is null or empty, the GMT time zone is assumed.
The <fmt:setTimeZone> tag, on the other hand, acts like the <fmt:setBundle> tag and exports the value specified time zone to a scope variable. The var attribute specifies the name of the EL variable to export the time zone to in the scope specified by scope (which defaults to page scope, as usual). If var is omitted, the time zone is saved to the EL variable named javax.servlet.jsp.jstl.fmt.timeZone and becomes the default time zone for that scope.
<fmt:setTimeZone value="America/Chicago" var="timeZoneCst" />
<fmt:timeZone value="${someTimeZone}">
tags nested here use someTimeZone
</fmt:timeZone>
<fmt:timeZone value="${timeZoneCst}">
tags nested here use America/Chicago
</fmt:timeZone>
<fmt:formatDate> and <fmt:parseDate>
The <fmt:formatDate> tag, as the name implies, formats the specified date (and/or time) using the default or specified locale and the default or specified time zone. The formatted date is then either inlined or saved to the variable specified in the attribute var with the indicated scope. The timeZone attribute specifies a different TimeZone or String time zone ID to format the date. The date value is specified using the value attribute. Currently, value must be an EL expression evaluating to an instance of java.util.Date; neitherjava.util.Calendar nor the Java 8 Date & Time API classes are supported. In the next chapter, you create a custom tag library with an improved date formatting tag that supports these newer classes. A future version of the JSTL will likely support these types.
How a date is formatted is determined using the locale combined with the type, dateStyle, timeStyle, and pattern attributes. type should be one of “date,” “time,” or “both” to indicate whether to output just the date, just the time, or the date followed by the time, respectively. The dateStyle and timeStyle attributes both follow the semantics defined in the API documentation for java.text.DateFormat and must be one of “default” (conveniently, the default), “short,” “medium,” “long,” or “full.” These attributes specify how the date and time, respectively, are formatted in relation to their locales. If you need to you can also specify a custom formatting pattern according to the java.text.SimpleDateFormat rules using the pattern attribute. In this case the type, dateStyle, and timeStyle attributes are ignored. Doing this also ignores the styles that come with the locale (though the months are still localized to the language), so it’s best to avoid using pattern if at all possible.
<fmt:formatDate value="${someDate}" type="both" dateStyle="long"
timeStyle="long" />
<fmt:formatDate value="${someDate}" type="date" dateStyle="short"
var="formattedDate" timeZone="${differentTimeZone}" />
Given a date of the 3rd day of October in the year 2013 at the time 15:22:37 in the default time zone of America/Chicago, the first example outputs “October 3, 2013 3:22:37 PM CDT” for the U.S. English locale and “3 October 2013 15:22:37 CDT” for the France French locale. The second example formats the date only and in a shorter format in the time zone specified by ${differentTimeZone} and saves it to the formattedDate variable. The value of formattedDate is “10/3/13” for the U.S. English locale and “03/10/13” for the France French locale.
If <fmt:parseDate> sounds to you like the opposite of <fmt:formatDate>, you’re exactly right. <fmt:parseDate> has all the same attributes and rules as <fmt:formatDate>, but it reverses the process. It takes formatted Strings like what <fmt:formatDate> would output and parses them into Date objects. Typically, you would always assign this to a variable using the var attribute; otherwise, it’s not very useful. Also, instead of specifying the date to parse using the value attribute, you can specify it as the body content within the tag.
<fmt:formatNumber> and <fmt:parseNumber>
The <fmt:formatNumber> tag is an extremely powerful action that enables the formatting of numbers (integer-style and decimals), currencies, and percentages. It has many attributes and not all of them apply to all situations. First, know that this tag, like so many others you have seen, has var and scope attributes that behave as you are accustomed. If var is omitted, the formatted number is inlined in the JSP. Now consider the need to format a currency and assume number is a scope variable with the value 12349.15823.
<fmt:formatNumber type="currency" value="${number}" />
This outputs “$12,349.16” for the U.S. English locale and “12.349,16 €” for the Spain Spanish locale. You should immediately see the problem: The number was represented with two different currency symbols without a currency conversion taking place. This would be inaccurate and confusing for any users of your application. Because of this, you should always specify the currencyCode attribute, which can be any valid ISO 4217 currency code. (You can view this list by clicking http://en.wikipedia.org/wiki/ISO_4217).
<fmt:formatNumber type="currency" value="${number}" currencyCode="USD" />
The output of this is still “$12,349.16” for the U.S. English locale but is now “12.349,16 USD” for the Spain Spanish locale, which is correct. The currencySymbol attribute can also be used to override the currency symbol used, but it is best to leave this alone. The tag can correctly determine the currency symbol based on the currency code you specify. Both of these attributes are ignored if type is not “currency.”
Another valid type value (and the default) is “number.” This formats a number as a generic number. By default it rounds numbers to three digits and groups digits of numbers according to the locale.
<fmt:formatNumber type="number" value="${number}" />
This outputs “12,349.158” for the U.S. English locale and “12.349,158” for the Spain Spanish locale. You use the maxFractionDigits attribute to increase and decrease the rounding accuracy by specifying the number of digits after the decimal separator and themaxIntegerDigits to specify the maximum number of digits before the decimal separator. (Don’t ever use maxIntegerDigits because it can truncate your numbers. For example, if set to 3, the number 12345 becomes 345.) The minFractionDigits is used to pad zeroes onto the end of the decimal portion of the number out to the specified number of digits, and likewise minIntegerDigits is used to pad zeroes onto the beginning of the integer portion of the number. The groupingUsed attribute (default true) specifies whether digits should be grouped in the formatted number. If false, the output from the previous example would have been “12349.158” and “12349,158.” These five attributes are all accepted for all three number types.
The third and final valid type value is “percent” and is used to format the number as a percentage.
<fmt:formatNumber type="percent" value="0.8572" />
The output of this is “86%” for both the U.S. English locale and the Spain Spanish locale because the default strategy is to round percentages to whole numbers. If the maxFractionDigits attribute were set to 2, the values would be “85.72%” and “85,72%”. Notice that the number is automatically multiplied by 100 for you so that it is converted to a percentage. The default value for maxFractionDigits is locale-specific for currencies, 3 for numbers and 0 for percentages. There is also a pattern attribute with which you can specify a custom pattern to format the number according to the java.text.DecimalFormat rules. You generally want to avoid using this attribute.
Like <fmt:parseDate>, <fmt:parseNumber> reverses the process of <fmt:formatNumber>. It does not have the maxFractionDigits, maxIntegerDigits, minFractionDigits, minIntegerDigits, or groupingUsed attributes because that information is not needed to parse numbers. It does contain the additional attributes integerOnly (which specifies whether to ignore the fraction part of the number and defaults to false) and parseLocale (which specifies the locale to use when parsing the number, if other than the default locale). Also like<fmt:parseDate>, you can specify the number to parse in the value attribute or in the tag body content.
Putting i18n and Formatting Library Tags to Use
To explore the i18n and Formatting library further, you can expand upon the Address-Book project you created earlier in the book and internationalize it. You can continue to add to the previous project, or you can follow along in the Address-Book-i18n project from the wrox.com code download site. The first thing you should do is add a new context init parameter in the deployment descriptor.
<context-param>
<param-name>javax.servlet.jsp.jstl.fmt.localizationContext</param-name>
<param-value>AddressBook-messages</param-value>
</context-param>
This establishes a resource bundle from which localized messages can be loaded. But where does the container locate this bundle? It looks for a file anywhere on your class path named AddressBook-messages_[language]_[region].properties. If it does not find that file, it looks for AddressBook-messages_[language].properties. If it doesn’t find that either, it switches to the fallback locale (English) and looks for its bundle. To satisfy this need, create a file named AddressBook-messages_en_US.properties in the source/production/resourcesdirectory of your IDE project. All the files in this resources directory will get copied to the /WEB-INF/classes directory at build time.
title.browser=Address Book
title.page=Address Book Contacts
message.noContacts=There are no contacts in the address book.
label.birthday=Birthday
label.creationDate=Created
You also want a translated version of this file so that you can test switching languages, so create a file named AddressBook-messages_fr_FR.properties in the same directory.
title.browser=Carnet d'Adresses
title.page=Contacts du Carnet d'Adresses
message.noContacts=Il n'y a pas des contacts dans le carnet d'adresses.
label.birthday=Anniversaire
label.creationDate=Établi
You need a way to easily change the language the page displays in, so add the following code to the top of the doGet method in the ListServlet. The Config class here is imported from javax.servlet.jsp.jstl.core.Config.
String language = request.getParameter("language");
if("french".equalsIgnoreCase(language))
Config.set(request, Config.FMT_LOCALE, Locale.FRANCE);
Because the <fmt:formatDate> tag doesn’t support the Java 8 Date and Time API, you need a way to access the old-style Date object, so add the following method to the Contact POJO. (If this seems like a hack to you, that’s because it is. It’s the easiest way right now to get the Date object for formatting. In the next chapter you create a way to format the new API without this hack.)
public Date getOldDateCreated()
{
return new Date(this.dateCreated.toEpochMilli());
}
Finally, add the taglib directive you learned about earlier in the chapter to the /WEB-INF/jsp/base.jspf file. Now that all the groundwork has been laid, take a look at the new (substantially changed) list.jsp in Listing 7-3. All literal text is replaced with <fmt:message>tags referencing the keys from your properties files. The process of placing the <fmt:message> tags in the JSP is the internationalization of your application. The process of creating the properties files that contain the translations is the localization of your application.
Also note the use of <fmt:formatDate> to format the creation date for display on the page and how the code that displays the birthday has changed. Now test it all out by compiling and debugging your project and going to http://localhost:8080/address-book/list in your browser. You can see that it looks the same for the most part, except that the birthday and creation date are both displaying in a friendly manner. Add ?language=french to the URL, and the page should now display in French instead of English, as shown inFigure 7-2. Add &empty to the URL and you see in French the message that there are no contacts. You have successfully internationalized and localized your application.
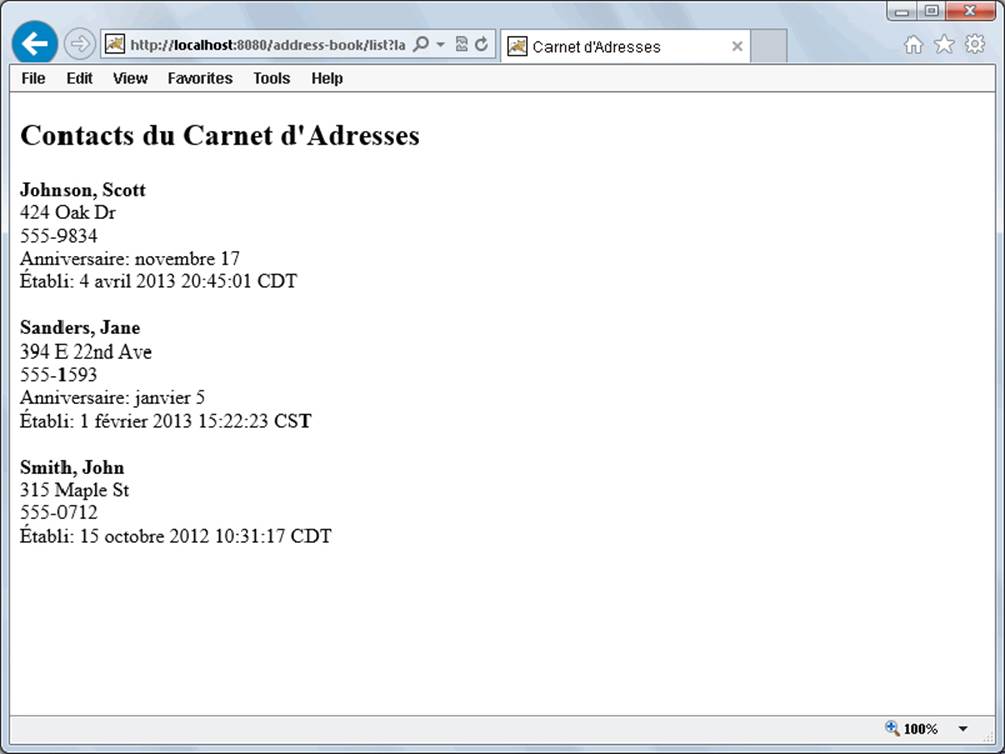
FIGURE 7-2
LISTING 7-3: list.jsp
<%--@elvariable id="contacts" type="java.util.Set<com.wrox.Contact>"--%>
<!DOCTYPE html>
<html>
<head>
<title><fmt:message key="title.browser" /></title>
</head>
<body>
<h2><fmt:message key="title.page" /></h2>
<c:choose>
<c:when test="${fn:length(contacts) == 0}">
<i><fmt:message key="message.noContacts" /></i>
</c:when>
<c:otherwise>
<c:forEach items="${contacts}" var="contact">
<b>
<c:out value="${contact.lastName}, ${contact.firstName}" />
</b><br />
<c:out value="${contact.address}" /><br />
<c:out value="${contact.phoneNumber}" /><br />
<c:if test="${contact.birthday != null}">
<fmt:message key="label.birthday" />:
${contact.birthday.month.getDisplayName(
'FULL', pageContext.response.locale
)} ${contact.birthday.dayOfMonth}<br />
</c:if>
<fmt:message key="label.creationDate" />:
<fmt:formatDate value="${contact.oldDateCreated}" type="both"
dateStyle="long" timeStyle="long" />
<br /><br />
</c:forEach>
</c:otherwise>
</c:choose>
</body>
</html>
USING THE DATABASE ACCESS TAG LIBRARY (SQL NAMESPACE)
The JSTL contains a library of tags that provides transactional access to relational databases. The standard prefix for this library is sql, and its taglib directive is similar to previous directives you have seen.
<%@ taglib prefix="sql" uri="http://java.sun.com/jsp/jstl/sql" %>
Generally speaking, performing database actions within the presentation layer (JSPs) is frowned upon and should be avoided if at all possible. Instead, such code should go in the business logic of the application, typically a Servlet or, more appropriately, a repository that the Servlet uses. For this reason, this book does not dive deeply into the details of the SQL tag library and strongly discourages you from using this library. However, this tag library is sometimes useful, especially for prototyping new applications or quickly testing theories or concepts, so an overview of its use is warranted.
The actions in the SQL library provide you with the capability of querying data with SELECT statements; accessing and iterating the results of those queries; updating data with INSERT, UPDATE, and DELETE statements; and performing any number of these actions within a transaction. Typically, the tags in this library operate using a javax.sql.DataSource. The <sql:query>, <sql:update>, <sql:transaction>, and <sql:setDataSource> tags all have dataSource attributes for specifying the data source that should be used to perform that action.
The dataSource attribute must either be a DataSource or a String. If it’s a DataSource, it is used as-is. If it’s a String, the container attempts to resolve the String as a JNDI name for a DataSource. If a matching DataSource is not found, the container makes a last-ditch effort by treating the String as a JDBC connection URL and attempts to connect using the java.sql.DriverManager. If none of these works, an exception is thrown. For all tags the dataSource attribute is optional, in which case the container looks for the EL variable namedjavax.servlet.jsp.jstl.sql.dataSource in the default scope (set using a context init parameter or <sql:setDataSource>). If it is a String or a DataSource, the same logic previously described is applied. Otherwise, an exception is thrown.
Queries are performed using the <sql:query> tag and update actions using the <sql:update> tag. For either tag, the SQL statement can be specified in the sql attribute or in the nested body content. Nested tags can be used to specify prepared statement parameters. You can create a transaction with <sql:transaction>, and all nested query and update tags will use that transaction, but you must keep in mind two rules:
· Only the <sql:transaction> tag may specify a dataSource attribute (nested tags within it may not).
· If you query data, you must iterate over that data within the transaction as well.
The following code demonstrates some of the things possible with the SQL tag library:
<sql:transaction dataSource="${someDataSource}" isolation="read_committed">
<sql:update sql="UPDATE dbo.Account
SET Balance = Balance - ?, LastTransaction = ?
WHERE AccountId = ?">
<sql:param value="${transferAmount}" />
<fmt:parseDate var="transactionDate" value="${effectiveDate}" />
<sql:dateParam value="${transactionDate}" />
<sql:param value="${sourceAccount}" />
</sql:update>
<sql:update>
UPDATE dbo.Account SET Balance = Balance + ?, LastTransaction = ?
WHERE AccountId = ?
<sql:param value="${transferAmount}" />
<sql:dateParam value="${someLaterDate}" />
<sql:param value="${destinationAccount}" />
</sql:update>
</sql:transaction>
<sql:query var="results" sql="SELECT * FROM dbo.User WHERE Status = ?">
<sql:param value="${statusParameter}" />
</sql:query>
<c:forEach items="${results.rows}" var="user">
...
</c:forEach>
USING THE XML PROCESSING TAG LIBRARY (X NAMESPACE)
Like the SQL tag library, the XML Processing tag library is not recommended for use and is not covered in-depth in this book. When it was invented, XML was the only widespread standard with which applications shared data, and having the ability to parse and traverse XML was crucial. Today, more and more applications support the JSON standard as an alternative to XML, and several highly efficient libraries can map objects to JSON or XML and back to objects. These tools are easier to use than the XML tag library and can take care of data transformation where it belongs — in the business logic.
The XML tag library, whose prefix is x, is based on the XPath standard and consists of nodes or node sets, variable bindings, functions, and namespace prefixes. It contains many actions similar to the tags in the Core tag library but designed specifically to work with XPath expressions against an XML document. The taglib directive and a small sampling of what can be done with the XML library are demonstrated in the following code.
<%@ taglib prefix="x" uri="http://java.sun.com/jsp/jstl/xml" %>
<c:import url="http://www.example.news/feed.xml" var="feed" />
<x:parse doc="${feed}" var="parsedDoc" />
<x:out select="$parsedDoc/feed/title" />
<x:forEach select="$parsedDoc/feed/stories//story">
<x:out select="@title" /><br />
<x:out select="@url" /><br /><br />
</x:forEach>
REPLACING JAVA CODE WITH JSP TAGS
In Chapter 6, you replaced a few lines of Java code with Expression Language (EL) in the JSPs for the Customer Support application. However, you simply could not change much because you did not have the tools yet. In this section you see nearly all of the JSP Java code replaced with JSTL tags. You can follow along in the Customer-Support-v5 project from the wrox.com code download site. Start by looking at the /WEB-INF/jsp/view/login.jsp page. As shown in the following code sample, not much has changed (because there wasn’t much Java code to begin with). The @elvariable type hint has been added to the first line of the page above the doctype, and the only scriptlet on the page was replaced with the <c:if> tag.
<%--@elvariable id="loginFailed" type="java.lang.Boolean"--%>
...
You must log in to access the customer support site.<br /><br />
<c:if test="${loginFailed}">
<b>The username and password you entered are not correct. Please try
again.</b><br /><br />
</c:if>
<form method="POST" action="<c:url value="/login" />">
...
/WEB-INF/jsp/view/viewTicket.jsp has been changed more, and again all the Java code in the file is now gone. You can see this change in Listing 7-4. The series of scriptlets and expressions that listed links to the attachments has been replaced with a <c:if> test of the number of attachments, a <c:forEach> loop over the list of attachments, and another <c:if> tag using the loop tag status variable to determine whether to print a comma before the current attachment. Also, most EL expressions have been placed within the valueattribute of <c:out> tags. This protects the application from injection of HTML and JavaScript. The <c:out> tags escape any XML reserved characters as long as the escapeXml attribute is left with its default true value. It’s good to get into the habit of always using<c:out> to output String variables. However, variables that you know with certainty are non-char primitives (integers, decimals, and so on) do not need escaping.
LISTING 7-4: viewTicket.jsp
<%--@elvariable id="ticketId" type="java.lang.String"--%>
<%--@elvariable id="ticket" type="com.wrox.Ticket"--%>
<!DOCTYPE html>
<html>
<head>
<title>Customer Support</title>
</head>
<body>
<a href="<c:url value="/login?logout" />">Logout</a>
<h2>Ticket #${ticketId}: <c:out value="${ticket.subject}" /></h2>
<i>Customer Name - <c:out value="${ticket.customerName}" /></i><br /><br />
<c:out value="${ticket.body}" /><br /><br />
<c:if test="${ticket.numberOfAttachments > 0}">
Attachments:
<c:forEach items="${ticket.attachments}" var="attachment"
varStatus="status">
<c:if test="${!status.first}">, </c:if>
<a href="<c:url value="/tickets">
<c:param name="action" value="download" />
<c:param name="ticketId" value="${ticketId}" />
<c:param name="attachment" value="${attachment.name}" />
</c:url>"><c:out value="${attachment.name}" /></a>
</c:forEach><br /><br />
</c:if>
<a href="<c:url value="/tickets" />">Return to list tickets</a>
</body>
</html>
The /WEB-INF/jsp/view/listTickets.jsp file in Listing 7-5 uses many of the same features to replace Java code as Listing 7-4 but also utilizes the more complex <c:choose>, <c:when>, and <c:otherwise> to replace the old if-else code. The <c:when> tests whether the ticket database is empty and prints, “There Are No Tickets in the System” if it is. Otherwise (hence the name of the tag) the <c:forEach> loop iterates over the database. Notice here that the items attribute of <c:forEach> resolves to a Map, so each iteration exposes aMap.Entry<Integer, Ticket> variable. It’s easy to access the int key with entry.key and the corresponding Ticket value with entry.value. The <c:out> tag outputs user input in a safe way.
One final note about Listing 7-5: The @elvariable type hint is wrapped for the purposes of printing in this book; however, it must be all on one line for your IDE to recognize it.
LISTING 7-5: listTickets.jsp
<%--@elvariable id="ticketDatabase"
type="java.util.Map<Integer, com.wrox.Ticket>"--%>
<!DOCTYPE html>
<html>
<head>
<title>Customer Support</title>
</head>
<body>
<a href="<c:url value="/login?logout" />">Logout</a>
<h2>Tickets</h2>
<a href="<c:url value="/tickets">
<c:param name="action" value="create" />
</c:url>">Create Ticket</a><br /><br />
<c:choose>
<c:when test="${fn:length(ticketDatabase) == 0}">
<i>There are no tickets in the system.</i>
</c:when>
<c:otherwise>
<c:forEach items="${ticketDatabase}" var="entry">
Ticket ${entry.key}: <a href="<c:url value="/tickets">
<c:param name="action" value="view" />
<c:param name="ticketId" value="${entry.key}" />
</c:url>"><c:out value="${entry.value.subject}" /></a>
(customer: <c:out value="${entry.value.customerName}" />)<br />
</c:forEach>
</c:otherwise>
</c:choose>
</body>
</html>
The only JSP remaining that still contains Java code at this point is /WEB-INF/jsp/view/sessions.jsp. This JSP contains a definition for a special method that converts a time interval into friendly text, such as “less than a second” or “about x minutes.” Unfortunately, nothing you have learned in this chapter can easily replace that method or how it’s used. If you really need to, you could calculate this value in some Servlet code and forward to the JSP with a list of POJOs instead of a list of HttpSessions. However, that would be more work than necessary, so you can leave replacing this Java code as an exercise to complete in the next chapter.
Now compile and fire up your application and go to http://localhost:8080/support/ to log in. Create some tickets, view the list of tickets, and view the tickets you created. Include some HTML tags, quotes, and apostrophes in your ticket titles and bodies. In the previous version of the project these would have been printed literally and interpreted as HTML in your browser. You can view the page source to see how they are now escaped properly and don’t pose a danger to your application anymore.
SUMMARY
In this chapter you have learned about all the features that the Java Standard Tag Library (JSTL) brings to the table, and also a little bit more about JSP tags in general and how they are created. You’ve explored the various facets of the Core tag library and the Internationalization and Formatting tag library, and also took a brief look at accessing databases and parsing XML in JSPs.
You saw how to replace Java code with JSP tags and how the JSTL covers almost everything you could need to do in a JSP, and you replaced nearly all the presentation layer Java code in the Customer Support application that you are working on for Multinational Widget Corporation.
You may have noticed that some things could be done better or more easily (such as formatting dates using the Java 8 Date and Time API) if you could create your own tags, and that the clever time interval formatter in the session list still uses Java code. In the next chapter you learn about creating custom tags, functions, and tag and function libraries, and you apply that to get rid of any remaining Java in your JSPs. Finally, recall that you did not internationalize and localize the Customer Support application. In Chapter 15 you study internationalization more in-depth using tools provided by Spring Framework that make the task substantially easier.
All materials on the site are licensed Creative Commons Attribution-Sharealike 3.0 Unported CC BY-SA 3.0 & GNU Free Documentation License (GFDL)
If you are the copyright holder of any material contained on our site and intend to remove it, please contact our site administrator for approval.
© 2016-2026 All site design rights belong to S.Y.A.