Wiley Linux Command Line and Shell Scripting Bible 3rd (2015)
Part IV. Creating Practical Scripts
Chapter 25. Producing Scripts for Database, Web, and E-Mail
In This Chapter
1. Writing database shell scripts
2. Using the Internet from your scripts
3. E-mailing reports from scripts
So far we've covered many different features of shell scripts. However, there's still more! You can also utilize advanced applications outside your shell scripts to provide advanced features, such as accessing databases, retrieving data from the Internet, and e-mailing reports. This chapter shows how to use these three common features found in Linux systems all from within your shell scripts.
Using a MySQL Database
One of the problems with shell scripts is persistent data. You can store all the information you want in your shell script variables, but at the end of the script, the variables just go away. Sometimes, you'd like for your scripts to be able to store data that you can use later.
In the old days, to store and retrieve data from a shell script required creating a file, reading data from the file, parsing the data, and then saving the data back into the file. Searching for data in the file meant reading every record in the file to look for your data. Nowadays with databases being all the rage, it's a snap to interface your shell scripts with professional-quality open source databases. Currently, the most popular open source database used in the Linux world is MySQL. Its popularity has grown as a part of the Linux-Apache-MySQL-PHP (LAMP) server environment, which many Internet web servers use for hosting online stores, blogs, and applications.
This section describes how to use a MySQL database in your Linux environment to create database objects and how to use those objects in your shell scripts.
Using MySQL
Most Linux distributions include the MySQL server and client packages in their software repositories, making it a snap to install a full MySQL environment on your Linux system. Figure 25.1 demonstrates the Add Software feature in the Ubuntu Linux distribution.
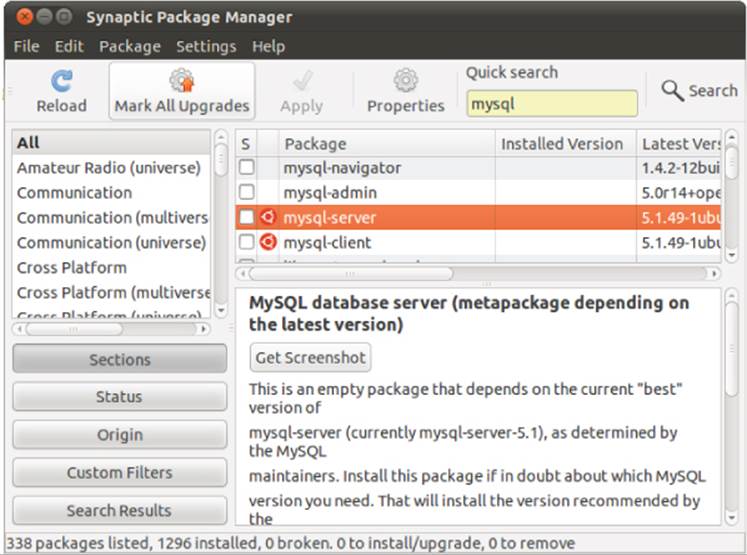
Figure 25.1 Installing MySQL server on an Ubuntu Linux system
After searching for the mysql-server package, just select the mysql-server entry that appears, and the Package Manager downloads and installs the complete MySQL server (and client) software. It doesn't get any easier than that!
Once installed, the portal to the MySQL database is the mysql command line interface program. This section describes how to use the mysql client program to interact with your database.
Connecting to the server
The mysql client program allows you to connect to any MySQL database server anywhere on the network, using any user account and password. By default, if you enter the mysql program on a command line without any parameters, it attempts to connect to a MySQL server running on the same Linux system, using the Linux login username.
Most likely, this isn't how you want to connect to the database though. It's usually safer to create a special user account for the application to use, rather than using your standard user account in the MySQL server. That way, you can limit access to the application user, and if the application is compromised, you can easily delete and recreate it if necessary.
You use the -u command line parameter to specify the user name to log in as:
$ mysql -u root –p
Enter password:
Welcome to the MySQL monitor. Commands end with ; or \g.
Your MySQL connection id is 42
Server version: 5.5.38-0ubuntu0.14.04.1 (Ubuntu)
Copyright (c) 2000, 2014, Oracle and/or its affiliates. All rights reserved.
Oracle is a registered trademark of Oracle Corporation and/or its
affiliates. Other names may be trademarks of their respective
owners.
Type 'help;' or '\h' for help. Type '\c' to clear the current input statement.
mysql>
The -p parameter tells the mysql program to prompt for a password to use with the user account to log in. Enter the password that you assigned to the root user account, either during the installation process, or using the mysqladmin utility. After you're logged in to the server, you can start entering commands.
The mysql commands
The mysql program uses two different types of commands:
· Special mysql commands
· Standard SQL statements
The mysql program uses its own set of commands that let you easily control the environment and retrieve information about the MySQL server. The mysql commands use either a full name (such as status) or a shortcut (such as ∖s).
You can use either the full command or the shortcut command directly from the mysql command prompt:
mysql> \s
--------------
mysql Ver 14.14 Distrib 5.5.38, for debian-linux-gnu (i686) using readline 6.3
Connection id: 43
Current database:
Current user: root@localhost
SSL: Not in use
Current pager: stdout
Using outfile: ''
Using delimiter: ;
Server version: 5.5.38-0ubuntu0.14.04.1 (Ubuntu)
Protocol version: 10
Connection: Localhost via UNIX socket
Server characterset: latin1
Db characterset: latin1
Client characterset: utf8
Conn. characterset: utf8
UNIX socket: /var/run/mysqld/mysqld.sock
Uptime: 2 min 24 sec
Threads: 1 Questions: 575 Slow queries: 0 Opens: 421 Flush tables: 1
Open tables: 41 Queries per second avg: 3.993
--------------
mysql>
The mysql program implements all the standard Structured Query Language (SQL) commands supported by the MySQL server. One uncommon SQL command that the mysql program implements is the SHOW command. Using this command, you can extract information about the MySQL server, such as the databases and tables created:
mysql> SHOW DATABASES;
+--------------------+
| Database |
+--------------------+
| information_schema |
| mysql |
+--------------------+
2 rows in set (0.04 sec)
mysql> USE mysql;
Database changed
mysql> SHOW TABLES;
+---------------------------+
| Tables_in_mysql |
+---------------------------+
| columns_priv |
| db |
| func |
| help_category |
| help_keyword |
| help_relation |
| help_topic |
| host |
| proc |
| procs_priv |
| tables_priv |
| time_zone |
| time_zone_leap_second |
| time_zone_name |
| time_zone_transition |
| time_zone_transition_type |
| user |
+---------------------------+
17 rows in set (0.00 sec)
mysql>
In this example, we used the SHOW SQL command to display the databases currently configured on the MySQL server and the USE SQL command to connect to a single database. Your mysql session can be connected to only one database at a time.
You'll notice that we added a semicolon after each command. The semicolon indicates the end of a command to the mysql program. If you don't use a semicolon, it prompts for more data:
mysql> SHOW
-> DATABASES;
+--------------------+
| Database |
+--------------------+
| information_schema |
| mysql |
+--------------------+
2 rows in set (0.00 sec)
mysql>
This feature can come in handy when you're working with long commands. You can enter part of the command on a line, press the Enter key, and continue on the next line. This can continue for as many lines as you like until you use the semicolon to indicate the end of the command.
Note
Throughout this chapter, we use uppercase letters for SQL commands. This has become a common way to write SQL commands, but the mysql program allows you to specify SQL commands using either uppercase or lowercase.
Creating a database
The MySQL server organizes data into databases. A database usually holds the data for a single application, separating it from other applications that use the database server. Creating a separate database for each shell script application helps eliminate confusion and data mix-ups.
Here's the SQL statement required to create a new database:
CREATE DATABASE name;
That's pretty simple. Of course, you must have the proper privileges to create new databases on the MySQL server. The easiest way to do that is to log in as the root user account:
$ mysql -u root –p
Enter password:
Welcome to the MySQL monitor. Commands end with ; or \g.
Your MySQL connection id is 42
Server version: 5.5.38-0ubuntu0.14.04.1 (Ubuntu)
Copyright (c) 2000, 2014, Oracle and/or its affiliates. All rights reserved.
Oracle is a registered trademark of Oracle Corporation and/or its
affiliates. Other names may be trademarks of their respective
owners.
Type 'help;' or '\h' for help. Type '\c' to clear the current input statement.
mysql> CREATE DATABASE mytest;
Query OK, 1 row affected (0.02 sec)
mysql>
You can see whether the new database was created by using the SHOW command:
mysql> SHOW DATABASES;
+--------------------+
| Database |
+--------------------+
| information_schema |
| mysql |
| mytest |
+--------------------+
3 rows in set (0.01 sec)
mysql>
Yes, it was successfully created. Now you can create a user account to access the new database.
Creating a user account
So far, you've seen how to connect to the MySQL server using the root administrator account. This account has total control over all the MySQL server objects (much like how the root Linux account has complete control over the Linux system).
It's extremely dangerous to use the root MySQL account for normal applications. If there were a breach of security and someone figured out the password for the root user account, all sorts of bad things could happen to your system (and data).
To prevent that, it's wise to create a separate user account in MySQL that has privileges only for the database used in the application. You do this with the GRANT SQL statement:
mysql> GRANT SELECT,INSERT,DELETE,UPDATE ON test.* TO test IDENTIFIED
by 'test';
Query OK, 0 rows affected (0.35 sec)
mysql>
That's quite a long command. Let's walk through the pieces and see what it's doing.
The first section defines the privileges the user account has on the database(s). This statement allows the user account to query the database data (the select privilege), insert new data records, delete existing data records, and update existing data records.
The test.* entry defines the database and tables to which the privileges apply. This is specified in the following format:
database.table
As you can see from this example, you're allowed to use wildcard characters when specifying the database and tables. This format applies the specified privileges to all the tables contained in the database named test.
Finally, you specify the user account(s) to which the privileges apply. The neat thing about the grant command is that if the user account doesn't exist, it creates it. The identified by portion allows you to set a default password for the new user account.
You can test the new user account directly from the mysql program:
$ mysql mytest -u test –p
Enter password:
Welcome to the MySQL monitor. Commands end with ; or \g.
Your MySQL connection id is 42
Server version: 5.5.38-0ubuntu0.14.04.1 (Ubuntu)
Copyright (c) 2000, 2014, Oracle and/or its affiliates. All rights reserved.
Oracle is a registered trademark of Oracle Corporation and/or its
affiliates. Other names may be trademarks of their respective
owners.
Type 'help;' or '\h' for help. Type '\c' to clear the current input statement.
mysql>
The first parameter specifies the default database to use (mytest), and as you've already seen, the -u parameter defines the user account to log in as, along with the -p to prompt for the password. After entering the password assigned to the test user account, you're connected to the server.
Now that you have a database and a user account, you're ready to create some tables for the data.
Creating a table
The MySQL server is considered a relational database. In a relational database, data is organized by data fields, records, and tables. A data field is a single piece of information, such as an employee's last name or a salary. A record is a collection of related data fields, such as the employee ID number, last name, first name, address, and salary. Each record indicates one set of the data fields.
The table contains all the records that hold the related data. Thus, you'll have a table called Employees that holds the records for each employee.
To create a new table in the database, you need to use the CREATE TABLE SQL command:
$ mysql mytest -u root -p
Enter password:
mysql> CREATE TABLE employees (
-> empid int not null,
-> lastname varchar(30),
-> firstname varchar(30),
-> salary float,
-> primary key (empid));
Query OK, 0 rows affected (0.14 sec)
mysql>
First, notice that to create the new table, we needed to log in to MySQL using the root user account because the test user doesn't have privileges to create a new table. Next, notice that we specified the mytest database on the mysql program command line. If we hadn't done that, we would need to use the USE SQL command to connect to the test database.
Caution
It's extremely important to make sure you're in the right database before creating the new table. Also, make sure you're logged in using the administrative user account (root for MySQL) to create the tables.
Each data field in the table is defined using a data type. The MySQL database supports lots of different data types. Table 25.1 shows some of the more popular data types you may need.
Table 25.1 MySQL Data Types
|
Data Type |
Description |
|
char |
A fixed-length string value |
|
varchar |
A variable-length string value |
|
int |
An integer value |
|
float |
A floating-point value |
|
boolean |
A Boolean true/false value |
|
date |
A date value in YYYY-MM-DD format |
|
time |
A time value in HH:mm:ss format |
|
timestamp |
A date and time value together |
|
text |
A long string value |
|
BLOB |
A large binary value, such as an image or video clip |
The empid data field also specifies a data constraint. A data constraint restricts what type of data you can enter to create a valid record. The not null data constraint indicates that every record must have an empid value specified.
Finally, the primary key defines a data field that uniquely identifies each individual record. This means that each data record must have a unique empid value in the table.
After creating the new table, you can use the appropriate command to ensure that it's created. In mysql, it's the show tables command:
mysql> show tables;
+----------------+
| Tables_in_test |
+----------------+
| employees |
+----------------+
1 row in set (0.00 sec)
mysql>
With the table created, you're now ready to start saving some data. The next section covers how to do that.
Inserting and deleting data
Not surprisingly, you use the INSERT SQL command to insert new data records into the table. Each INSERT command must specify the data field values for the MySQL server to accept the record.
Here's the format of the INSERT SQL command:
INSERT INTO table VALUES (...)
The values are in a comma-separated list of the data values for each data field:
$ mysql mytest -u test -p
Enter password:
mysql> INSERT INTO employees VALUES (1, 'Blum', 'Rich', 25000.00);
Query OK, 1 row affected (0.35 sec)
The example uses the –u command line prompt to log in as the test user account that was created in MySQL.
The INSERT command pushes the data values you specify into the data fields in the table. If you attempt to add another record that duplicates the empid data field value, you get an error message:
mysql> INSERT INTO employees VALUES (1, 'Blum', 'Barbara', 45000.00);
ERROR 1062 (23000): Duplicate entry '1' for key 1
However, if you change the empid value to a unique value, everything should be okay:
mysql> INSERT INTO employees VALUES (2, 'Blum', 'Barbara', 45000.00);
Query OK, 1 row affected (0.00 sec)
You should now have two data records in your table.
If you need to remove data from your table, you use the DELETE SQL command. However, you need to be very careful with it.
Here's the basic DELETE command format:
DELETE FROM table;
where table specifies the table to delete records from. There's just one small problem with this command: It removes all the records in the table.
To just specify a single record or a group of records to delete, you must use the WHERE clause. The WHERE clause allows you to create a filter that identifies which records to remove. You use the WHERE clause like this:
DELETE FROM employees WHERE empid = 2;
This restricts the deletion process to all the records that have an empid value of 2. When you execute this command, the mysql program returns a message indicating how many records matched the filter:
mysql> DELETE FROM employees WHERE empid = 2;
Query OK, 1 row affected (0.29 sec)
As expected, only one record matched the filter and was removed.
Querying data
After you have all your data in your database, it's time to start running reports to extract information.
The workhorse for all your querying is the SQL SELECT command. The SELECT command is extremely versatile, but with versatility comes complexity.
Here's the basic format of a SELECT statement:
SELECT datafields FROM table
The datafields parameter is a comma-separated list of the data field names you want the query to return. If you want to receive all the data field values, you can use an asterisk as a wildcard character.
You must also specify the specific table you want the query to search. To get meaningful results, you must match your query data fields with the proper table.
By default, the SELECT command returns all the data records in the specified table:
mysql> SELECT * FROM employees;
+-------+----------+------------+--------+
| empid | lastname | firstname | salary |
+-------+----------+------------+--------+
| 1 | Blum | Rich | 25000 |
| 2 | Blum | Barbara | 45000 |
| 3 | Blum | Katie Jane | 34500 |
| 4 | Blum | Jessica | 52340 |
+-------+----------+------------+--------+
4 rows in set (0.00 sec)
mysql>
You can use one or more modifiers to define how the database server returns the data requested by the query. Here's a list of commonly used modifiers:
· WHERE: Displays a subset of records that meet a specific condition
· ORDER BY: Displays records in a specified order
· LIMIT: Displays only a subset of records
The WHERE clause is the most common SELECT command modifier. It allows you to specify conditions to filter data from the result set. Here's an example of using the WHERE clause:
mysql> SELECT * FROM employees WHERE salary > 40000;
+-------+----------+-----------+--------+
| empid | lastname | firstname | salary |
+-------+----------+-----------+--------+
| 2 | Blum | Barbara | 45000 |
| 4 | Blum | Jessica | 52340 |
+-------+----------+-----------+--------+
2 rows in set (0.01 sec)
mysql>
Now you can see the power of adding database access to your shell scripts! You can easily control your data management needs just with a few SQL commands and the mysql program. The next section describes how you can incorporate these features into your shell scripts.
Using the database in your scripts
Now that you have a working database going, it's finally time to turn our attention back to the shell scripting world. This section describes what you need to do to interact with your databases using shell scripts.
Logging into the server
If you've created a special user account in MySQL for your shell scripts, you need to use it to log in with the mysql command. There are a couple ways to do that. One method is to include the password on the command line using the -p parameter:
mysql mytest -u test –p test
This, however, is not a good idea. Anyone who has access to your script will know the user account and password for your database.
To solve this problem, you can use a special configuration file used by the mysql program. The mysql program uses the $HOME/.my.cnf file to read special startup commands and settings. One of those settings is the default password for mysql sessions started by the user account.
To set the default password in this file, just create the following:
$ cat .my.cnf
[client]
password = test
$ chmod 400 .my.cnf
$
The chmod command is used to restrict the .my.cnf file so only you can view it. You can test this now from the command line:
$ mysql mytest -u test
Reading table information for completion of table and column names
You can turn off this feature to get a quicker startup with -A
Welcome to the MySQL monitor. Commands end with ; or \g.
Your MySQL connection id is 44
Server version: 5.5.38-0ubuntu0.14.04.1 (Ubuntu)
Copyright (c) 2000, 2014, Oracle and/or its affiliates. All rights reserved.
Oracle is a registered trademark of Oracle Corporation and/or its
affiliates. Other names may be trademarks of their respective
owners.
Type 'help;' or '\h' for help. Type '\c' to clear the current input statement.
mysql>
Perfect! Now you don't have to include the password on the command line in your shell scripts.
Sending commands to the server
After establishing the connection to the server, you'll want to send commands to interact with your database. There are two methods to do this:
· Send a single command and exit.
· Send multiple commands.
To send a single command, you must include the command as part of the mysql command line. For the mysql command, you do this using the -e parameter:
$ cat mtest1
#!/bin/bash
# send a command to the MySQL server
MYSQL=$(which mysql)
$MYSQL mytest -u test -e 'select * from employees'
$ ./mtest1
+-------+----------+------------+---------+
| empid | lastname | firstname | salary |
+-------+----------+------------+---------+
| 1 | Blum | Rich | 25000 |
| 2 | Blum | Barbara | 45000 |
| 3 | Blum | Katie Jane | 34500 |
| 4 | Blum | Jessica | 52340 |
+-------+----------+------------+---------+
$
The database servers return the results from the SQL commands to the shell scripts, which display them in STDOUT.
If you need to send more than one SQL command, you can use file redirection (see Chapter 15). To redirect lines in the shell script, you must define an end of file string. The end of file string indicates the beginning and end of the redirected data.
This is an example of defining an end of file string, with data in it:
$ cat mtest2
#!/bin/bash
# sending multiple commands to MySQL
MYSQL=$(which mysql)
$MYSQL mytest -u test <<EOF
show tables;
select * from employees where salary > 40000;
EOF
$ ./mtest2
Tables_in_test
employees
empid lastname firstname salary
2 Blum Barbara 45000
4 Blum Jessica 52340
$
The shell redirects everything with the EOF delimiters to the mysql command, which executes the lines as if you typed them yourself at the prompt. Using this method, you can send as many commands to the MySQL server as you need. You'll notice, however, that there's no separation between the output from each command. In the next section, “Formatting data,” you'll see how to fix this problem.
Note
You should also notice that the mysql program changed the default output style when you used the redirected input method. Instead of creating the ASCII symbol boxes around the data, the mysql program detected that the input was redirected, so it returned just the raw data. This comes in handy when you need to extract the individual data elements.
Of course, you're not limited to just retrieving data from the tables. You can use any type of SQL command in your script, such as an INSERT statement:
$ cat mtest3
#!/bin/bash
# send data to the table in the MySQL database
MYSQL=$(which mysql)
if [ $# -ne 4 ]
then
echo "Usage: mtest3 empid lastname firstname salary"
else
statement="INSERT INTO employees VALUES ($1, '$2', '$3', $4)"
$MYSQL mytest -u test << EOF
$statement
EOF
if [ $? -eq 0 ]
then
echo Data successfully added
else
echo Problem adding data
fi
fi
$ ./mtest3
Usage: mtest3 empid lastname firstname salary
$ ./mtest3 5 Blum Jasper 100000
Data added successfully
$
$ ./mtest3 5 Blum Jasper 100000
ERROR 1062 (23000) at line 1: Duplicate entry '5' for key 1
Problem adding data
$
This example demonstrates a few things about using this technique. When you specify the end of file string, it must be the only thing on the line, and the line must start with the string. If we had indented the EOF text to match the rest of the if-then indentation, it wouldn't work.
Inside the INSERT statement, notice that there are single quotes around the text values and double quotes around the entire INSERT statement. It's important not to mix up the quotes used for the string values with the quotes used to define the script variable text.
Also, notice how we used the special $? variable to test the exit status of the mysql program. This helps you determine whether the command failed.
Just sending output from the commands to STDOUT is not the easiest way to manage and manipulate the data. The next section shows you some tricks you can use to help your scripts capture data retrieved from the database.
Formatting data
The standard output from the mysql command doesn't lend itself to data retrieval. If you need to actually do something with the data you retrieve, you need to do some fancy data manipulation. This section describes some of the tricks you can use to help extract data from your database reports.
The first step in trying to capture database data is to redirect the output from the mysql and psql commands in an environment variable. This allows you to use the output information in other commands. Here's an example:
$ cat mtest4
#!/bin/bash
# redirecting SQL output to a variable
MYSQL=$(which mysql)
dbs=$($MYSQL mytest -u test -Bse 'show databases')
for db in $dbs
do
echo $db
done
$ ./mtest4
information_schema
test
$
This example uses two additional parameters on the mysql program command line. The -B parameter specifies for the mysql program to work in batch mode, and in combination with the -s (silent) parameter, the column headings and formatting symbols are suppressed.
By redirecting the output of the mysql command to a variable, this example is able to step through the individual values of each returned record.
The mysql program also supports an additional popular format, called Extensible Markup Language (XML). This language uses HTML-like tags to identify data names and values.
For the mysql program, you do this using the -X command line parameter:
$ mysql mytest -u test -X -e 'select * from employees where empid = 1'
<?xml version=''1.0''?>
<resultset statement=''select * from employees''>
<row>
<field name=''empid''>1</field>
<field name=''lastname''>Blum</field>
<field name=''firstname''>Rich</field>
<field name=''salary''>25000</field>
</row>
</resultset>
$
Using XML, you can easily identify individual rows of data, along with the individual data values in each record. You can then use standard Linux string handling functions to extract the data you need!
Using the Web
Often when you think of shell script programming, the last thing you think of is the Internet. The command line world often seems foreign to the fancy, graphical world of the Internet. There are, however, several different utilities you can easily use in your shell scripts to gain access to data content on the web, as well as on other network devices.
Almost as old as the Internet itself, the Lynx program was created in 1992 by students at the University of Kansas as a text-based browser. Because it's text-based, the Lynx program allows you to browse websites directly from a terminal session, replacing the fancy graphics on web pages with HTML text tags. This allows you to surf the Internet from just about any type of Linux terminal. A sample Lynx screen is shown in Figure 25.2.
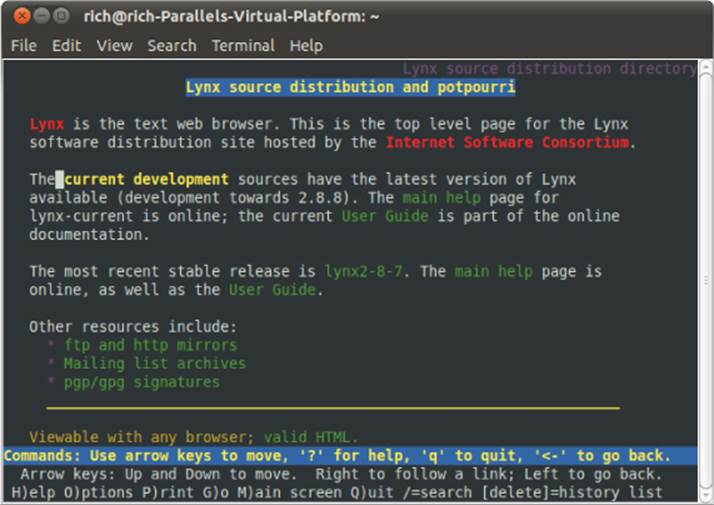
Figure 25.2 Viewing a web page using Lynx
Lynx uses the standard keyboard keys to navigate around the web page. Links appear as highlighted text within the web page. Using the right-arrow key allows you to follow a link to the next web page.
You may be wondering how you can use a graphical text program in your shell scripts. The Lynx program also provides a feature that allows you to dump the text contents of a web page to STDOUT. This feature is great for mining for data contained within a web page. This section describes how to use the Lynx program within your shell scripts to extract data from websites.
Installing Lynx
Even though the Lynx program is somewhat old, it's still in active development. At the time of this writing, the latest version of Lynx is version 2.8.8, released in June 2010, with a new release in development. Because of its popularity among shell script programmers, many Linux distributions install the Lynx program in their default installations.
If you're using an installation that doesn't provide the Lynx program, check your distribution's installation packages. Most likely you'll find it there for easy installation.
If your distribution doesn't include the Lynx package, or if you just want the latest version, you can download the source code from the lynx.isc.org website and compile it yourself (assuming that you've got the C development libraries installed on your Linux system). See Chapter 9 for information on how to compile and install source code distribution packages.
Note
The Lynx program uses the curses text-graphics library in Linux. Most distributions have this installed by default. If your distribution doesn't, consult your particular distribution's instructions on installing the curses library before trying to compile Lynx.
The next section describes how to use the lynx command from the command line.
The lynx command line
The lynx command line command is extremely versatile in what information it can retrieve from the remote website. When you view a web page in your browser, you're only seeing part of the information that's transferred to your browser. Web pages consist of three types of data elements:
· HTTP headers
· Cookies
· HTML content
HTTP headers provide information about the type of data sent in the connection, the server sending the data, and the type of security used in the connection. If you're sending special types of data, such as video or audio clips, the server identifies that in the HTTP headers. The Lynx program allows you to view all the HTTP headers sent within a web page session.
If you've done any type of web browsing, no doubt you're familiar with web page cookies. Websites use cookies to store data about your website visit for future use. Each individual site can store information, but it can only access the information it sets. The lynxcommand provides options for you to view cookies sent by web servers, as well as reject or accept specific cookies sent from servers.
The Lynx program allows you to view the actual HTML content of the web page in three different formats:
· In a text-graphics display on the terminal session using the curses graphical library
· As a text file, dumping the raw data from the web page
· As a text file, dumping the raw HTML source code from the web page
For shell scripts, viewing the raw data or HTML source code is a gold mine. After you capture the data retrieved from a website, you can easily extract individual pieces of information.
As you can see, the Lynx program is extremely versatile in what it can do. However, with versatility comes complexity, especially when it comes to command line parameters. The Lynx program is one of the more complex programs you'll run into in the Linux world.
Here's the basic format of the lynx command:
lynx options URL
where URL is the HTTP or HTTPS destination you want to connect to, and options are one or more options that modify the behavior of Lynx as it interacts with the remote website. There are options for just about any type of web interaction required by Lynx. Use theman command to view all the options available for Lynx.
Many of the command line parameters define behaviors that control Lynx when you're using it in full-screen mode, allowing you to customize the behavior of Lynx as you're traversing web pages.
There are often groups of command line parameters that you find useful in your normal browsing environment. Instead of having to enter these parameters on the command line every time you use Lynx, Lynx provides a general configuration file that defines the base behavior when you use Lynx. This configuration file is discussed in the next section.
The Lynx configuration file
The lynx command reads a configuration file for many of its parameter settings. By default, this file is located at /usr/local/lib/lynx.cfg, although you'll find that many Linux distributions change this to the /etc directory (/etc/lynx.cfg) (the Ubuntu distribution places the lynx.cfg file in the /etc/lynx-cur folder).
The lynx.cfg configuration file groups related parameters into sections to make finding parameters easier. Here's the format of an entry in the configuration file:
PARAMETER:value
where PARAMETER is the full name of the parameter (often, but not always in uppercase letters) and value is the value associated with the parameter.
Perusing this file, you'll find many parameters that are similar to the command line parameters, such as the ACCEPT_ALL_COOKIES parameter, which is equivalent to setting the -accept_all_cookies command line parameter.
There are also a few configuration parameters that are similar in function but different in name. The FORCE_SSL_COOKIES_SECURE configuration file parameter setting can be overridden by the -force_secure command line parameter.
However, you'll also find quite a few configuration parameters that don't match with command line parameters. These values can be set only from the configuration file.
The most common configuration parameters that you can't set on the command line are for the proxy servers. Some networks (especially corporate networks) use a proxy server as a middleman between the client's browser and the destination website server. Instead of sending HTTP requests directly to the remote web server, client browsers must send their requests to the proxy server. The proxy server in turn sends the requests to the remote web server, retrieves the results, and forwards them back to the client browser.
This may seem like a waste of time, but it's a vital function in protecting clients from dangers on the Internet. A proxy server can filter inappropriate content and malicious coding, or even detect sites used for Internet data phishing schemes (rogue servers pretending to be someone else in order to capture customer data). Proxy servers can also help reduce Internet bandwidth usage, because they cache commonly viewed web pages and return them to clients instead of having to download the original page again.
These are the configuration parameters used to define proxy servers:
http_proxy:http://some.server.dom:port/
https_proxy:http://some.server.dom:port/
ftp_proxy:http://some.server.dom:port/
gopher_proxy:http://some.server.dom:port/
news_proxy:http://some.server.dom:port/
newspost_proxy:http://some.server.dom:port/
newsreply_proxy:http://some.server.dom:port/
snews_proxy:http://some.server.dom:port/
snewspost_proxy:http://some.server.dom:port/
snewsreply_proxy:http://some.server.dom:port/
nntp_proxy:http://some.server.dom:port/
wais_proxy:http://some.server.dom:port/
finger_proxy:http://some.server.dom:port/
cso_proxy:http://some.server.dom:port/
no_proxy:host.domain.dom
You can define a different proxy server for any network protocol supported by Lynx. The NO_PROXY parameter is a comma-separated list of websites that you prefer to have direct access to without using the proxy server. These are often internal websites that don't require filtering.
Capturing data from Lynx
When you use Lynx in a shell script, most likely you're trying to obtain a specific piece (or pieces) of information from a web page. The technique to accomplish this is called screen scraping. In screen scraping, you're trying to programmatically find data in a specific location on a graphical screen so you can capture it and use it in your shell script.
The easiest way to perform screen scraping with lynx is to use the -dump option. This option doesn't bother trying to display the web page on the terminal screen. Instead, it displays the web page text data directly to STDOUT:
$ lynx -dump http://localhost/RecipeCenter/
The Recipe Center
"Just like mom used to make"
Welcome
[1]Home
[2]Login to post
[3]Register for free login
_____________________________________________________________
[4]Post a new recipe
Each link is identified by a tag number, and Lynx displays a listing of all the tag references after the web page data.
After you have all the text data from the web page, you probably know what tools we're going to get out of the toolbox to start work on extracting data. That's right, our old friends the sed and gawk programs (see Chapter 19).
First, let's find some interesting data to collect. The Yahoo! weather web page is a great source for finding the current weather conditions anywhere in the world. Each location uses a separate URL to display weather information for that city (you can find the specific URL for your city by going to the site in a normal browser and entering your city's information). Here's the lynx command for finding the weather in Chicago, Illinois:
lynx -dump http://weather.yahoo.com/united-states/illinois/chicago-2379574/
This command dumps lots and lots of data from the web page. The first step is to find the precise information you want. To do that, redirect the output from the lynx command to a file, and then search the file for your data. After doing that with the preceding command, we found this text in the output file:
Current conditions as of 1:54 pm EDT
Mostly Cloudy
Feels Like:
32 °F
Barometer:
30.13 in and rising
Humidity:
50%
Visibility:
10 mi
Dewpoint:
15 °F
Wind:
W 10 mph
That's all the information about the current weather you really need. There's just one small problem with this output. You'll notice that the numbers are on a line below the heading. Trying to just extract individual numbers will be difficult. Chapter 19 discusses how to deal with a problem just like this.
The key to solving this is to write a sed script that can search for the data heading first. When you find it, you can then go to the correct line to extract the data. We're fortunate in this example in that all the data we need are on lines by themselves. We should be able to solve this with just the sed script. If there had also been other text on the same line, we'd need to get out the gawk tool to filter out just the data we needed.
First, you need to create a sed script that looks for the location text and then skips to the next line to get the text that describes the current weather condition and prints it. Here's what that looks like for the Chicago weather page:
$ cat sedcond
/IL, United States/{
n
p
}
$
The address specifies to look for the line with the desired text. If the sed command finds it, the n command skips to the next line, and the p command prints the contents of the line, which is the text describing the current weather conditions of the city.
Next, you'll need a sed script that can search for the Feels Like text and then go to the next line to print the temperature:
$ cat sedtemp
/Feels Like/{
p
}
$
Perfect. Now, you can use these two sed scripts in a shell script that first captures the lynx output of the web page to a temporary file, and then applies the two sed scripts to the web page data to extract only the data you're looking for. Here's an example of how to do that:
$ cat weather
#!/bin/bash
# extract the current weather for Chicago, IL
URL=''http://weather.yahoo.com/united-states/illinois/chicago-2379574/''
LYNX=$(which lynx)
TMPFILE=$(mktemp tmpXXXXXX)
$LYNX -dump $URL > $TMPFILE
conditions=$(cat $TMPFILE | sed -n -f sedcond)
temp=$(cat $TMPFILE | sed -n -f sedtemp | awk '{print $4}')
rm -f $TMPFILE
echo ''Current conditions: $conditions''
echo The current temp outside is: $temp
$ ./weather
Current conditions: Mostly Cloudy
The current temp outside is: 32 °F
$
The weather script connects to the Yahoo! weather web page for the desired city, saves the web page to a temporary file, extracts the appropriate text, removes the temporary file, and then displays the weather information. The beauty of this is that after you've extracted the data from a website, you can do whatever you want with it, such as create a table of temperatures. You can then create a cron job (see Chapter 16) that runs every day to track daily temperatures.
Caution
The Internet is a dynamic place. Don't be surprised if you spend hours working out the precise location of data on a web page, only to find that it's moved a couple of weeks later, breaking your scripts. In fact, it's quite possible that this example won't work by the time you read this book. The important thing is to know the process for extracting data from web pages. You can then apply that principle to any situation.
Using E-Mail
With the popularity of e-mail, these days just about everyone has an e-mail address. Because of that, people often expect to receive data via e-mail instead of seeing files or printouts. That's no different in the shell scripting world. If you generate any type of report from your shell script, most likely at some point you'll be asked to e-mail the results to someone.
The main tool you have available for sending e-mail messages from your shell scripts is the Mailx program. Not only can you use it interactively to read and send messages, but you can also use the command line parameters to specify how to send a message.
Note
Some Linux distributions require that you also install a mail server package (such as sendmail or Postfix) before you can install the mailutils package that includes the Mailx program.
Here's the format for the Mailx program's command line for sending messages:
mail [-eIinv] [-a header] [-b addr] [-c addr] [-s subj] to-addr
The mail command uses the command line parameters shown in Table 25.2.
Table 25.2 The Mailx Command Line Parameters
|
Parameter |
Description |
|
-a |
Specifies additional SMTP header lines |
|
-b |
Adds a BCC: recipient to the message |
|
-c |
Adds a CC: recipient to the message |
|
-e |
Doesn't send the message if it's empty |
|
-i |
Ignores TTY interrupt signals |
|
-I |
Forces Mailx to run in interactive mode |
|
-n |
Doesn't read the /etc/mail.rc startup file |
|
-s |
Specifies a Subject line |
|
-v |
Displays details of the delivery on the terminal |
As you can see from Table 25.2, you can pretty much create an entire e-mail message just from the command line parameters. You just need to add the message body.
To do that, you need to redirect text to the mail command. Here's a simple example of how to create and send an e-mail message directly from the command line:
$ echo "This is a test message" | mailx -s "Test message" rich
The Mailx program sends the text from the echo command as the message body. This provides an easy way for you to send messages from your shell scripts. Here's a quick example:
$ cat factmail
#!/bin/bash
# mailing the answer to a factorial
MAIL=$(which mailx)
factorial=1
counter=1
read -p "Enter the number: " value
while [ $counter -le $value ]
do
factorial=$[$factorial * $counter]
counter=$[$counter + 1]
done
echo The factorial of $value is $factorial | $MAIL -s "Factorial
answer" $USER
echo "The result has been mailed to you."
This script does not assume that the Mailx program is located in the standard location. It uses the which command to determine just where the mail program is.
After calculating the result of the factorial function, the shell script uses the mail command to send the message to the user-defined $USER environment variable, which should be the person executing the script.
$ ./factmail
Enter the number: 5
The result has been mailed to you.
$
You just need to check your mail to see if the answer arrived:
''/var/mail/rich'': 1 message 1 new
>N 1 Rich Blum Mon Sep 1 10:32 13/586 Factorial answer
?
Return-Path: <rich@rich-Parallels-Virtual-Platform>
X-Original-To: rich@rich-Parallels-Virtual-Platform
Delivered-To: rich@rich-Parallels-Virtual-Platform
Received: by rich-Parallels-Virtual-Platform (Postfix, from userid 1000)
id B4A2A260081; Mon, 1 Sep 2014 10:32:24 -0500 (EST)
Subject: Factorial answer
To: <rich@rich-Parallels-Virtual-Platform>
X-Mailer: mail (GNU Mailutils 2.1)
Message-Id: <20101209153224.B4A2A260081@rich-Parallels-Virtual-Platform>
Date: Mon, 1 Sep 2014 10:32:24 -0500 (EST)
From: rich@rich-Parallels-Virtual-Platform (Rich Blum)
The factorial of 5 is 120
?
It's not always convenient to send just one line of text in the message body. Often, you'll need to send an entire output as the e-mail message. In those situations, you can always redirect text to a temporary file and use the cat command to redirect the output to themail program.
Here's an example of sending a larger amount of data in an e-mail message:
$ cat diskmail
#!/bin/bash
# sending the current disk statistics in an e-mail message
date=$(date +%m/%d/%Y)
MAIL=$(which mailx)
TEMP=$(mktemp tmp.XXXXXX)
df -k > $TEMP
cat $TEMP | $MAIL -s "Disk stats for $date" $1
rm -f $TEMP
The diskmail program gets the current date using the date command (along with some special formatting), finds the location of the Mailx program, and creates a temporary file. After all that, it uses the df command to display the current disk space statistics (see Chapter 4), redirecting the output to the temporary file.
It then redirects the temporary file to the mail command, using the first command line parameter for the destination address and the current date in the Subject header. When you run the script, you don't see anything appear on the command line output:
$ ./diskmail rich
But if you check your mail, you should see the sent message:
''/var/mail/rich'': 1 message 1 new
>N 1 Rich Blum Mon Sep 1 10:35 19/1020 Disk stats for 09/01/2014
?
Return-Path: <rich@rich-Parallels-Virtual-Platform>
X-Original-To: rich@rich-Parallels-Virtual-Platform
Delivered-To: rich@rich-Parallels-Virtual-Platform
Received: by rich-Parallels-Virtual-Platform (Postfix, from userid 1000)
id 3671B260081; Mon, 1 Sep 2014 10:35:39 -0500 (EST)
Subject: Disk stats for 09/01/2014
To: <rich@rich-Parallels-Virtual-Platform>
X-Mailer: mail (GNU Mailutils 2.1)
Message-Id: <20101209153539.3671B260081@rich-Parallels-Virtual-Platform>
Date: Mon, 1 Sep 2014 10:35:39 -0500 (EST)
From: rich@rich-Parallels-Virtual-Platform (Rich Blum)
Filesystem 1K-blocks Used Available Use% Mounted on
/dev/sda1 63315876 2595552 57504044 5% /
none 507052 228 506824 1% /dev
none 512648 192 512456 1% /dev/shm
none 512648 100 512548 1% /var/run
none 512648 0 512648 0% /var/lock
none 4294967296 0 4294967296 0% /media/psf
?
Now you just need to schedule the script to run every day using the cron feature, and you can get disk space reports automatically e-mailed to your inbox! System administration doesn't get much easier than that!
Summary
This chapter walked through how to use some advanced features within your shell scripts. First, we discussed how to use the MySQL server to store persistent data for your applications. Just create a database and unique user account in MySQL for your application, and grant the user account privileges to only that database. You can then create tables to store the data that your application uses. The shell script uses the mysql command line tool to interface with the MySQL server, submit SELECT queries, and retrieve the results to display. Next we discussed how to use the lynx text-based browser to extract data from websites on the Internet. The lynx tool can dump all the text from a web page, and you can use standard shell programming skills to store that data and search it for the content you're looking for. Finally, we walked through how to use the standard Mailx program to send reports using the Linux e-mail server installed on your Linux system. The Mailx program allows you to easily send output from commands to any e-mail address.
In the next chapter we finish up by looking at some more shell script examples that show you just what you can do with your shell scripting knowledge.
All materials on the site are licensed Creative Commons Attribution-Sharealike 3.0 Unported CC BY-SA 3.0 & GNU Free Documentation License (GFDL)
If you are the copyright holder of any material contained on our site and intend to remove it, please contact our site administrator for approval.
© 2016-2026 All site design rights belong to S.Y.A.