Beginning the Linux Command Line, Second edition (2015)
CHAPTER 1. Starting Linux Command-Line Administration
To unleash the full power of Linux, as a Linux administrator you will spend most of your time typing commands on the Linux command line, the so-called shell prompt. For someone who is new to the command line, the things that advanced users do there may look like magic. In this chapter, you’ll learn about the following topics:
· History of the Linux operating system
· What is open source?
· What are distributions?
· Logging in to Linux
· Command basics: working with commands, options, and arguments
· Using piping and redirection
· Getting help with --help and man
· Working with the shell
Linux Distributions
For someone new to Linux, the operating system may appear a little bit strange. Due to its open source character, there are different versions (the so-called distributions) of Linux. After some Linux history, this chapter teaches you about the differences and similarities between these distributions so that you’ll be able to pick the Linux distribution that fits your needs in the best possible way.
Linux History
Linux started around 1991 all because the Finnish student Linus Torvalds wasn’t too happy with Minix, the educational version of the UNIX operating system that he had to work with at the University of Helsinki. In particular, the ability of the kernel (which is the heart of the operating system) of this Minix distribution didn’t please him much. He decided to create a better kernel and gave it the name Linux.
Possibly the smartest thing that Torvalds did when starting his initiative was deciding not to do it alone. To find other people who wanted to work with him, he posted a message on Usenet, a major social media platform in those days that could be used to exchange information with other people and get help from other people.
The initiative by Torvalds didn’t stand on its own. Many other software developers had already started initiatives to create free software for the UNIX operating system. The only thing that really was missing at that moment was a kernel that was stable enough to go into production and offer a complete and free alternative to the expensive UNIX operating system.
Open Source
Right from the start, Torvalds released his software as open source software—that is, software whose source code is freely available to anyone. This brings a major benefit: other programmers have access to the source code and thus it becomes much easier to fix issues in the code, with the result of getting code that is more stable and reliable. This open source initiative fitted well into many other open source programs that were a part of the GNU initiative. The acronym GNU stands for GNU is Not UNIX, which means that this is about software written for the UNIX platform but doesn’t use UNIX licensing. This GNU initiative was a part of the Free Software Foundation (FSF), which wanted to create free software for a better operating system experience.
When it came to licensing, Torvalds released his software under the GPL. In those days, GPL stood for GNU Public License, but nowadays it means General Public License. The details of this license are quite complex, but in essence it means that software released under the GPL can be used and modified by anyone, as long as the person modifying this software makes sure that his or her modifications will be released under the GPL as well. In brief: once software has a GPL, it will always stay GPL software. This prevents companies from making small modifications and then taking the software out of GPL and selling it for a lot of money.
In current Linux versions GPL still is very important. Most distributions consider it an essential property of the Operating system and will refuse software that doesn’t comply with the conditions in the GPL license. By being so strict about the licensing, Linux distributions ensure that the software that is released as Open Source software will always stay Open Source software. Some distrubutions do also allow non-open source softare to be included, such as binary code for specific firmware. You will notice a different philosophical approach in this between the different distributions.
The First Distributions
Apart from the Linux kernel, lots of other programs were available under the GPL as well. In the early days, people who wanted to start using Linux had to go on the Internet and download these software programs themselves. Often, after downloading them, they even had to compile them for themselves. This compilation process was necessary to convert the program files, which were published as source code files only, to executable programs that users could execute on their computer.
Software compilation is not very easy to do, and for that reason, different people started to create collections that consisted of the Linux kernel and some other useful programs. One of the first persons to do so was Patrick Volkerding, who started his Slackware distribution in 1993. In those days, this distribution consisted of different software categories, all put together on no fewer than 43 diskettes. Volkerding was perhaps the first who made a successful Linux distribution that started to get used on servers all around the world, and his Slackware distribution still exists, although new releases are not published very frequently.
Linux Turning Mainstream
The years between 1993 and 1998 marked the rise of the Linux operating system. One of the most important reasons that it took of so rapidly, is that it provided a very affordable alternative for the expensive UNIX operating system that was used on many mission-critical server systems. In the early days of Linux, no support was available, but that didn’t prevent scientists at different institutes around the globe to start working with it. Linux also acquired huge popularity rapidly in educational environments. Due to this popularity, during this period the most important Linux distributions were created.
Whereas Slackware was just a collection of software programs with an installation program that made working with Linux easy, other Linux distributions soon started to add value to the open source software. Some did this by adding commercial support to their software collection, others by creating programs and adding that to their distribution, and some hired developers to optimize the open source programs. The result is that nowadays dozens of Linux distributions are available for new Linux users. Of all these Linux distributions, only some really matter. In this book, I’ve focused on the three most important distributions: Red Hat, SUSE, and Ubuntu. By focusing on these three only, I am not making a statement about the quality of the other distributions; however, it makes sense to focus on these three as they make up more than 90% of the Linux market. Following are short descriptions of these three distributions.
Red Hat
North Carolina–based Linux distribution Red Hat had a major role in bringing Linux to the data center of many companies. The reason for the success of Red Hat was that this distributor added support for Linux. At one level, this is support of different hardware and software programs, which means that users of the supported hardware and software programs were guaranteed that they would work on Linux. Red Hat also added help for Linux users, available as a commercial added value to Linux.
Because Red Hat offered Linux with support, companies started putting aside their old flavors of UNIX and replacing them with the much cheaper Linux. This made Red Hat the most successful Linux distribution on the planet. Even though Ubuntu is widely adopted in environments where people don’t want to pay for a supported Linux distribution, Red Hat by far is the leader of the commercial Linux distributions.
Currently, there are three product lines related to Red Hat. The most important of these is Red Hat Enterprise Linux (RHEL), which consists of two server versions and a desktop version. RHEL is a commercial product, so it is not available as a free download. It is open source software, however, but the only reason you can’t download it for free is because Red Hat has added the Red Hat logo to the RHEL software, and this is something that users have to pay for.
Red Hat also founded the Fedora open source project. Basically, you can see this as the development environment for RHEL. Most new software components are first used and tested in Fedora, and if they are successful there, they will make it into RHEL as well. Fedora Linux is available for free download at www.redhat.com/fedora.
Since the only thing that is not free in Red Hat Enterprise Linux is the Red Hat logo, the CentOS (Community ENTerprise Operating System) distribution offers Red Hat Enterprise Linux software from which the Red Hat logo has been removed. This sounds illegal, but it isn’t, as Red Hat is completely open source software. In fact, Red Hat has integrated the CentOS community within the Red Hat business, so that they can provide a freely available Linux distribution with the quality of Red Hat Enterprise Linux to those people and companies who aren’t ready to pay for their Linux support yet. So if you want the stability of Red Hat Enterprise Linux, but don’t want to pay for it, CentOS provides a good alternative. You can download CentOS at www.centos.org.
SUSE
The SUSE Linux distribution was founded in Germany. It became popular quite fast because from the beginning SUSE Linux came with lots of software packages that were shipped on DVDs in a large box, that contained installation manuals and even a stciker. SUSE was one of the first distributions that only sold their distribution and just delivered a demo system as freely available software, thus trying to make money out of it.
In 2004, Utah-based network software company Novell purchased SUSE and developed it into an enterprise-ready Linux distribution that could compete with Red Hat, which in that period still dominated the market. Currently, SUSE is an independent brand again.
Currently, there are two directions in SUSE Linux. SUSE Linux Enterprise is the commercial software that offers support, and it exists in two different flavors: SUSE Linux Enterprise Server, SUSE Linux Enterprise Desktop. With SUSE Linux Enterprise Desktop, SUSE has some success in bringing Linux to the enterprise desktop, whereas Red Hat, for example, still focuses on server versions. Interestingly, the SUSE Linux Enterprise products are freely downloadable at downloads.suse.com Notice however that in order to download updates and patches, a subscription is required. So even if you can download and install it for free, you’ll need a subscription if you want to continue using it.
Apart from the SUSE Linux Enterprise products, there is OpenSUSE, which is a fully open source product. This version also offers a stable Linux distribution, but at the same time is used as a development platform for new software. You can download OpenSUSE atwww.opensuse.org. All versions of SUSE Linux Enterprise Server are based on OpenSUSE.
Ubuntu
Ubuntu has become quite successful because its founder, the South African millionaire Mark Shuttleworth, made it an extremely user-friendly distribution and in the early days of Ubuntu even gave away CDs with the Ubuntu Desktop for free.
Apart from the Ubuntu Desktop, Ubuntu has a server edition as well, which due to the success of the desktop version has become quite. Both versions of Ubuntu Linux are available for free; customers who are interested in getting support can purchase it from Canonical, the company that has been created by Ubuntu founder Mark Shuttleworth to provide professional support services on Ubuntu.
Remarkable about Ubuntu Linux is the fact that there is a new software release every 6 months. By looking at the name of the distribution, you can see when it was released; for instance, Ubuntu 15.04 was released in April 2015. As enterprise users normally don’t like upgrading their operating system every 6 months, there is also a Long Term Support (LTS) version that currently is released every 2 years. The special thing about this version is the extended period of support that is offered. For desktops and servers this is 7 years. For setting up a server that is based on Ubuntu Linux, it is highly recommended to use the LTS version.
![]() Note This book focuses on Red Hat, SUSE, and Ubuntu Linux. You will notice, however, that 98% of the commands and configuration files covered in this book are available on other Linux distributions as well. This means that no matter what Linux distribution you use, the information in this book will be useful for you.
Note This book focuses on Red Hat, SUSE, and Ubuntu Linux. You will notice, however, that 98% of the commands and configuration files covered in this book are available on other Linux distributions as well. This means that no matter what Linux distribution you use, the information in this book will be useful for you.
Logging In and Out
Now that you know about Linux in general, and about the Linux distributions more specifically, it’s time to move on and get familiar with the essential tasks while working with Linux. Before you can do anything on a Linux computer, you have to log in. In this section, you’ll learn about usernames and different ways you can use to make yourself known to your Linux computer.
Different Login Interfaces
Before starting to work on your Linux computer, you need to tell it who you are. The person that installed your Linux version has created a user account, and you must use this account and the associated password to make yourself known. To do this, Linux offers you a login prompt. This can be either a graphical or a nongraphical prompt. If you are working on a Linux desktop, you are likely to see a graphical environment. If, however, it is a server you a working from, you’ll just see a shell login prompt.
In Linux, there often is a choice between different solutions. This means there is not just one unified graphical login prompt, but many, depending on the distribution that you are using and on the graphical environment that you have installed. You will notice that the graphical login screen for that reason will be different between the distributions. In Figure 1-1, you can see what it looks like on CentOS Linux.
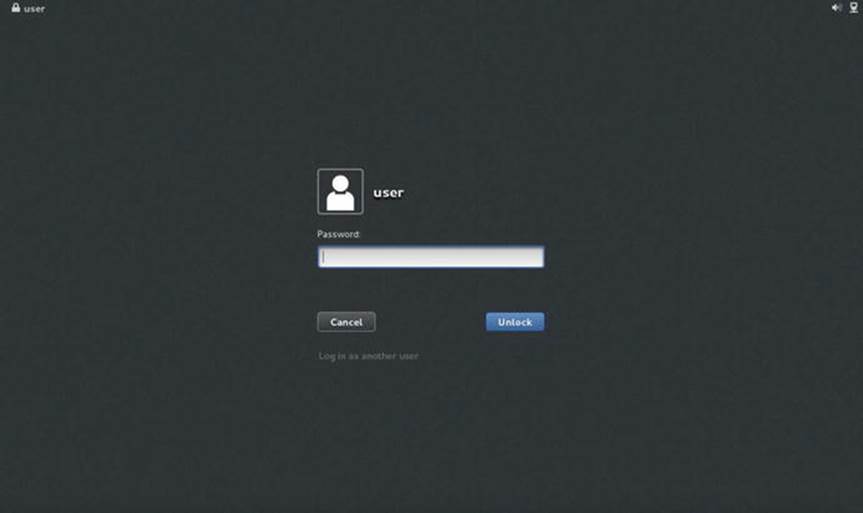
Figure 1-1. The graphical login screen on CentOS
When working with a graphical environment, it is the graphical environment that provides you with the login screen. More specifically, it is the gdm process that starts the graphical login screen. So what you see in Figure 1-1 is really the result of this xdm process. On specific graphical desktop environments, alternatives may be used, such as the gdm process which is the default on the GNOME graphical desktop.
Note: Historically, different graphical desktops have been offered on Linux. Currently, the GNOME desktop is used as the default on most Linux distributions. It runs on top of the X Windowing system, which is the generic system that provides a graphical screen, but with very basic functionality. GNOME adds functionality such as menu’s to that screen. KDE is an alternative graphical desktop.
If you are working on a server, the graphical environment doesn’t matter and is normally not started by default. That is because the graphical environment consumes resources, and these resources on server systems are better reserved for other purposes. Therefore, servers normally offer a text-based login prompt only. In Figure 1-2, you can see what this sort of login prompt looks like.
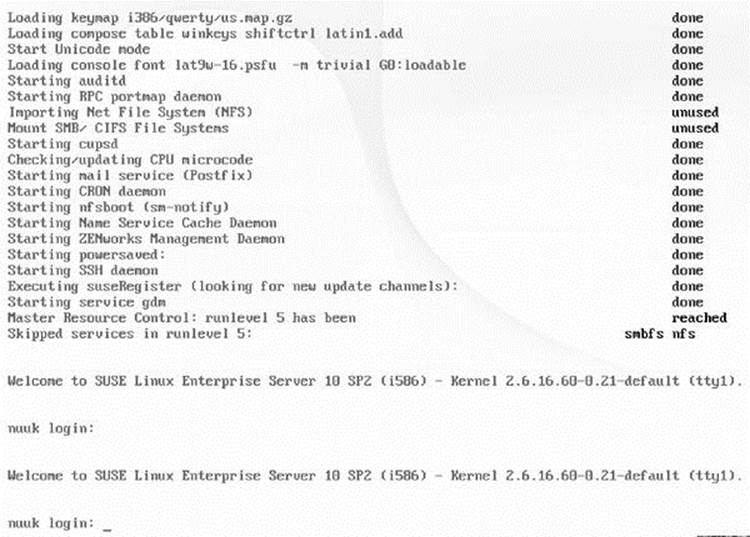
Figure 1-2. The text-based login prompt
There are other ways of connecting to a Linux machine as well. If you are a server administrator, your server will probably be installed in an air-conditioned and cold server room that you enter only if really necessary. Alternatively, your Linux server may be hosted somewhere remotely in the cloud, or as a Virtual Private Server (VPS) at somehosting provider. No matter how it is running, often your server isn’t physically accessible. Therefore, as a server administrator, you may use a remote access tool like the Windows utility PuTTY to get shell access to the server. In Figure 1-3, you can see what the PuTTY login screen looks like.
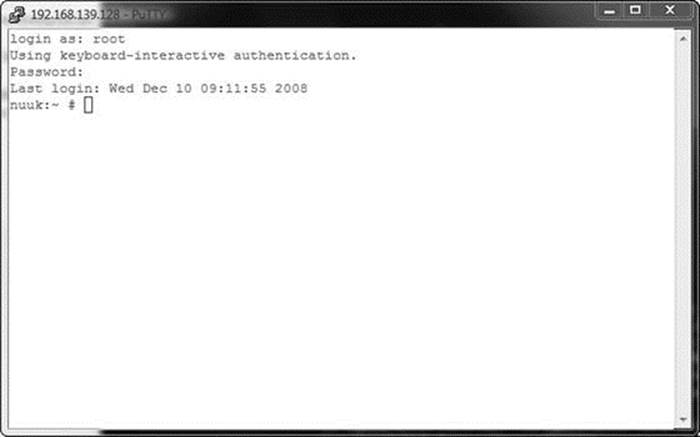
Figure 1-3. PuTTY is the de facto standard for accessing a Linux console remotely from a Windows workstation
![]() Note PuTTY is the de facto standard for accessing Linux machines from a Windows desktop. You can download PuTTY for free from www.putty.org. To use it, you need an SSH server running on your Linux computer as well. SSH is covered in detail in Chapter 11. On Linux workstations and Apple computers a native SSH client is integrated in the operating system, and you won’t need PuTTY to establish a remote session with your Linux server.
Note PuTTY is the de facto standard for accessing Linux machines from a Windows desktop. You can download PuTTY for free from www.putty.org. To use it, you need an SSH server running on your Linux computer as well. SSH is covered in detail in Chapter 11. On Linux workstations and Apple computers a native SSH client is integrated in the operating system, and you won’t need PuTTY to establish a remote session with your Linux server.
As you can see, there are many ways to connect to a Linux machine. In all cases, you do need to provide user credentials. The next section gives more information about that.
Working with a User Account
To log in to a Linux machine, you need a user account name and a password. You should already know what username to use if you installed the machine yourself. If someone else installed the machine for you, ask him or her what username you should use. This username will also have a password. At the login prompt, you need to provide the username and password to make yourself known to the machine. This procedure is also known as authentication.
![]() Note There are alternatives to passwords for authentication. For instance, you may use a smart card to authenticate on your machine. However, this requires additional hardware, and for this reason, in this book I will focus on password authentication.
Note There are alternatives to passwords for authentication. For instance, you may use a smart card to authenticate on your machine. However, this requires additional hardware, and for this reason, in this book I will focus on password authentication.
When authenticating for the first time, you have to decide what user account to use. You can authenticate as a normal user, but you can authenticate with the account of the system administrator as well. The username for this account is root. On every Linux computer, there is a user with the name root, and this user account has no restrictions. The user root really is almighty. If you are connecting to Linux to perform system administration tasks, it makes sense to authenticate as root; after all, you need to do system administration, and for that purpose you need all the permissions there are. If, however, you are a normal user, you shouldn’t make a habit of logging in as root by default. Just log in with your normal user account, and use su or sudo to become root when needed. In Chapter 2, you’ll learn how to do this. At this time, just make sure that you are authenticated.
Command-Line Basics
The command line is important, because a system administrator can do anything from it. Even if your Linux installation is running a graphical interface as well, you’ll need command line access to unleash the full power and potential of Linux. The only reason why many administrators are using a graphical interface on Linux, is because it allows them to run many terminal windows simultaneously, which makes it easy to read the documentation in one window, configure in another window and test the configuration in a third window for instance.
Linux has many, many commands, more than you will ever know, and new commands are added on a regular basis. All of these commands, though, share a common way of working. In this section, you’ll learn about common elements that you will encounter in any Linux command. First, you’ll learn about the common structure that every Linux command has. Next, we’ll talk about characters that you can and can’t use in Linux commands. Figure 1-4 shows what a command line looks like, when started as a terminal from a graphical environment.

Figure 1-4. The command line as seen from a terminal window
The command line offers you a prompt that consists of different parts. The first part of the prompt, as you can see in Figure 1-4, is the name of the computer you are working on. In this case, the computer name is server1. Next, the prompt refers to the current directory in the file system where the user is at right now. In Figure 1-4, you can see a ~ sign instead of the name of a directory. This sign refers to the home directory, which is the folder in the file system where the user can store his or her personal files. Last, the # sign in this prompt indicates that the current user isroot, the mighty system administrator. If you see anything other than #, the current user is not root, but a normal user with normal privileges. Be aware that if this is the case, some commands have limited use. For instance, on Linux a normal user cannot format hard disks, and many other tasks cannot be accomplished by non-root users.
![]() Note Since in open source there are no rules that are strictly enforces to everyone, a developer can do as he or she likes. Therefore, words like “always” and “every” are not applicable in Linux, as there are often exceptions to the rules that are used in Linux. To keep this book readable, I will, however, use these words anyway. Just keep in mind that when you see the terms “every” and “always,” it should read “almost every” and “almost always.”
Note Since in open source there are no rules that are strictly enforces to everyone, a developer can do as he or she likes. Therefore, words like “always” and “every” are not applicable in Linux, as there are often exceptions to the rules that are used in Linux. To keep this book readable, I will, however, use these words anyway. Just keep in mind that when you see the terms “every” and “always,” it should read “almost every” and “almost always.”
Bash: The Command Interpreter
When working on the command line, as an administrator you will be dealing with the shell. The shell is the command interpreter: it is responsible for making something out of the things that you type on the command line. How you work with commands is largely defined by the abilities of the shell. The shell itself is a program that your server starts automatically after you log in on your server, no matter if you’ve done so directly on the server console or via a remote session that you’ve started from PuTTY on your Windows workstation. Two shells are used quite often: Bash and Dash. Bash is the default shell on the current SUSE and Red Hat versions, and Dash is available on Ubuntu. The good news is that as a beginning command-line administrator, you don’t really care which shell is used—both work in the same way. In the section “Working with the Shell” later in this chapter, you’ll learn about some of its most important and most useful features.
Commands, Options, and Arguments
A Linux command normally consists of three parts: the command itself, the command options, and its arguments. For instance, the following example shows what a Linux command looks like:
useradd -m -G sales linda
This example consists of three parts, useradd, which is the command; -m and -G sales, which are both options; and linda, which is a generic argument. Notice that the word "sales" behind the -G is also a special item, it is an argument to the option -G. Further on in this section, I’ll explain these components in more detail.
The command itself is the character string you type to activate a certain task. For instance, the command ls (see Listing 1-1) lists files. In Listing 1-1, you see the result of this command when used in the home directory of the user root (the Linux system administrator). Certain functionality is defined for this command. Linux has many commands, as mentioned previously; later in this chapter, in the section “Using man to Get Help,” you’ll learn how to get detailed usage information about them by using the man command.
Listing 1-1. Using the ls Command Without Options Shows Files in the Current Directory
nuuk:~ # ls
.ICEauthority .exrc .gnome2_ private .metacity
.Xauthority .fvwm .gnupg .nautilus .wapi
.bash_history .gconf .gstreamer-0.10 .qt .xsession-errors
.config .gconfd .gtkrc .recently-used Desktop
.dmrc .gnome .gtkrc-1.2-gnome2 .skel Documents
.esd_auth .gnome2 .kbd .suse_ register.log bin
Options
Most commands have options as their second part. By using these options, you modify the behavior of the commands. Options are a part of the program code, they are fixed and the software programmer that created the program has provided the available options. For instance, the lscommand just shows the names of files in the current directory, as you can see in Listing 1-1. If you want to see details, such as the file size, the permissions that are set for it, and information about the creation date, you can add the option -l. In Listing 1-2, you can see how this option modifies the behavior of the ls command.
Listing 1-2. By Adding an Option to a Command, You Modify Its Behavior
nuuk:~ # ls -l
total 120
-rw------- 1 root root 777 Dec 5 10:43 .ICEauthority
-rw------- 1 root root 115 Dec 5 10:43 .Xauthority
-rw------- 1 root root 2558 Nov 24 13:39 .bash_history
drwx------ 3 root root 4096 Nov 7 11:04 .config
-rw------- 1 root root 24 Nov 7 11:03 .dmrc
-rw------- 1 root root 16 Nov 7 11:03 .esd_auth
-rw-r--r-- 1 root root 1332 Nov 23 2005 .exrc
drwxr-xr-x 2 root root 4096 Nov 7 10:47 .fvwm
drwx------ 5 root root 4096 Dec 5 10:43 .gconf
drwx------ 2 root root 4096 Dec 5 11:03 .gconfd
drwxr-xr-x 3 root root 4096 Nov 7 11:04 .gnome
drwx------ 6 root root 4096 Nov 7 11:04 .gnome2
drwx------ 2 root root 4096 Nov 7 11:03 .gnome2_private
drwx------ 3 root root 4096 Nov 7 11:03 .gnupg
drwxr-xr-x 2 root root 4096 Dec 5 10:43 .gstreamer-0.10
-rw-r--r-- 1 root root 123 Nov 7 11:03 .gtkrc
-rw-r--r-- 1 root root 134 Nov 7 11:03 .gtkrc-1.2-gnome2
drwxr-xr-x 2 root root 4096 Nov 7 10:47 .kbd
drwx------ 3 root root 4096 Nov 7 11:03 .metacity
drwxr-xr-x 3 root root 4096 Nov 7 11:04 .nautilus
drwxr-xr-x 2 root root 4096 Nov 19 15:03 .qt
-rw------- 1 root root 325 Dec 5 10:43 .recently-used
drwxr-xr-x 2 root root 4096 Nov 7 11:03 .skel
-rw-r--r-- 1 root root 795 Dec 5 10:44 .suse_register.log
drwx------ 3 root root 4096 Nov 7 11:04 .thumbnails
drwxr-xr-x 2 root root 4096 Dec 1 05:27 .wapi
-rw-r--r-- 1 root root 1238 Dec 5 10:43 .xsession-errors
drwxr-xr-x 2 root root 4096 Nov 7 11:04 Desktop
drwx------ 2 root root 4096 Nov 7 11:04 Documents
drwxr-xr-x 2 root root 4096 May 3 2007 bin
Options provide a method that is defined within the command code to modify the behavior of the command. This means that as a user or an administrator, you cannot add options yourself. The only way of doing this is to change the source code of the command and recomplie the command, which is not something that you want to be doing as a Linux user or administrator. Options are very specific to the command you use. Some commands don’t have any options, and other commands can have more than 50. The man command normally gives you a complete list of all options that are available. Alternatively, many commands support the option --help, which will show a summary of all available options.
Many commands offer two different methods of working with options: the short option and the long option. For example, you can use the command ls -lh, which makes the ls command present its output in a human-readable way by showing kilobytes, megabytes, and gigabytes instead of just bytes. You can also use the short option -h in a long way, written as --human-readable. In Listing 1-3, you can see this option at work, combined with the option -l, which makes sure that the output of ls is given as a long listing. (Unfortunately, there is no long alternative for the short option -l.) Notice that if more than one option is used, all options can be specified together, without a - in front of each option. So the command ls -lh is valid, and so is the command ls -l -h.
Listing 1-3. Most Linux Commands Work with Short As Well As Long Options
nuuk:/somedir # ls -l -h
total 4.0M
-rwxr-xr-x 1 root root 1.5M Dec 5 11:32 vmlinux-2.6.16.60-0.21-default.gz
-rw-r--r-- 1 root root 1.3M Dec 5 11:32 vmlinuz
-rw-r--r-- 1 root root 1.3M Dec 5 11:32 vmlinuz-2.6.16.60-0.21-default
nuuk:/somedir # ls -l --human-readable
total 4.0M
-rwxr-xr-x 1 root root 1.5M Dec 5 11:32 vmlinux-2.6.16.60-0.21-default.gz
-rw-r--r-- 1 root root 1.3M Dec 5 11:32 vmlinuz
-rw-r--r-- 1 root root 1.3M Dec 5 11:32 vmlinuz-2.6.16.60-0.21-default
Short options are preceded by a sign, and you can add more than one short option after the sign. For instance, you can combine the options -l and -h from the example in Listing 1-4 as ls -lh. Long options are preceded by the -- sign. For instance, ls --human-readableexecutes the ls command with just one option, which Is --human-readable. If by mistake you put just one in front of a long option, the long option is not interpreted as a long option, but as a collection of short options. This means that ls -human-readable would be interpreted as ls -h -u -m -a -n -- -r -e -a -d -a -b -l -e.
Arguments
Apart from options, many Linux commands have arguments. These are additional specifications that you can add to the command to tell it more precisely what to do, but the argument is typically not defined in the command code itself. For example, consider the command ls -l /etc/hosts:
nuuk:/somedir # ls -l /etc/hosts
-rw-r--r-- 1 root root 683 Nov 7 10:53 /etc/hosts
In this example, /etc/hosts is the argument. As you can imagine, you can use any other file name instead of /etc/hosts, and this is typical for arguments. They are not fixed, and you can use any argument you like as long as it is relevant in the context of the command. In this book, I’ll make a very clear distinction between options and arguments.
You should be aware that not only commands have arguments, but also options have arguments as well. For example, consider the following command:
mail -s hello root
This command consists of four different parts:
· mail: The command itself
· -s: The option that tells the mail command what subject it should use
· hello: The argument of the option -s, which specifies what exactly you want to do with the option -s
· root: The argument of the command, which in this case makes clear to whom to send the mail message
As a rule of thumb, arguments at the end of the command are normally command arguments, and arguments for options are placed right next to the options. You may wonder now how to find out the differences between command arguments and arguments for options, but later in this chapter in the section “Getting Help,” you’ll see that it is fairly simple to differentiate the two argument types.
Piping and Redirection
To unleash the full power of Linux’s many commands, you can use piping and redirection. By piping, you can send the result of a command to another command, and by using redirection, you can determine where the command should send its results.
Piping
Piping offers you great benefits in a Linux environment. By using piping, you can combine the abilities of two or more commands to create a kind of super command that offers even more capabilities. By creating the right pipes, you can really do amazing stuff. For an advanced Linux administrator, a command such as the following is pretty common (after reading all the chapters in this book, you should be able to understand what this command is doing):
kill `ps aux | grep y2 | grep -v grep | awk '{ print $2 }'`
As a Linux administrator, you absolutely need to know about piping, so let’s start with an easy example. If you try a command like ls -R /, you will see that it gives a lot of output that scrolls over your screen without stopping. On Linux, there is a very useful command, named less, that you can use as a viewer for text files. For example, try less /etc/hosts (see Listing 1-4); this will open the /etc/hosts file in less to show the contents of the file (use q to quit less).
![]() Note The /etc/hosts file contains a list of IP addresses and the matching host name. In a small network, you can use it as an alternative to using DNS for resolving host names.
Note The /etc/hosts file contains a list of IP addresses and the matching host name. In a small network, you can use it as an alternative to using DNS for resolving host names.
Listing 1-4. You Can Use less As a Viewer to Read Text Files
nuuk:/ # less /etc/hosts
#
# hosts This file describes a number of hostname-to-address
# mappings for the TCP/IP subsystem. It is mostly
# used at boot time, when no name servers are running.
# On small systems, this file can be used instead of a
# "named" name server.
# Syntax:
#
# IP-Address Full-Qualified-Hostname Short-Hostname
#
127.0.0.1 localhost
# special IPv6 addresses
::1 localhost ipv6-localhost ipv6-loopback
fe00::0 ipv6-localnet
ff00::0 ipv6-mcastprefix
ff02::1 ipv6-allnodes
ff02::2 ipv6-allrouters
ff02::3 ipv6-allhosts
127.0.0.2 nuuk.sander.gl nuuk
/etc/hosts lines 1-23/23 (END)
The less command can be very useful in a pipe as well. By using piping, you’ll send the result of the first command to the second command. So if you use ls -R / | less, the ls -R / command executes and sends its result to the less command. less will function as a pager in this situation and show you the output of the first command screen by screen (see Listing 1-5). It will also show you the current position that you are at; this is indicated by lines 1-23, which you see at the end of the example file. Press the spacebar to proceed to the next screen of output.
Listing 1-5. By Piping to less, You Can Display the Results of a Command That Gives a Large Amount of Output Screen by Screen
nuuk:/ # ls -R / | less
/:
.rnd
bin
boot
dev
etc
home
lib
lost+found
media
mnt
opt
proc
root
sbin
somedir
srv
sys
tmp
usr
var
/bin:
lines 1-23
Redirection
Another operator that is very useful in the Linux command shell is the redirection operator, >. By default, a command will show its result on your computer monitor. In Linux slang, you can also say that the shell will send the result of a command to standard output, abbreviated to STDOUT, which is usually your computer monitor (but can be something else as well. A long time ago, printers were often used as STDOUT instead of monitors). Using redirection, you can send it anywhere else.
![]() Tip If possible, try all commands described in this section immediately after reading about them. Without trying them yourself, it may be quite hard to understand what they are doing.
Tip If possible, try all commands described in this section immediately after reading about them. Without trying them yourself, it may be quite hard to understand what they are doing.
Let’s use the command ls -l once more as an example. If you just type the command, you will see its result on STDOUT. However, if you type ls -l > somewhere, you’ll tell the command to send its output somewhere else, in this case to a file that has the name somewhere. This file will be created in the current directory if it doesn’t exist. If a file with this name already exists, you will overwrite it by using this command. In case you want to add to an existing file instead of overwriting it, use ls -l >> somewhere. The double redirector tells the command to append to the contents of the file instead of overwriting it. If the file doesn’t already exist, the command will create it. So if you want to be sure never to overwrite an existing file by accident when using redirection, use >> at all times instead of >.
Some commands give you error messages apart from output. The good thing is that you can redirect these error messages also. To do this, use 2> instead of >. So if ls -l gives you a lot of error messages as well (which isn’t very likely, but you never know), you can send all of them to the file errors, which will be created in the current directory if you use ls -l 2> errors. And it is even possible to redirect the standard output of a command in one direction, while sending the error output somewhere else. For instance, the command ls -l > output 2> errors will create two files, the file output for the regular output and the file errors for the error output.
Instead of sending the results of a command to a file, you can redirect to some of the Linux special devices as well. Every piece of hardware in Linux can be addressed by using a device file. For instance, there is the device file /dev/null, which can be used as a digital waste bin. Everything that you send to /dev/null will immediately disappear into thin air. So if you just don’t want to see any error messages at all, instead of saving them somewhere on your system, you can redirect the error messages to the /dev/null device. The following example shows how to do so:
ls -l 2> /dev/null
In this example, the regular output is still written to your current terminal, but you just won’t see error messages anymore.
Apart from output, you can also use redirection on input for a command. This is used not as often, but can be useful for commands that open an interactive prompt where you are expected to provide input for the command. An example of this is the Linux mail command that you can use on the command line.
![]() Tip You can use the mail command for some simple mail handling from a terminal screen, but if your server is configured properly, you can even use it to send mail to other users on the Internet. The only thing you need to do is set up DNS on your server.
Tip You can use the mail command for some simple mail handling from a terminal screen, but if your server is configured properly, you can even use it to send mail to other users on the Internet. The only thing you need to do is set up DNS on your server.
Consider the command mail -s hello root. This command opens a command prompt that will allow you to compose a mail message to the user root (whose name is provided as the argument to the command). The option -s hello specifies the subject, in this case hello. InListing 1-6, you can see the result of this command.
Listing 1-6. Composing a Mail Message with mail
nuuk:/ # mail -s hello root
Hi root, how are you.
.
EOT
Now the problem with the mail command is that when used in this way, it opens an interactive prompt where you type the message body. When finished typing the message body, you have to provide a dot on a separate line and press Enter. By using input redirection, you can feed the dot immediately to the command, which allows you to run the command without any interruption from the command line.
mail -s hello root < .
The difference between Listing 1-6, where mail opens a command prompt, and the preceding example, where input redirection is used, is that in the example with input redirection, you cannot enter a message in the body of the mail. To send the mail, there is just one line to use, and that’s all.
EXERCISE 1-1: WORKING WITH LINUX COMMANDS
1. Log in to your Linux machine as root and open a shell.
2. Type useradd lisa to create a user with the name lisa.
3. Type passwd lisa. This command will prompt you for the password that you want to use. Enter the password “password” and when asked for confirmation, enter it again. Notice that this command will give you a warning about the password being too simple, which you can safely ignore.
4. Use Ctrl-D to close the shell you are currently logged in to. If it was a non-graphical shell, you’ll now see a login prompt. If you’re working from a graphical environment, find the option that logs you out of your current session.
5. Log in again, this time as user lisa and open a shell.
6. Type ls -l iwehig. This should give you an error message.
7. Type ls il iwehig 2> ~/errors. This command redirects all errors to a file with the name errors that is created in your home directory.
8. Type cat ~/errors to view the contents of this file.
9. Type ls --help to view a list of options that can be used with the ls command. You’ll notice that the list is too long and doesn’t fit on the screen.
10.Type ls --help | less to pipe the output of the ls command to less. You can now use the arrow keys to move up and down in the output.
11.Press q to quit the less viewer.
Getting Help
Linux offers many ways to get help. Let’s start with a short overview:
· The man command offers documentation for most commands that are available on your system.
· Almost all commands accept the --help option. Using it will display a short overview of available options that can be used with the command.
· As with every shell, the Bash shell also has internal commands. These commands can’t be found as a program file on disk, but they are built in the Bash shell and available in memory as soon as the Bash shell is loaded. For these Bash internal commands, you can use thehelp command to find out more about them. For example, use help for to get more information about the Bash internal command for.
![]() Note Want to find out whether a command is an internal command or not? Use type. For example, try type cd; the result will show you what kind of command cd is, in this case a Bash internal command.
Note Want to find out whether a command is an internal command or not? Use type. For example, try type cd; the result will show you what kind of command cd is, in this case a Bash internal command.
Using man to Get Help
The most important source of information about commands on your Linux system is man, which is short for the System Programmers Manual. The basic structure for using man is to type man followed by the command you want information about. For example, type man passwd to get more information about the passwd item. You’ll then see a page displayed by the less pager, as shown in Listing 1-7.
Listing 1-7. Example of a man Page
PASSWD(1) User Commands PASSWD(1)
NAME
passwd - change user password
SYNOPSIS
passwd [options] [LOGIN]
DESCRIPTION
passwd changes passwords for user accounts. A normal user
may only change the password for his/her own account, while
the super user may change the password for any account.
passwd also changes account information, such as the full
name of the user, the user’s login shell, or his/her
password expiry date and interval.
Password Changes
Manual page passwd(1) line 1
Each man page consists of the following elements.
· Name: This is the name of the command. It also includes a short description of the purpose of the command.
· Synopsis: Here you can find short usage information about the command. It will show all available options and indicate whether an option is optional (shown between square brackets) or mandatory (not between brackets).
· Description: This describes what the command is doing. Read it to get a clear and complete picture of the purpose of the command.
· Options: This is a complete list of all options that are available, and it documents the use of all of them.
· Files: If it exists, this section provides a brief list of files that are related to the command you want more information about.
· See also: This is a list of related commands.
· Author: This indicates the author and also provides the mail address of the person who wrote the man page.
man Sections
In the early days, nine different man volumes documented every aspect of the UNIX operating system. This structure of separate books (nowadays called sections) is still present in the man command. Table 1-1 lists the available sections and the type of help you can find in them.
Table 1-1. man Sections and What They Cover
|
Section |
Topic |
Description |
|
0 |
Header files |
These are files that are typically in /usr/include and contain generic code that can be used by your programs. |
|
1 |
Executable programs or shell commands |
For the user, this is the most important section because it normally documents all commands that can be used. |
|
2 |
System calls |
As an administrator, you will not use this section on a frequent basis. The system calls are functions that are provided by the kernel. It’s all very interesting if you are a kernel debugger, but normal administrators won’t need this information. |
|
3 |
Library calls |
A library is a piece of shared code that can be used by several different programs. Typically, man pages that are documented in section 3 are relevant for programmers, not so much for Linux users and system administrators. |
|
4 |
Special files |
In here, the device files in the directory /dev are documented. These files are needed to access devices in a computer. This section can be useful for learning more about the workings of specific devices and how to address them using device files. |
|
5 |
Configuration files |
Here you’ll find the proper format you can use for most configuration files on your server. If, for example, you want to know more about the way /etc/passwd is organized, use the entry for passwd in this section by using the command man 5 passwd. |
|
6 |
Games |
On a modern Linux system, this section contains hardly any information. |
|
7 |
Miscellaneous |
This section contains some information on macro packages used on your server. |
|
8 |
System administration commands |
This section does contain important information about thev commands you will use on a frequent basis to change settings on your Linux machine. |
|
9 |
Kernel routines |
This is documentation that isn’t even included as part of the standard install and optionally contains information about kernel routines. |
So the information that matters to you as a system administrator is in sections 1, 5, and 8 Mostly you don’t need to know anything about the other sections, but sometimes an entry can be found in more than one section. For example, information on an item called passwd is found in section 1 as well as in section 5. If you just type man passwd, you’ll see the content of the first entry that man finds. If you want to make sure that all the information you need is displayed, use man -a <yourcommand>. This makes sure that man browses all sections to see whether it can find anything about <yourcommand>. If you know what section to look in, specify the section number as well, as in man 5 passwd, which will open the passwd item from section 5 directly.
Now man is a very useful tool for getting more information on how to use a given command. On its own, however, it is useful only if you know the name of the command you want to read about. If you don’t have that information and need to locate the proper command, you will like man -k. The -k option allows you to locate the command you need by looking at keywords.
![]() Note man -k is very useful. Instead of using man -k, you may also use the apropos command, which does exactly the same thing.
Note man -k is very useful. Instead of using man -k, you may also use the apropos command, which does exactly the same thing.
man -k often produces a very long list of commands from all sections of the man pages, and in most cases you don’t need to see all that information; the commands that are relevant for the system administrator are in sections 1 and 8. Sometimes, when you are looking for a configuration file, section 5 should be browsed as well. Therefore, it’s good to pipe the output of man -k through the grep utility, which can be used for filtering. Just add the text you’re looking for as an argument to the grep command, and it will show you only those lines that contain that specific text. For example, use man -k time | grep 1 to show only lines from man section 1 that have the word “time” in the description.
![]() Tip It may happen that man -k provides only a message stating that nothing is appropriate. If this is the case, run the mandb command (makewhatis on some Linux distributions). This will create the database that is necessary to search the man indexes.
Tip It may happen that man -k provides only a message stating that nothing is appropriate. If this is the case, run the mandb command (makewhatis on some Linux distributions). This will create the database that is necessary to search the man indexes.
Using the --help Option
The --help option is pretty straightforward. Most commands accept this option, although not all commands recognize it. But the nice thing is that if your command doesn’t recognize the option, it will give you a short summary on how to use the command anyway because it doesn’t understand what you want it to do. Although the purpose of the command is to provide a short overview of the way it should be used, you should be aware that the information is often still too long to fit on one screen. If this is the case, pipe it through less to view the information page by page. In Listing 1-8, you see what happens when you do that.
Listing 1-8. Displaying Information Screen by Screen by Piping Through less
nuuk:/ # ls --help | less
Usage: /bin/ls [OPTION]… [FILE]…
List information about the FILEs (the current directory by default). Sort entries alphabetically if none of -cftuSUX nor --sort.
Mandatory arguments to long options are mandatory for short options too.
-a, --all do not ignore entries starting with .
-A, --almost-all do not list implied . and ..
--author with -l, print the author of each file
-b, --escape print octal escapes for nongraphic characters
--block-size=SIZE use SIZE-byte blocks
-B, --ignore-backups do not list implied entries ending with ~
-c with -lt: sort by, and show, ctime (time of
modification of file status information)
with -l: show ctime and sort by name
otherwise: sort by ctime
-C list entries by columns
--color[=WHEN] control whether color is used to distinguish file
types. WHEN may be `never', `always', or
`auto'
-d, --directory list directory entries instead of contents,
and do not dereference symbolic links
-D, --dired generate output designed for Emacs' dired mode
-f do not sort, enable -aU, disable -lst
-F, --classify append indicator (one of */=>@|) to entries
lines 1-23
Getting Information on Installed Packages
Another nice source for information that is often overlooked is the documentation that is isntalled automatically for many software packages in the directory /usr/share/doc/. Beneath this directory, you’ll find a long list of subdirectories that all contain some usage information. In many cases, the information is really short and not very good, but in other cases, thorough and helpful information is available. Often this information is available in ASCII text format and can be viewed with less or any other utility that is capable of handling clear text.
In some cases, the information in /usr/share/doc is stored in a compressed format. You can recognize this format by the extension .gz. To read files in this format, you can use zcat and pipe the output of that to less, which allows you to browse through it page by page. For example, if you see a file with the name changelog.gz, use zcat changelog.gz | less to read it.
Note: On many distributions, less has been modified and can read compressed files directly. So often, there won’t be a reason anymore to use zcat or other utilities that have a name that starts with the letter z.
In other cases, you will find the documentation in HTML format, which can only be displayed properly with a browser. If this is the case, it is good to know that you don’t necessarily need to start a graphical environment to see the contents of the HTML file because many distributions come with the w3m text browser, which is designed to run from a nongraphical environment. In w3m you can use the arrow keys to browse between hyperlinks. To quit the w3m utility, use the q command. Alternatively, the elinks browser can be used as a text browser.
EXERCISE 1-2: GETTING HELP
1. Type man 3 intro. Every section in the man pages has an intro page, describing the purpose of the section.
2. Type man lvcreate. Use /examples to look for the word examples. Many man pages have an examples section near the end of the man page. In this section you can often find useful usage information.
3. Type man -k sander. It will tell you “Nothing appropriate”. If this happens on commands that you do expect to be available on your computer, it’s a good idea to use mandb to generate the new man pages index file.
Working with the Shell
Linux uses the kernel to address and control the machine’s hardware. The kernel can be considered the heart of the Linux operating system. On top of this kernel, as shown in Figure 1-5, Linux gives users the shell interface to tell this kernel and the services running on top of it what they should do. This interface interprets the commands that users enter and translates them to machine code.

Figure 1-5. Overview of the relation between kernel and shell
Several shells are available for Linux, but bash is the default. The very first shell that was ever created for UNIX, back in the 1970s, was the Bourne shell. It is still available in Linux as the program file /bin/sh. Another popular shell is Bash (short for the Bourne Again Shell). The Bash shell is completely compatible with the original Bourne shell, but it has many enhancements. Bash is used as the default shell for all users on most Linux distributions. Whereas SUSE and Red Hat use Bash, Ubuntu also offers another shell, named Dash. For regular server administration tasks, there are no important differences between Bash and Dash. You should be aware that other shells are available as well. Some people prefer using these other shells, three of which I’ll merely mention here:
· tcsh: A shell with a scripting language that works like the C programming language (and thus is fairly popular with C programmers).
· zsh: A shell that is compatible with Bash, but offers even more features.
· sash: The stand-alone shell. This is a very minimal shell that runs in almost all environments. It is thus well suited for troubleshooting systems.
Using the Shell to Best Effect
Basically, in the shell environment, an administrator is working with commands to execute the tasks he or she wants to perform. An example of such a command is ls, which can be used to display a list of files in a directory. Bash has some useful features to make working with these line commands as easy as possible.
Some shells offer the option to complete a command automatically. Bash has this feature, but it does more than just complete commands. Bash can complete almost everything: not just commands, but also file names and shell variables.
Working with Files and Directories
You’ll find that when working in the shell, you’ll often be manipulating files and directories. A directory is the folder in which files are stored that are related to one another; for instance, in the directory /bin, you will find binary files. Some directories are created by default, but you can also create directories yourself. To do this, use mkdir. For instance, the following command would create a directory with the name groups in the root of the file system:
mkdir /groups
In a directory, you’ll find files. These can be text configuration files, program files, and documents; all that is stored on a Linux machine is stored in a file in some directory. In some cases, it can be useful to create a dummy text file that allows you to test functionality. To do this, use thetouch command. The following command shows how to use touch to create an empty text file in the current directory:
touch somefile
This was just a very short introduction to working with files and directories. Chapter 2 of this book gives many more details on this subject.
Using automatic Command Completion
Using this feature is as simple as pressing the Tab key. For example, the cat line command is used to display the contents of an ASCII text file. The name of this file, which is in the current directory, is thisisafile. So, to open this file, the user can type cat thi and then press the Tab key. If the directory has only one file that starts with the letters “thi,” Bash automatically completes the name of the file. If the directory has other files that start with the same letters, Bash will complete the name of the file as far as possible. For example, let’s say that there is a file in the current directory with the name thisisatextfile and another with the name thisAlsoIsAFile. Because both files start with the text this, Bash will complete only up to this and no further. To display a list of possibilities, you then press the Tab key again. This allows you to manually enter more information. Of course, you can then press the Tab key again to use the completion feature once more.
Bash command line completion has developed into a very rich solution. If you want to be able to use it in the best possible way, make sure the bash-completion software package is installed. In this package information is available that help you using bash completion in a very rich way, against many different commands.
![]() Tip Working with the Tab key really makes the command-line interface much easier. Imagine that you need to manage logical volumes on your server, and you remember only that the command for that starts with lv. In this case, you can type lv and press the Tab key twice. The result will be a nice list of all commands that start with lv, from which you’ll probably recognize the command that you need.
Tip Working with the Tab key really makes the command-line interface much easier. Imagine that you need to manage logical volumes on your server, and you remember only that the command for that starts with lv. In this case, you can type lv and press the Tab key twice. The result will be a nice list of all commands that start with lv, from which you’ll probably recognize the command that you need.
Working with Variables
A variable is simply a common value that is used often enough by the shell that it is stored with a name. Many system variables are available from the moment your system boots, but you can set variables yourself as well. For instance, when you use the command SWEET=good on the command line, you have temporarily defined a variable that you can use later (it will disappear if you close the current shell or open a new shell). Setting variables yourself is mainly interesting when writing shell scripts; you’ll read much more about this subject in Chapter 12.
Apart from the variables that you would define yourself, there are system variables as well. These system variables are stored in the user’s environment and help make it easier to work from the shell. An example of such a variable is PATH, which stores a list of directories that should be searched when a user enters a command. To refer to the contents of a variable, prefix a $ sign before the name of the variable. For example, the command echo $PATH displays the content of the current search path that Bash is using.
On any Linux system, you’ll get quite a few variables automatically when logging in. For an overview of all of them, you can use the env (short for environment) command. Listing 1-9 shows the result of this command.
Listing 1-9. The env Command Shows All Variables That Are Defined in Your Shell Environment
root@RNA:~# env
TERM=xterm
SHELL=/bin/bash
SSH_CLIENT=192.168.1.71 1625 22
SSH_TTY=/dev/pts/1
USER=root
MAIL=/var/mail/root
PATH=/usr/local/sbin:/usr/local/bin:/usr/sbin:/usr/bin:/sbin:/bin:/usr/games
PWD=/root
LANG=en_US.UTF-8
SHLVL=1
HOME=/root
LOGNAME=root
VISUAL=vi
When working from the command line, in some cases you’ll need to change some variables. Several of the most relevant variables are listed here:
· MANPATH: A lists of directories where your system will look for man pages.
· PATH: A list of directories that your system will search for executable files.
· HOSTNAME: The name of your computer. When booting, your computer reads this variable from the file /etc/HOSTNAME.
· PS1: The current prompt layout that your computer uses.
· SHELL: The name of the shell the current user is using.
· TERM: The terminal type that is used. This is an important variable, because it defines how text on your console is displayed.
· USER: The name of the current user.
· LANG: The current language settings and what language is used to display items like man pages. This variable is important for international users. POSIX is the setting for US English. If, for example, you want to use the French language, change this setting tofr_FR.UTF-8.
Normally, as a user, you’ll get your variables automatically when logging in to the system. The most important source of new variables is the /etc/profile file, a script that is processed for every user who logs in to the system. Want to add a new variable for all users on your system? Add it to the bottom of the /etc/profile file to make sure it is available for all users. You must, however, log in as the system administrator root if you want to do this, if you have some code you want to apply to /etc/profile. Also be aware that changes you make to/etc/profile only become active after you log out and back in to the system.
If you want to make sure that your variable experiments don’t cause harm to all users on your system, use the command cd ~ to change to your home directory, and in the directory, create a file with the name .profile. All users can have such a file in their home directories, and it will be treated as an addition to /etc/profile. So if you put a new variable in this file, it will be executed only for the user in whose home directory you inserted this file.
An alternative to the /etc/profile file is /etc/bashrc. This file is processed when a user opens a new shell. That happens for instance if you open a new terminal window from a graphical console. This file also has its counterpart in user home directories, with the name .bashrc. Some Linux distributions store all variables and other shell settings just in the bashrc file, and read this file from /etc/profile as well, to make sure that the settings are executed when users are logging in to the system.
Working with Bash history
Another useful feature of the Bash shell is the history feature, which lets you reuse commands you have recently used. Many distributions will remember the last 1,000 commands that a user has used; in fact the number of commands the shell remembers is defined in a variable itself. The name of this variable is HISTSIZE. The history feature is useful for sessions beyond even the current one. A file, named .bash_history, is created in the home directory of every user, and this file records the last 1,000 commands that the user has entered. You can see an overview of these commands by entering history at the Bash prompt. Listing 1-10 is an example of this list.
![]() Note In addition to the history command, you can also use the up/down arrow keys, page up/down keys, and Ctrl+P/Ctrl+N to browse the history.
Note In addition to the history command, you can also use the up/down arrow keys, page up/down keys, and Ctrl+P/Ctrl+N to browse the history.
Listing 1-10. The history Command Shows a List of All Commands That You Recently Used
sander@RNA:~$ history
....
182 ls -l -h
183 ls -l --human-readable
184 clear
185 ls -l /etc/hosts
186 ls -R / | less
187 ls -R
188 ls -R /
189 clear
190 ls -R /
191 clear
192 cd /
193 clear
194 less /etc/hosts
195 clear
196 ls -R / | less
197 clear
198 mail -s hello root
199 type ls
200 type cd
201 man ls
202 clear
203 ls --help | less
204 history
The history feature is especially useful because you can reissue any command from this list without typing it all over again. If you want to run any of the listed (and numbered) commands again, simply type its number preceded by an exclamation mark. In this example, typing !198 would run mail -s hello root again.
A user can also erase his or her history by using the history command. The most important option offered by this Bash internal command is -c, which clears the history list for that user. This is especially useful because everything that a user types at the command line—such as passwords—is recorded. So use history -c to make sure your history is cleared if you’d rather not have others knowing what you’ve been up to. Once you use this option, however, you can’t use the up arrow key to access previous commands, because those are all erased.
When a user works in a current shell session, the history is kept in memory only. When the shell is normally exited, the history file gets updated. If a shell it closed in a non-regular way, the history file won’t get updated. As a user you can manually force the history file to be updated, using the history -w command. If you want to make sure you’ll never loose your history, it’s a good idea to use this command.
Because everything you enter from the command line is saved in the file .bash_history in your home directory, I recommend never entering a plain-text password in the first place, even if you regularly erase the history. Never forget that the history file is also a default keylogger on your Linux system!
Managing Bash with Key Sequences
Sometimes, you’ll enter a command from the Bash command line, and either nothing happens at all or something totally unexpected happens. In such an event, it’s good to know that some key sequences are available to perform basic Bash management tasks. Here are some of the most useful key sequences:
· Ctrl+C: Use this key sequence to quit a command that is not responding (or simply takes too long to complete). This key sequence works in most scenarios where the command is operational and producing output to the screen. In general, Ctrl+C is also a good choice if you absolutely don’t have a clue as to what’s happening, and you just want to terminate the command that’s running in your shell. If used in the shell itself, it will close the shell as well.
· Ctrl+D: This key sequence is used to send the “end of file” (EOF) signal to a command. Use this when the command is waiting for more input, which is indicated by the secondary prompt (>). You can also use this key sequence to close a shell session.
· Ctrl+R: This is the reversed search feature. It will open the “reversed I-search” prompt, which helps you locate commands that you used previously. The Ctrl+R key sequence searches the Bash history, and the feature is especially useful when working with longer commands. As before, type the first characters of the command, and you will see the last command you’ve used that started with the same characters.
· Ctrl+Z: Some people use Ctrl+Z to stop a command that is running interactively on the console (in the foreground). Although it does stop the command, it does not terminate it. A command that is stopped with Ctrl+Z is merely paused, so that you can easily start it in the background using the bg command or in the foreground again with the fg command. To start the command again, you need to refer to the job number that the program is using. You can see a list of these job numbers using the jobs command. You will learn more on running commands in the background in Chapter 7. For the moment, just remember never to use this key sequence if you want to stop a command!
EXERCISE 1-3: WORKING WITH THE SHELL
1. Log in as root.
2. Type echo LANG. This echoes the text LANG to the STDOUT.
3. Type echo $LANG. This echoes the current contents of the language variable to the STDOUT.
4. Type LANG=fr_FR.UTF-8. You have now set the language variable to the French language.
5. Type ls --help. You’ll notice that the output of the command shows in French. Notice that on some distributions the language packages are not installed by default, so you won’t see a change in language after doing this.
6. Create a user florence, using the command useradd -m florence. Use passwd florence to set the password for user florence. Set it to “password”
7. Log in as user florence and type echo LANG=fr_FR.UTF-8 >> ~/.bashrc. This appends the LANG variable with its new value to the .bashrc file in this users home directory.
8. Still as florence, type ls --help. You’ll see the output still in English.
9. Log out, and log back in again as user Florence. Type ls --help again. You should now see French language output.
10.Type echo’ and press Enter. As the command is incomplete, it will show a > indicating it is waiting for additional input.
11.Use Ctrl-C to stop the command that is waiting.
Summary
In this chapter, you have learned about the essentials you’ll need to know to work with Linux. The following topics were covered:
· History of the Linux operating system
· What is open source?
· Differences between distributions
· Logging in to Linux
· Structure of a command, including options and arguments
· Piping and redirection
· Getting help with man and --help
· Working with the shell
Based on the information in this chapter, you now have the basic skills that are required to start using some commands. In the next chapter, you’ll learn about some useful commands and the way they work.
All materials on the site are licensed Creative Commons Attribution-Sharealike 3.0 Unported CC BY-SA 3.0 & GNU Free Documentation License (GFDL)
If you are the copyright holder of any material contained on our site and intend to remove it, please contact our site administrator for approval.
© 2016-2026 All site design rights belong to S.Y.A.