CompTIA Linux+ / LPIC-1 Cert Guide (Exams LX0-103 & LX0-104/101-400 & 102-400) (2016)
Chapter 9. Partitions and Filesystems
This chapter covers the following topics:
![]() Creating Partitions
Creating Partitions
![]() Filesystems
Filesystems
![]() Space Utilization
Space Utilization
This chapter covers the following exam objectives:
![]() Create partitions and filesystems: 104.1
Create partitions and filesystems: 104.1
![]() Maintain the integrity of filesystems: 104.2
Maintain the integrity of filesystems: 104.2
![]() Control mounting and unmounting of filesystems: 104.3
Control mounting and unmounting of filesystems: 104.3
![]() Manage disk quotas: 104.4
Manage disk quotas: 104.4
So far you’ve had an overview of the Linux File System Hierarchy Standard, learned a bit about how Linux treats filesystems, and seen how to manipulate files. It’s time to dig into the details of the filesystems: the different kinds, how to set them up, use their unique features, fix them when they break, and enforce quotas.
“Do I Know This Already?” Quiz
The “Do I Know This Already?” quiz enables you to assess whether you should read this entire chapter or simply jump to the “Exam Preparation Tasks” section for review. If you are in doubt, read the entire chapter. Table 9-1 outlines the major headings in this chapter and the corresponding “Do I Know This Already?” quiz questions. You can find the answers in Appendix A, “Answers to the ‘Do I Know This Already?’ Quizzes and Review Questions.”

Table 9-1 “Do I Know This Already?” Foundation Topics Section-to-Question Mapping
1. To modify a GUID partition table you would use (choose two):
a. fdisk
b. gdisk
c. genguid
d. parted
2. You are looking at a Linux partition table and the filesystem id is set to 83. What type of partition is this?
a. LVM
b. Swap
c. RAID
d. Linux
3. Which partition table allows you to have the largest number of primary partitions?
a. Master boot record
b. GUID partition table
c. Logical partition
d. Primary partition
4. Which of the following is not stored in the file’s inode?
a. Filename
b. File size
c. Owner
d. Location on disk
5. You are creating a file and are using an inode ratio of 4096. What does this mean?
a. 4096 inodes will be created per megabyte of disk space.
b. 1/4096 of the disk will be filled with inodes.
c. Inodes will be created in groups of 4096.
d. One inode will be created per 4096 bytes of disk space.
6. Your server will not complete booting because one of the filesystems won’t mount because of errors. Which command will help you the most?
a. fsck
b. df
c. du
d. mkfs
7. You are trying to figure out how much space David has used in his home directory: /home/david. Which command is most appropriate?
a. repquota –u david
b. du /home/david
c. df /home/david
d. find /home/david –ls
8. You want to make sure that a particular user never uses more than 1GB of disk space. What do you need to configure?
a. repquota
b. Soft limit
c. Grace period
d. Hard limit
Foundation Topics
Creating Partitions
Before a disk can be used by users to store their information, the systems administrator must perform a few tasks:
1. Install the device.
2. Partition it.
3. Make a filesystem on the partition(s).
4. Make or choose a mount point (directory).
5. Mount the filesystem
6. Configure the filesystem to be mounted on boot.
7. Set the permissions.
Linux devices are associated with a device file in the /dev directory. There are many preexisting files in this directory. As you saw in Chapter 1, “Installing Linux,” a hard drive has a corresponding device file similar to /dev/sda. The device is partitioned into one or more partitions such as /dev/sda1. A filesystem is applied to the partition, and then the device is grafted on to the rest of the filesystem to make the storage usable. Finally, the permissions are configured to allow the necessary people to access it.
Partitions
Disks on PCs can have up to four primary partitions per disk, and in cases when you need more than four, one of the primary partition slots can be exchanged for an extended partition. The extended partition can then be divided further into more partitions called logical partitions.
There is allowance for only one extended partition per disk. The extended partition can hold an unlimited number of logical partitions, although warnings abound to hold the number down to 12 or so.
The logical partitions inside an extended partition are virtually identical to a primary partition; they just happen to live only inside an extended partition. No perceivable difference exists between a primary and logical partition except in the numbering, position on disk, and the fact that the boot files for a Linux machine should exist on a primary partition.
Logical partitions exist to get around the four partition limitation in the master boot record.
Swap
Swap is used as a way to make the system pretend it has more RAM than it does. If the kernel needs to allocate more memory but has already allocated everything, it may copy some memory that hasn’t been used in a while to disk. The kernel can copy that information back to RAM if it’s ever needed without the applications knowing.
The cost for this is steep. A read- or write-to disk is order of magnitudes slower than the same operation in RAM. If you get some temporary memory pressure, swap can save you from a crash. In extreme cases the demand for memory greatly exceeds the available memory and the resulting swapping makes the system too slow to be usable.
Swap is normally configured as a separate partition on Linux systems. Swap files can be created on demand to satisfy a momentary need but won’t perform as well as if they were on a dedicated partition due to having to be accessed via the filesystem.
How much swap space should you have? It depends on your workload. In some server environments you may choose to run without swap if you would rather have the process crash than run slowly. On a workstation you may have swap that is one to two times the physical RAM, especially if you have a laptop that can hibernate by storing RAM to swap before powering off.
Older versions of Linux used to have limitations on how big swap could be or how many partitions were usable. Current limitations depend on the architecture of the computer but are practically bigger than you’ll ever need.
Disk Partitioning Tools
The canonical disk tool is the fdisk utility. Nearly every system has a copy of fdisk that can be used to create or alter the partition table. Having said that, various other tools can be used, and distribution vendors have come up with others that make the partitioning stage easier and clearer, or provide data migration along with partitioning. The three tools that must be discussed are

![]() fdisk—Included on nearly every system that runs Linux
fdisk—Included on nearly every system that runs Linux
![]() gdisk—Specifically for managing the gdisk partition tables discussed later in this chapter
gdisk—Specifically for managing the gdisk partition tables discussed later in this chapter
![]() parted—More features than the others, including reorganizing existing data
parted—More features than the others, including reorganizing existing data
fdisk
fdisk is a handy command line tool for managing the master boot record (MBR). If you’re trying to get a basic partition set up, you can’t do it any faster than with fdisk.
fdisk’s interface is line-based and has constantly disappearing lines of screen output, making it sometimes hard to remember where you are or what happened unless you have a scrollback buffer set in your terminal.
A key concept with fdisk is that your changes are not written to disk until you tell it to save. You can manipulate your partition table at will without fear of making any permanent changes until you’re ready.
Starting the fdisk tool to partition a drive is easy—just remember to specify the device file that contains the partition table you want to edit, such as
fdisk /dev/sda
The following steps show you how to create a quick layout of three partitions on a new disk with fdisk, including setting the swap and viewing your handiwork afterward:
1. Start the fdisk program, passing the name of the device. In this case, it’s sdb:
# fdisk /dev/sdb
Welcome to fdisk (util-linux 2.25.2).
Changes will remain in memory only, until you decide to write them.
Be careful before using the write command.
Device does not contain a recognized partition table.
Created a new DOS disklabel with disk identifier 0x25fd25d2.
2. There are no partitions per the previous message. But press p anyway to view the device details:
Command (m for help): p
Disk /dev/sdb: 8 GiB, 8589934592 bytes, 16777216 sectors
Units: sectors of 1 * 512 = 512 bytes
Sector size (logical/physical): 512 bytes / 512 bytes
I/O size (minimum/optimal): 512 bytes / 512 bytes
Disklabel type: dos
Disk identifier: 0x25fd25d2
3. This is a good time to verify you’re using the right disk. The message says it’s an 8GB drive, which is what’s expected here. If there were partitions, you could clear them out with the d command. You’re not deleting the data on the disk, just the part of the disk that points to the data. Think of data in this situation as lost instead of deleted.
4. Create a new partition by pressing the n key and then press the p key to make it a primary partition. After that, specify it’s the first partition:
Command (m for help): n
Partition type
p primary (0 primary, 0 extended, 4 free)
e extended (container for logical partitions)
Select (default p): p
Partition number (1-4, default 1): 1
5. You are then prompted to lay the partition out on disk in terms of the starting and ending sector. It’s best to accept the defaults for the starting sector, which here is 2048. You can then enter a value like +1G to indicate you want the partition to be one gigabyte. It may seem strange that the partition doesn’t start at the beginning of the disk, but fdisk is trying to align your partitions on disk in such a way that they start on 1MB boundaries. 2048 sectors at 512 bytes a piece is 1MB, and the first 1MB block contains your partition table so the new partition can’t overlap with it. This helps makes things faster as disks and operating systems expect these large blocks.
First sector (2048-16777215, default 2048): 2048
Last sector, +sectors or +size{K,M,G,T,P} (2048-16777215, default
16777215): +1G
Created a new partition 1 of type 'Linux' and of size 1 GiB.
6. Press p to verify that the partition was created, as shown in Example 9-1.
Example 9-1 Verify the Partition Was Created
Command (m for help): p
Disk /dev/sdb: 8 GiB, 8589934592 bytes, 16777216 sectors
Units: sectors of 1 * 512 = 512 bytes
Sector size (logical/physical): 512 bytes / 512 bytes
I/O size (minimum/optimal): 512 bytes / 512 bytes
Disklabel type: dos
Disk identifier: 0x2178bc7b
Device Boot Start End Sectors Size Id Type
/dev/sdb1 2048 2099199 2097152 1G 83 Linux
7. Create another partition for primary partition number 2 the same way you did the first, as shown in Example 9-2.
Example 9-2 Create Partition for Primary Partition Number 2
Command (m for help): n
Partition type
p primary (1 primary, 0 extended, 3 free)
e extended (container for logical partitions)
Select (default p): p
Partition number (2-4, default 2): 2
First sector (2099200-16777215, default 2099200):
Last sector, +sectors or +size{K,M,G,T,P} (2099200-16777215, default
16777215): +2G
Created a new partition 2 of type 'Linux' and of size 2 GiB.
Command (m for help): p
Disk /dev/sdb: 8 GiB, 8589934592 bytes, 16777216 sectors
Units: sectors of 1 * 512 = 512 bytes
Sector size (logical/physical): 512 bytes / 512 bytes
I/O size (minimum/optimal): 512 bytes / 512 bytes
Disklabel type: dos
Disk identifier: 0x2178bc7b
Device Boot Start End Sectors Size Id Type
/dev/sdb1 2048 2099199 2097152 1G 83 Linux
/dev/sdb2 2099200 6293503 4194304 2G 83 Linux
8. Allocate the rest of the disk to primary partition 3. The last part of the print command will look as follows:
Device Boot Start End Sectors Size Id Type
/dev/sdb1 2048 2099199 2097152 1G 83 Linux
/dev/sdb2 2099200 6293503 4194304 2G 83 Linux
/dev/sdb3 6293504 16777215 10483712 5G 83 Linux
9. The final two columns, Id and Type, are worth noting. Id 83 is for a regular Linux partition. If you want to use swap or LVM, you need to explicitly set the partition type with the t command. Set the second partition to swap, which is ID 82:
Command (m for help): t
Partition number (1-3, default 3): 2
Hex code (type L to list all codes): 82
Changed type of partition 'Linux' to 'Linux swap / Solaris'.
10. The third partition should be used as an LVM physical volume, which is id 8e (the number is in hexadecimal):
Command (m for help): t
Partition number (1-3, default 3): 3
Hex code (type L to list all codes): 8e
Changed type of partition 'Linux' to 'Linux LVM'.
11. Double check your work with the p command:
Device Boot Start End Sectors Size Id Type
/dev/sdb1 2048 2099199 2097152 1G 83 Linux
/dev/sdb2 2099200 6293503 4194304 2G 82 Linux swap / Solaris
/dev/sdb3 6293504 16777215 10483712 5G 8e Linux LVM
12. Finally, write your changes by pressing the w key and press Enter.
Caution
This operation is destructive, so take time to make sure you’re configuring the correct disk!
Command (m for help): w
The partition table has been altered.
Calling ioctl() to re-read partition table.
Syncing disks.
13. Confirming that you correctly partitioned the disk layout after a system is running or viewing the partition tables is easy. You can run the following command:
fdisk –l
Note
The exams test your basic knowledge about fdisk, which letter commands are used to accomplish which tasks, the types of partitions used by default, and so on.
For the real world, mail a copy of this output to your sysadmin’s account with this command:
# fdisk –l | mail me@example.com –s "Fdisk params for server X"
This sends an email to your external account with the subject shown in quotation marks, so you can find it if you mess up the partition table of the system.
Tools such as dd or sfdisk also back up your partition table just in case you mess things up beyond repair. Repair is also easy, just use the same tool to put the partition table back. No matter which way you go about it, the partition table is an important piece of your backup strategy.
gdisk
The MBR partition table format is long in the tooth. There are a few limitations:
![]() 2Tb limit on a partition size
2Tb limit on a partition size
![]() Only four partitions (extended partitions are a hack to get around this)
Only four partitions (extended partitions are a hack to get around this)
![]() No checksums, so a single bit error can render a disk useless
No checksums, so a single bit error can render a disk useless
For these reasons, and more, the Unified Extensible Firmware Interface (UEFI) specified that MBRs were to be replaced with GUID Partition Tables (GPT), which overcome these limitations. In particular, the maximum partition size is measured in zettabytes (billions of terabytes), and it supports up to 128 partitions.
The GPT is a different format than the MBR, but for compatibility reasons the MBR is stored on the first logical block and the GPT is stored on the second block. When present, the MBR uses a special filesystem id of 0xee, so that tools that expect an MBR see an unknown operating system and don’t attempt to claim the disk as their own.
You must be running a particular configuration to boot off a GPT disk. Either you need an EIFI compatible motherboard (instead of a legacy BIOS), or your bootloader must know about GPT. Later versions of GRUB understand this format, so most Linux distributions work fine.
As fdisk initially only worked with MBR partitions, gdisk was created to work with GPT. It behaves a lot like fdisk; you can run gdisk -l to view a disk’s partition information, as shown in Example 9-3.
Example 9-3 Using gdisk –l to View Partition Information
# gdisk -l /dev/sda
GPT fdisk (gdisk) version 0.8.10
Partition table scan:
MBR: MBR only
BSD: not present
APM: not present
GPT: not present
***************************************************************
Found invalid GPT and valid MBR; converting MBR to GPT format
in memory.
***************************************************************
Disk /dev/sda: 33554432 sectors, 16.0 GiB
Logical sector size: 512 bytes
Disk identifier (GUID): F2A2194A-E316-4A76-9AE4-986527922687
Partition table holds up to 128 entries
First usable sector is 34, last usable sector is 33554398
Partitions will be aligned on 2048-sector boundaries
Total free space is 6077 sectors (3.0 MiB)
Number Start (sector) End (sector) Size Code Name
1 2048 1026047 500.0 MiB 8300 Linux filesystem
2 1026048 33550335 15.5 GiB 8E00 Linux LVM
The preceding command gives a list of the partitions on a disk. gdisk points out that the disk only has an MBR partition and gives some details about it. The warnings about converting the table in memory can be ignored because the command is running in read-only mode.
Note
Not only do you need to rework your partitions and bootloader to boot from a GPT system on an existing MBR style disk, but you need to make some space at the end of your disk. GPT partition layouts store a duplicate copy of the partition table at the end of the disk for redundancy.
While it is possible to convert an existing MBR partition table to GPT, booting off it is more difficult as you need to create a partition for GRUB and this is not a great job for gdisk. For a new disk, gdisk behaves almost identically to fdisk. Begin by invoking the command on the disk, as shown in Example 9-4.
Example 9-4 Using gdisk to Convert an Existing MBR Partition Table to GPT
# gdisk /dev/sdb
GPT fdisk (gdisk) version 0.8.10
Partition table scan:
MBR: not present
BSD: not present
APM: not present
GPT: not present
Creating new GPT entries.
The output shows that there are no tables. gdisk creates the GUID partition table for you. This is all done in memory, just like fdisk, so at this point you can still back out without causing damage.
Listing the partitions shows the new GPT is empty, as shown in Example 9-5.
Example 9-5 List the Partitions
Command (? for help): p
Disk /dev/sdb: 16777216 sectors, 8.0 GiB
Logical sector size: 512 bytes
Disk identifier (GUID): CC47CA6B-6C9F-4C83-91CC-2FEC81254B39
Partition table holds up to 128 entries
First usable sector is 34, last usable sector is 16777182
Partitions will be aligned on 2048-sector boundaries
Total free space is 16777149 sectors (8.0 GiB)
Number Start (sector) End (sector) Size Code Name
Again, just like fdisk, the n command creates a partition, as shown in Example 9-6. The differences from fdisk are that you are prompted for the partition type, and the type is now a four-digit hexadecimal number instead of 2.
Example 9-6 Using n to Create a Partition
Command (? for help): n
Partition number (1-128, default 1): 1
First sector (34-16777182, default = 2048) or {+-}size{KMGTP}: 2048
Last sector (2048-16777182, default = 16777182) or {+-}size{KMGTP}: +7G
Current type is 'Linux filesystem'
Hex code or GUID (L to show codes, Enter = 8300): 8e00
Changed type of partition to 'Linux LVM'
Command (? for help): n
Partition number (2-128, default 2): 2
First sector (34-16777182, default = 14682112) or {+-}size{KMGTP}:
14682112
Last sector (14682112-16777182, default = 16777182) or {+-}size{KMGTP}:
16777182
Current type is 'Linux filesystem'
Hex code or GUID (L to show codes, Enter = 8300): 8200
Changed type of partition to 'Linux swap'
The partition types are mostly the same as before (see Example 9-7) with a trailing 00. You can then see your handiwork before saving it.
Example 9-7 Partition Verification
Command (? for help): p
Disk /dev/sdb: 16777216 sectors, 8.0 GiB
Logical sector size: 512 bytes
Disk identifier (GUID): CC47CA6B-6C9F-4C83-91CC-2FEC81254B39
Partition table holds up to 128 entries
First usable sector is 34, last usable sector is 16777182
Partitions will be aligned on 2048-sector boundaries
Total free space is 2014 sectors (1007.0 KiB)
Number Start (sector) End (sector) Size Code Name
1 2048 14682111 7.0 GiB 8E00 Linux LVM
2 14682112 16777182 1023.0 MiB 8200 Linux swap
Command (? for help): w
Final checks complete. About to write GPT data. THIS WILL OVERWRITE
EXISTING
PARTITIONS!!
Do you want to proceed? (Y/N): y
OK; writing new GUID partition table (GPT) to /dev/sdb.
The operation has completed successfully.
Parted
Parted is the Swiss army knife of disk partitioning tools. It can manage partition tables in both GPT and MBR formats and modify partition flags and sizes. Truth be told, the other utilities you’ve seen so far can do much the same thing but parted has a much nicer syntax. This is no excuse to forget about fdisk though: fdisk is on every system and in a crisis it might be all you have access to.
Be careful when resizing partitions, especially when shrinking. You need to shrink the underlying filesystem before the partition itself. When growing the partition, you need to expand the filesystem after expanding the partition. There exists a graphical partition manager, gparted, that resizes both the filesystem and the partition for you. Otherwise, you can use the command line tools like resizefs, which is covered in detail later.
Start parted just like the others, by passing the device on the command line:
# parted /dev/sdb
GNU Parted 3.2
Using /dev/sdb
Welcome to GNU Parted! Type 'help' to view a list of commands.
The command to create a partition is mkpart, and you can specify all the parameters on one line. Here you create a partition with the label “MyData” going from the beginning of the drive to the 7 Gigabyte marker, as shown in Example 9-8.
Example 9-8 Create a Partition with the Label “MyData” Going from the Beginning of the Drive to 7GB
(parted) mkpart MyData 0.0 7G
Warning: The resulting partition is not properly aligned for best performance.
Ignore/Cancel? ignore
(parted) p
Model: ATA VBOX HARDDISK (scsi)
Disk /dev/sdb: 8590MB
Sector size (logical/physical): 512B/512B
Partition Table: gpt
Disk Flags:
Number Start End Size File system Name Flags
1 17.4kB 7000MB MyData
Curiously, one thing that parted doesn’t do is set the filesystem type. As it turns out, Linux doesn’t care much about those ids—you can overwrite an LVM partition with swap and Linux won’t complain. Set it correctly when you have the option and you’ll spare someone, or some application, confusion later on.
Filesystems
Once you have the space on disk carved out into a partition, you need to tell Linux how to use that space. You might want to store files on it, either directly or indirectly through LVM. You may want to use it for swap.
A filesystem is an organizing construct that acts like a database or hierarchical structure that contains directories and files in a partition. The filesystem is what helps Linux lay out the files into their blocks on disk and to find those blocks later.
Think of everything on a Linux system as a file, starting with the filesystem itself. Typically inodes, or index nodes, store information about the file such as the owner, permissions, timestamps, and where the blocks making up the contents of the file are stored. Directory entries relate a filename to an inode, and a directory itself is just a list of directory entries for the files and subdirectories.
Filesystem Types
Linux supports different filesystems, which allows the administrator to choose the one that best suits the needs of the data. The more popular filesystems supported are
![]() ext2—The Linux extended filesystem, which was the default for a long time.
ext2—The Linux extended filesystem, which was the default for a long time.
![]() ext3—Essentially ext2 with journaling (logging) to help recover faster after a crash.
ext3—Essentially ext2 with journaling (logging) to help recover faster after a crash.
![]() ext4—Performance improvements made on top of ext3.
ext4—Performance improvements made on top of ext3.
![]() iso9660—The CD-ROM filesystem.
iso9660—The CD-ROM filesystem.
![]() udf—The DVD filesystem.
udf—The DVD filesystem.
![]() vfat—A 32-bit filesystem readable by Windows (FAT32).
vfat—A 32-bit filesystem readable by Windows (FAT32).
![]() nfs—The Network Filesystem by Sun Microsystems, which is the default network file sharing protocol for all of Unix/Linux.
nfs—The Network Filesystem by Sun Microsystems, which is the default network file sharing protocol for all of Unix/Linux.
![]() smb—The Samba filesystem is Microsoft’s default file sharing protocol for network shares. It’s otherwise known as CIFS (Common Internet File System).
smb—The Samba filesystem is Microsoft’s default file sharing protocol for network shares. It’s otherwise known as CIFS (Common Internet File System).
![]() xfs—The extent filesystem, adopted from Silicon Graphics (SGI) is a higher performance filesystem with many features.
xfs—The extent filesystem, adopted from Silicon Graphics (SGI) is a higher performance filesystem with many features.
![]() ReiserFS—At the time of its introduction ReiserFS had many novel features that have since been added to other filesystems. In particular it was first to introduce journaling and online resizing.
ReiserFS—At the time of its introduction ReiserFS had many novel features that have since been added to other filesystems. In particular it was first to introduce journaling and online resizing.
![]() btrfs—A filesystem still in development (but stable) that builds on ideas from ReiserFS and focuses on the administrative and performance needs of systems with huge amounts of storage.
btrfs—A filesystem still in development (but stable) that builds on ideas from ReiserFS and focuses on the administrative and performance needs of systems with huge amounts of storage.
There are more filesystems that can be used on block devices, plus there are all the pseudofilesystems such as procfs.
Each filesystem has advantages and disadvantages. They are mostly incompatible except for the ext2, ext3, and ext4 filesystems, which are mostly evolutions of the original ext standard.
Superblocks
Most filesystems have a superblock. The superblock contains information about the filesystem, such as filesystem size, inode statistics, and when the filesystem was last checked by a utility like the fsck command. It is usually stored in the first sector of the filesystem and is replicated multiple times, making it much easier to recover from errors. The first available backup superblock in the ext filesystems is usually stored at the 8,193rd block.
Inodes and Files
The files are laid out on disk in individual blocks, which may or may not be together. Each file has a corresponding inode, which contains information about the file (but not the name!) along with the list of blocks comprising the files.
It’s easy to see the inode of a file with the ls -i command:
$ ls -i .bashrc
15272747 .bashrc
From this command you can see that the .bashrc file is referenced by inode 15272747. You can get more information about what’s in the inode with stat:
$ stat .bashrc
File: '.bashrc'
Size: 966 Blocks: 8 IO Block: 4096 regular
file
Device: fd00h/64768d Inode: 15272747 Links: 1
Access: (0644/-rw-r--r--) Uid: ( 500/ sean) Gid: ( 500/ sean)
Access: 2014-10-07 09:17:48.000000000 -0500
Modify: 2014-10-07 09:17:48.000000000 -0500
Change: 2014-10-07 09:17:48.000000000 -0500
Birth: -
On the exam it’s important to know that everything descriptive about the file except the actual filename is stored in the inode. The file’s data is kept in the disk block, which is shown in the inode’s stat output. The total amount of inodes is set only at the filesystem creation, and their number cannot be changed without re-creating the filesystem.
The stat output tells you the various timestamps of the file, its ownership and permissions, and where it’s stored. Even though the file is less than 1k long, it takes up eight 512-byte blocks because the minimum block allocation is 4096 bytes.
The debugfs command lets you dig into the gory details of disk allocation, as shown in Example 9-9.
Example 9-9 debugfs Command
# debugfs /dev/mapper/VolGroup00-LogVol00
debugfs 1.41.14 (22-Dec-2010)
debugfs: cd /home/sean
debugfs: stat .bashrc
Inode: 15272747 Type: regular Mode: 0644 Flags: 0x0
Generation: 873527854 Version: 0x00000000
User: 500 Group: 500 Size: 966
File ACL: 0 Directory ACL: 0
Links: 1 Blockcount: 8
Fragment: Address: 0 Number: 0 Size: 0
ctime: 0x5433f60c -- Tue Oct 7 09:17:48 2014
atime: 0x5433f60c -- Tue Oct 7 09:17:48 2014
mtime: 0x5433f60c -- Tue Oct 7 09:17:48 2014
BLOCKS:
(0):15291419
TOTAL: 1
This information is virtually identical to what the command line stat showed, except that you can see that the file is stored on block 15291419. If you were to look at the filesystem at that location—15291419 blocks * 4096 bytes per block—you would see the start of the file.
Inodes and Directories
Directories have inodes too! Instead of pointing to the contents of the file, the disk blocks contain a list of files in the directory, along with the inodes that describe the file.
Figure 9-1 shows the relationship between inodes, files, and directories:
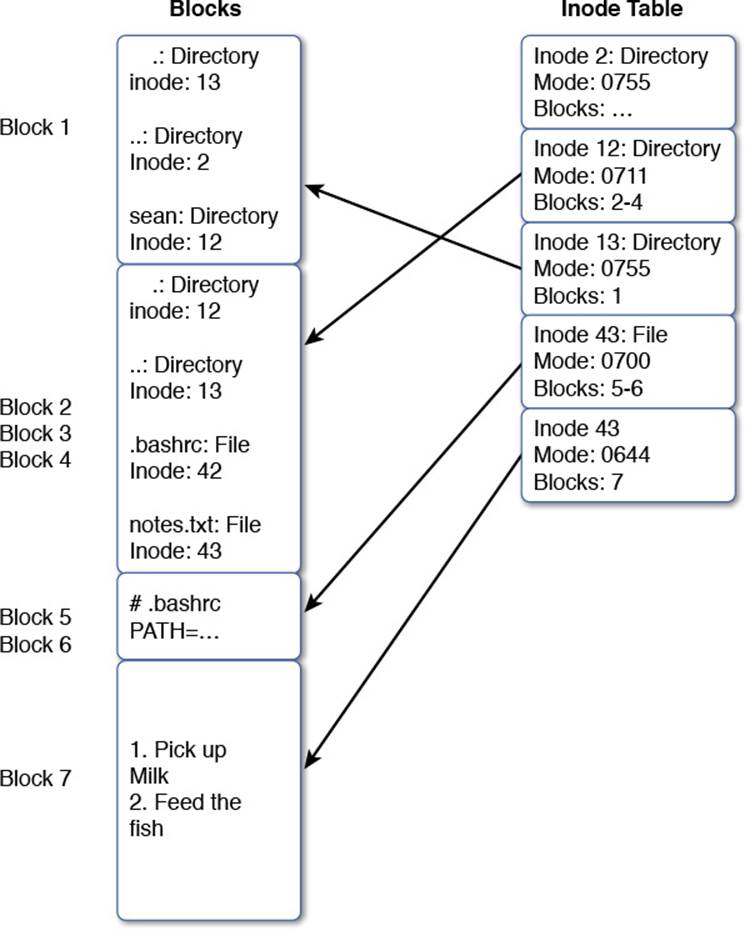
Figure 9-1 How inodes are used in directories
The filesystem has two structures on it. The first is the data blocks that contain the files and directories; the second is the inode table that has all the file metadata.
The first block is pointed to by inode 13. In that block are three directories: . is the directory itself, .. is the parent, and sean is a subdirectory at inode 12. Looking at inode 12 you can see that it is a directory with permissions 711 with information stored in blocks 2-4. Inside those blocks is a list of subdirectories and files. The . and .. directories are there along with two files. Following the inode chain for those files gets you the contents.
An important thing to take from Figure 9-1 is that the name of a directory is always found in its parent. Thus, being able to walk the list of inodes and directory blocks is important. The other thing to note is that there’s nothing magical about directories: They’re just a list of pointers to inodes.
This diagram also helps reinforce the difference between hard and soft links. A hard link adds a new directory entry to the inode, increasing the link count.
Inodes and Disk Space
Each file and directory needs an inode. Most filesystems are created with a fixed number of inodes, so if it runs out no more files can be stored even if there is free space.
The number of inodes, by default, is calculated as a ratio of bytes per inode, so a lower value gives you more inodes. If you would rather specify the exact number of inodes there is an option for that, which is seen shortly.
If a filesystem is to contain a lot of little files, such as many HTML or cache files, it should be formatted to contain many inodes so that more files can be stored. This is done using the smallest ratio available, effectively creating more inodes to handle the possible number of files. Practically, this would mean setting the bytes per inode to the same as the disk block size.
This topic is largely for the benefit of the exam. These days disks are so large that you get an incredible number of inodes. It’s rare to exhaust your inodes even at the default settings. The most common problem is that an application goes berserk and creates a lot of zero byte files without cleaning them up.
If you’re expecting to fill your disk with files smaller than 16K, the inode ratio may be an issue. Otherwise, you’re going to run out of disk space first.
The real danger of having a large block size and relatively few inodes (such as for a database server) is that you might run out of available inodes and still have disk space left over. A system can run completely out of inodes and still have available disk space, a situation that often requires extensive troubleshooting and work to remedy.
The inodes themselves take up 128 bytes of space each, or about 8,000 per megabyte of space. You must strike a balance between the number of files on disk and the size of the files. Too many inodes and you’re wasting space with inodes that never get used. Not enough and you’ll run out before the disk is full.
The df -i command shows inode utilization.
$ df -i
Filesystem Inodes IUsed IFree IUse% Mounted on
/dev/mapper/VolGroup00-LogVol00
60686336 1500786 59185550 3% /
Here you can see that the root filesystem has about 60 million inodes and is using 3% of them.
Creating Filesystems
You wipe out any existing files on the partition when you create a filesystem, so it always pays to think twice about your filesystem related commands before you press that Enter key!
The mkfs Command
Even though you have your choice of many different filesystems, the commands to create them are fairly consistent. The mkfs command is a front end for these individual programs that create filesystems. The mkfs command, when used with the -t fstype option, calls the mkfs.fstypeprogram to make the actual filesystem. Here’s an example:
mkfs –t ext4 /dev/sdb1
This command executes the mkfs program, supplying the type of ext4, which in turn executes the mkfs.ext4 program against the target partition, creating an Ext4 filesystem.
The long commands, (called filesystem builders) can be invoked directly, saving some time and confusion, as shown here:
mkfs.ext4 /dev/sda5
The DOS and ext2 filesystem builders have additional shortcuts of mkdosfs and mke2fs, respectively.
Other filesystem creation mk tools are available on the system. Here is a sample list of the important ones:
![]() mkisofs—Creates ISO filesystems and is used for CD creation
mkisofs—Creates ISO filesystems and is used for CD creation
![]() mknod—Creates special files (dev files, named pipes, and so on)
mknod—Creates special files (dev files, named pipes, and so on)
![]() mkraid—Creates RAID sets from separate disks
mkraid—Creates RAID sets from separate disks
![]() mkswap—Makes a partition or file into swap space for use as part of virtual memory
mkswap—Makes a partition or file into swap space for use as part of virtual memory
Filesystem Creation Options
Creating filesystems can either be quick and easy or take some time and involve many options. Several examples of quick and easy were given in the previous section, so let’s dive into the long and involved ones.
Creating a specific filesystem such as ext3 is accomplished with one of three methods:
mkfs –t ext3 device
mkfs.ext3 device
mke2fs –j device
The first two options are synonyms. The third variant uses the -j option to create an ext filesystem with a journal, which turns out to be ext3. The contents of /etc/mke2fs.conf also have an impact on these commands.
Setting other options for the filesystem is accomplished with either a specific option or the general-purpose -O option (which allows you to specify multiple options after -O).
In Example 9-10, the command creates an ext3 filesystem on the /dev/sdb1 partition with a 4,096 block size, a reserved block percentage of 2%, a volume label of data, and the sparse_super option for fewer superblock copies for the disk:
Example 9-10 mkfs and Options
# mkfs.ext3 -b 4096 -m 2 -L data -O sparse_super /dev/sdb1
mke2fs 1.42.11 (09-Jul-2014)
/dev/sdb1 contains a ext4 file system
created on Thu Feb 19 00:27:24 2015
Proceed anyway? (y,n) y
Creating filesystem with 1708980 4k blocks and 427392 inodes
Filesystem UUID: 2d6fa418-77f9-47f3-b6ad-e36026cda3a9
Superblock backups stored on blocks:
32768, 98304, 163840, 229376, 294912, 819200, 884736, 1605632
Allocating group tables: done
Writing inode tables: done
Creating journal (32768 blocks): done
Writing superblocks and filesystem accounting information: done
Note
On the exam, you need to know exactly what the options do and how to format them properly. The previous examples should serve as a firm foundation. Practice making all the various types of filesystems with the more common options.
The filesystem parameters can be checked with the dumpe2fs command, as shown in Example 9-11.
Example 9-11 dumpe2fs
# dumpe2fs -h /dev/sdb1
dumpe2fs 1.42.11 (09-Jul-2014)
Filesystem volume name: data
Last mounted on: <not available>
Filesystem UUID: 5b5a4a07-57e6-417c-8f1c-7d32e6c1bfeb
Filesystem magic number: 0xEF53
Filesystem revision #: 1 (dynamic)
Filesystem features: has_journal ext_attr resize_inode dir_index
filetype sparse_super large_file
Filesystem flags: signed_directory_hash
Default mount options: user_xattr acl
Filesystem state: clean
Errors Continue
Filesystem OS type: Linux
Inode count: 427392
Block count: 1708980
Reserved block count: 34179
Free blocks: 1645584
Free inodes: 427381
First block: 0
Block size: 4096
Fragment size: 4096
Reserved GDT blocks: 417
Blocks per group: 32768
Fragments per group: 32768
Inodes per group: 8064
Inode blocks per group: 504
Filesystem created: Sun Feb 22 13:31:36 2015
Last mount time: n/a
Last write time: Sun Feb 22 13:31:36 2015
Mount count: 0
Maximum mount count: -1
Last checked: Sun Feb 22 13:31:36 2015
Check interval: 0 (<none>)
Reserved blocks uid: 0 (user root)
Reserved blocks gid: 0 (group root)
First inode: 11
Inode size: 256
Required extra isize: 28
Desired extra isize: 28
Journal inode: 8
Default directory hash: half_md4
Directory Hash Seed: 60f8ddfe-961e-40af-8770-381bc895e28b
Journal backup: inode blocks
Journal features: (none)
Journal size: 128M
Journal length: 32768
Journal sequence: 0x00000001
Journal start: 0
The use of the -h option keeps the group information from showing up, which is usually unnecessary unless an error occurs on the filesystem.
Advanced Filesystem Commands
The filesystems on your machines are relatively robust but need some care and attention now and then. Different tools can be used to check the filesystems, configure settings that affect their performance, and debug their operations.
Filesystem Checker
When a filesystem is broken or has errors, an fsck (filesystem check) is in order. The mount count and maximum mount count are how the system knows when to check the filesystem structure and data health (see the section “Tuning Filesystems” for more on mount counts and usingtune2fs). On a filesystem such as ext4, this is important because a periodic check can save you hours of heartache and troubleshooting (repairing the filesystem after a crash) when the data is most needed.
When you run fsck, it’s really delegating the work to the appropriate filesystem check tool. These commands are
![]() e2fsck—Shortcut for checking the ext filesystems
e2fsck—Shortcut for checking the ext filesystems
![]() dosfsck—Used for all varieties of the DOS/FAT filesystem
dosfsck—Used for all varieties of the DOS/FAT filesystem
![]() reiserfsck—Used for the ReiserFS filesystem
reiserfsck—Used for the ReiserFS filesystem
fsck does not do anything for XFS filesystems, so you must use xfs_repair on its own.
The fsck tool uses the /etc/fstab file to automatically check filesystems at system start. If a filesystem is marked unclean for reasons that include a power outage, unexpected system stoppage, or other event that didn’t let the system finish writing to disk properly, a lengthy check of the filesystem is probably required.
The worst scenario is filesystem damage, usually noticed when restarting a system that crashed or was turned off abruptly. The system attempts to run a quick fsck session on the filesystems noted in /etc/fstab, beginning with those that have a 1 in the sixth column, and continuing on numerically until finished. The fsck program skips any that have a 0 (zero) in the sixth column. The fstab file looks like this:
UUID=6489f3c4-13fd-449e-8648-918b58a948f5 / ext3
noatime 1 1
All filesystems that have a 1 in the column are checked first in parallel, then any that have a 2 in the column in parallel, and so on. In this example, the filesystem will be checked on the first pass because the final column is 1.
If the filesystem was shut down cleanly, such as through the shutdown or halt commands, then fsck doesn’t need to check anything. It is rare to have a mounted filesystem with corruption. When a filesystem is properly unmounted anything cached in memory is flushed to disk and fsckdoesn’t need to check anything. If the computer was shut down abruptly, it’s possible that some of this cache is lost and what is on disk may be missing something. It is the job of fsck to fix any damage caused by this missing data.
If the damage is too great to fix automatically, the system presents you with a message stating “Ctrl-d to continue, otherwise enter the root password to perform a filesystem check.” Entering the root password displays the shell prompt and prints a helpful message that tells you the filesystem that needs checking. fsck options that can help the busy sysadmin include
![]() –A—Moves through /etc/fstab checking all filesystems in one long pass
–A—Moves through /etc/fstab checking all filesystems in one long pass
![]() –C—Percentage or hash mark progress bars for any operations that support their display
–C—Percentage or hash mark progress bars for any operations that support their display
![]() –N—Performs a dry run (makes no changes), showing what would be done; doesn’t change anything (good for seeing how bad it is)
–N—Performs a dry run (makes no changes), showing what would be done; doesn’t change anything (good for seeing how bad it is)
![]() –V—Produces verbose output for everything, including commands that are being executed by fsck
–V—Produces verbose output for everything, including commands that are being executed by fsck
![]() –a—Doesn’t ask questions and noninteractively repairs the filesystem
–a—Doesn’t ask questions and noninteractively repairs the filesystem
fsck makes five passes or types of changes to the filesystem, shown here:
![]() Pass 1—Checking inodes, blocks, and sizes
Pass 1—Checking inodes, blocks, and sizes
![]() Pass 2—Checking directory structure
Pass 2—Checking directory structure
![]() Pass 3—Checking directory connectivity
Pass 3—Checking directory connectivity
![]() Pass 4—Checking reference counts
Pass 4—Checking reference counts
![]() Pass 5—Checking group summary information
Pass 5—Checking group summary information
When fsck finds serious errors such as blocks claimed by multiple files (cross-linked), blocks claimed outside the filesystem, too few link counts (the number of directories linked to an inode), or unaccounted blocks or directories that correspond to unallocated inodes, it displays an error message and asks to be run manually.
Note
Always only run fsck on unmounted or read-only mounted filesystems. This is mandatory; otherwise, fsck might perform an operation on a file a user has open, causing corruption. If it’s the root filesystem, you should either do it in single-user mode or use the rescue CD-ROM to ensure that the root is mounted read-only.
Example 9-12 shows a sample of a check on a filesystem.
Example 9-12 Sample Check on a Filesystem
# fsck -v /dev/sda1
fsck from util-linux 2.25.2
e2fsck 1.42.11 (09-Jul-2014)
/dev/sda1 is mounted.
e2fsck: Cannot continue, aborting.
# umount /dev/sda1
# fsck -v /dev/sda1
fsck from util-linux 2.25.2
e2fsck 1.42.11 (09-Jul-2014)
/dev/sda1: clean, 430/128016 files, 182615/512000 blocks
The system would not run fsck on a mounted filesystem, so it failed with an error. When it did finally run, fsck reports the system as clean, so there was no need to run the checks. Running it again with the -f option forces a check, as shown in Example 9-13.
Example 9-13 –f Forces a Check
# fsck -v -f /dev/sda1
fsck from util-linux 2.25.2
e2fsck 1.42.11 (09-Jul-2014)
Pass 1: Checking inodes, blocks, and sizes
Pass 2: Checking directory structure
Pass 3: Checking directory connectivity
Pass 4: Checking reference counts
Pass 5: Checking group summary information
430 inodes used (0.34%, out of 128016)
4 non-contiguous files (0.9%)
2 non-contiguous directories (0.5%)
# of inodes with ind/dind/tind blocks: 0/0/0
Extent depth histogram: 420/1
182615 blocks used (35.67%, out of 512000)
0 bad blocks
0 large files
403 regular files
17 directories
0 character device files
0 block device files
0 fifos
0 links
1 symbolic link (1 fast symbolic link)
0 sockets
------------
421 files
Tuning Filesystems
The tune2fs command is used to set parameters after the filesystem is created. For example, the maximum mount count dictates how many times a filesystem can be mounted before an fsck is forced on it. This number is set to 20 by default unless you set it at filesystem creation or change it afterward with tune2fs. An example of setting the mount count to 0 (zero) for an ext3 journaling filesystem is shown here:
tune2fs –c 0 /dev/sda1
When an application writes to disk, the kernel can cache that write in memory to make the application faster. If the computer reboots before the memory is flushed to disk, the data is lost and corruption of the disk has happened. With a journaling filesystem the write is always logged to a journal, which can be done quickly. The fsck that happens on boot can then replay that journal and get the filesystem back to a known good state with no data loss.
By using the journal there is almost no chance at corruption, so there is no need for periodic filesystem checks. Journaling writes to a disk are therefore a good thing to have in a filesystem.
In addition to the mount count, error checking can be altered with tune2fs -e so the system does one of three things when a filesystem error is detected by the kernel:
![]() Continue—Continues normally
Continue—Continues normally
![]() remount-ro—Remounts the filesystem read-only, ready to fsck
remount-ro—Remounts the filesystem read-only, ready to fsck
![]() Panic—Causes the kernel to panic, which stops the system (not recommended unless you’re a system tester)
Panic—Causes the kernel to panic, which stops the system (not recommended unless you’re a system tester)
The reserved percentage (space available only to the root user) associated with the root user can also be associated with a system group with the -g option, such as
tune2fs –g admins /dev/sdb1
XFS Commands
The ext filesystems may get most of the attention, but you shouldn’t ignore xfs. It is now the default filesystem for some enterprise Linux systems because it has high performance for large files and has advanced journaling and online backup features.
Making the filesystem is just like ext4, as shown in Example 9-14.
Example 9-14 Making the Filesystem with xfs
# mkfs -t xfs -f /dev/sdb1
meta-data=/dev/sdb1 isize=256 agcount=4, agsize=427245
blks
= sectsz=512 attr=2, projid32bit=1
= crc=0 finobt=0
data = bsize=4096 blocks=1708980,
imaxpct=25
= sunit=0 swidth=0 blks
naming =version 2 bsize=4096 ascii-ci=0 ftype=0
log =internal log bsize=4096 blocks=2560, version=2
= sectsz=512 sunit=0 blks, lazy-
count=1
realtime =none extsz=4096 blocks=0, rtextents=0
Many of the parameters are best left at defaults. One parameter to note is the log, which says where the journal will go. By default it goes on the same device as the filesystem, but you can choose to place it on a dedicated device if it is needed for performance.
You can also see these same details with the xfs_info command.
Some advanced commands are different between ext4 and xfs. Instead of using fsck to look for and fix problems, you use xfs_check to look for problems and fix the problems with xfs_repair. If the repair fails you may need to use xfs_metadump if you call a vendor for support. This command puts debugging information into a file that helps the vendor diagnose the problem.
An interesting thing about xfs is that you can grow the filesystem with xfs_growfs, but you can’t shrink it. This is not because of technical reasons but because the project hasn’t implemented it! It’s a lot of work to implement that could be better spent on other features, and as it turns out, people rarely need to use it.
A final feature of xfs—it supports online defragmentation (called reorganization in xfs lingo) through the xfs_fsr command. Over time the blocks comprising a single file might be placed in different parts of the disk, which means it’s fragmented and will have lower performance because the disk heads need to seek more. Reorganizing, or defragmenting, the file copies it to a new spot where it’s in a contiguous series of blocks.
Debugging Filesystems
The debugfs command is useful for debugging and fiddling with the filesystems on your machine, which is needed if you need to recover from an errant deletion or corruption. It’s also possible to delete or corrupt a portion or all of the filesystem, so extreme caution is recommended. Fortunately it’s run in read-only mode by default for your own safety, and you have to go out of your way to make changes. You’ve been warned.
The debugfs tool is interactive, with a command-line shell environment you can get help with by typing ? and pressing Enter.
For example, you can enter the tool simply by typing
debugfs /dev/sdb5
Then type ? and press Enter to see a menu of commands available to you. Interesting and informative commands include
![]() open—Opens a filesystem for debugging
open—Opens a filesystem for debugging
![]() features—Shows the filesystem’s feature set
features—Shows the filesystem’s feature set
![]() stats—Shows the statistics for the filesystem and is similar to the dumpe2fs –h output
stats—Shows the statistics for the filesystem and is similar to the dumpe2fs –h output
![]() ls—Shows the directory, which by default is the root (/)
ls—Shows the directory, which by default is the root (/)
![]() pwd—Shows the working directory
pwd—Shows the working directory
![]() undelete—Undeletes a file (used immediately after the deletion in successful cases)
undelete—Undeletes a file (used immediately after the deletion in successful cases)
![]() logdump—Shows the contents of the journal (if in a journal-led filesystem)
logdump—Shows the contents of the journal (if in a journal-led filesystem)
![]() quit—Quits the tool
quit—Quits the tool
Mounting and Unmounting
Filesystems must be mounted to be used. Mounting a filesystem places it in the directory tree where users can access it.
Unmounting is equally important as Linux keeps some information in memory and only writes it to disk when it is advantageous to do so. This keeps things fast but can lead to unclean filesystems if the power were to be suddenly turned off. Unclean filesystems lead to long nights watchingfsck run and the possibility of data corruption. Data corruption leads to uncomfortable discussions with your manager. So shut down your servers cleanly!
When you are mounting a filesystem you need to be able to tell Linux how to find that device. There are different ways to do this. The first is to refer to the device, such as /dev/sda1. This works on a small scale, but if you add or remove hardware the device names can change.
To get around this unpredictable naming, information can be stored inside the superblock of the filesystem to identify that particular filesystem. The two elements used are the filesystem label and the universally unique identifier (UUID). The label is a human generated name that should be unique across all disks, while the UUID is generated when the filesystem is made and should always be unique.
You can see your label and UUIDs with the blkid command:
# blkid
/dev/sda1: UUID="4d2b8b91-9666-49cc-a23a-1a183ccd2150" TYPE="ext4"
/dev/sda3: LABEL="flubbers" UUID="bab04315-389d-42bf-9efa-
b25c2f39b7a0" TYPE="ext4"
/dev/sda4: UUID="18d6e8bc-14a0-44a0-b82b-e69b4469b0ad" TYPE="ext4"
Here, you can see that each filesystem has a UUID to identify it, and the second one was also assigned a label of “flubbers”.
The Filesystem Table
The filesystem table, /etc/fstab, is a configuration file that tells the system which mounts it should know about. While the administrator can always mount a filesystem manually, having the mount described in fstab ensures that it happens when the system boots and that the correct options are used every time.
An added bonus of using fstab is that when you provide only the mount point or device when manually mounting, the fstab file is consulted to determine the rest of the information, including mount options.
Filesystems should be set up in /etc/fstab, one per line. Any mounted filesystem, whether or not it is in fstab is also reflected in /etc/mtab automatically by the system. This information (or most of it) is also in the /proc/mounts file.
Type the mount command to see the current list of filesystems. Here’s an example:
$ mount
/dev/sda1 on / type ext4 (rw,errors=remount-ro)
proc on /proc type proc (rw,noexec,nosuid,nodev)
sysfs on /sys type sysfs (rw,noexec,nosuid,nodev)
udev on /dev type devtmpfs (rw,mode=0755)
devpts on /dev/pts type devpts (rw,noexec,nosuid,gid=5,mode=0620)
tmpfs on /run type tmpfs (rw,noexec,nosuid,size=10%,mode=0755)
/dev/sda3 on /mnt/data type ext4 (rw)
/dev/sda4 on /mnt/timemachine type ext4 (rw)
Compare this to the contents of /etc/mtab:
$ cat /etc/mtab
/dev/sda1 / ext4 rw,errors=remount-ro 0 0
proc /proc proc rw,noexec,nosuid,nodev 0 0
sysfs /sys sysfs rw,noexec,nosuid,nodev 0 0
udev /dev devtmpfs rw,mode=0755 0 0
devpts /dev/pts devpts rw,noexec,nosuid,gid=5,mode=0620 0 0
tmpfs /run tmpfs rw,noexec,nosuid,size=10%,mode=0755 0 0
/dev/sda3 /mnt/data ext4 rw 0 0
/dev/sda4 /mnt/timemachine ext4 rw 0 0
And the same view of the mounted disks, but through /proc/mounts:
$ cat /proc/mounts
rootfs / rootfs rw 0 0
sysfs /sys sysfs rw,nosuid,nodev,noexec,relatime 0 0
proc /proc rw,nosuid,nodev,noexec,relatime 0 0
udev /dev devtmpfs rw,relatime,size=1980172k,nr_inodes=495043,mode=755
0 0
devpts /dev/pts devpts rw,nosuid,noexec,relatime,gid=5,mode=620,ptmxm
ode=000 0 0
tmpfs /run tmpfs rw,nosuid,noexec,relatime,size=404804k,mode=755 0 0
/dev/disk/by-uuid/309b3416-5a59-4954-b4a6-f2c105d9aac5 / ext4
rw,relatime,errors=remount-ro,data=ordered 0 0
/dev/sda3 /mnt/data ext4 rw,relatime,data=ordered 0 0
/dev/sda4 /mnt/timemachine ext4 rw,relatime,data=ordered 0 0
All three outputs show roughly the same information except that the information in /proc/mounts is the most detailed. The first two examples omit any default options, but /proc/mounts shows all mount options whether they’re default or provided.
The filesystem table should consist of one line per filesystem, with a device, a mount point, a filesystem type, options, and dump/check orders. This file should be modifiable only by the root user; otherwise, any user could put a removable device or disk in the system and mount it, potentially replacing system tools with their own.
Here’s an example of a live /etc/fstab file:
LABEL=/ / ext3 defaults 1 1
LABEL=/boot /boot ext3 defaults 1 2
LABEL=/data /data ext3 defaults 1 2
none /proc proc defaults 0 0
none /dev/shm tmpfs defaults 0 0
/dev/sr0 /cdroms ext2 defaults 0 0
/dev/sda3 swap swap defaults 0 0
/dev/sdb1 /mnt/media auto noauto,user 0 0
/dev/cdrom /mnt/cdrom iso9660 noauto,users,ro 0 0
The column contents (from left to right) are as follows:
![]() Device—This is any device; local dev files, NFS shares, or partition labels.
Device—This is any device; local dev files, NFS shares, or partition labels.
![]() Mount point—This is any directory where the device’s filesystem will be attached. It should initially be empty.
Mount point—This is any directory where the device’s filesystem will be attached. It should initially be empty.
![]() Filesystem type—This is a valid filesystem type.
Filesystem type—This is a valid filesystem type.
![]() Options—Options are separated by a comma. The defaults option is made up of rw, suid, dev, exec, auto, nouser, and async, or any filesystem specific options.
Options—Options are separated by a comma. The defaults option is made up of rw, suid, dev, exec, auto, nouser, and async, or any filesystem specific options.
![]() Dump—If this value is 0 (zero), the dump command doesn’t act on it; otherwise, a 1 indicates that the filesystem should be dumped on demand.
Dump—If this value is 0 (zero), the dump command doesn’t act on it; otherwise, a 1 indicates that the filesystem should be dumped on demand.
![]() fsck—This causes the filesystem with a 1 to be checked first and then those with a 2 and so on to be checked next.
fsck—This causes the filesystem with a 1 to be checked first and then those with a 2 and so on to be checked next.
The columns closely match the order in which you specify the manual mount command. Add a -t before the type, an -o before the options, and drop the last two columns and you have a mount command. The fstab format also lets you mount filesystems by label or UUID instead of device, which are separate options to mount.
The auto option in the filesystem column for the sdb1 removable media disk probes the superblock for the device to attempt identification of the filesystem type. This works for nearly any other filesystem type, including ext2, ext3, iso9660, udf, and ntfs to name a few.
Notice also the mutually exclusive user and users options in the USB and CD-ROM entries’ options column. These enable either exclusive or nonexclusive mounting for users on that device.
For example, if the user option is present for the system’s CD-ROM and the daytime user Sally mounts her favorite Taylor Swift release into the drive and plays it, only user Sally (and the root user) can unmount that CD-ROM.
This is unacceptable to Steven the night shift operator, who simply must have his Dust Rhinos CD-ROM to help the night pass. Steven should request that the root user switch that option with the users option, which allows any user to mount the device and any other user to unmount it.
Manually Mounting Filesystems
If a filesystem isn’t configured in the /etc/fstab file, it can be mounted manually following this convention:
mount –t type –o option device mountpoint
The following example of a manual mount includes the type, the option, the device, and a mount point:
mount –t iso9660 –o exec /dev/cdrom /mnt/cdrom
With this mount command, the system’s CD-ROM is mounted, allowing users access to the contents. The exec option also means that files on the disk can be executed, such as if the CD-ROM included a software installation file.
Important mounting options include
![]() -a—Mounts all filesystems listed in /etc/fstab
-a—Mounts all filesystems listed in /etc/fstab
![]() -f—Fakes the mounting of filesystems
-f—Fakes the mounting of filesystems
![]() -r—Mounts the filesystem read-only
-r—Mounts the filesystem read-only
![]() -w—Mounts the filesystem in write mode
-w—Mounts the filesystem in write mode
![]() –n—Mounts without updating /etc/mtab
–n—Mounts without updating /etc/mtab
![]() –L—Mounts a filesystem with a given label, instead of using the device filename
–L—Mounts a filesystem with a given label, instead of using the device filename
Automatically Mounting Filesystems
All filesystems in the /etc/fstab and don’t have the noauto option set are mounted when the system is booted. This is equivalent to issuing a mount –a command as the root user.
The noauto option is necessary for removable USB drives and CD-ROMs because access errors would occur if an empty removable media drive were to be affected by the mount system call. This option is also useful for rarely needed or user-specific filesystems, allowing a script or user to invoke the mount as desired.
Unmounting Filesystems
The unmounting command name is umount, and it works similarly to the mount command, acting on the label, mount point, or device listed in the /etc/fstab entry.
For example, to unmount the /mnt/cdrom, use either of the following:
umount /mnt/cdrom
umount /dev/cdrom
The most important fact about the umount command is that it doesn’t let you unmount any device currently in use, including a device that has a user accessing it via a file manager, a shell session, or a file in use on that device. If you don’t know who is using the filesystem, the fusercommand is there to help:
# fuser -m /mnt/data/
/mnt/data: 1929c
The -m option denotes a mounted filesystem and returns a list of all processes with an open file on that device. In this case /mnt/data is being used by process 1929 and the c denotes that the process is using it as its current directory. The process needs to be killed, or the user needs to get out of the directory, before the device can be unmounted.
Space Utilization
There are several methods of determining the space used by data on your system. It’s important to know when to use which command because each acts differently and displays different information.
Note
The LPI exams test whether you can parse the question and whether you know what the various utilities produce as output. If you’ve not used the options for the du and df commands, some questions will be unanswerable.
Using du
To see the space used by a set of files or a file tree, you use the du command. This command is configurable to show file and directory sizes, including summarization and human-readable output (KB, MB, and GB).
To summarize the disk usage, in blocks, for each file and directory, use the following command:
# du *
8 a_directory
4 go
4 sharing
This command descends into directories, such as the first line in the preceding example. The value reported next to the name of the directory or file is the number of blocks in the file, or in all the files underneath that directory.
To see the current directory and all below with KB/MB/GB human-readable output, use the following command:
# du –h
24K ./.gconfd
8.0K ./.gstreamer
8.0K ./.gconf/desktop/gnome/applications/window_manager
12K ./.gconf/desktop/gnome/applications
8.0K ./.gconf/desktop/gnome/file_views
24K ./.gconf/desktop/gnome
28K ./.gconf/desktop
... Output removed
To view the space used by all files on a given directory tree, such as the /home user’s tree, use this command:
du –sh /home
Typical output would look like this:
404 MB /home
It’s important when using du to not traverse NFS systems across the network, causing extra traffic and annoying other users. To restrict your query to the local system only, use the following:
du –shx /home
22M /home
Without the x option, (which restricts du to the local system) a remotely mounted user’s home directory or attached separate disk drive is shown in the output. Therefore, you should know from which drive and system the data is shown.
Using df
The df command is different from the du command: It operates on filesystems rather than files.
The df command displays used and available disk space for all mounted filesystems, on a per-filesystem basis (shown here with the -h human readable output option) such as
# df –h
Filesystem Size Used Avail Use% Mounted on
/dev/sda2 5.5G 1.8G 3.5G 34% /
/dev/sda1 99M 9.3M 85M 10% /boot
none 62M 0 62M 0% /dev/shm
/dev/sdb8 966M 38M 909M 4% /data
Notice that df works only on mounted filesystems, and that the output includes
![]() The size of the partition
The size of the partition
![]() The size used in MB or GB
The size used in MB or GB
![]() The size available in MB or GB
The size available in MB or GB
![]() The percent used
The percent used
![]() Where the device is mounted
Where the device is mounted
To view disk-free statistics on local-only filesystems, (excluding NFS and other remote mounts) use the following command:
df –l
To see the disk utilization statistics expressed in KB, use this command:
# df –k
Filesystem 1K-blocks Used Available Use% Mounted on
/dev/sda2 5708320 1794004 3624344 34% /
/dev/sda1 101089 9426 86444 10% /boot
none 62996 0 62996 0% /dev/shm
/dev/sdb8 988212 38180 929952 4% /home/data
Finally, to see the amount of the disk’s free and used inodes expressed in disk utilization statistics, use the following command:
# df –i
Filesystem Inodes IUsed IFree IUse% Mounted on
/dev/sda2 725760 104049 621711 15% /
/dev/sda1 26104 41 26063 1% /boot
none 15749 1 15748 1% /dev/shm
/dev/sdb8 125696 889 124807 1% /home/data
Notice that the number of inodes total, used, free, and percent used is shown on a filesystem-by-filesystem basis. This option is incredibly useful for busy sysadmins who are worried about running out of space or inodes.
The du and df commands are prominently featured on the exams, particularly questions about the output of each and what is shown for various options. Expect to see questions that have the keywords disk utilization and amount of free space or words to that effect.
Using Disk Quotas
Most sysadmins have had a server system partition fill up due to one thing or another, usually followed closely by a system crash or kernel panic (and sysadmin panic). A package on nearly every Unix/Linux system, called quota, lets you limit disk usage on a per-user and per-filesystem basis.
One important limitation is that quotas are on a filesystem, not a directory tree. If you have two directory trees (/home and /var/www, for example) that need to have conflicting or different quotas, these directory trees must be on separate filesystems, which means separate partitions.
Quota Commands and Files
The quota system is designed to limit users to a certain amount of disk space per filesystem. The quota command allows a user to view the quotas that are in place for her account.
The commands, settings, and files that are used for quotas are as follows:
![]() quotaon—Turns on quotas
quotaon—Turns on quotas
![]() quotaoff—Turns off quotas
quotaoff—Turns off quotas
![]() quotacheck—Verifies each user’s usage is correct and updates the stored values if necessary
quotacheck—Verifies each user’s usage is correct and updates the stored values if necessary
![]() edquota—Used for editing the user’s quota amounts
edquota—Used for editing the user’s quota amounts
![]() quota—Used by users to see quota limits/space
quota—Used by users to see quota limits/space
![]() aquota.user—The binary file that contains user quota information
aquota.user—The binary file that contains user quota information
![]() aquota.group—The binary file that contains group quota information
aquota.group—The binary file that contains group quota information
![]() usrquota—The /etc/fstab option for user quotas
usrquota—The /etc/fstab option for user quotas
![]() grpquota—The /etc/fstab option for group quotas
grpquota—The /etc/fstab option for group quotas
Quota Concepts
The following are terms you need to understand to configure quotas:
![]() Soft limit—This is a limit that can be exceeded, with resulting warnings up until the grace period is met.
Soft limit—This is a limit that can be exceeded, with resulting warnings up until the grace period is met.
![]() Hard limit—This is usually set higher than the soft limit and cannot be exceeded.
Hard limit—This is usually set higher than the soft limit and cannot be exceeded.
![]() Grace period—The soft limit can be exceeded up to the hard limit until the grace period value is met. Then, to save more data, the amount used must be brought below the soft limit.
Grace period—The soft limit can be exceeded up to the hard limit until the grace period value is met. Then, to save more data, the amount used must be brought below the soft limit.
Configuring Quotas
To set up quotas, you need to choose a filesystem. It’s not recommended to set quotas on the root (/) filesystem, but instead to set quotas on the filesystems that have the most active sets of users and data.
For example, this next exercise was done on a system that has a partition on the device /dev/sdb5 mounted to the mount point /data. An entry in the /etc/fstab mounts this partition on system boot. The permissions for the /data filesystem allow users who are in the users group to create objects in it. There are already files from various users in that directory.
To set up quotas on the /data filesystem, do the following:
1. Ensure the /data partition is mounted by issuing the mount command and inspecting the output.
2. Edit the /etc/fstab file and add usrquota and grpquota, as shown here, to enable both user and group quotas:
/dev/sdb5 /data ext3 defaults,usrquota,grpquota 0 0
3. Remount the /data filesystem with the following command. This enables the quota options you added previously without taking the filesystem offline.
mount –o remount,rw /data
4. Check that it has the correct options (shows usrquota and grpquota) with this command:
# mount | grep usrquota
/dev/sdb5 on /data type ext3 (rw,noexec,nosuid,nodev,usrquota,grpquota)
5. Add a normal user to test quotas with the following:
useradd –m quotaboy
passwd quotaboy
6. Now update the aquota.* files with the command shown in Example 9-15.
Example 9-15 Updating aquota.* with quotacheck -avugc
# quotacheck -avugc
quotacheck: Your kernel probably supports journaled quota but you are
not using it. Consider switching to journaled quota to avoid running
quotacheck after an unclean shutdown.
quotacheck: Scanning /dev/sdb5 [/data] done
quotacheck: Cannot stat old user quota file /data/aquota.user: No such
file or directory. Usage will not be subtracted.
quotacheck: Cannot stat old group quota file /data/aquota.group: No
such file or directory. Usage will not be subtracted.
quotacheck: Cannot stat old user quota file /data/aquota.user: No such
file or directory. Usage will not be subtracted.
quotacheck: Cannot stat old group quota file /data/aquota.group: No
such file or directory. Usage will not be subtracted.
quotacheck: Checked 2 directories and 1 files
quotacheck: Old file not found.
quotacheck: Old file not found.
The errors you see are just the quotacheck command letting you know the quota files don’t contain data yet, but it will update them with the right information. However, options are available for a journaled quota in the mount man page.
7. Edit the quota settings for this user with this command:
edquota –u quotaboy
8. You see the user’s quota information in vi, so you can edit the amounts, like so:
Disk quotas for user quotaboy (uid 1001):
Filesystem blocks soft hard inodes soft hard
/dev/sdb5 0 0 0 0 0 0
9. Set quotaboy’s block quotas to match the following:
Filesystem blocks soft hard inodes soft hard
/dev/sdb5 0 5000 6000 0 0 0
10. Save and exit the file; it will be loaded properly by the quota system.
11. Sign on as, or use the su - command to become, quotaboy:
su – quotaboy
12. Create a new file in the /data directory as quotaboy:
touch /data/file1.quotaboy
13. As the root user, check to see that quotaboy has a quota listed:
# quota quotaboy
Filesystem blocks quota limit grace files quota limit grace
/dev/sdb5 0 5000 6000 1 0 0
14. Turn on the quota system for the /data filesystem. Prior to this, the system is tracking quotas but not enforcing them.
quotaon /data
15. Log in as quotaboy or su over to his account:
su – quotaboy
16. Run the quota command to see what quotaboy’s usage is presently:
$ quota
Disk quotas for user quotaboy (uid 1001):
Filesystem blocks quota limit grace files quota limit grace
/dev/sdb5 0 5000 6000 0 0 0
17. As the quotaboy user, copy all the regular files in the /etc directory to the /data directory:
$ cp /etc/* /data
18. Run the quota command to see how many blocks are used and free:
Disk quotas for user quotaboy (uid 1001):
Filesystem blocks quota limit grace files quota limit grace
/dev/sdb5 2524 5000 6000 152 0 0
19. Fill up your quota by copying the entire /etc/ tree to the /data directory, observing the multiple errors about the disk quota being exceeded:
cp –r /etc /data
20. Be sure to clean up the mess on your test system and try it again until you’re comfortable with configuring quotas.
Your distribution should take care of enabling quotas at boot, which you can test by rebooting and checking for quotas. If not, you need to add /sbin/quotaon to your startup scripts.
Hard and Soft Limits
Dissecting the edquota –u quotaboy editor session is important because several items will be on the exam. Let’s look at each section of the output:
Filesystem blocks soft hard inodes soft hard
/dev/sdb5 0 0 0 0 0 0
The sections are described here:
![]() Filesystem—This is the filesystem on which the user has a quota.
Filesystem—This is the filesystem on which the user has a quota.
![]() blocks—This is the number of blocks presently used by the user on the filesystem in question.
blocks—This is the number of blocks presently used by the user on the filesystem in question.
![]() soft—This is the soft limit, which can be exceeded for the grace period.
soft—This is the soft limit, which can be exceeded for the grace period.
![]() hard—This is the hard limit, which cannot be exceeded.
hard—This is the hard limit, which cannot be exceeded.
![]() inodes—This is the number of inodes presently in use.
inodes—This is the number of inodes presently in use.
![]() soft—If set, this is the number of inodes for which you want to set a soft limit (if you can’t think why, don’t use it).
soft—If set, this is the number of inodes for which you want to set a soft limit (if you can’t think why, don’t use it).
![]() hard—This is the hard limit for inodes, which, if met, keeps the user from creating more files.
hard—This is the hard limit for inodes, which, if met, keeps the user from creating more files.
The editable fields are the soft and hard settings for both blocks and inodes. Editing any of the other values does not do anything.
Setting the Grace Period
Use edquota –t to set the grace period for users; it’s configurable in days, hours, minutes, or seconds. You’re a pretty tough sysadmin if you configure a grace period that’s less than a day. Here’s the syntax for it:
edquota –t
To establish a grace period before enforcing soft limits for users, use the following format, where time units can be days, hours, minutes, or seconds:
Filesystem Block grace period Inode grace period
/dev/sdb5 7days 7days
Getting Quota Information
Run the quota command as a normal user to get just that user’s quota information (as seen in the previous exercise). If there are no quotas for that user, the output states there are none.
The root user has the ability to get quota statistical data on all users, like so:
# repquota -a
*** Report for user quotas on device /dev/sdb5
Block grace time: 7days; Inode grace time: 7days
Block limits File limits
User used soft hard grace used soft hard grace
----------------------------------------------------------------------
root -- 32844 0 0 5 0 0
snuffy -- 0 0 0 1 0 0
quotaboy +- 6000 5000 6000 6days 1464 0 0
Summary
In this chapter you learned how to work with filesystems. The mkfs command creates a filesystem on a partition, and it delegates its work to a filesystem builder such as mkfs.ext4. The filesystem is mounted with the mount command, and unmounted with umount. Should the computer restart without the unmount step, such as after a power outage, the filesystem will be unclean and need to be checked. The filesystem check tool, fsck, itself delegates its work to tools such as fsck.ext4, except in the case of XFS filesystems where you need to use xfs_check and xfs_repair to do the same work.
Linux provides a variety of tools to investigate disk space usage, the most popular being du to show disk usage of a series of files and directories, and df, which shows your disk free statistics. A filesystem’s free space is expressed in terms of the number of free bytes of space, along with the number of free inodes it has with which to store files.
Users can also be restricted to a certain amount of disk usage on a particular partition through use of the quota tools. First you must mount the filesystem with the usrqota and grpquota options and then you create the quota databases with quotacheck. Edit a user’s quota with edquota to allocate the number of files or bytes to allow. The system needs to have quota enforcement on through quotaon.
Exam Preparation Tasks
As mentioned in the section “How to Use This Book” in the Introduction, you have a couple of choices for exam preparation: the exercises here, Chapter 21, “Final Preparation,” and the practice exams on the DVD.
Review All Key Topics
Review the most important topics in this chapter, noted with the Key Topics icon in the outer margin of the page. Table 9-2 lists a reference of these key topics and the page numbers on which each is found.
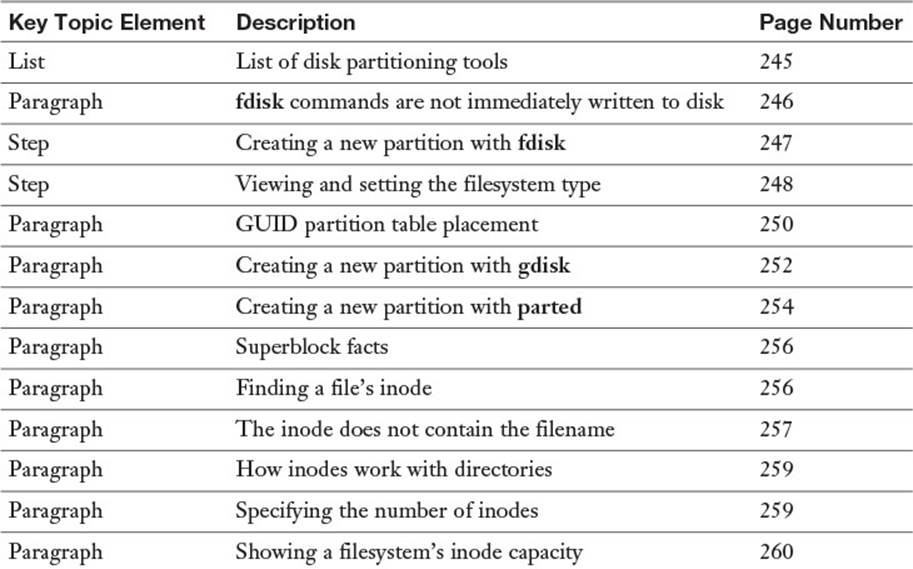
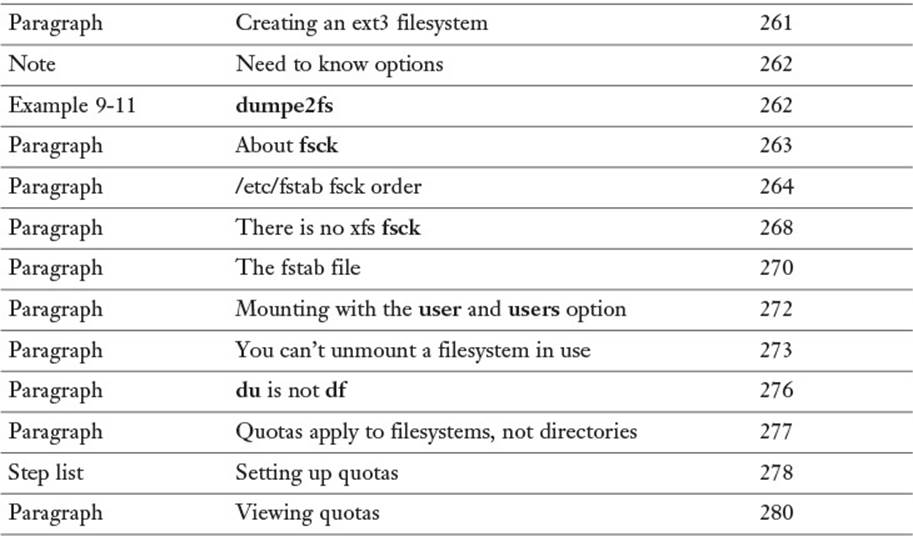
Table 9-2 Key Topics for Chapter 9
Define Key Terms
Define the following key terms from this chapter and check your answers in the glossary:
swap
filesystem
directory entries
superblock
Review Questions
The answers to these review questions are in Appendix A.
1. You are configuring your /etc/fstab file and want to have a filesystem mountable by non-root users. Which option in which column would you use to accomplish this?
a. owner in the third column
b. owner in the fifth column
c. noauto in the fourth column
d. user in the fourth column
2. You are troubleshooting your Linux machine after an unexplained crash. The automated filesystem check fails with a message to perform a check manually. What’s the most important thing to make certain of for the affected filesystem before initiating the manual check?
a. It should be unmounted.
b. It should be mounted read-write.
c. It should be in noauto mode.
d. The user=root option should be set.
3. You are installing a Linux server that will primarily hold users’ data. If you could place two directory trees on a separate drive, which would be the most effective choice? (Choose two.)
a. /tmp
b. /var
c. /home
d. /data
4. You require your system to check a particular filesystem every 50 times the filesystem is mounted. Which command would you use to make this change?
a. debugfs
b. dumpe2fs
c. tune2fs
d. setfs
5. A user reports that one of his fellow users is hogging all the disk space on their shared server. Which command would you use to show that system’s disk statistics for its mounted filesystems?
a. dir
b. df
c. du
d. ls
6. Which portion of a file’s information is not stored in the inode or data blocks?
a. Link count
b. Link permissions
c. Filename
d. Owner
7. Which command is used to alter the maximum mount count so an ext3 filesystem isn’t checked every 20 mounts by default?
a. fsck
b. mkfs.ext3
c. hdparm
d. tune2fs
8. When upgrading a system that has multiple data partitions of the ext2 filesystem type, which of the following would represent the least disruptive journaling filesystem to upgrade them with?
a. ext3
b. ReiserFS
c. JFS
d. XFS
9. Which utility on your system can display the number of free and used inodes as a total and percentage?
a. ls -li
b. du -sh
c. df -i
d. find -inum
10. You are configuring your server after a system crash due to a full disk. When configuring a user quota for the /home directory of 1GB and a user quota for the /var/ftp directory of 200MB, what must be true about those directory trees for quotas to work?
a. They can exist only on an ext2 filesystem.
b. They must have the sparse_super option set.
c. They must be mounted with the usrquota option.
d. They must exist on different partitions or drives.
11. While setting up quotas you run repquota and see that a particular user is well over her hard disk quota. Which of the following are possible reasons? (Choose two.)
a. The user created the files prior to quotas being enabled.
b. You didn’t mount the filesystem with the right options.
c. You didn’t run quotaon.
d. This is expected, as the user can exceed her hard disk quota for the duration of the grace period.
All materials on the site are licensed Creative Commons Attribution-Sharealike 3.0 Unported CC BY-SA 3.0 & GNU Free Documentation License (GFDL)
If you are the copyright holder of any material contained on our site and intend to remove it, please contact our site administrator for approval.
© 2016-2026 All site design rights belong to S.Y.A.