Ansible for DevOps: Server and configuration management for humans (2015)
Chapter 9 - Deployments with Ansible
Deploying application code to servers is one of the hardest, but most rewarding, tasks of any development team. Most shops using traditional deployment techniques (manual steps, shell scripts, and prayers) dread deployments, especially for complex, monolithic apps.
Deployments are less daunting when you adopt modern deployment processes and use the right amount of automation. In the best case, deployments become so boring and routine they barely register as a blip on your team’s radar.
Consider Etsy, a company whose engineers are deploying code to production up to 40 times per day, with no manual intervention from the operations team. The operations team is free to work on more creative endeavors, and the developers see their code go live in near-real-time!
Etsy’s production deployment schedule is enabled by a strong DevOps-oriented culture (with robust code repository management, continuous integration, well-tested code, feature flags, etc.). While it may not be immediately possible to start deploying your application to production 20 times a day, you can move a long way towards effortless deployments by automating deployments with Ansible.
Deployment strategies
There are dozens of ways to deploy code to servers. For the simplest of applications, all that’s involved might be switching to a new tag in a code repository on the server and restarting a service.
For more complex applications, you might do a full Blue-Green deployment, where you build an entire new infrastructure alongside your current production infrastructure, run tests on the new infrastructure, then automatically cut over to the new instances. This may be overkill for many applications (especially if <100% uptime is acceptable), but it is becoming more and more common—and Ansible can automate the entire process.
In this chapter, we will be covering the following deployment strategies:
1. Single-server deployments.
2. Zero-downtime multi-server deployments.
3. Capistrano-style and blue-green deployments.
These are three of the most common deployment techniques, and they cover many common use cases. There are other ways you can strengthen your deployment processes, often involving application-level and organizational change, but those deployment aspects are out of the scope of this book.
Simple single-server deployments
The vast majority of small applications and websites are easily run on a single virtual machine or dedicated server. Using Ansible to provision and manage the configuration on the server is a no-brainer. Even though you only have to manage one server, it’s better to encapsulate all the setup so you don’t end up with a snowflake server.
In this instance, we are managing a very simple Ruby on Rails site that allows users to perform CRUD operations on articles (very simple database records with a title and body).
The code repository for this app is located on GitHub at https://github.com/geerlingguy/demo-rails-app.
To make testing simple, we’ll begin by creating a new Vagrant VM using the following Vagrantfile:
1 # -*- mode: ruby -*-
2 # vi: set ft=ruby :
3
4 Vagrant.configure(2) do |config|
5 config.vm.box = "geerlingguy/ubuntu1404"
6
7 config.vm.provider "virtualbox" do |v|
8 v.name = "rails-demo"
9 v.memory = 1024
10 v.cpus = 2
11 end
12
13 config.vm.hostname = "rails-demo"
14 config.vm.network :private_network, ip: "192.168.33.7"
15
16 config.vm.provision "ansible" do |ansible|
17 ansible.playbook = "playbooks/main.yml"
18 ansible.sudo = true
19 end
20
21 end
In this case, we have a very simple VM that will be accessible at the IP address 192.168.33.7, and when provisioned, it will run the Ansible playbook defined in playbooks/main.yml.
Provisioning a simple Ruby on Rails server
To prepare for our application deployment, we need to do the following:
1. Install git (our application is version controlled in a git repository).
2. Install Node.js (asset compilation requires it’s Javascript runtime).
3. Install Ruby (our application requires version 2.2.0 or later).
4. Install Passenger with Nginx (we need a fast web server to run our rails application).
5. Install any other dependencies, and prepare the server for deployment.
To that end, let’s create a new playbook just for the provisioning tasks (we’ll worry about deployment later), in a new file, playbooks/provision.yml:
1 ---
2 - hosts: all
3 sudo: yes
4
5 vars_files:
6 - vars.yml
7
8 roles:
9 - geerlingguy.git
10 - geerlingguy.nodejs
11 - geerlingguy.ruby
12 - geerlingguy.passenger
13
14 tasks:
15 - name: Install app dependencies.
16 apt: "name={{ item }} state=present"
17 with_items:
18 - libsqlite3-dev
19 - libreadline-dev
20
21 - name: Ensure app directory exists and is writeable.
22 file:
23 path: "{{ app_directory }}"
24 state: directory
25 owner: "{{ app_user }}"
26 group: "{{ app_user }}"
27 mode: 0755
This is a fairly simple playbook. We’ll need to define a few variables to make sure the geerlingguy.ruby role installs the correct version of Ruby (at least 2.2.0), and the geerlingguy.passenger role is configured to serve our app correctly.
There are also a few other variables we will need, like app_directory and app_user, so let’s create the variables file now, at playbooks/vars.yml:
1 # Variables for our app.
2 app_directory: /opt/demo-rails-app
3 app_user: www-data
4
5 # Variables for Passenger and Nginx.
6 passenger_server_name: 0.0.0.0
7 passenger_app_root: /opt/demo-rails-app/public
8 passenger_app_env: production
9 passenger_ruby: /usr/local/bin/ruby
10
11 # Variables for Ruby installation.
12 ruby_install_from_source: true
13 ruby_download_url: http://cache.ruby-lang.org/pub/ruby/2.2/ruby-2.2.0.tar.gz
14 ruby_version: 2.2.0
The passenger variables tell Passenger to run a server available on every network interface, and to launch our app (which will be located in /opt/demo-rails-app/public) with production settings (the app’s environment), using the ruby binary we have installed in /usr/local/bin/ruby.
The Ruby variables tell the ruby role to install Ruby 2.2.0 from source, since the packages available through Ubuntu’s standard apt repositories only contain older versions.
The playbook specified in our Vagrantfile, playbooks/main.yml, doesn’t yet exist. Let’s create that playbook and include the above provisioning.yml playbook so our server will be provisioned successfully. We’ll separate out the deployment steps into another playbook and include that separately. Inside playbooks/main.yml:
1 ---
2 - include: provision.yml
Deploying a Rails app to the server
All the dependencies for our app’s deployment were configured in provision.yml, so we’re ready to build a playbook to perform all the deployment tasks.
Add a line to the main.yml file to include a new deploy.yml playbook:
1 ---
2 - include: provision.yml
3 - include: deploy.yml
Now we’re ready to create a the deploy.yml playbook, which will do the following:
1. Use git to check out the latest production release of the Rails app.
2. Copy over a secrets.yml template that holds some secure app data required for running the app.
3. Make sure all the gems required for the app are installed (via Bundler).
4. Create the database (if it doesn’t already exist).
5. Run rake tasks to make sure the database schema is up-to-date and all assets (like JS and CSS) are compiled.
6. Make sure the app files’ ownership is set correctly so Passenger and Nginx can serve them without error.
7. If any changes or updates were made, restart Passenger and Nginx.
Most of these tasks will use Ansible’s modules, but for a few, we’ll just wrap the normal deployment-related commands in shell since there aren’t pre-existing modules to take care of them for us:
1 ---
2 - hosts: all
3 sudo: yes
4
5 vars_files:
6 - vars.yml
7
8 roles:
9 - geerlingguy.passenger
10
11 tasks:
12 - name: Ensure demo application is at correct release.
13 git:
14 repo: https://github.com/geerlingguy/demo-rails-app.git
15 version: "{{ app_version }}"
16 dest: "{{ app_directory }}"
17 accept_hostkey: true
18 register: app_updated
19 notify: restart nginx
20
21 - name: Ensure secrets file is present.
22 template:
23 src: templates/secrets.yml.j2
24 dest: "{{ app_directory }}/config/secrets.yml"
25 owner: "{{ app_user }}"
26 group: "{{ app_user }}"
27 mode: 0664
28 notify: restart nginx
29
30 - name: Install required dependencies with bundler.
31 shell: "bundle install --path vendor/bundle chdir={{ app_directory }}"
32 when: app_updated.changed == true
33 notify: restart nginx
34
35 - name: Check if database exists.
36 stat: "path={{ app_directory }}/db/{{ app_environment.RAILS_ENV }}.sqlite3"
37 register: app_db_exists
38
39 - name: Create database.
40 shell: "bundle exec rake db:create chdir={{ app_directory }}"
41 when: app_db_exists.stat.exists == false
42 notify: restart nginx
43
44 - name: Perform deployment-related rake tasks.
45 shell: "{{ item }} chdir={{ app_directory }}"
46 with_items:
47 - bundle exec rake db:migrate
48 - bundle exec rake assets:precompile
49 environment: app_environment
50 when: app_updated.changed == true
51 notify: restart nginx
52
53 - name: Ensure demo application has correct user for files.
54 file:
55 path: "{{ app_directory }}"
56 state: directory
57 owner: "{{ app_user }}"
58 group: "{{ app_user }}"
59 recurse: yes
60 notify: restart nginx
The first thing you’ll notice (besides the fact that we’ve included the vars.yml file again, since we need those variables in this playbook as well) is that we’ve added the geerlingguy.passenger role in this playbook. Since we’ll be using one of the handlers defined in that playbook (restart nginx), we need to include the role explicitly. We could’ve added a separate handler specific to this playbook, but it’s more maintainable to reuse handlers from roles if necessary.
Let’s walk through the tasks, one-by-one:
1. (Lines 12-19) We put all the application files in place by checking out the git repository at the version app_version into the directory app_directory. We set accept_hostkey to true so that, the first time we deploy the app, this task doesn’t hang since we haven’t yet accepted the Git server’s hostkey.
2. (Lines 21-28) We copy a secrets.yml file to the application’s configuration directory. There are different ways to deploy app secrets, but this is the simplest and easiest, and allows us to store the app secrets in an Ansible Vault-protected vars file if we so desire.
3. (Lines 30-33) If the app_updated variable shows that a change occurred as part of the first git task, we’ll run a bundler command to ensure all the latest bundled dependencies are installed in the vendor/bundle directory.
4. (Lines 35-42) Create the application database with rake db:create if it doesn’t already exist. Since this application uses a simple SQLite database, it’s a matter of checking if the .sqlite3 file exists, and if not, running the db:create task.
5. (Lines 44-51) If the app_updated variable shows that a change occurred as part of the first git task, we’ll also run a couple rake tasks to make sure the database schema is up to date, and all assets (like scripts and stylesheets) are compiled.
6. (Lines 53-60) Make sure all app files have the correct permissions for Passenger/Nginx to serve them correctly.
Because many of the tasks result in filesystem changes that could change the behavior of the application, they all notify the restart nginx handler provided by the geerlingguy.passenger role, so Passenger reloads the configuration and restarts the app.
There are a few new variables we need to add to vars.yml, and we also need to add the secrets.yml.j2 template mentioned in the task that copies it into place.
First, we’ll create the secrets file, inside playbooks/templates/secrets.yml.j2:
1 development:
2 secret_key_base: {{ app_secrets.dev }}
3
4 test:
5 secret_key_base: {{ app_secrets.test }}
6
7 production:
8 secret_key_base: {{ app_secrets.prod }}
We’ll be using a dictionary variable for app_secrets, so let’s add that and all the other new variables to playbooks/vars.yml:
1 ---
2 # Variables for our app.
3 app_version: 1.2.2
4 app_directory: /opt/demo-rails-app
5 app_user: www-data
6 app_secrets:
7 dev: fe562ec1e21eecc5af4d83f6a157a7
8 test: 4408f36dd290766d2f368fdfcedf4d
9 prod: 9bf801da1a24c9a103ea86a1438caa
10 app_environment:
11 RAILS_ENV: production
12
13 # Variables for Passenger and Nginx.
14 passenger_server_name: 0.0.0.0
15 passenger_app_root: /opt/demo-rails-app/public
16 passenger_app_env: production
17 passenger_ruby: /usr/local/bin/ruby
18
19 # Variables for Ruby installation.
20 ruby_install_from_source: true
21 ruby_download_url: http://cache.ruby-lang.org/pub/ruby/2.2/ruby-2.2.0.tar.gz
22 ruby_version: 2.2.0
Note the addition of the following variables to support our deploy.yml playbook:
· app_version: This is the git tag or branch tip to be deployed to the server.
· app_secrets: A dictionary of Rails app secrets, which are used to verify the integrity of signed app cookies. You can generate new, unique strings for these variables using rake secret.
· app_environment: Environment settings required for certain commands (like bundle exec and rake) to run with the correct Rails application environment.
Provisioning and Deploying the Rails App
Since we now have our provision.yml and deploy.yml playbooks completed, and both are included in the main.yml playbook Vagrant will run, we can finally bring up the new VM using Vagrant, and see if our application works!
The structure of your project folder should look like this:
deployments/
playbooks/
templates/
secrets.yml.j2
deploy.yml
main.yml
provision.yml
vars.yml
Vagrantfile
Before we can run the playbook, we need to make sure all the role dependencies are present. If you were building everything from scratch, you might have a roles directory with all the roles inside, but in this case, since we’re using roles from Ansible Galaxy, it’s best to not include the role files directly with our playbook, but instead, add a requirements.txt file to the project and install the roles automatically with Galaxy.
Inside requirements.txt:
1 geerlingguy.git
2 geerlingguy.ruby
3 geerlingguy.nodejs
4 geerlingguy.passenger
Now, in the same directory as that file, run the command $ ansible-galaxy install -r requirements.txt, and after a minute, all the required roles will be downloaded to your default Ansible roles directory, if they’re not already present.
Change directory back to the main directory containing the Vagrantfile, and run vagrant up. Assuming everything runs correctly, you should see the playbook complete successfully after a few minutes:
TASK: [Ensure demo application has correct user for files.] *************
changed: [default]
NOTIFIED: [geerlingguy.passenger | restart nginx] ***********************
changed: [default]
PLAY RECAP **************************************************************
default : ok=46 changed=28 unreachable=0 failed=0
Now, jump over to a web browser and load http://192.168.33.7/. You should see something like the following:
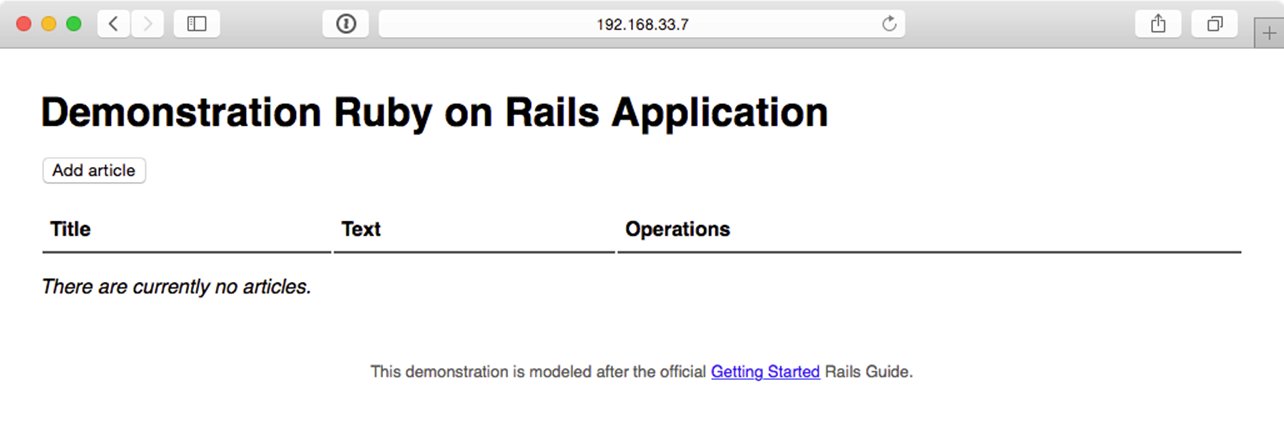
Demonstration Rails app running successfully.
Try creating, updating, and deleting a few articles to make sure the database and all app functionality is working correctly:
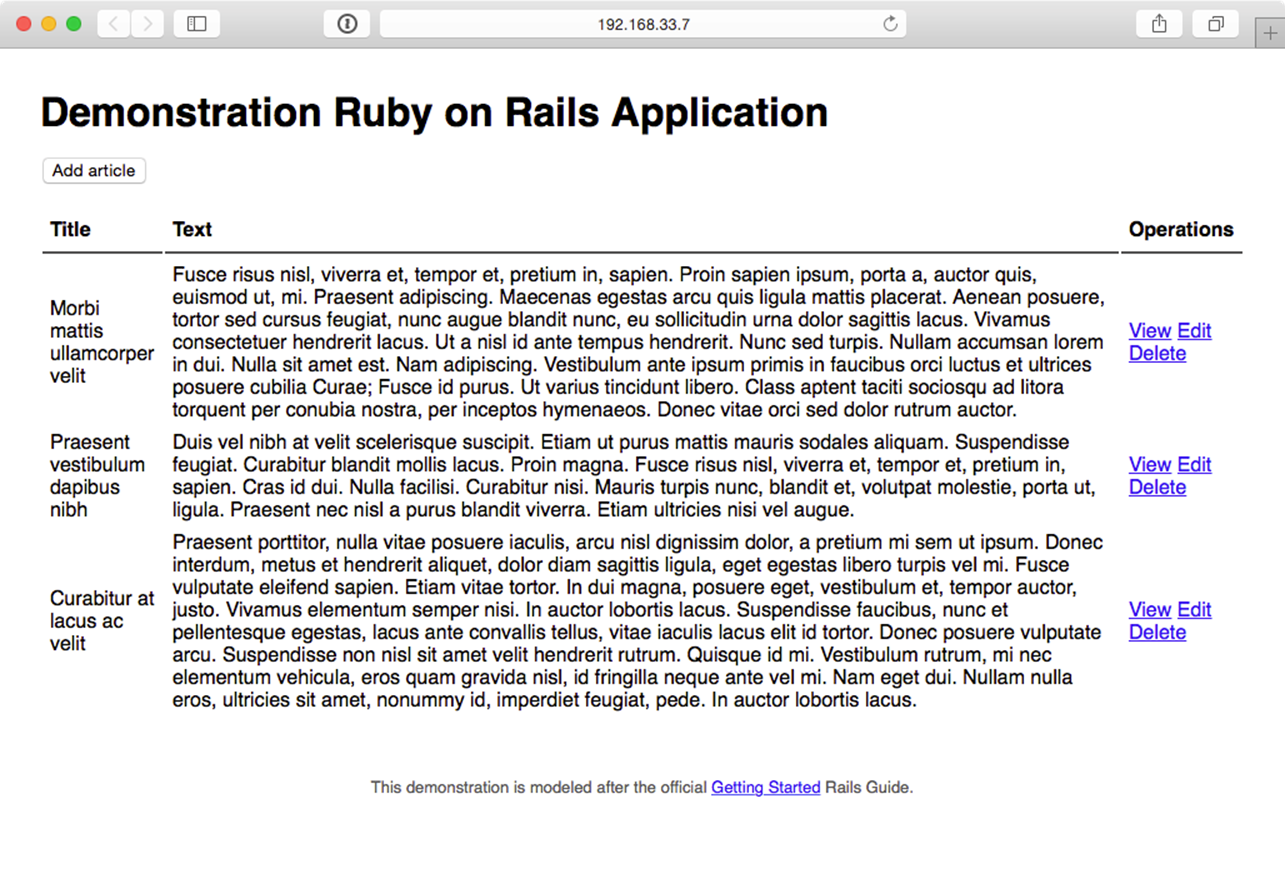
A simple app to perform CRUD operations on Articles.
The app seems to function perfectly, but it could use some improvements. After more development work, we have a new version of to deploy. We could update the app_version variable in vars.yml and run vagrant provision to run the entire provisioning and deployment playbook again, but to save a little time, and to utilize the more flexible playbook layout (with provisioning and deployment concerns separated), we can run the deploy.yml playbook separately.
Deploying application updates
First, to test whether we can deploy without provisioning, we will need to create an inventory file to tell Ansible how to connect directly to the Vagrant-managed VM.
Create the file playbooks/inventory-ansible with the following contents:
1 [rails]
2 192.168.33.7
3
4 [rails:vars]
5 ansible_ssh_user=vagrant
6 ansible_ssh_private_key_file=~/.vagrant.d/insecure_private_key
|
|
If you were creating this playbook for a server or VM running outside of Vagrant’s control, you’d probably have already created an inventory file or added the server to your global inventory, but when we’re working with Vagrant, it’s often convenient to use Vagrant’s own dynamically-managed inventory. Running playbooks outside of Vagrant’s up/provision functionality requires us to create a separate inventory file. |

Test the ability to run the deploy.yml playbook by running the following command inside the playbooks directory:
$ ansible-playbook deploy.yml -i inventory-ansible
Hopefully the playbook completed its run successfully. It may have reported a change in the “Ensure demo application has correct user for files” task, and if so, it will have restarted Passenger. Run it again, and ansible should report no changes:
PLAY RECAP **************************************************************
192.168.33.7 : ok=16 changed=0 unreachable=0 failed=0
Hopefully you’ve noticed that running the deploy.yml playbook standalone is much faster than running the provision and deploy playbooks together (deployment only takes 16 tasks, while both playbooks add up to 70+ tasks!). In the future, we can deploy application updates using only the deploy.yml playbook and changing the app_version either in vars.yml or by specifying the version on the command line in the ansible-playbook command.
|
|
It’s generally preferred to change variables in vars files that are versioned with your playbooks, rather than specify them through inventory files, environment variables, or on the command line. This way the entire state of your infrastructure is encapsulated in your playbook files, which ideally should be version controlled and managed similarly to the application they deploy. Plus, who wants to enter any more information on the command line than is absolutely required? |
Our application is a fairly generic web application that has updates to application code (which require a webserver reload), styles (which need recompiling), and possibly the database schema (which needs rake migrate tasks to be run). Any time app_version is changed inside playbooks/vars.yml, the deploy playbook will automatically run all the required tasks to get our app running with the latest code.
Update app_version to 1.3.0, and then run the following command again:
$ ansible-playbook deploy.yml -i inventory-ansible
After a minute or so, the deployment should complete, and once that’s done, you’ll see the much improved new version of the Demonstration Ruby on Rails Application:
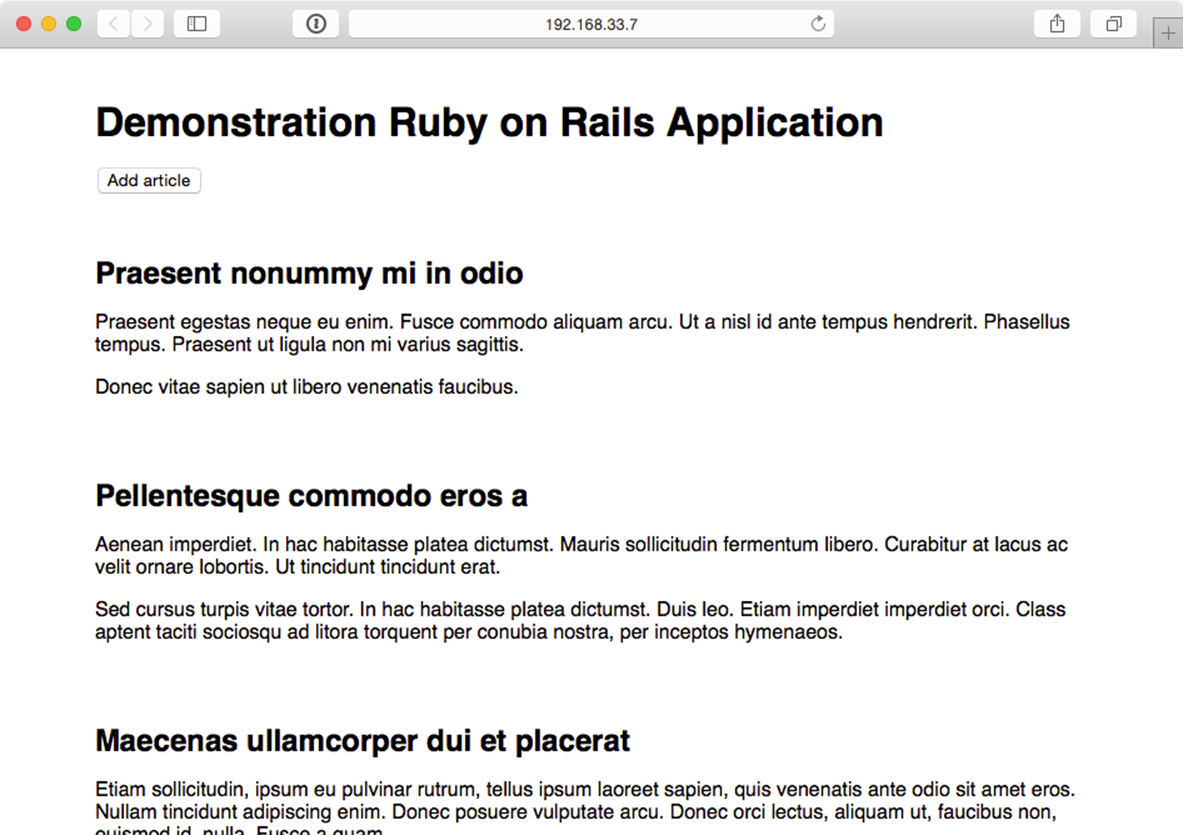
Rails app - version 1.3.0 with a responsive UI.
Simple application update deployments will involve incrementing the app_version to the latest git tag, then running the deploy.yml playbook again. You can always run the main.yml playbook to ensure the entire server stack is in the correct state, but it’s faster to just deploy the app updates.
Zero-downtime multi-server deployments
A single server deployment strategy is all that’s needed for many applications, but if you need to run an application on multiple servers for horizontal scalability or redundancy, deployments can be cumbersome—but not when you use Ansible!
Server Check.in is a simple server and website monitoring service that has a microservices-based architecture; there is a website, an API application, and a server checking application.
The server checking application needs to run on a variety of servers hosted around the world by different providers to provide redundancy and reliability. Server Check.in uses Ansible to manage rolling deployments for this application, so new code can be deployed across all the servers in minutes while maintaining 100% uptime!
We’ll emulate part of Server Check.in’s infrastructure (the check server application) by deploying and updating a simple Node.js application to a set of virtual machines. The code repository for this app is located on GitHub at https://github.com/geerlingguy/demo-nodejs-api. Here’s a diagram of the infrastructure we’ll be building:
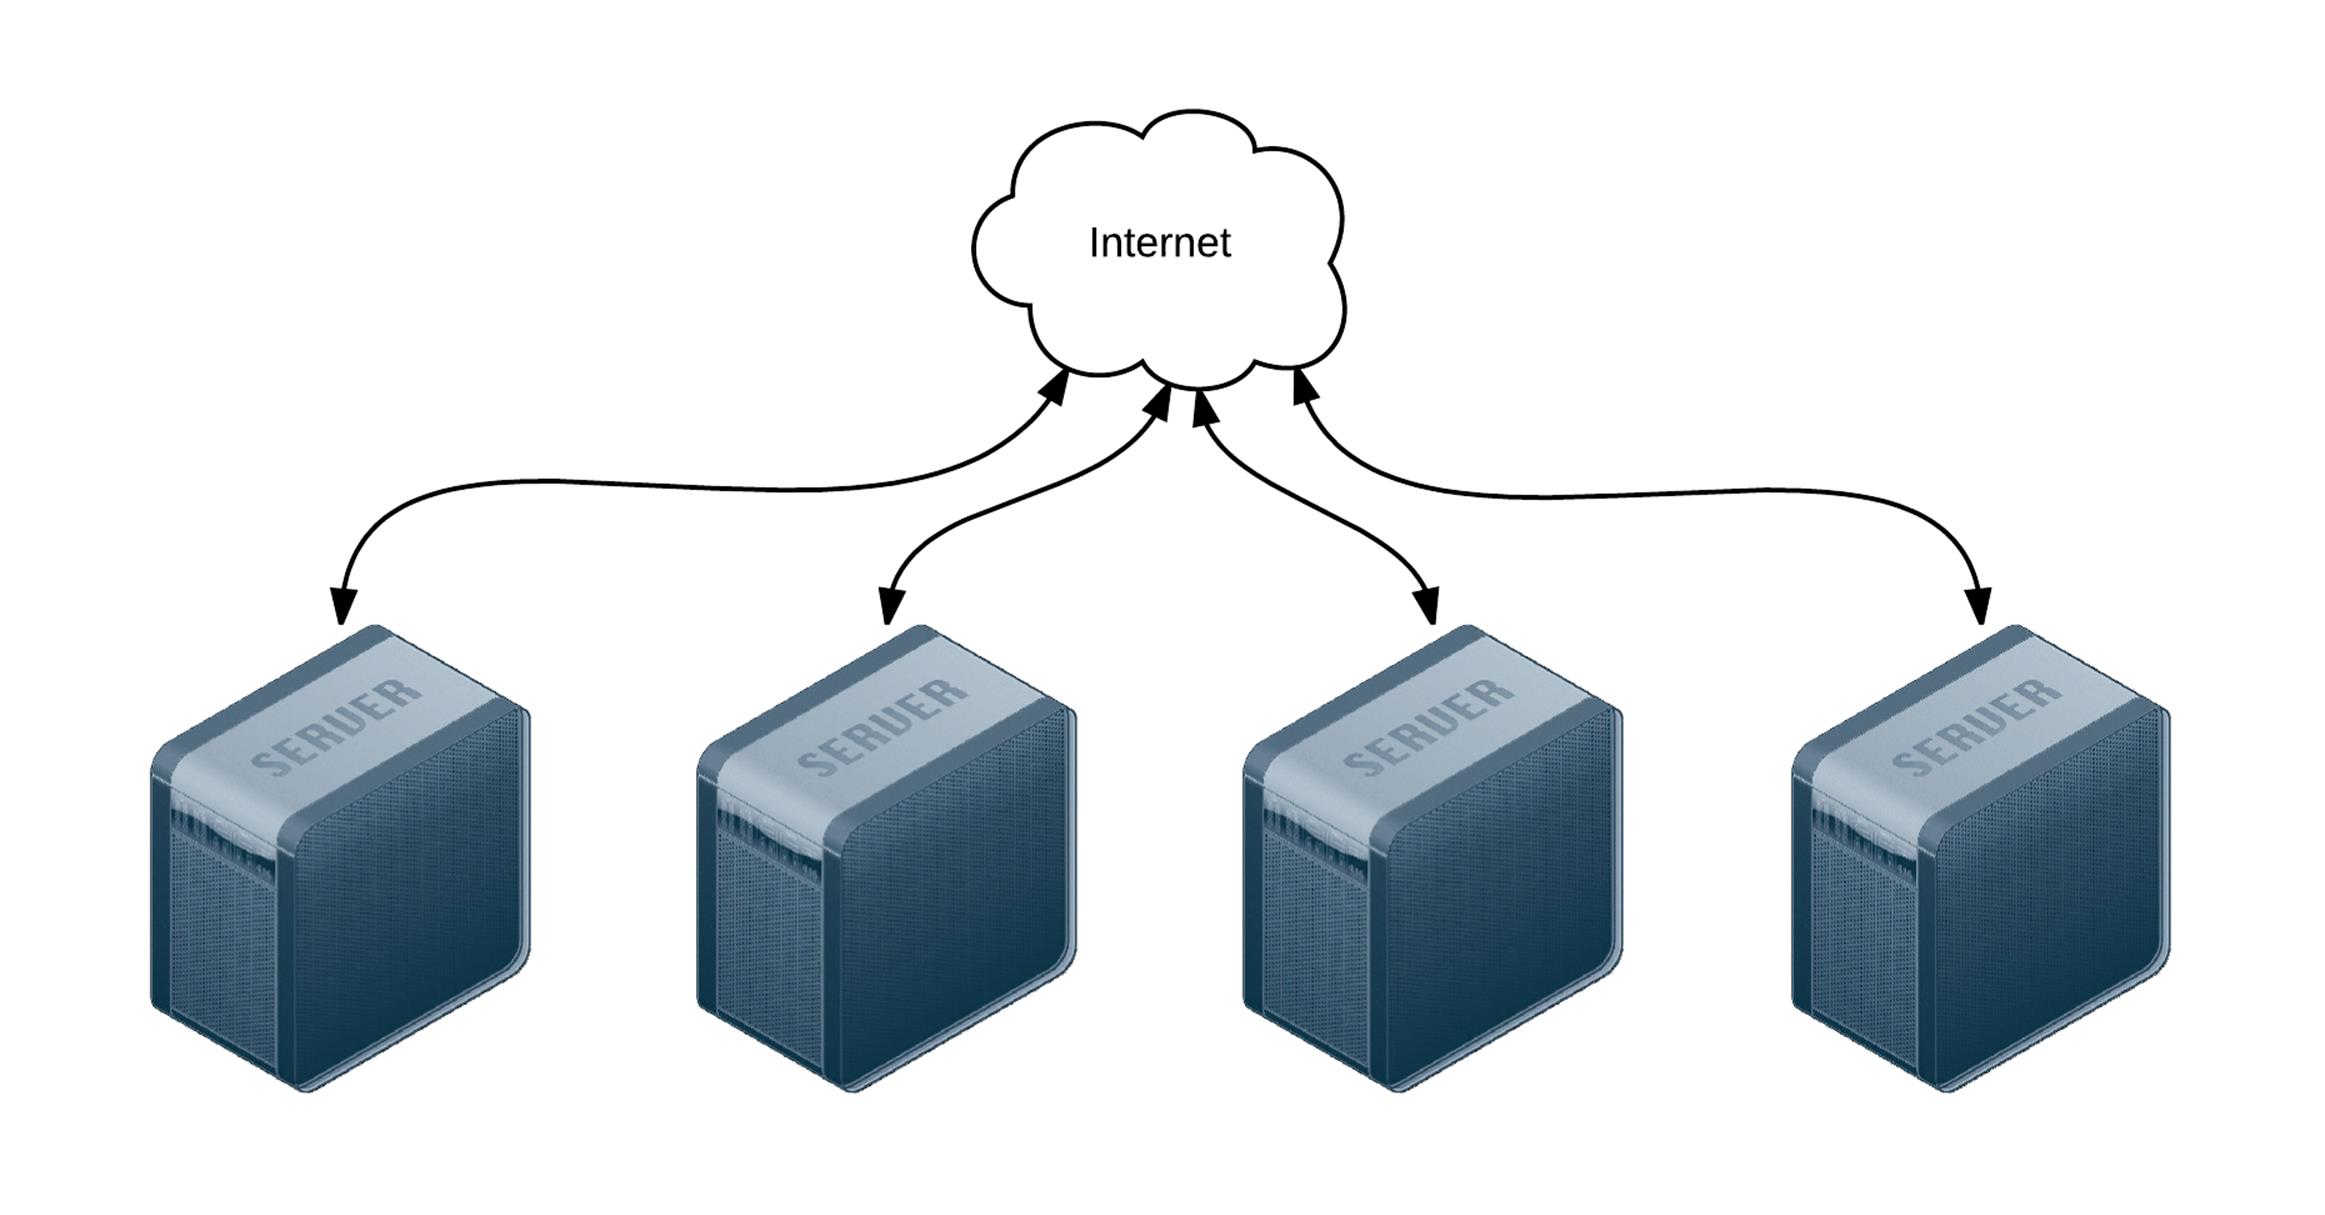
Four servers connected to the Internet.
To begin, create four lightweight Vagrant VMs using the following Vagrantfile:
1 # -*- mode: ruby -*-
2 # vi: set ft=ruby :
3
4 Vagrant.configure("2") do |config|
5 # Base VM OS configuration.
6 config.vm.box = "geerlingguy/ubuntu1404"
7 config.vm.synced_folder '.', '/vagrant', disabled: true
8 config.ssh.insert_key = false
9
10 config.vm.provider :virtualbox do |v|
11 v.memory = 256
12 v.cpus = 1
13 end
14
15 # Define four VMs with static private IP addresses.
16 boxes = [
17 { :name => "nodejs1", :ip => "192.168.3.2" },
18 { :name => "nodejs2", :ip => "192.168.3.3" },
19 { :name => "nodejs3", :ip => "192.168.3.4" },
20 { :name => "nodejs4", :ip => "192.168.3.5" }
21 ]
22
23 # Provision each of the VMs.
24 boxes.each do |opts|
25 config.vm.define opts[:name] do |config|
26 config.vm.hostname = opts[:name]
27 config.vm.network :private_network, ip: opts[:ip]
28
29 # Provision all the VMs using Ansible after the last VM is booted.
30 if opts[:name] == "nodejs4"
31 config.vm.provision "ansible" do |ansible|
32 ansible.playbook = "playbooks/main.yml"
33 ansible.inventory_path = "inventory"
34 ansible.limit = "all"
35 end
36 end
37 end
38 end
39
40 end
The above Vagrantfile defines four VMs that each use 256MB of RAM and have a unique hostname and IP address (defined by the boxes variable). Our Node.js app doesn’t require much in the way of processing power or memory.
In the provision section of the playbook, we told Vagrant to provision the all the VMs with Ansible, using the inventory file inventory, and the playbook playbooks/main.yml. Create these two files in the same folder as your Vagrantfile:
rolling-deployments/
playbooks/
main.yml
inventory
Vagrantfile
Inside the inventory file, we just need to define a list of all the Node.js API app VMs by IP address:
1 [nodejs-api]
2 192.168.3.2
3 192.168.3.3
4 192.168.3.4
5 192.168.3.5
6
7 [nodejs-api:vars]
8 ansible_ssh_user=vagrant
9 ansible_ssh_private_key_file=~/.vagrant.d/insecure_private_key
Inside the main.yml playbook, we’ll call out two separate playbooks—one for the initial provisioning (installing Node.js and making sure the server is configured correctly), and another for deployment (ensuring our Node.js API app is present and running):
1 ---
2 - include: provision.yml
3 - include: deploy.yml
Go ahead and create the provision.yml and deploy.yml playbooks, starting with provision.yml:
1 ---
2 - hosts: nodejs-api
3 sudo: yes
4
5 vars:
6 nodejs_forever: true
7 firewall_allowed_tcp_ports:
8 - "22"
9 - "8080"
10
11 roles:
12 - geerlingguy.firewall
13 - geerlingguy.nodejs
This extremely simple playbook runs on all the servers defined in our inventory file, and runs two roles on the servers: geerlingguy.firewall (which installs and configures a firewall, in this case opening ports 22 for SSH and 8080 for our app) and geerlingguy.nodejs (which installs Node.js, NPM, and forever, which we’ll use to run our app as a daemon).
Since we’re using two roles from Ansible Galaxy, it’s best practice to also include those roles in a requirements file so CI tools and others using this playbook can easily install all the required roles.
Create a requirements.txt file in the root folder and add the following:
1 geerlingguy.firewall
2 geerlingguy.nodejs
Now, whenever someone new to the project wants to run the playbook, all that person needs to do is run ansible-galaxy install -r requirements.txt to install all the required roles.
At this point, your project directory should be structured like the following:
rolling-deployments/
playbooks/
deploy.yml
main.yml
provision.yml
inventory
requirements.txt
Vagrantfile
Before we can run vagrant up and see our infrastructure in action, we need to build out the deploy.yml playbook, which will ensure our app is present and running correctly on all the servers.
Inside deploy.yml, add the following:
1 ---
2 - hosts: nodejs-api
3 gather_facts: no
4 sudo: yes
5
6 vars_files:
7 - vars.yml
Use sudo for this playbook to keep things simple, and set gather_facts to no to save a little time during deployments, since our simple app doesn’t require any of the gathered system facts to run.
Since we have a few variables to define, and we’d like to track them separately for easier file revision history, we’ll define the variables in a vars.yml file in the same directory as the deploy.yml playbook:
1 ---
2 app_repository: https://github.com/geerlingguy/demo-nodejs-api.git
3 app_version: "1.0.0"
4 app_directory: /opt/demo-nodejs-api
Once you’ve saved the vars.yml file, continue building out deploy.yml, starting with a task to clone the app’s repository (which we just defined in vars.yml):
9 tasks:
10 - name: Ensure Node.js API app is present.
11 git:
12 repo: "{{ app_repository }}"
13 version: "{{ app_version }}"
14 dest: "{{ app_directory }}"
15 accept_hostkey: true
16 register: app_updated
17 notify: restart forever apps
Using variables for the git module’s repo and version affords flexibility; app version changes might happen frequently, and it’s easier to manage that in a separate vars.yml file.
We also want to notify a restart forever apps handler whenever the codebase is changed. We’ll define the restart forever apps handler later in the playbook.
18 - name: Stop all running instances of the app.
19 command: "forever stopall"
20 when: app_updated.changed
21
22 - name: Ensure Node.js API app dependencies are present.
23 npm: "path={{ app_directory }}"
24 when: app_updated.changed
25
26 - name: Run Node.js API app tests.
27 command: "npm test chdir={{ app_directory }}"
28 when: app_updated.changed
Once the app is present on the server, we need to use npm to install dependencies (using Ansible’s npm module), then run the app’s test suite using npm test. To save time, we only stop the application, update dependencies, and run tests if the application has changed (using the app_updated variable we registered when checking out the application code).
Running the tests for the app during every deployment ensures the app is present and in a functioning state. Having a thorough unit and integration test suite that runs on every deployment is almost prerequisite to a frequent or continuously-integrated project! Running the tests during deployments also helps with ensuring zero-downtime deployments, as we’ll see later.
25 - name: Get list of all running Node.js apps.
26 command: forever list
27 register: forever_list
28 changed_when: false
29
30 - name: Ensure Node.js API app is started.
31 command: "forever start {{ app_directory }}/app.js"
32 when: "forever_list.stdout.find('app.js') == -1"
Once the app is present and running correctly, we need to make sure it’s started. There’s a command to get the list of all running apps (using forever), then a command to start the app if it’s not already running.
34 - name: Add cron entry to start Node.js API app on reboot.
35 cron:
36 name: "Start Node.js API app"
37 special_time: reboot
38 job: "forever start {{ app_directory }}/app.js"
The final task adds a cron job to make sure the app is started after the server reboots. Since we’re managing the deamonization of our app using forever instead of the OS’s init system, it’s simplest to make sure the app starts on system boot using a reboot cron job.
Remember when we added the line notify: restart forever apps to the task that ensured the app was present on the server? It’s time to define that handler, which runs the command forever restartall (which does exactly what it says):
40 handlers:
41 - name: restart forever apps
42 command: "forever restartall"
At this point, the Ansible playbooks and Vagrant configuration should be complete. The playbook will clone the demo-nodejs-api project, run its tests to make sure everything’s working correctly, then start the app using forever and make sure it’s started whenever the the server reboots.
You can run the command below to test all the new servers and make sure the app is running correctly:
$ for i in {2..5}; \
do curl -w "\n" "http://192.168.3.$i:8080/hello/john"; \
done
If all the servers are online, you should see the text "hello john" repeated four times (once for each server):
"hello john"
"hello john"
"hello john"
"hello john"
You can run vagrant provision to run the entire provisioning and deployment process again, or just run ansible-playbook -i inventory playbooks/deploy.yml to run the deployment playbook again. In either case, you should see no changes, and Ansible should verify that everything’s ok.
You now have a fleet of Node.js API servers similar to Server Check.in’s server checking infrastructure—except it doesn’t do much yet! Luckily, the project has seen some new feature development since the initial 1.0.0 version you just deployed. We now need a way to get the new version deployed to and running on all the servers while maintaining 100% uptime for the API as a whole.
Ensuring zero downtime with serial and integration tests
Now, after a little extra time in development, we have new features to deploy in a 1.0.1 version. You could run the exact same ansible-playbook command as above, adding in --extra-vars "app_version=1.0.1", but best practice is to update the variable in your included variables file, since that change can be tracked in version control and (hopefully) be used for automated deployments.
Change the app_version in playbooks/vars.yml to 1.0.1, and run the deployment playbook again:
ansible-playbook -i inventory playbooks/deploy.yml
Uh oh—after we deployed the new version, our tests started failing! Since we deployed to all four servers asynchronously, all four application servers are offline, and our boss and customers are going to be very angry.
In this case, rolling back is simply a matter of reverting to 1.0.0 and redeploying (go ahead and do that now, so you keep at least a few 9’s of uptime!), but imagine if part of the application update changed a database schema or did something else that required a lot more work to roll back changes; you’d be in a world of hurt!
Ansible has two particular settings that will help protect you when you deploy to many servers while maintaining your infrastructure’s overall integrity during a failed deployment.
Open the deployment playbook (playbooks/deploy.yml) and modify the initial settings to match the following:
1 ---
2 - hosts: nodejs-api
3 gather_facts: no
4 sudo: yes
5 serial: 2
Note the addition of serial: 1. This tells Ansible to run the entire playbook on two servers at a time. If you update app_version to 1.0.1 again, and run the playbook, you should see it run on two of the four servers, and once it hits the test failure, the playbook execution will stop—leaving your other two servers up (and saving you a few hours on a conference bridge explaining the outage).
You could again revert back to 1.0.0, but in the time that you were deploying the failed version, developers finished a new version that got all tests passing again, 1.0.2. Go ahead and update app_version and run the playbook again.
PLAY RECAP ***********************************************************
192.168.3.2 : ok=8 changed=5 unreachable=0 failed=0
192.168.3.3 : ok=8 changed=5 unreachable=0 failed=0
192.168.3.4 : ok=8 changed=5 unreachable=0 failed=0
192.168.3.5 : ok=8 changed=5 unreachable=0 failed=0
Whew! Everything is back online and operational, and all tests are passing with the latest version of the application.
|
|
This contrived example should be pretty rare in the real world; it should be rare that tests fail only on production. But there are many times where networking issues or even latency in third party services causes a random failure or two. Whenever you move beyond one server (usually to provide both redundancy and cacpacity), you will eventually run into these transient issues. It’s best to account for them in your automated deployment process by tuning settings like serial well. |

Ansible exposes two different settings that you can use to control rolling deployment failure scenarios:
1. serial: Can be an integer (e.g. 3) or a percentage (e.g. 30%). Used to control how many hosts Ansible will manage at once.
2. max_fail_percentage: An integer between 1-100. Used to tell Ansible what percentage of hosts can fail a task before the play will be aborted.
If you have some headroom in your infrastructure, you can set these values higher without fear of leaving your infrastructure in a very bad state after a failed deployment. If you have only as much infrastructure running as your application needs, and having more than one or two servers offline would put your infrastructure into a bad state, you should probably be more conservative with these settings—and provision a little more capacity!
Deploying to app servers behind a load balancer
In the case of Server Check.in, there are two separate API layers that manage the complexity of ensuring all server checks happen, regardless of whether certain servers are up or down. The ‘load balancing’ occurs on the application layer instead of as a separate infrastructure layer (this is extremely helpful when dealing with global latency and network reliability variation).
For many applications, especially those with app servers close together (e.g. in the same data center) the infrastructure layer follows a more traditional layout, with a load balancer to handle the API request distribution:

Four servers behind a load balancer.
TODO.
Capistrano-style and blue-green deployments
Many developers who deal with Ruby applications are familiar with Capistrano, a task automation and application deployment application built with Ruby. Capistrano’s basic style of deployment is to create dated release directories, then symlink the current release into a stable application directory, along with resources that are continuous among releases (like logs and uploaded files).
Capistrano does a lot more than that basic deployment model, but many people want to replicate that simple application deployment workflow (which is also fairly simple for rollbacks, since you just revert the symlink to the previous release directory!). This is fairly simple to do with Ansible, and rather than walk you through the entire process in this book, I’ll point you to a few great resources that explain the process in detail, along with an Ansible Galaxy role that coordinates Capistrano-style deployments even more easily!
· Rebuilding Capistrano-like deployment with Ansible
· project_deploy role on Ansible Galaxy
· Thoughts on deploying with Ansible (background for the above role)
· Ansible project-deploy (presentation about the above role)
Extending things a little further, many organizations use blue-green deployments. The basic concept involves bringing up a parallel production infrastructure, then switching over to it. The cutover may take only a few milliseconds and no active production infrastructure is ever offline during the deployment process.
A few different technologies and concepts, like container-based infrasturcture and microservices (which are faster to deploy), and better cloud autoscaling and load balancing options, have made blue-green deployments much easier than in the past.
This book won’t go through a detailed example of this style of deployment, as the process is similar to other examples provided, the only difference being an additional task of switching a load balancer from the old to the new infrastructure once it’s up and running. Ansible’s blog has an excellent overview of AWS-based blue-green deployments: Immutable Systems and Ansible, and there are built-in modules to manage almost any type of load balancer you could use, including F5’s BIG-IP, HAProxy, Citrix NetScaler, and Amazon ELB.
Additional Deployment Scenarios
TODO:
· run_once For things like database updates and schema changes.
· delegate_to
· Notifications with Ansible
Summary
Automating deployments with Ansible enables your development team to have their code on production servers more reliably and quickly, and it enables your operations team to spend less time on repetitive tasks, and more time improving your infrastructure.
This chapter outlined only a few of the most popular deployment techniques, but Ansible is flexible enough to handle almost any situation out of the box.
_______________________________________
/ One machine can do the work of fifty \
| ordinary men. No machine can do the |
| work of one extraordinary man. |
\ (Elbert Hubbard) /
---------------------------------------
\ ^__^
\ (oo)\_______
(__)\ )\/\
||----w |
|| ||
All materials on the site are licensed Creative Commons Attribution-Sharealike 3.0 Unported CC BY-SA 3.0 & GNU Free Documentation License (GFDL)
If you are the copyright holder of any material contained on our site and intend to remove it, please contact our site administrator for approval.
© 2016-2025 All site design rights belong to S.Y.A.