Linux All-in-One For Dummies, 5th Edition (2014)
Book III. Networking
Chapter 4. Managing the Network
In This Chapter
![]() Finding out about the TCP/IP configuration files
Finding out about the TCP/IP configuration files
![]() Checking TCP/IP networks
Checking TCP/IP networks
![]() Configuring networks at boot time
Configuring networks at boot time
Like almost everything else in Linux, TCP/IP setup is a matter of preparing numerous configuration files (text files you can edit with any text editor). Most of these configuration files are in the /etc directory. The Linux installer tries to be helpful by hiding the details of the TCP/IP configuration files. Nevertheless, if you know the names of the files and their purposes, editing the files manually (if necessary) is easier.
Discovering the TCP/IP Configuration Files
You can configure TCP/IP networking when you install Linux. However, if you want to effectively manage the network, you need to become familiar with the TCP/IP configuration files so that you can edit the files, if necessary. (For example, if you want to check whether the name servers are specified correctly, you have to know about the /etc/resolv.conf file, which stores the IP addresses of name servers.)
 Table 4-1 summarizes the basic TCP/IP configuration files. I describe these configuration files in the next few sections.
 A pound sign (#) in a text file indicates a comment.
/etc/hosts
The /etc/hosts text file contains a list of IP addresses and host names for your local network. In the absence of a name server, any network program on your system consults this file to determine the IP address that corresponds to a host name. Think of /etc/hosts as the local phone directory where you can look up the IP address (instead of a phone number) for a local host.
Table 4-1 Basic TCP/IP Network Configuration Files
|
This File |
Contains the Following |
|
/etc/hosts |
IP addresses and host names for your local network as well as any other systems that you access often. |
|
/etc/networks |
Names and IP addresses of networks. |
|
/etc/host.conf |
Instructions on how to translate host names into IP addresses. |
|
/etc/resolv.conf |
IP addresses of name servers. |
|
/etc/hosts.allow |
Instructions on which systems can access Internet services on your system. |
|
/etc/hosts.deny |
Instructions on which systems must be denied access to Internet services on your system. |
|
/etc/nsswitch.conf |
Instructions on how to translate host names into IP addresses. |
Here is the /etc/hosts file from a system, showing the IP addresses and names of other hosts on a typical LAN:
127.0.0.1 localhost localhost.localdomain
# Other hosts on the LAN
192.168.0.100 lnbp933
192.168.0.50 lnbp600
192.168.0.200 lnbp200
192.168.0.233 lnbp233
192.168.0.40 lnbp400
As the example shows, each line in the file starts with an IP address followed by the host name for that IP address. (You can have more than one host name for any given IP address.) In some distributions, such as openSUSE, the /etc/hosts file has the following: IP-Address,Fully-Qualified-Hostname, Short-Hostname. In all cases, anything after the host name (such as the Short-Hostname) is taken as an alias.
/etc/networks
/etc/networks is another text file that contains the names and IP addresses of networks. These network names are commonly used in the routing command (/sbin/route) to specify a network by name instead of by its IP address.
Don’t be alarmed if your Linux PC doesn’t have the /etc/networks file. Your TCP/IP network works fine without this file. In fact, the Linux installer doesn’t create a /etc/networks file.
/etc/host.conf
Linux uses a special library (that is, a collection of computer code) called the resolver to obtain the IP address that corresponds to a host name. The /etc/host.conf file specifies how names are resolved (that is, how the name gets converted to a numeric IP address). A typical/etc/host.conf file might contain the following lines:
order hosts, bind
multi on
The entries in the /etc/host.conf file tell the resolver what services to use (and in which order) to resolve names.
The order option indicates the order of services (in recent distributions, the nsswitch.conf file, discussed in a later section, performs this function). The sample entry tells the resolver to first consult the /etc/hosts file and then check the name server to resolve a name.
 Use the multi option to indicate whether a host in the /etc/hosts file can have multiple IP addresses. Hosts that have more than one IP address are called multihomed because the presence of multiple IP addresses implies that the host has several network interfaces. (In effect, the host lives in several networks simultaneously.)
/etc/resolv.conf
The /etc/resolv.conf file is another text file used by the resolver — the library that determines the IP address for a host name. Here is a sample /etc/resolv.conf file:
nameserver 192.168.0.1 # dhcp: eth0
search nrockv01.md.comcast.net
The nameserver line provides the IP addresses of name servers for your domain. If you have multiple name servers, list them on separate lines. They’re queried in the order in which they appear in the file.
The search line tells the resolver how to search for a host name. For example, when trying to locate a host name myhost, the search directive in the example causes the resolver to try myhost.nrockv01.md.comcast.net first, then myhost.md.comcast.net, and finallymyhost.comcast.net.
If you don’t have a name server for your network, you can safely ignore this file. TCP/IP still works, even though you may not be able to refer to hosts by name (other than those listed in the /etc/hosts file).
/etc/hosts.allow
The /etc/hosts.allow file specifies which hosts are allowed to use the Internet services (such as TELNET and FTP) running on your system. This file is consulted before certain Internet services start. The services start only if the entries in the hosts.allow file imply that the requesting host is allowed to use the services.
The entries in /etc/hosts.allow are in the form of a server:IP address format, where server refers to the name of the program providing a specific Internet service and IP address identifies the host allowed to use that service. For example, if you want all hosts in your local network (which has the network address 192.168.0.0) to access the TELNET service (provided by the in.telnetd program), add the following line in the /etc/hosts.allow file (the last octet is left off to signify all possibilities within that range):
in.telnetd:192.168.0.
If you want to let all local hosts have access to all Internet services, you can use the ALL keyword and rewrite the line as follows:
ALL:192.168.0.
Finally, to open all Internet services to all hosts, you can replace the IP address with ALL, as follows:
ALL:ALL
You can also use host names in place of IP addresses.
 To find out the detailed syntax of the entries in the /etc/hosts.allow file, type man hosts.allow at the shell prompt in a terminal window.
/etc/hosts.deny
The /etc/hosts.deny file is just the opposite of /etc/hosts.allow. Whereas hosts.allow specifies which hosts may access Internet services (such as TELNET and TFTP) on your system, the hosts.deny file identifies the hosts that must be denied services. The/etc/hosts.deny file is consulted if no rules are in the /etc/hosts.allow file that apply to the requesting host. Service is denied if the hosts.deny file has a rule that applies to the host.
The entries in /etc/hosts.deny file have the same format as those in the /etc/hosts.allow file; they’re in the form of a server:IP address format, where server refers to the name of the program providing a specific Internet service and IP address identifies the host that must not be allowed to use that service.
If you already set up entries in the /etc/hosts.allow file to allow access to specific hosts, you can place the following line in /etc/hosts.deny to deny all other hosts access to any service on your system:
ALL:ALL
To find out the detailed syntax of the entries in the /etc/hosts.deny file, type man hosts.deny at the shell prompt in a terminal window.
/etc/nsswitch.conf
The /etc/nsswitch.conf file, known as the name service switch (NSS) file, specifies how services such as the resolver library, NIS, NIS+, and local configuration files (such as /etc/hosts and /etc/shadow) interact.
NIS and NIS+ are network information systems — another type of name-lookup service. Newer versions of the Linux kernel use the /etc/nsswitch.conf file to determine what takes precedence: a local configuration file, a service such as DNS (Domain Name System), or NIS.
As an example, the following hosts entry in the /etc/nsswitch.conf file says that the resolver library first tries the /etc/hosts file, then tries NIS+, and finally tries DNS:
hosts: files nisplus dns
You can find out more about the /etc/nsswitch.conf file by typing man nsswitch.conf in a terminal window.
Checking Out TCP/IP Networks
After you configure Ethernet and TCP/IP (whether during Linux installation or by running a network configuration tool or command later), you can use various networking applications without much problem. On the off chance that you do run into trouble, Linux includes several tools to help you monitor and diagnose problems.
Checking the network interfaces
Use the /sbin/ifconfig command to view the currently configured network interfaces. The ifconfig command is used to configure a network interface (that is, to associate an IP address with a network device). If you run ifconfig without any command-line arguments, the command displays information about current network interfaces. The following is a typical output when you type /sbin/ifconfig:
eth0 Link encap:Ethernet HWaddr 00:08:74:E5:C1:60
inet addr:192.168.0.7 Bcast:192.168.0.255 Mask:255.255.255.0
inet6 addr: fe80::208:74ff:fee5:c160/64 Scope:Link
UP BROADCAST RUNNING MULTICAST MTU:1500 Metric:1
RX packets:612851 errors:0 dropped:0 overruns:0 frame:0
TX packets:574187 errors:0 dropped:0 overruns:0 carrier:0
collisions:0 txqueuelen:1000
RX bytes:99834031 (95.2 MiB) TX bytes:76034821 (72.5 MiB)
Interrupt:10 Base address:0x3000
eth1 Link encap:Ethernet HWaddr 00:02:2D:8C:F8:C5
inet addr:192.168.0.9 Bcast:192.168.0.255 Mask:255.255.255.0
inet6 addr: fe80::202:2dff:fe8c:f8c5/64 Scope:Link
UP BROADCAST RUNNING MULTICAST MTU:1500 Metric:1
RX packets:3833 errors:0 dropped:0 overruns:0 frame:0
TX packets:1242 errors:0 dropped:0 overruns:0 carrier:0
collisions:0 txqueuelen:1000
RX bytes:560194 (547.0 KiB) TX bytes:250287 (244.4 KiB)
Interrupt:3 Base address:0x100
lo Link encap:Local Loopback
inet addr:127.0.0.1 Mask:255.0.0.0
inet6 addr: ::1/128 Scope:Host
UP LOOPBACK RUNNING MTU:16436 Metric:1
RX packets:2456 errors:0 dropped:0 overruns:0 frame:0
TX packets:2456 errors:0 dropped:0 overruns:0 carrier:0
collisions:0 txqueuelen:0
RX bytes:2891581 (2.7 MiB) TX bytes:2891581 (2.7 MiB)
This output shows that three network interfaces — the loopback interface (lo) and two Ethernet cards (eth0 and eth1) — are currently active on this system. For each interface, you can see the IP address, as well as statistics on packets delivered and sent. If the Linux system has a dial-up PPP link up and running, you also see an item for the ppp0 interface in the output.
Checking the IP routing table
The other network configuration command, /sbin/route, also provides status information when you run it without a command-line argument. If you’re having trouble checking a connection to another host (that you specify with an IP address), check the IP routing table to see whether a default gateway is specified. Then check the gateway’s routing table to ensure that paths to an outside network appear in that routing table.
A typical output from the /sbin/route command looks like the following:
Kernel IP routing table
Destination Gateway Genmask Flags Metric Ref Use Iface
192.168.0.0 * 255.255.255.0 U 0 0 0 eth0
192.168.0.0 * 255.255.255.0 U 0 0 0 eth1
169.254.0.0 * 255.255.0.0 U 0 0 0 eth1
default 192.168.0.1 0.0.0.0 UG 0 0 0 eth0
As this routing table shows, the local network uses the eth0 and eth1 Ethernet interfaces, and the default gateway is the eth0 Ethernet interface. The default gateway is a routing device that handles packets addressed to any network other than the one in which the Linux system resides. In this example, packets addressed to any network address other than those beginning with 192.168.0 are sent to the gateway — 192.168.0.1. The gateway forwards those packets to other networks (assuming, of course, that the gateway is connected to another network, preferably the Internet).
Checking connectivity to a host
To check for a network connection to a specific host, use the ping command. ping is a widely used TCP/IP tool that uses a series of Internet Control Message Protocol (ICMP, pronounced EYE-comp) messages. ICMP provides for an echo message to which every host responds. Using the ICMP messages and replies, ping can determine whether the other system is alive and can compute the round-trip delay in communicating with that system.
The following example shows how I run ping to see whether a system on my network is alive:
ping 192.168.0.1
Here is what this command displays on my home network:
PING 192.168.0.1 (192.168.0.1) 56(84) bytes of data.
64 bytes from 192.168.0.1: icmp_seq=1 ttl=63 time=0.256 ms
64 bytes from 192.168.0.1: icmp_seq=2 ttl=63 time=0.267 ms
64 bytes from 192.168.0.1: icmp_seq=3 ttl=63 time=0.272 ms
64 bytes from 192.168.0.1: icmp_seq=4 ttl=63 time=0.267 ms
64 bytes from 192.168.0.1: icmp_seq=5 ttl=63 time=0.275 ms
--- 192.168.0.1 ping statistics ---
5 packets transmitted, 5 received, 0% packet loss, time 3999ms
rtt min/avg/max/mdev = 0.256/0.267/0.275/0.016 ms
In Linux, ping continues to run until you press Ctrl+C to stop it; then it displays summary statistics showing the typical time it takes to send a packet between the two systems. On some systems, ping simply reports that a remote host is alive. However, you can still get the timing information by using appropriate command-line arguments.
 The ping command relies on ICMP messages that many firewalls are configured to block. Therefore ping may not always work and is no longer a reliable way to test network connectivity. If ping fails for a specific host, don’t assume that the host is down or not connected to the network. You can typically use ping to successfully check connectivity within your local area network.
Checking network status
To check the status of the network, use the netstat command. This command displays the status of network connections of various types (such as TCP and UDP connections). You can view the status of the interfaces quickly by typing netstat -i, which results in an output similar to the following:
Kernel Interface table
Iface MTU Met RX-OK RX-ERR RX-DRP RX-OVR TX-OK TX-ERR TX-DRP TX-OVR Flg
eth0 1500 0 613175 0 0 1 574695 0 0 0 BMRU
eth1 1500 0 4298 0 0 0 1375 1 0 0 BMRU
lo 16436 0 3255 0 0 0 3255 0 0 0 LRU
In this case, the output shows the current status of the loopback and Ethernet interfaces.
Table 4-2 describes the meanings of the columns.
Table 4-2 Meaning of Columns in the Kernel Interface Table
|
Column |
Meaning |
|
Iface |
Name of the interface |
|
MTU |
Maximum Transmission Unit — the maximum number of bytes that a packet can contain |
|
Met |
Metric value for the interface — a number indicating distance (in terms of number of hops) that routing software uses when deciding which interface to send packets through |
|
RX-OK, TX-OK |
Number of error-free packets received (RX) or transmitted (TX) |
|
RX-ERR, TX-ERR |
Number of packets with errors |
|
RX-DRP, TX-DRP |
Number of dropped packets |
|
RX-OVR, TX-OVR |
Number of packets lost due to overflow |
|
Flg |
A = receive multicast; B = broadcast allowed; D = debugging turned on; L = loopback interface (notice the flag on lo), M = all packets received, N = trailers avoided; O = no ARP on this interface; P = point-to-point interface; R = interface is running; and U = interface is up |
Another useful form of netstat option is -t, which shows all active TCP connections. Following is a typical result of typing netstat -t on one Linux PC:
Active Internet connections (w/o servers)
Proto Recv-Q Send-Q Local Address Foreign Address State
tcp 0 0 localhost:2654 localhost:1024 ESTABLISHED
tcp 0 0 localhost:1024 localhost:2654 ESTABLISHED
tcp 0 0 LNBNECXAN.nrockv01.:ssh 192.168.0.6:1577 ESTABLISHED
In this case, the output columns show the protocol (Proto), the number of bytes in the receive and transmit queues (Recv-Q, Send-Q), the local TCP port in hostname:service format (Local Address), the remote port (Foreign Address), and the state of the connection.
Type netstat -ta to see all TCP connections — both active and the ones your Linux system is listening to (with no connection established yet). For example, here’s a typical output from the netstat -ta command:
Active Internet connections (servers and established)
Proto Recv-Q Send-Q Local Address Foreign Address State
tcp 0 0 *:32769 *:* LISTEN
tcp 0 0 *:mysql *:* LISTEN
tcp 0 0 *:sunrpc *:* LISTEN
tcp 0 0 *:ftp *:* LISTEN
tcp 0 0 localhost.localdomain:ipp *:* LISTEN
tcp 0 0 *:telnet *:* LISTEN
tcp 0 0 localhost.localdomain:5335 *:* LISTEN
tcp 0 0 localhost.localdomain:smtp *:* LISTEN
tcp 0 0 192.168.0.9:45876 www.redhat.com:http ESTABLISHED
tcp 0 0 192.168.0.9:45877 www.redhat.com:http ESTABLISHED
tcp 0 0 192.168.0.9:45875 www.redhat.com:http ESTABLISHED
tcp 0 0 *:ssh *:* LISTEN
tcp 0 0 ::ffff:192.168.0.7:ssh ::ffff:192.168.0.3:4932 ESTABLISHED
Sniffing network packets
Sniffing network packets — sounds like something illegal, doesn’t it? Nothing like that. Sniffing simply refers to viewing the TCP/IP network data packets. The concept is to capture all the network packets so that you can examine them later.
If you feel like sniffing TCP/IP packets, you can use tcpdump, a command-line utility that comes with Linux. As its name implies, it dumps (prints) the headers of TCP/IP network packets.
To use tcpdump, log in as root and type the tcpdump command in a terminal window. Typically, you want to save the output in a file and examine that file later. Otherwise tcpdump starts spewing results that just flash by on the window. For example, to capture 1,000 packets in a file named tdout and attempt to convert the IP addresses to names, type the following command:
tcpdump -a -c 1000 > tdout
After capturing 1,000 packets, tcpdump quits. Then you can examine the output file, tdout. It’s a text file, so you can simply open it in a text editor or type more tdout to view the captured packets.
Just to whet your curiosity, here are some lines from a typical output from tcpdump:
20:05:57.723621 arp who-has 192.168.0.1 tell
LNBNECXAN.nrockv01.md.comcast.net
20:05:57.723843 arp reply 192.168.0.1 is-at 0:9:5b:44:78:fc
20:06:01.733633 LNBNECXAN.nrockv01.md.comcast.net.1038 > 192.168.0.6.auth:
S 536321100:536321100(0) win 5840 <mss 1460,sackOK,timestamp 7030060
0,nop,wscale 0> (DF)
20:06:02.737022 LNBNECXAN.nrockv01.md.comcast.net.ftp > 192.168.0.6.1596:
P 1:72 (71) ack 1 win 5840 (DF)
20:06:02.935335 192.168.0.6.1596 > LNBNECXAN.nrockv01.md.comcast.net.ftp:
. ack 72 win 65464 (DF)
20:06:05.462481 192.168.0.6.1596 > LNBNECXAN.nrockv01.md.comcast.net.ftp:
P 1:12 (11) ack 72 win 65464 (DF)
20:06:05.462595 LNBNECXAN.nrockv01.md.comcast.net.ftp > 192.168.0.6.1596:
. ack 12 win 5840 (DF)
20:06:05.465344 LNBNECXAN.nrockv01.md.comcast.net.ftp > 192.168.0.6.1596:
P 72:105(33) ack 12 win 5840 (DF)
. . . lines deleted . . .
The output offers some clues to what’s going on, with each line showing information about one network packet. Every line starts with a timestamp followed by details of the packet (information such as where it originates and where it is going). I don’t try to explain the details here, but you can type man tcpdump to find out more about some of the details (and more importantly, see what other ways you can use tcpdump).
 If tcpdump isn’t installed in Debian, type apt-get install tcpdump to install it.
You can use another packet sniffer called Wireshark in Linux. To find out more about Wireshark, visit. www.wireshark.org/.
Using GUI tools
You can check the status of your network through the graphical interfaces a number of ways. One of those is to use the System Monitor, as shown in Figure 4-1. In addition to seeing the network load, you can click the Processes tab to see the status of various processes.

Figure 4-1: The System Monitor.
Configuring Networks at Boot Time
It makes sense to start your network automatically every time you boot the system. For that to happen, various startup scripts must contain appropriate commands. You don’t have to do anything special other than configure your network (either during installation or by using the network configuration tool at a later time). If the network balks at startup, however, you can troubleshoot by checking the files I mention in this section.
In Debian, Ubuntu, and Xandros, the /etc/network/interfaces file describes the network interfaces available in your system, and the /sbin/ifup command activates the interfaces when you boot the system. Here is the content of a typical/etc/network/interfaces file from a Debian system:
# This file describes the network interfaces available on your system
# and how to activate them. For more information, see interfaces(5).
# The loopback network interface
auto lo
iface lo inet loopback
# The primary network interface
auto eth0
iface eth0 inet dhcp
The auto eth0 line indicates that you can bring up the Ethernet interface at initialization by using the command ifup -a invoked by a system startup script. The line ifup eth0 inet dhcp identifies Ethernet as a TCP/IP network interface that is configured by Dynamic Host Configuration Protocol (DHCP).
In Fedora, the network-activation script uses a set of text files in the /etc/sysconfig directory to activate the network interfaces. For example, the script checks the variables defined in the /etc/sysconfig/network file to decide whether to activate the network. In/etc/sysconfig/network, you see a line with the NETWORKING variable as follows:
NETWORKING=yes
The network activates only if the NETWORKING variable is set to yes. A number of scripts in the /etc/sysconfig/network-scripts directory activate specific network interfaces. For example, the configuration file for activating the Ethernet interface eth0 is the file/etc/sysconfig/network-scripts/ifcfg-eth0. Here’s what a typical /etc/sysconfig/network-scripts/ifcfg-eth0 file contains:
DEVICE=eth0
BOOTPROTO=dhcp
HWADDR=00:08:74:E5:C1:06
ONBOOT=yes
TYPE=Ethernet
The DEVICE line provides the network device name. The BOOTPROTO variable is set to dhcp, indicating that the IP address is obtained dynamically by using DHCP. The ONBOOT variable states whether this network interface activates when Linux boots. If your PC has an Ethernet card and you want to activate the eth0 interface at boot time, ONBOOT must be set to yes. The configuration file ifcfg-eth0 in the /etc/sysconfig/network-scripts directory works only if your PC has an Ethernet card and the Linux kernel has detected and loaded the specific driver for that card.
In SUSE, the network information is kept in the /etc/sysconfig/network directory in files with names beginning with ifcfg. For Ethernet interfaces, the configuration filename begins with ifcfg-eth-id- followed by the unique hardware address of the Ethernet card. Here are the key lines in a typical Ethernet configuration file:
BOOTPROTO='dhcp'
STARTMODE='auto'
The BOOTPROTO='dhcp' line indicates that the interface is set up using DHCP, and STARTMODE='auto' means that the interface is initialized when the system boots.
Within KDE, you can start the Control Center by typing Session Management in the Search box and configuring the default operations for the system, as shown in Figure 4-2.
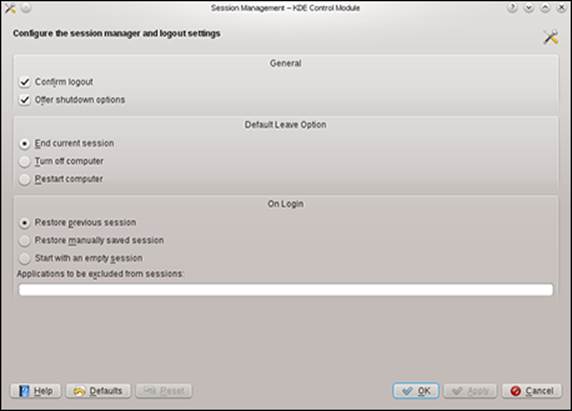
Figure 4-2: The Session Management interface.
Another useful interface that can give you a quick look at whether the network is up and running is System Information, shown in Figure 4-3. Although this interface offers no way to change configuration settings, it’s nice to have a tool that can quickly show you the status of the system, including network status.

Figure 4-3: System Information can show the network status.
All materials on the site are licensed Creative Commons Attribution-Sharealike 3.0 Unported CC BY-SA 3.0 & GNU Free Documentation License (GFDL)
If you are the copyright holder of any material contained on our site and intend to remove it, please contact our site administrator for approval.
© 2016-2026 All site design rights belong to S.Y.A.