LINUX: Easy Linux For Beginners, Your Step-By-Step Guide to Learning The Linux Operating System and Command Line (2015)
Chapter Four: Your First Linux Experience
Now that your Linux system is up and running on your computer, let’s start exploring the system.
Turning on Your PC
Once you turn on your computer, the boot loader – either GRUB or LILO, will come up and display the names of the operating systems installed in the computer. Use the arrow keys to select which OS you would like to load. This is applicable for PCs with two OS installed. If Linux is the only OS on your computer, wait for a couple of seconds as the boot loader starts up Linux.
Once Linux boots, a graphical login screen will be shown. Note however that other distributions don’t require login upon start up. Each Linux distribution uses the root username for administrator access. In order to avoid doing any accidental changes to your system when you use root, login to your system using a different account. Assigning the root password is part of the installation process. Make sure that you know and remember your system’s root password.
Here is an example an Ubuntu desktop after logging in:
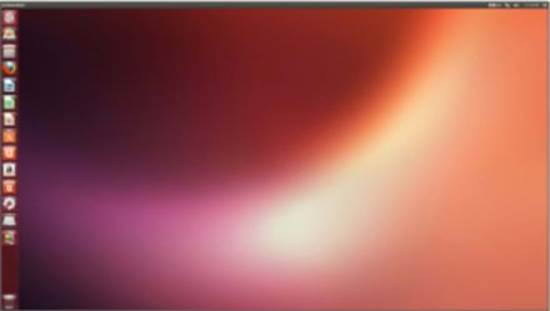
Figure 4: Ubuntu Desktop
The desktop that comes up is either KDE or GNOME. We will discuss more of these in the succeeding sections.
Getting To Know Shell
The GUI from KDE or GNOME provides the best way to explore Linux through icons, windows, and pointers. However, in the event that the GUI does not work (as we have seen in the section about Installation Troubleshooting), it’s a plus if we know how to use the terminal. Typing commands in the terminal is usually faster than navigating and clicking too.
In your desktop, browse and find the icon that looks like a monitor. This is the icon for the terminal window. If you can’t find the icon, explore the Main Menu and find the one with the label Console or Terminal.
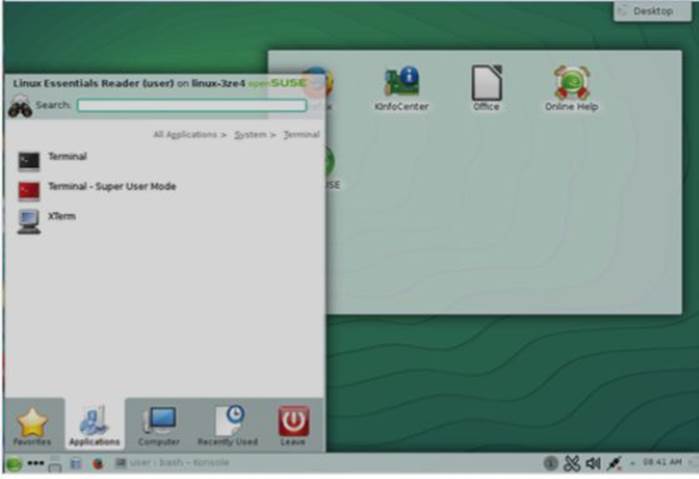
Figure 5: Terminal on a KDE Desktop
Here is how it looks like for Ubuntu:
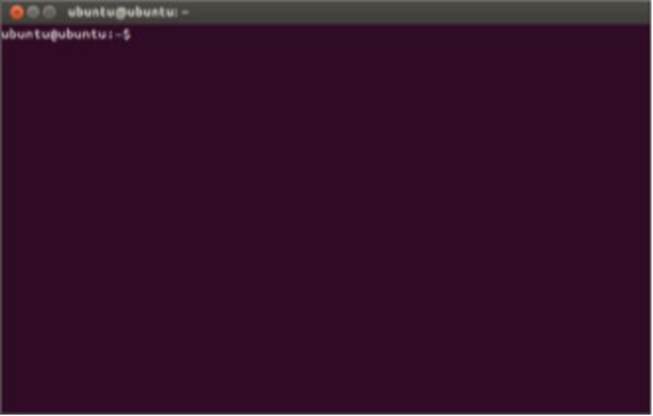
Figure 6: Terminal Screen on Ubuntu
The shell is where you can run executable files and shell scripts. The shell is also what we call the command line. Commands are written using the general syntax below:
command option1 option2 . . . optionN
Here are a few sample commands that you can try in your Linux environment, with their corresponding output:
uptime
19:26 up 29 days, 1:39, 2 users, load averages: 1.32 1.36 1.34
uptime is the command that shows the duration that the computer has been up. In this case, the computer has been up for the last 29 days or almost 1 month.
uname –srv
Linux 3.9.31.5-127.fc12.i686 #1 SMP Mon Nov 18 18:21:25 EST 2015
uname is the command to show the operating system name. –s (print the operating system name), -r (print the operating system release), and –v (print the operating system version) are options that you can use for the uname command. In the particular example, we want to use all three so we put n –srv to simplify. If we want to display the results as if we used all the options, we can use the -a option.
To know about the options that you can use for a particular command, you can use the man command.
man uname
The man command is extremely useful especially for beginners. This displays all the options that you can use. Try to use the command for every Linux command that you encounter.
To switch to root while in the shell, enter the commandsu- and then input your root password. Changing to root password while in the shell environment will allow you to run tasks that only administrators and superusers can do.
Linux Desktops
There are two commonly used GUIs that come with Linux distributions: GNOME and KDE. You can have both installed in your computer and switch between the two whenever you want to. Both GUIs also run on Unix, and while there are other GUIs that can be installed on Linux, these two remain as the most popular in use.
Here is a chart that compares both desktops:
|
Criteria |
GNOME |
KDE |
|
Availability |
Free |
Free |
|
Minimum System Requirements |
700 Mhz CPU, 768 MB RAM |
1 Ghz CPU, 615 MB RAM |
|
Development Priorities |
Focuses on freedom, accessibility, and developer-friendliness |
Provides an aesthetically pleasing website with great configurability |
|
Customization Experience |
Interface is simple to use and great for first-time Linux users, advanced users may find its customization settings as limiting |
Allow for versatile configuration that creates great looking desktop, but user has to learn to navigate the options. Customization makes it more resource-intensive |
|
Default appearance (Note that both offers customization options) |
Default setting: Toolbar at the top and a dock that pops out featuring application icons |
Default setting: toolbar at the bottom and a main menu. |
|
Universal Search |
Uses text-based search functionality |
Uses text-based and menu-based navigation |
|
Resource Usage and User Experience |
Less resource-intensive than KDE |
Good for users who came from Windows OS |
Table 3: Comparison of GNOME and KDE desktops
Those are only some of the criteria in which the two GUIs differ. However, I encourage you to try both desktops so you can evaluate which one suits you best.
I’ll show you some screenshots displaying the default settings of the desktops. GNOME desktop is shown in the next figure with its toolbar at the top that features details such as Applications Running, Day and Time, Volume, Network, and Battery Life.
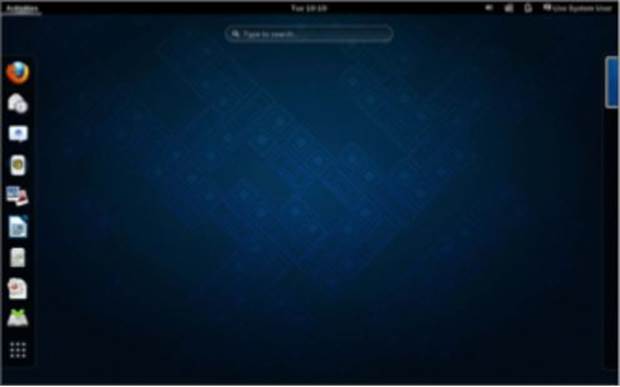
Figure 7: A GNOME desktop running on Fedora
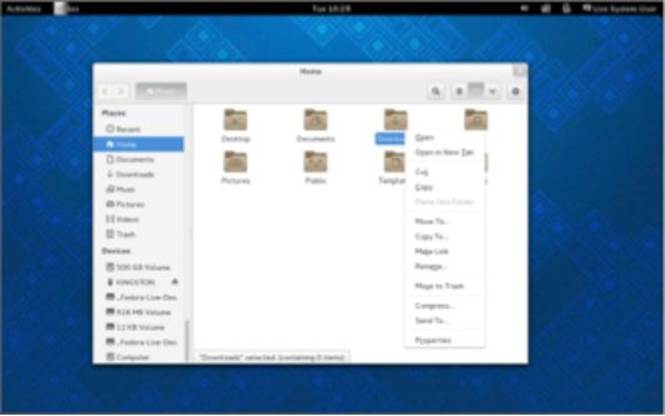
Figure 8: Gnome Folder Menu
The next set of screenshots show the default desktop for KDE. You’ll find the panel at the bottom of the screen – similar to a Windows desktop.
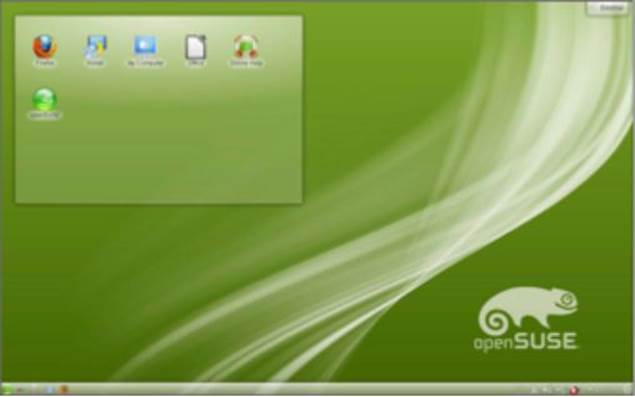
Figure 9: KDE Desktop on openSUSE
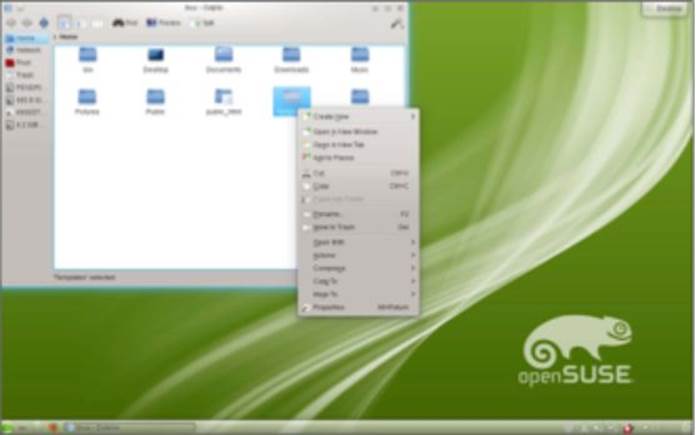
Figure 10: Menu Options on a KDE
Both can be customized to get the look and feel that you want to achieve. Go ahead and experiment with the desktops! Some distro only have one pre-installed but you can always get and install both. You can switch between the two in seconds.
Navigating the Linux Filesystem
Linux organizes files using a hierarchical system. Files are stored inside directories and these directories can also contain other directories. When you compare the Linux filesystem to Windows, you will find that there are no drive letters in Linux. All files are stored in a single root directory noted as / regardless of where the data is physically stored (hard drive, external drive, or CR-ROM).
To find a file in Linux, you also need the information about the directory hierarchy known as the pathname. The figure below dissects a sample path name.
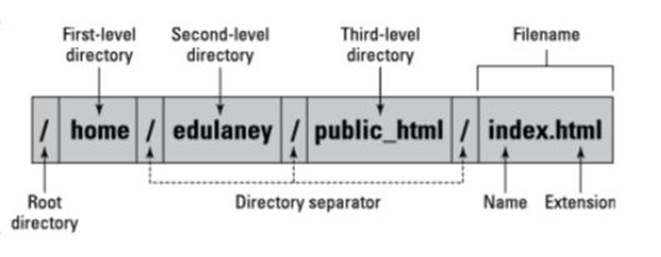
Figure 11: Pathname in Linux
The pathname is composed of a top-level directory, a directory hierarchy, and the filename with the file extension. All are separated by a forward slash (/).
Here is a listing of Linux top-level directories and the data that they contain:
|
Top-Level Directory |
Files that the directory contains |
|
/ |
Single root directory – file system base |
|
/bin |
Executable files such as Linux commandscat,cp,ls |
|
/boot |
Files that the boot loaders accesses during startup – including the Linux kernel |
|
/dev |
Files for the different hardware/devices |
|
/etc |
Initialization scripts and system config files |
|
/home |
User directories |
|
/lib |
Library files which includes driver modules |
|
/lost+found |
For lost files |
|
/media |
Mounting removal media filesystems |
|
/mnt |
Temporary directory for mounted filesystems |
|
/opt |
For storing application packages |
|
/proc |
Information on Linux processes |
|
/root |
Root user home directory |
|
/sbin |
Executable files for commands used by root user |
|
/srv |
For services hosted by the system (eg. FTP, web) |
|
/tmp |
Temporary directory – deleted during system reboot |
|
/usr |
Contains subdirectories for program files |
|
/var |
Log files |
Table 4: Linux Top-level Directories
To navigate in the directories of Linux, you can either use the GUI to find a certain file by going through the folders, using the universal text-based search function, or by using the command line.
You can use the following useful commands in your terminal to navigate and work in the file system:
|
Commands |
What it does |
|
ls |
List down all the contents of a director |
|
cd /bin/ |
Changes directory and goes to bin dir |
|
cd ~ |
the tilde (~) sign signifies the user’s home dir – change dir to home director |
|
cd .. |
Means to change directory one level up. For example, you are currently /home/edulaney/, using the command will take you to /home/ |
|
mkdir |
Command used to create directories |
|
pwd |
Short for present working directory. This command will display the directory where you are currently in. |
Table 5: Directory Navigation Commands
Here I’ll give out more commands that you can use to manage your files using the command line. Try this out on your terminal.
|
Commands |
What it does |
|
cat /home/edulaney/files/file1.txt |
Command to print all the contents of file1.text in the screen |
|
cp /home/ /tmp/ |
Copy contents of /home/ to /tmp |
|
mv /home/edulaney/files/file1.txt /tmp/ |
Move the file file1.txt to the /tmp/ directory. You can also use this command to move the entire directory to another directory |
|
rm file1.txt |
Delete the file file1.txt. Take extra precaution in using the rm command especially when you are logged in as root. |
|
find / -name “linux*” |
The find command is a powerful tool that you can use when searching using the command line. The command here will search for any file or directory with a name that starts withlinux |
Table 6: Basic Commands for Managing Files
Explore more of the commands by using the man command.
Shutting Down your PC
Turning off your Linux PC is similar to how you do it in other operating systems. Click on the Main Menu, select Shutdown, and click on OK. This will initiate a system shutdown. Some distributions will not allow you to shut down the system without logging out first. To do this, click on Log Out and then select Shutdown in the login page.
***
Now that you are acquainted with the look and feel of a Linux environment, let’s get to the post-installation activities such as managing your computer’s hardware and installing applications.
All materials on the site are licensed Creative Commons Attribution-Sharealike 3.0 Unported CC BY-SA 3.0 & GNU Free Documentation License (GFDL)
If you are the copyright holder of any material contained on our site and intend to remove it, please contact our site administrator for approval.
© 2016-2026 All site design rights belong to S.Y.A.