Learning Ubuntu: A Beginners Guide to Using Linux (2016)
CHAPTER 7
SETTING UP A WEB SERVER
APACHE2
A common configuration for Linux servers is to set them up to be web servers. 80% of servers that host websites are running Linux. To establish a good foundation, learning how to install these features are important.
To get started in setting this server up as a web server, we need to install Apache2. Apache2 is the most commonly used web server on Linux systems. Web servers are used to serve up web pages requested by client computers. To run website software like WordPress we will need more packages than this, but installing Apache2 is the best starting place.
|
Installing Apache2 |
|
|
Command |
sudo apt-get install apache2 |
|
Result |
System will install apache2 and dependent packages to the server. |
|
CLI Display |
milo@ubuntu:~$ sudo apt-get install apache2 [sudo] password for milo: Do you want to continue? [Y/n] y milo@ubuntu:~$ |
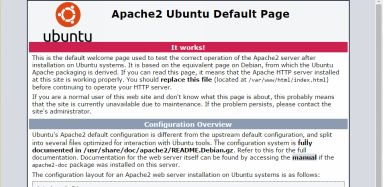
Now if we open our web browser and type in our IP address, we will see the Apache2 landing page.
Stopping and Restarting Apache2
There may be an instance when you want to stop or restart the Apache2 webserver.
You can do so by using the following commands:
Stop Apache2: sudo service apache2 stop
Start Apache2: sudo service apache2 start
Restart Apache2: sudo service apache2 restart
THE WEB FOLDER
You may be wondering, where are my website files located? On most Ubuntu installs you can get to the web directory by changing directory to /var/www/html.
|
Go To The HTML Directory |
|
|
Command |
cd /var/www/html; ls |
|
Result |
System will change to the html directory and list the files. |
|
CLI Display |
milo@ubuntu:~$ cd /var/www/html index.html |
If you want to, you can open the default index.html file in nano.
|
Open index.html in nano |
|
|
Command |
nano index.html |
|
Result |
System will load index.html into nano. |
Note: To save and make changes, you may need to open the file using sudo.
Now let’s change back to our home directory by using cd.
INSTALLING PHP5
PHP is a popular web server-side scripting language. It is very popular and used by most content management systems, such as WordPress.
|
Installing PHP5 |
|
|
Command |
sudo apt-get install php5 |
|
Result |
System will install php5 and dependencies. |
|
CLI Display |
milo@ubuntu:~$ sudo apt-get install php5 [sudo] password for milo: Do you want to continue? [Y/n] y milo@ubuntu:~$ |
INSTALLING MYSQL
Along with Apache2 and PHP, your server will need MySQL for many web applications that need to store data. This includes the widely popular WordPress CMS.
|
Installing MySQL Server |
|
|
Command |
sudo apt-get install mysql-server |
|
Result |
System will install MySQL Server. |
Once you run this command, you will need to enter your password in addition to agreeing to continue as we did before. After that is done the install will prompt you for a password for the ‘root’ user. It is highly recommended you use a different password for MySQL.
Enter your password, then tab to ok and press enter. After that you will need to reenter the password again.
Now, we need to install another package to allow PHP to talk with MySQL.
|
Installing PHP5 MySQL Dependency |
|
|
Command |
sudo apt-get install php5-mysql |
|
Result |
System will install php5 dependency for MySQL. |
|
CLI Display |
milo@ubuntu:~$ sudo apt-get install php5-mysql [sudo] password for milo: Do you want to continue? [Y/n] y milo@ubuntu:~$ |
Next we need to install a package to allow apache2 to talk and authenticate to MySQL.
To do so, use the following command:
sudo apt-get install libapache2-mod-auth-mysql
In some circumstances you may use contact forms on your site for people to reach you. In order to send mail from the server we need to install another package: postfix.
INSTALLING POSTFIX
Postfix is a mail server that started out of IBM research labs as an alternative to Sendmail. Postfix aims to be fast, easy to use (great for beginners), and secure. This is my recommendation if you want to be able to have mail services running on your server. The installation is easy.
|
Installing Postfix |
|
|
Command |
sudo apt-get install postfix |
|
Result |
System will install phpmyadmin. |
|
CLI Display |
milo@ubuntu:~$ sudo apt-get install phpmyadmin [sudo] password for milo: Do you want to continue? [Y/n] y |
After you approve the install, you will see the window below:
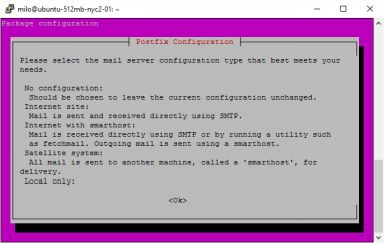
Tap to hit enter on the OK button and then select Internet Site in the next prompt. Once that is done press tab to ok and then enter. The next step asks for your fully qualified domain (FQDN). If you do not have one yet just tab to ok and use the default.
Now it is installed! We won’t cover the other various configuration settings in this book, but you can find various helpful resources online.
INSTALLING PHPMYADMIN
A great way to test to see if we configured all of this properly, is by installing phpmyadmin. Phpmyadmin is a great tool to provide a web interface for managing your MySQL server, its tables and databases.
|
Installing phpmyadmin |
|
|
Command |
sudo apt-get install phpmyadmin |
|
Result |
System will install phpmyadmin. |
|
CLI Display |
milo@ubuntu:~$ sudo apt-get install phpmyadmin [sudo] password for milo: Do you want to continue? [Y/n] y |
 During the phpmyadmin installation, it will prompt you to select which web server you would like to configure. Next to apache2, press the spacebar, then tab to ok, and press enter. Shortly after, the installation will ask you if you want to configure database for phpmyadmin with dbconfig-common. Make sure that yes is selected and press enter. Afterwards you will be prompted to enter the password for the administrative user. Complete the prompts and continue.
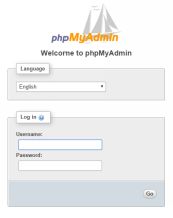
Now that phpmyadmin is installed, we can see if it works by going to http://myipaddress/phpmyadmin and entering our credentials.
If your installation was successful, you should see a screen like the one below:
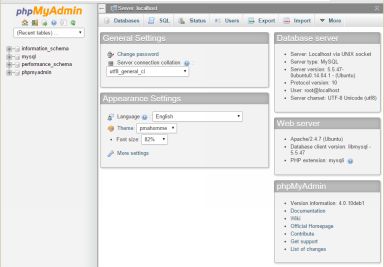
We will get back to more of this later, but there are a few more things that we should learn first.
By now we know some of the basics of installing, updating, navigating, and setting up a VPS.
Next we will take a look at understanding, Linux file and directory permissions.