Ubuntu: Questions and Answers (2014)
System Installation
Questions
Q: When installing I'm given the option of encrypting my home folder -- what does this do?
Tags: system-installation (Next Q), encryption (Next Q)
· Does encrypting my home folder make my computer more secure?
· Do I have to enter my password more if my home folder is encrypted?
· What else should I know about encrypting my home folder?
Tags: system-installation (Next Q), encryption (Next Q)
User: david-siegel
Answer by marco-ceppi
Simply
1. Encrypting your home folder doesn't actually make your computer more secure - it simply makes all the files and folders in your home folder more secure from unauthorized viewing.
o Your computer is still "vulnerable" in a security standpoint - but it becomes very difficult for your content to be stolen (unless the attacker has your password).
2. You won't need to actually enter your password any more than you normally do - when you log in to your computer your files are seamlessly decrypted for just your session.
3. There is a possibility (depending on your computers hardware) that this will affect the performance on your machine. If you're worried about performance more than security (and you're on an older machine) you may wish to disable this feature.
Technically
Ubuntu uses "eCryptfs" which stores all the data in a directory (this case the home folders) as encrypted data. When a user is logged in that encrypted folder is mounted with second decryption mount (this is a temporary mount that works similar to tmpfs - it's created and run in RAM so the files are never stored in a decrypted state on the HD). The idea is - if your hard drive is stolen and the contents read those items aren't able to be read since Linux needs to be running with your authentication to create the successful mount and decryption ( The keys are SHA-512 encrypted data based of several user aspects - the keys are then stored in your encrypted key ring ). The end result is technically secure data (as long as your password isn't cracked or leaked).
You will not have to enter your password any more than usual. There is a slight increase of Disk I/O and CPU which (depending on your computer specs) may hinder performance - though it's quite seamless on most modern PCs
Tags: system-installation (Next Q), encryption (Next Q)
Q: Which computers are guaranteed to work?
Tags: system-installation (Next Q)
Before I buy my next laptop, I'd like to make sure that it will work perfectly with Ubuntu. Is there a list of completely supported computers anywhere?
Tags: system-installation (Next Q)
User: david-siegel
Answer by marco-ceppi
There is an ongoing QA effort for Laptops and Desktops in the Ubuntu Community - you can find that information here:
Old Ubuntu Laptop Reports and for everything 11.04 and onwards, Laptop Testing Site and more recently at Ubuntu Friendly
You can find the reports for Lucid tested Laptops tests here: 10.04 Lucid Laptop Tests. The best course of action is to find a handful of laptops you're interested in then check the Reports on each.
If you feel compelled to help you can find more information at the Laptop Testing page.
Finally there is a detailed list of compatible systems on the Ubuntu Certification page.
Answer by snostorm
If you get a computer with Ubuntu preinstalled, it's guaranteed to work with Ubuntu. Dell (http://www.dell.com/ubuntu) and System76 (http://www.system76.com/) are the two most recommended companies from which to get Ubuntu computers.
Answer by jorge-castro
This page on ubuntu.com has the breakdown of certified machines by manufacturer and model type.
Tags: system-installation (Next Q)
Q: What's your recommendation on drive partitioning schemes for a desktop and home server?
Tags: system-installation (Next Q), partitioning (Next Q)
What partitioning scheme do you recommend for a desktop? I've always created three or four primary partitions -- root, swap, home, and sometimes a separate boot partition. Ubuntu's default install offers LVMs. I've never had to add additional drives or space, so it never seemed like a big deal. Whenever I do a fresh install, though, I always think there might be a better way.
Tags: system-installation (Next Q), partitioning (Next Q)
User: tinker
Answer by buttink
1. / (i.e. the root filesystem)
2. swap
3. /home
The biggest reason to do this is that you can do anything to your Ubuntu install and it won't affect your music/videos/whatever in your home. I especially enjoy this when a upgrade to a new Ubuntu version and the installation goes weird.
Answer by evan
Generally speaking, you shouldn't bother with a separate /home or /boot partition unless you're running multiple Linux distributions at once.
The Ubuntu installers for both the desktop CD and server/alternate CD have the ability to install over an existing system, preserving your home directory (and the local system driectories: /usr/local, /usr/src, and /var/local). This functionality also reuses the user ID and group ID of an existing user, if it has the same username as the user you're creating during installation.
To use this option when installing, choose the option for advanced partitioning, then select your existing / or /home partition. In the box that appears, make sure the filesystem selected matches the existing filesystem of that partition, and that the format box is not checked. Proceed as normal through the rest of the options.
In Ubuntu 10.10 we had hoped to add an option to the installer that detected when you had an existing copy of Ubuntu installed and offered to replace it with the newer version you were attempting to install (using the aforementioned functionality behind the scenes). While it did not make the final cut, it is likely to arrive in Ubuntu 11.04.
As for a separate /boot partition, that's a relic of hardware constraints of the past (the bootloader 1024 cylinder limit). I can think of no practical advantage a separate /boot would have on a modern system, and if not given an arguably excessive amount of space, it will potentially fill up and create problems of its own, given that Ubuntu does not automatically remove old kernels.
Tags: system-installation (Next Q), partitioning (Next Q)
Q: What's the difference between Wubi and a regular "alongside Windows" installation?
Tags: system-installation (Next Q)
At this time, Wubi does not work with Windows 8 default boot-loader. Thus at this point Wubi would not work on a new Windows 8 machine.
Citation fom WubiGuide
Question
Recently I've learned of Wubi, a way to install Ubuntu right from Windows.
Besides installing from Windows, I would like to know key differences between a regular "alongside Windows" or Dual-boot Ubuntu installation and one done with Wubi. Are there any disadvantages (for example a performance penalty) or incompatibilities I should look out for when using Wubi?
Tags: system-installation (Next Q)
User: cesar
Answer by nicholas-knight
You can expect disk performance to be a bit lower (bouncing through NTFS isn't exactly ideal), and you're still somewhat at the mercy of Windows. If your Windows install goes pear-shaped, you may lose access to your Wubi install, too. The reliance on NTFS would also give me heartburn in general, but that by itself probably won't be a serious reliability problem.
Other than that, I can't think of anything that should be different. If you do find a problem, report a bug! :)
There is one other catch noted on the Wubi FAQ in addition to performance/reliability: Hibernation isn't supported.
(I'll note for the record, however, that even with native installs, I've rarely had reliable suspend or hibernation support in any Linux distribution, including Ubuntu.)
· What performance differences are there when installing with Wubi?
Tags: system-installation (Next Q)
Q: How can I install Ubuntu without removing Windows?
Tags: system-installation (Next Q), windows (Next Q)
I need my pre-installed version of Windows 7 (or any other version of Windows), how could I install Ubuntu without erasing it?
Tags: system-installation (Next Q), windows (Next Q)
User: dani-barca-casafont
Answer by fader
The instructions below are for Ubuntu 11.10. Other versions will be similar but might have a slightly different appearance or order. You must make sure that Windows is correctly shutdown (no Hibernation, no Suspend, no Fast Boot) and your NTFS drive is healthy.
1. Boot from your Ubuntu CD or USB stick. When prompted, choose "Install Ubuntu".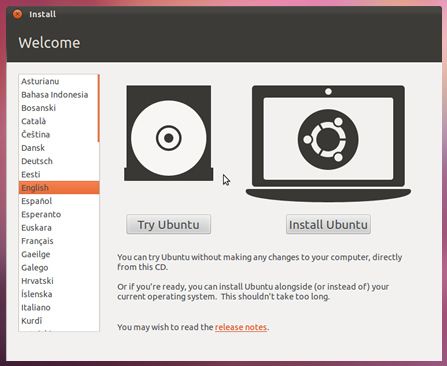
2. Ensure that you meet all the installation prerequisites. Ideally, connect to the internet at this time as well.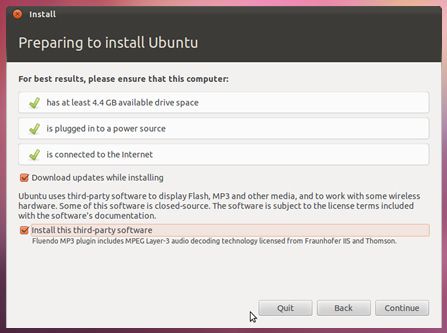
3. If you have wireless network hardware and there is an available network, you can (optionally) connect to it at this time.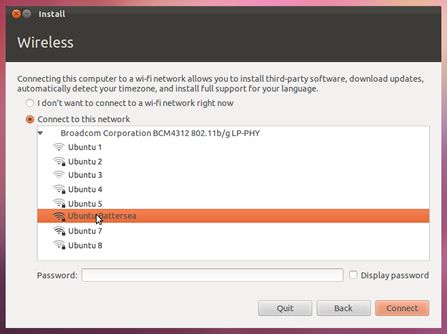
4. Be certain to choose "Install Ubuntu alongside Windows" (or "other operating systems" or other similar wording, depending on your system configuration). This is the important step that will ensure that Ubuntu and windows are both available after the installation.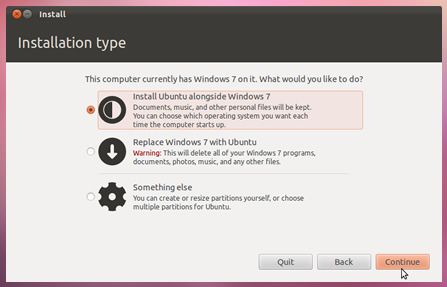
5. Choose how much space to give to Ubuntu and Windows. How much you give each one is up to you.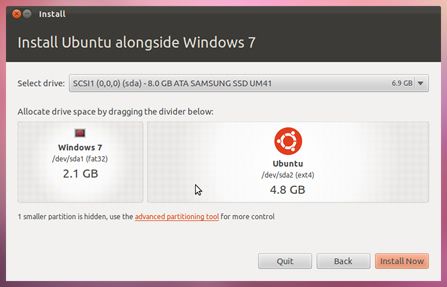
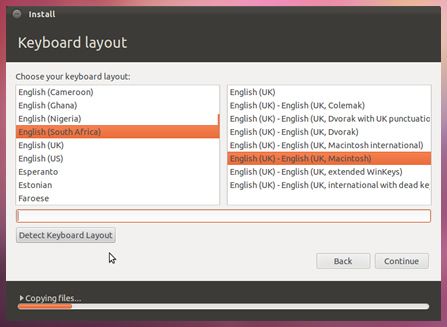
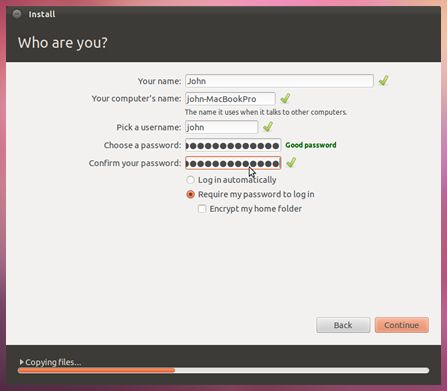
6. Complete the rest of the installation by setting your timezone and entering information about your computer and yourself.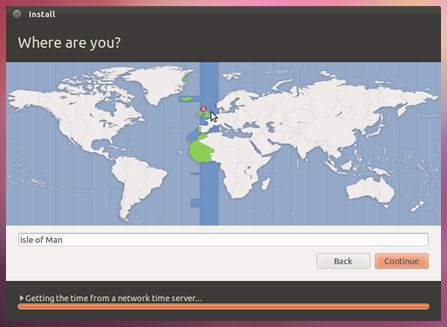
7. Enjoy the informative slide show while the system installs.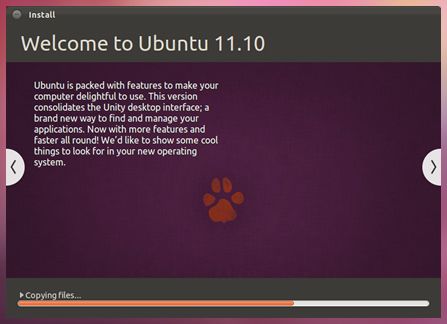
8. Restart and enjoy Ubuntu!
o http://www.ubuntu.com/download/ubuntu/windows-installer
Answer by ricky
You can do it either with Wubi or you can install it in a separate partition.
These links may be useful:
· Wubi Guide
· How to partition
Tags: system-installation (Next Q), windows (Next Q)
Q: How can I install Windows after I've installed Ubuntu?
Tags: system-installation (Next Q), windows (Next Q), dual-boot (Next Q)
I have Ubuntu on my laptop. Now I want install Windows 7 in a dual-boot. How can I do this?
I can't lose my Ubuntu files, and I'm afraid that I might break GRUB.
Tags: system-installation (Next Q), windows (Next Q), dual-boot (Next Q)
User: sk8er
Answer by evgeny
Here's the general outline:
1. Make space for Windows 7
2. Install Windows 7
3. Reinstall GRUB
1. Mount the /boot partition
4. Install the boot loader
Step One
Open up GParted, and make sure that you have at least 20 GB available for Windows 7, either as a partition you can remove, or as unpartitioned space. If it's a partition, remove it from GRUB to make sure it doesn't break your Ubuntu install -- GParted will complain if anything bad is about to happen. Make note of current /boot device. If that doesn't show up there, make note of the / device. The device name is something like sda5.
Step Two
Install Windows 7 into the space you just made
Step Three
Load up from your Ubuntu live CD, and then run these commands.
If you DO NOT have a separate /boot partition:
sudo mount /dev/DEVICENAME_FROM_STEP_ONE /mnt
sudo rm -rf /boot # Careful here, make sure YOU ARE USING THE LIVE CD. I tried it, it works.
sudo ln -s /mnt/boot /boot
If you have a SEPARATE /boot partition:
sudo mount /dev/DEVICENAME_FROM_STEP_ONE /boot
Step Four
Then continue with those commands:
sudo apt-get update && sudo apt-get install grub-pc
sudo grub-install /dev/sda # NOTE THAT THERE IS NO DIGIT
sudo umount /boot
And restart. It should work fine and boot both systems.
Answer by peachy
Installing Windows after Ubuntu is not the recommended process for a dual boot Windows and Ubuntu system, but it is possible.
· First, you have to make sure that the 50GB free space is available, resizing your Ubuntu by using gParted if necessary.
· Also use gParted or Disk Utility to format the the free space as NTFS, this prevents Windows 7 from creating an additional boot partition in addition to the "C" drive.
· Next, boot to the Windows DVD installer and install Windows on the NTFS partition. Upon reboot, Windows will automatically boot and you won't see the grub menu allowing you to choose Ubuntu, because the Windows bootloader has replaced grub.
· Now, what you need to do is run Ubuntu from LiveCD or LiveUSB and install boot-repair.
· To install boot-repair, open up a terminal by pressing Ctrl+Alt+T and type the following commands:
· sudo add-apt-repository ppa:yannubuntu/boot-repair && sudo apt-get update
· sudo apt-get install -y boot-repair && boot-repair
· After installation, boot-repair will automatically launch, if is doesn't, launch it via Dash.
· Make sure to select recommended repair to repair grub. Reboot and that's it.
· You should now have a Grub menu on boot, allowing you to choose from Ubuntu, memtest, and Windows 7
Tags: system-installation (Next Q), windows (Next Q), dual-boot (Next Q)
Q: How do I install Ubuntu to a USB key? (without using Startup Disk Creator)
Tags: system-installation (Next Q)
If you are hurrying to reply, System Administration StartUp Disk Creator -- no, that's not what I'm talking about.
I want to try Ubuntu 11.04's Unity without touching my existing Ubuntu install.
To do this, I need to install the nVidia drivers first (sigh).
To do this, I need changes to persist a reboot.
To do this, I need to really install Ubuntu on a USB key.
How do you do that?
What I tried
1. I tried to make a USB key from Testdrive, then boot from it, then choose "Install Ubuntu." The installer refused to install to the installation media itself.
2. I tried, from my installed copy of Ubuntu:
3. sudo kvm /dev/sdb --cdrom .cache/testdrive/iso/ubuntu_natty-desktop-i386.iso
...but the installer didn't detect the disk properly.
Tags: system-installation (Next Q)
User: badp
Answer by badp
Ubuntu/Linux solution
1. Obtain latest image
You should do this with testdrive  .
.
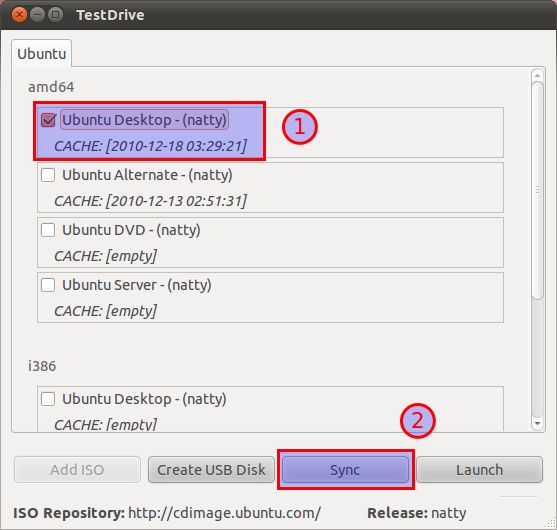
Note. If your key is smaller than 4.4 GB (for Ubuntu 11.04), you must get the alternate installer. The Desktop installer refuses to continue if there is less than 4.4 GB of free disk space.
2. Format the USB disk.
This is important if you already have anything looking like a Linux install on your disk, or the installer will not want to touch that disk, for some reason. I failed earlier because I didn't perform this step, so skip at your own risk! You need a key that is at least 3GB in size.
You can do so from System Administration Disk Utility. Choose the destination USB key, unmount all partitions and select Format Drive.
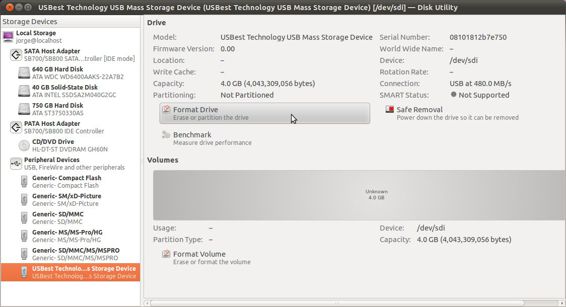
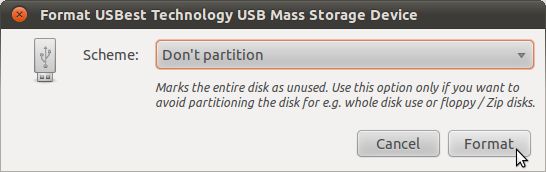
You need to make sure you select "Don't Partition" before it lets you format the disk.
3. Start a virtual machine on the USB key
I made sure (with file) that my USB key was in /dev/sdb, then ran:
sudo qemu-system-x86_64 /dev/sdb -cdrom ~/.cache/testdrive/iso/ubuntu_natty-desktop-i386.iso
...to install the i386 ISO of Natty desktop -- the file name will vary if you download a different ISO.
Details for your virtualization solution of choice will vary, but you want to use the device file of your USB key as the VM's hard drive.
Append -boot order=dto the kvm command to make it boot from the image in case it tries to boot from the 'hard disk' and fails because it cannot find an operating system there.
4. Install normally.
At this point you are working on a virtual machine that sees your USB key as the only connected hard drive. From inside the "QEMU" window, install as you would normally do.
A few notes:
· Partitioning. Avoid using the automatic partitioning system, as it will create a swap partition on your USB key. That's no good, as swapping becomes super slow (seconds-long system freezes slow) and quickly kills your drive's life. Simply allocate a single partition for /. If you're using the alternate installer, make sure you set the noatime flag to further reduce the amount of writes to the disk.
· Updates. Skip the option to automatically download and install updates. It is not guaranteed that the repositories will be in a consistent state by the time you run the installer. Personally, I'd rather manage the upgrades manually with a tool such as aptitude (which does no longer ship with Ubuntu by default).
· Alpha-quality software. Things are a little wonky -- it is alpha quality software, after all. I had dpkg exiting with error code 1 without being able to review the error - no packages were broken as a result, however. I tried to shutdown the virtual machine cleanly after the setup, but it hung. On a reboot, however, the system booted fine.
5. Reboot and boot into your copy of Ubuntu
You may need to fiddle with your BIOS settings to make this work.
A nice (or annoying, based on your use case) thing about Ubuntu on a USB is that next time it'll refresh GRUB, it'll also detect and add to the list the kernels and operative systems on the HDD. This should let you boot straight into your HDD from your USB key's GRUB.
Answer by takkat
Installing Ubuntu to a removable USB drive with Virtual Box
In order to install Ubuntu to a portable external USB drive (either disk or stick) we may also use Virtual Box to install from a virtual environment. For USB 2.0 support the closed source but free PUEL-version of Virtual Box is needed.
Create a virtual machine for the installation live environment:
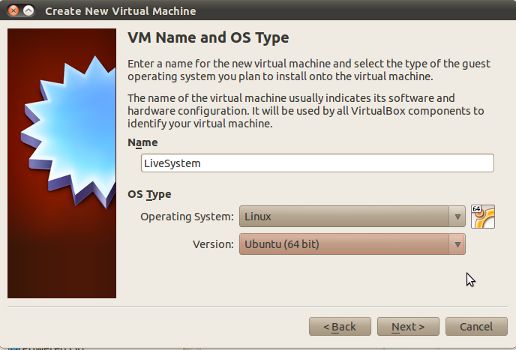
We create a virtual machine for a Linux/Ubuntu environment (32- or 64-bit, depending on the installation medium):
As we want to install to an USB drive we do not create a virtual harddisk (VDI) for this machine by unticking the box in the following window:

We then need to assign system memory (e.g. 1024 MB), graphics memory (e.g. 128MB), and adjust CPU settings according to our host hardware. Also we may want to create a bridged network in order to be able to download files during the installation.
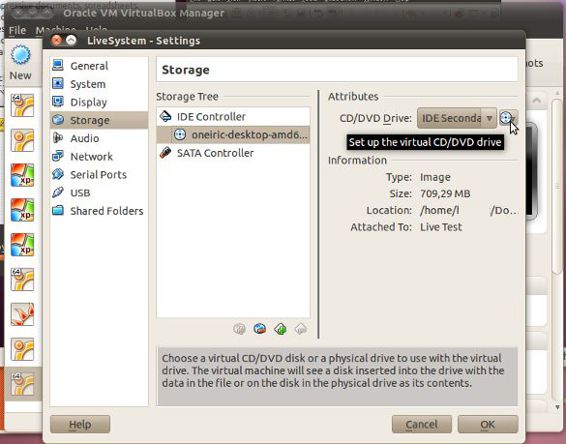
Mount the installation CD to the virtual machine:
In the Storage menu from Virtual Box Manager we select the .iso image of our installation CD to mount as CD drive. Make sure the boot order of the virtual machine is set to boot from CD.
Mount the USB drive to the installation environment
After we started the virtual machine (USB support needs to have been set up first) to boot the installation CD we need to mount the USB drive either by clicking on the small icon in the bottom panel or by choosing from Devices -> USB Devices menu of Virtual Box Manager.
 This is when the USB drive needs to have been mounted before we proceed
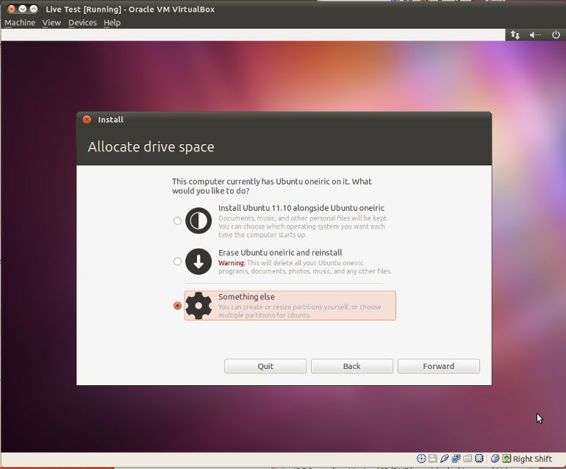
Partition and format the USB drive
After having chosen Something else the graphical partition manager GParted will guide us through the partitioning process:
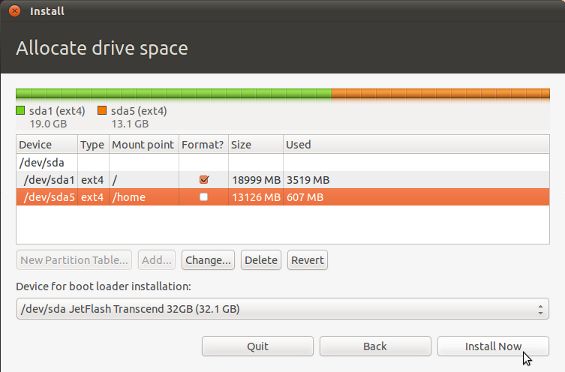
We need at least a partition with a mount point root (/). In the example above an additional /home partition was created. By unticking Format we keep the data that may already be there. A /swap partition may not be needed for an USB-stick or a portable drive.
· At this point take extra care that the boot loader Grub indeed will be installed to the USB drive (/sda) and not to anywhere else
By selecting Install Now we start the installation to our USB drive. Consider that this installation may take a bit longer than we are used to.
After the installation has finished we may unmount our drive eith the brand new operating system and boot from any other machine to customized it to our needs.
· Do not forget to enable booting from USB in this computer's BIOS.
Answer by zkriesse
If you are talking about an actual install, as in a full Ubuntu install rather than just a Live USB type then what you can do is use an external hard drive that plugs in via USB and install to that via the following method.
Please Note: The following steps were tested using Ubuntu Version 9.10, but has not been tested with the later versions. Use at your own risk & discretion.
What You Will Need
1. A Computer with Internet access.
2. A LiveCD or LiveUSB with Ubuntu.
3. An external Hard Drive with USB capability.
What To Do
1. Open up your computer and remove the Hard Drive.
2. Plug in your external USB Hard Drive via the USB cable.
3. Stick in your LiveUSB or LiveCD and then boot up your PC.
4. Open up the boot menu, and choose to boot from the LiveCD/LiveUSB.
5. During the installation process you should your external hard drive listed, install Ubuntu to that.
6. Finish the installation process, turn off your PC, and put your other hard drive back into your computer.
7. Reboot your computer, go to the boot menu and select your external hard drive and attempt to boot from it. If it does congratulations, you now have an external hard drive with a full fledged Operating System on it.
8. Enjoy your external hard drive running Ubuntu/Linux! Please do let me know if this helps you! If not let me know about that too. :)
But if you're just wanting a Live USB then you can use the Universal USB Installer for that or the Ubuntu USB Startup Disk Creator...
Tags: system-installation (Next Q)
Q: Installing Ubuntu on a SSD
Tags: system-installation (Next Q), ssd (Next Q)
Going to install Ubuntu 10.10 on new intel x25M 80GB SSD. It will be fresh install. I have been googling for past few days and getting overwhelming articles/blogs/Q&As. One particularly very useful being:
How do I optimize the OS for SSDs?
But with so many suggestions and differences of opinions (on different links) this simple OS install process seems to be daunting task to me and I really want to stick with Ubuntu (although have used for very short period of time).
Can someone help me by answering few questions (yes, they are repeated because I couldn't comprehend the answers elsewhere)
1. Which file system (ext2/3/4 or something else)? (consider SSD life)
2. Can it be changed after installation?
3. Should I partition the disk? (as we do in traditional HDD) for now, no plan of dual booting. Only Ubuntu will live on scarce space of 80GB SSD.
4. I have 2 GB RAM, should i still allocate swap space (if I don't allocate swap space, can I still hibernate the machine)? will swap space impact SSD life?
5. Should I consider putting additional 1GB RAM to avoid swap space?
6. What is partition aligning? Is it needed to be done before installing the Ubuntu OS or can be done later?
Intended usage - heavy browsing, programming, regular video/music and some other non-CPU/RAM-intensive programs. Will keep big files in an external hard drive.
laptop config - 3yr old Vaio, Core2 Duo, 2GB RAM
More references:
· http://opentechnow.blogspot.com/2010/02/linux-ssd-optimization-guide.html
· Is a 40GB SSD practical to use for ' / '
· http://ubuntuforums.org/archive/index.php/t-1145332.html
· https://help.ubuntu.com/community/SwapFaq
· http://ubuntuforums.org/showthread.php?t=1242740 (resizing/creating does not seem a simple process after look this)
· http://en.dogeno.us/2010/01/karmic-with-solid-state-disk-how-to-optimize-ubuntu-for-ssd/
· How to enable TRIM?
Tags: system-installation (Next Q), ssd (Next Q)
User: kunal
Answer by openningia
I'll start by saying that the answer you linked already summarizes all the optimizations you may need.
Next, to answer your questions:
1. Which file system (ext2/3/4 or something else)? (consider SSD life)
ext4 is a good filesystem even for SSD, so that would be my suggestion. (If you want performance so bad you should try XFS )
2. Can it be changed after installation?
Yes, but it is not trivial, so choose well from the start :)
3. Should I partition the disk? (as we do in traditional HDD) for now, no plan of dual booting. Only Ubuntu will live on scarce space of 80GB SSD.
This is really not a matter of SSD, but your personal choice. If you were to ask me I'll say no; don't partition the disk you will end in loosing useful space. (If you end with a partition with 2GB free and another with 1GB free, you theoretically have 3Gb free but cannot copy a 3GB file... that space is wasted )
4. I have 2 GB RAM, should I still allocate swap space (if I dont allocate swap space, can i still hibernate the machine)? will swap space impact SSD life? I wouldn't worry so much about the SSD life ( modern one can run for decades ), however 2GB of RAM are enough not to need the swap partition. Finally the swap partition is needed in order to hibernation, so if you want to hibernate the machine then you need the swap partition.
5. Should I consider putting additional 1GB RAM to avoid swap space? 1GB more or ram is always useful :) do it if you can.
6. What is partition aligning? is it needed to be done before installing the Ubuntu OS or can be done later?
That is the procedure where you align clusters, blocks and chunks. IMHO it is only needed on servers with a lot of data throughput. A good tool to do partition alignment is GParted. Of course this should be done before installing Ubuntu.
Hope this helps :)
Tags: system-installation (Next Q), ssd (Next Q)
Q: How can I install on a non-PAE CPU? (error "Kernel requires features not present on the CPU: PAE")
Tags: system-installation kernel (Next Q)
After burning Ubuntu 12.04 to a CD, I tried booting and got the message:
This kernel requires the following features not present on the CPU:
pae
Unable to boot - please use a kernel appropriate for your CPU.
What does this mean?
Tags: system-installation kernel (Next Q)
User: oshirowanen
Answer by fossfreedom
The error message means that your CPU does not support PAE extensions - that is a technique which allows a 32bit CPU to address more than 4GB of memory address space.
By default, 12.04 and later versions of Ubuntu expects a CPU with this capability:
PAE is provided by Intel Pentium Pro and above CPUs, including all later Pentium-series processors (except the 400 MHz-bus versions of the Pentium M). It is also available on other processors with similar or more advanced versions of the same architecture, such as the AMD Athlon[dubious discuss] and later AMD processor models. wikipedia
While the above is strictly true, old systems which have the memory controller on the motherboard may not "expose" the CPU's PAE support, effectively making them non-PAE.
There is a heated bug report about this; Canonical has decided that the default Ubuntu Desktop install will expect PAE support.
A few suggested workarounds:
Workaround 1: Install Lubuntu or Xubuntu, then install the regular Ubuntu Desktop
· Install either Lubuntu 12.04 32-bit or Xubuntu 12.04 32-bit; both of these use a non-PAE kernel by default.
· Once you boot into your new Lubuntu/Xubuntu, you can then switch to the default Unity desktop by installing the ubuntu-desktop package.
Workaround 2: Install an older version and then upgrade to 12.04
Install 10.04 or 11.10 and then upgrade to 12.04. See the linked question below for 12.10.
Workaround 3: If you have a wired internet connection, use the "net install" mini-CD
· You will need a reasonably fast wired connection for this method -- all packages will be downloaded over the internet.
· Download the non-PAE netboot CD image mini.iso and burn it to a CD or USB.
· Boot from it, follow the steps, and choose linux-generic when asked to choose a kernel, and ubuntu-desktop to get the "default" Ubuntu installation the regular Desktop CD would have given you, just with a non-PAE kernel.
o You can also choose one of the other desktops. You should choose a desktop otherwise you will not have a GUI to play with after installation.
Workaround 4: Ubuntu 12.04.5 and 14.04 (or later) on Pentium M only
· Ubuntu 12.04.5 and 14.04 support an option ("forcepae") to enable PAE on Pentium M CPUs (where it is disabled by default). To enable it:
o Boot the 32-bit Ubuntu (or Xubuntu etc.) installer
o When the image of the keyboard and little man in circle appears hit the Tab key
o "Choose your language" popup appears. Use the cursor keys and hit the Enter key to choose your language
o Press F6, a grey menu will popup with some boot options
o Press escape to close the window
o You will now see a line that says:
Boot Options file=/cdrom/preseed/ubuntu.seed boot=casper initrd=/casper/initrd.lz quiet splash --
Edit this line and add the forcepae parameter to the end:
Boot Options file=/cdrom/preseed/ubuntu.seed boot=casper initrd=/casper/initrd.lz quiet splash -- forcepae
o Hit the Enter key, hopefully Ubuntu will boot and the rest of your install will be successful. If you have graphical problems with Unity, or just find it slow, try a more lightweight distribution like Xubuntu.
Linked Question:
1. How can I tell if a machine has PAE?
2. Will it be possible to use a non-pae kernel in recent versions of Ubuntu?
Answer by rolandixor
There is a custom iso available (use at your own risk).
It worked for me, and I just had to install the relevant updates when I was done.
Tags: system-installation kernel (Next Q)
Q: When installing I'm given the option of encrypting my home folder -- what does this do?
Q: Which computers are guaranteed to work?
Q: What's your recommendation on drive partitioning schemes for a desktop and home server?
Q: What's the difference between Wubi and a regular "alongside Windows" installation?
Q: How can I install Ubuntu without removing Windows?
Q: How can I install Windows after I've installed Ubuntu?
Q: How do I install Ubuntu to a USB key? (without using Startup Disk Creator)
Q: Installing Ubuntu on a SSD
Q: How can I install on a non-PAE CPU? (error "Kernel requires features not present on the CPU: PAE")
All materials on the site are licensed Creative Commons Attribution-Sharealike 3.0 Unported CC BY-SA 3.0 & GNU Free Documentation License (GFDL)
If you are the copyright holder of any material contained on our site and intend to remove it, please contact our site administrator for approval.
© 2016-2026 All site design rights belong to S.Y.A.