Ubuntu Unleashed 2017 Edition (2017)
Part II: Desktop Ubuntu
Chapter 3. Working with Unity
In This Chapter
![]() Foundations and the X Server
Foundations and the X Server
![]() Using Unity, a Primer
Using Unity, a Primer
![]() Power Shortcuts
Power Shortcuts
![]() References
References
Imagine a world of black screens with white text, or, for those of you who remember, dark green screens with light green text. That used to be the primary interface for users to access computers. Computing has moved on significantly and has adopted the graphical user interface (GUI) as standard on most desktop and workstation platforms. Not only that, but GUIs have gradually changed and evolved over time. This chapter starts with low-level information about what lies underneath the GUI and builds up to a description of the Unity desktop and how to use it.
Foundations and the X Server
Ubuntu uses the X Window System, the graphical networking interface found on many Linux distributions that provides the foundation for a wide range of graphical tools and window managers. More commonly known as just X, it can also be referred to as X11R7 and X11 (as found on Mac OS X). Coming from the world-renowned Massachusetts Institute of Technology, X has gone through several versions, each of which has extended and enhanced the technology. The open-source implementation is managed by the X.Org foundation, whose board includes several key figures from the open-source world. On September 15, 2012, X11 turned 25 years old, which is a very long time for any software to remain usable and be in active development.
The best way to think about how X works is to see it as a client/server system. The X server provides services to programs that have been developed to make the most of the graphical and networking capabilities that are available under the server and in the supported libraries. X.Org provides versions for many platforms, including Linux and Mac OS X. Originally implemented as XFree86, X.Org was forked when a fight broke out over certain restrictions that were going to be included in the XFree86 license. Taking a snapshot of code that was licensed under the previous version of the license, X.Org drove forward with its own implementation based on the code. Almost in unison, most Linux distributions turned away from XFree86 and switched their development and efforts to X.Org.
A desktop environment for X provides one or more window managers and a suite of clients that conform to a standard graphical interface based on a common set of software libraries. When used to develop associated clients, these libraries provide graphical consistency for the client windows, menus, buttons, and other onscreen components, along with some common keyboard controls and client dialogs. In this chapter, you find out how to work with Ubuntu’s Unity interface and learn something about the version of X that is included with Ubuntu. If you want to discover more about some of the other desktop environments that are available to use with Ubuntu, including KDE and Xfce, take a look at Chapter 7, “Other Ubuntu Interfaces.”
Note
Ubuntu is in the process of developing Mir, a replacement for X. This is being done because of Ubuntu’s strong desire and commitment to creating a unified interface and user experience across multiple types of platforms and devices. Interaction with a touch screen, such as is found on a smart phone or tablet, is different than on a desktop or laptop system. This requires different backend processes, too. Mir is not yet in use by default, but is considered ready for use by testers. See https://wiki.ubuntu.com/Mir/ for more information.
Basic X Concepts
The underlying engine of X11 is the X protocol, which provides a system of managing displays on local and remote desktops. The protocol uses a client/server model that allows an abstraction of the drawing of client windows and other decorations locally and over a network. An X server draws client windows, dialog boxes, and buttons that are specific to the local hardware and in response to client requests. The client, however, does not have to be specific to the local hardware. This means that system administrators can set up a network with a large server and clients and enable users to view and use those clients on workstations with totally different CPUs and graphics displays.
Because X offers users a form of distributed processing, Ubuntu can be used as a very cheap desktop platform for clients that connect to a powerful X server. The more powerful the X server, the larger the number of X-based clients that can be accommodated. This functionality can breathe new life into older hardware, pushing most of the graphical processing on to the server. A fast network is a must if you intend to run many X clients because X can become bandwidth hungry.
Note
A great way to demonstrate the capability of X to handle remote clients is Edubuntu’s use of LTSP, covered in Chapter 33, “Linux Terminal Server Project (LTSP).” It is designed to set up a main server and a set of dumb terminals that display programs that are being run on the server.
X is hugely popular in the UNIX and Linux world for a variety of reasons. That it supports nearly every hardware graphics system is a strong point. This and strong multiplatform programming standards give it a solid foundation of developers committed to X. Another key benefit of X is its networking capability, which plays a central point in administration of many desktops and can also assist in the deployment of a thin-client computing environment. Being able to launch applications on remote desktops and also standardize installations are examples of the versatility of this powerful application.
More recent versions of X have also included support for shaped windows (that is, nonrectangular), graphical login managers (also known as display managers), and compressed fonts. Each release of X brings more features designed to enhance the user experience, including being able to customize how X client applications appear, right down to buttons and windows. Most office and home environments run Linux and X on their local machines. The more-enlightened companies and users harness the power of the networking features of X, enabling thin-client environments and allowing the use of customized desktops designed specifically for that company. Having applications launch from a single location makes the lives of system administrators a lot easier because they have to work on only one machine, rather than several.
Using X
X.Org (www.x.org) is the X server that is used with Ubuntu. The base distribution consists of many packages including the server, support and development libraries, fonts, various clients, and documentation. An additional 1,000 or more X clients, fonts, and documentation are also available in the Ubuntu repositories.
The /usr directory and its subdirectories contain the majority of the Xorg software (along with a lot of other stuff; the location is not exclusive to X). Some important subdirectories are as follows:
![]() /usr/bin—This is the location of the X server and various X clients. (Note that not all X clients require active X sessions.)
/usr/bin—This is the location of the X server and various X clients. (Note that not all X clients require active X sessions.)
![]() /usr/include—This is the path to the files necessary for developing X clients and graphics such as icons.
/usr/include—This is the path to the files necessary for developing X clients and graphics such as icons.
![]() /usr/lib—This directory contains required software libraries to support the X server and clients.
/usr/lib—This directory contains required software libraries to support the X server and clients.
![]() /usr/lib/X11—This directory contains fonts, default client resources, system resources, documentation, and other files that are used during X sessions and for various X clients. You will also find a symbolic link to this directory, named X11, under the /usr/lib directory.
/usr/lib/X11—This directory contains fonts, default client resources, system resources, documentation, and other files that are used during X sessions and for various X clients. You will also find a symbolic link to this directory, named X11, under the /usr/lib directory.
![]() /usr/lib/modules—This path to drivers and the X server modules used by the X server enables use of various graphics cards.
/usr/lib/modules—This path to drivers and the X server modules used by the X server enables use of various graphics cards.
The main components required for an active local X session are installed on your system if you choose to use a graphical desktop. These components are the X server, miscellaneous fonts, a terminal client (that is, a program that provides access to a shell prompt), and a client known as a window manager. Window managers administer onscreen displays, including overlapping and tiling windows, command buttons, title bars, and other onscreen decorations and features.
Elements of the xorg.conf File
Traditionally, the most important file for Xorg has been the xorg.conf configuration file. This file contained configuration information that was vital for X to function correctly and was usually created during the installation of Ubuntu.
Bullet Proof X
Ubuntu is designed to work no matter what might happen. So in the event of some cataclysmic event that destroys your main X system, you still have some graphical way of getting yourself back into a fully functional X-based system. An additional upside is that much of the complexity of the information in this chapter is unnecessary for most users, in fact, the files are not even created or used by default and are only used if you create them. The downside to this is that much of the configurability of the X-server is now overwritten when an upgrade happens.
Modern versions of Xorg do not create an xorg.conf file by default. Instead, various files ending in *.conf reside in the /usr/share/X11/xorg.conf.d directory and are automatically loaded by X at boot, prior to reading any xorg.conf. These files can each contain one or more sections in the same format used by xorg.conf. Users can create the file and continue making custom configurations in /etc/xorg.conf as has been traditionally done, but the file is not created by default. What is included in the previously mentioned individual files should not be changed, but you may override those settings by creating your own xorg.conf file.
Note
We refer to using an xorg.conf file from here on, but keep the preceding information in mind to prevent confusion.
Let’s take a look at the potential contents of xorg.conf so that you can get an idea of what X is looking for. The components, or sections, of the xorg.conf file specify the X session or server layout, along with pathnames for files that are used by the server, any options relating directly to the server, any optional support modules needed, information relating to the mouse and keyboard attached to the system, the graphics card installed, the monitor in use, and the resolution and color depth that Ubuntu uses. These are the essential components:
![]() ServerLayout—Defines the display, defines one or more screen layouts, and names input devices.
ServerLayout—Defines the display, defines one or more screen layouts, and names input devices.
![]() Files—Defines the location of colors, fonts, or port number of the font server.
Files—Defines the location of colors, fonts, or port number of the font server.
![]() Module—Tells the X server what graphics display support code modules to load.
Module—Tells the X server what graphics display support code modules to load.
![]() InputDevice—Defines the input devices, such as the keyboard and mouse; multiple devices can be used.
InputDevice—Defines the input devices, such as the keyboard and mouse; multiple devices can be used.
![]() Monitor—Defines the capabilities of any attached display; multiple monitors can be used.
Monitor—Defines the capabilities of any attached display; multiple monitors can be used.
![]() Device—Defines one or more graphics cards and specifies what optional features (if any) to enable or disable.
Device—Defines one or more graphics cards and specifies what optional features (if any) to enable or disable.
![]() Screen—Defines one or more resolutions, color depths, perhaps a default color depth, and other settings.
Screen—Defines one or more resolutions, color depths, perhaps a default color depth, and other settings.
The following sections provide short descriptions of these elements; the xorg.conf man page contains full documentation of all the options and other keywords you can use to customize your desktop settings.
The ServerLayout Section
As noted previously, the ServerLayout section of the xorg.conf file defines the display and screen layouts, and it names the input devices. A typical ServerLayout section from an automatically configured xorg.conffile might look like this:
Click here to view code image
Section "ServerLayout"
Identifier "single head configuration"
Screen 0 "Screen0" 0 0
InputDevice "Mouse0" "CorePointer"
InputDevice "Keyboard0" "CoreKeyboard"
InputDevice "DevInputMice" "AlwaysCore"
EndSection
In this example, a single display is used (the numbers designate the position of a screen), and two default input devices, Mouse0 and Keyboard0, are used for the session.
The Files Section
The Files section of the xorg.conf file might look like this:
Click here to view code image
Section "Files"
RgbPath "/usr/lib/X11/rgb"
FontPath "unix/:7100"
EndSection
This section lists available session colors (by name, in the text file rgb.txt) and the port number to the X font server. The font server, xfs, is started at boot and does not require an active X session. If a font server is not used, the FontPath entry could instead list each font directory under the /usr/lib/X11/fonts directory, as in this example:
Click here to view code image
FontPath "/usr/lib/X11/fonts/100dpi"
FontPath "/usr/lib/X11/fonts/misc"
FontPath "/usr/lib/X11/fonts/75dpi"
FontPath "/usr/lib/X11/fonts/type1"
FontPath "/usr/lib/X11/fonts/Speedo"
...
These directories contain the default compressed fonts that are available for use during the X session. The font server is configured by using the file named config under the /etc/X11/fs directory. This file contains a listing, or catalog, of fonts for use by the font server. By adding an alternate-server entry in this file and restarting the font server, you can specify remote font servers for use during X sessions. This can help centralize font support and reduce local storage requirements (even though only 25MB is required for the almost 5,000 fonts installed with Ubuntu and X).
The Module Section
The Module section of the xorg.conf file specifies loadable modules or drivers to load for the X session. This section might look like this:
Section "Module"
Load "dbe"
Load "extmod"
Load "fbdevhw"
Load "glx"
Load "record"
Load "freetype"
Load "type1"
Load "dri"
EndSection
These modules can range from special video card support to font rasterizers. The modules are located in subdirectories under the /usr/lib/modules directory.
The InputDevice Section
The InputDevice section configures a specific device, such as a keyboard or mouse, as in this example:
Click here to view code image
Section "InputDevice"
Identifier "Keyboard0"
Driver "kbd"
Option "XkbModel" "pc105"
Option "XkbLayout" "us"
EndSection
Section "InputDevice"
Identifier "Mouse0"
Driver "mouse"
Option "Protocol" "IMPS/2"
Option "Device" "/dev/input/mice"
Option "ZAxisMapping" "4 5"
Option "Emulate3Buttons" "yes"
EndSection
You can configure multiple devices, and multiple InputDevice sections might exist. The preceding example specifies a basic keyboard and a two-button PS/2 mouse (actually, a Dell touchpad pointer). An InputDevice section that specifies use of a USB device could be used at the same time (to enable mousing with PS/2 and USB pointers) and might look like this:
Click here to view code image
Section "InputDevice"
Identifier "Mouse0"
Driver "mouse"
Option "Device" "/dev/input/mice"
Option "Protocol" "IMPS/2"
Option "Emulate3Buttons" "off"
Option "ZAxisMapping" "4 5"
EndSection
The Monitor Section
The Monitor section configures the designated display device as declared in the ServerLayout section, as shown in this example:
Click here to view code image
Section "Monitor"
Identifier "Monitor0"
VendorName "Monitor Vendor"
ModelName "Monitor Model"
DisplaySize 300 220
HorizSync 31.5-48.5
VertRefresh 50-70
Option "dpms"
EndSection
Note that the X server automatically determines the best video timings according to the horizontal and vertical sync and refresh values in this section. If required, old-style mode-line entries (used by distributions and servers prior to XFree86 4.0) might still be used. If the monitor is automatically detected when you configure X (see the “Configuring X” section, later in this chapter), its definition and capabilities are inserted in your xorg.conf file from the MonitorsDB database. This database contains more than 600 monitors and is located in the /usr/share/hwdata directory.
The Device Section
The Device section provides details about the video graphics chipset used by the computer, as in this example:
Click here to view code image
Section "Device"
Identifier "Intel Corporation Mobile 945GM/GMS,\943/940GML Express
Integrated Graphics Controller"
Driver "intel"
BusID "PCI:0:2:0"
EndSection
This example identifies an installed video card as using an integrated Intel 945 graphics chipset. The Driver entry tells the Xorg server to load the intel kernel module. Different chipsets have different options. For example, here’s the entry for a NeoMagic video chipset:
Click here to view code image
Section "Device"
Identifier "NeoMagic (laptop/notebook)"
Driver "neomagic"
VendorName "NeoMagic (laptop/notebook)"
BoardName "NeoMagic (laptop/notebook)"
Option "externDisp"
Option "internDisp"
EndSection
In this example, the Device section specifies the driver for the graphics card (neomagic_drv.o) and enables two chipset options (externDisp and internDisp) to allow display on the laptop’s LCD screen and an attached monitor.
The Xorg server supports hundreds of different video chipsets. If you configure X11 but subsequently change the installed video card, you need to edit the existing Device section or generate a new xorg.conf file, using one of the X configuration tools discussed in this chapter, to reflect the new card’s capabilities. You can find details about options for some chipsets in a companion man page. You should look at these sources for hints about optimizations and troubleshooting.
The Screen Section
The Screen section ties together the information from the previous sections (using the Screen0, Device, and Monitor Identifier entries). It can also specify one or more color depths and resolutions for the session. Here’s an example:
Click here to view code image
Section "Screen"
Identifier "Screen0"
Device "Videocard0"
Monitor "Monitor0"
DefaultDepth 24
SubSection "Display"
Viewport 0 0
Depth 16
Modes "1024x768" "800x600" "640x480"
EndSubSection
EndSection
In this example, a color depth of thousands of colors and a resolution of 1024 × 768 is the default, with optional resolutions of 800 × 600 and 64 × 480. Multiple Display subsection entries with different color depths and resolutions (with settings such as Depth 24 for millions of colors) can be used if supported by the graphics card and monitor combination. You can also use a DefaultDepth entry (which is 24, or thousands of colors, in the example), along with a specific color depth to standardize display depths in installations.
You can also specify a desktop resolution larger than that supported by the hardware in your monitor or notebook display. This setting is known as a virtual resolution in the Display subsection. This allows, for example, an 800 × 600 display to pan (that is, slide around inside) a virtual window of 1024 × 768.
Note
If your monitor and graphics card support multiple resolutions and the settings are properly configured, you can use the key combination of Ctrl+Alt+(Keypad) + or Ctrl+Alt+(Keypad) − to change resolutions on-the-fly during your X session.
Starting X
You can start X sessions in a variety of ways. The Ubuntu installer sets up the system to have Linux boot directly to an X session using a display manager called LightDM, for Light(weight) Display Manager. This is an X client that provides a graphical login. After you log in, you use a local session (running on your computer) or, if the system is configured to do so, an X session running on a remote computer on the network.
Logging in via a display manager requires you to enter a username and password. You can also start X sessions from the command line. The following sections describe these two methods.
Note
If you have used the Server install, your system boots to a text login. See Chapter 10, “Command-Line Beginner’s Class,” for more information about what to do here.
Using a Display Manager
An X display manager presents a graphical login that requires a username and password to be entered before access is granted to the X desktop. It also enables you to choose a different desktop for your X session. Whether an X display manager is presented after you boot Linux is controlled by a runlevel—a system state entry in /etc/event.d/. The following runlevels as handled by Ubuntu are as follows:
![]() 0—Halt (Do not set initdefault to this.)
0—Halt (Do not set initdefault to this.)
![]() 1—Multiuser text mode
1—Multiuser text mode
![]() 2—X graphical multiuser mode
2—X graphical multiuser mode
![]() 6—Reboot (Do not set initdefault to this.)
6—Reboot (Do not set initdefault to this.)
You may see mention of runlevels 3 through 5; you can ignore these because they are treated the same as runlevel 2 in Ubuntu. Historically, Ubuntu used the /etc/inittab file to handle runlevels, but this file no longer exists. (See Chapter 15, “The Boot Process,” for information about runlevels.) Instead, there are several files under the /etc/events.d/ directory, including an individual file for each of the virtual consoles (accessible by pressing Ctrl+Alt+F1 to F7). However, you can still create an inittab file if you want to override any defaults held by Ubuntu. Make sure you create the inittab file as root and include at least one line similar to the following:
id:1:initdefault:
This forces your system to start up in text mode.
Changing Window Managers
Ubuntu makes it fairly painless to switch to another window manager or desktop environment. Desktop environment refers to not only the window manager but also the suite of related applications, such as productivity or configuration tools.
First, you need to ensure that you have the relevant desktop environment installed on your system; the easiest way to do this is by installing the relevant *-desktop package. You can do this by installing the package kubuntu-desktop, for example (in the case of a KDE desktop); just search for “desktop” and look for Xubuntu or Kubuntu, and so on. After the download and installation is complete (you might want to grab a coffee while you wait because these packages include a ton of dependencies and take some time to download, install, and configure), you are all set to change environments.
Next, you need to log out of Ubuntu. When you return to the log-in page, select your name as usual and then select the session named for the desktop you want to use. Chapter 7, “Other Ubuntu Interfaces,” provides a brief introduction to some of the desktop environments other than Unity that are available from the Ubuntu repositories.
Using Unity, a Primer
Unity is a fresh take on the GUI. It has been created with the assistance of user interface professionals and graphic designers and aims toward elegance, beauty, and efficiency while providing obvious ways to perform tasks. This section gives a tour of the basic features and use and then moves in to more specific details that are likely to thrill power users.
Mark Shuttleworth on Unity
“Our goal with Unity is unprecedented ease of use, visual style and performance on the Linux desktop.”
From a blog post on August 16, 2011; www.markshuttleworth.com/archives/717
This chapter describes the current release version of Unity (7). Unity 8 is a multi-year project that is not yet ready for prime time, but nonetheless exciting and worth mentioning. With Unity 8, the goal is convergence, the ability to use the same operating system and have it adapt to the user. For example, what if you had a tablet device or a mobile phone that would use a typical mobile touch-screen interface until you connected a keyboard, an external display, or a mouse, in which case it would automatically switch to a standard desktop interface ready for you to get real work done? That is part of the goal with Unity 8, and it is worth watching.
The Desktop
When you boot your computer and log in to a Unity session, you are greeted by the desktop you see in Figure 3.1. This screen is made up of many parts, each of which is described in this chapter.
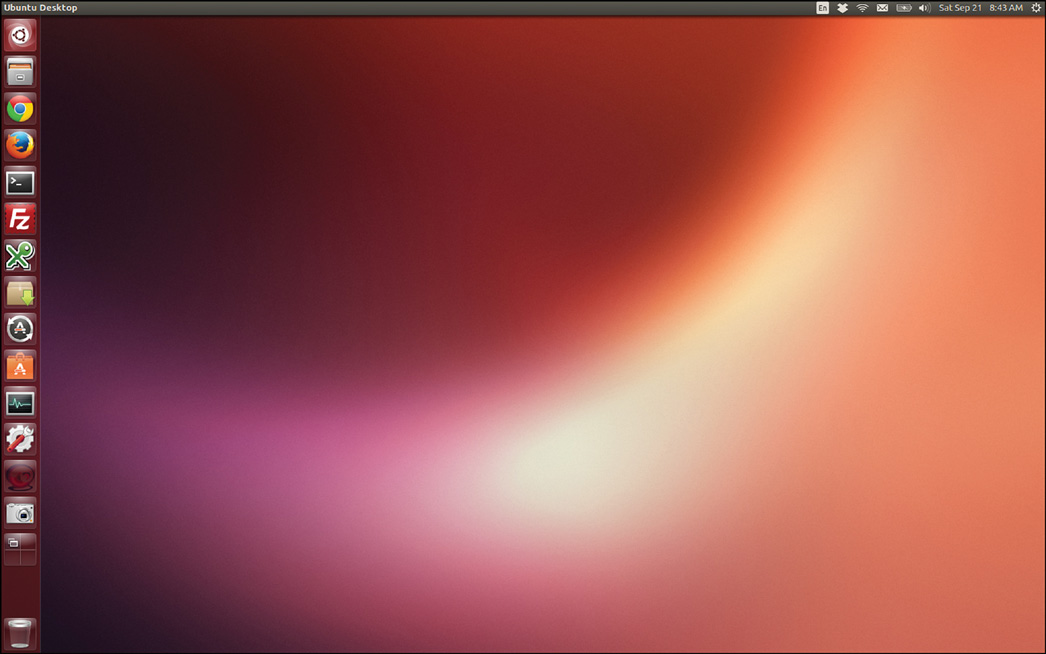
FIGURE 3.1 The default look of Ubuntu Unity.
The Launcher
To the left of the screen is a vertical bar. This is the Launcher (see Figure 3.2). Icons in the Launcher represent programs that are either running or which have been set to be included in the Launcher at all times. Click an icon to open a program. Right-click an icon for additional options, including an option to keep an item in the Launcher at all times.
![]()
FIGURE 3.2 You can customize the Launcher to include your most-used programs.
The Dash
Click the Ubuntu logo icon at the top of the Launcher to open the Dash (see Figure 3.3). The Dash is the primary way to find programs and files in Unity. At the bottom of the Dash is a row of icons. These represent lenses, which are different ways to focus your searching with the Dash.
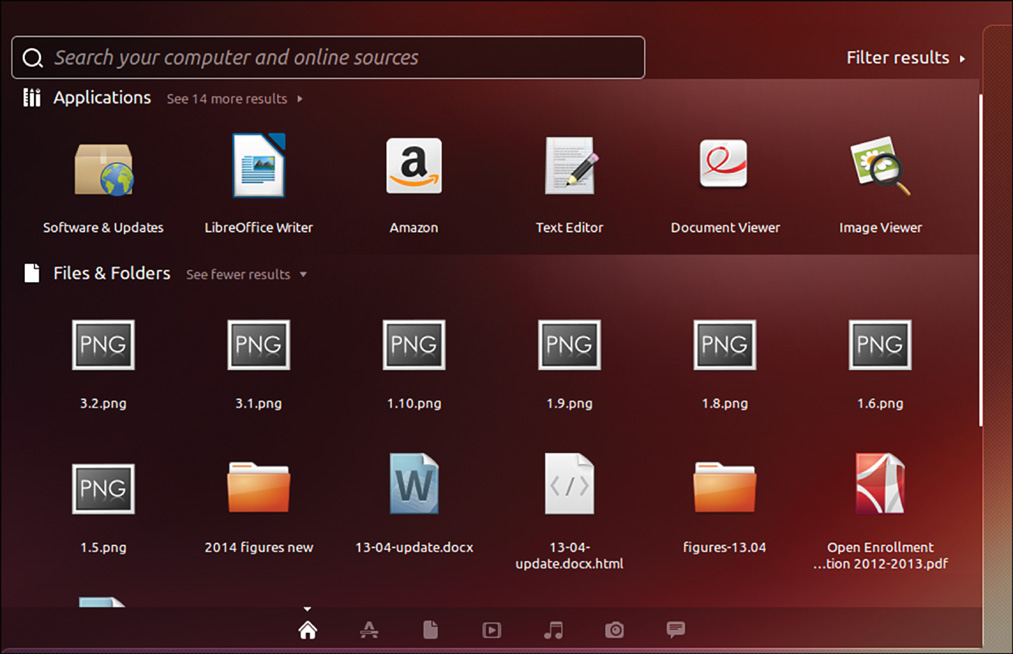
FIGURE 3.3 The Dash helps you find programs and files.
The default Dash lens is represented by a house icon. This lens gives a set of shortcuts to often-used features. At the top is a Search box that searches your computer for programs, files, and directories that match any search terms you enter and then categorizes the results according to type (see Figure 3.4).
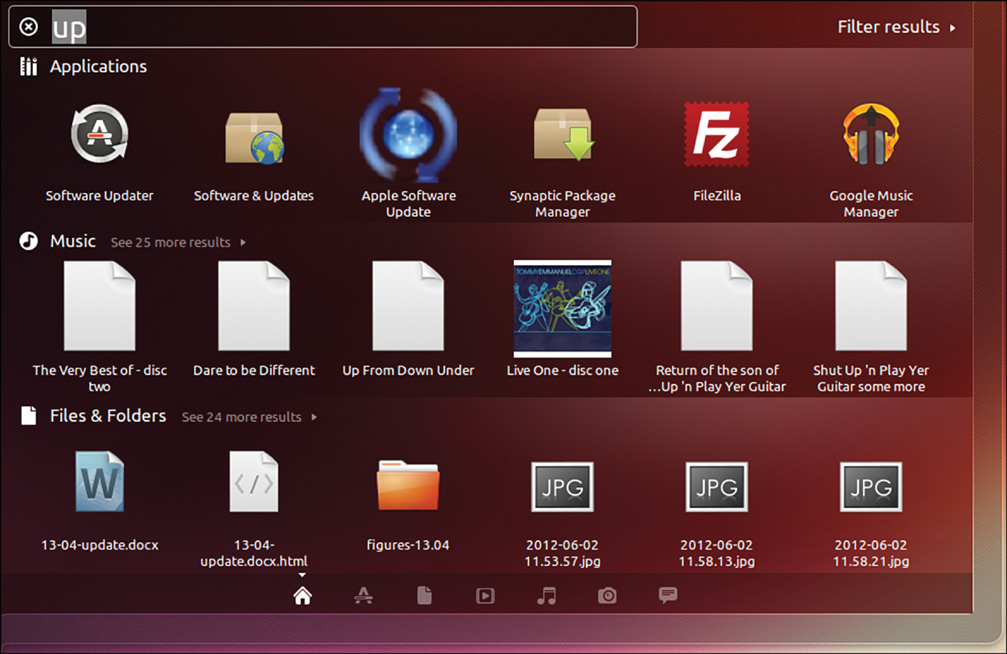
FIGURE 3.4 Sorted results in the main Dash lens.
The applications Dash lens is represented by a ruler-pencil-pen icon. This lens lists and searches installed applications and also applications that are available from the Ubuntu Software Center (see Chapter 9, “Managing Software”), as in Figure 3.5. You can click to view more results and perform a visual search if you do not know the name of a program.
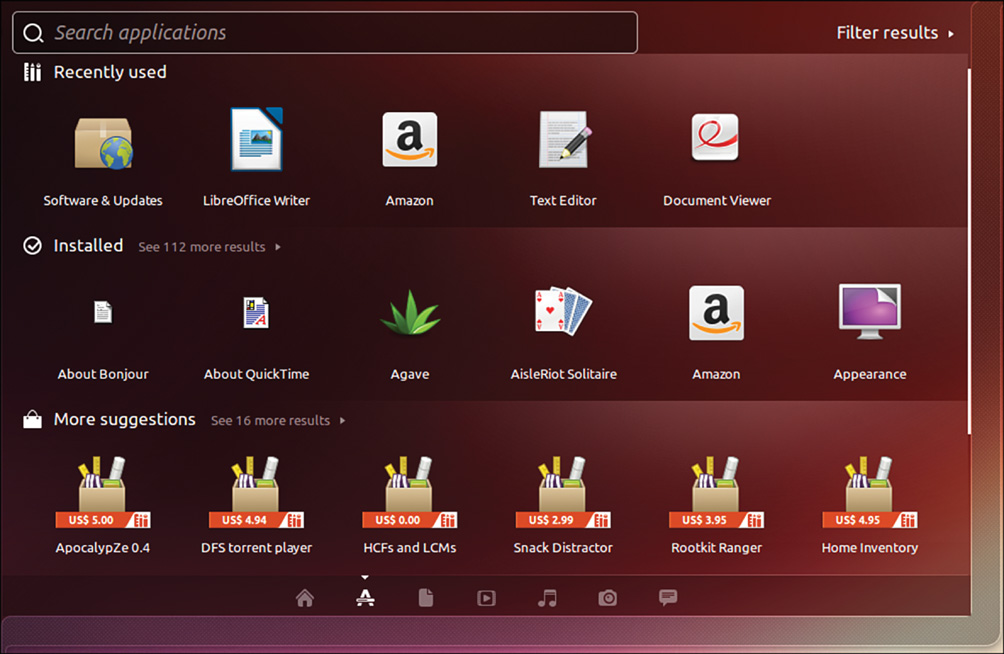
FIGURE 3.5 Exploring applications in the Dash.
The files and folders Dash lens is represented by a sheet of paper icon. You can search by entering a term in the Search box or visually by clicking through what is shown here, as in Figure 3.6.
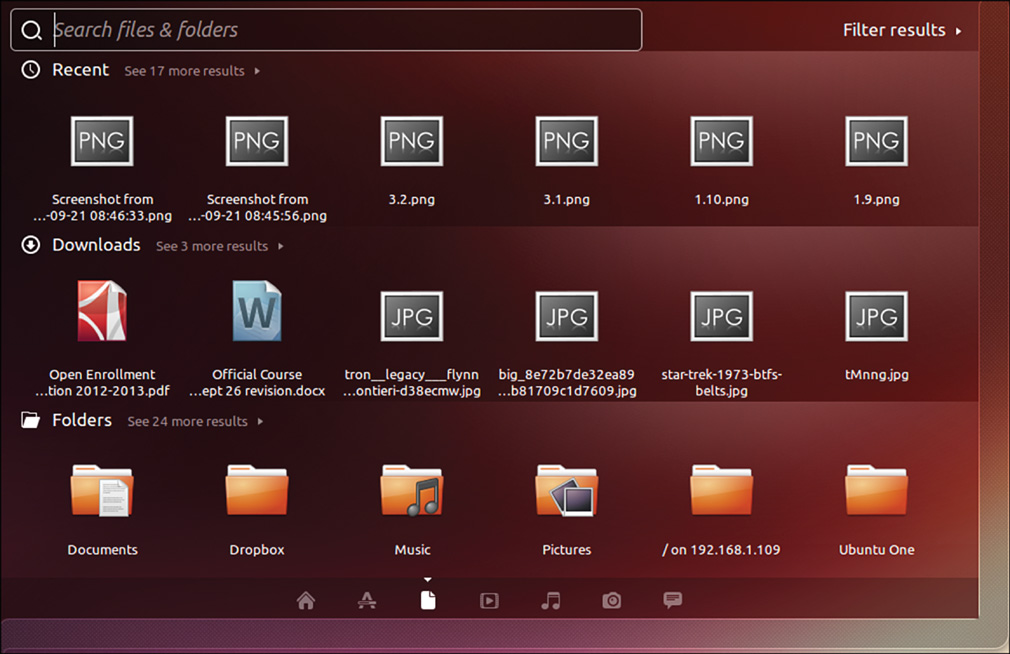
FIGURE 3.6 Exploring applications in the Dash.
Other Dash lenses may appear depending on your configuration. Possibilities include, but are not limited to, a Music lens for audio files and a Gwibber lens for interactive media such as Twitter and Facebook updates. More are likely to arrive as Unity matures.
In any Dash lens in which it appears, you can click Filter Results to view predefined ways to filter what is shown. Figure 3.7 shows a list of available filters for the Applications lens. The list you see may be different as new filters are created.
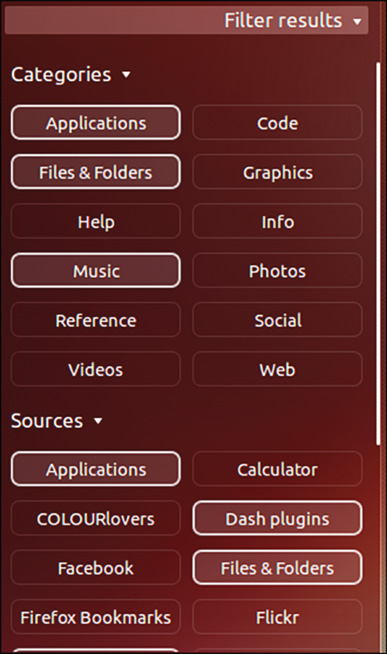
FIGURE 3.7 Filtering applications in the Dash.
The Panel
The panel is the bar across the top of the screen. When a program is being used, the panel houses various menus and buttons. (Some of these appear only when you hover your mouse over the panel; so if you can’t find the File menu or close button, point at the panel with your mouse, and it is likely to appear.) The right side of the panel has a series of useful indicators. The Networking indicator was discussed in Chapter 1, “Installing Ubuntu and Post-Installation Configuration,” because it is often needed right away to connect a computer to the Internet. Other indicators do the following:
![]() Help manage your mail and social applications such as chat (envelope icon)
Help manage your mail and social applications such as chat (envelope icon)
![]() Show your battery status and provide quick access to power settings
Show your battery status and provide quick access to power settings
![]() Provide volume and playback controls for the Rhythmbox media player
Provide volume and playback controls for the Rhythmbox media player
![]() Give quick access to the clock and calendar
Give quick access to the clock and calendar
![]() Show active users and sessions
Show active users and sessions
![]() Give convenient access to commonly used system administration options and the logout menu
Give convenient access to commonly used system administration options and the logout menu
Customizing and Configuring Unity
Everyone likes to customize. Unity is quite new, and, as a result, not everything is customizable (yet). All existing options for customization and system settings are available in the System Settings menu.
System Settings
Search for “system settings” in the Dash. Click the System Settings icon to open the menu. The menu includes entries that enable you to change your desktop appearance, set up online accounts, configure additional languages for the system to use for displays, colors, keyboards, displays, and much more (see Figure 3.8).
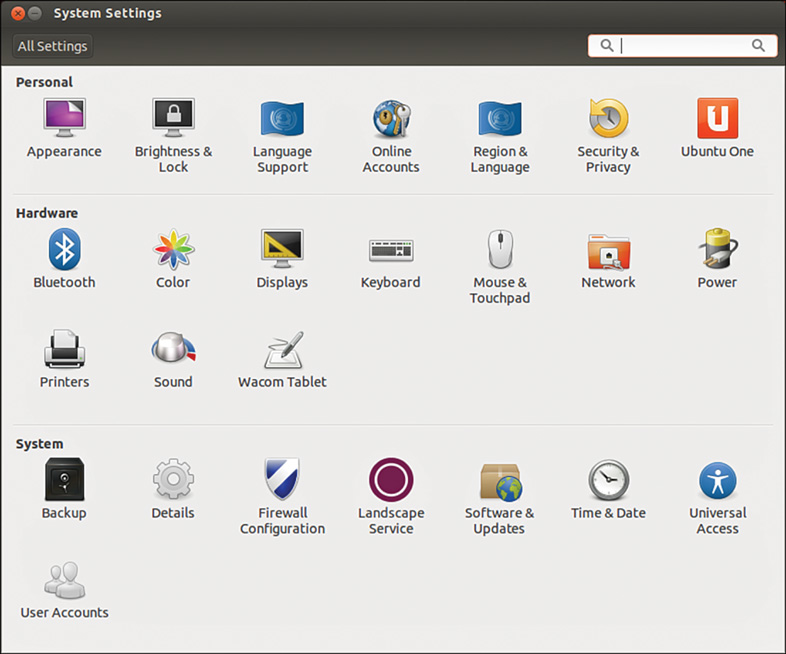
FIGURE 3.8 The System Settings menu.
Smart Scopes
Smart Scopes tries to provide a better Dash searching experience. It does so by using the search terms entered to change the set of locations being searched, that is, it changes the scope of the search. By default, Ubuntu includes a number of internal and external search locations when you use the Dash. Search terms entered may return results from a user’s /home directory, the list of applications installed, recently used files, the Ubuntu software repositories, and even sites like Amazon.com. From the specification: “The Dash now gets and contributes information from a central server on which scopes are best able to answer Dash queries, in order to make the Dash home scope maximally useful through community-contributed scopes and usage data. As before, the Dash can be restricted from including any online content or contribution in the Privacy system settings” (from: https://wiki.ubuntu.com/SmartScopes1304Spec).
When you search for something, the Dash will attempt to show you results from appropriate categories and specific sources within those categories. For example, searching for the name of a famous musician or band may return results from your Music directory or maybe Wikipedia. The categories and locations that the Dash selects from can be changed; you can manually select or unselect categories. If you want to limit the scope of your search to include only local files, you may. If you only want to include specific websites and not others, you may. The scope of your search is limited or expanded by which Scopes (now with a capital “S”) you select or deselect. A Scope is a single location in which the Dash may search.
Many Scopes include previews that display in the Dash. For example, a Wikipedia article will include the summary of the article from the site, to help you decide whether to click and read further or not.
To enable or disable specific Scopes:
1. Open the Applications Lens.
2. Select Search plugins.
3. Open the preview of the Scope.
4. Click Enable or Disable to toggle whether it is used or not.
If you want to search a specific source, you can. Just like on Google, power users can learn prefixes like wiki: to force the Dash to only return results from Wikipedia. Many are available, but a definitive list has not been released, so you may want to experiment.
Other Settings
You can configure or adjust many other GUI-related settings by installing a package from the Ubuntu repositories called the CompizConfig Settings Manager (CCSM) (see Chapter 9, “Managing Software,” for information on how to install this and other packages). The documentation for these settings is not always clear, so go slowly.
A new community-developed tool called Unity Tweak Tool is available in the Ubuntu software repositories as unity-tweak-tool. It is a GUI tool for adjusting how Unity operates. It, like CCSM above, it is not an official software product and may change things that Ubuntu developers never planned to be adjusted, so use with caution and make sure you know how to undo any changes you make before you make them.
Power Shortcuts
Often, power users want to avoid using the mouse. They don’t want to take their hands off the keyboard unless absolutely necessary because doing so slows them down. Here are some of the more useful keyboard shortcuts that readers of this book are likely to appreciate. You can configure or adjust many of these by installing a package from the Ubuntu repositories called the CompizConfig Settings Manager:
![]() Use the Special key (that is, the Windows key) to open the Dash. Click Esc to close the Dash without selecting anything in it.
Use the Special key (that is, the Windows key) to open the Dash. Click Esc to close the Dash without selecting anything in it.
![]() Use the middle mouse button to click an icon in the Launcher to open more than one instance of the same program. On a laptop, you can do this by clicking both right and left buttons simultaneously.
Use the middle mouse button to click an icon in the Launcher to open more than one instance of the same program. On a laptop, you can do this by clicking both right and left buttons simultaneously.
![]() Holding Alt+Tab brings up a menu of icons showing open programs so that you may switch between them quickly. Hold Alt and press Tab repeatedly to move from one program to the next until you reach the one you desire. Shift+Alt+Tab scrolls through them in reverse order. This and the next shortcut work together as a powerful combination when the application you want has multiple windows or instances.
Holding Alt+Tab brings up a menu of icons showing open programs so that you may switch between them quickly. Hold Alt and press Tab repeatedly to move from one program to the next until you reach the one you desire. Shift+Alt+Tab scrolls through them in reverse order. This and the next shortcut work together as a powerful combination when the application you want has multiple windows or instances.
![]() Switching from Alt+Tab to Alt+` (on an English keyboard; for other keyboards, read on) modifies the Alt+Tab menu so that it shows miniature images of open program windows when there are multiple instances of the same program. Hold Alt and press ` repeatedly to scroll through and select a specific instance. If you begin this while the desktop focus is on an instance of a program that has multiple instances open, you automatically begin with this set of open instances to select from among them. (On an English keyboard, ` is the key just above the Tab key. For other language keyboards, it is whatever key is in this same location, regardless of the character represented on the key itself.)
Switching from Alt+Tab to Alt+` (on an English keyboard; for other keyboards, read on) modifies the Alt+Tab menu so that it shows miniature images of open program windows when there are multiple instances of the same program. Hold Alt and press ` repeatedly to scroll through and select a specific instance. If you begin this while the desktop focus is on an instance of a program that has multiple instances open, you automatically begin with this set of open instances to select from among them. (On an English keyboard, ` is the key just above the Tab key. For other language keyboards, it is whatever key is in this same location, regardless of the character represented on the key itself.)
![]() Icons in the Launcher indicate when multiple instances of a program are open or when a program has multiple windows. Click twice on an icon in the Launcher that shows multiple arrows next to it and all of its windows will be displayed for you to select the one you desire.
Icons in the Launcher indicate when multiple instances of a program are open or when a program has multiple windows. Click twice on an icon in the Launcher that shows multiple arrows next to it and all of its windows will be displayed for you to select the one you desire.
![]() Click PrtSc (Print Screen) to take a screenshot of the current workspace.
Click PrtSc (Print Screen) to take a screenshot of the current workspace.
![]() Use Special+T to open the trash can.
Use Special+T to open the trash can.
![]() Click Ctrl+Alt+arrow-key to move up, down, right, and left from workspace to workspace.
Click Ctrl+Alt+arrow-key to move up, down, right, and left from workspace to workspace.
References
![]() www.gnome.org/—The launch point for more information about GNOME, links to new clients, and GNOME development projects.
www.gnome.org/—The launch point for more information about GNOME, links to new clients, and GNOME development projects.
![]() www.x.org/—Curators of the X Window System.
www.x.org/—Curators of the X Window System.
![]() www.x.org/Downloads_mirror.html—Want to download the source to the latest revision of X? Start at this list of mirror sites.
www.x.org/Downloads_mirror.html—Want to download the source to the latest revision of X? Start at this list of mirror sites.
![]() www.xfree86.org/—Home of The XFree86 Project, Inc., which provided a graphical interface for Linux for nearly 10 years.
www.xfree86.org/—Home of The XFree86 Project, Inc., which provided a graphical interface for Linux for nearly 10 years.
![]() https://wiki.ubuntu.com/X—The place to get started when learning about X and Ubuntu.
https://wiki.ubuntu.com/X—The place to get started when learning about X and Ubuntu.
![]() https://wiki.ubuntu.com/X/Config—Great information about configuring X on Ubuntu.
https://wiki.ubuntu.com/X/Config—Great information about configuring X on Ubuntu.
![]() http://www.freedesktop.org/wiki/Software/LightDM—LightDM, a new window manager.
http://www.freedesktop.org/wiki/Software/LightDM—LightDM, a new window manager.
All materials on the site are licensed Creative Commons Attribution-Sharealike 3.0 Unported CC BY-SA 3.0 & GNU Free Documentation License (GFDL)
If you are the copyright holder of any material contained on our site and intend to remove it, please contact our site administrator for approval.
© 2016-2026 All site design rights belong to S.Y.A.