Ubuntu Unleashed 2017 Edition (2017)
Part V: Programming Linux
Chapter 39. Opportunistic Development
In This Chapter
![]() Version Control Systems
Version Control Systems
![]() Introduction to Opportunistic Development
Introduction to Opportunistic Development
![]() Launchpad
Launchpad
![]() Ubuntu Make
Ubuntu Make
![]() Snap Packaging
Snap Packaging
![]() Bikeshed and Other Tools
Bikeshed and Other Tools
![]() References
References
There are some among us who love to write program code. Others are able to write code but do not particularly enjoy doing so. Most of this section of the book (Part V, “Programming Linux”) is dedicated to the first group—those who love to code and want to know how to get started using their favorite tools in Ubuntu. However, it also applies to those of us who just want to scratch a specific itch by coding up a quick program to do something useful and make it available to other Ubuntu users, but who are not interested in learning how to become a package maintainer, upload to the official software repositories, and so on. We call this process opportunistic development, where an end user codes up a quick solution to a problem. This is in direct contrast to systematic development with professional planning, requirements gathering, design, processes, and procedures. We have a couple of links in the “References” section if serious, sustained development and helping with official packaging is your ultimate goal; but to get started, let’s look at a ways to help scratch that itch—to get something written and then make it available to others quickly and easily. We start with information about version control systems, then move on to a short survey of some initiatives in the Ubuntu community to whet your appetite and help you know where to look to get connected and get started if you want to do further work to make your program available to others.
Version Control Systems
It was difficult to decide whether to include this information in this chapter. On one hand, someone who only wants to scratch an itch quickly may not be interested in setting up a version control system. On the other hand, they are not difficult to set up, especially when used with the assistance of a code hosting site like the ones discussed in each section, and they are immensely valuable if code is to have a life outside of your system.
Although you can use make to manage a small software project (see Chapter 38, “Using Programming Tools for Ubuntu”), larger software projects require document management, source code controls, security, and revision tracking as the source code goes through a series of changes during its development. Version control systems provide utilities for this kind of large software project management. Changes to files placed in version control are tracked. Files can be checked out by one developer, changed in their local environment, and tested before those changes are saved in the version control system. Changes that are later discovered to be unwanted can be found and removed from the tracked files. Various version control systems manage projects differently; some use a central repository, others a distributed format where any and every copy could become the master copy.
The next few sections introduce the three most commonly used version control systems at the moment. You have certainly heard of others, and new ones crop up every few years. Each has its strengths and benefits. At the end of the chapter, in the “References” section, is a list of resources for learning more aboutGit, Bazaar, Subversion, and Mercurial to further your knowledge after you peruse this chapter’s short and basic introduction to each.
Note
Subversion and Mercurial are still in heavy use, but most developers today have switched to Git and Bazaar for new projects. Keep that in mind as you read the next few sections.
Managing Software Projects with Git
Git was initially created by Linux kernel creator Linus Torvalds and was first released in 2005 to host all development files for the Linux kernel. It is now actively developed by a large team of developers led by Junio Hamano and is widely used by many other open-source projects.
Git works without a central repository and works from a different perspective than other version control systems while accomplishing the same goals. Every directory that is tracked by Git acts as an individual repository with full history and source changes for whatever is contained in it. There is no need for central tracking. Source code control is done from the command line, as shown in the following examples. You first need to install Git from the Ubuntu software repositories, where it is called git.
To create a new repository, access the top-level directory for the project and enter the following:
matthew@seymour:~$ git init
To check out code from an existing central repository, you must first tell Git where that repository is:
Click here to view code image
matthew@seymour:~$ git remote add origin git://path_to_repository/directory/proj.git
Then you can pull the code from that repository to your local one:
Click here to view code image
matthew@seymour:~$ git pull git://path_to_repository/directory/proj.git
To add new files to the repository, use the following:
Click here to view code image
matthew@seymour:~$ git add file_or_dir_name
To delete files from the repository, use this:
Click here to view code image
matthew@seymour:~$ git rm file_or_dir_name
To check in code after you have made changes, use the -m flag to add a note, which is a good idea so that others will know what the commit contains:
Click here to view code image
matthew@seymour:~$ git commit -m 'This fixes bug 204982.'
In Git, a commit does not change the remote files, it only commits the change to your local copy. If you want others to see your changes, you must push the changes to them:
Click here to view code image
matthew@seymour:~$ git push git://path_to_repository/directory/proj.git
Many open-source projects that use Git host their code using GitHub. You can find it at http://github.com.
Managing Software Projects with Bazaar
Bazaar was created by Canonical and first released in 2007 to host all development files for Ubuntu and other projects. It is actively developed and widely used, not only by Canonical and Ubuntu developers, but also by many other open-source projects. Launchpad, covered later in this chapter, uses Bazaar.
Bazaar supports working with or without a central repository. Then, changes are tracked over any and all files you check out, including multiple versions of files. Source code control is done from the command line, as shown in the following examples. You first need to install Bazaar from the Ubuntu software repositories, where it is called bzr.
There are two ways to create a new repository. If you are starting with an empty directory, use the following:
Click here to view code image
matthew@seymour:~$ bzr init your_project_name
If you are creating a repository for an existing project, enter the top-level directory for the project and enter the following:
Click here to view code image
matthew@seymour:~$ bzr init
matthew@seymour:~$ bzr add .
To check out code from an existing central repository, use this:
Click here to view code image
matthew@seymour:~$ bzr checkout your_project_name
To check your changes before you check them in, you can use bzr diff or bzr cdiff. They do the same thing, but bzr cdiff does so with colored output:
matthew@seymour:~$ bzr cdiff
To check in code after you have made changes, use the -m flag to add a note, which is a good idea so that others know what the commit contains:
Click here to view code image
matthew@seymour:~$ bzr commit -m "This fixes bug 204982."
In Bazaar, a commit does not change the remote files, it only commits the change to your local copy. If you want others to see your changes, you must push the changes to them:
Click here to view code image
matthew@seymour:~$ bzr push sftp://path.to.main/repository
To update the source code in your local repository from the main repository to make sure you have all the latest changes to the code from other developers, use the following:
matthew@seymour:~$ bzr pull
Many open-source projects that use Bazaar host their code using Launchpad, which receives more press later in this chapter as it is where Ubuntu development takes place. You can find it at http://launchpad.net.
Managing Software Projects with Subversion
Subversion was first created in 2000 as a replacement for an older version control system called the Concurrent Versioning System (CVS). At that time, CVS was 10 years old, and although it served its purpose well, it lacked some features that developers wanted. It is actively developed and widely used.
In Subversion, you check out a file from a repository in which code is stored in a client/server fashion. Then, changes are tracked over any and all files you check out, including multiple versions of files. You can use Subversion to backtrack or branch off versions of documents inside the scope of a project. It can also be used to prevent or resolve conflicting entries or changes made to source code files by multiple developers. Source code control with Subversion is done from the command line, as shown in the following examples. You first need to install Subversion from the Ubuntu software repositories, where it is called subversion.
You can create a new repository as follows:
Click here to view code image
matthew@seymour:~$ svnadmin create /path/to/your_svn_repo_name
To add a new project to the repository, first enter the top directory of the code that is going to be placed into the repository. Then, create three subdirectories: branches, tags, and trunk. Move all of your files into trunk and enter the following:
Click here to view code image
matthew@seymour:~$ svn import project file:///your_svn_repo_name/your_project -m "First Import"
To check out code from an existing central repository, use this:
Click here to view code image
matthew@seymour:~$ svn checkout file:///your_svn_repo_name/your_project/trunkyour_project
To check in code after you have made changes, use the -m flag to add a note, which is a good idea so that others know what the commit contains:
Click here to view code image
matthew@seymour:~$ svn commit -m "This fixes bug 204982."
To update the source code in your local repository from the main repository to make sure you have all the latest changes to the code from other developers, use this:
matthew@seymour:~$ svn update
To add new files to the repository, use the following:
Click here to view code image
matthew@seymour:~$ svn add file_or_dir_name
To delete files from the repository, use this:
Click here to view code image
matthew@seymour:~$ svn delete file_or_dir_name
Many open-source projects that use Subversion host their code using SourceForge, which also works with Git and Mercurial. Like the other code-hosting sites discussed in the following sections, SourceForge is a great place to find open-source software projects that might be useful to you or to which you might want to contribute through participation. You can find it at http://sourceforge.net.
Managing Software Projects with Mercurial
The Linux kernel used to be hosted using a version control system and code-hosting service that was free to use, but it wasn’t open source. This was often a source of tension among free software advocates within the Linux community. Then, that service announced it was moving to a for-payment plan and gave some time for transition. Out of that decision, two new version control systems were birthed. Mercurial is one of them, and Git is the other. Both were initially written to host the code for the Linux kernel. Git, as it was originally written by the main kernel developer himself, Linus Torvalds (in just 2 weeks), won out. However, the wider open-source development community was the ultimate winner as two interesting and useful version control systems were birthed.
Mercurial was created by and development is still led by one developer: Matt Mackall. It uses a distributed architecture and is designed to be fast, even when working with large codebases. Its commands are similar to Subversion, which makes transition and initial use quick and easy. One interesting feature is that Mercurial is extensible; extensions may be installed from the project’s wiki or written by users to change how things work or to add features without changing the original code. Source code control is done from the command line, as shown in the following examples. You first need to install Mercurial from the Ubuntu software repositories, where it is called mercurial.
Note
The chemical symbol for mercury is Hg. This is why Mercurial commands use hg.
To create a new repository, create an empty project directory:
Click here to view code image
matthew@seymour:~$ hg init your_project_name
Then add your files to the directory. cd into the directory if you are not already in it, and enter the following:
matthew@seymour:~$ hg add
To check in code the first time or after you have made changes, use the -m flag to add a note, which is a good idea so that others know what the commit contains:
Click here to view code image
matthew@seymour:~$ hg commit -m 'First commit.'
In Mercurial, a commit does not change the remote files, it only commits the change to your local copy. If you want others to see your changes, you must push the changes to them:
matthew@seymour:~$ hg push
To update the source code in your local repository from the main repository to make sure you have all the latest changes to the code from other developers, use this:
matthew@seymour:~$ hg update
Many open-source projects that use Mercurial host their code using Bitbucket. You can find it at http://bitbucket.org.
Introduction to Opportunistic Development
You have an idea for a program that will save time by automating a repetitive task. You plan for it to have a pretty GUI, and you think there are probably others out there who would like to use the tool after it is written. The problem is that you work full time, have a family, and already have a ton of side projects that do not get enough attention. You are either not able or not willing to sit down and study how Ubuntu packages programs to get them into the official software repositories. (If you are, see the links in the “References” section.)
It used to be that you had one simple choice at this juncture: Write the program and put it on a website for others to find—and hope that maybe someone would find it useful, make a DEB package, and upload it into either the Debian or Ubuntu repositories. That is no longer the only option if your goal is simply to write your tool and make the software available to Ubuntu users. Now, you need to be technically proficient at writing whatever code you want to write, and you need to be able to understand complex systems, but Ubuntu is lowering the complexity for getting that code written and making it available to the wider community. This enables developers who want only to scratch that one itch to do so without reading tons of documentation about tools they expect to use rarely or only once.
Launchpad
To get started, you need to sign up for an account on Launchpad (see Figure 39.1). Launchpad is an infrastructure created to simplify communication, collaboration, and processes within software development. It was developed and is supported by Canonical, the company that supports the Ubuntu community, but it is used by many software projects, including several that are not a part of the Ubuntu community.
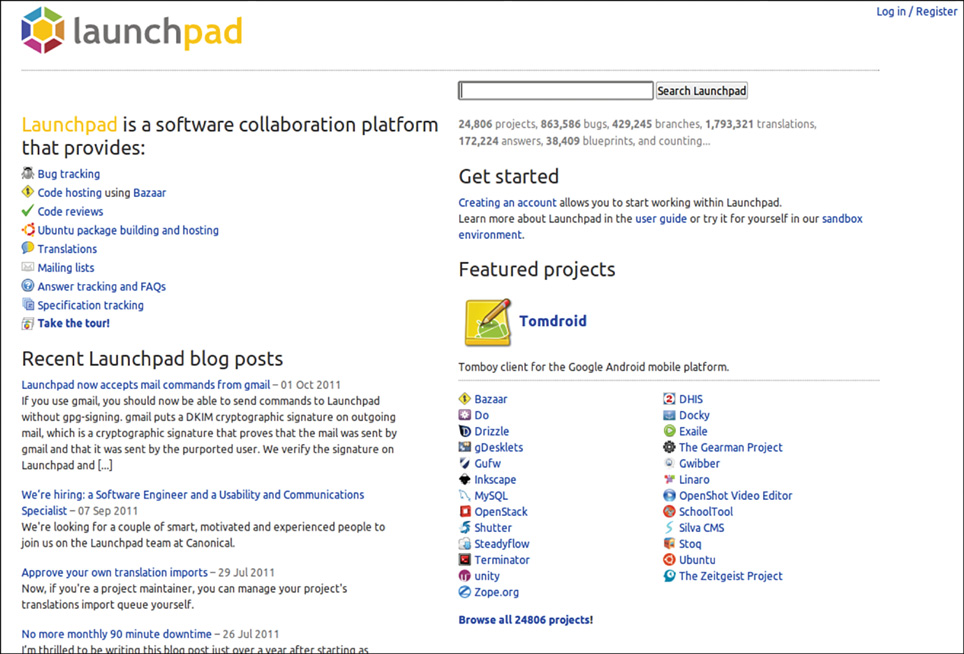
FIGURE 39.1 Launchpad is the place to start for development in Ubuntu.
Launchpad is where most Ubuntu development takes place, although some has moved to Git. It integrates Bazaar, the version control system introduced earlier, to make keeping track of changes to software code much simpler and permit those changes to be reverted when necessary while tracking who is performing the actions. Launchpad also incorporates Soyuz, which is a distribution and archive management software that handles the automatic package builds within Launchpad.
For developers using Launchpad, this means that the process became a bit simpler. They can concentrate on writing and editing their code and let Launchpad deal with keeping track of the changes and creating their packages. This is useful for active developers who write and maintain big projects that need source code version control and so on. It also hosts bug reporting and tracking, mailing lists, software interface translation, and much more. Most of this is beyond the scope of this chapter but of great interest to the serious developer.
What is of interest to us is that registered Launchpad users can create a personal package archive (PPA). This is a much simpler way to make programs available. Anyone with a PPA can upload source code to be built in to packages. Those packages will then be made available in an apt repository that may be added to any Ubuntu user’s list of source repositories and downloaded or removed using any of the standard package management tools in Ubuntu, such as apt, Ubuntu Software Center, and Synaptic. Instructions are included on the web page for each Launchpad PPA, describing how to add that repository, making this an easy method to share software that may be added and removed by even the most nontechnical end user. Figure 39.2 shows the PPA for the stable version of Google Chromium.
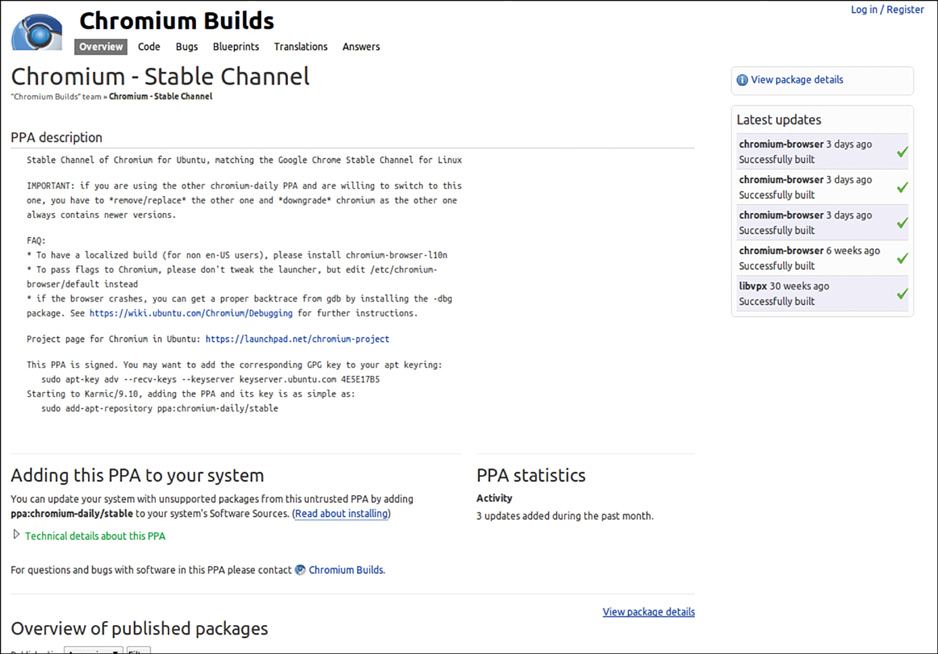
FIGURE 39.2 A Launchpad PPA for the stable version of Google Chromium.
Ubuntu Make
Ubuntu Make is a command-line tool that sets up your system for development use quickly and easily. It allows you to download the latest version of popular developer tools and their dependencies, enable multi-arch, and more. Install ubuntu-make to get started. Then, run commands like this to install tools:
matthew@seymour:~$ umake android
In this example, you will be prompted to accept the install path and Google license, and then Ubuntu Make will download and install Android Studio and the latest SDK, configure everything, and if you are running on a 64-bit platform, even add a Unity launcher icon.
See https://wiki.ubuntu.com/ubuntu-make to learn more about the packages available and get started.
Creating Snap Packages
One of the more exciting opportunities for developers is the new snap package format. Along with the basic installation and other details given in Chapter 9, “Managing Software,” snap packaging also allows single packaged application to be used across multiple Linux distributions. Although snap packages are not expected to replace traditional packaging formats like DEBs, which we cover in Chapter 40, “Helping with Ubuntu Development,” it is reasonable to expect snaps to find wide use for applications provided by third-party vendors like Mozilla, who are already committed to using it for their Firefox web browser, and for applications intended for use on devices like phones, routers, switches, and the new category of IoT (internet of things) devices (see https://en.wikipedia.org/wiki/Internet_of_things). For desktop applications, snap packaging enables the developer to submit free or even for-payment apps for review and inclusion in the Ubuntu Software application (see Chapter 9, “Managing Software”).
The tool used to create snap packages is Snapcraft, available from http://snapcraft.io/. Snapcraft is designed to take your already-created application and bundle it with any and all dependencies for easy installation and updating.
Another helpful community project related to snap packaging is Snappy Playpen at https://github.com/ubuntu/snappy-playpen, which exists to share knowledge and best practices about snap packaging while helping test the packages that community members and others create.
Bikeshed and Other Tools
Bikeshed was started by Dustin Kirkland in September 2010 as a project to package a series of tools he wrote to scratch some personal itches that he had as an Ubuntu developer working on Canonical’s Ubuntu Server Team or that he thought would be useful to others. Every good developer, systems administrator, and DevOps guru eventually writes scripts to perform specific tasks they find useful. This project began when Dustin gathered his scripts together and made them accessible to the world. The wider Ubuntu community is invited to give suggestions or submit patches to make them better. The project describes itself as “a collection of random useful tools and utilities that either do not quite fit anywhere else, or have not yet been accepted by a more appropriate project. Think of this package as an ‘orphanage,’ where tools live until they are adopted by loving, accepting parents.” The slogan for Bikeshed on the Launchpad project page is “While others debate where some tool should go, we put it in the Bikeshed.”
To give credit where credit is due, much of the content in this section comes, with permission, from Dustin’s blog at http://blog.dustinkirkland.com, from direct communication with him, or from the tool man pages. Dustin also wrote Byobu, a tool that is covered at the end of Chapter 12, “Command-Line Master Class Part 2,” and which contains some of the tools that have graduated from Bikeshed.
The first set of tools in this section are available by installing the bikeshed package from the Ubuntu repositories. Bikeshed sometimes works as an incubator, housing specific tools until they are ready to stand alone as a separate package or until they are accepted into an existing package. All the tools run from the command line, and most have useful man pages. (Others are still being written.)
The current contents of Bikeshed are as follows:
![]() apply-patch—wraps the patch utility and makes it a little easier to use by automatically detecting the patch strip level.
apply-patch—wraps the patch utility and makes it a little easier to use by automatically detecting the patch strip level.
![]() bch—determines the files that have been modified in the current Bazaar (bzr) tree, opens debian/changelog for editing, uses dch, and appends a changelog entry for the current list of modified files.
bch—determines the files that have been modified in the current Bazaar (bzr) tree, opens debian/changelog for editing, uses dch, and appends a changelog entry for the current list of modified files.
![]() bzrp—is the same as bzr, except that output is piped to a pager to make reading easier.
bzrp—is the same as bzr, except that output is piped to a pager to make reading easier.
![]() col1—splits and prints a given column, where the column to print is the name of the script program you are running (col1 to col9). col2 to col9 are symlinks to col1; their behavior simply changes based on the name called. For example, instead of using awk '{print $5}' you can use col5.
col1—splits and prints a given column, where the column to print is the name of the script program you are running (col1 to col9). col2 to col9 are symlinks to col1; their behavior simply changes based on the name called. For example, instead of using awk '{print $5}' you can use col5.
![]() cloud-sandbox—launches a cloud instance and connects directly to it using ssh, with the cloud system running isolated as what is generally called a sandbox.
cloud-sandbox—launches a cloud instance and connects directly to it using ssh, with the cloud system running isolated as what is generally called a sandbox.
![]() dman—remotely retrieves man pages from http://manpages.ubuntu.com but reads them on the local system. This is useful to read the man page for a utility you to not have installed on the local system.
dman—remotely retrieves man pages from http://manpages.ubuntu.com but reads them on the local system. This is useful to read the man page for a utility you to not have installed on the local system.
![]() pbget—retrieves content uploaded to a pastebin by pbput or pbputs.
pbget—retrieves content uploaded to a pastebin by pbput or pbputs.
![]() pbput—uploads text files, binary files, or entire directory structures to a pastebin. It is similar to pastebinit, covered later, but adds support for binaries and only uses http://pastebin.com.
pbput—uploads text files, binary files, or entire directory structures to a pastebin. It is similar to pastebinit, covered later, but adds support for binaries and only uses http://pastebin.com.
![]() pbputs—operates exactly like pbput, except the user is prompted for a passphrase for encrypting the content with gpg before uploading. pbget automatically prompts the user for the preshared passphrase when the file is requested.
pbputs—operates exactly like pbput, except the user is prompted for a passphrase for encrypting the content with gpg before uploading. pbget automatically prompts the user for the preshared passphrase when the file is requested.
![]() release—creates a release of a project for Ubuntu.
release—creates a release of a project for Ubuntu.
![]() release-build—takes project information for a bzr project in a Launchpad PPA that uses specific parameters and builds the project as an upstream project that can then be released to Ubuntu.
release-build—takes project information for a bzr project in a Launchpad PPA that uses specific parameters and builds the project as an upstream project that can then be released to Ubuntu.
![]() socks-prox—establishes an encrypted connection for tunneling traffic through a socks proxy.
socks-prox—establishes an encrypted connection for tunneling traffic through a socks proxy.
![]() system-search—performs a unified search through a set of system commands, packages, documentation, and files.
system-search—performs a unified search through a set of system commands, packages, documentation, and files.
![]() uquick—performs a quick server installation.
uquick—performs a quick server installation.
![]() what-provides—determines which package provides a specific binary in your path.
what-provides—determines which package provides a specific binary in your path.
![]() wifi-status—monitors a wireless interface for connection and associated information.
wifi-status—monitors a wireless interface for connection and associated information.
The contents of Bikeshed are expected to change over time. Some of these tools may graduate to standalone tools, merge into other existing packages, or get added to more official upstream packages. You can always check the Launchpad page to find a current list of Bikeshed’s contents.
The rest of the tools in this section are not an actual part of Bikeshed but have either graduated from Bikeshed and been spun off as freestanding tools or were developed individually by Dustin or others in the Ubuntu community. All the tools run from the command line and have useful man pages.
Other useful tools that you can find in the Ubuntu repositories include the following:
![]() pastebinit—is a script to upload a file or the result of a command to the pastebin you want and gives you the URL in return. It was written by another Ubuntu developer, Stéphane Graber, and you can find it at https://launchpad.net/pastebinit or from the Ubuntu repositories. By default, it uses http://pastebin.com, but it is configurable to use others such as http://paste.ubuntu.com.
pastebinit—is a script to upload a file or the result of a command to the pastebin you want and gives you the URL in return. It was written by another Ubuntu developer, Stéphane Graber, and you can find it at https://launchpad.net/pastebinit or from the Ubuntu repositories. By default, it uses http://pastebin.com, but it is configurable to use others such as http://paste.ubuntu.com.
![]() run-one—runs no more than one unique instance of a command with a unique set of arguments. This is often useful with cronjobs, when you want no more than one copy running at a time, but where a cronjob has the potential to run long and finish after the next scheduled run. Also see: run-one-constantly, run-one-until-failure,and run-one-until-success.
run-one—runs no more than one unique instance of a command with a unique set of arguments. This is often useful with cronjobs, when you want no more than one copy running at a time, but where a cronjob has the potential to run long and finish after the next scheduled run. Also see: run-one-constantly, run-one-until-failure,and run-one-until-success.
![]() run-this-one—is exactly like run-one, except that it uses pgrep and kill to find and kill any running processes owned by the user and matching the target commands and arguments. It blocks while trying to kill matching processes until all matching processes are dead.
run-this-one—is exactly like run-one, except that it uses pgrep and kill to find and kill any running processes owned by the user and matching the target commands and arguments. It blocks while trying to kill matching processes until all matching processes are dead.
![]() keep-one-running—operates exactly like run-one except that it respawns "COMMAND [ARGS]" any time COMMAND exits (zero or nonzero).
keep-one-running—operates exactly like run-one except that it respawns "COMMAND [ARGS]" any time COMMAND exits (zero or nonzero).
![]() ssh-import-id—uses a secure connection to contact a public key server, https://launchpad.net by default, to retrieve one or more user’s public keys and append them to the current user’s ~/.ssh/authorized_keysfile.
ssh-import-id—uses a secure connection to contact a public key server, https://launchpad.net by default, to retrieve one or more user’s public keys and append them to the current user’s ~/.ssh/authorized_keysfile.
![]() bootmail—is called by cron to send an email any time a system is rebooted. It reads a list of one or more comma-separated email addresses from /etc/bootmail/recipients and then loops over a list of whitespace-separated files in /etc/bootmail/logs to construct the email. This is useful to know when remote systems are rebooted.
bootmail—is called by cron to send an email any time a system is rebooted. It reads a list of one or more comma-separated email addresses from /etc/bootmail/recipients and then loops over a list of whitespace-separated files in /etc/bootmail/logs to construct the email. This is useful to know when remote systems are rebooted.
![]() purge-old-kernels—looks for old kernels on your system and removes them. This is a part of the byobu package.
purge-old-kernels—looks for old kernels on your system and removes them. This is a part of the byobu package.
![]() col1—splits and prints a given column, where the column to print is the name of the script program you are running (col1 to col9). col2 to col9 are symlinks to col1; their behavior simply changes based on the name called. For example, instead of using awk '{print $5}' you can use col5. This used to be in bikeshed but is not part of the byobu package.
col1—splits and prints a given column, where the column to print is the name of the script program you are running (col1 to col9). col2 to col9 are symlinks to col1; their behavior simply changes based on the name called. For example, instead of using awk '{print $5}' you can use col5. This used to be in bikeshed but is not part of the byobu package.
![]() wifi-status—monitors a wireless interface for connection and associated information. This used to be in bikeshed but is not part of the byobu package.
wifi-status—monitors a wireless interface for connection and associated information. This used to be in bikeshed but is not part of the byobu package.
References
![]() http://subversion.apache.org/—The main website for Subversion.
http://subversion.apache.org/—The main website for Subversion.
![]() http://bazaar.canonical.com/en/—The main website for Bazaar.
http://bazaar.canonical.com/en/—The main website for Bazaar.
![]() http://www.mercurial-scm.org—The main website for Mercurial.
http://www.mercurial-scm.org—The main website for Mercurial.
![]() http://git-scm.com/—The main website for Git.
http://git-scm.com/—The main website for Git.
![]() https://launchpad.net/—Launchpad is an open-source website that hosts code, tracks bugs, and helps developers and users collaborate and share.
https://launchpad.net/—Launchpad is an open-source website that hosts code, tracks bugs, and helps developers and users collaborate and share.
![]() https://launchpad.net/ubuntu/+ppas—Personal package archives allow source code to be uploaded and built in to .deb packages and made available to others as an apt repository.
https://launchpad.net/ubuntu/+ppas—Personal package archives allow source code to be uploaded and built in to .deb packages and made available to others as an apt repository.
![]() http://www.pygtk.org/, based on http://www.gtk.org/—PyGTK is the toolkit most used by Ubuntu developers when creating GUI interfaces with GTK in Python, which is what Quickly is set to do in the ubuntu-application template.
http://www.pygtk.org/, based on http://www.gtk.org/—PyGTK is the toolkit most used by Ubuntu developers when creating GUI interfaces with GTK in Python, which is what Quickly is set to do in the ubuntu-application template.
![]() http://glade.gnome.org/—A user interface designer for GTK.
http://glade.gnome.org/—A user interface designer for GTK.
![]() www.freedesktop.org/wiki/Specifications/desktopcouch, http://couchdb.apache.org/ and https://launchpad.net/desktopcouch—Desktop Couch is a data storage format used by Ubuntu One and many desktop programs for easy integration data storage, replication from one computer to another, and synchronization into programs.
www.freedesktop.org/wiki/Specifications/desktopcouch, http://couchdb.apache.org/ and https://launchpad.net/desktopcouch—Desktop Couch is a data storage format used by Ubuntu One and many desktop programs for easy integration data storage, replication from one computer to another, and synchronization into programs.
![]() http://projects.gnome.org/gedit/—gedit is the default text editor in the GNOME desktop environment.
http://projects.gnome.org/gedit/—gedit is the default text editor in the GNOME desktop environment.
![]() https://launchpad.net/bikeshed—The main page for Bikeshed.
https://launchpad.net/bikeshed—The main page for Bikeshed.
![]() https://help.ubuntu.com/community/PowerUsersProgramming—Another Ubuntu community page filled with programming resources.
https://help.ubuntu.com/community/PowerUsersProgramming—Another Ubuntu community page filled with programming resources.
All materials on the site are licensed Creative Commons Attribution-Sharealike 3.0 Unported CC BY-SA 3.0 & GNU Free Documentation License (GFDL)
If you are the copyright holder of any material contained on our site and intend to remove it, please contact our site administrator for approval.
© 2016-2026 All site design rights belong to S.Y.A.