Learning Windows Azure Mobile Services for Windows 8 and Windows Phone 8 (2014)
Chapter 4. Service Customization with Scripts
When we create a table, we get a set of methods (Query, Insert, Update, and Delete). For many implementations, these methods will be fine as they are, but we can also change their behavior with JavaScript scripts. When we first create a table, we get a set of stubbed scripts, which we can modify to do things such as validate and manipulate our data and filter data for authenticated users.
Just like modifying table methods, we can also create our own API methods outside the scope of a table's operations to do anything we like.
Scripts can access tables, trigger push notifications, make HTTP requests, or do anything we like with third-party libraries using NPM modules. The portal has a fantastic script editor with intelliSense, but we can also pull a copy of all the scripts to work on locally using Git version control.
In this chapter, we'll look at some examples which try and incorporate a number of features in one go rather than examining things individually out of context.
Understanding table scripts
Each table's Insert, Update, Delete, and Read methods can be modified. All the methods take a user and request parameter. The method signatures look like the following:
function del(id, user, request)
function insert(item, user, request)
function read(query, user, request)
function update(item, user, request)
The following parameters are used in the method signatures:
· id: This is the ID of an item to be deleted with the delete method.
· item: This is the item object to be inserted or updated. It will have the same properties as the model that we created in the app.
· query: This is the OData query expression for reading data with a query.
· user: This is the user object with user ID, level (admin, anonymous, and authenticated), and access tokens properties.
· request: This contains execute methods that execute the default action for the method and a respond method that returns the response.
Level-insert table script example
I've created a table to store game levels called Levels. When the app starts, it loads the levels from the service. This script is implemented in the insert method of the Levels table to validate the data and check if the board cells are square. The steps are as follows:
1. First we do a null check:
2. if(item === null || item.name === null || item.time === null){
3. valid = false;
}
4. Next check if the cells property is square (and not null):
5. if(valid &&item.cells !== null){
6. var sqrt = Math.sqrt(item.cells.length);
7. if(Math.pow(sqrt, 2) != item.cells.length){
8. valid = false;
9. }
10.}
11.else {
12. valid = false;
}
13. Finally, we execute if valid or respond with a bad request:
14.if(valid){
15. request.execute({
16. success: function(results) {
17. console.log("Inserted level");
18. },
19. error: function(error) {
20. console.error(error);
21. }
22. });
23. }else {
24. request.respond(statusCodes.BAD_REQUEST);
}
Note
You can see the full script in the samples.
Score-insert script example
The scores table holds user scores. Therefore, we need to make sure we track the authenticated user's ID so that we can filter their results for other operations. The insert script populates the owner property from user.userId:
function insert(item, user, request) {
item.owner = user.userId;
request.execute();
Score-read script example
Because we only want to return results for the calling user, we can filter just their data as follows:
function read(query, user, request) {
query.where({
owner: user.userId
});
request.execute();
}
For both the Score methods, users must be authenticated. For the TileTapper game, the user doesn't need to use the update or delete method, so I've set these to be Only Authenticated Users. But, if you need to use them, the item's owner should be checked before execution.
API scripts
API scripts can be used to do things outside the scope of a table's method, such as making HTTP requests to call other web services and performing push notification requests (this will be discussed in the next chapter). We can still access tables through therequest.service.tables object, which exposes our tables and all their methods. However, these methods go directly into the table and not through the API. Hence, any table script modifications will be bypassed.
API scripts support the following five HTTP methods:
· GET
· POST
· PUT
· PATCH
· DELETE
Creating an API script
To create an API script, follow this procedure:
1. Go to the API tab in the portal and click on the CREATE button:

2. Enter the name and choose the permissions:

3. Once created, select it from the API list in the portal. A stubbed GET and POST method is created for you:
4. exports.post = function(request, response) {
5. // Use "request.service" to access features of your mobile service, e.g.:
6. // var tables = request.service.tables;
7. // var push = request.service.push;
8.
9. response.send(statusCodes.OK, { message : 'Hello World!' });
10.};
11.
12.exports.get = function(request, response) {
13. response.send(statusCodes.OK, { message : 'Hello World!' });
};
14. You can modify or delete these methods. To add different methods, just add a new exports method with the HTTP method you require.
High-score API script
The TileTapper game uses an API called HighScore. The high score POST script adds a new item to the leaderboard table, validates that it is the highest score, and calls an external web service:
1. First, we're going to grab the JSON object from the request body:
2. exports.post = function(request, response) {
3.
4. // Get item from request body
var item = request.body;
5. Next, we query the leaderboard table to get the highest score by performing an orderByDescending and take(1) operation and then calling read, which takes a success and error function (I've chopped the inside out of the success function so you can see it in one.). The error function logs the error and returns an error response (400), shown as follows:
6. // Get high score
7. var leaderBoardTable = request.service.tables.getTable('leaderboard');
8. leaderBoardTable
9. .orderByDescending('score').take(1)
10. .read({
11. // Read success function
12. success: function(results) {
13. // Success code removed for brevity
14. },
15. // Read error function
16. error: function(err) {
17. console.error(err);
18. response.send(400);
19. }
});
20. When the read is successful, we go on to get the value from the results, then check if the user score is actually higher. Again, if it is not, we log an error and return an error response (400), shown as follows:
21.var highScore = 0;
22.
23. // Try and get high score
24. if(results.length > 0){
25. highScore = results[0].score;
26. }
27.
28. // If new score is higher execute
29. if(item.score > highScore){
30.
31. // Success code removed for brevity
32. }
33. else { // Otherwise return failure
34. var msg = "Score " + item.score + ", is lower than high score " + highScore;
35. console.error(msg);
36. response.send(statusCodes.BAD_REQUEST, msg);
}
37. If the score is higher, we insert the item into the table and use success and error functions again:
38. // Insert into table
39. leaderBoardTable.insert(item, {success: function(results)
40. {
41. // Success code removed for brevity
42. },
43. error: function(err) {
44. console.error(err);
45. response.send(statusCodes.BAD_REQUEST, err);
}});
46. Once inserted, we're going to send the new high score to an external web service. I published an MVC Web API service to an Azure website to test it. We load an NPM package (already installed) called request, which simplifies HTTP operations in JavaScript, by using the require method:
47.// Send score to external web service
48.var httpRequest = require("request");
49.var url = "http://tiletapperadmin.azurewebsites.net/api/leaderboard";
50.httpRequest.post({
51. url: url,
52. json: item
53. }, function(err, response, body) {
54. if (err) {
55. console.error("Error connecting to admin service");
56. } else if (response.statusCode !== 200) {
57. console.error("Error posting to admin service");
58. } else {
59. console.log("Posted to admin service, response: " + JSON.stringify(body));
60. }
61. });
62.
response.send(statusCodes.OK, results);
Finally, we've got to the bit of the script where we can send an OK result (200) along with the inserted item and its ID set. Note that I've not worried about the output of the result of the web request. The results are logged, but if it fails, I don't want to return an error as we've still successfully inserted the item in the table.
API methods can be called using the InvokeApiAsync method, which has a number of overloads for whether you want to pass in an object, return an object, or pass in queries. We can call this method using the following code:
var result = await _mobileService.InvokeApiAsync<HighScore, LeaderBoardItem>("highScore", item);
Here, item is an instance of the highScore model:
[JsonObject(Title = "highScore")]
public class HighScore
{
[JsonProperty(PropertyName = "name")]
public string Name { get; set; }
[JsonProperty(PropertyName = "score")]
public int Score { get; set; }
}
Script debugging and logs
Scripts can easily be debugged using the console object, which has the following methods:
· console.log(formatString, obj1, obj2, ...): This method logs at info level
· console.info(formatString, obj1, obj2, ...): This method logs at info level
· console.warn(formatString, obj1, obj2, ...): This method logs at warn level
· console.error(formatString, obj1, obj2, ...): This method logs at error level
These methods output a single log entry that can be viewed under the LOGS tab in the portal. All the methods can be called with a single string or a formatter and object arguments, shown as follows:
· Number (%d): console.log("Board size: %d", size);
· String (%s): console.log("Board: %s", board);
· JSON (%j): console.log("Level JSON: %j", level);
While working with scripts, we soon learn that logging is our friend. Every time we make a mistake (which we will as we can't debug them in our own IDE), errors will be logged, which we can view under the LOGS tab in the portal. Logged errors are generally pretty helpful, telling you which script failed and what the error was. I had the following error on the api/highscore.js script:
{ _super: undefined, message: 'A value cannot be specified for property \'id\'', code: 'BadInput' }
It was telling me that I was trying to insert an object with the id property set into the leaderboard table.
Scheduling
From the SCHEDULER tab in the portal, it's possible to write scripts to be run on a schedule (or on demand) to perform tasks such as cleaning up data or sending push notifications.
Note
Note that free and basic subscriptions are allowed one task and standard subscriptions are allowed 10.
For the TileTapper game, I created a scheduled script to create daily game levels:
function DailyLevel() {
// Set board size
var min = 3;
var max = 10;
var size = Math.floor((Math.random()*(max-min))+min);
// Create board
var board = "";
for(var i = 0; i < size; i++)
{
for(var j = 0; j < size; j++)
{
if(Math.random() < 0.5){
// Active tile
board += "1";
}
else{
// Inactive tile
board += "0";
}
}
}
// Set allowed time
min = 100;
max = 3000;
var time = Math.floor((Math.random()*(max-min))+min);
// Get reference to Levels table
var levelsTable = tables.getTable('levels');
// Add level
levelsTable.insert({
name: "Level X",
cells: board,
time: time
});
}
The script makes use of the standard JavaScript Math object to randomize board size and time allowance, and then uses the API-specific tables object to insert the level into the table.
Working locally with Git
We can work on scripts in the portal if we like; however, we can also pull a copy if we want to work locally or for a backup using Git version control. I personally use the Git GUI; however, I don't want to waste pages with screenshots of this, so we'll talk about using Git Bash (the console)!
Pulling the repository
First, we need to get a copy of the repository onto our local machine. To do this, follow this procedure:
1. We need to set up the service's repository Git credentials. On the dashboard, click on the Set up source control button and enter some credentials for Git authentication.
2. Create a folder somewhere for the repository (I put mine in one of the Visual Studio projects, so I can work on the scripts easily in Visual Studio). Next, launch Git Bash by right-clicking on the folder and selecting Git Bash or launching Bash and setting the path to the directory you want.
3. Type the following command into Bash (You can copy the URL from the GIT URL setting under the CONFIGURE tab):
4. $ git clone https://your_service.scm.azure-mobile.net/Your_Service.git
Enter the user name and password when prompted.
5. We should now have a full copy of the service's scripts in our directory:
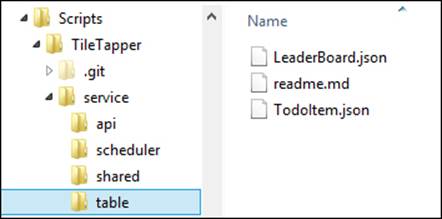
6. If you've pulled them under one of your projects, you can add the directory into your solution and even check them in to TFS if you're using it.
Updating our repository
When we add or change tables or other scripted items in our service through the portal, we can call a pull to update our local repository:
$ git pull origin master
Enter the username and password when prompted. If there are any conflicts, edit the conflicting files and call commit.
Adding scripts manually
I manually added a script named LeaderBoard.insert.js to modify the insert behavior of the LeaderBoard table:
function insert(item, user, request) {
request.execute();
console.log(item);
}
This will asynchronously insert the item into the table and log the JSON item object to a log file, which we can view in the portal.
We need to add this to the repository by calling an add to add the file to the repository:
$ git add service/table/LeaderBoard.insert.js
Or we can use the following:
$ git add *
Once added, we can commit the change and add a comment:
$ git commit -m "Added LeaderBoard insert script"
Pushing back changes
Once we've done some work and committed everything, we can go and push the changes back to the service by calling a push:
$ git push origin master
Enter the username and password when prompted. We can now see that any changes made are reflected in the portal.
Implementing NPM modules
It's possible to make use of existing script libraries that have a Node NPM module. For the TileTapper game, I decided to use the moment.js library to easily get a formatted date string for the level name. To use a NPM module in your scripts, follow the following procedure:
1. Make sure you have installed node.js (see Chapter 2, Start Developing with Windows Azure Mobile Services).
2. Launch Git Bash and navigate to your repository.
3. Update your repository (commit any changes first):
4. $ git pull origin master
5. Navigate to the service directory.
6. Install the NPM package with the following command:
7. $ npm install package_name
8. We should see the following results:
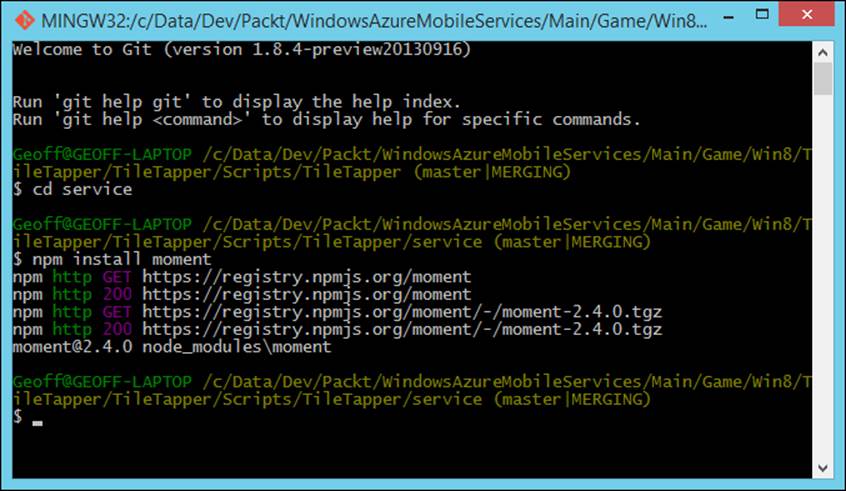
9. We can see a node_modules directory in our service folder.
10. Add the modules to the repository:
11.$ git add *
12. Now, we can edit the script we want (if you want to do it in the portal, skip to committing and pushing).
13. Use the require method to get a reference to the installed package and use it as needed. I created a level name using the following code:
14.var moment = require('moment');
15.var name = moment().format('YYMMDD dddd [Level]');
16.
17.// Add level
18. var level = {
19. name: name,
20. cells: board,
21. time: time
22. }
23.
24. levelsTable.insert(level, {
25. success: function(results) {
26. console.log("Inserted level");
27. },
28. error: function(error) {
29. console.error(error);
30. }});
31.
console.log("Level JSON: %j", level);
32. Commit the changes:
33.$ git commit -m "Added moment package and modified daily script"
34. Push the changes back:
35.$ git push origin master
36. Test if the script changes work with the installed module (look in the LOGS tab for errors).
Summary
We've seen that scripts are fantastic for customizing our services in order to manipulate data and do pretty much anything we can think of using external services and a third-party library with an NPM module. We've also learned how to pull and push our scripts using the Git version control and install NPM modules using Node.
We're not yet done with scripts either. In the next chapter, we will send different types of push notifications with the push object.
All materials on the site are licensed Creative Commons Attribution-Sharealike 3.0 Unported CC BY-SA 3.0 & GNU Free Documentation License (GFDL)
If you are the copyright holder of any material contained on our site and intend to remove it, please contact our site administrator for approval.
© 2016-2026 All site design rights belong to S.Y.A.