Exam Ref 70-695 Deploying Windows Devices and Enterprise Apps (2015)
Chapter 1. Implement an operating system deployment infrastructure
Deploying a client operating system is a routine task that you will perform numerous times in your career as a systems administrator. It’s easy to deploy the operating system to a single computer, but the task becomes more daunting and complex in enterprise environments in which you need to deploy the operating system to hundreds, and sometimes even thousands, of devices. To scale operating system deployment to more than a few devices, you need to rely on automation. The more automation you use, the less time you need to spend per device when performing operating system deployments. In this chapter, you learn about implementing the necessary infrastructure to deploy an operating system over the network to thousands of devices.
Objectives in this chapter:
![]() Objective 1.1: Assess the computing environment
Objective 1.1: Assess the computing environment
![]() Objective 1.2: Plan and implement user state migration
Objective 1.2: Plan and implement user state migration
![]() Objective 1.3: Configure the deployment infrastructure
Objective 1.3: Configure the deployment infrastructure
![]() Objective 1.4: Configure and manage activation
Objective 1.4: Configure and manage activation
Objective 1.1: Assess the computing environment
Before you can deploy a new operating system, it’s important to assess your existing environment to discover which, if any, of the existing devices support the new operating system. By assessing your environment, you can also determine whether hardware upgrades are necessary for any of the devices.
This objective covers how to:
![]() Use the Microsoft Assessment and Planning Toolkit (MAP)
Use the Microsoft Assessment and Planning Toolkit (MAP)
![]() Assess Configuration Manager reports
Assess Configuration Manager reports
![]() Integrate MAP with Configuration Manager
Integrate MAP with Configuration Manager
![]() Determine network load capacity
Determine network load capacity
Using the Microsoft Assessment and Planning Toolkit
Microsoft Assessment and Planning (MAP) is an agentless inventory, assessment, and reporting tool that can securely assess IT environments for various platform migrations, including but not limited to Windows 8.1, Windows 8, Microsoft Office 2013 and Microsoft Office 365, Windows Server 2012 and Windows Server 2012 R2, SQL Server 2012, Microsoft Hyper-V, Microsoft Private Cloud Fast Track, and Microsoft Azure.
MAP is a solution accelerator available as a free download from the Microsoft Download Center. You install the toolkit according to the options that best fit your environment and goals. The MAP page on the Microsoft Download Center has additional information and documentation to help you install MAP correctly.
You can use MAP to scan and assess your organization’s readiness for Windows 8.1. MAP uses several agentless methods to connect to your network’s computers, assess the hardware and device compatibility with Windows 8.1, and then create comprehensive Microsoft Word and Microsoft Excel reports.
You should tie your use of MAP to a phased approach as part of your overall deployment strategy. There are six distinct phases for you to consider, and the key to a successful MAP experience is to complete each of six phases sequentially. The following sections describe the six phases.
Phase 1: Choose your goals
To use this phase correctly, know what MAP can do. It contains a number of inventory, assessment, capacity planning, and software usage tracking scenarios that fit various situations. MAP uses wizards to perform data collection from which you can make better decisions. The overall purpose of this phase is to understand what you are attempting to do with respect to deploying Windows and to have an overall idea of what the outcome will be. By knowing what you want to accomplish, you can use MAP better to gather information, which is covered in the next phase.
As an example, your goal could be to deploy Windows 8.1 on 300 devices in the Miami office successfully by a specific date.
Phase 2: Gather your data collection requirements
MAP communicates with machines in a network to collect information to use in the assessments, but before you can start collecting data, some prep work is necessary. In this phase, you work on the following data collection requirements:
![]() Credentials for target computers To connect to target computers, you must specify credentials, and they must be able to collect data from Windows-based computers by using Windows Management Instrumentation (WMI). For Linux or UNIX computers, the credentials must be able to connect by using Secure Socket Shell (SSH) and collect data. It is a good practice to use a dedicated service account for MAP communication so you can use local administrative access and avoid using domain admin-level or root-level credentials.
Credentials for target computers To connect to target computers, you must specify credentials, and they must be able to collect data from Windows-based computers by using Windows Management Instrumentation (WMI). For Linux or UNIX computers, the credentials must be able to connect by using Secure Socket Shell (SSH) and collect data. It is a good practice to use a dedicated service account for MAP communication so you can use local administrative access and avoid using domain admin-level or root-level credentials.
![]() Credentials for Active Directory discovery To connect to Active Directory to perform queries for discovery, supply Active Directory credentials. These can be the same credentials used for collecting data from target computers.
Credentials for Active Directory discovery To connect to Active Directory to perform queries for discovery, supply Active Directory credentials. These can be the same credentials used for collecting data from target computers.
Phase 3: Prepare your environment
In this phase, you prepare your environment to ensure that MAP can connect and gather information from the target machines successfully. The following list highlights the preparation tasks:
![]() Configure target devices to allow MAP communication The configuration will vary by platform. If a firewall is in place between the MAP computer and the target device, open ports. If a host-based firewall is in use on devices, you must configure it to allow the MAP communication. For Windows-based devices, you can automate the configuration of the Windows firewall by using Group Policy Objects.
Configure target devices to allow MAP communication The configuration will vary by platform. If a firewall is in place between the MAP computer and the target device, open ports. If a host-based firewall is in use on devices, you must configure it to allow the MAP communication. For Windows-based devices, you can automate the configuration of the Windows firewall by using Group Policy Objects.
![]() Configure logging on target devices Logging can be used for troubleshooting purposes and security auditing purposes.
Configure logging on target devices Logging can be used for troubleshooting purposes and security auditing purposes.
More Info: Detailed Firewall and Logging Information
At a minimum, familiarize yourself with the general Windows firewall considerations shown at http://social.technet.microsoft.com/wiki/contents/articles/17809.preparing-your-map-environment.aspx. If time allows, scan through the remaining details for firewall and logging considerations too.
Phase 4: Install the MAP Toolkit
Before installing MAP, decide how MAP will store the data it collects in your environment. MAP stores collected information in SQL Server databases. You can use the Microsoft SQL Server 2012 Express LocalDB, which is free; it comes with MAP, and you can install it with MAP. Alternatively, you can use a SQL Server database hosted on Microsoft SQL Server 2008, SQL Server 2008 R2, or SQL Server 2012 database server. If you use a full SQL Server installation, you must create a named instance called MAPS before you run the MAP installer.
More Info: MAP
This book uses MAP version 9.1. You can download it from the Microsoft Download Center at http://www.microsoft.com/en-us/download/details.aspx?id=7826. You can find the installation steps for MAP on the download page, under “Install Instructions.“
To install MAP, perform the following steps:
1. Run MapSetup.exe.
2. In the Microsoft Assessment And Planning Toolkit dialog box, click Next.
3. On the License Agreement page, select I Accept The Terms In The License Agreement and then click Next.
4. On the Installation Folder page, specify the folder where MAP should be installed and then click Next.
5. On the Customer Experience Improvement Program page, specify whether to join the customer experience improvement program and then click Next.
6. On the Begin The Installation page, click Install and, after the install is complete, click Finish.
Phase 5: Collect data
Now you can begin using MAP for the data-collection process. Two wizards collect the data that most scenarios require:
![]() Inventory and Assessment Wizard
Inventory and Assessment Wizard
![]() Performance Metrics Wizard
Performance Metrics Wizard
Inventory and Assessment Wizard
The Inventory and Assessment Wizard is the starting point for all MAP scenarios. When you use the information gathered in phases 1 through 3, the wizard prompts you to:
![]() Select your inventory scenario Your scenario will depend on your goals. For instance, if you want to deploy Windows 8.1, you should select the Windows Computers scenario. This maps back to phase 1: Choose your goals. Although many of the available scenarios won’t be covered in this book, it is valuable to know about MAP’s capabilities for inventorying an environment. The complete list of available scenarios is:
Select your inventory scenario Your scenario will depend on your goals. For instance, if you want to deploy Windows 8.1, you should select the Windows Computers scenario. This maps back to phase 1: Choose your goals. Although many of the available scenarios won’t be covered in this book, it is valuable to know about MAP’s capabilities for inventorying an environment. The complete list of available scenarios is:
![]() Windows Computers
Windows Computers
![]() Linux/UNIX Computers
Linux/UNIX Computers
![]() Vmware Computers
Vmware Computers
![]() Active Devices And Users
Active Devices And Users
![]() Exchange Server
Exchange Server
![]() Endpoint Protection Server
Endpoint Protection Server
![]() Lync Server
Lync Server
![]() Software ID (SWID) Tags
Software ID (SWID) Tags
![]() SQL Server
SQL Server
![]() SQL Server With Database Details
SQL Server With Database Details
![]() Windows Azure Platform Migration
Windows Azure Platform Migration
![]() Oracle
Oracle
![]() Windows Volume Licensing
Windows Volume Licensing
![]() Client Access Tracking For Windows Server 2012 Or Later
Client Access Tracking For Windows Server 2012 Or Later
![]() Client Access Tracking For SQL Server 2012 Or Later
Client Access Tracking For SQL Server 2012 Or Later
![]() Client Access Tracking For Configuration Manager
Client Access Tracking For Configuration Manager
![]() Client Access Tracking For Sharepoint Server 2013
Client Access Tracking For Sharepoint Server 2013
![]() Client Access Tracking For Remote Desktop Services
Client Access Tracking For Remote Desktop Services
![]() Select your discovery method You can use any of the following discovery methods:
Select your discovery method You can use any of the following discovery methods:
![]() Active Directory Domain Services (AD DS) Use AD DS discovery to retrieve a list of computer accounts from Active Directory during the discovery process.
Active Directory Domain Services (AD DS) Use AD DS discovery to retrieve a list of computer accounts from Active Directory during the discovery process.
![]() Windows networking protocols Use Windows networking protocols to retrieve a list of computers from the Computer Browser service. This method is used for computers that are part of a workgroup or computers that are part of legacy domains such as those running on Windows NT 4.0.
Windows networking protocols Use Windows networking protocols to retrieve a list of computers from the Computer Browser service. This method is used for computers that are part of a workgroup or computers that are part of legacy domains such as those running on Windows NT 4.0.
![]() System Center Configuration Manager Use System Center 2012 R2 Configuration Manager to discover computers based on data discovery records (DDRs) that Configuration Manager maintains.
System Center Configuration Manager Use System Center 2012 R2 Configuration Manager to discover computers based on data discovery records (DDRs) that Configuration Manager maintains.
![]() IP address range Use the IP address range option to scan IP addresses in a range that you specify. A maximum of 100,000 IP addresses are allowed in a single scan.
IP address range Use the IP address range option to scan IP addresses in a range that you specify. A maximum of 100,000 IP addresses are allowed in a single scan.
![]() Manual entry Use manual entries to specify the names of individual computers you want to connect to during the discovery process. When you select this option, you can specify the credentials used for each manually entered computer. This is useful if you have several computers, each of which will have a unique credential, which can be common in a highly secure environment.
Manual entry Use manual entries to specify the names of individual computers you want to connect to during the discovery process. When you select this option, you can specify the credentials used for each manually entered computer. This is useful if you have several computers, each of which will have a unique credential, which can be common in a highly secure environment.
![]() Import computer names from a file Use this option to import computers from a file based on host names, fully qualified domain names, NetBIOS names, or IP addresses. In addition, you can specify the credentials for each import file.
Import computer names from a file Use this option to import computers from a file based on host names, fully qualified domain names, NetBIOS names, or IP addresses. In addition, you can specify the credentials for each import file.
![]() Provide the credentials to connect and inventory the target machines You need to specify two sets of credentials to retrieve data successfully during the discovery and inventory process of MAP:
Provide the credentials to connect and inventory the target machines You need to specify two sets of credentials to retrieve data successfully during the discovery and inventory process of MAP:
![]() Discovery credentials Use discovery credentials to generate a list of computers from which you want to collect inventory data. The credentials used depend on the discovery methods you decide to use. For example, if you use AD DS for discovery, you must specify an account that has Read permission on the containers that store computer accounts in the Active Directory database. By default, all users have Read permissions on containers and organizational units (OUs) that contain computer objects. If you use Configuration Manager, specify credentials that have read rights in the Configuration Manager database.
Discovery credentials Use discovery credentials to generate a list of computers from which you want to collect inventory data. The credentials used depend on the discovery methods you decide to use. For example, if you use AD DS for discovery, you must specify an account that has Read permission on the containers that store computer accounts in the Active Directory database. By default, all users have Read permissions on containers and organizational units (OUs) that contain computer objects. If you use Configuration Manager, specify credentials that have read rights in the Configuration Manager database.
![]() Inventory credentials Inventory credentials are called All Computers Credentials in the wizard. These credentials are used to connect, by WMI, to the discovered computers and must have local administrative rights on the computers from which you want to gather inventory data.
Inventory credentials Inventory credentials are called All Computers Credentials in the wizard. These credentials are used to connect, by WMI, to the discovered computers and must have local administrative rights on the computers from which you want to gather inventory data.
![]() Retrieve hardware inventory Depending on the scenarios chosen, MAP uses different technologies to retrieve hardware inventory. The technologies used for the most used scenarios are
Retrieve hardware inventory Depending on the scenarios chosen, MAP uses different technologies to retrieve hardware inventory. The technologies used for the most used scenarios are
![]() WMI Gathers inventory data from Windows-based computers and from Configuration Manager.
WMI Gathers inventory data from Windows-based computers and from Configuration Manager.
![]() SSH Gathers inventory data from Linux and UNIX computers.
SSH Gathers inventory data from Linux and UNIX computers.
![]() VMWare Gathers inventory data from VMWare virtualization host servers.
VMWare Gathers inventory data from VMWare virtualization host servers.
Performance Metrics Wizard
The Performance Metrics Wizard collects specific performance-related information such as CPU, memory, network, and disk usage for Windows-based servers and clients as well as for LINUX-based servers. The information that this collection mechanism gathers supports the capacity-planning features for server consolidation, desktop virtualization, Microsoft Private Cloud Fast Track, and Azure application migration.
Using MAP to Discover and Inventory Computers
To discover and inventory computers, do the following:
1. On the computer on which you installed MAP, on the Start screen, type Assessment.
2. In the search results, click the Microsoft Assessment And Planning Toolkit tile. Wait for MAP to start.
It might take approximately 30 to 60 seconds. The dialog box shown in Figure 1-1 appears.
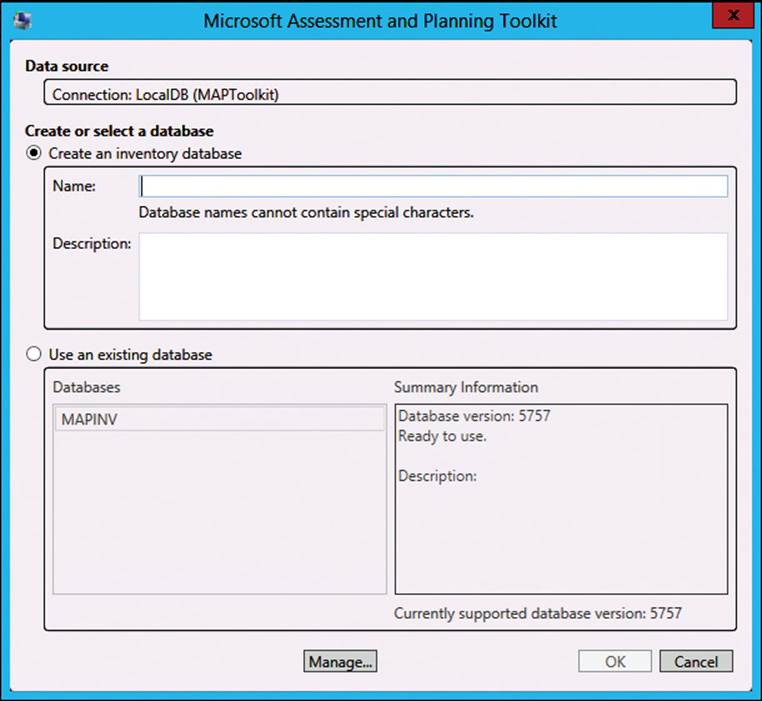
FIGURE 1-1 Microsoft Assessment And Planning Toolkit
3. In the Microsoft Assessment And Planning Toolkit dialog box, in the Create Or Select A Database section, click Create An Inventory Database. In the Name field, type Client Assessment and, in the Description section, type Initial client assessment. Click OK.
4. In the console tree, select Overview and, in the Where To Start section, click Perform An Inventory to start the Inventory And Assessment Wizard. On the Inventory Scenarios page shown in Figure 1-2, select Windows Computers and click Next.
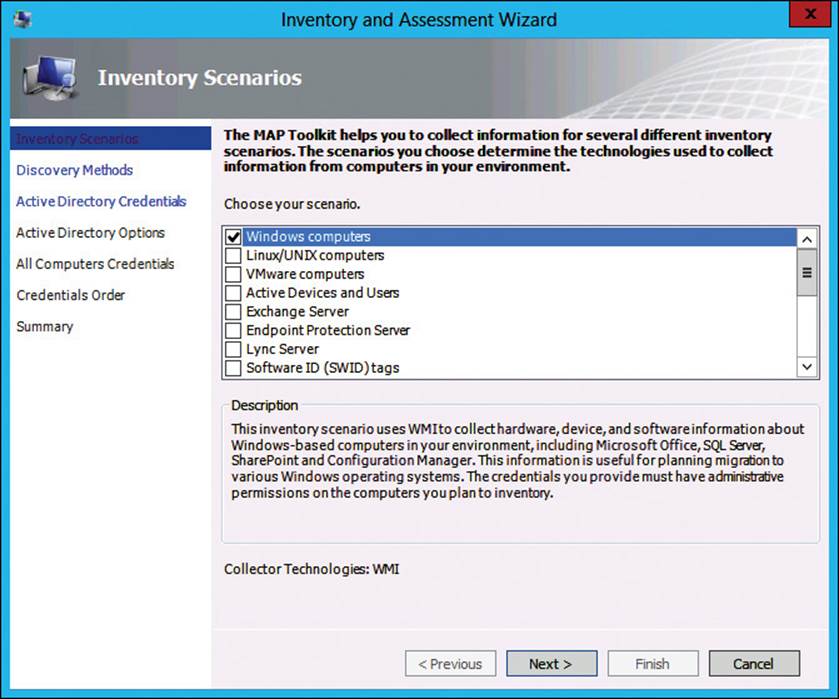
FIGURE 1-2 Inventory And Assessment Wizard, Inventory Scenarios page
5. On the Discovery Methods page shown in Figure 1-3, ensure that Use Active Directory Domain Services (AD DS) is selected and click Next.
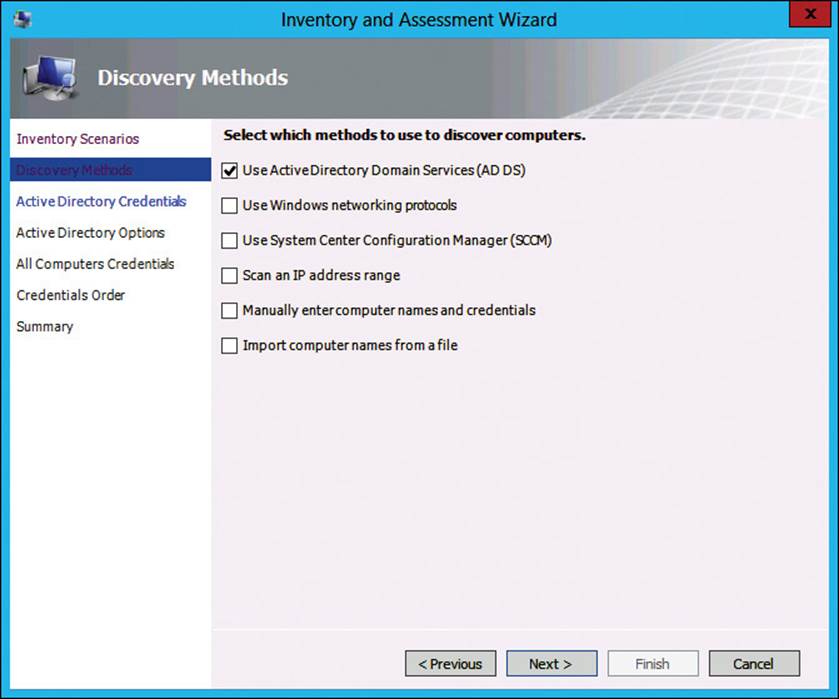
FIGURE 1-3 Inventory And Assessment Wizard, Discovery Methods page
6. On the Active Directory Credentials page displayed in Figure 1-4, enter the following information in the text boxes and then click Next.
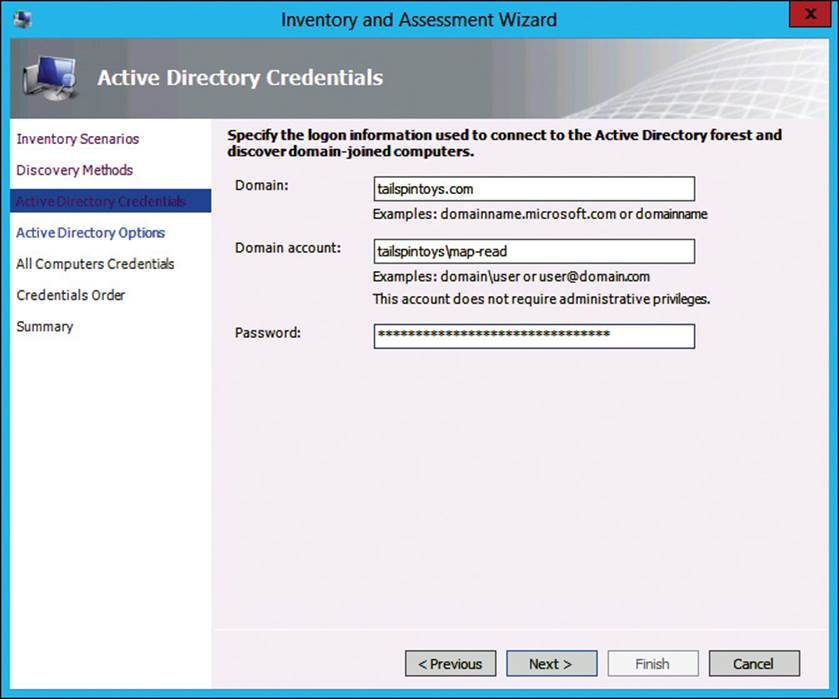
FIGURE 1-4 Inventory And Assessment Wizard, Active Directory Credentials page
![]() Domain The name of the domain in which you want to discover computers.
Domain The name of the domain in which you want to discover computers.
![]() Domain Account An account with read rights in Active Directory, for example, CONTOSO\MAP-SVC.
Domain Account An account with read rights in Active Directory, for example, CONTOSO\MAP-SVC.
![]() Password The password for the account entered.
Password The password for the account entered.
7. On the Active Directory Options page, ensure that Find All Computers In All Domains, Containers, And Organizational Units is selected and then click Next. On the All Computers Credentials page displayed in Figure 1-5, click Create to specify an account to be used to gather inventory data from discovered computers and then click Save after entering the account details.
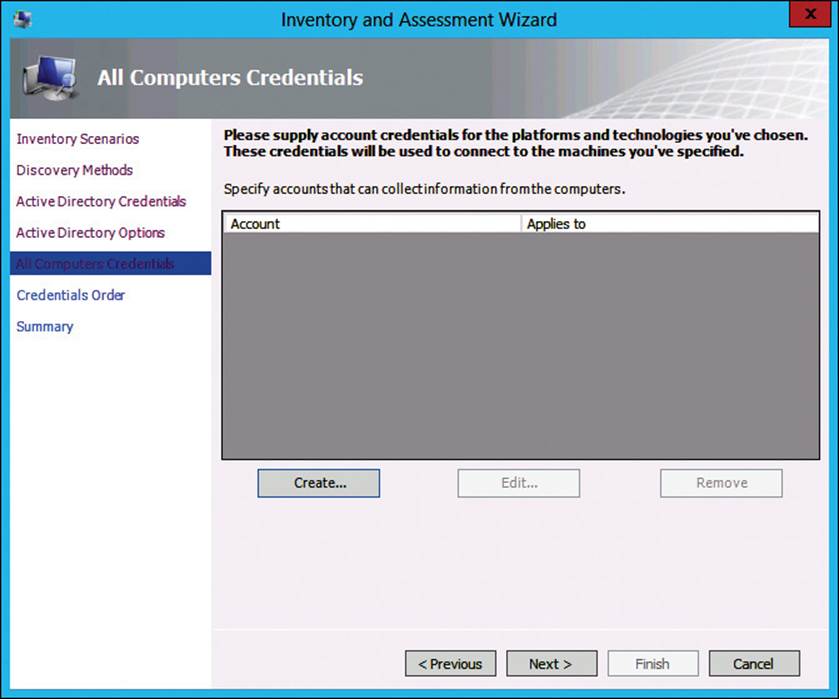
FIGURE 1-5 Inventory And Assessment Wizard, All Computers Credentials page
8. Repeat step 7 if more than one account is required for your environment and then click Next. On the Credentials Order page displayed in Figure 1-6, click Move Up and Move Down to specify the order in which MAP will try to use accounts when gathering inventory data.
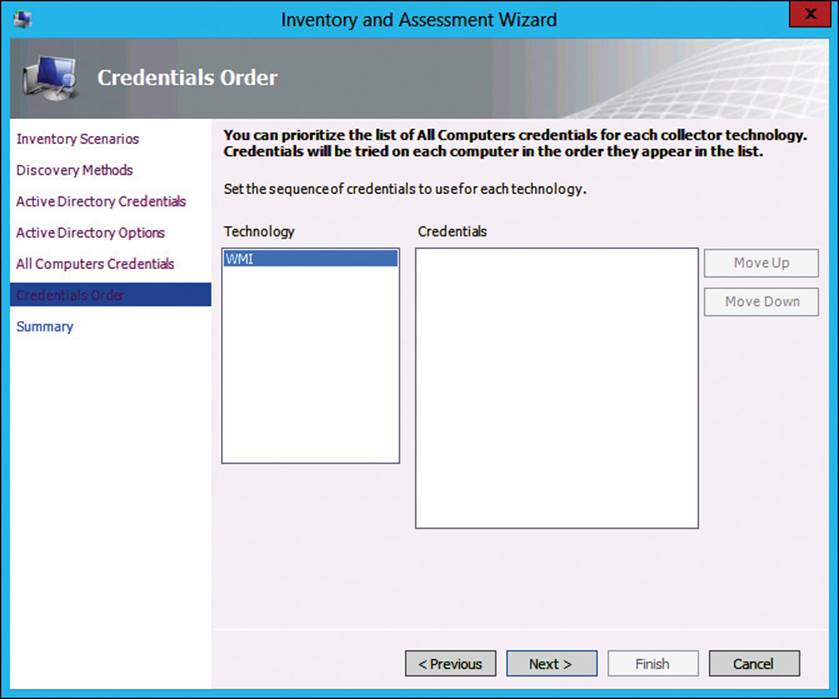
FIGURE 1-6 Inventory And Assessment Wizard, Credentials Order page
9. Click Next and then click Finish.
Data will appear in the Inventory And Assessment dialog box, as displayed in Figure 1-7. You can review the data and then click Close when you are finished.
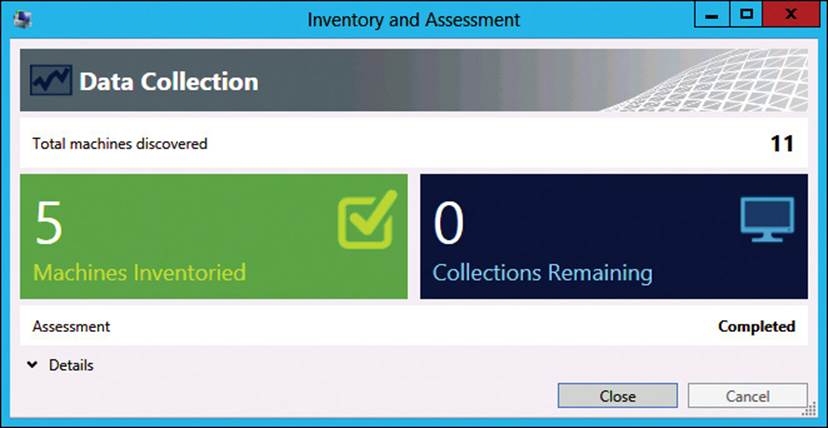
FIGURE 1-7 Inventory And Assessment dialog box
10. To collect inventory data, look at the Environment Summary in the Overview section.
11. Expand Desktop in the console tree and then click the Windows 8.1 Readiness tile.
12. In the Options section, click Generate Windows 8.1 Readiness Report and observe the Report Generation Status dialog box displayed in Figure 1-8. Click Close.
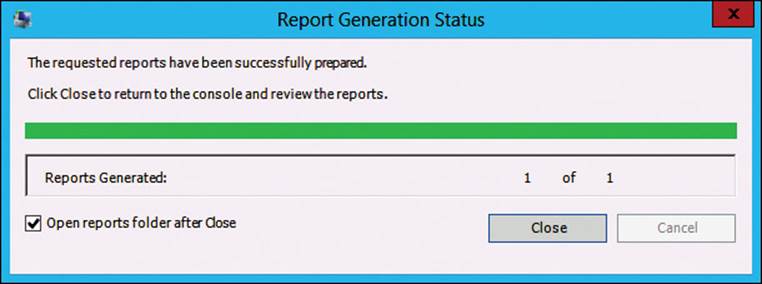
FIGURE 1-8 Report Generation Status dialog box
Phase 6: Review the reports
When you run the data collection wizards, MAP has the information necessary to generate custom reports and proposals that are specific to the environment that MAP inventoried.
To preview Windows 8.1 readiness reports, do the following:
1. In the View menu, click Saved Reports.
2. Open the Excel worksheet report named Windows81Assessment with the date of the process. Look at the following worksheets:
![]() Summary Displays the number of computers that are ready for Windows 8.1 with, and without, hardware upgrades as well as the number of computers not ready for Windows 8.1 and the number of computers that could not be inventoried.
Summary Displays the number of computers that are ready for Windows 8.1 with, and without, hardware upgrades as well as the number of computers not ready for Windows 8.1 and the number of computers that could not be inventoried.
![]() Assessment Values Displays the minimum requirements for Windows 8.1. You can change the requirements used for the reports or use the provided ones.
Assessment Values Displays the minimum requirements for Windows 8.1. You can change the requirements used for the reports or use the provided ones.
![]() ClientAssessment Displays a row for each computer and what requirements it meets or does not meet.
ClientAssessment Displays a row for each computer and what requirements it meets or does not meet.
![]() AfterUpgrades Displays a row for each computer that requires an upgrade and its settings after the upgrade.
AfterUpgrades Displays a row for each computer that requires an upgrade and its settings after the upgrade.
![]() DeviceSummary Displays a row for each type of device found, such as USB hubs and processors, and the number of computers that have each specified device.
DeviceSummary Displays a row for each type of device found, such as USB hubs and processors, and the number of computers that have each specified device.
![]() DeviceDetails Displays a row per device for each computer inventoried.
DeviceDetails Displays a row per device for each computer inventoried.
![]() DiscoveredApplications Displays a row for each application discovered and the number of computers on which the application was found.
DiscoveredApplications Displays a row for each application discovered and the number of computers on which the application was found.
 Exam Tip
If you scan a Hyper-V host computer, MAP will automatically attempt to scan the virtual machines (VMs) hosted on the Hyper-V host computer. Watch for exam scenarios in which your MAP reports have data for computers that were not part of your original scope. Those computers might be VMs from a Hyper-V host. In some cases, your user account might not have access rights to scan the VMs. In that case, you might see errors but still see the full set of inventory data you were expecting. Again, this could be due to scanning a Hyper-V host computer.
Assessing Configuration Manager reports
One of the advantages of MAP, besides the fact that it has been created specifically for upgrade and deployment assessments, is that it’s a free tool. Before the creation of MAP, IT professionals had to rely on paper-based documentation or the use of commercial applications that gathered hardware and software inventory data.
One such application is System Center 2012 R2 Configuration Manager. Medium to large enterprises use Configuration Manager to collect hardware and software inventory, manage configuration and compliance settings, deploy apps, and deploy operating systems to devices.
Companies that have a Configuration Manager infrastructure can take advantage of the hardware inventory, software inventory, and Asset Intelligence features to collect data that MAP usually collects and view reports from within Configuration Manager itself. Configuration Manager has a much broader range of features and, as such, offers a broader range of flexibility when it comes to gathering data. If you are comfortable with writing your own SQL queries, or have a database admin that can assist, you will find hundreds of attributes that Configuration Manager is gathering automatically. When the necessary inventory data isn’t available, you can use custom inventory classes to extend your reporting capabilities further.
The reports in Configuration Manager can also provide a great source of comparison with the inventory you receive from MAP. Taking the reports side by side can help you eliminate questionable clients that did not respond to your MAP assessment.
Real World: Asset Intelligence Reports
I worked on a project to reduce licensing costs. The management team had expressed concerns about licensing costs going up even though the company had not hired additional employees or purchased new software. Using the built-in reports in Configuration Manager, along with software metering to see when or if applications were launched, I was able to deduce that some licensed applications that were needed by only a subset of employees were unexpectedly part of the standard corporate computer image. Thus, every time the desktop team reimaged a computer or deployed a new computer, the licensed applications were installed. We removed those licensed applications from the image and automatically uninstalled the applications that had not been used.
Integrating MAP with Configuration Manager
You can use both MAP and Configuration Manager to determine whether devices in a network can be upgraded to Windows 8.1. Configuration Manager relies on data collected by its client agent, which you can later use to generate compliance reports. MAP uses WMI to collect the same data.
Some people say that you should use Configuration Manager if you have it and MAP if you don’t. Configuration Manager is a much broader tool, not just specific to upgrading an environment. MAP has built-in reports that are specific to a migration or upgrade. Should you go through the trouble of discovering and inventorying your environment with MAP when you already have Configuration Manager?
The good news is that you don’t have to. You can use discovery data that Configuration Manager inventoried to feed MAP. Configuration Manager can be integrated with MAP to do so. To integrate MAP and Configuration Manager, perform the following steps:
1. From the Start screen, type Assessment.
2. In the search results, click the Microsoft Assessment And Planning Toolkit tile. Wait for MAP to start. It might take approximately 30 to 60 seconds.
3. In the console tree, click Overview and, in the Where To Start section, click Perform An Inventory. In the Inventory And Assessment Wizard dialog box, select Windows Computers and click Next.
4. On the Inventory Scenarios page, under Choose Your Scenario, select Windows Computers and click Next.
5. On the Discovery Methods page, select Use System Center Configuration Manager and click Next.
6. On the SCCM Server And Credentials page shown in Figure 1-9, enter the Configuration Manager site server name and account to be used to retrieve data from the site server. The account must have local administrative rights on the site server. Click Next.
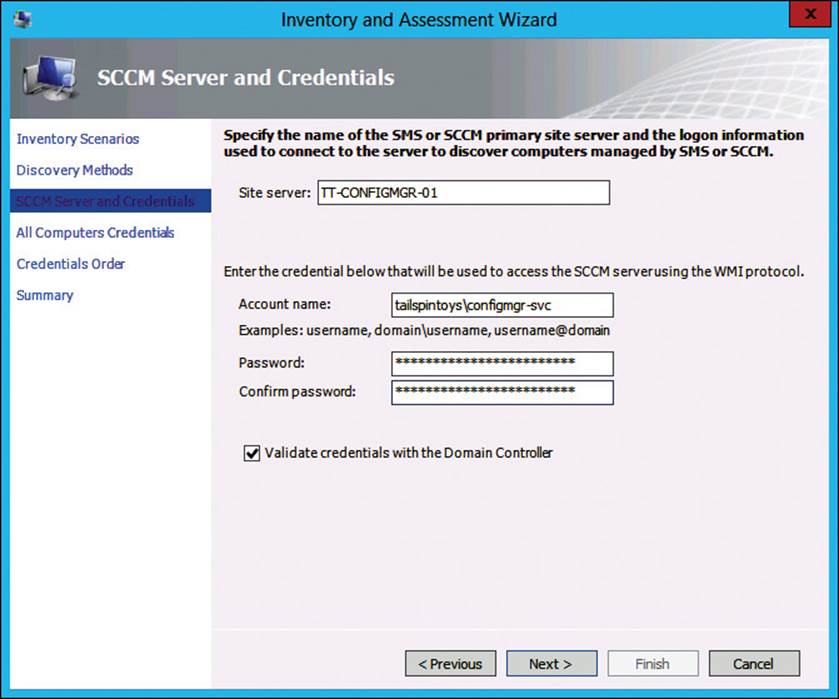
FIGURE 1-9 Inventory And Assessment Wizard dialog box, SCCM Server And Credentials page
7. In the All Computers Credentials section, click Create to specify an account to be used to gather inventory data from discovered computers and then click Save after entering the account details.
8. Repeat step 7 if more than one account is required for your environment. After you have entered all accounts you want to use, click Next.
9. On the Credentials Order page, change the order in which accounts should be tried on individual computers and then click Next.
10. On the Summary page, click Finish.
Determining network load capacity
One of the most common mistakes in the field when using MAP for assessments is to ignore the load it can generate on a network when assessing data from hundreds of computers. Before running MAP to inventory all computers on a network, monitor the network and run inventory on a single computer to measure the network load the inventory process generates.
Vendors offer several tools you can use for network monitoring. You should ask the network team members at your organization which tools they use for bandwidth monitoring in general and check what the average available bandwidth is during different hours of the day to choose the right time to run an inventory scan.
To capture network load for an inventory scan, follow these steps:
1. Install a network capture application such as Wireshark.
Wireshark is an open-source network capture application available at www.wireshark.org.
2. Determine which computer to scan as a test for measuring network load and write down its IP address.
3. Run the network capture application.
4. Filter the capture by changing the IP address to the IP address you wrote down in step 2.
5. Start the network capture.
6. On the Start screen, type Assessment.
7. In the search results, click the Microsoft Assessment And Planning Toolkit tile. Wait for MAP to start. It might take 30 to 60 seconds.
8. On the console tree, click Overview and, in the Where To Start section, click Perform An Inventory. In the Inventory And Assessment Wizard dialog box, select Windows Computers and click Next.
9. On the Inventory Scenarios page, under Choose Your Scenario, select Windows Computers and click Next.
10. On the Discovery Methods page, select Scan An IP Address Range and click Next. On the Scan An IP Address Range page, set the Starting Address and Ending Address to the IP address you wrote down in step 2, as displayed in Figure 1-10. Click Next.
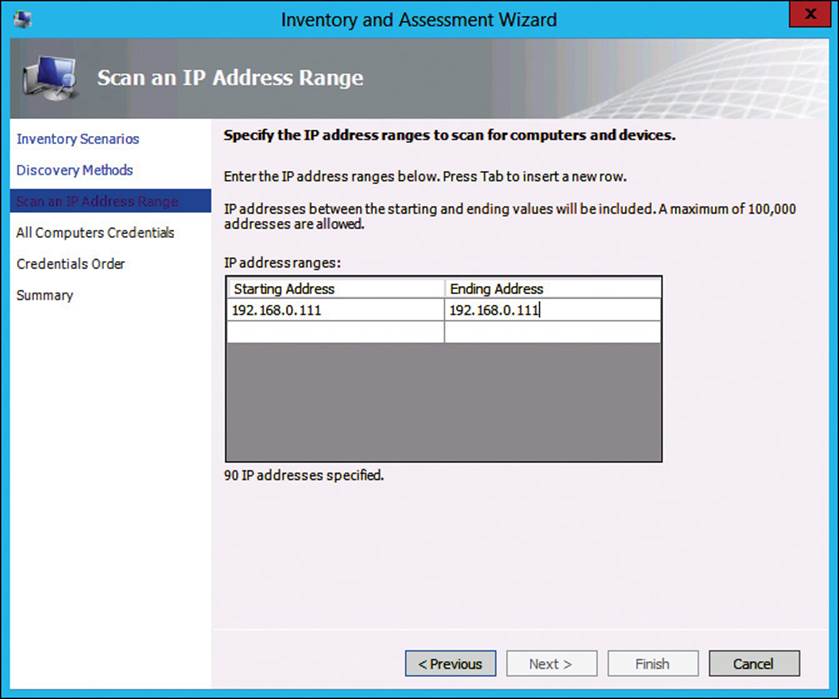
FIGURE 1-10 Inventory And Assessment Wizard, Scan An IP Address Range
11. In the All Computers Credentials page displayed, click Create to specify an account to be used to gather inventory data from discovered computers. Click Save after entering the account details for an account with local administrative rights on the computers to be inventoried.
12. On the Credentials Order page, click Next.
13. On the Summary page, click Finish.
Data starts to appear in the Inventory And Assessment dialog box. You can click Close after you see that the computer has been inventoried.
14. Switch to your network capture program and stop the capture.
15. Determine with the network team at your organization whether the traffic required is within the limits of the physical network. You must decide whether you need to segment the data collection and when to run it.
Besides using a network capture program, you can also use Performance Monitor to retrieve similar data. However, Performance Monitor will not filter the network traffic data by IP address or process.
 Thought experiment: Windows 8.1 deployment at Tailspin Toys
Tailspin Toys has a single office in Miami, Florida, with approximately 200 computers. Computers run mostly Windows XP, but several run Linux. Tailspin Toys has decided to upgrade all computers to Windows 8.1, including the computers currently running Linux. All Windows-based computers are part of an Active Directory Domain Services domain, tailspintoys.com.
During a customer meeting, you were informed that Tailspin Toys does not use any of the System Center products. It also doesn’t have any documentation on the hardware specifications of its computers.
You decide to use MAP to assess the environment. To help you plan better for the assessment, answer the following questions:
1. Which MAP scenarios should you choose to assess?
2. Which MAP discovery methods should you choose for the assessment?
3. Which technologies will MAP use to inventory the computers?
Objective summary
![]() You can inventory your network environment and generate upgrade reports by using MAP or Configuration Manager.
You can inventory your network environment and generate upgrade reports by using MAP or Configuration Manager.
![]() You can use Asset Intelligence reports in Configuration Manager to determine which computers need hardware upgrades to make them compliant with a new operating system.
You can use Asset Intelligence reports in Configuration Manager to determine which computers need hardware upgrades to make them compliant with a new operating system.
![]() MAP does not require an agent for inventory purposes. It uses WMI for Windows devices.
MAP does not require an agent for inventory purposes. It uses WMI for Windows devices.
![]() Configuration Manager uses an agent to inventory your environment.
Configuration Manager uses an agent to inventory your environment.
![]() MAP can use discovery data from Configuration Manager, which can save administrative time because you might not have to perform an inventory with MAP.
MAP can use discovery data from Configuration Manager, which can save administrative time because you might not have to perform an inventory with MAP.
Objective review
Answer the following questions to test your knowledge of the information in this objective. You can find the answers to these questions and explanations of why each answer choice is correct or incorrect in the “Answers” section at the end of this chapter.
1. You use Configuration Manager to manage 500 client computers. You need to discover which computers can be upgraded to Windows 8.1. Which Configuration Manager features should you use? (Choose all that apply.)
A. Hardware inventory
B. Software inventory
C. Asset Intelligence
D. Compliance settings
2. Twenty-five client computers need to be upgraded to Windows 8.1. You need to determine whether they can be upgraded without using an agent on them. Which tool should you use?
A. Configuration Manager
B. ACT
C. MAP
D. WDS
3. Which discovery methods can MAP use? (Choose all that apply.)
A. WMI
B. Network protocol
C. AD DS
D. SNMP
4. You have an environment that includes the entire System Center suite of products. You plan to install MAP to assess your environment. You don’t want MAP to perform a discovery and instead want to rely on existing data. What should you do?
A. Integrate MAP with Operations Manager.
B. Integrate MAP with Configuration Manager.
C. Integrate MAP with App Controller.
D. Integrate MAP with Service Manager.
5. You need to collect inventory data on 250 client computers. Which environmental prerequisites are required before you can successfully connect to these computers by using MAP? (Choose all that apply.)
A. Remote access to the computers using RDP
B. Firewall access for MAP
C. Configuration Manager client installed
D. A known service account
Objective 1.2: Plan and implement user state migration
At most companies, users have a mapped network drive that is used as their home folder. It’s where they are supposed to store all their data. Some of those companies also use folder redirection to map common local storage locations to home folders. However, as you probably know, only some data ends up in the home folder. Quite a bit of the data ends up spread out in multiple locations on the client computers. This poses a challenge for computer upgrades and migrations because the data needs to be available to the users after the upgrade or migration. As part of planning computer upgrades and migrations, you need to account for the data.
Now that you know that there is local data, you need to figure out how to handle it before you begin an upgrade or migration project.
This objective discusses how to handle user state migration by using the User State Migration Tool (USMT) for wipe-and-load and side-by-side migration scenarios.
This objective covers how to:
• Design a user migration strategy
• Estimate migration store size
• Secure migrated data
• Create a User State Migration Tool (USMT) package
Designing a user migration strategy
The User State Migration Tool (USMT) is a free tool from Microsoft to migrate user profiles and data from a source operating system to a destination operating system. It’s included as part of the Windows Automated Installation Kit (AIK) and consists of three client tools and some XML files that you can use to configure the specific data that migrates. The following list describes the USMT components:
![]() ScanState This tool (ScanState.exe) scans a source computer, collects the files and settings, and then creates a migration store that holds the data in a compressed format. ScanState does not modify the source computer. It uses .xml files that dictate which data is part of the migration. The migration store can be stored on a network share, on a folder in a removable drive, locally on the source computer if hard links are used, or on a computer running the Configuration Manager State Migration Point System role.
ScanState This tool (ScanState.exe) scans a source computer, collects the files and settings, and then creates a migration store that holds the data in a compressed format. ScanState does not modify the source computer. It uses .xml files that dictate which data is part of the migration. The migration store can be stored on a network share, on a folder in a removable drive, locally on the source computer if hard links are used, or on a computer running the Configuration Manager State Migration Point System role.
More Info: ScanState
For more information about ScanState, see http://technet.microsoft.com/en-us/library/dd560781(v=WS.10).aspx.
![]() LoadState This tool (LoadState.exe) migrates files and settings, one at a time, from the migration store to a temporary location on the destination computer. During this process, files are decompressed and decrypted if necessary. LoadState then transfers files to their correct locations, deletes the temporary copies, and begins migrating more files. Compression improves performance by reducing network bandwidth usage and the space that the migration store requires. You can turn off compression by using /nocompress.
LoadState This tool (LoadState.exe) migrates files and settings, one at a time, from the migration store to a temporary location on the destination computer. During this process, files are decompressed and decrypted if necessary. LoadState then transfers files to their correct locations, deletes the temporary copies, and begins migrating more files. Compression improves performance by reducing network bandwidth usage and the space that the migration store requires. You can turn off compression by using /nocompress.
More Info: LoadState
For more information about LoadState, see http://technet.microsoft.com/en-us/library/dd560804(v=ws.10).aspx.
![]() Usmtutils This tool (Usmtutils.exe) can perform several functions relating to compression, encryption, and validation of a migration store. Usmtutils also can extract files manually if your data store becomes corrupt or your hard-link store becomes locked.
Usmtutils This tool (Usmtutils.exe) can perform several functions relating to compression, encryption, and validation of a migration store. Usmtutils also can extract files manually if your data store becomes corrupt or your hard-link store becomes locked.
![]() Migration XML files These are the XML files that you use with ScanState and LoadState to control the data migration. They include the MigApp.xml, MigUser.xml, and MigDocs.xml files and any custom .xml files that you create.
Migration XML files These are the XML files that you use with ScanState and LoadState to control the data migration. They include the MigApp.xml, MigUser.xml, and MigDocs.xml files and any custom .xml files that you create.
![]() MigApp.xml This is one of the .xml files included with USMT. It contains rules for migrating application settings.
MigApp.xml This is one of the .xml files included with USMT. It contains rules for migrating application settings.
![]() MigDocs.xml This is one of the .xml files included with USMT. This file contains rules for the MigXmlHelper.GenerateDocPatterns helper function, which can find user documents on a computer automatically without creating extensive custom migration .xml files.
MigDocs.xml This is one of the .xml files included with USMT. This file contains rules for the MigXmlHelper.GenerateDocPatterns helper function, which can find user documents on a computer automatically without creating extensive custom migration .xml files.
![]() MigUser.xml This is one of the .xml files included with USMT. This file contains rules for migrating user profiles and data.
MigUser.xml This is one of the .xml files included with USMT. This file contains rules for migrating user profiles and data.
![]() Config.xml To exclude data from the migration, you can create and modify the Config.xml file by using /genconfig with the ScanState tool. This optional file has a different format from the migration .xml files because it does not contain migration rules.
Config.xml To exclude data from the migration, you can create and modify the Config.xml file by using /genconfig with the ScanState tool. This optional file has a different format from the migration .xml files because it does not contain migration rules.
![]() Config.xml This file lists the elements that you can migrate. Specify migrate=“no” for the elements that you want to exclude from the migration. You also can use this file to control some migration options for USMT. Note that specifying migrate=“no” is not the same as removing a line from the file. Removing a line from the file results in that element not being processed.
Config.xml This file lists the elements that you can migrate. Specify migrate=“no” for the elements that you want to exclude from the migration. You also can use this file to control some migration options for USMT. Note that specifying migrate=“no” is not the same as removing a line from the file. Removing a line from the file results in that element not being processed.
More Info: USMT .xml Migration Files
For more information about the USMT .xml migration files, see http://technet.microsoft.com/en-us/library/cc766203(v=ws.10).aspx.
Before you can use USMT to perform user state migration, understand the different scenarios in which you can use USMT, how to determine which data is migrated, and how to store the data during migration.
There are two scenarios to consider when migrating user state data: refresh (one example would be wipe and load) and replace (also known as side by side). In wipe-and-load migration scenarios, the ScanState tool collects the user state in one of two ways:
![]() Online An online migration involves running ScanState while the source instance of the Windows operating system is running.
Online An online migration involves running ScanState while the source instance of the Windows operating system is running.
![]() Offline In an offline migration, ScanState is run against a copy of the Windows operating system that is not running. Do this by performing either of the following tasks:
Offline In an offline migration, ScanState is run against a copy of the Windows operating system that is not running. Do this by performing either of the following tasks:
![]() Run ScanState from the Windows PE environment and collect data from an existing version of the Windows operating system.
Run ScanState from the Windows PE environment and collect data from an existing version of the Windows operating system.
![]() Run ScanState against the Windows.old directory that contains data from the previous Windows installation.
Run ScanState against the Windows.old directory that contains data from the previous Windows installation.
Sample wipe-and-load scenarios
In wipe-and-load scenarios, the source and destination computers are the same computer. Windows 8.1 replaces the old operating system, and you preserve and migrate the user state to Windows 8.1 by using USMT.
There are four scenarios in which you can use a wipe-and-load migration:
![]() Offline migration by using Windows PE and hard-link migration. A hard-link migration is an in-place migration that enables you to maintain data files on the source computer while the original installation of Windows is removed and a new version of Windows is installed. A hard-link migration greatly reduces the amount of time required to complete an in-place migration.
Offline migration by using Windows PE and hard-link migration. A hard-link migration is an in-place migration that enables you to maintain data files on the source computer while the original installation of Windows is removed and a new version of Windows is installed. A hard-link migration greatly reduces the amount of time required to complete an in-place migration.
![]() Offline migration by using the Windows.old folder and hard-link migration.
Offline migration by using the Windows.old folder and hard-link migration.
![]() Online migration by using a compressed migration store.
Online migration by using a compressed migration store.
![]() Online migration by using hard-link migration.
Online migration by using hard-link migration.
An offline migration by using Windows PE and hard-link migration is normally used when you need to upgrade an existing computer without starting the existing operating system or accessing the network. You can perform this migration by performing the following steps on each computer to be migrated:
1. Boot the computer to Windows PE and then run the ScanState command-line tool, specifying /hardlink and /nocompress. ScanState saves the user state to a hard-link migration store on each computer, which improves performance by minimizing network traffic.
2. Install your company’s standard image that includes Windows 8.1 and standard applications.
3. Run the LoadState command-line tool. LoadState restores each user state back to each computer.
An offline migration using the Windows.old folder and hard-link migration takes advantage of the Windows.old folder created by the Windows setup program when upgrading an existing version of Windows to maintain state data. To perform this type of migration, perform the following steps on each computer to be migrated:
1. Install Windows 8.1 without reformatting or repartitioning the operating system drive and then install all required applications.
2. Run ScanState and then run LoadState on each computer with /hardlink and /nocompress.
An online migration using a compressed migration store copies the user state data to a file server or a removable drive and then copies the data back to the computer after the new operating system is installed. To move forward with this type of migration, perform the following steps on each computer to be migrated:
1. Run ScanState and then specify a file share or removable drive as the location for the migration store.
2. Install the company’s standard image that includes Windows 8.1 and standard applications.
3. Run LoadState to load data from the migration store created in step 1.
An online migration by using hard-link migration is commonly used when you can start the computer with its current operating system to scan the user state data; then load the same data after installing the new operating system. Using a hard-link migration store will reduce the user-state migration time because it maintains the data in its current location. For this scenario, perform the following steps on each computer to be migrated:
1. Run ScanState with /hardlink and /nocompress. This will save the user state to a local hard-link migration store on the computer. The ScanState process completes faster because the files don’t have to transfer across the network or write to an external disk. The files don’t even move on the disk but instead are left in their original location.
2. On each computer, install the company’s standard image that includes Windows 8.1 and standard applications.
3. Run LoadState, which will restore the user state from the previous version of the Windows operating system.
 Exam Tip
Exam item writers sometimes target easy-to-test areas of a technology. For Objective 1.2, a few areas stand out as easily testable: knowing the difference between MigApp.xml, MigDocs.xml, and MigUser.xml; knowing the order in which you run ScanState (first) and LoadState (second); and understanding how to work with EFS-encrypted files. (ScanState fails if you don’t account for them, and you need to use /efs:copyraw with ScanState to bring over the files and keep them encrypted.) It is also worth noting that drives encrypted with BitLocker must have BitLocker suspended before ScanState can read the file system.
Sample side-by-side scenarios
In the side-by-side scenario, the source and destination computers are not the same. Computer-replace scenarios involve migrating user states from one computer to another. Thus, such scenarios don’t have to follow the computer-refresh process of scan, install, and load.
You would use a side-by-side migration in three migration scenarios:
![]() Offline migration by using Windows PE and an external migration store
Offline migration by using Windows PE and an external migration store
![]() Manual network migration
Manual network migration
![]() Managed network migration
Managed network migration
Use an offline migration using Windows PE and an external migration store when you have access to the source computers locally but can’t start them by using their current operating system, and you don’t have access to a network. You then must perform the entire user state migration offline by using an external hard disk as the location for the migration store. For this scenario, perform the following steps:
1. On each of the source computers, start in Windows PE and then run ScanState to collect the user state data and store it on the external hard disk.
2. On each of the destination computers, deploy Windows 8.1 by using the company’s standard Windows deployment process.
3. On each of the destination computers, run LoadState, which restores the user state from the external hard disk.
Use a manual network migration when you can start the source computers by using their current operating system and the computers can access the network. In this scenario, you use a file server to host the migration store. Perform the following steps:
1. On each of the source computers, run ScanState to export the user state to the migration store on the file server.
2. On each of the destination computers, deploy Windows 8.1 by using the company’s standard Windows deployment process.
3. On each of the destination computers, run LoadState to retrieve user state data from the file server used to store the migration store.
You can use a managed network migration when the source computers are running the System Center Configuration Manager client agent and have access to a network. Use a site role in Configuration Manager named the state migration point. To perform this migration, follow these steps:
1. On each of the source computers, configure System Center Configuration Manager, Microsoft Deployment Toolkit (MDT) 2013, or a logon script to run ScanState. Store the user state data in the migration store on the file server.
2. On each of the destination computers, deploy Windows 8.1 by using the company’s standard Windows deployment process. This involves using System Center Configuration Manager or Windows Deployment Services (WDS).
3. On each of the destination computers, configure System Center Configuration Manager, MDT, or a logon script to run LoadState. Restore the user state data from the migration store on the file server.
Determining which settings to preserve
USMT migrates user accounts, application settings, operating-system settings, files, and folders. These default settings frequently are enough for a basic migration. However, you should consider which settings you want users to be able to configure and which settings you want to standardize when determining which settings to migrate.
USMT controls the data that you can migrate by using migration .xml files, including MigApp.xml, MigDocs.xml, and MigUser.xml as well as any custom .xml files that you create.
User Data
ScanState uses rules in the MigUser.xml file to collect everything in a user’s profile. ScanState then performs a file extension–based search on most of the system for other user data.
By default, USMT migrates the following user data and access control lists (ACLs) by using the MigUser.xml, MigDocs.xml, and MigApps.xml files:
![]() Folders from each user profile USMT migrates everything in a user’s profile, including My Documents, My Video, My Music, My Pictures, Desktop files, Start menu, Quick Launch settings, and Favorites.
Folders from each user profile USMT migrates everything in a user’s profile, including My Documents, My Video, My Music, My Pictures, Desktop files, Start menu, Quick Launch settings, and Favorites.
![]() Folders from the All Users and Public profiles USMT also migrates the following from the All Users profile in Windows XP or the Public profile in Windows Vista, Windows 7, or Windows 8.1: Shared Documents, Shared Video, Shared Music, Shared Desktop files, Shared Pictures, Shared Start menu, and Shared Favorites.
Folders from the All Users and Public profiles USMT also migrates the following from the All Users profile in Windows XP or the Public profile in Windows Vista, Windows 7, or Windows 8.1: Shared Documents, Shared Video, Shared Music, Shared Desktop files, Shared Pictures, Shared Start menu, and Shared Favorites.
![]() Specific file types The ScanState tool searches the fixed drives and collects and migrates files that have any of the following file name extensions: .accdb, .ch3, .csv, .dif, .doc*, .dot*, .dqy, .iqy, .mcw, .mdb*, .mpp, .one*, .oqy, .or6, .pot*, .ppa, .pps*, .ppt*, .pre, .pst, .pub, .qdf, .qel, .qph, .qsd, .rqy, .rtf, .scd, .sh3, .slk, .txt, .vl*, .vsd, .wk*, .wpd, .wps, .wq1, .wri, .xl*, .xla, .xlb, or .xls*.
Specific file types The ScanState tool searches the fixed drives and collects and migrates files that have any of the following file name extensions: .accdb, .ch3, .csv, .dif, .doc*, .dot*, .dqy, .iqy, .mcw, .mdb*, .mpp, .one*, .oqy, .or6, .pot*, .ppa, .pps*, .ppt*, .pre, .pst, .pub, .qdf, .qel, .qph, .qsd, .rqy, .rtf, .scd, .sh3, .slk, .txt, .vl*, .vsd, .wk*, .wpd, .wps, .wq1, .wri, .xl*, .xla, .xlb, or .xls*.
![]() ACL USMT migrates the ACL for the files and folders that you specify, from computers that are running Windows XP and Windows Vista.
ACL USMT migrates the ACL for the files and folders that you specify, from computers that are running Windows XP and Windows Vista.
The MigUser.xml file does not migrate the following data:
![]() Files outside of a user profile that don’t match one of the file-name extensions in the MigUser.xml file
Files outside of a user profile that don’t match one of the file-name extensions in the MigUser.xml file
![]() ACLs for folders that are outside of a user profile
ACLs for folders that are outside of a user profile
![]() Operating system components
Operating system components
By default, USMT migrates most standard operating-system features to destination computers that are running Windows 8.1 from computers that are running Windows XP, Windows Vista, Windows 7, or Windows 8. Some settings, such as fonts, are not available for an offline migration until after the destination computer is restarted. For this reason, it’s a good idea to restart the destination computer after LoadState has run. There are USMT version limitations, depending on the source and destination computer’s operating system version. For example, if the source computer is running Windows XP, you can’t use ScanState 6.3 or later. In such scenarios, you can use multiple versions of ScanState and/or LoadState to perform the migration tasks.
The following list includes some of the operating-system components that migrate with USMT:
![]() Mapped network drives
Mapped network drives
![]() Network printers
Network printers
![]() Folder options
Folder options
![]() Users personal certificates
Users personal certificates
![]() Internet Explorer settings
Internet Explorer settings
![]() Supported applications
Supported applications
It’s considered a best practice to install all applications on the destination computer before restoring the user state. This ensures that you preserve migrated settings. If you install the application after the user state has been migrated, the installation might overwrite the users’ settings.
The versions of installed applications must match on the source and destination computers. USMT does not support migrating the settings of an earlier version of an application to a later version, except for Microsoft Office. USMT only migrates settings that users have changed. Default application settings will not be migrated if the user has not changed the settings from the default values.
Settings USMT does not migrate
USMT does not migrate the following settings:
![]() Application settings USMT does not migrate settings from earlier versions of an application. In addition, it does not migrate application settings, and some operating-system settings, when you create a local account to use as the user account on the destination computer.
Application settings USMT does not migrate settings from earlier versions of an application. In addition, it does not migrate application settings, and some operating-system settings, when you create a local account to use as the user account on the destination computer.
![]() Existing applications You have to reinstall all applications on the destination computer before restoring the application settings.
Existing applications You have to reinstall all applications on the destination computer before restoring the application settings.
![]() Operating system settings USMT does not migrate these operating system items: local printers, hardware-related settings, drivers, and passwords.
Operating system settings USMT does not migrate these operating system items: local printers, hardware-related settings, drivers, and passwords.
![]() Some operating system settings Depending on the version of Windows that is installed, USMT will not migrate some settings.
Some operating system settings Depending on the version of Windows that is installed, USMT will not migrate some settings.
![]() Shared folder permissions You must share these folders again after the migration completes.
Shared folder permissions You must share these folders again after the migration completes.
![]() Files and settings migrating between operating systems with different languages.
Files and settings migrating between operating systems with different languages.
![]() Customized icons for shortcuts.
Customized icons for shortcuts.
![]() Taskbar settings when the source computer is running Windows XP.
Taskbar settings when the source computer is running Windows XP.
USMT requires administrative credentials. If you run the USMT as a standard user, the tool will not run; it only migrate some settings or only the current user. Many factors play into this, including the version of the source operating system on which you are running ScanState and whether User Account Control (UAC) is enabled.
Determining which settings to migrate
As you now know, USMT can be used to migrate user profiles, application settings, operating system settings, and files. When deciding what to migrate, consider the following:
![]() Users
Users
![]() Applications and settings
Applications and settings
![]() Operating system settings
Operating system settings
![]() File types, files, and folders
File types, files, and folders
Consider carefully how to migrate users. You can specify which users to include and exclude on the command line with user options.
Before migration, review the following considerations:
![]() If local user accounts don’t exist on the destination computer, use /lac with the LoadState command. If you don’t use this option, USMT will not migrate the accounts.
If local user accounts don’t exist on the destination computer, use /lac with the LoadState command. If you don’t use this option, USMT will not migrate the accounts.
![]() You might need to create new user accounts on the destination computer. The /lae option enables the account that was created by using /lac. If you create a disabled local account by using only the /lac option, a local administrator must enable the account on the destination computer.
You might need to create new user accounts on the destination computer. The /lae option enables the account that was created by using /lac. If you create a disabled local account by using only the /lac option, a local administrator must enable the account on the destination computer.
![]() Be careful when specifying a password for local accounts. The /lac:[Password] allows you to specify a password when the local user accounts are created. If you create a local account that has a blank password, anyone can sign in to that account on the destination computer. If you create a local account that has a password, the password is available to anyone with access to the folder where you store the USMT command-line tools and accompanying scripts.
Be careful when specifying a password for local accounts. The /lac:[Password] allows you to specify a password when the local user accounts are created. If you create a local account that has a blank password, anyone can sign in to that account on the destination computer. If you create a local account that has a password, the password is available to anyone with access to the folder where you store the USMT command-line tools and accompanying scripts.
![]() Source and destination computers don’t have to be connected to a domain for domain user profiles to migrate.
Source and destination computers don’t have to be connected to a domain for domain user profiles to migrate.
The following process might help you decide which applications to redeploy and which to discontinue:
1. Create and prioritize a list of applications to migrate.
2. Identify an experienced application owner to provide insight into how the organization installs, configures, and uses the various applications.
3. Identify and locate the application settings to migrate.
4. After you complete the list of applications to migrate, review the list and then work with each application owner to develop a list of settings to migrate.
5. Consider whether the destination version of the application is newer than the source version and whether the existing settings work with the new version. If they do, consider whether they work correctly.
6. Create a custom .xml file to migrate the settings and work with application owners to develop test cases. Typically, you continue to perform migration testing for application settings to determine whether the settings have migrated successfully.
When planning your migration, identify which operating-system settings you want to migrate and to what extent you want to create a new standardized environment. USMT allows you to migrate the settings that you choose and keep the default values for all other operating-system settings. Operating-system settings include the desktop’s appearance, such as wallpaper or colors; actions such as double-clicking or single-clicking to open an item; and Internet settings and mail-server connection information.
Consider the following when determining which operating system settings to migrate:
![]() Any previous migration experiences or the results of any surveys and tests that you conduct.
Any previous migration experiences or the results of any surveys and tests that you conduct.
![]() The number of help-desk calls related to operating-system settings that you have had in the past and how many you think you will receive in the future.
The number of help-desk calls related to operating-system settings that you have had in the past and how many you think you will receive in the future.
![]() How much new operating-system functionality you want to use.
How much new operating-system functionality you want to use.
![]() Which settings to migrate. Divide the settings into three categories: settings that users must have to do their work, settings that enhance the user experience, and settings that might reduce support calls. Migrating these items can increase user productivity and overall satisfaction with the migration process.
Which settings to migrate. Divide the settings into three categories: settings that users must have to do their work, settings that enhance the user experience, and settings that might reduce support calls. Migrating these items can increase user productivity and overall satisfaction with the migration process.
When planning your migration, if you are not using MigDocs.xml, identify the file types, files, folders, and settings to migrate. It’s important to perform the following steps:
1. Determine the standard file locations on each computer.
2. Identify and locate the nonstandard locations. Consider the file types that you want to include and exclude in the migration, the locations that you want to exclude, and new locations to which you want to migrate files on the destination computer.
3. After verifying which files and file types end users regularly use, locate the files.
Estimating migration store size
You must determine how much space you need to store the data that you want to migrate. Base your calculations on the volume of email, personal documents, and system settings for each user. The best way to estimate these is to survey several computers that are representative for the entire set of computers and then arrive at an average size that you can multiply by the total number of computers.
The amount of space the store will require will vary depending on your organization’s local storage strategies. For example, one key element that determines the size of migration data stores is email storage. If your organization stores email centrally, data stores will be smaller. If your organization stores email locally, such as by using .pst files, data stores will be larger. Mobile users will often have larger amounts of data than desktop users. Perform tests and inventory the network to determine the average size of your organization’s data stores. During the tests, measure the time that you need to perform the migration. Several companies have had to extend the time to finish migration due to the extended time it takes to copy huge amounts of data to and from the network’s shared folder.
If you use a hard-link migration, you don’t have to estimate the size of the migration store because files don’t move from the local disk. This is only possible in the computer refresh scenario.
Consider the following issues when determining how much disk space you will need:
![]() Email If users manage a large volume of email or keep email on their local computers instead of on a mail server, this email can occupy as much disk space as all other user files combined. Before migrating user data, consider having users who store email locally move their email to the mail server.
Email If users manage a large volume of email or keep email on their local computers instead of on a mail server, this email can occupy as much disk space as all other user files combined. Before migrating user data, consider having users who store email locally move their email to the mail server.
![]() User documents The size required for user documents varies greatly depending on the types of files involved. You can use an estimate of 100 to 300 megabytes (MB) as a general average. However, this might differ greatly from company to company. This estimate assumes typical office work such as using word-processing and spreadsheet programs. You should compare this estimate to several sample folders of user documents before performing calculations for storage requirements.
User documents The size required for user documents varies greatly depending on the types of files involved. You can use an estimate of 100 to 300 megabytes (MB) as a general average. However, this might differ greatly from company to company. This estimate assumes typical office work such as using word-processing and spreadsheet programs. You should compare this estimate to several sample folders of user documents before performing calculations for storage requirements.
![]() User operating-system settings Five MB usually is a sufficient amount of space in which to save registry settings. However, this requirement can fluctuate based on the number of applications that a user installs on his or her computer.
User operating-system settings Five MB usually is a sufficient amount of space in which to save registry settings. However, this requirement can fluctuate based on the number of applications that a user installs on his or her computer.
You can use the ScanState tool to calculate the disk-space requirements of a particular compressed or uncompressed migration. The ScanState tool provides disk-space requirements for the computer’s state when the tool is running. The computer’s state might change during daily use. Therefore, using the calculations as an estimate when planning your migration is recommended.
To create an XML file that includes an improved space estimate for the migration store, use /p of the ScanState tool. This option creates an XML file in the path that you specify. The following example shows the ScanState command to create this .xml file:
ScanState.exe C:\MigrationLocation [additional parameters]
/p:"C:\MigrationStoreSize.xml"
The following example shows a sample report:
<?xml version="1.0" encoding="UTF-8"?>
<PreMigration>
<storeSize>
<size clusterSize="4096">11010592768</size>
</storeSize>
<temporarySpace>
<size>58189144</size>
</temporarySpace>
</PreMigration>
The report returns the disk-space requirements in bytes, so in the sample report, the store is estimated to be about 10.5 gigabytes (GB) and a temporary space of 55 MB.
Securing migrated data
One of the most crucial things to keep in mind when using a remote storage location for user state data is security. Security of the migration store is easily overlooked and sometimes poses a security breach that could be easily avoided. Data maintained by users might contain privileged information that should not be accessible to other users.
When designing your user state migration strategy, consider the following:
![]() Security of the file server and the deployment server You must maintain the security of the file and deployment servers. Make sure that the file server where you save the migration store is secure. You also must secure the deployment server to ensure that the user data in the log files is not exposed. Transmitting data over a secure Internet connection, such as a virtual private network (VPN), is recommended.
Security of the file server and the deployment server You must maintain the security of the file and deployment servers. Make sure that the file server where you save the migration store is secure. You also must secure the deployment server to ensure that the user data in the log files is not exposed. Transmitting data over a secure Internet connection, such as a virtual private network (VPN), is recommended.
![]() Encrypting the migration store You can use ScanState with the /encrypt switch and specify a password, or path to a certificate, to be used for the encryption. To recover the user state data, you must use the /decrypt switch with the LoadState command.
Encrypting the migration store You can use ScanState with the /encrypt switch and specify a password, or path to a certificate, to be used for the encryption. To recover the user state data, you must use the /decrypt switch with the LoadState command.
Creating a USMT package
If you are using System Center 2012 R2 Configuration Manager, you will notice that there is already a deployment package containing all files needed to run USMT. However, previous versions of Configuration Manager don’t contain such a package. If that is your case, you must create a package so you can use USMT in your deployment task sequences.
More Info: Task Sequences
Learn more about Configuration Manager task sequences in Chapter 3, “Implement a Zero Touch deployment.”
To create a USMT package, perform the following steps:
1. Download and install the Windows Assessment and Deployment Kit (Windows ADK). Although the Windows ADK contains several tools, you only need to install the USMT for this procedure.
Note: Windows Assessment and Deployment Toolkit
You can download the Windows Assessment and Deployment Toolkit from http://www.microsoft.com/en-us/download/details.aspx?id=39982.
2. Locate the USMT folder, usually found in C:\Program Files (x86)\Windows Kits\8.1\Assessment and Deployment Kit\User State Migration Tool, and copy its contents to a network share.
3. Create a new package in Configuration Manager with the contents of the network share you copied the USMT files to.
 Thought experiment: Windows 8.1 migration at Contoso Ltd.
Contoso Ltd. wants to migrate 300 existing computers from Windows 7 to Windows 8.1. After all hardware upgrades were made, your new assessment shows all computers are ready to migrate. Users will retain their existing computers after the migration, and their user state data must be maintained while minimizing network traffic and decreasing the time to migrate. You decide to use USMT to migrate the user state data. To help you plan better for user state migration, answer the following questions:
1. Should you perform an online or offline user state migration?
2. Should you use a compressed migration store or a hard-link migration?
3. What tools can you use to automate the process of migrating user state data?
Objective summary
![]() You can use hard links to increase the performance of user state migration in wipe-and-load scenarios.
You can use hard links to increase the performance of user state migration in wipe-and-load scenarios.
![]() You can use remote storage to migrate user state in side-by-side scenarios.
You can use remote storage to migrate user state in side-by-side scenarios.
![]() You can use ScanState /p to estimate the space requirements for user state migration.
You can use ScanState /p to estimate the space requirements for user state migration.
![]() You can use ScanState /encrypt to encrypt the migration store, and LoadState /decrypt to decrypt the migration store.
You can use ScanState /encrypt to encrypt the migration store, and LoadState /decrypt to decrypt the migration store.
![]() You don’t need to create a USMT package in System Center 2012 R2 Configuration Manager because one exists by default.
You don’t need to create a USMT package in System Center 2012 R2 Configuration Manager because one exists by default.
Objective review
Answer the following questions to test your knowledge of the information in this objective. You can find the answers to these questions and explanations of why each answer choice is correct or incorrect in the “Answers” section at the end of this chapter.
1. You run ScanState /p and review the results. Part of the .xml file returned contains the following text:
<storeSize>
<size clusterSize="4096">11010592768</size>
</storeSize>
You need to report to your manager the amount of necessary space for the migration store. How much space is needed?
A. 10.5 MB
B. 10.5 GB
C. 10.5 TB
D. 10.5 EB
2. You are upgrading 50 computers from Windows 7 to Windows 8.1. Users will maintain their existing computers after the migration. You need to specify how to migrate the user state data in the minimum amount of time. What approach should you use?
A. Use a USB drive for the migration store and compress the data.
B. Use a network share for the migration store and compress the data.
C. Use a local drive for the migration store.
D. Use hard links for the migration store.
3. You are upgrading all computers from the sales and IT departments in your company’s network from Windows XP to Windows 8.1. The IT users will receive newly purchased computers, and the Sales users will receive the computers IT users were using. You need to select a user state migration approach. Which approach should you use?
A. Use a hard-link migration store for IT users and a network share migration store for Sales users.
B. Use a hard-link migration store for Sales users and a network share migration store for IT users.
C. Use a network share migration store for all users.
D. Use a hard-link migration store for all users.
4. You are upgrading computers from Windows 7 to Windows 8.1. Some computers have a local printer attached, some computers have shared folders, some computers have network printers, and some computers have customized Internet Explorer settings. Which of the following items should you migrate with USMT as part of your upgrade to Windows 8.1?
A. Local printers, shared folders, network printers, and customized Internet Explorer settings
B. Only local printers and network printers
C. Only shared folders and customized Internet Explorer settings
D. Only network printers and customized Internet Explorer settings
5. You are planning an offline migration. In what state is the ScanState tool supported?
A. ScanState can be run while the source instance of Windows is running.
B. ScanState can run while the source instance of Windows is booted into Safe Mode.
C. ScanState can run while booted into Windows PE.
D. ScanState can run while booted into recovery mode.
Objective 1.3: Configure the deployment infrastructure
In the next few chapters, you learn how to deploy a new operating system to devices over the network. To achieve that, you must prepare your deployment infrastructure with various tools required to push an operating system image over the network.
In this section, you learn about Windows Deployment Services (WDS), Microsoft Deployment Toolkit (MDT), and Configuration Manager distribution points. These technologies can be used alone or together to deploy an operating system over the network.
This objective covers how to:
![]() Configure WDS
Configure WDS
![]() Install and configure MDT
Install and configure MDT
![]() Identify network services that support deployments
Identify network services that support deployments
![]() Select Configuration Manager distribution points
Select Configuration Manager distribution points
![]() Support BitLocker
Support BitLocker
Configuring Windows Deployment Services
Windows Deployment Services (WDS) is a server role that you can install on computers running Windows Server. WDS enables you to deploy operating systems including, but not limited to Windows 8.1, Windows 8, Windows Server 2012, and Windows Server 2012 R2, to computers over the network. WDS sends these operating systems across the network by using unicast or multicast transmissions. Unicast is the default transmission method. It uses a one-to-one communication method so that each image it deploys to a remote computer requires one-to-one communication. Multicast enables WDS to send an operating system image to multiple computers at the same time, using the same amount of bandwidth required for a single unicast deployment. Multicast can minimize the use of network bandwidth, but mostly only when dealing with large deployments. When you use multicast transmissions, the same amount of traffic crosses the network independently of whether you are deploying Windows 8.1 to one computer at a time or 50 computers at a time.
The following high-level steps describe how to deploy Windows 8.1 by using multicast through WDS:
1. An operating system deployment transmission is prepared on the WDS server.
2. The media access control (MAC) addresses of Preboot Execution Environment (PXE)–compliant network adapters are made available to the WDS server.
3. The computers that are targets of the transmission must boot by using PXE–compliant network adapters.
4. The computers locate the WDS server and begin the operating system setup process. If the WDS server has been provisioned with an answer file, the setup completes automatically. If the WDS server has not been provisioned with an answer file, an administrator must enter setup configuration information.
Note: Multiple WDS Servers
When using the WDS console, you can configure each WDS server to have only one unattended installation file for each processor architecture. To work around this limitation in the GUI, you can use WDSutil to create multiple unattended installation files. In environments in which you frequently perform operating system deployment, consider using System Center 2012 R2 Configuration Manager because it makes the process of configuring automatic operating system deployment for multiple operating system types and roles easier.
 Exam Tip
For WDS to deploy images to Hyper-V VMs by using PXE, you must configure the VMs to boot to a legacy network adapter. However, if you use Generation 2 VMs, you can use the default synthetic network adapter to boot to PXE. Note that only the 64-bit versions of Windows 8, Windows 8.1, Windows Server 2012, and Windows Server 2012 R2 are supported as Generation 2 VMs. Watch for exam scenarios involving PXE booting of VMs.
The installation defaults for WDS are suitable when you deploy the role in small environments. If you are deploying WDS in larger environments and don’t choose to implement System Center 2012 R2 Virtual Machine Manager for server operating system deployments, you might want to configure the options discussed in the following sections, which are available by editing the properties of the WDS server in the Windows Deployment Services console.
PXE response settings
With PXE response settings, you can configure how the WDS server responds to computers. As Figure 1-11 shows, you can configure WDS not to respond to any client computers (effectively disabling WDS), to respond to known client computers, or to respond to all computers but require an administrator manually to approve an unknown computer. Known computers are computers that have prestaged computer accounts in Active Directory. To create a prestaged computer, you need one of the following identifiers:
![]() Globally unique identifier (GUID) of the computer This is a 32-digit, alphanumeric string that uniquely identifies a computer. You can find the GUID in the BIOS, on the computer as a sticker, or by using Windows PowerShell to query for the ObjectGUID property. For example, if you want to find the GUID of Computer01, you would run the Get-ADComputer Server01 -Properties ObjectGUID | Select ObjectGUID Windows PowerShell command.
Globally unique identifier (GUID) of the computer This is a 32-digit, alphanumeric string that uniquely identifies a computer. You can find the GUID in the BIOS, on the computer as a sticker, or by using Windows PowerShell to query for the ObjectGUID property. For example, if you want to find the GUID of Computer01, you would run the Get-ADComputer Server01 -Properties ObjectGUID | Select ObjectGUID Windows PowerShell command.
![]() MAC address of the network interface card (NIC) that the computer uses You can find the MAC address on a sticker on the NIC, on the computer as a sticker, or by running the ipconfig /all command and looking for the physical address. Using a MAC with the GUI-based creation can be tricky because the GUI-based wizard in Active Directory Users And Computers only asks for the GUID. If you enter just the MAC address, the Next button remains dimmed, and you can’t proceed.
MAC address of the network interface card (NIC) that the computer uses You can find the MAC address on a sticker on the NIC, on the computer as a sticker, or by running the ipconfig /all command and looking for the physical address. Using a MAC with the GUI-based creation can be tricky because the GUI-based wizard in Active Directory Users And Computers only asks for the GUID. If you enter just the MAC address, the Next button remains dimmed, and you can’t proceed.
Instead, you must use twenty zeros in front of the MAC address. For example, if your computer’s MAC address is C6-50-00-DE-BF-83, you would need to use 00000000000000000000C65000DEBF83 in the wizard.
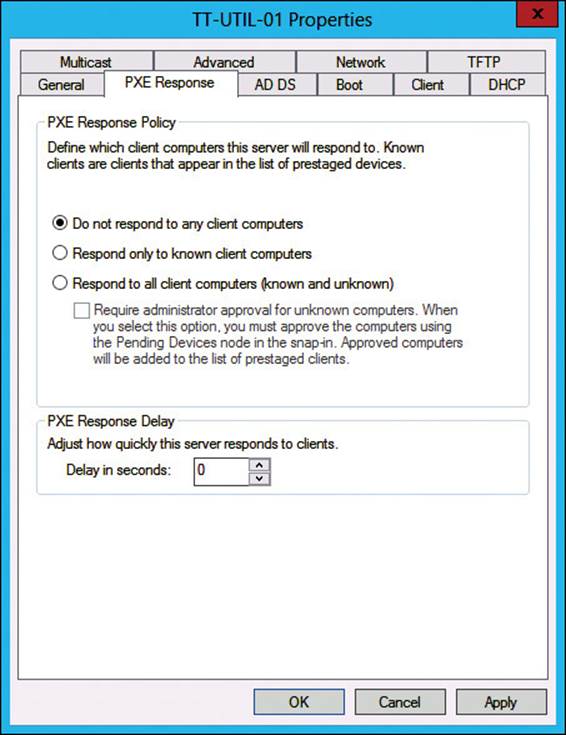
FIGURE 1-11 WDS Server Properties, PXE Response tab
To create the prestaged computer accounts, first add the AD DS Tools feature Remote Server Administration Tools. Perform the following high-level steps:
1. Launch Active Directory Users And Computers from the WDS server.
2. Create a new computer object.
3. Select the This Is A Managed Computer check box during the new computer object creation.
4. Enter the GUID (without dashes) or the MAC address (without dashes and preceded by twenty zeros) in the computer’s unique ID (GUID/UUID) text box.
5. Select the option to use any remote installation server or select a specific remote installation server.
You use the PXE Response Delay setting when you have more than one WDS server in an environment. You can use this setting to ensure that clients receive transmissions from one WDS server over another, giving the server configured with the lowest PXE response delay priority over other WDS servers with higher delay settings.
Exam Tip
Make sure you know the benefits of only responding to known client computers: higher security, less risk, more control for administrators—and know the downsides: more administrative overhead and slower computer deployment cycle. In addition, know the benefits of responding to all client computers: faster computer deployment cycle, less administrative overhead. Finally, know the downsides of responding to all client computers: less secure, less control, more risk.
Client naming policy
A client naming policy enables you to configure how computers deployed from WDS will be named if you aren’t using deployment options that perform the action. You can also use the settings on the tab, shown in Figure 1-12, to configure domain membership and the OU location to use for newly created computer accounts.
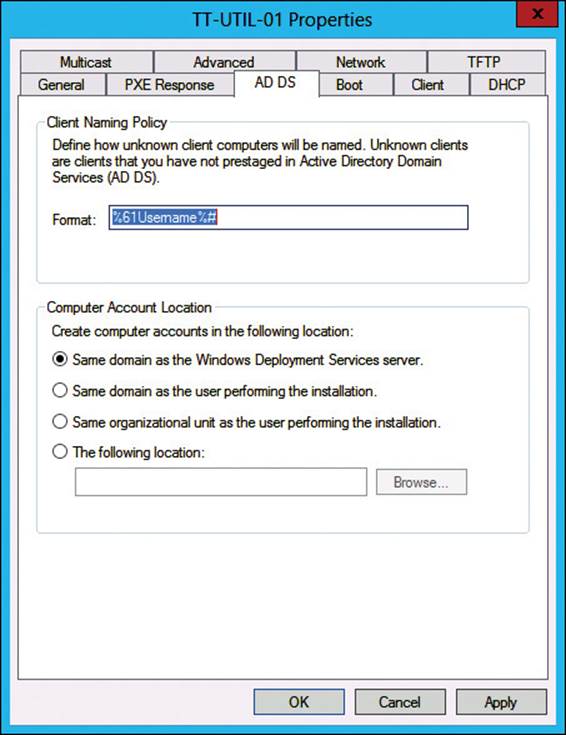
FIGURE 1-12 WDS Server Properties, AD DS tab
WDS boot options
On the Boot tab of the WDS server’s properties dialog box, shown in Figure 1-13, you can configure when or whether clients continue with a PXE boot. The settings enable you to configure known clients and unknown clients independently. One of the common options available is to require the F12 key to be pressed to continue the PXE boot. You can also configure a default boot image for each architecture that WDS supports. By default, after a client has connected to a WDS server, you must press the F12 key to continue deploying the operating system. In environments in which you are performing a large number of simultaneous deployments, requiring this level of manual intervention might slow down the deployment process.
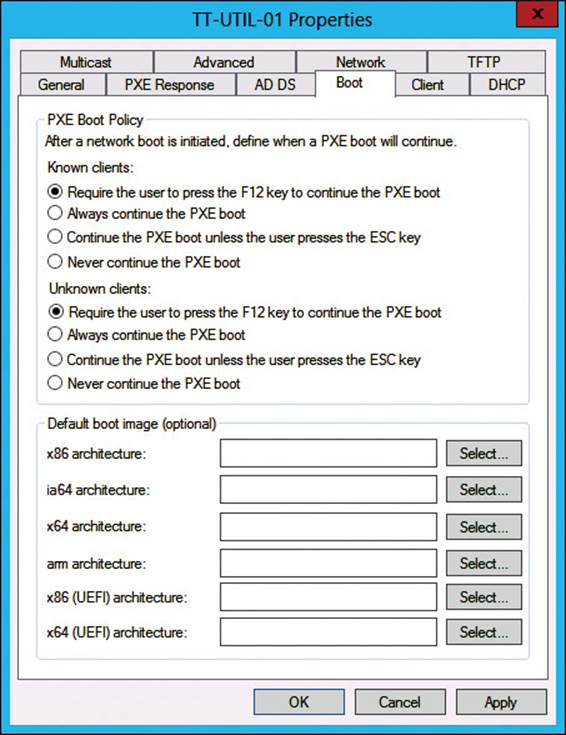
FIGURE 1-13 WDS Server Properties, Boot tab
Multicast options
The default settings of WDS cause all computers that join a multicast transmission to receive the installation image at the same speed. If you frequently deploy operating systems, you are aware that sometimes one or two computers have network adapters that slow a transmission that should take only 15 minutes into one that takes hours. The slowest multicast client dictates the transmission speed for the rest of the multicast clients.
To avoid this issue, you can configure the transfer settings on the Multicast tab, shown in Figure 1-14, so that clients are partitioned into separate sessions, depending on how fast they can consume the multicast transmission. Those slow computers will still take a long time to receive the image, but the other computers connected to the transmission can complete the deployment more quickly without having to wait for the slower computers.
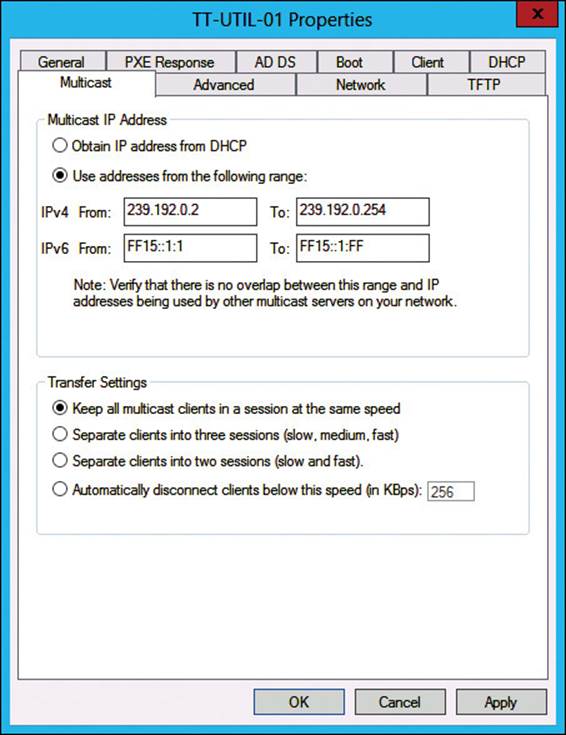
FIGURE 1-14 WDS Server Properties, Multicast tab
Other options
Although you are less likely to need them, you can configure other options on the following tabs:
![]() Advanced tab You can configure WDS to use a specific domain controller and Global Catalog (GC) server. You can also configure whether WDS is authorized in Dynamic Host Configuration Protocol (DHCP). DHCP authorization occurs automatically when you install the WDS role.
Advanced tab You can configure WDS to use a specific domain controller and Global Catalog (GC) server. You can also configure whether WDS is authorized in Dynamic Host Configuration Protocol (DHCP). DHCP authorization occurs automatically when you install the WDS role.
![]() Network tab You can specify a User Datagram Protocol (UDP) port policy to limit when UDP ports are used with transmissions. You can also configure a network profile to specify the speed of the network, minimizing the chance that WDS transmissions will slow the network down.
Network tab You can specify a User Datagram Protocol (UDP) port policy to limit when UDP ports are used with transmissions. You can also configure a network profile to specify the speed of the network, minimizing the chance that WDS transmissions will slow the network down.
![]() TFTP tab You can specify maximum block size and Trivial File Transfer Protocol (TFTP) window size.
TFTP tab You can specify maximum block size and Trivial File Transfer Protocol (TFTP) window size.
Installing and configuring MDT
MDT consists of free guidance material and free tools to help produce repeatable and scalable client computer deployment solutions based on Lite Touch Installation (LTI) and, when combined with Configuration Manager, zero-touch installation (ZTI) technologies. Throughout the planning phase, this solution package can assist you in understanding the requirements, best practices, and methods you can use to implement an efficient and cost-effective deployment strategy.
Install MDT 2013
MDT 2013 is the newest version of MDT that supports Windows Server 2012 R2 and Windows 8.1. It requires the Windows ADK to run. Both applications have a straightforward installation process, which is not covered in this book.
More Info: Download MDT 2013 and the Windows ADK
You can download MDT 2013 from http://www.microsoft.com/en-us/download/details.aspx?id=40796. You can also find the necessary installation instructions on the same page, under Install Instructions.
You can download the Windows ADK for Windows 8.1 Update from http://www.microsoft.com/en-us/download/details.aspx?id=39982. You can also find the necessary installation instructions on the same page, under Install Instructions.
Configure MDT 2013
After MDT is installed, you must create a deployment share to host boot images, install images, device drivers, task sequences, and other settings. To create a deployment share, perform the following steps:
1. On the computer on which you installed MDT 2013, from the Start screen, type Deployment.
2. In the search results, click Deployment Workbench.
The Deployment Workbench window appears, as shown in Figure 1-15.
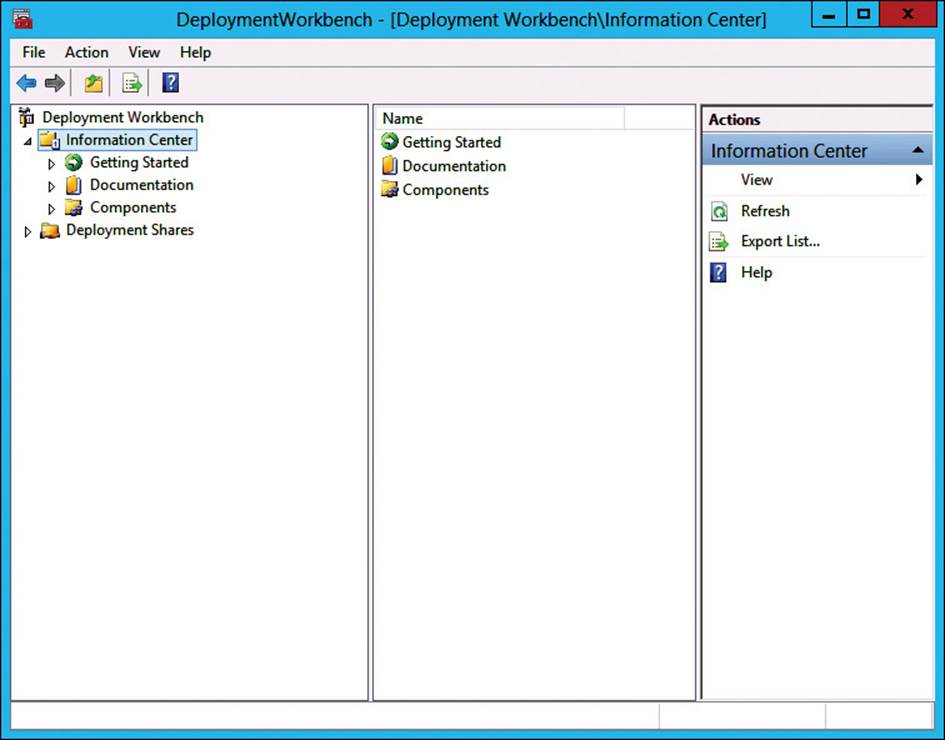
FIGURE 1-15 Deployment Workbench
3. Right-click Deployment Shares and then click New Deployment Share.
4. In the New Deployment Wizard, in the Deployment Share Path text box, type the path to the new deployment share and then click Next.
5. On the Share page, in the Share Name text box, type the name of the new share.
It’s recommended to use a hidden share (hidden share names end with the $ character, as in DeploymentShare$).
6. Click Next.
7. On the Descriptive Name page, in the Deployment Share Description text box, type a description for the deployment share and then click Next.
8. On the Options page, enable the deployment settings that you want to use and then click Next. The following options are available:
A. Ask If A Computer Backup Should Be Performed. This option displays a message to the user during the installation, asking whether a backup should be done prior to installing the new operating system.
B. Ask For A Product Key. This option displays a message to the user when deploying from the MDT deployment share, asking for the product key of the operating system being installed.
C. Ask To Set The Local Administrator Password. This option displays a message to the user, asking for a password to be used for the local administrator account.
D. Ask If An Image Should Be Captured. This option displays a message to the user when starting a deployment, asking whether MDT should capture an image from the computer to use as an install image.
E. Ask If Bitlocker Should Be Enabled. This option displays a message to the user, asking whether BitLocker should be enabled after the operating system is installed.
9. On the Summary page, click Next and then, on the Confirmation page, click Finish.
More Info: MDT 2013
Learn more about configuring and using MDT in Chapter 2, “Implement a Lite Touch deployment.”
Identifying network services that support deployments
Besides the different tools and services you have learned about so far, operating system deployment over a network requires standard network services such as:
![]() DNS Devices that connect to MDT or Configuration Manager must be able to resolve names to connect to shares and add their computer accounts to Active Directory.
DNS Devices that connect to MDT or Configuration Manager must be able to resolve names to connect to shares and add their computer accounts to Active Directory.
![]() DHCP Devices that use the PXE service must be allocated an IP address. To avoid manually assigning IP addresses, you should use DHCP.
DHCP Devices that use the PXE service must be allocated an IP address. To avoid manually assigning IP addresses, you should use DHCP.
![]() AD DS If the device on which you are deploying an operating system will be part of a domain, you need access to AD DS to create the computer account for the device.
AD DS If the device on which you are deploying an operating system will be part of a domain, you need access to AD DS to create the computer account for the device.
![]() PXE service If you are installing the operating system on a bare-metal system over the network, you must boot the devices by using PXE.
PXE service If you are installing the operating system on a bare-metal system over the network, you must boot the devices by using PXE.
![]() WDS You can use WDS to deploy images to devices over the network. WDS is usually integrated with MDT for LTI deployments and Configuration Manager for ZTI deployments.
WDS You can use WDS to deploy images to devices over the network. WDS is usually integrated with MDT for LTI deployments and Configuration Manager for ZTI deployments.
![]() Configuration Manager You can use Configuration Manager to deploy images to devices over the network. Configuration Manager is usually integrated with MDT for ZTI deployments.
Configuration Manager You can use Configuration Manager to deploy images to devices over the network. Configuration Manager is usually integrated with MDT for ZTI deployments.
![]() Configuration Manager distribution point A distribution point is a server in the Configuration Manager infrastructure that integrates with WDS to provide PXE services and access to images and task sequences used to deploy an operating system.
Configuration Manager distribution point A distribution point is a server in the Configuration Manager infrastructure that integrates with WDS to provide PXE services and access to images and task sequences used to deploy an operating system.
![]() Configuration Manager state migration point A state migration point is a server in the Configuration Manager infrastructure that USMT can use to migrate user state data.
Configuration Manager state migration point A state migration point is a server in the Configuration Manager infrastructure that USMT can use to migrate user state data.
Selecting Configuration Manager distribution points
Configuration Manager distribution points store the images that you can deploy to destination computers. The distribution point also stores any other content that the task sequence references, such as applications, software updates, or packages. Furthermore, a distribution point can be integrated with WDS to provide PXE service and multicasting.
When selecting which distribution points to use for operating system deployment, you must consider the proximity of the distribution point to the device on which you want to deploy an operating system. Install images are large and can consume a lot of bandwidth if they are delivered over a wide area network (WAN). For that reason, it’s recommended to have at least one distribution point for each physical network location, which enables you to deploy operating systems locally over the local area network (LAN).
To add a distribution point to an existing Configuration Manager infrastructure, perform the following steps:
1. In the Configuration Manager console, click Administration.
2. In the Administration workspace, expand Site Configuration and click Servers And Site System Roles.
3. Right-click Servers And Site System Roles and choose Create Site System Server.
The Create Site System Server Wizard appears, as shown in Figure 1-16.
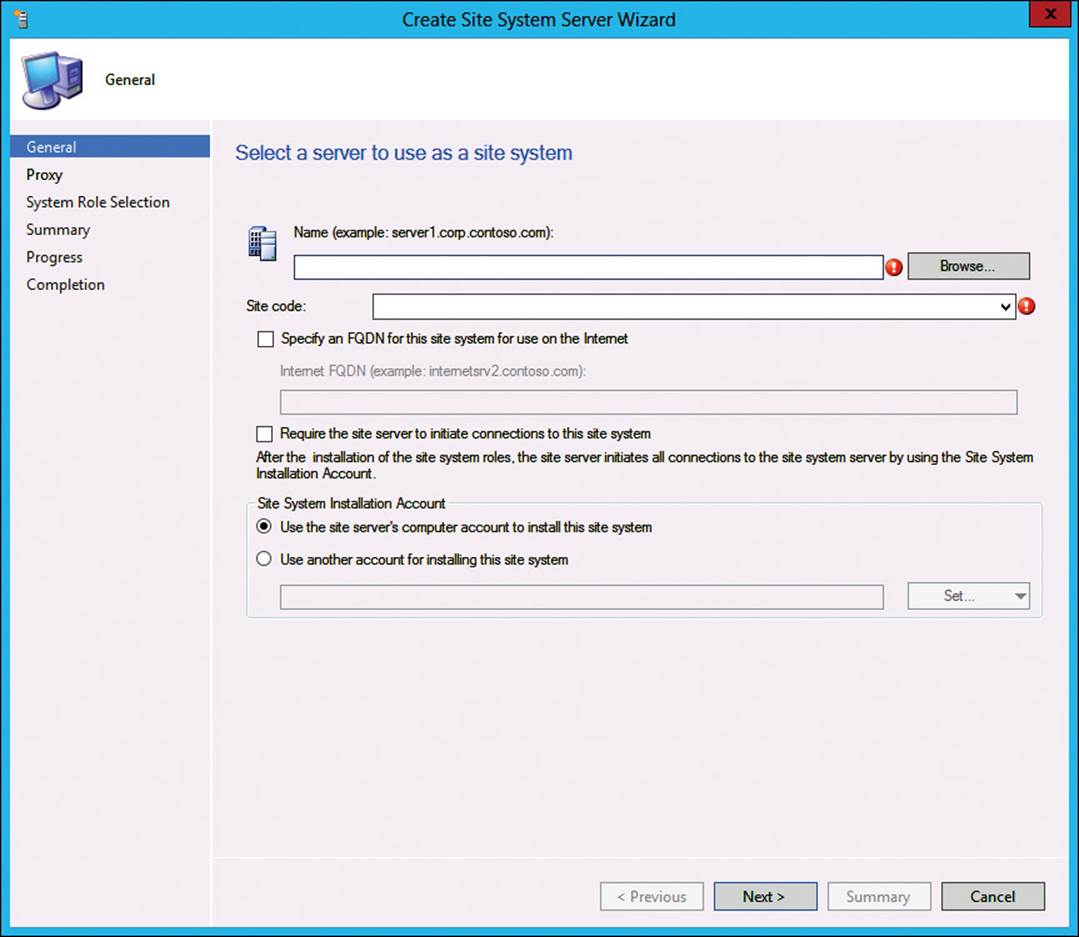
FIGURE 1-16 Create Site System Server Wizard
4. In the Name text box, type the name of the computer to be used as a distribution point and, in the Site Code list, select your site code. Click Next.
5. On the Proxy page, click Next.
6. On the System Role Selection page, click Distribution Point and then click Next.
7. On the Summary page, click Next and then, on the Completion page, click Close.
To configure a distribution point to use PXE and multicasting, perform the following steps:
1. In the Administration workspace, expand Site Configuration and click Distribution Points.
2. Right-click the distribution point you want to configure and then click Properties.
3. In the Properties dialog box, click the PXE tab.
The PXE properties appear, as shown in Figure 1-17.
FIGURE 1-17 Distribution Point Properties, PXE tab
4. Ensure that Enable PXE Support For Clients is selected to enable PXE. Selecting this check box automatically installs the WDS role on the server in question after the dialog box is closed.
5. Specify which settings to use based on your needs according to the following list:
![]() Allow This Distribution Point To Respond To Incoming PXE Requests. This activates the PXE boot services on this server.
Allow This Distribution Point To Respond To Incoming PXE Requests. This activates the PXE boot services on this server.
![]() Enable Unknown Computer Supports. This allows computers that don’t have a record in Configuration Manager to use PXE services.
Enable Unknown Computer Supports. This allows computers that don’t have a record in Configuration Manager to use PXE services.
![]() Require A Password When Computers Use PXE. This requires a user to type a password when booting a system by using PXE and connecting to this distribution point.
Require A Password When Computers Use PXE. This requires a user to type a password when booting a system by using PXE and connecting to this distribution point.
![]() Specify The PXE Server Response Delay (Seconds). This value dictates the number of seconds before a system continues its normal boot process. If the task sequence advertisement is not mandatory, you must press F12 at boot to begin the Windows PE boot process.
Specify The PXE Server Response Delay (Seconds). This value dictates the number of seconds before a system continues its normal boot process. If the task sequence advertisement is not mandatory, you must press F12 at boot to begin the Windows PE boot process.
6. Click the Multicast tab.
The Multicast properties appear, as shown in Figure 1-18.
FIGURE 1-18 Distribution Point Properties, Multicast tab
7. Ensure that the Enable Multicast To Simultaneously Send Data To Multiple Clients option is selected and then click OK.
More Info: Creating Distribution Points
For more information about how to designate a distribution point in Configuration Manager, see http://technet.microsoft.com/en-us/library/bb681012.aspx.
Supporting BitLocker
When you protect a logical volume with BitLocker, it encrypts the entire volume. BitLocker typically is used to encrypt the system volume to help prevent unauthorized access to the operating system and associated files.
Implementing BitLocker in an enterprise environment has several prerequisites for both client systems and the infrastructure that must support them. BitLocker can run on any computer that supports Windows Vista or a newer operating system. However, using hardware with a motherboard that supports TPM 1.2 or newer has several advantages. TPM support enables BitLocker to ensure the integrity of the volume by performing the following tasks:
![]() Verifying that the early boot files have not been compromised, such as with a virus or malware.
Verifying that the early boot files have not been compromised, such as with a virus or malware.
![]() Enhancing protection against software-based attacks. If someone were to attempt to start the system from a DVD or USB drive, his other operating system would not have access to the decryption keys.
Enhancing protection against software-based attacks. If someone were to attempt to start the system from a DVD or USB drive, his other operating system would not have access to the decryption keys.
![]() Locking the system if the early boot files have been tampered with.
Locking the system if the early boot files have been tampered with.
You can use a tool called Microsoft BitLocker Administration And Monitoring (MBAM) to support BitLocker on a large corporate network. MBAM is part of the Microsoft Desktop Optimization Pack (MDOP). MBAM can work in stand-alone mode, or you can integrate it with Configuration Manager.
The MBAM architecture is composed of multiple components:
![]() Administration and monitoring server The main component of the MBAM installation. This role hosts the MBAM management console and monitoring web services.
Administration and monitoring server The main component of the MBAM installation. This role hosts the MBAM management console and monitoring web services.
![]() Compliance and audit database Stores the compliance data for MBAM client computers.
Compliance and audit database Stores the compliance data for MBAM client computers.
![]() Recovery and hardware database Stores the recovery data and hardware information that MBAM client computers collect.
Recovery and hardware database Stores the recovery data and hardware information that MBAM client computers collect.
![]() Compliance and audit reports You can view the compliance and audit reports by using a browser to connect to the Microsoft SQL Server Reporting Services (SSRS) site or by using the MBAM management console
Compliance and audit reports You can view the compliance and audit reports by using a browser to connect to the Microsoft SQL Server Reporting Services (SSRS) site or by using the MBAM management console
![]() Self-service portal Provides a self-service portal so that users can retrieve recovery keys when necessary.
Self-service portal Provides a self-service portal so that users can retrieve recovery keys when necessary.
![]() Policy template The Group Policy template that specifies the MBAM settings.
Policy template The Group Policy template that specifies the MBAM settings.
The MBAM client agent is responsible for
![]() Enforcing BitLocker settings configured in Group Policy.
Enforcing BitLocker settings configured in Group Policy.
![]() Collecting the recovery keys for the three BitLocker data drive types—operating system drives, fixed data drives, and removable data drives—and transferring them to the recovery and hardware database.
Collecting the recovery keys for the three BitLocker data drive types—operating system drives, fixed data drives, and removable data drives—and transferring them to the recovery and hardware database.
![]() Collecting recovery and hardware information about the client computer and transferring it to the recovery and hardware database.
Collecting recovery and hardware information about the client computer and transferring it to the recovery and hardware database.
![]() Collecting compliance data for the computer and transferring the data to the reporting system.
Collecting compliance data for the computer and transferring the data to the reporting system.
MBAM 2.5 supports integration with Configuration Manager 2007, Configuration Manager 2012, and Configuration Manager 2012 R2. Integration with Configuration Manager eliminates the stand-alone MBAM compliance infrastructure and uses the Configuration Manager infrastructure. If you use Configuration Manager, you can now view the compliance status in the Configuration Manager console and inspect reports to view individual computers.
Integration with Configuration Manager is in the form of a configuration pack that installs:
![]() The MBAM configuration items and a configuration baseline.
The MBAM configuration items and a configuration baseline.
![]() An MBAM collection that includes clients that support MBAM.
An MBAM collection that includes clients that support MBAM.
![]() Four compliance reports.
Four compliance reports.
More Info: MBAM
For more information about MBAM, see http://technet.microsoft.com/en-us/library/hh826072.aspx.
 Thought experiment: Windows 8.1 migration at Contoso Ltd.
Contoso Ltd. wants to migrate 300 existing client computers from Windows 7 to Windows 8.1. After hardware upgrades were completed, you performed an assessment and discovered that all computers are ready to migrate. All computers to be migrated are System Center Configuration Manager clients. Configuration Manager is currently used only for hardware and software inventory. You decide to use Configuration Manager to migrate to Windows 8.1. To help you prepare better for the migration, answer the following questions:
1. Which Configuration Manager site system roles must be configured to allow images to be deployed by using multicast?
2. What must be enabled in distribution points to allow a bare-metal computer to deploy an operating system image from Configuration Manager?
3. If Configuration Manager were not available, which tool should you use to deploy client computer images with multicasting?
Objective summary
![]() MDT 2013 requires Windows ADK for Windows 8.1 Update.
MDT 2013 requires Windows ADK for Windows 8.1 Update.
![]() MDT can be used with WDS for LTI deployments.
MDT can be used with WDS for LTI deployments.
![]() MDT can be used with Configuration Manager for ZTI deployments.
MDT can be used with Configuration Manager for ZTI deployments.
![]() Deployment shares contain boot images, install images, drivers, and task sequences used to deploy an operating system.
Deployment shares contain boot images, install images, drivers, and task sequences used to deploy an operating system.
Objective review
Answer the following questions to test your knowledge of the information in this objective. You can find the answers to these questions and explanations of why each answer choice is correct or incorrect in the “Answers” section at the end of this chapter.
1. You are configuring WDS so you can use it to deploy computers that will run the Windows 8.1 operating system. All the computers in your organization have PXE-compliant network cards. Which of the following images must you add in WDS to perform a basic operating system deployment? (Choose all that apply.)
A. Boot image
B. Install image
C. Capture image
D. Discover image
2. You decide to use LTI deployment to deploy Windows 8.1 to devices on your network. Which services or tools are required to use LTI deployment over PXE? (Choose two. Each correct answer forms part of a complete solution.)
A. WDS
B. MDT
C. WINS
D. VMM
3. You decide to use ZTI deployment to deploy Windows 8.1 to devices on your network. Which services or tools are required to use ZTI deployment over PXE? (Choose three. Each answer forms part of a complete solution.)
A. WDS
B. MDT
C. WINS
D. Configuration Manager
4. You are prestaging a computer object in Active Directory. You obtained the MAC address of the target computer. However, when you enter it as part of the prestaging computer object creation process, you cannot click Next. You need to proceed in the process and ensure that the computer can be imaged in WDS. What should you do?
A. Add 20 zeros to the end of the MAC address.
B. Add 20 zeros to the beginning of the MAC address.
C. Add the IP address of the computer to the end of the MAC address.
D. Add the IP address of the computer to the beginning of the MAC address.
5. You must implement BitLocker on 2,500 computers. Which tool can you use to simplify the enforcement of BitLocker and ensure its compliance through reports and policy?
A. ADK
B. WDS
C. MBAM
D. MAP
Objective 1.4: Configure and manage activation
As part of maintaining an infrastructure of Windows-based computers, you must determine how to handle Windows operating system activation. Activation is a requirement of the Windows 8.1 operating system and requires validation for each Windows 8.1 license through an online activation service, by phone, through the Key Management Service (KMS), or through Active Directory–based activation. In this section, you learn how activation works and about the volume activation models to consider for an effective Windows 8.1 deployment.
This objective covers how to:
![]() Identify the appropriate activation tool
Identify the appropriate activation tool
![]() Configure KMS
Configure KMS
![]() Configure Active Directory–based activation
Configure Active Directory–based activation
![]() Configure MAK
Configure MAK
Identifying the appropriate activation tool
Enterprise environments use three types of volume activation models. You can use any or all of the options associated with these models, depending on your organization’s needs and network infrastructure.
![]() Key Management Service A service that enables organizations to activate systems within their network from a computer on which a Key Management Service (KMS) host has been installed. KMS enables IT professionals to complete activations on their local network, eliminating the need for individual computers to connect to Microsoft for product activation. KMS does not require a dedicated system, and it can coexist on a system that provides other services. By default, volume editions of Windows 8.1 and Windows Server 2012 R2 connect to a system that hosts the KMS service to request activation. No action is required from the user. KMS usage is recommended for managed environments where more than 25 physical or virtual Windows client operating systems are connected consistently to the organization’s network or in environments with five or more servers.
Key Management Service A service that enables organizations to activate systems within their network from a computer on which a Key Management Service (KMS) host has been installed. KMS enables IT professionals to complete activations on their local network, eliminating the need for individual computers to connect to Microsoft for product activation. KMS does not require a dedicated system, and it can coexist on a system that provides other services. By default, volume editions of Windows 8.1 and Windows Server 2012 R2 connect to a system that hosts the KMS service to request activation. No action is required from the user. KMS usage is recommended for managed environments where more than 25 physical or virtual Windows client operating systems are connected consistently to the organization’s network or in environments with five or more servers.
![]() Active Directory–based activation A service that enables you to use AD DS to store activation objects, which can greatly simplify the maintenance of volume-activation services for a network. Active Directory–based activation is new for Windows 8 and Windows Server 2012. Therefore, if you need to activate older operating systems such as Windows 7 or Windows Server 2008 R2, use KMS or another activation method. To support Active Directory–based activation, the schema must be updated to the Windows Server 2012 or Windows Server 2012 R2 schema level. You do not need to set the forest or domain functional level to Windows Server 2012 or later. When you use Active Directory–based activation, you don’t need a host server, and activation requests process during client computer startup. Any computer that is running Windows 8.1 with a generic Volume License Key (VLK) and is connected to the domain will activate automatically and transparently. Computers will stay activated as long as they remain members of the domain and maintain periodic contact with a domain controller. Activation takes place after the licensing service starts. When the service starts, the computer running Windows 8.1 connects to AD DS automatically, receives the activation object, and activates without user intervention.
Active Directory–based activation A service that enables you to use AD DS to store activation objects, which can greatly simplify the maintenance of volume-activation services for a network. Active Directory–based activation is new for Windows 8 and Windows Server 2012. Therefore, if you need to activate older operating systems such as Windows 7 or Windows Server 2008 R2, use KMS or another activation method. To support Active Directory–based activation, the schema must be updated to the Windows Server 2012 or Windows Server 2012 R2 schema level. You do not need to set the forest or domain functional level to Windows Server 2012 or later. When you use Active Directory–based activation, you don’t need a host server, and activation requests process during client computer startup. Any computer that is running Windows 8.1 with a generic Volume License Key (VLK) and is connected to the domain will activate automatically and transparently. Computers will stay activated as long as they remain members of the domain and maintain periodic contact with a domain controller. Activation takes place after the licensing service starts. When the service starts, the computer running Windows 8.1 connects to AD DS automatically, receives the activation object, and activates without user intervention.
![]() MAK activation Uses product keys that activate a specific number of computers. If you don’t control the use of VLKs, excessive activations can result in the depletion of the activation pool. You don’t use MAKs to install Windows 8.1 but, rather, to activate after installation. You can use MAKs to activate any Windows 8.1 volume edition.
MAK activation Uses product keys that activate a specific number of computers. If you don’t control the use of VLKs, excessive activations can result in the depletion of the activation pool. You don’t use MAKs to install Windows 8.1 but, rather, to activate after installation. You can use MAKs to activate any Windows 8.1 volume edition.
The biggest task you will face when setting up volume activation is the decision about which tool or tools to use. You can use KMS, AD DS, MAKs, or any combination of these, depending on your needs. To understand better when to use each technology, consider the following:
![]() When to use KMS KMS is the default key for volume activation clients, independent of the Windows version in use. If your network has multiple versions of Windows client and server operating systems, you will probably want to use KMS to activate them. KMS is used routinely in large enterprise networks to reduce the administrative overhead of activation.
When to use KMS KMS is the default key for volume activation clients, independent of the Windows version in use. If your network has multiple versions of Windows client and server operating systems, you will probably want to use KMS to activate them. KMS is used routinely in large enterprise networks to reduce the administrative overhead of activation.
![]() When to use Active Directory–based activation Active Directory–based activation is only available for Windows 8, Windows Server 2012, and newer Windows operating systems. Although it provides better control of activation by enabling an administrator to set permissions on activation objects in Active Directory, this activation method can’t be used for computers running older operating systems. Although Active Directory–based activation is still fairly new, it’s likely to become the standard activation method in the future because it offers reduced administrative overhead as well as enhancements to KMS.
When to use Active Directory–based activation Active Directory–based activation is only available for Windows 8, Windows Server 2012, and newer Windows operating systems. Although it provides better control of activation by enabling an administrator to set permissions on activation objects in Active Directory, this activation method can’t be used for computers running older operating systems. Although Active Directory–based activation is still fairly new, it’s likely to become the standard activation method in the future because it offers reduced administrative overhead as well as enhancements to KMS.
![]() When to use MAKs Both KMS and Active Directory–based activation require computers to be connected periodically to a company network that provides those services. MAK can be used to activate computers that are being used in remote locations without access to corporate network resources. On smaller networks, use of MAKs is more common because activation isn’t as much of an administrative burden as it would be on large enterprise networks.
When to use MAKs Both KMS and Active Directory–based activation require computers to be connected periodically to a company network that provides those services. MAK can be used to activate computers that are being used in remote locations without access to corporate network resources. On smaller networks, use of MAKs is more common because activation isn’t as much of an administrative burden as it would be on large enterprise networks.
Configuring KMS
You can use KMS to perform local activations for computers in a managed environment without connecting each computer to Microsoft. You can enable KMS functionality on a physical computer or virtual machine that runs Windows Server 2012 R2, Windows Server 2012, Windows Server 2008, Windows 7, Windows 8, or Windows 8.1.
Windows Server 2012, Windows 8, and newer versions include KMS host services. After you initialize KMS, the KMS activation infrastructure is self-maintaining.
A single KMS host can support an almost unlimited number of KMS clients. Most organizations can operate with just two KMS hosts for their entire infrastructure: one main KMS host and a backup host for redundancy.
To enable KMS functionality, you install a KMS host key on the KMS host and then activate it on the phone or by using an online web service. You can use a single KMS host key six times, so if you are installing seven or more KMS hosts, you must purchase another host key. Start the command prompt window on the host computer by using elevated privileges and then run the cscript C:\windows\system32\slmgr.vbs -ipk <KmsKey> command.
During installation, a KMS host will automatically publish its existence and location in DNS in the form of a service (SRV) record. This enables both domain members and stand-alone computers to locate the KMS infrastructure.
Client computers can also locate the KMS host by using connection information manually configured in the registry. Client computers then use information returned from the KMS host to self-activate.
More Info: KMS
For more information about how KMS works, see http://technet.microsoft.com/en-us/library/ff793434.aspx.
Configuring Active Directory–based activation
Active Directory–based activation greatly simplifies the process of activating clients that are running Windows 8, Windows 8.1, Windows Server 2012, or Windows Server 2012 R2. To use Active Directory–based activation, your forest and domain must be at the Windows Server 2012 or Windows Server 2012 R2 functional level.
Although you can’t edit activation objects directly, you can use advanced AD DS tools to view each activation object, and you can configure security ACLs for the activation objects to restrict access as needed. If necessary, you can delete activation objects. On a local client computer, a user with read/write permission for an activation object can use the command prompt to perform the functions.
Note: Active Directory–Based Activation and KMS
If an environment will continue to have older versions of volume-licensed operating systems and Microsoft Office applications, administrators need a KMS host to maintain activation status in addition to enabling Active Directory–based activation for clients that are running Windows 8 and Windows Server 2012 or newer versions.
The high-level process for enabling Active Directory–based activation is as follows:
1. Install the Volume Activation Services role on a domain controller.
2. Configure Volume Activation Services by selecting Active Directory–based activation as the activation method and entering the KMS host key.
3. Activate the KMS host key with Microsoft-hosted activation services by using the Volume Activation Tools console.
4. When a domain-joined computer running Windows Server 2012 R2 or Windows 8.1 with a generic VLK starts, the licensing service on the client automatically queries the domain controller for licensing information.
5. If the licensing service on the client finds a valid activation object, activation proceeds silently without requiring any user intervention. The same renewal guidelines apply to both Active Directory–based activation and KMS activation.
6. If the licensing service on the client does not find volume licensing information in AD DS, clients that are running Windows Server 2012 R2 and Windows 8.1 look for a KMS host and then attempt activation by following the KMS activation process.
More Info: Active Directory–Based Activation
For more information about Active Directory–based activation, see http://technet.microsoft.com/en-us/library/dn613828.aspx.
Configuring MAK
You can use a multiple activation key (MAK) in organizations that have a volume licensing agreement but don’t meet the requirements to operate a KMS or prefer a simpler approach. A MAK also enables activation of computers that are isolated from a corporate network.
A MAK is simply a product key that you can use to activate Windows on multiple computers. Each MAK can be used a specific number of times. You can use the Volume Activation Management Tool (VAMT) to track the number of activations that have been performed with each key and how many activations remain. The VAMT tool is covered in detail in Chapter 5, “Prepare and deploy the application environment.”
If a client computer is not connected to the Internet, or is in a remote or highly secure location that is not connected to the Internet, you can use another MAK validation option called a MAK proxy activation, which performs the following tasks:
1. Installs a MAK product key on the client computer.
2. Retrieves the installation ID from the client computer.
3. Transmits the installation ID to Microsoft on behalf of the client.
4. Obtains a confirmation ID.
5. Activates the client computer by applying the confirmation ID.
Thought experiment: Windows 8.1 deployment at Tailspin Toys
Tailspin Toys has a single office in Miami, Florida, with more than 200 computers, which run Windows XP or Linux. Tailspin Toys has decided to upgrade all computers to Windows 8.1, including the computers currently running Linux. All Windows-based computers will be part of an Active Directory domain named tailspintoys.com. Besides the computers being upgraded, Tailspin Toys maintains 20 servers running Windows Server 2008, Windows Server 2008 R2, and Windows Server 2012. The company also has remote users that spend most of the time visiting customers and don’t have connectivity to the corporate network. The company plans to allow network administrators to delete activations of computers running Windows 8.1.
To provide the company with a complete activation solution, answer the following questions:
1. Which tool should you use to activate the existing servers?
2. Which tool should you use to manage activation of computers running Windows 8.1?
3. Which technology should you use to manage activation of remote computers?
Objective summary
![]() You can use MAK, KMS, Active Directory–based activation, or a combination of any of these solutions to activate computers.
You can use MAK, KMS, Active Directory–based activation, or a combination of any of these solutions to activate computers.
![]() You can use Active Directory–based activation only for computers running Windows 8, Windows Server 2012, and newer operating systems.
You can use Active Directory–based activation only for computers running Windows 8, Windows Server 2012, and newer operating systems.
![]() Active Directory–based activation requires the Active Directory schema to be updated with the Windows Server 2012 schema extensions.
Active Directory–based activation requires the Active Directory schema to be updated with the Windows Server 2012 schema extensions.
![]() KMS can be used to manage activation for newer Windows versions such as Windows 8.1 and Windows Server 2012 as well as for older Windows versions, including Vista and Windows Server 2003.
KMS can be used to manage activation for newer Windows versions such as Windows 8.1 and Windows Server 2012 as well as for older Windows versions, including Vista and Windows Server 2003.
![]() A MAK can be used to activate any Windows operating system and acts as a regular product license that can be reused.
A MAK can be used to activate any Windows operating system and acts as a regular product license that can be reused.
Objective review
Answer the following questions to test your knowledge of the information in this objective. You can find the answers to these questions and explanations of why each answer choice is correct or incorrect in the “Answers” section at the end of this chapter.
1. You have 100 client computers that were configured with a MAK. The computers are connected to the corporate network. You want to avoid communication between these computers and the Internet for activation purposes. What should you do?
A. Implement KMS.
B. Implement Active Directory–based activation.
C. Implement Volume Activation Services.
D. Implement a MAK proxy.
2. You have 250 client computers that were upgraded to Windows 8.1. You need to manage activation for these computers and enable an administrator to remove the activation for a given computer if necessary. Which activation technology should you use?
A. KMS
B. Active Directory–based activation
C. MAK
D. MAK proxy
3. Which activation technologies can you use to manage activation for Windows 7 and Windows Server 2008? (Choose all that apply.)
A. KMS
B. Active Directory–based activation
C. MAK
D. MAK proxy
4. Your existing environment consists of domain controllers that run Windows Server 2012. The domain and forest functional level are set to Windows Server 2008 R2. Client computers run Windows 8. You plan to use Active Directory–based activation. What should you do first?
A. Upgrade the domain controllers to Windows Server 2012 R2.
B. Upgrade the client computers to Windows 8.1.
C. Update the domain and forest functional levels to Windows Server 2012.
D. Update the domain and forest functional levels to Windows Server 2012 R2.
5. Your sales team is made up of 250 people, and each has a portable computer. On average, 50 of the computers connect to the corporate network. The remaining 200 computers are offsite and rarely connect to the corporate network. Some of the computers are not joined to the domain. Which activation method would best suit the computers to avoid activation reminders while also allowing activation?
A. MAK Proxy
B. Active Directory-based activation
C. KMS
D. MAK
Answers
This section contains the solutions to the thought experiments and answers to the lesson review questions in this chapter.
Objective 1.1
Thought experiment
1. Windows-based and Linux/UNIX computers. Because the environment consists of multiple operating systems, you must select multiple scenarios to match.
2. AD DS for the Windows-based computers; IP range, manual list, or file import for Linux computers. Because the environment consists of multiple operating systems, you must select multiple discovery methods to ensure that you assess all the computers.
3. WMI for Windows-based computers, SSH for Linux computers. MAP can use multiple methods to assess computers, based on the operating system.
Objective review
1. Correct answers: A and C
A. Correct: Hardware inventory is used to retrieve WMI data related to hardware requirements.
B. Incorrect: Software inventory returns information about files found on a computer.
C. Correct: Asset Intelligence enables you to run reports to see which computers don’t support installing a given software or operating system.
D. Incorrect: Compliance settings are used to check if settings are enabled on a computer.
2. Correct answer: C
A. Incorrect: Configuration Manager requires an agent.
B. Incorrect: ACT verifies app compatibility issues.
C. Correct: MAP uses WMI to gather inventory without using an agent.
D. Incorrect: WDS is used to deploy an operating system image, not to gather inventory data.
3. Correct answers: B and C
A. Incorrect: WMI is used to gather inventory data; it is not a method for discovery.
B. Correct: Network protocol can be used to find computers on the network.
C. Correct: AD DS can be used to discover computer accounts.
D. Incorrect: SNMP is used to manage network devices.
4. Correct answer: B
A. Incorrect: MAP does not integrate with Operations Manager.
B. Correct: By integrating MAP with Configuration Manager, you can rely on existing data that Configuration Manager gathers.
C. Incorrect: MAP does not integrate with App Controller.
D. Incorrect: MAP does not integrate with Service Manager.
5. Correct answers: B and D
A. Incorrect: RDP is not a protocol that MAP requires.
B. Correct: MAP requires network access.
C. Incorrect: MAP does not require the Configuration Manager client to be installed for inventory to be collected.
D. Correct: You must provide MAP with a known service account that can connect to the target computers.
Objective 1.2
Thought experiment
1. Online. By using an online migration, you meet the requirements of minimizing network traffic and decreasing time to migrate. In this scenario, you would likely use a hard-link migration or a removable disk drive.
2. Hard-link migration. A hard-link migration leaves the data where it is, which is the fastest method. A compressed migration store copies the data off to a file server or to a removable disk drive, which slows the process down.
3. System Center Configuration Manager, MDT, or logon scripts. There are multiple methods for automation, and each can reduce or eliminate the time an IT administrator would have to spend migrating user state data.
Objective review
1. Correct answer: B
A. Incorrect: 10.5 MB. ScanState returns the amount of space required in bytes. Thus, for most situations, you must divide the returned number by 1048576 to view the required space in megabytes or by 1048576000 to view the required space in gigabytes.
B. Correct: 10.5 GB. ScanState returns the amount of space required in bytes. Thus, for most situations, you must divide the returned number by 1048576 to view the required space in megabytes or by 1048576000 to view the required space in gigabytes.
C. Incorrect: 10.5 TB. ScanState returns the amount of space required in bytes. Thus, for most situations, you must divide the returned number by 1048576 to view the required space in megabytes or by 1048576000 to view the required space in gigabytes.
D. Incorrect: 10.5 EB. ScanState returns the amount of space required in bytes. Thus, for most situations, you must divide the returned number by 1048576 to view the required space in megabytes or by 1048576000 to view the required space in gigabytes.
2. Correct answer: D
A. Incorrect: Using a USB drive for the migration store and compressing the data copies the data, which is unnecessary when upgrading the same computer.
B. Incorrect: Using a network share for the migration store and compressing the data copies the data, which is unnecessary when upgrading the same computer.
C. Incorrect: Using a local drive for the migration store copies the data, which is unnecessary when upgrading the same computer.
D. Correct: Using hard links for the migration store keeps the data on the computer and is faster than the other options.
3. Correct answer: C
A. Incorrect: Using a hard-link migration store for IT users and a network share migration store for sales users is incorrect. None of the users will reuse the same computer. Hard links can’t be used.
B. Incorrect: Using a hard-link migration store for sales users and a network share migration store for IT users is incorrect. None of the users will reuse the same computer. Hard links can’t be used.
C. Correct: Use a network share migration store for all users. None of the users will reuse the same computer, so the data needs to be moved off the computers. Hard links can’t be used.
D. Incorrect: Using a hard-link migration store for all users is incorrect because hard links can’t be used, and none of the users will reuse the same computer.
4. Correct answer: D
A. Incorrect: USMT does not migrate local printers or shared folders.
B. Incorrect: USMT does not migrate local printers.
C. Incorrect: USMT does not migrate shared folders.
D. Correct: USMT migrates network printers and customized Internet Explorer settings.
5. Correct answer: C
A. Incorrect: Offline migrations cannot be completed while the source instance of Windows is running.
B. Incorrect: Offline migrations cannot be completed while the source instance of Windows is running.
C. Correct: Offline migrations require the source instance of Windows to be shut down. Windows PE enables access to the source operating system without having it running.
D. Incorrect: ScanState is not supported under recovery mode.
Objective 1.3
Thought experiment
1. Distribution point. A distribution point is where the operating system images are stored. In addition, multicast is configured as part of the distribution point configuration.
2. PXE support. A bare-metal computer does not have an operating system, so it must boot over the network. This requires PXE.
3. WDS. Besides Configuration Manager, WDS also supports multicast deployments. In environments without Configuration Manager, MDT integrated with WDS is the next best solution.
Objective review
1. Correct answers: A and B
A. Correct: A boot image is required to boot from PXE.
B. Correct: An install image is required to install an operating system.
C. Incorrect: A capture image is used to capture an operating system from a reference computer.
D. Incorrect: A discover image is used for booting from a removable device.
2. Correct answers: A and B
A. Correct: WDS is required for PXE boot.
B. Correct: MDT is required for an LTI deployment.
C. Incorrect: WINS is used for NetBIOS name resolution, which is not a requirement for LTI deployments.
D. Incorrect: VMM is used to manage virtual machines, services, and virtualization hosts.
3. Correct answers: A, B, and D
A. Correct: WDS is installed on distribution points with PXE enabled.
B. Correct: MDT is used to create task sequences integrated to Configuration Manager for ZTI deployments.
C. Incorrect: WINS is used for NetBIOS name resolution, which is not a requirement for ZTI deployments.
D. Correct: Configuration Manager integrates with WDS and MDT for ZTI deployments.
4. Correct answer: B
A. Incorrect: Adding 20 zeros to the end of the MAC address will allow you to proceed in the process, but the computer being imaged won’t be matched up to the prestaged computer object. When using a MAC address in place of a GUID in a prestaged computer object, you must use 20 zeros at the beginning of the MAC address.
B. Correct: Adding 20 zeros to the beginning of the MAC address will allow you to complete the creation of the prestaged computer object and image the computer. When using a MAC address in place of a GUID in a prestaged computer object, you must use 20 zeros at the beginning of the MAC address.
C. Incorrect: Adding the IP address of the computer to the end of the MAC address will not allow you to proceed. The prestaging of a computer object requires a GUID or a MAC address with 20 zeros prepended. Until the appropriate length is reached, the new computer creation wizard will not allow you to click Next.
D. Incorrect: Adding the IP address of the computer to the beginning of the MAC address will not allow you to proceed. The prestaging of a computer object requires a GUID or a MAC address with 20 zeros prepended. Until the appropriate length is reached, the new computer creation wizard will not allow you to click Next.
5. Correct answer: C
A. Incorrect: The Assessment and Deployment Kit does not offer the necessary tools required for large-scale BitLocker deployments and management.
B. Incorrect: Windows Deployment Services does not offer the necessary tools required for large-scale BitLocker deployments and management.
C. Correct: Microsoft BitLocker Administration and Monitoring is the correct tool for managing large-scale BitLocker deployments.
D. Incorrect: MAP is an assessment planning tool unrelated to BitLocker management.
Objective 1.4
Thought experiment
1. KMS is the correct choice because Windows Server 2008 and Windows Server 2008 R2 must be supported. For server-based operating systems, Active Directory–based activation handles only Windows Server 2012 and Windows Server 2012 R2.
2. Active Directory–based activation offers the best overall solution if you are activating Windows 8, Windows 8.1, Windows Server 2012, or Windows Server 2012 R2. For example, with Active Directory–based activation, you don’t need to meet a minimum threshold before activation can occur. In addition, the activations are indefinite as long as the computer remains actively joined to the domain. With KMS, a KMS host is required, periodic check-ins with the KMS host are required, and activations are valid for 180 days at a time.
3. When computers are mostly or always disconnected from the corporate network, using a MAK is the most appropriate method because it doesn’t require connectivity to the corporate network.
Objective review
1. Correct answer: D
A. Incorrect: KMS does not work with MAKs.
B. Incorrect: Active Directory–based activation does not work with MAKs.
C. Incorrect: Volume Activation Services are used for KMS and AD DS.
D. Correct: MAK proxies access the Microsoft licensing services on behalf of MAK clients.
2. Correct answer: B
A. Incorrect: KMS does not allow removing a license from a given computer.
B. Correct: Active Directory–based activation allows an administrator to remove an activation object from Active Directory.
C. Incorrect: A MAK does not allow an administrator to remove the activation.
D. Incorrect: A MAK proxy does not allow an administrator to remove the activation.
3. Correct answers: A, C, and D
A. Correct: KMS can be used with older versions of Windows.
B. Incorrect: Active Directory–based activation can only be used with Windows 8, Windows Server 2012, and newer.
C. Correct: A MAK can be used with older versions of Windows.
D. Correct: A MAK proxy can be used with older versions of Windows.
4. Correct answer: C
A. Incorrect: Upgrading the domain controllers to Windows Server 2012 R2 isn’t necessary because Active Directory–based activation is supported on Windows Server 2012, which is already being used on the existing domain controllers.
B. Incorrect: Upgrading the client computers to Windows 8.1 isn’t necessary because Active Directory–based activation is supported for Windows 8 client computers, which are already being used in the existing environment.
C. Correct: Updating the domain and forest functional levels to Windows Server 2012 will enable you to begin using Active Directory–based activation immediately and without any substantial changes to the environment.
D. Incorrect: Updating the domain and forest functional levels to Windows Server 2012 R2 isn’t necessary because it would require an update of all the domain controllers first. In addition, by just updating the domain and forest functional levels to Windows Server 2012, you’ll be ready to use Active Directory–based activation with the existing environment.
5. Correct answer: D
A. Incorrect: Using a MAK proxy would require all of the computers to come back to your proxy server before activating. This adds an unnecessary step to the activation and uses the company network for all activations. Instead, for remote computers, you should use a MAK key without a proxy so that they can go directly to the Microsoft service and activate.
B. Incorrect: Active Directory-based activation requires computers to be joined to the domain. In this scenario, some computers are not joined to the domain, so using a MAK key would be a better choice.
C. Incorrect: KMS is best suited for computers that are consistently connected to your corporate network on the internal LAN. Communication occurs over RPC, which isn’t supported over the Internet directly. (Instead, it is often encapsulated in HTTP or HTTPS.)
D. Correct: There are two reasons to use a MAK key without a proxy. One reason is that the computers are remote and have limited contact with the corporate network. The other reason is that not all the computers are joined to the domain. Using a MAK key without a proxy allows successful activations without introducing complexities or unnecessary steps.
All materials on the site are licensed Creative Commons Attribution-Sharealike 3.0 Unported CC BY-SA 3.0 & GNU Free Documentation License (GFDL)
If you are the copyright holder of any material contained on our site and intend to remove it, please contact our site administrator for approval.
© 2016-2026 All site design rights belong to S.Y.A.