Excel 2016 Power Programming with VBA (2016)
Part I. Introduction to Excel VBA
Chapter 3. VBA Programming Fundamentals
In This Chapter
· Understanding VBA language elements, including variables, data types, constants, and arrays
· Using VBA built-in functions
· Manipulating objects and collections
· Controlling the execution of your procedures
VBA Language Elements: An Overview
If you’ve used other programming languages, much of the information in this chapter may sound familiar. However, VBA has a few unique wrinkles, so even experienced programmers may find some new information.
This chapter explores the VBA language elements, which are the keywords and control structures that you use to write VBA routines.
To get the ball rolling, take a look at a the following VBA Sub procedure. This simple procedure, which is stored in a VBA module, calculates the sum of the first 100 positive integers. When the code finishes executing, the procedure displays a message with the result.
Sub VBA_Demo()
' This is a simple VBA Example
Dim Total As Long, i As Long
Total = 0
For i = 1 To 100
Total = Total + i
Next i
MsgBox Total
End Sub
This procedure uses some common VBA language elements, including:
· A comment (the line that begins with an apostrophe)
· A variable declaration statement (the line that begins with Dim)
· Two variables (Total and i)
· Two assignment statements (Total = 0 and Total = Total + i)
· A looping structure (For-Next)
· A VBA function (MsgBox)
You will explore all of these language elements in subsequent sections of this chapter.
 Note
Note
VBA procedures need not manipulate any objects. The preceding procedure, for example, doesn’t do anything with objects. It simply works with numbers.
 Entering VBA code
VBA code, which resides in a VBA module, consists of instructions. The accepted practice is to use one instruction per line. This standard isn’t a requirement, however; you can use a colon to separate multiple instructions on a single line. The following example combines four instructions on one line:
Sub OneLine()
x= 1: y= 2: z= 3: MsgBox x + y + z
End Sub
Most programmers agree that code is easier to read if you use one instruction per line:
Sub MultipleLines()
x = 1
y = 2
z = 3
MsgBox x + y + z
End Sub
Each line can be as long as you like; the VBA module window scrolls to the left when you reach the right side. For lengthy lines, you may want to use VBA’s line continuation sequence: a space followed by an underscore (_). For example:
Sub LongLine()
SummedValue = _
Worksheets("Sheet1").Range("A1").Value + _
Worksheets("Sheet2").Range("A1").Value
End Sub
When you record macros, Excel often uses the line continuation sequence to break a long statement into multiple lines.
After you enter an instruction, VBA performs the following actions to improve readability:
· It inserts spaces between operators. If you enter Ans=1+2 (without spaces), for example, VBA converts it to:
·Ans = 1 + 2
· It adjusts the case of the letters for keywords, properties, and methods. If you enter the following text: Result=activesheet.range("a1").value=12
· VBA converts it to:
·Result = ActiveSheet.Range("a1").Value = 12
· Notice that text within quotation marks (in this case, "a1") isn’t changed.
· Because VBA variable names aren’t case-sensitive, VBE, by default, adjusts the names of all variables with the same letters so that their case matches the case of letters that you most recently typed. For example, if you first specify a variable as myvalue (all lowercase) and then enter the variable as MyValue (mixed case), VBA changes all other occurrences of the variable to MyValue. An exception occurs if you declare the variable with Dim or a similar statement; in this case, the variable name always appears as it was declared.
· VBA scans the instruction for syntax errors. If VBA finds an error, it changes the color of the line and might display a message describing the problem. Choose the Visual Basic Editor Tools ➜ Options command to display the Options dialog box, where you control the error color (use the Editor Format tab) and whether the error message is displayed (use the Auto Syntax Check option in the Editor tab).
Comments
A comment is descriptive text embedded in your code and ignored by VBA. It’s a good idea to use comments liberally to describe what you’re doing because an instruction’s purpose isn’t always obvious.
You can use a complete line for your comment, or you can insert a comment after an instruction on the same line. A comment is indicated by an apostrophe. VBA ignores any text that follows an apostrophe — except when the apostrophe is contained within quotation marks — up until the end of the line. For example, the following statement doesn’t contain a comment, even though it has an apostrophe:
Msg ="Can't continue"
The following example shows a VBA procedure with three comments:
Sub CommentDemo()
' This procedure does nothing of value
x = 0 'x represents nothingness
' Display the result
MsgBox x
End Sub
Although the apostrophe is the preferred comment indicator, you can also use the Rem keyword to mark a line as a comment. For example:
Rem -- The next statement prompts the user for a filename
The Rem keyword (short for Remark) is essentially a holdover from older versions of BASIC and is included in VBA for the sake of compatibility. Unlike the apostrophe, Rem can be written only at the beginning of a line, not on the same line as another instruction.
Following are a few general tips on making the best use of comments:
· Use comments to describe briefly the purpose of each procedure that you write.
· Use comments to describe changes that you make to a procedure.
· Use comments to indicate that you’re using functions or constructs in an unusual or a nonstandard manner.
· Use comments to describe the purpose of variables so that you and other people can decipher otherwise cryptic names.
· Use comments to describe workarounds that you develop to overcome Excel bugs or limitations.
· Write comments while you code rather than after.
 Tip
Tip
In some cases, you may want to test a procedure without including a particular instruction or group of instructions. Instead of deleting the instruction, convert it to a comment by inserting an apostrophe at the beginning. VBA then ignores the instruction when the routine is executed. To convert the comment back to an instruction, just delete the apostrophe.
The Visual Basic Editor (VBE) Edit toolbar contains two useful buttons. (The Edit toolbar isn’t displayed by default. To display this toolbar, choose View ➜ Toolbars ➜ Edit.) Select a group of instructions and then click the Comment Block button to convert the instructions to comments. The Uncomment Block button converts a group of comments back to instructions.
Variables, Data Types, and Constants
VBA’s main purpose is to manipulate data. Some data resides in objects, such as worksheet ranges. Other data is stored in variables that you create.
You can think of a variable as a named storage location in your computer’s memory. Variables can accommodate a wide variety of data types — from simple Boolean values (True or False) to large, double-precision values (see the following section). You assign a value to a variable by using the equal sign operator (more about this process in the upcoming section, “Assignment Statements”).
You make your life easier if you get into the habit of making your variable names as descriptive as possible. VBA does, however, have a few rules regarding variable names:
· You can use alphabetic characters, numbers, and some punctuation characters, but the first character must be alphabetic.
· VBA doesn’t distinguish between case. To make variable names more readable, programmers often use mixed case (for example, InterestRate rather than interestrate).
· You can’t use spaces or periods. To make variable names more readable, programmers often use the underscore character (Interest_Rate).
· You can’t embed special type declaration characters (#, $, %, &, or !) in a variable name.
· Variable names can be as long as 254 characters — but using such long variable names isn’t recommended.
The following list contains some examples of assignment expressions that use various types of variables. The variable names are to the left of the equal sign. Each statement assigns the value to the right of the equal sign to the variable on the left.
x = 1
InterestRate = 0.075
LoanPayoffAmount = 243089.87
DataEntered = False
x = x + 1
MyNum = YourNum * 1.25
UserName ="Bob Johnson"
DateStarted = #12/14/2012#
VBA has many reserved words, which are words that you can’t use for variable or procedure names. If you attempt to use one of these words, you get an error message. For example, although the reserved word Next might make a very descriptive variable name, the following instruction generates a syntax error:
Next = 132
Unfortunately, syntax error messages aren’t always descriptive. If the Auto Syntax Check option is turned on, you get the error Compile error: Expected: variable. If Auto Syntax Check is turned off, attempting to execute this statement results in Compile error: Syntax error. It would be more helpful if the error message were something like Reserved word used as a variable. So if an instruction produces a strange error message, check the VBA Help system to ensure that your variable name doesn’t have a special use in VBA.
Defining data types
VBA makes life easy for programmers because it can automatically handle all the details involved in dealing with data. Some programming languages, however, are strictly typed, which means that the programmer must explicitly define the data type for every variable used.
Data type refers to how data is stored in memory — as integers, real numbers, strings, and so on. Although VBA can take care of data typing automatically, it does so at a cost: slower execution and less efficient use of memory. As a result, letting VBA handle data typing may present problems when you’re running large or complex applications. Another advantage of explicitly declaring your variables as a particular data type is that VBA can perform some additional error checking at the compile stage. These errors might otherwise be difficult to locate.
Table 3.1 lists VBA’s assortment of built-in data types. (Note that you can also define custom data types, which are covered later in this chapter in the section “User-Defined Data Types.”)
Table 3.1 VBA Built-In Data Types
|
Data Type |
Bytes Used |
Range of Values |
|
Byte |
1 byte |
0 to 255 |
|
Boolean |
2 bytes |
True or False |
|
Integer |
2 bytes |
–32,768 to 32,767 |
|
Long |
4 bytes |
–2,147,483,648 to 2,147,483,647 |
|
Single |
4 bytes |
–3.402823E38 to –1.401298E-45 (for negative values); 1.401298E-45 to 3.402823E38 (for positive values) |
|
Double |
8 bytes |
–1.79769313486232E308 to –4.94065645841247E-324 (negative values); 4.94065645841247E-324 to 1.79769313486232E308 (for positive values) |
|
Currency |
8 bytes |
–922,337,203,685,477.5808 to 922,337,203,685,477.5807 |
|
Decimal |
12 bytes |
+/–79,228,162,514,264,337,593,543, 950,335 with no decimal point; +/–7.9228162514264337593543950335 with 28 places to the right of the decimal |
|
Date |
8 bytes |
January 1, 0100 to December 31, 9999 |
|
Object |
4 bytes |
Any object reference |
|
String (variable length) |
10 bytes + string length |
0 to approximately 2 billion characters |
|
String (fixed length) |
Length of string |
1 to approximately 65,400 characters |
|
Variant (with numbers) |
16 bytes |
Any numeric value up to the range of a double data type. It can also hold special values, such as Empty, Error, Nothing, and Null. |
|
Variant (with characters) |
22 bytes + string length |
0 to approximately 2 billion |
|
User-defined |
Varies |
Varies by element |
Note
The Decimal data type is unusual because you can’t declare it. In fact, it is a subtype of a variant. You need to use the VBA CDec function to convert a variant to the Decimal data type.
Generally, it’s best to use the data type that uses the smallest number of bytes yet still can handle all the data that will be assigned to it. When VBA works with data, execution speed is partially a function of the number of bytes that VBA has at its disposal. In other words, the fewer bytes used by data, the faster VBA can access and manipulate the data.
For worksheet calculation, Excel uses the Double data type, so that’s a good choice for processing numbers in VBA when you don’t want to lose any precision. For integer calculations, you can use the Integer type (which is limited to values less than or equal to 32,767). Otherwise, use the Long data type. In fact, using the Long data type even for values less than 32,767 is recommended because this data type may be a bit faster than using the Integer type. When dealing with Excel worksheet row numbers, you want to use the Long data type because the number of rows in a worksheet exceeds the maximum value for the Integer data type.
Declaring variables
If you don’t declare the data type for a variable that you use in a VBA routine, VBA uses the default data type, Variant. Data stored as a Variant acts like a chameleon: It changes type, depending on what you do with it.
The following procedure demonstrates how a variable can assume different data types:
Sub VariantDemo()
MyVar = True
MyVar = MyVar * 100
MyVar = MyVar / 4
MyVar ="Answer:" & MyVar
MsgBox MyVar
End Sub
In the VariantDemo procedure, MyVar starts out as a Boolean. The multiplication operation converts it to an Integer. The division operation converts it to a Double. And finally, it’s concatenated with text to make it a String. The MsgBox statement displays the final string:Answer: -25.
To further demonstrate the potential problems in dealing with Variant data types, try executing this procedure:
Sub VariantDemo2()
MyVar ="123"
MyVar = MyVar + MyVar
MyVar ="Answer:" & MyVar
MsgBox MyVar
End Sub
The message box displays Answer: 123123. This is probably not what you wanted. When dealing with variants that contain text strings, the + operator performs string concatenation.
Determining a data type
You can use the VBA TypeName function to determine the data type of a variable. Here’s a modified version of the VariantDemo procedure. This version displays the data type of MyVar at each step.
Sub VariantDemo3()
MyVar = True
MsgBox TypeName(MyVar)
MyVar = MyVar * 100
MsgBox TypeName(MyVar)
MyVar = MyVar / 4
MsgBox TypeName(MyVar)
MyVar ="Answer:" & MyVar
MsgBox TypeName(MyVar)
MsgBox MyVar
End Sub
Thanks to VBA, the data type conversion of undeclared variables is automatic. This process may seem like an easy way out, but remember that you sacrifice speed and memory — and you run the risk of errors that you may not even know about.
Declaring each variable in a procedure before you use it is an excellent habit. Declaring a variable tells VBA its name and data type. Declaring variables provides two main benefits:
· Your programs run faster and use memory more efficiently. The default data type, Variant, causes VBA to repeatedly perform time-consuming checks and reserve more memory than necessary. If VBA knows the data type, it doesn’t have to investigate, and it can reserve just enough memory to store the data.
· You avoid problems involving misspelled variable names. This benefit assumes that you use Option Explicit to force yourself to declare all variables (see the next section). Say that you use an undeclared variable named CurrentRate. At some point in your routine, however, you insert the statement CurentRate = .075. This misspelled variable name, which is very difficult to spot, will likely cause your routine to give incorrect results.
Forcing yourself to declare all variables
To force yourself to declare all the variables that you use, include the following as the first instruction in your VBA module:
Option Explicit
When this statement is present, VBA won’t even execute a procedure if it contains an undeclared variable name. VBA issues the error message shown in Figure 3.1, and you must declare the variable before you can proceed.
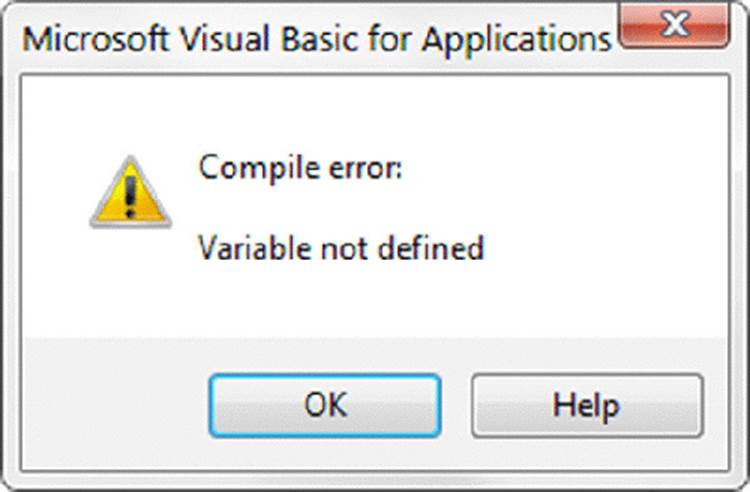
Figure 3.1 VBA’s way of telling you that your procedure contains an undeclared variable.
To ensure that the Option Explicit statement is inserted automatically whenever you insert a new VBA module, enable the Require Variable Declaration option in the Editor tab of the VBE Options dialog box (choose Tools ➜ Options). It is generally considered a best-practice to enable this option. Be aware, however, that this option will not affect existing modules; only modules created after it is enabled.
Scoping variables
A variable’s scope determines in which modules and procedures you can use the variable. Table 3.2 lists the three ways in which a variable can be scoped.
Table 3.2 Variable Scope
|
Scope |
To Declare a Variable with This Scope |
|
Single procedure |
Include a Dim or Static statement within the procedure. |
|
Single module |
Include a Dim or Private statement before the first procedure in a module. |
|
All modules |
Include a Public statement before the first procedure in a module. |
We discuss each scope further in the following sections.
A note about the examples in this chapter
This chapter contains many examples of VBA code, usually presented in the form of simple procedures. These examples demonstrate various concepts as simply as possible. Most of these examples don’t perform any particularly useful task; in fact, the task can often be performed in a different (perhaps more efficient) way. In other words, don’t use these examples in your own work. Subsequent chapters provide many more code examples that are useful.
Local variables
A local variable is a variable declared within a procedure. You can use local variables only in the procedure in which they’re declared. When the procedure ends, the variable no longer exists, and Excel frees up the memory that the variable used. If you need the variable to retain its value when the procedure ends, declare it as a Static variable. (See the section “Static variables,” later in this chapter.)
The most common way to declare a local variable is to place a Dim statement between a Sub statement and an End Sub statement. Dim statements usually are placed right after the Sub statement, before the procedure’s code.
Note
Dim is a shortened form of Dimension. In old versions of BASIC, this statement was used exclusively to declare the dimensions for an array. In VBA, the Dim keyword is used to declare any variable, not just arrays.
The following procedure uses six local variables declared by using Dim statements:
Sub MySub()
Dim x As Integer
Dim First As Long
Dim InterestRate As Single
Dim TodaysDate As Date
Dim UserName As String
Dim MyValue
' - [The procedure's code goes here] -
End Sub
Notice that the last Dim statement in the preceding example doesn’t declare a data type; it simply names the variable. As a result, that variable becomes a variant.
You also can declare several variables with a single Dim statement. For example:
Dim x As Integer, y As Integer, z As Integer
Dim First As Long, Last As Double
 Caution
Unlike some languages, VBA doesn’t let you declare a group of variables to be a particular data type by separating the variables with commas. For example, the following statement, although valid, does not declare all the variables as integers:
Dim i, j, k As Integer
In VBA, only k is declared to be an integer; the other variables are declared variants. To declare i, j, and k as integers, use this statement:
Dim i As Integer, j As Integer, k As Integer
If a variable is declared with a local scope, other procedures in the same module can use the same variable name, but each instance of the variable is unique to its own procedure.
In general, local variables are the most efficient because VBA frees up the memory that they use when the procedure ends.
Module-wide variables
Sometimes, you want a variable to be available to all procedures in a module. If so, just declare the variable before the module’s first procedure (outside of any procedures or functions).
In the following example, the Dim statement is the first instruction in the module. Both Procedure1 and Procedure2 have access to the CurrentValue variable.
Dim CurrentValue as Long
Sub Procedure1()
' - [Code goes here] -
End Sub
Sub Procedure2()
' - [Code goes here] -
End Sub
The value of a module-wide variable retains its value when a procedure ends normally (that is, when it reaches the End Sub or End Function statement). An exception is if the procedure is halted with an End statement. When VBA encounters an End statement, all variables in all modules lose their values.
Public variables
To make a variable available to all the procedures in all the VBA modules in a project, declare the variable at the module level (before the first procedure declaration) by using the Public keyword rather than Dim. Here’s an example:
Public CurrentRate as Long
The Public keyword makes the CurrentRate variable available to any procedure in the VBA project, even those in other modules in the project. You must insert this statement before the first procedure in a module (any module). This type of declaration must appear in a standard VBA module, not in a code module for a sheet or a UserForm.
Static variables
Static variables are a special case. They’re declared at the procedure level, and they retain their value when the procedure ends normally. However, if the procedure is halted by an End statement, static variables do lose their values. Note that an End statement is not the same as an End Sub statement.
You declare static variables by using the Static keyword:
Sub MySub()
Static Counter as Long
'- [Code goes here] -
End Sub
Working with constants
A variable’s value may change while a procedure is executing (that’s why it’s called a variable). Sometimes, you need to refer to a named value or string that never changes: a constant.
Using constants throughout your code in place of hard-coded values or strings is an excellent programming practice. For example, if your procedure needs to refer to a specific value (such as an interest rate) several times, it’s better to declare the value as a constant and use the constant’s name rather than its value in your expressions. This technique not only makes your code more readable, it also makes it easier to change should the need arise — you have to change only one instruction rather than several.
Declaring constants
You declare constants with the Const statement. Here are some examples:
Const NumQuarters as Integer = 4
Const Rate = .0725, Period = 12
Const ModName as String ="Budget Macros"
Public Const AppName as String ="Budget Application"
The second example doesn’t declare a data type. Consequently, VBA determines the data type from the value. The Rate variable is a Double, and the Period variable is an Integer. Because a constant never changes its value, you normally want to declare your constants as a specific data type.
Like variables, constants also have a scope. If you want a constant to be available within a single procedure only, declare it after the Sub or Function statement to make it a local constant. To make a constant available to all procedures in a module, declare it before the first procedure in the module. To make a constant available to all modules in the workbook, use the Public keyword and declare the constant before the first procedure in a module. For example:
Public Const InterestRate As Double = 0.0725
Note
If your VBA code attempts to change the value of a constant, you get an error (Assignment to constant not permitted). This message is what you would expect. A constant is a constant, not a variable.
Using predefined constants
Excel and VBA make available many predefined constants, which you can use without declaring. In fact, you don’t even need to know the value of these constants to use them. The macro recorder generally uses constants rather than actual values. The following procedure uses a built-in constant (xlLandscape) to set the page orientation to landscape for the active sheet:
Sub SetToLandscape()
ActiveSheet.PageSetup.Orientation = xlLandscape
End Sub
It’s often useful to record a macro just to discover the various constants that can be used. And, if you have the AutoList Members option turned on, you can often get some assistance while you enter your code (see Figure 3.2). In many cases, VBA lists all the constants that you can assign to a property.
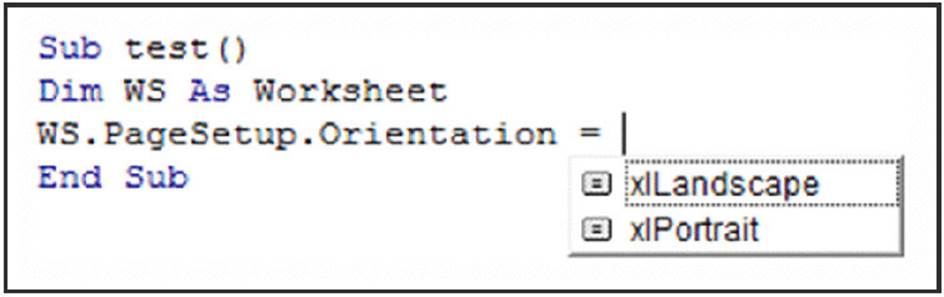
Figure 3.2 VBA displays a list of constants that you can assign to a property.
The actual value for xlLandscape is 2 (which you can discover by using the Immediate window). The other built-in constant for changing paper orientation is xlPortrait, which has a value of 1. Obviously, if you use the built-in constants, you don’t really need to know their values.
Note
The Object Browser can display a list of all Excel and VBA constants. In VBE, press F2 to bring up Object Browser.
Working with strings
Like Excel, VBA can manipulate both numbers and text (strings). There are two types of strings in VBA:
· Fixed-length strings are declared with a specified number of characters. The maximum length is 65,535 characters.
· Variable-length strings theoretically can hold up to 2 billion characters.
Each character in a string requires 1 byte of storage, plus a small amount of storage for the header of each string. When you declare a variable with a Dim statement as data type String, you can specify the length if you know it (that is, a fixed-length string), or you can let VBA handle it dynamically (a variable-length string).
In the following example, the MyString variable is declared to be a string with a maximum length of 50 characters. YourString is also declared as a string; but it’s a variable-length string, so its length is not fixed.
Dim MyString As String * 50
Dim YourString As String
Working with dates
You can use a string variable to store a date, but if you do, it’s not a real date (meaning you can’t perform date calculations with it). Using the Date data type is a better way to work with dates.
A variable defined as a date uses 8 bytes of storage and can hold dates ranging from January 1, 0100, to December 31, 9999. That’s a span of nearly 10,000 years — more than enough for even the most aggressive financial forecast! The Date data type is also useful for storing time-related data. In VBA, you specify dates and times by enclosing them between two hash marks (#).
Note
The range of dates that VBA can handle is much larger than Excel’s own date range, which begins with January 1, 1900, and extends through December 31, 9999. Therefore, be careful that you don’t attempt to use a date in a worksheet that is outside Excel’s acceptable date range.
 Cross-Ref
In Chapter 5, we describe some relatively simple VBA functions that enable you to create formulas that work with pre-1900 dates in a worksheet.
About Excel’s date bug
It is commonly known that Excel has a date bug: It incorrectly assumes that the year 1900 is a leap year. Even though there was no February 29, 1900, Excel accepts the following formula and displays the result as the 29th day of February, 1900:
=Date(1900,2,29)
VBA doesn’t have this date bug. The VBA equivalent of Excel’s DATE function is DateSerial. The following expression (correctly) returns March 1, 1900:
DateSerial(1900,2,29)
Therefore, Excel’s date serial number system doesn’t correspond exactly to the VBA date serial number system. These two systems return different values for dates between January 1, 1900, and February 28, 1900.
Here are some examples of declaring variables and constants as Date data types:
Dim Today As Date
Dim StartTime As Date
Const FirstDay As Date = #1/1/2013#
Const Noon = #12:00:00#
Dates are always defined using month/day/year format, even if your system is set to display dates in a different format (for example, day/month/year).
If you use a message box to display a date, it’s displayed according to your system’s short date format. Similarly, a time is displayed according to your system’s time format (either 12- or 24-hour). You can modify these system settings by using the Regional Settings option in the Windows Control Panel.
Assignment Statements
An assignment statement is a VBA instruction that evaluates an expression and assigns the result to a variable or an object. Excel’s Help system defines expression as “a combination of keywords, operators, variables, and constants that yields a string, number, or object. An expression can perform a calculation, manipulate characters, or test data.”
Much of the work done in VBA involves developing (and debugging) expressions. If you know how to create formulas in Excel, you’ll have no trouble creating expressions in VBA. With a worksheet formula, Excel displays the result in a cell. The result of a VBA expression, on the other hand, can be assigned to a variable or used as a property value.
VBA uses the equal sign (=) as its assignment operator. The following are examples of assignment statements (the expressions are to the right of the equal sign):
x = 1
x = x + 1
x = (y * 2) / (z * 2)
FileOpen = True
FileOpen = Not FileOpen
Range("TheYear").Value = 2010
Tip
Expressions can be complex. You may want to use the line continuation sequence (space followed by an underscore) to make lengthy expressions easier to read.
Often, expressions use functions. These functions can be built-in VBA functions, Excel’s worksheet functions, or custom functions that you develop in VBA. We discuss built-in VBA functions later in this chapter (see the upcoming section “Built-in Functions”).
Operators play a major role in VBA. Familiar operators describe mathematical operations, including addition (+), multiplication (*), division (/), subtraction (–), exponentiation (^), and string concatenation (&). Less familiar operators are the backslash (\) operator (used in integer division) and the Mod operator (used in modulo arithmetic). The Mod operator returns the remainder of one number divided by another. For example, the following expression returns 2:
17 Mod 3
VBA also supports the same comparison operators used in Excel formulas: equal to (=), greater than (>), less than (<), greater than or equal to (>=), less than or equal to (<=), and not equal to (<>).
With one exception, the order of precedence for operators in VBA is exactly the same as in Excel (see Table 3.3). And, of course, you can use parentheses to change the natural order of precedence.
Table 3.3 Operator Precedence
|
Operator |
Operation |
Order of Precedence |
|
^ |
Exponentiation |
1 |
|
* and / |
Multiplication and division |
2 |
|
+ and - |
Addition and subtraction |
3 |
|
& |
Concatenation |
4 |
|
=, <, >, <=, >=, <> |
Comparison |
5 |
Caution
The negation operator (a minus sign) is handled differently in VBA. In Excel, the following formula returns 25:
=-5^2
In VBA, x equals –25 after this statement is executed:
x = -5 ^ 2
VBA performs the exponentiation operation first and then applies the negation operator. The following statement returns 25:
x = (-5) ^ 2
In the statement that follows, x is assigned the value 10 because the multiplication operator has a higher precedence than the addition operator:
x = 4 + 3 * 2
To avoid ambiguity, you may prefer to write the statement as follows:
x = 4 + (3 * 2)
In addition, VBA provides a full set of logical operators, shown in Table 3.4. For complete details on these operators (including examples), use the VBA Help system.
Table 3.4 VBA Logical Operators
|
Operator |
What It Does |
|
Not |
Performs a logical negation on an expression |
|
And |
Performs a logical conjunction on two expressions |
|
Or |
Performs a logical disjunction on two expressions |
|
Xor |
Performs a logical exclusion on two expressions |
|
Eqv |
Performs a logical equivalence on two expressions |
|
Imp |
Performs a logical implication on two expressions |
The following instruction uses the Not operator to toggle the gridline display in the active window. The DisplayGridlines property takes a value of either True or False. Therefore, using the Not operator changes False to True and True to False.
ActiveWindow.DisplayGridlines = Not ActiveWindow.DisplayGridlines
The following expression performs a logical And operation. The MsgBox statement displays True only when Sheet1 is the active sheet and the active cell is in Row 1. If either or both of these conditions aren’t true, the MsgBox statement displays False.
MsgBox ActiveSheet.Name ="Sheet1" And ActiveCell.Row = 1
The following expression performs a logical Or operation. The MsgBox statement displays True when either Sheet1 or Sheet2 is the active sheet.
MsgBox ActiveSheet.Name ="Sheet1" Or ActiveSheet.Name ="Sheet2"
Arrays
An array is a group of elements of the same type that have a common name. You refer to a specific element in the array by using the array name and an index number. For example, you can define an array of 12 string variables so that each variable corresponds to the name of a month. If you name the array MonthNames, you can refer to the first element of the array as MonthNames(0), the second element as MonthNames(1), and so on, up to MonthNames(11).
Declaring arrays
You declare an array with a Dim or Public statement, just as you declare a regular variable. You can also specify the number of elements in the array. You do so by specifying the first index number, the keyword To, and the last index number — all inside parentheses. For example, here’s how to declare an array comprising exactly 100 integers:
Dim MyArray(1 To 100) As Integer
Tip
When you declare an array, you need to specify only the upper index, in which case VBA assumes that 0 is the lower index. Therefore, the two statements that follow have the same effect:
Dim MyArray(0 to 100) As Integer
Dim MyArray(100) As Integer
In both cases, the array consists of 101 elements.
By default, VBA assumes zero-based arrays. If you would like VBA to assume that 1 is the lower index for all arrays that declare only the upper index, include the following statement before any procedures in your module:
Option Base 1
Declaring multidimensional arrays
The array examples in the preceding section are one-dimensional arrays. VBA arrays can have up to 60 dimensions, although you’ll rarely need more than three dimensions (a 3-D array). The following statement declares a 100-integer array with two dimensions (2-D):
Dim MyArray(1 To 10, 1 To 10) As Integer
You can think of the preceding array as occupying a 10-x-10 matrix. To refer to a specific element in a 2-D array, you need to specify two index numbers. For example, here’s how you can assign a value to an element in the preceding array:
MyArray(3, 4) = 125
Following is a declaration for a 3-D array that contains 1,000 elements (visualize this array as a cube):
Dim MyArray(1 To 10, 1 To 10, 1 To 10) As Integer
Reference an item in the array by supplying three index numbers:
MyArray(4, 8, 2) = 0
Declaring dynamic arrays
A dynamic array doesn’t have a preset number of elements. You declare a dynamic array with a blank set of parentheses:
Dim MyArray() As Integer
Before you can use a dynamic array in your code, however, you must use the ReDim statement to tell VBA how many elements are in the array. You can use a variable to assign the number of elements in an array. Often the value of the variable isn’t known until the procedure is executing. For example, if the variable x contains a number, you can define the array’s size by using this statement:
ReDim MyArray (1 To x)
You can use the ReDim statement any number of times, changing the array’s size as often as you need to. When you change an array’s dimensions the existing values are destroyed. If you want to preserve the existing values, use ReDim Preserve. For example:
ReDim Preserve MyArray (1 To y)
Arrays crop up later in this chapter when we discuss looping (see the section “Looping blocks of instructions”).
Object Variables
An object variable is a variable that represents an entire object, such as a range or a worksheet. Object variables are important for two reasons:
· They can simplify your code significantly.
· They can make your code execute more quickly.
Object variables, like normal variables, are declared with the Dim or Public statement. For example, the following statement declares InputArea as a Range object variable:
Dim InputArea As Range
Use the Set keyword to assign an object to the variable. For example:
Set InputArea = Range("C16:E16")
To see how object variables simplify your code, examine the following procedure, which doesn’t use an object variable:
Sub NoObjVar()
Worksheets("Sheet1").Range("A1").Value = 124
Worksheets("Sheet1").Range("A1").Font.Bold = True
Worksheets("Sheet1").Range("A1").Font.Italic = True
Worksheets("Sheet1").Range("A1").Font.Size = 14
Worksheets("Sheet1").Range("A1").Font.Name ="Cambria"
End Sub
This routine enters a value into cell A1 of Sheet1 on the active workbook, applies some formatting, and changes the fonts and size. That’s a lot of typing. To reduce wear and tear on your fingers (and make your code more efficient), you can condense the routine with an object variable:
Sub ObjVar()
Dim MyCell As Range
Set MyCell = Worksheets("Sheet1").Range("A1")
MyCell.Value = 124
MyCell.Font.Bold = True
MyCell.Font.Italic = True
MyCell.Font.Size = 14
MyCell.Font.Name ="Cambria"
End Sub
After the variable MyCell is declared as a Range object, the Set statement assigns an object to it. Subsequent statements can then use the simpler MyCell reference in place of the lengthy Worksheets("Sheet1").Range("A1") reference.
 Tip
Tip
After an object is assigned to a variable, VBA can access it more quickly than it can a normal, lengthy reference that has to be resolved. So when speed is critical, use object variables. One way to think about code efficiency is in terms of dot processing.Every time VBA encounters a dot, as in Sheets(1).Range("A1"), it takes time to resolve the reference. Using an object variable reduces the number of dots to be processed. The fewer the dots, the faster the processing time. Another way to improve the speed of your code is by using the With-End With construct, which also reduces the number of dots to be processed. We discuss this construct later in this chapter.
The true value of object variables will become apparent when we discuss looping later in this chapter.
User-Defined Data Types
VBA lets you create custom, or user-defined, data types. A user-defined data type can ease your work with some types of data. For example, if your application deals with customer information, you may want to create a user-defined data type named CustomerInfo:
Type CustomerInfo
Company As String
Contact As String
RegionCode As Long
Sales As Double
End Type
 Note
Note
You define custom data types at the top of your module, before any procedures.
After you create a user-defined data type, you use a Dim statement to declare a variable as that type. Usually, you define an array. For example:
Dim Customers(1 To 100) As CustomerInfo
Each of the 100 elements in this array consists of four components (as specified by the user-defined data type, CustomerInfo). You can refer to a particular component of the record as follows:
Customers(1).Company ="Acme Tools"
Customers(1).Contact ="Tim Robertson"
Customers(1).RegionCode = 3
Customers(1).Sales = 150674.98
You can also work with an element in the array as a whole. For example, to copy the information from Customers(1) to Customers(2), use this instruction:
Customers(2) = Customers(1)
The preceding example is equivalent to the following instruction block:
Customers(2).Company = Customers(1).Company
Customers(2).Contact = Customers(1).Contact
Customers(2).RegionCode = Customers(1).RegionCode
Customers(2).Sales = Customers(1).Sales
Built-In Functions
Like most programming languages, VBA has a variety of built-in functions that simplify calculations and operations. Many VBA functions are similar (or identical) to Excel worksheet functions. For example, the VBA function UCase, which converts a string argument to uppercase, is equivalent to the Excel worksheet function UPPER.
 Appendix A contains a complete list of VBA functions, with a brief description of each. All are thoroughly described in the VBA Help system.
To get a list of VBA functions while you’re writing your code, type VBA followed by a period (.).VBE displays a list of all its members, including functions (see Figure 3.3). The functions are preceded by a green icon. If this technique doesn’t work for you, make sure that the Auto List Members option is selected. Choose Tools ➜ Options and then click the Editor tab.
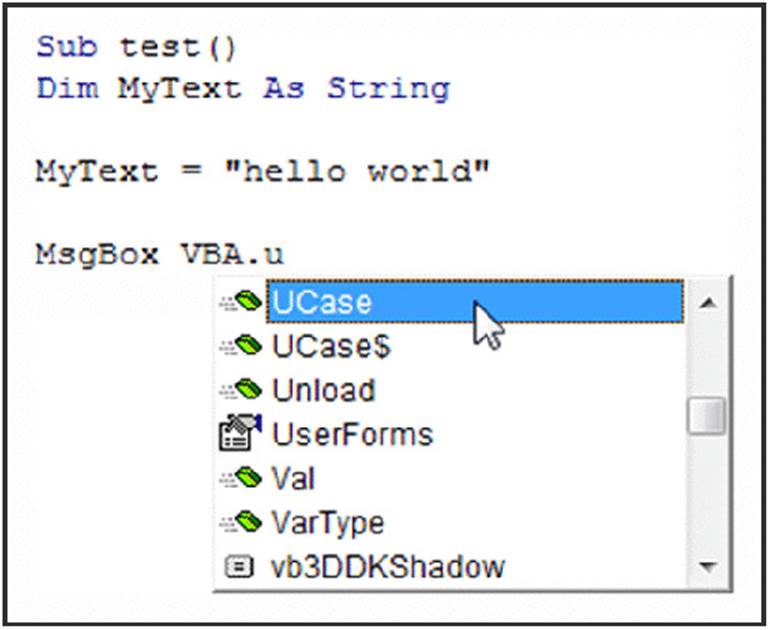
Figure 3.3 Displaying a list of VBA functions in VBE.
You use functions in VBA expressions in much the same way that you use functions in worksheet formulas. Here’s a simple procedure that calculates the square root of a variable (using the VBA Sqr function), stores the result in another variable, and then displays the result:
Sub ShowRoot()
Dim MyValue As Double
Dim SquareRoot As Double
MyValue = 25
SquareRoot = Sqr(MyValue)
MsgBox SquareRoot
End Sub
The VBA Sqr function is equivalent to the Excel SQRT worksheet function.
You can use many (but not all) of Excel’s worksheet functions in your VBA code. The WorksheetFunction object, which is contained in the Application object, holds all the worksheet functions that you can call from your VBA procedures.
To use a worksheet function in a VBA statement, just precede the function name with:
Application.WorksheetFunction
The following example demonstrates how to use an Excel worksheet function in a VBA procedure. Excel’s infrequently used ROMAN function converts a decimal number into a roman numeral.
Sub ShowRoman()
Dim DecValue As Long
Dim RomanValue As String
DecValue = 1939
RomanValue = Application.WorksheetFunction.Roman(DecValue)
MsgBox RomanValue
End Sub
When you execute this procedure, the MsgBox function displays the string MCMXXXIX.
Keep in mind that you can’t use worksheet functions that have an equivalent VBA function. For example, VBA can’t access the Excel SQRT worksheet function because VBA has its own version of that function: Sqr. Therefore, the following statement generates an error:
MsgBox Application.WorksheetFunction.Sqrt(123) 'error
Cross-Ref
You will discover, in Chapter 5 that you can use VBA to create custom worksheet functions that work just like Excel’s built-in worksheet functions.
 The MsgBox function
The MsgBox function is one of the most useful VBA functions. Many of the examples in this chapter use this function to display the value of a variable.
This function often is a good substitute for a simple custom dialog box. It’s also a useful debugging tool because you can insert MsgBox functions at any time to pause your code and display the result of a calculation or an assignment.
Most functions return a single value, which you assign to a variable. The MsgBox function not only returns a value but also displays a dialog box to which the user can respond. The value returned by the MsgBox function represents the user’s response to the dialog box. You can use the MsgBox function even when you have no interest in the user’s response but want to take advantage of the message display.
The official syntax of the MsgBox function has five arguments (those in square brackets are optional):
MsgBox(prompt[, buttons][, title][, helpfile, context])
· prompt: Required. The message displayed in the pop-up display.
· buttons: Optional. A value that specifies which buttons and which icons, if any, appear in the message box. Use built-in constants — for example, vbYesNo.
· title: Optional. The text that appears in the message box’s title bar. The default is Microsoft Excel.
· helpfile: Optional. The name of the Help file associated with the message box.
· context: Optional. The context ID of the Help topic, which represents a specific Help topic to display. If you use the context argument, you must also use the helpfile argument.
You can assign the value returned to a variable, or you can use the function by itself without an assignment statement. This example assigns the result to the variable Ans:
Dim Ans As Long
Ans = MsgBox("Continue?", vbYesNo + vbQuestion,"Tell me")
If Ans = vbNo Then Exit Sub
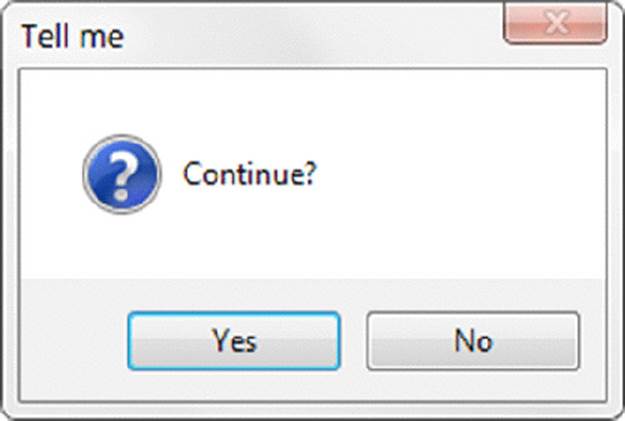
Note that we used the sum of two built-in constants (vbYesNo + vbQuestion) for the buttons argument. Using vbYesNo displays two buttons in the message box: one labeled Yes and one labeled No. Adding vbQuestion to the argument also displays a question mark icon. When the first statement is executed, Ans contains one of two values, represented by the constant vbYes or vbNo. In this example, if the user clicks the No button, the procedure ends.
See Chapter 12 for more information about the MsgBox function.
Manipulating Objects and Collections
As an Excel programmer, you’ll spend a lot of time working with objects and collections. Therefore, you want to know the most efficient ways to write your code to manipulate these objects and collections. VBA offers two important constructs that can simplify working with objects and collections:
· With-End With constructs
· For Each-Next constructs
With-End With constructs
The With-End With construct enables you to perform multiple operations on a single object. To start understanding how the With-End With construct works, examine the following procedure, which modifies six properties of a selection’s formatting (the selection is assumed to be a Range object):
Sub ChangeFont1()
Selection.Font.Name ="Cambria"
Selection.Font.Bold = True
Selection.Font.Italic = True
Selection.Font.Size = 12
Selection.Font.Underline = xlUnderlineStyleSingle
Selection.Font.ThemeColor = xlThemeColorAccent1
End Sub
You can rewrite this procedure using the With-End With construct. The following procedure performs exactly like the preceding one:
Sub ChangeFont2()
With Selection.Font
.Name ="Cambria"
.Bold = True
.Italic = True
.Size = 12
.Underline = xlUnderlineStyleSingle
.ThemeColor = xlThemeColorAccent1
End With
End Sub
Some people think that the second incarnation of the procedure is more difficult to read. Remember, though, that the objective is increased speed. Although the first version may be more straightforward and easier to understand, a procedure that uses the With-End With construct to change several properties of an object can be faster than the equivalent procedure that explicitly references the object in each statement.
Note
When you record a VBA macro, Excel uses the With-End With construct every chance it gets. To see a good example of this construct, try recording your actions while you change the page orientation using the Page Layout ➜ Page Setup ➜ Orientation command.
For Each-Next constructs
Recall from the preceding chapter that a collection is a group of related objects. For example, the Workbooks collection is a collection of all open Workbook objects. You can also work with many other collections.
Suppose that you want to perform some action on all objects in a collection. Or suppose that you want to evaluate all objects in a collection and take action under certain conditions. These occasions are perfect for the For Each-Next construct because you don’t have to know how many elements are in a collection to use the For Each-Next construct.
The syntax of the For Each-Next construct is:
For Each element In collection
[instructions]
[Exit For]
[instructions]
Next [element]
The following procedure uses the For Each-Next construct with the Worksheets collection in the active workbook. When you execute the procedure, the MsgBox function displays each worksheet’s Name property. (If five worksheets are in the active workbook, the MsgBoxfunction is called five times.)
Sub CountSheets()
Dim Item as Worksheet
For Each Item In ActiveWorkbook.Worksheets
MsgBox Item.Name
Next Item
End Sub
Note
In the preceding example, Item is an object variable (more specifically, a Worksheet object). There’s nothing special about the name Item; you can use any valid variable name in its place.
The next example uses For Each-Next to cycle through all objects in the Windows collection and count the number of windows that are hidden:
Sub HiddenWindows()
Dim Cnt As Integer
Dim Win As Window
Cnt = 0
For Each Win In Windows
If Not Win.Visible Then Cnt = Cnt + 1
Next Win
MsgBox Cnt &" hidden windows."
End Sub
For each window, if the window is hidden, the Cnt variable is incremented. When the loop ends, the message box displays the value of Cnt.
Here’s an example that closes all workbooks except the active workbook. This procedure uses the If-Then construct to evaluate each workbook in the Workbooks collection:
Sub CloseInactive()
Dim Book as Workbook
For Each Book In Workbooks
If Book.Name <> ActiveWorkbook.Name Then Book.Close
Next Book
End Sub
A common use for the For Each-Next construct is to loop through all cells in a range. The next example of For Each-Next is designed to be executed after the user selects a range of cells. Here, the Selection object acts as a collection that consists of Range objects because each cell in the selection is a Range object. The procedure evaluates each cell and uses the VBA UCase function to convert its contents to uppercase. (Numeric cells are not affected.)
Sub MakeUpperCase()
Dim Cell as Range
For Each Cell In Selection
Cell.Value = UCase(Cell.Value)
Next Cell
End Sub
VBA provides a way to exit a For-Next loop before all the elements in the collection are evaluated. Do this with an Exit For statement. The example that follows selects the first negative value in Row 1 of the active sheet:
Sub SelectNegative()
Dim Cell As Range
For Each Cell In Range("1:1")
If Cell.Value < 0 Then
Cell.Select
Exit For
End If
Next Cell
End Sub
This example uses an If-Then construct to check the value of each cell. If a cell is negative, it’s selected, and then the loop ends when the Exit For statement is executed.
Controlling Code Execution
Some VBA procedures start at the top and progress line by line to the bottom. Macros that you record, for example, always work in this fashion. Often, however, you need to control the flow of your routines by skipping over some statements, executing some statements multiple times, and testing conditions to determine what the routine does next.
The preceding section describes the For Each-Next construct, which is a type of loop. This section discusses the additional ways of controlling the execution of your VBA procedures:
· GoTo statements
· If-Then constructs
· Select Case constructs
· For-Next loops
· Do While loops
· Do Until loops
GoTo statements
The most straightforward way to change the flow of a program is to use a GoTo statement. This statement simply transfers program execution to a new instruction, which must be preceded by a label (a text string followed by a colon, or a number with no colon). VBA procedures can contain any number of labels, but a GoTo statement can’t branch outside a procedure.
The following procedure uses the VBA InputBox function to get the user’s name. If the name is not Howard, the procedure branches to the WrongName label and ends. Otherwise, the procedure executes some additional code. The Exit Sub statement causes the procedure to end.
Sub GoToDemo()
UserName = InputBox("Enter Your Name:")
If UserName <>"Howard" Then GoTo WrongName
MsgBox ("Welcome Howard...")
' -[More code here] -
Exit Sub
WrongName:
MsgBox"Sorry. Only Howard can run this macro."
End Sub
This simple procedure works, but it’s not an example of good programming. In general, you should use the GoTo statement only when you have no other way to perform an action. In fact, the only time you really need to use a GoTo statement in VBA is for error handling (refer to Chapter 4).
Finally, it goes without saying that the preceding example is not intended to demonstrate an effective security technique!
If-Then constructs
Perhaps the most commonly used instruction grouping in VBA is the If-Then construct. This common instruction is one way to endow your applications with decision-making capability. Good decision-making is the key to writing successful programs.
The basic syntax of the If-Then construct is:
If condition Then true_instructions [Else false_instructions]
The If-Then construct is used to execute one or more statements conditionally. The Else clause is optional. If included, the Else clause lets you execute one or more instructions when the condition that you’re testing isn’t True.
The following procedure demonstrates an If-Then structure without an Else clause. The example deals with time, and VBA uses a date-and-time serial number system similar to Excel’s. The time of day is expressed as a fractional value — for example, noon is represented as .5. The VBA Time function returns a value that represents the time of day, as reported by the system clock. In the following example, a message is displayed if the time is before noon. If the current system time is greater than or equal to .5, the procedure ends, and nothing happens.
Sub GreetMe1()
If Time < 0.5 Then MsgBox"Good Morning"
End Sub
Another way to code this routine is to use multiple statements, as follows:
Sub GreetMe1a()
If Time < 0.5 Then
MsgBox"Good Morning"
End If
End Sub
Note that the If statement has a corresponding End If statement. In this example, only one statement is executed if the condition is True. You can, however, place any number of statements between the If and End If statements.
If you want to display a different greeting when the time of day is after noon, add another If-Then statement, like so:
Sub GreetMe2()
If Time < 0.5 Then MsgBox"Good Morning"
If Time >= 0.5 Then MsgBox"Good Afternoon"
End Sub
Notice that we used >= (greater than or equal to) for the second If-Then statement. This covers the remote chance that the time is precisely 12:00 noon.
Another approach is to use the Else clause of the If-Then construct. For example,
Sub GreetMe3()
If Time < 0.5 Then MsgBox"Good Morning" Else _
MsgBox"Good Afternoon"
End Sub
Notice that we used the line continuation sequence; If-Then-Else is actually a single statement.
If you need to execute multiple statements based on the condition, use this form:
Sub GreetMe3a()
If Time < 0.5 Then
MsgBox"Good Morning"
' Other statements go here
Else
MsgBox"Good Afternoon"
' Other statements go here
End If
End Sub
If you need to expand a routine to handle three conditions (for example, morning, afternoon, and evening), you can use either three If-Then statements or a form that uses ElseIf. The first approach is simpler:
Sub GreetMe4()
If Time < 0.5 Then MsgBox"Good Morning"
If Time >= 0.5 And Time < 0.75 Then MsgBox"Good Afternoon"
If Time >= 0.75 Then MsgBox"Good Evening"
End Sub
The value 0.75 represents 6:00 p.m. — three-quarters of the way through the day and a good point at which to call it an evening.
In the preceding examples, every instruction in the procedure gets executed, even if the first condition is satisfied (that is, it’s morning). A more efficient procedure would include a structure that ends the routine when a condition is found to be True. For example, it might display the Good Morning message in the morning and then exit without evaluating the other, superfluous conditions. True, the difference in speed is inconsequential when you design a procedure as small as this routine. But for more complex applications, you need another syntax:
If condition Then
[true_instructions]
[ElseIf condition-n Then
[alternate_instructions]]
[Else
[default_instructions]]
End If
Here’s how you can use this syntax to rewrite the GreetMe procedure:
Sub GreetMe5()
If Time < 0.5 Then
MsgBox"Good Morning"
ElseIf Time >= 0.5 And Time < 0.75 Then
MsgBox"Good Afternoon"
Else
MsgBox"Good Evening"
End If
End Sub
With this syntax, when a condition is True, the conditional statements are executed, and the If-Then construct ends. In other words, the extraneous conditions aren’t evaluated. Although this syntax makes for greater efficiency, some find the code to be more difficult to understand.
The following procedure demonstrates yet another way to code this example. It uses nested If-Then-Else constructs (without using ElseIf). This procedure is efficient and also easy to understand. Note that each If statement has a corresponding End If statement.
Sub GreetMe6()
If Time < 0.5 Then
MsgBox"Good Morning"
Else
If Time >= 0.5 And Time < 0.75 Then
MsgBox"Good Afternoon"
Else
If Time >= 0.75 Then
MsgBox"Good Evening"
End If
End If
End If
End Sub
The following is another example that uses the simple form of the If-Then construct. This procedure prompts the user for a value for Quantity and then displays the appropriate discount based on that value. Note that Quantity is declared as a Variant data type. This is because Quantity contains an empty string (not a numeric value) if InputBox is cancelled. To keep the procedure simple, it doesn’t perform any other error checking. For example, it doesn’t ensure that the quantity entered is a non-negative numeric value.
Sub Discount1()
Dim Quantity As Variant
Dim Discount As Double
Quantity = InputBox("Enter Quantity:")
If Quantity ="" Then Exit Sub
If Quantity >= 0 Then Discount = 0.1
If Quantity >= 25 Then Discount = 0.15
If Quantity >= 50 Then Discount = 0.2
If Quantity >= 75 Then Discount = 0.25
MsgBox"Discount:" & Discount
End Sub
Notice that each If-Then statement in this procedure is always executed, and the value for Discount can change. The final value, however, is the desired value.
The following procedure is the previous one rewritten to use the alternate syntax. In this case, the procedure ends after executing the True instruction block.
Sub Discount2()
Dim Quantity As Variant
Dim Discount As Double
Quantity = InputBox("Enter Quantity:")
If Quantity ="" Then Exit Sub
If Quantity >= 0 And Quantity < 25 Then
Discount = 0.1
ElseIf Quantity < 50 Then
Discount = 0.15
ElseIf Quantity < 75 Then
Discount = 0.2
Else
Discount = 0.25
End If
MsgBox"Discount:" & Discount
End Sub
VBA’s IIf function
VBA offers an alternative to the If-Then construct: the IIf function. This function takes three arguments and works much like Excel’s IF worksheet function. The syntax is:
IIf(expr, truepart, falsepart)
· expr: (Required) Expression you want to evaluate.
· truepart: (Required) Value or expression returned if expr is True.
· falsepart: (Required) Value or expression returned if expr is False.
The following instruction demonstrates the use of the IIf function. The message box displays Zero if cell A1 contains a 0 or is empty and displays Nonzero if cell A1 contains anything else.
MsgBox IIf(Range("A1") = 0,"Zero","Nonzero")
It’s important to understand that the third argument (falsepart) is always evaluated, even if the first argument (expr) is True. Therefore, the following statement generates a Division By Zero error if the value of n is 0 (zero):
MsgBox IIf(n = 0, 0, 1 / n)
Select Case constructs
The Select Case construct is useful for choosing among three or more options. This construct also works with two options and is a good alternative to If-Then-Else. The syntax for Select Case is as follows:
Select Case testexpression
[Case expressionlist-n
[instructions-n]]
[Case Else
[default_instructions]]
End Select
The following example of a Select Case construct shows another way to code the GreetMe examples presented in the preceding section:
Sub GreetMe()
Dim Msg As String
Select Case Time
Case Is < 0.5
Msg ="Good Morning"
Case 0.5 To 0.75
Msg ="Good Afternoon"
Case Else
Msg ="Good Evening"
End Select
MsgBox Msg
End Sub
And here’s a rewritten version of the Discount example using a Select Case construct. This procedure assumes that Quantity is always an integer value. For simplicity, the procedure performs no error checking.
Sub Discount3()
Dim Quantity As Variant
Dim Discount As Double
Quantity = InputBox("Enter Quantity:")
Select Case Quantity
Case""
Exit Sub
Case 0 To 24
Discount = 0.1
Case 25 To 49
Discount = 0.15
Case 50 To 74
Discount = 0.2
Case Is >= 75
Discount = 0.25
End Select
MsgBox"Discount:" & Discount
End Sub
The Case statement also can use a comma to separate multiple values for a single case. The following procedure uses the VBA WeekDay function to determine whether the current day is a weekend (that is, the Weekday function returns 1 or 7). The procedure then displays an appropriate message.
Sub GreetUser1()
Select Case Weekday(Now)
Case 1, 7
MsgBox"This is the weekend"
Case Else
MsgBox"This is not the weekend"
End Select
End Sub
The following example shows another way to code the previous procedure:
Sub GreetUser2()
Select Case Weekday(Now)
Case 2, 3, 4, 5, 6
MsgBox"This is not the weekend"
Case Else
MsgBox"This is the weekend"
End Select
End Sub
Here’s another way to code the procedure, using the To keyword to specify a range of values.
Sub GreetUser3()
Select Case Weekday(Now)
Case 2 To 6
MsgBox"This is not the weekend"
Case Else
MsgBox"This is the weekend"
End Select
End Sub
And to demonstrate the flexibility of VBA, a final example in which each case is evaluated until one of the expressions evaluates to True:
Sub GreetUser4()
Select Case True
Case Weekday(Now) = 1
MsgBox"This is the weekend"
Case Weekday(Now) = 7
MsgBox"This is the weekend"
Case Else
MsgBox"This is not the weekend"
End Select
End Sub
Any number of instructions can be written below each Case statement, and they’re all executed if that case evaluates to True. If you use only one instruction per case, as in the preceding example, you might want to put the instruction on the same line as the Casekeyword (but don’t forget the VBA statement-separator character, the colon). This technique makes the code more compact. For example:
Sub Discount3()
Dim Quantity As Variant
Dim Discount As Double
Quantity = InputBox("Enter Quantity:")
Select Case Quantity
Case"": Exit Sub
Case 0 To 24: Discount = 0.1
Case 25 To 49: Discount = 0.15
Case 50 To 74: Discount = 0.2
Case Is >= 75: Discount = 0.25
End Select
MsgBox"Discount:" & Discount
End Sub
Tip
VBA exits a Select Case construct as soon as a True case is found. Therefore, for maximum efficiency, you should check the most likely case first.
Select Case structures can also be nested. The following procedure, for example, uses the VBA TypeName function to determine what is selected (a range, nothing, or anything else). If a range is selected, the procedure executes a nested Select Case and tests for the number of cells in the range. If one cell is selected, it displays One cell is selected. Otherwise, it displays a message with the number of selected rows.
Sub SelectionType()
Select Case TypeName(Selection)
Case"Range"
Select Case Selection.Count
Case 1
MsgBox"One cell is selected"
Case Else
MsgBox Selection.Rows.Count &" rows"
End Select
Case"Nothing"
MsgBox"Nothing is selected"
Case Else
MsgBox"Something other than a range"
End Select
End Sub
This procedure also demonstrates the use of Case Else, a catch-all case. You can nest Select Case constructs as deeply as you need, but make sure that each Select Case statement has a corresponding End Select statement.
This procedure demonstrates the value of using indentation in your code to clarify the structure. For example, take a look at the same procedure without the indentations:
Sub SelectionType()
Select Case TypeName(Selection)
Case"Range"
Select Case Selection.Count
Case 1
MsgBox"One cell is selected"
Case Else
MsgBox Selection.Rows.Count &" rows"
End Select
Case"Nothing"
MsgBox"Nothing is selected"
Case Else
MsgBox"Something other than a range"
End Select
End Sub
Fairly incomprehensible, eh?
Looping blocks of instructions
Looping is the process of repeating a block of instructions. You might know the number of times to loop, or the number may be determined by the values of variables in your program.
The following code, which enters consecutive numbers into a range, demonstrates what is considered to be a bad loop. The procedure uses two variables to store a starting value (StartVal) and the total number of cells to fill (NumToFill). This loop uses the GoTostatement to control the flow. If the Cnt variable, which keeps track of how many cells are filled, is less than the value of NumToFill, the program control loops back to DoAnother.
Sub BadLoop()
Dim StartVal As Integer
Dim NumToFill As Integer
Dim Cnt As Integer
StartVal = 1
NumToFill = 100
ActiveCell.Value = StartVal
Cnt = 1
DoAnother:
ActiveCell.Offset(Cnt, 0).Value = StartVal + Cnt
Cnt = Cnt + 1
If Cnt < NumToFill Then GoTo DoAnother Else Exit Sub
End Sub
This procedure works as intended, so why is it an example of bad looping? Programmers generally frown on using a GoTo statement when not absolutely necessary. Using GoTo statements to loop is contrary to the concept of structured coding. (See the “What is structured programming?” sidebar.) A GoTo statement makes the code much more difficult to read because representing a loop using line indentations is almost impossible. In addition, this type of unstructured loop makes the procedure more susceptible to error. Furthermore, using lots of labels results in spaghetti code — code that appears to have little or no structure and has a tangled flow.
Because VBA has several structured looping commands, you almost never have to rely on GoTo statements for your decision-making.
For-Next loops
The simplest type of a good loop is a For-Next loop. Its syntax is:
For counter = start To end [Step stepval]
[instructions]
[Exit For]
[instructions]
Next [counter]
What is structured programming?
Hang around with programmers, and sooner or later you’ll hear the term structured programming. You’ll also discover that structured programs are considered superior to unstructured programs.
So what is structured programming? And can you do it with VBA?
The basic premise of structured programming is that a routine or code segment should have only one entry point and one exit point. In other words, a body of code should be a stand-alone unit, and program control should not jump into or exit from the middle of this unit. As a result, structured programming rules out the GoTo statement. When you write structured code, your program progresses in an orderly manner and is easy to follow — as opposed to spaghetti code, in which a program jumps around.
A structured program is easier to read and understand than an unstructured one. More important, it’s also easier to modify.
VBA is a structured language. It offers standard structured constructs, such as If-Then-Else and Select Case and the For-Next, Do Until, and Do While loops. Furthermore, VBA fully supports modular code construction.
If you’re new to programming, form good structured programming habits early.
Following is an example of a For-Next loop that doesn’t use the optional Step value or the optional Exit For statement. This routine executes the Sum = Sum + Sqr(Count) statement 100 times and displays the result — that is, the sum of the square roots of the first 100 integers.
Sub SumSquareRoots()
Dim Sum As Double
Dim Count As Integer
Sum = 0
For Count = 1 To 100
Sum = Sum + Sqr(Count)
Next Count
MsgBox Sum
End Sub
In this example, Count (the loop counter variable) starts out as 1 and increases by 1 each time the loop repeats. The Sum variable simply accumulates the square roots of each value of Count.
 Caution
When you use For-Next loops, it’s important to understand that the loop counter is a normal variable — nothing special. As a result, it’s possible to change the value of the loop counter in the block of code executed between the For and Next statements. Changing the loop counter inside a loop, however, is a bad practice and can cause unpredictable results. You should take precautions to ensure that your code doesn’t change the loop counter.
You can also use a Step value to skip some values in the loop. Here’s the same procedure rewritten to sum the square roots of the odd numbers between 1 and 100:
Sub SumOddSquareRoots()
Dim Sum As Double
Dim Count As Integer
Sum = 0
For Count = 1 To 100 Step 2
Sum = Sum + Sqr(Count)
Next Count
MsgBox Sum
End Sub
In this procedure, Count starts out as 1 and then takes on values of 3, 5, 7, and so on. The final value of Count used in the loop is 99. When the loop ends, the value of Count is 101.
A Step value in a For-Next loop can also be negative. The procedure that follows deletes Rows 2, 4, 6, 8, and 10 of the active worksheet:
Sub DeleteRows()
Dim RowNum As Long
For RowNum = 10 To 2 Step -2
Rows(RowNum).Delete
Next RowNum
End Sub
You may wonder why we used a negative Step value in the DeleteRows procedure. If you use a positive Step value, as shown in the following procedure, incorrect rows are deleted. That’s because the rows below a deleted row get a new row number. For example, when Row 2 is deleted, Row 3 becomes the new Row 2. Using a negative Step value ensures that the correct rows are deleted.
Sub DeleteRows2()
Dim RowNum As Long
For RowNum = 2 To 10 Step 2
Rows(RowNum).Delete
Next RowNum
End Sub
The following procedure performs the same task as the BadLoop example at the beginning of the “Looping blocks of instructions” section. We eliminate the GoTo statement, however, converting a bad loop into a good loop that uses the For-Next structure.
Sub GoodLoop()
Dim StartVal As Integer
Dim NumToFill As Integer
Dim Cnt As Integer
StartVal = 1
NumToFill = 100
For Cnt = 0 To NumToFill - 1
ActiveCell.Offset(Cnt, 0).Value = StartVal + Cnt
Next Cnt
End Sub
For-Next loops can also include one or more Exit For statements in the loop. When this statement is encountered, the loop terminates immediately and control passes to the statement following the Next statement of the current For-Next loop. The following example demonstrates the use of the Exit For statement. This procedure determines which cell has the largest value in Column A of the active worksheet:
Sub ExitForDemo()
Dim MaxVal As Double
Dim Row As Long
MaxVal = Application.WorksheetFunction.Max(Range("A:A"))
For Row = 1 To 1048576
If Cells(Row, 1).Value = MaxVal Then
Exit For
End If
Next Row
MsgBox"Max value is in Row" & Row
Cells(Row, 1).Activate
End Sub
The maximum value in the column is calculated by using the Excel MAX function, and the value is assigned to the MaxVal variable. The For-Next loop checks each cell in the column. If the cell being checked is equal to MaxVal, the Exit For statement terminates the loop and the statements following the Next statement are executed. These statements display the row of the maximum value and activate the cell.
Note
The ExitForDemo procedure is presented to demonstrate how to exit from a For-Next loop. However, it’s not the most efficient way to activate the largest value in a range. In fact, a single statement does the job:
Range("A:A").Find(Application.WorksheetFunction.Max _
(Range("A:A"))).Activate
The previous examples use relatively simple loops. But you can have any number of statements in the loop, and you can even nest For-Next loops inside other For-Next loops. Here’s an example that uses nested For-Next loops to initialize a 10 x 10 x 10 array with the value –1. When the procedure is finished, each of the 1,000 elements in MyArray contains –1.
Sub NestedLoops()
Dim MyArray(1 to 10, 1 to 10, 1 to 10)
Dim i As Integer, j As Integer, k As Integer
For i = 1 To 10
For j = 1 To 10
For k = 1 To 10
MyArray(i, j, k) = -1
Next k
Next j
Next i
' [More code goes here]
End Sub
Do While loops
This section describes another type of looping structure available in VBA. Unlike a For-Next loop, a Do While loop executes as long as a specified condition is met.
A Do While loop can have either of two syntaxes:
Do [While condition]
[instructions]
[Exit Do]
[instructions]
Loop
or
Do
[instructions]
[Exit Do]
[instructions]
Loop [While condition]
As you can see, VBA lets you put the While condition at the beginning or the end of the loop. The difference between these two syntaxes involves the point at which the condition is evaluated. In the first syntax, the contents of the loop may never be executed. In the second syntax, the statements inside the loop are always executed at least one time.
The following examples insert a series of dates into the active worksheet. The dates correspond to the days in the current month, and the dates are entered in a column beginning at the active cell.
Note
These examples use some VBA date-related functions:
Date returns the current date.
Month returns the month number for a date supplied as its argument.
DateSerial returns a date for the year, month, and day supplied as arguments.
The first example demonstrates a Do While loop that tests the condition at the beginning of the loop: The EnterDates1 procedure writes the dates of the current month to a worksheet column, beginning with the active cell.
Sub EnterDates1()
' Do While, with test at the beginning
Dim TheDate As Date
TheDate = DateSerial(Year(Date), Month(Date), 1)
Do While Month(TheDate) = Month(Date)
ActiveCell = TheDate
TheDate = TheDate + 1
ActiveCell.Offset(1, 0).Activate
Loop
End Sub
This procedure uses a variable, TheDate, which contains the dates that are written to the worksheet. This variable is initialized with the first day of the current month. Inside the loop, the value of TheDate is entered into the active cell, TheDate is incremented, and the next cell is activated. The loop continues while the month of TheDate is the same as the month of the current date.
The following procedure has the same result as the EnterDates1 procedure, but it uses the second Do While loop syntax, which checks the condition at the end of the loop.
Sub EnterDates2()
' Do While, with test at the end
Dim TheDate As Date
TheDate = DateSerial(Year(Date), Month(Date), 1)
Do
ActiveCell = TheDate
TheDate = TheDate + 1
ActiveCell.Offset(1, 0).Activate
Loop While Month(TheDate) = Month(Date)
End Sub
Do While loops can also contain one or more Exit Do statements. When an Exit Do statement is encountered, the loop ends immediately and control passes to the statement following the Loop statement.
Do Until loops
The Do Until loop structure is similar to the Do While structure. The difference is evident only when the condition is tested. In a Do While loop, the loop executes while the condition is True; in a Do Until loop, the loop executes until the condition is True.
Do Until also has two syntaxes:
Do [Until condition]
[instructions]
[Exit Do]
[instructions]
Loop
or
Do
[instructions]
[Exit Do]
[instructions]
Loop [Until condition]
The two examples that follow perform the same action as the Do While date entry examples in the previous section. The difference in these two procedures is where the condition is evaluated (at the beginning or the end of the loop). Here is the first example:
Sub EnterDates3()
' Do Until, with test at beginning
Dim TheDate As Date
TheDate = DateSerial(Year(Date), Month(Date), 1)
Do Until Month(TheDate) <> Month(Date)
ActiveCell = TheDate
TheDate = TheDate + 1
ActiveCell.Offset(1, 0).Activate
Loop
End Sub
Here is the second example:
Sub EnterDates4()
' Do Until, with test at end
Dim TheDate As Date
TheDate = DateSerial(Year(Date), Month(Date), 1)
Do
ActiveCell = TheDate
TheDate = TheDate + 1s
ActiveCell.Offset(1, 0).Activate
Loop Until Month(TheDate) <> Month(Date)
End Sub
The following example was originally presented for the Do While loop but has been rewritten to use a Do Until loop. The only difference is the line with the Do statement. This example makes the code a bit clearer because it avoids the negative required in the Do Whileexample.
Sub DoUntilDemo1()
Dim LineCt As Long
Dim LineOfText As String
Open"c:\data\textfile.txt" For Input As #1
LineCt = 0
Do Until EOF(1)
Line Input #1, LineOfText
Range("A1").Offset(LineCt, 0) = UCase(LineOfText)
LineCt = LineCt + 1
Loop
Close #1
End Sub
Note
VBA supports yet another type of loop, While Wend. This looping structure is included primarily for compatibility purposes. Here’s how the date entry procedure looks when it’s coded to use a While Wend loop:
Sub EnterDates5()
Dim TheDate As Date
TheDate = DateSerial(Year(Date), Month(Date), 1)
While Month(TheDate) = Month(Date)
ActiveCell = TheDate
TheDate = TheDate + 1
ActiveCell.Offset(1, 0).Activate
Wend
End Sub
All materials on the site are licensed Creative Commons Attribution-Sharealike 3.0 Unported CC BY-SA 3.0 & GNU Free Documentation License (GFDL)
If you are the copyright holder of any material contained on our site and intend to remove it, please contact our site administrator for approval.
© 2016-2026 All site design rights belong to S.Y.A.