Excel 2016 Power Programming with VBA (2016)
Part I. Introduction to Excel VBA
Chapter 4. Working with VBA Sub Procedures
In This Chapter
· Declaring and creating VBA Sub procedures
· Executing procedures
· Passing arguments to a procedure
· Using error-handling techniques
· An example of developing a useful procedure
About Procedures
A procedure is a series of VBA statements that resides in a VBA module, which you access in Visual Basic Editor (VBE). A module can hold any number of procedures. A procedure holds a group of VBA statements that accomplishes a desired task. Most VBA code is contained in procedures.
You have a number of ways to call, or execute, procedures. A procedure is executed from beginning to end, but it can also be ended prematurely.
 Tip
Tip
A procedure can be any length, but many people prefer to avoid creating extremely long procedures that perform many different operations. You may find it easier to write several smaller procedures, each with a single purpose. Then, design a main procedure that calls those other procedures. This approach can make your code easier to maintain.
Some procedures are written to receive arguments. An argument is information that is used by the procedure and that is passed to the procedure when it is executed. Procedure arguments work much like the arguments that you use in Excel worksheet functions. Instructions within the procedure perform operations using these arguments, and the results of the procedure are usually based on those arguments.
 Although this chapter focuses on Sub procedures, VBA also supports Function procedures, which we discuss in Chapter 5. Chapter 7 has many additional examples of procedures, both Sub and Function, that you can incorporate into your work.
Declaring a Sub procedure
A procedure declared with the Sub keyword must adhere to the following syntax:
[Private | Public][Static] Sub name ([arglist])
[instructions]
[Exit Sub]
[instructions]
End Sub
Here’s a description of the elements that make up a Sub procedure:
· Private: Optional. Indicates that the procedure is accessible only to other procedures in the same module.
· Public: Optional. Indicates that the procedure is accessible to all other procedures in all other modules in the workbook. If used in a module that contains an Option Private Module statement, the procedure is not available outside the project.
· Static: Optional. Indicates that the procedure’s variables are preserved when the procedure ends.
· Sub: Required. The keyword that indicates the beginning of a procedure.
· name: Required. Any valid procedure name.
· arglist: Optional. Represents a list of variables, enclosed in parentheses, that receive arguments passed to the procedure. Use a comma to separate arguments. If the procedure uses no arguments, a set of empty parentheses is required.
· instructions: Optional. Represents valid VBA instructions.
· Exit Sub: Optional. Forces an immediate exit from the procedure prior to its formal completion.
· End Sub: Required. Indicates the end of the procedure.
 Note
Note
With a few exceptions, all VBA instructions in a module must be contained in procedures. Exceptions include module-level variable declarations, user-defined data type definitions, and a few other instructions that specify module-level options (for example, Option Explicit).
 Naming procedures
Every procedure must have a name. The rules governing procedure names are generally the same as those for variable names. Ideally, a procedure’s name should describe what its contained processes do. A good rule is to use a name that includes a verb and a noun (for example, ProcessDate, PrintReport, Sort_Array, or CheckFilename). Unless you’re writing a quick and dirty procedure that you’ll use once and delete, avoid meaningless names such as DoIt, Update, and Fix.
Some programmers use sentence-like names that describe the procedure (for example, WriteReportToTextFile and Get_Print_Options_ and_Print_Report).
Scoping a procedure
In the preceding chapter, we note that a variable’s scope determines the modules and procedures in which you can use the variable. Similarly, a procedure’s scope determines which other procedures can call it.
Public procedures
By default, procedures are public — that is, they can be called by other procedures in any module in the workbook. It’s not necessary to use the Public keyword, but programmers often include it for clarity. The following two procedures are both public:
Sub First()
' ... [code goes here] ...
End Sub
Public Sub Second()
' ... [code goes here] ...
End Sub
Private procedures
Private procedures can be called by other procedures in the same module but not by procedures in other modules.
Note
When a user displays the Macro dialog box (by pressing Alt+F8), Excel shows only public procedures. Therefore, if you have procedures that are designed to be called only by other procedures in the same module, you should make sure that those procedures are declared as Private. Doing so prevents the user from running these procedures from the Macro dialog box.
The following example declares a private procedure named MySub:
Private Sub MySub()
' ... [code goes here] ...
End Sub
Tip
You can force all procedures in a module to be private — even those declared with the Public keyword — by including the following statement before your first Sub statement:
Option Private Module
If you write this statement in a module, you can omit the Private keyword from your Sub declarations.
Excel’s macro recorder creates new Sub procedures called Macro1, Macro2, and so on. Unless you modify the recorded code, these procedures are all public procedures, and they will never use any arguments.
Executing Sub Procedures
In this section, we describe the various ways to execute, or call, a VBA Sub procedure:
· With the Run ➜ Run Sub/UserForm command (in the VBE menu). Or you can press the F5 shortcut key, or click the Run Sub/UserForm button on the Standard toolbar. These methods all assume that the cursor is within a procedure.
· From Excel’s Macro dialog box.
· By using the Ctrl key shortcut assigned to the procedure (assuming that you assigned one).
· By clicking, on a worksheet, a button or shape assigned to the procedure.
· From another procedure that you write. Sub and Function procedures can execute other procedures.
· From an icon added to the Quick Access toolbar.
· From a button added to the Ribbon.
· From a customized shortcut menu.
· When an event occurs, such as opening the workbook, saving the workbook, closing the workbook, changing a cell’s value, or activating a sheet.
· From the Immediate window in VBE. Just type the name of the procedure, including any arguments that may apply, and press Enter.
We discuss these methods of executing procedures in the following sections.
Note
In many cases, a procedure won’t work properly unless it’s executed in the appropriate context. For example, if a procedure is designed to work with the active worksheet, it will fail if a chart sheet is active. A good procedure incorporates code that checks for the appropriate context and exits gracefully if it can’t proceed.
Executing a procedure with the Run Sub/UserForm command
The VBE Run ➜ Run Sub/UserForm menu command is used primarily to test a procedure while you’re developing it. You would never require a user to activate VBE to execute a procedure. Choose Run ➜ Run Sub/UserForm in VBE to execute the current procedure (in other words, the procedure that contains the cursor). Or press F5, or use the Run Sub/UserForm button on the Standard toolbar.
If the cursor isn’t located within a procedure, VBE displays its Macro dialog box so that you can select a procedure to execute.
Executing a procedure from the Macro dialog box
Choose Excel’s View ➜ Macros ➜ Macros command to display the Macro dialog box, as shown in Figure 4-1. You can also press Alt+F8, or choose Developer ➜ Code ➜ Macros to access this dialog box. Use the Macros In drop-down box to limit the scope of the macros displayed (for example, show only the macros in the active workbook).
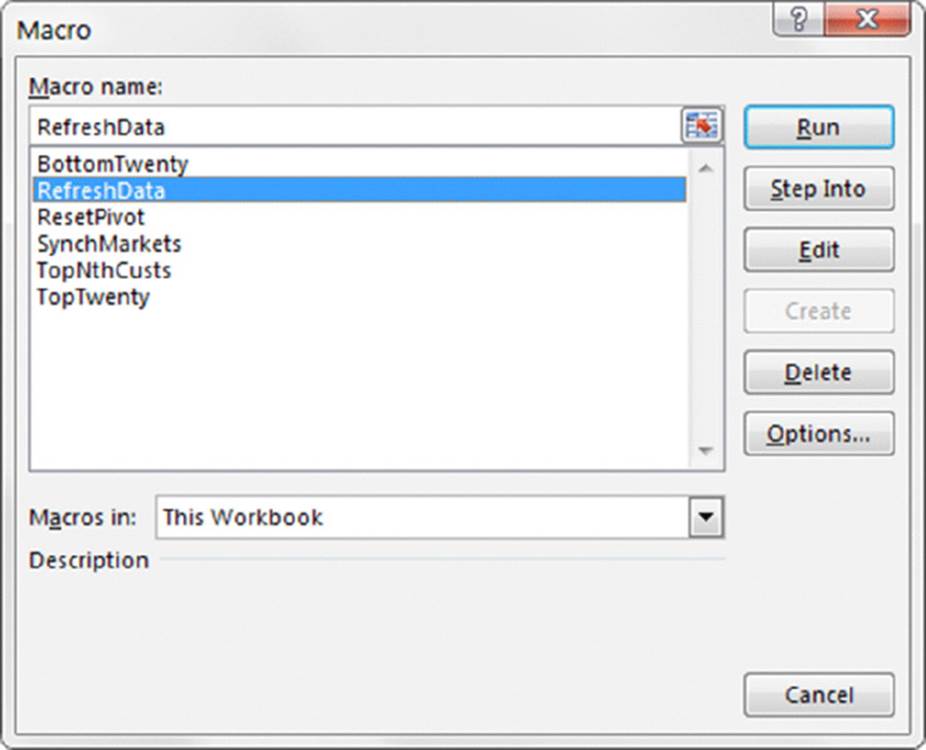
Figure 4.1 The Macro dialog box.
The Macro dialog box does not display:
· Function procedures
· Sub procedures declared with the Private keyword
· Sub procedures that require one or more arguments
· Sub procedures contained in add-ins
· Event procedures stored in code modules for objects such as ThisWorkbook, Sheet1, or UserForm1
Tip
Even though procedures stored in an add-in are not listed in the Macro dialog box, you still can execute such a procedure if you know the name. Simply type the procedure name in the Macro Name field in the Macro dialog box and then click Run.
Executing a procedure with a Ctrl+shortcut key combination
You can assign a Ctrl+shortcut key combination to any Sub procedure that doesn’t use any arguments. If you assign the Ctrl+U key combo to a procedure named UpdateCustomerList, for example, pressing Ctrl+U executes that procedure.
When you begin recording a macro, the Record Macro dialog box gives you the opportunity to assign a shortcut key. However, you can assign a shortcut key at any time. To assign a Ctrl shortcut key to a procedure (or to change a procedure’s shortcut key), follow these steps:
1. Activate Excel and display the Macro dialog box (Alt+F8 is one way to do that).
2. Select the appropriate procedure from the list box in the Macro dialog box.
3. Click the Options button to display the Macro Options dialog box (see Figure 4.2).
4. Enter a character into the Ctrl+ text box.
Note: The character that you enter into the Ctrl+ text box is case-sensitive. If you enter a lowercase s, the shortcut key combo is Ctrl+S. If you enter an uppercase S, the shortcut key combo is Ctrl+Shift+S.
5. Enter a description (optional). If you enter a description for a macro, it’s displayed at the bottom of the Macro dialog box when the procedure is selected in the list box.
6. Click OK to close the Macro Options dialog box and then click Cancel to close the Macro dialog box.
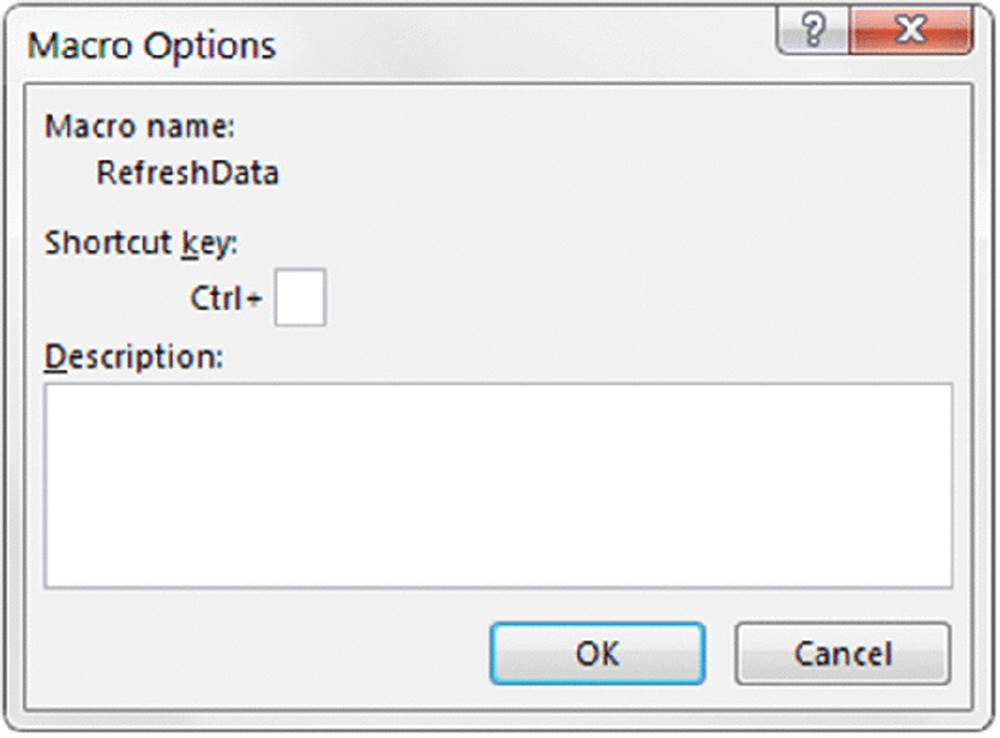
Figure 4.2 The Macro Options dialog box lets you assign a Ctrl key shortcut and an optional description to a procedure.
 Caution
If you assign one of Excel’s predefined shortcut key combinations to a procedure, your key assignment takes precedence over the predefined key assignment. For example, Ctrl+S is the Excel predefined shortcut key for saving the active workbook. But if you assign Ctrl+S to a procedure, pressing Ctrl+S no longer saves the active workbook when that macro is available.
Tip
The following keyboard keys are not used by Excel 2016 for Ctrl+key combinations: J, M, and Q. Excel doesn’t use too many Ctrl+Shift+key combinations, and they are used for obscure commands.
Executing a procedure from the Ribbon
Excel’s Ribbon user interface was introduced in Excel 2007. In that version, customizing the Ribbon required writing XML code to add a new button (or other control) to the Ribbon. Note that you modify the Ribbon in this way outside of Excel, and you can’t do it using VBA.
Beginning with Excel 2010, users can modify the Ribbon directly from Excel. Just right-click any part of the Ribbon and choose Customize the Ribbon from the shortcut menu. It’s a simple matter to add a new control to the Ribbon and assign a VBA macro to the control. However, this must be done manually. In other words, it’s not possible to use VBA to add a control to the Ribbon.
Cross-Ref
Refer to Chapter 17 for more information about customizing the Ribbon.
Executing a procedure from a customized shortcut menu
You can also execute a macro by clicking a menu item in a customized shortcut menu. A shortcut menu appears when you right-click an object or range in Excel. It’s fairly easy to write VBA code that adds a new item to any of Excel’s shortcut menus.
Refer to Chapter 18 for more information about customizing shortcut menus.
Executing a procedure from another procedure
One of the most common ways to execute a procedure is to call it from another VBA procedure. You have three ways to do this:
· Enter the procedure’s name, followed by its arguments (if any) separated by commas. Do not enclose the argument list in parentheses.
· Use the Call keyword followed by the procedure’s name and then its arguments (if any) enclosed in parentheses and separated by commas.
· Use the Run method of the Application object. The Run method is useful when you need to run a procedure whose name is assigned to a variable. You can then pass the variable as an argument to the Run method.
Here’s a simple Sub procedure that takes two arguments. The procedure displays the product of the two arguments.
Sub AddTwo (arg1, arg2)
MsgBox arg1 + arg2
End Sub
The following three statements demonstrate three different ways to execute the AddTwo procedure and pass two arguments. All three have the same result.
AddTwo 12, 6
Call AddTwo (12, 6)
Run"AddTwo", 12, 6
Even though it’s optional, some programmers always use the Call keyword just to make it perfectly clear that another procedure is being called.
Perhaps the best reason to use the Run method is when the procedure name is assigned to a variable. In fact, it’s the only way to execute a procedure in such a way. The following oversimplified example demonstrates this. The Main procedure uses the VBA WeekDayfunction to determine the day of the week (an integer between 1 and 7, beginning with Sunday). The SubToCall variable is assigned a string that represents a procedure name. The Run method then calls the appropriate procedure (either WeekEnd or Daily).
Sub Main()
Dim SubToCall As String
Select Case WeekDay(Now)
Case 1, 7: SubToCall ="WeekEnd"
Case Else: SubToCall ="Daily"
End Select
Application.Run SubToCall
End Sub
Sub WeekEnd()
MsgBox"Today is a weekend"
' Code to execute on the weekend
' goes here
End Sub
Sub Daily()
MsgBox"Today is not a weekend"
' Code to execute on the weekdays
' goes here
End Sub
Calling a procedure in a different module
If VBA can’t locate a called procedure in the current module, it looks for public procedures in other modules in the same workbook.
If you need to call a private procedure from another procedure, both procedures must reside in the same module.
You can’t have two procedures with the same name in the same module, but you can have identically named procedures in different modules within the project. You can force VBA to execute an ambiguously named procedure — that is, another procedure in a different module that has the same name. To do so, precede the procedure name with the module name and a dot.
For example, assume that you define procedures named MySub in Module1 and Module2. If you want a procedure in Module2 to call the MySub in Module1, you can use either of the following statements:
Module1.MySub
Call Module1.MySub
If you do not differentiate between procedures that have the same name, you get the aptly named Ambiguous name detected error message.
Calling a procedure in a different workbook
In some cases, you may need your procedure to execute another procedure defined in a different workbook. To do so, you have two options: Either establish a reference to the other workbook or use the Run method and specify the workbook name explicitly.
To add a reference to another workbook, choose VBE’s Tools ➜ References command. Excel displays the References dialog box (see Figure 4-3), which lists all available references, including all open workbooks. Select the box that corresponds to the workbook that you want to add as a reference and then click OK. After you establish a reference, you can call procedures in the workbook as if they were in the same workbook as the calling procedure.
A referenced workbook doesn’t have to be open when you create the reference; the referenced workbook is treated like a separate object library. Use the Browse button in the References dialog box to establish a reference to a workbook that isn’t open.
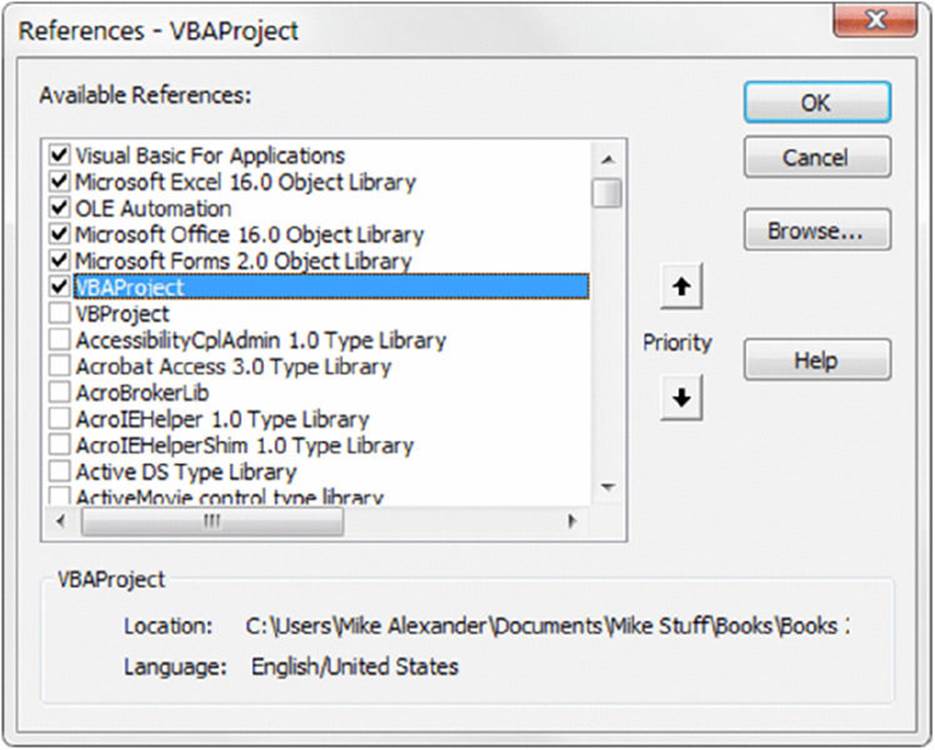
Figure 4.3 The References dialog box lets you establish a reference to another workbook.
When you open a workbook that contains a reference to another workbook, the referenced workbook is opened automatically.
Note
The workbook names that appear in the list of references are listed by their VBE project names. By default, every project is initially named VBAProject. Therefore, the list may contain several identically named items (but the full path of the selected item appears at the bottom of the dialog box). To distinguish a project, change its name in the Project Properties dialog box. Click the project name in the Project window and then choose Tools➜ xxxx Properties (where xxxx is the current project name). In the Project Properties dialog box, click the General tab and change the name displayed in the Project Name field.
The list of references displayed in the References dialog box also includes object libraries and ActiveX controls that are registered on your system. Excel 2016 workbooks always include references to the following object libraries:
· Visual Basic for Applications
· Microsoft Excel 16.0 Object Library
· OLE Automation
· Microsoft Office 16.0 Object Library
· Microsoft Forms 2.0 Object Library (This reference is included only if your project includes a UserForm.)
Note
Any additional references to other workbooks that you add are also listed in your project outline in the Project Explorer window in VBE. These references are listed under a node called References.
If you’ve established a reference to a workbook that contains the YourSub procedure, for example, you can use either of the following statements to call YourSub:
YourSub
Call YourSub
To precisely identify a procedure in a different workbook, specify the project name, module name, and procedure name by using the following syntax:
YourProject.YourModule.YourSub
Alternatively, you can use the Call keyword:
Call YourProject.YourModule.YourSub
Another way to call a procedure in a different workbook is to use the Run method of the Application object. This technique doesn’t require that you establish a reference, but the workbook that contains the procedure must be open. The following statement executes theConsolidate procedure located in a workbook named budget macros.xlsm:
Application.Run"'budget macros.xlsm'!Consolidate"
Note that the workbook name is enclosed in single quotes. That syntax is necessary only if the filename includes one or more space characters. Here’s an example of calling a procedure in a workbook that doesn’t have any spaces:
Application.Run"budgetmacros.xlsm!Consolidate"
Why call other procedures?
If you’re new to programming, you may wonder why anyone would ever want to call a procedure from another procedure. You may ask, “Why not just put the code from the called procedure into the calling procedure and keep things simple?”
One reason is to clarify your code. The simpler your code, the easier it is to maintain and modify. Smaller routines are easier to decipher and then debug. Examine the accompanying procedure, which does nothing but call other procedures. This procedure is easy to follow.
Sub Main()
Call GetUserOptions
Call ProcessData
Call CleanUp
Call CloseAllFiles
End Sub
Calling other procedures also eliminates redundancy. Suppose that you need to perform an operation at ten different places in your routine. Rather than enter the code ten times, you can write a procedure to perform the operation and then simply call the procedure ten times. Also, if you need to make a change, you make it only one time rather than ten times.
Also, you may have a series of general-purpose procedures that you use frequently. If you store these in a separate module, you can import the module to your current project and then call these procedures as needed — which is much easier than copying and pasting the code into your new procedures.
Creating several small procedures rather than a single large one is often considered good programming practice. A modular approach not only makes your job easier but also makes life easier for the people who wind up working with your code.
Executing a procedure by clicking an object
Excel provides a variety of objects that you can place on a worksheet or chart sheet; you can attach a macro to any of these objects. These objects fall into several classes:
· ActiveX controls
· Forms controls
· Inserted objects (Shapes, SmartArt, WordArt, charts, and pictures)
The Developer ➜ Controls ➜ Insert drop-down list contains two types of controls that you can insert on a worksheet: form controls and ActiveX controls. Form controls are designed specifically for use on a spreadsheet, and ActiveX controls are typically used on Excel user forms. As a general rule, you should always use form controls when working on a spreadsheet. Form controls perform better on spreadsheets and they are easier to configure.
Unlike the Form controls, you can’t use the ActiveX controls to execute an arbitrary macro. An ActiveX control executes a specially named macro. For example, if you insert an ActiveX button control named CommandButton1, clicking the button executes a macro named CommandButton1_Click, which must be located in the code module for the sheet on which the control was inserted.
Refer to Chapter 13 for information about using controls on worksheets.
To assign a procedure to a Button object from the Form controls, follow these steps:
1. Choose Developer ➜ Controls ➜ Insert and click the button icon in the Form Controls group.
2. Click the worksheet to create the button. Or you can drag your mouse on the worksheet to change the default size of the button.
Excel jumps right in and displays the Assign Macro dialog box (see Figure 4-4).
3. Select the macro that you want to assign to the button and then click OK.
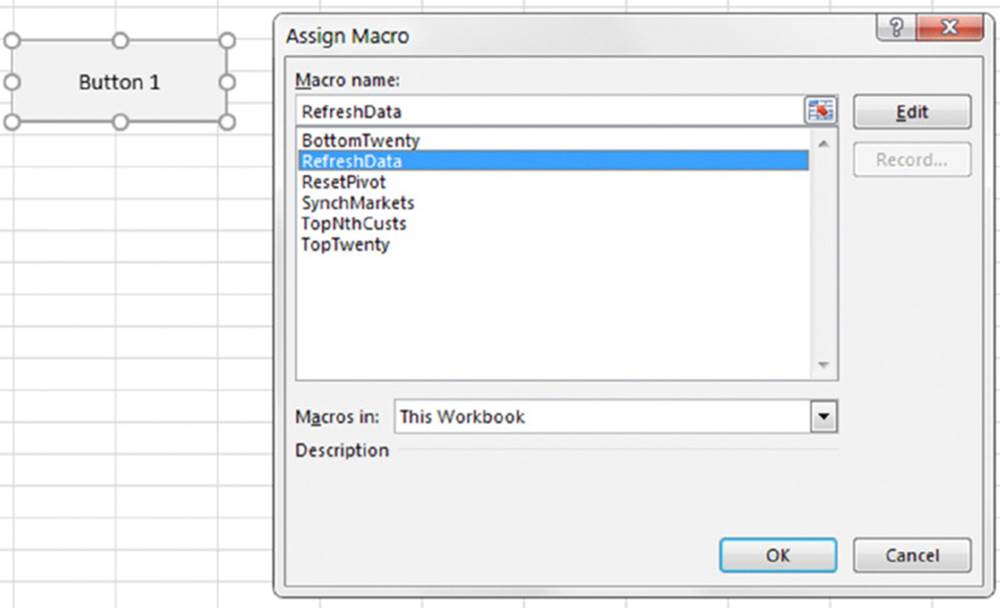
Figure 4.4 Assigning a macro to a button.
You can always change the macro assignment by right-clicking the button and choosing Assign Macro.
To assign a macro to a Shape, SmartArt, WordArt, or picture, right-click the object and choose Assign Macro from the shortcut menu.
To assign a macro to an embedded chart, press Ctrl and click the chart (to select the chart as an object). Then right-click and choose Assign Macro from the shortcut menu.
Executing a procedure when an event occurs
You might want a procedure to execute when a particular event occurs, such as opening a workbook, entering data into a worksheet, saving a workbook, or clicking a CommandButton ActiveX control. A procedure that is executed when an event occurs is an event-handler procedure. Event-handler procedures are characterized by the following:
· They have special names that are made up of an object, an underscore, and the event name. For example, the procedure that is executed when a workbook is opened is Workbook_Open.
· They’re stored in the Code module for the particular object (for example, ThisWorkbook or Sheet1).
Chapter 6 is devoted to event-handler procedures.
Executing a procedure from the Immediate window
You also can execute a procedure by entering its name in the Immediate window of VBE. (If the Immediate window isn’t visible, press Ctrl+G.) The Immediate window executes VBA statements while you enter them. To execute a procedure, simply enter the name of the procedure in the Immediate window and press Enter.
This method can be useful when you’re developing a procedure because you can insert commands to display results in the Immediate window. The following procedure demonstrates this technique:
Sub ChangeCase()
Dim MyString As String
MyString ="This is a test"
MyString = UCase(MyString)
Debug.Print MyString
End Sub
Figure 4-5 shows what happens when you enter ChangeCase in the Immediate window: The Debug.Print statement displays the result immediately.
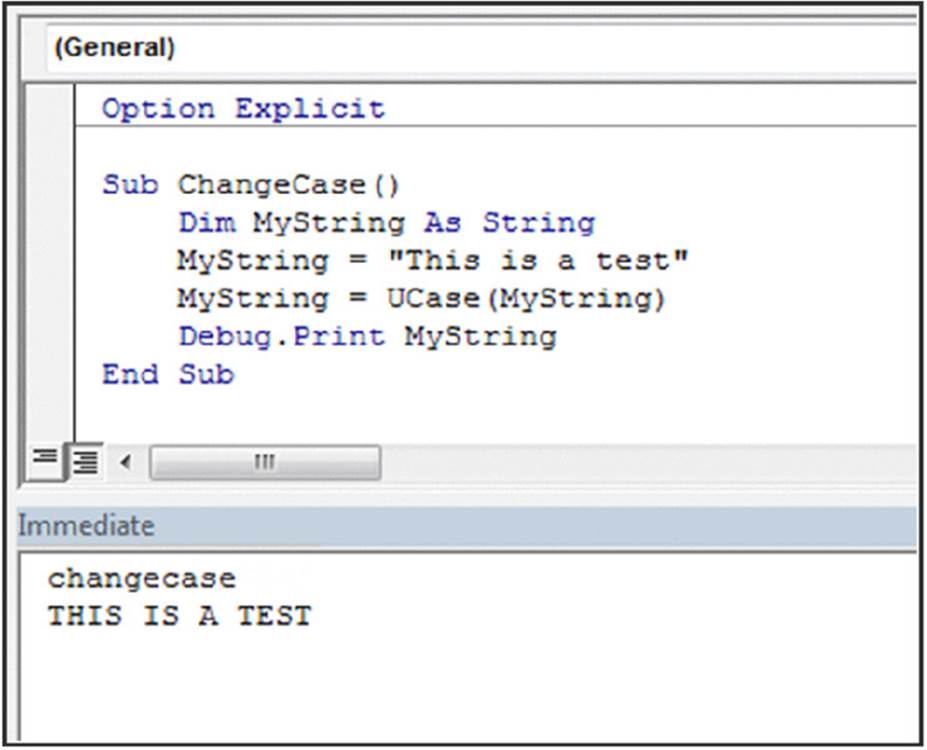
Figure 4.5 Executing a procedure by entering its name in the Immediate window.
Passing Arguments to Procedures
A procedure’s arguments provide it with data that it uses in its instructions. The data that’s passed by an argument can be any of the following:
· A variable
· A constant
· An expression
· An array
· An object
You are probably familiar with many of Excel’s worksheet functions. Arguments for procedures are similar:
· A procedure may not require any arguments.
· A procedure may require a fixed number of arguments.
· A procedure may accept an indefinite number of arguments.
· A procedure may require some arguments, leaving others optional.
· A procedure may have all optional arguments.
For example, a few of Excel’s worksheet functions, such as RAND and NOW, use no arguments. Others, such as COUNTIF, require two arguments. Others still, such as SUM, can use up to 255 arguments.
Still other worksheet functions have optional arguments. The PMT function, for example, can have five arguments (three are required; two are optional).
Most of the procedures that you’ve seen so far in this book have been declared without arguments. They were declared with just the Sub keyword, the procedure’s name, and a set of empty parentheses. Empty parentheses indicate that the procedure does not accept arguments.
The following example shows two procedures. The Main procedure calls the ProcessFile procedure three times (the Call statement is in a For-Next loop). Before calling ProcessFile, however, a three-element array is created. Inside the loop, each element of the array becomes the argument for the procedure call. The ProcessFile procedure takes one argument (named TheFile). Note that the argument goes inside parentheses in the Sub statement. When ProcessFile finishes, program control continues with the statement after theCall statement.
Sub Main()
Dim File(1 To 3) As String
Dim i as Integer
File(1) ="dept1.xlsx"
File(2) ="dept2.xlsx"
File(3) ="dept3.xlsx"
For i = 1 To 3
Call ProcessFile(File(i))
Next i
End Sub
Sub ProcessFile(TheFile)
Workbooks.Open FileName:=TheFile
' ...[more code here]...
End Sub
You can also pass literals (that is, not variables) to a procedure. For example:
Sub Main()
Call ProcessFile("budget.xlsx")
End Sub
You can pass an argument to a procedure in two ways:
· By reference: Passing an argument by reference passes the memory address of the variable. Changes to the argument within the procedure are made to the original variable. This is the default method of passing an argument.
· By value: Passing an argument by value passes a copy of the original variable. Consequently, changes to the argument within the procedure are not reflected in the original variable.
The following example demonstrates this concept. The argument for the Process procedure is passed by reference (the default method). After the Main procedure assigns a value of 12 to MyValue, it calls the Process procedure and passes MyValue as the argument. TheProcess procedure multiplies the value of its argument (named YourValue) by 10. When Process ends and program control passes back to Main, the MsgBox function displays 120.
Sub Main()
Dim MyValue As Integer
MyValue = 12
Call Process(MyValue)
MsgBox MyValue
End Sub
Sub Process(YourValue)
YourValue = YourValue * 10
End Sub
If you don’t want the called procedure to modify any variables passed as arguments, you can modify the called procedure’s argument list so that arguments are passed to it by value rather than by reference. To do so, precede the argument with the ByVal keyword. This technique causes the called routine to work with a copy of the passed variable’s data — not the data itself. In the following procedure, for example, the changes made to YourValue in the Process procedure do not affect the MyValue variable in Main. As a result, the MsgBoxfunction displays12 and not 120.
Sub Process(ByVal YourValue)
YourValue = YourValue * 10
End Sub
In most cases, you’ll be content to use the default reference method of passing arguments. However, if your procedure needs to use data passed to it in an argument — and you must keep the original data intact — you’ll want to pass the data by value.
A procedure’s arguments can mix and match by value and by reference. Arguments preceded with ByVal are passed by value; all others are passed by reference.
Note
If you pass a variable defined as a user-defined data type to a procedure, it must be passed by reference. Attempting to pass it by value generates an error.
Because we didn’t declare a data type for any of the arguments in the preceding examples, all the arguments have been of the Variant data type. But a procedure that uses arguments can define the data types directly in the argument list. The following is a Substatement for a procedure with two arguments of different data types. The first is declared as an integer, and the second is declared as a string.
Sub Process(Iterations As Integer, TheFile As String)
When you pass arguments to a procedure, the data that is passed as the argument must match the argument’s data type. For example, if you call Process in the preceding example and pass a string variable for the first argument, you get an error: ByRef argument type mismatch.
Note
Arguments are relevant to both Sub procedures and Function procedures. In fact, arguments are more often used in Function procedures. In Chapter 5, where we focus on Function procedures, we provide additional examples of using arguments with your routines, including how to handle optional arguments.
Using public variables versus passing arguments to a procedure
In Chapter 3, we point out how a variable declared as Public (at the top of the module) is available to all procedures in the module. In some cases, you may want to access a Public variable rather than pass the variable as an argument when calling another procedure.
For example, the procedure that follows passes the value of MonthVal to the ProcessMonth procedure:
Sub MySub()
Dim MonthVal as Integer
' ... [code goes here]
MonthVal = 4
Call ProcessMonth(MonthVal)
' ... [code goes here]
End Sub
An alternative approach, which doesn’t use an argument, is:
Public MonthVal as Integer
Sub MySub()
' ... [code goes here]
MonthVal = 4
Call ProcessMonth2
' ... [code goes here]
End Sub
In the revised code, because MonthVal is a public variable, the ProcessMonth2 procedure can access it, thus eliminating the need for an argument for the ProcessMonth2 procedure.
Error-Handling Techniques
When a VBA procedure is running, errors can (and probably will) occur. These include either syntax errors (which you must correct before you can execute a procedure) or runtime errors (which occur while the procedure is running). This section deals with runtime errors.
Caution
For error-handling procedures to work, the Break on All Errors setting must be turned off. In VBE, choose Tools ➜ Options and click the General tab in the Options dialog box. If Break on All Errors is selected, VBA ignores your error-handling code. You’ll usually want to use the Break on Unhandled Errors option.
Normally, a runtime error causes VBA to stop, and the user sees a dialog box that displays the error number and a description of the error. A good application doesn’t make the user deal with these messages. Rather, it incorporates error-handling code to trap errors and take appropriate actions. At the very least, your error-handling code can display a more meaningful error message than the one VBA pops up.
Trapping errors
You can use the On Error statement to specify what happens when an error occurs. Basically, you have two choices:
· Ignore the error and let VBA continue. Your code can later examine the Err object to determine what the error was and then take action, if necessary.
· Jump to a special error-handling section of your code to take action. This section is placed at the end of the procedure and is also marked by a label.
To cause your VBA code to continue when an error occurs, insert the following statement in your code:
On Error Resume Next
Some errors are inconsequential, and you can ignore them without causing a problem. But you might want to determine what the error was. When an error occurs, you can use the Err object to determine the error number. You can use the VBA Error function to display the text that corresponds to the Err.Number value. For example, the following statement displays the same information as the normal Visual Basic error dialog box (the error number and the error description):
MsgBox"Oops! Can't find the object being referenced. " & _
"Error" & Err &":" & Error(Err.Number)
Figure 4-6 shows a VBA error message, and Figure 4-7 shows the same error displayed in a message box. You can, of course, make the error message a bit more meaningful to your end users by using more descriptive text.
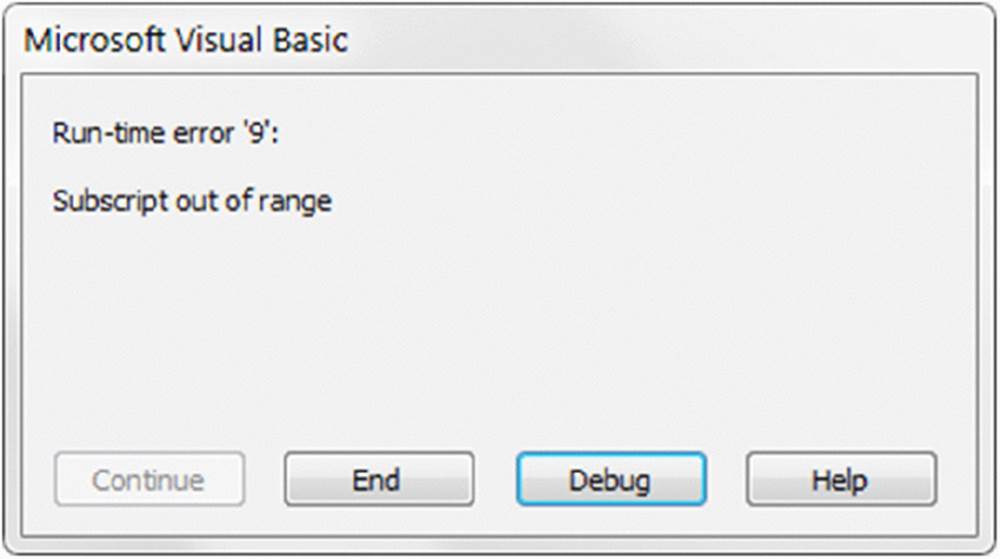
Figure 4.6 VBA error messages aren’t always user friendly.
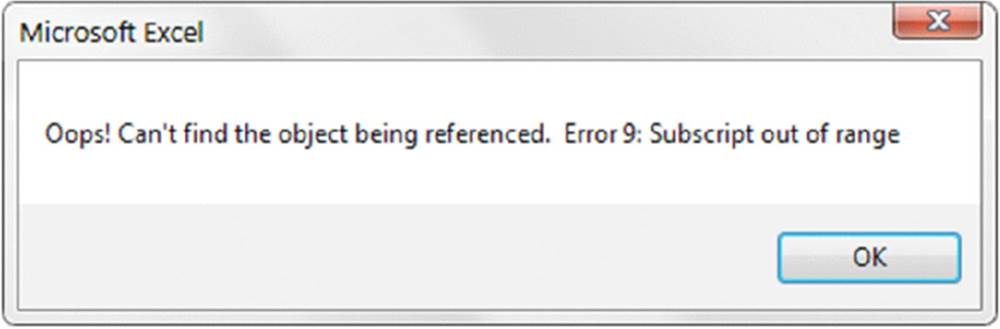
Figure 4.7 You can create a message box to display the error code and description.
Note
Referencing Err is equivalent to accessing the Number property of the Err object. Therefore, the following two statements have the same effect:
MsgBox Err
MsgBox Err.Number
You also use the On Error statement to specify a location in your procedure to jump to when an error occurs. You use a label to mark the location. For example:
On Error GoTo ErrorHandler
Error-handling examples
The first example demonstrates an error that you can safely ignore. The SpecialCells method selects cells that meet a certain criterion.
The SpecialCells method is equivalent to choosing the Home ➜ Editing ➜ Find & Select ➜ Go To Special command. The Go To Special dialog box provides you with a number of choices. For example, you can select cells that contain a numeric constant (nonformula).
In the example that follows, which doesn’t use any error handling, the SpecialCells method selects all the cells in the current range selection that contain a formula. If no cells in the selection qualify, VBA displays the error message shown in Figure 4-8.
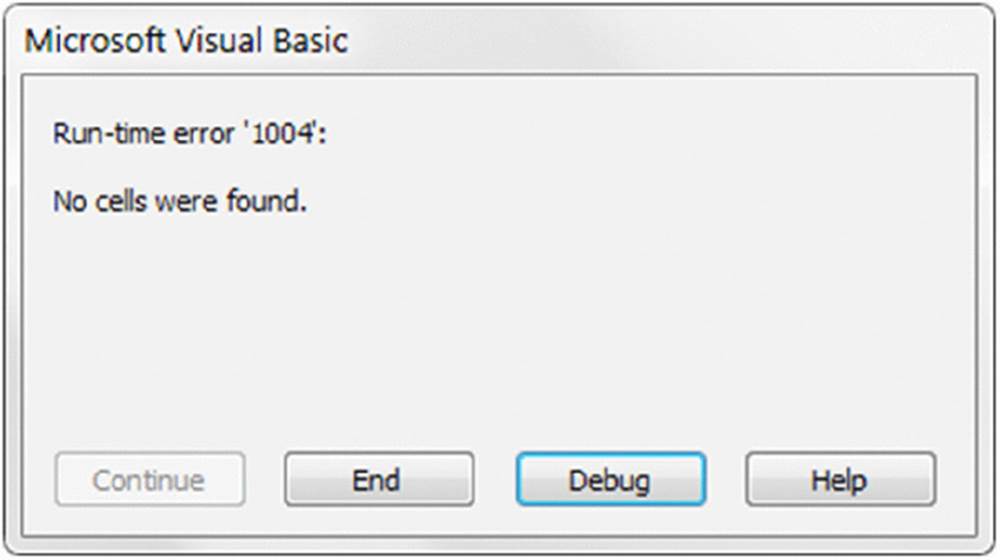
Figure 4.8 The SpecialCells method generates this error if no cells are found.
Sub SelectFormulas()
Selection.SpecialCells(xlFormulas).Select
' ...[more code goes here]
End Sub
Following is a variation that uses the On Error Resume Next statement to prevent the error message from appearing:
Sub SelectFormulas2()
On Error Resume Next
Selection.SpecialCells(xlFormulas).Select
On Error GoTo 0
' ...[more code goes here]
End Sub
The On Error GoTo 0 statement restores normal error handling for the remaining statements in the procedure.
The following procedure uses an additional statement to determine whether a specific error did occur. If so, the user is informed by a message.
Sub SelectFormulas3()
On Error Resume Next
Selection.SpecialCells(xlFormulas).Select
If Err.Number = 1004 Then MsgBox"No formula cells were found."
On Error GoTo 0
' ...[more code goes here]
End Sub
If the Number property of Err is equal to anything other than 0, an error occurred. The If statement checks to see if Err.Number is equal to 1004 and displays a message box if it is. In this example, the code is checking for a specific error number. To check for any error, use a statement like this:
If Err.Number <> 0 Then MsgBox"An error occurred."
The next example demonstrates error handling by jumping to a label:
Sub ErrorDemo()
On Error GoTo Handler
Selection.Value = 123
Exit Sub
Handler:
MsgBox"Cannot assign a value to the selection."
End Sub
The procedure attempts to assign a value to the current selection. If an error occurs (for example, a range isn’t selected or the sheet is protected), the assignment statement results in an error. The On Error statement specifies a jump to the Handler label if an error occurs. Note the use of the Exit Sub statement before the label. This statement prevents the error-handling code from being executed if no error occurs. If this statement is omitted, the error message is displayed even if an error does not occur.
Sometimes, you can take advantage of an error to get information. The example that follows simply checks whether a particular workbook is open. It doesn’t use any error handling.
Sub CheckForFile1()
Dim FileName As String
Dim FileExists As Boolean
Dim book As Workbook
FileName ="BUDGET.XLSX"
FileExists = False
' Cycle through all open workbooks
For Each book In Workbooks
If UCase(book.Name) = FileName Then FileExists = True
Next book
' Display appropriate message
If FileExists Then
MsgBox FileName &" is open."
Else
MsgBox FileName &" is not open."
End If
End Sub
Here, a For Each-Next loop cycles through all objects in the Workbooks collection. If the workbook is open, the FileExists variable is set to True. Finally, a message is displayed that tells the user whether the workbook is open.
You can rewrite the preceding routine to use error handling to determine whether the file is open. In the example that follows, the On Error Resume Next statement causes VBA to ignore any errors. The next instruction attempts to reference the workbook by assigning the workbook to an object variable (by using the Set keyword). If the workbook isn’t open, an error occurs. The If-Then-Else structure checks the value property of Err and displays the appropriate message. This procedure uses no looping, so it’s slightly more efficient.
Sub CheckForFile()
Dim FileName As String
Dim x As Workbook
FileName ="BUDGET.XLSX"
On Error Resume Next
Set x = Workbooks(FileName)
If Err = 0 Then
MsgBox FileName &" is open."
Else
MsgBox FileName &" is not open."
End If
On Error GoTo 0
End Sub
Cross-Ref
Chapter 7 includes several additional examples that use error handling.
A Realistic Example That Uses Sub Procedures
Up to this point, the code examples covered in this chapter have been demonstrational in nature, and not very useful on their own. The remainder of this chapter will walk you through a real-life exercise that demonstrates many of the concepts covered in this and the preceding two chapters.
This section describes the development of a useful utility. More important, you will explore the process of analyzing a problem and then solving it with VBA.
 On the Web
You can find the completed application, named sheet sorter.xlsm, on this book’s website.
The goal
The goal of this exercise is to develop a utility that rearranges a workbook by alphabetizing its sheets (something that Excel can’t do on its own). If you tend to create workbooks that consist of many sheets, you know that locating a particular sheet can be difficult. If the sheets are ordered alphabetically, however, it’s easier to find a desired sheet.
Project requirements
Where to begin? One way to get started is to list the requirements for your application. When you develop your application, you can check your list to ensure that you’re covering all the bases.
Here’s the list of requirements for this example application:
· It should sort the sheets (that is, worksheets and chart sheets) in the active workbook in ascending order of their names.
· It should be easy to execute.
· It should always be available. In other words, the user shouldn’t have to open a workbook to use this utility.
· It should work properly for any workbook that’s open.
· It should trap errors gracefully, and not display any cryptic VBA error messages.
What you know
Often, the most difficult part of a project is figuring out where to start. It’s often helpful to start by listing things that you know about Excel that may be relevant to the project requirements. For this scenario, we know that:
· Excel doesn’t have a command that sorts sheets, so we’re not reinventing the wheel.
· The macro recorder can’t be used to record the sorting of worksheets, as new worksheets (that didn’t exist at the time of recording) will likely be added by the user sometime in the future. That being said, a recorded macro might provide some helpful guidance on the correct syntax to use.
· Sorting the sheets will require moving some or all of them. We can manually move a sheet easily by dragging its sheet tab.
· Mental note: Turn on the macro recorder and drag a sheet to a new location to find out what kind of code this action generates.
· Excel also has a Move or Copy dialog box, which is displayed when we right-click a sheet tab and choose Move or Copy. Would recording a macro of this command generate different code than moving a sheet manually?
· We’ll need to know how many sheets are in the active workbook. We can get this information with VBA.
· We’ll need to know the names of all the sheets. Again, we can get this information with VBA.
· Excel has a command that sorts data in worksheet cells.
· Mental note: Maybe we can transfer the sheet names to a range and use this feature. Or maybe VBA has a sorting method that we can take advantage of.
· We will need a way to test the code on workbooks other than the one we’re working in. This means we will need to store the macro in the Personal Macro workbook so that we can use it with other workbooks.
· Mental note: Create a dummy workbook for testing.
The approach
After detailing what you know, you can start listing the series of steps needed to accomplish the actual task. In this case, we will need VBA to:
1. Identify the active workbook.
2. Get a list of all the sheet names in the workbook.
3. Count the sheets.
4. Sort the sheet names (somehow).
5. Rearrange the sheets so they correspond to the sorted sheet names.
Tip
It’s likely that you will not know exactly how to code the steps needed to accomplish the task you have in mind. Don’t let this discourage you. The truth is that many developers rarely know the exact syntax needed off the top of their heads. Rest assured that you will be able to eventually find the correct syntax by using a combination of the macro recorder, the VBA Help system, and examples found on the Internet.
Some preliminary recording
The best place to start any VBA procedure is the macro recorder; it’s a developer’s best friend. Let’s start by figuring out the VBA syntax for moving sheets around.
We can turn on the macro recorder and specify that the macro should be placed in the Personal Macro Workbook (because we want to test the code on workbooks other than the one we’re working in). Once the macro starts recording, we can drag Sheet3 before Sheet1 and then stop recording. A review of the recorded macro code shows that Excel used the Move method.
Sub Macro1()
Sheets("Sheet3").Select
Sheets("Sheet3").Move Before:=Sheets(1)
End Sub
A quick search in the VBA Help system tells us that the Move method moves a sheet to a new location in the workbook. It also takes an argument that specifies the location for the sheet. This must be why the recorded macro included Before:=Sheets(1).
So far so good. Now we need to find out how many sheets are in the active workbook. Searching VBA Help for the word Count tells us that it’s a property of a collection. This means all collections such as Sheets, Rows, Cells, and Shapes have a Count property. Good to know.
To test out this newly acquired piece of information, we can fire up the Visual Basic Editor, activate the Immediate window, and then type:
? ActiveWorkbook.Sheets.Count
Figure 4-9 shows the result. Success!.
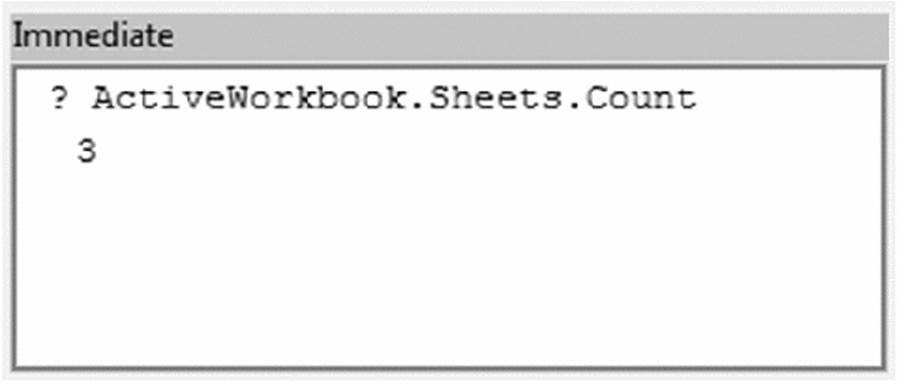
Figure 4.9 Using the VBE Immediate window to test a statement.
Okay. What about the sheet names? Time for another test. We can enter the following statement in the Immediate window:
? ActiveWorkbook.Sheets(1).Name
This results in the name of the first sheet is Sheet3, which is correct (because we moved it while recording our macro). More good information to keep in mind.
We can now take this information to construct a simple For Each-Next construct (covered in Chapter 3 of this book).
Sub Test()
For Each Sht In ActiveWorkbook.Sheets
MsgBox Sht.Name
Next Sht
End Sub
Running this procedure displays three message boxes, each showing a different sheet name. Great. Now we know how to get a list of sheet names.
So what about sorting? A quick search of the VBA Help system tells us that the Sort method applies to a Range object. So one option is to transfer the sheet names to a range and then sort the range, but that seems like overkill for this application. A better option would be to dump the sheet names into an array of strings and then sort the array by using VBA code.
Cross-Ref
Check out Chapter 3 for a refresher on Arrays.
Initial setup
At this point we know enough to start writing the procedure. But before doing so, we need to set up a test workbook. This test workbook will allow us to re-create the steps we determined at the start of this endeavor.
1. Create an empty workbook with five worksheets, named Sheet1, Sheet2, Sheet3, Sheet4, and Sheet5.
2. Move the sheets around randomly so that they aren’t in any particular order. Just click and drag the sheet tabs.
3. Save the workbook as Test.xlsx.
4. Activate VBE and select the Personal.xlsb project in the Project window.
If Personal.xlsb doesn’t appear in the Project window in VBE, it means that you’ve never used the Personal Macro Workbook. To have Excel create this workbook for you, simply record a macro (any macro) and specify the Personal Macro Workbook as the destination for the macro.
5. Insert a new VBA module in Personal.xlsb (choose Insert ➜ Module).
6. Create an empty Sub procedure called SortSheets (see Figure 4-10).
You can store this macro in any module in the Personal Macro Workbook. However, keeping each group of related macros in a separate module is a good idea. That way, you can easily export the module and import it into a different project later on.
7. Activate Excel and choose Developer ➜ Code ➜ Macros to display the Macro dialog box.
8. In the Macro dialog box, select the SortSheets procedure and click the Options button to assign a shortcut key to this macro.
The Ctrl+Shift+S key combination is a good choice.
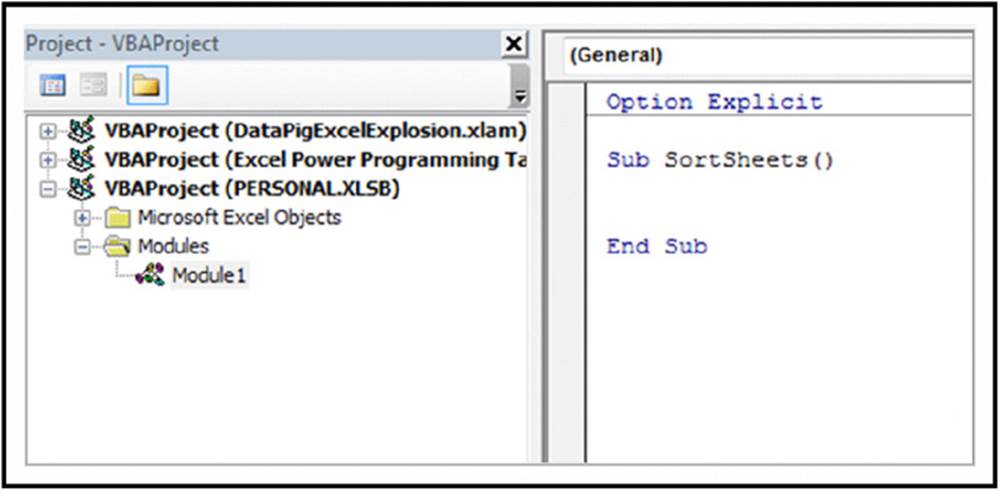
Figure 4.10 An empty procedure in a module located in the Personal Macro Workbook.
Code writing
Now it’s time to write some code. We know we need to put the sheet names into an array of string, but because we don’t know yet how many sheets there will be in any given workbook, we use a Dim statement with empty parentheses to declare the array. We can useReDim once we know the actual number of sheets.
As you can see in the code (see below) we loop through all the sheets in the active workbook and insert each sheet’s name into the SheetNames array. We also add a MsgBox function within the loop just to give ourselves a visual indicator that the sheets’ names are indeed being entered into the array.
Sub SortSheets()
' Sorts the sheets of the active workbook
Dim SheetNames() as String
Dim i as Long
Dim SheetCount as Long
SheetCount = ActiveWorkbook.Sheets.Count
ReDim SheetNames(1 To SheetCount)
For i = 1 To SheetCount
SheetNames(i) = ActiveWorkbook.Sheets(i).Name
MsgBox SheetNames(i)
Next i
End Sub
It’s a best-practice to test as you go. So test the code to see five message boxes appear, each displaying the name of a sheet in the active workbook. So far, so good.
We can now remove the MsgBox statement. (These message boxes become annoying after a while.)
Rather than use the MsgBox function to test your work, you can use the Print method of the Debug object to display information in the Immediate window. For this example, use the following statement in place of the MsgBox statement:
Debug.Print SheetNames(i)
This technique is much less intrusive than using MsgBox statements. Just make sure that you remember to remove the statement when you’re finished.
At this point, the SortSheets procedure simply creates an array of sheet names corresponding to the sheets in the active workbook. Two steps remain: Sort the elements in the SheetNames array and then rearrange the sheets to correspond to the sorted array.
Writing the Sort procedure
Now that we have the sheet names in the SheetNames array, we can start thinking about sorting. One option is to insert the sorting code in the SortSheets procedure, but a better approach is to write a general-purpose sorting procedure that we can reuse with other projects. (Sorting arrays is a common operation.)
The thought of writing a sorting procedure seems daunting, but we can search the Internet to find commonly used routines that we can use or adapt. A quick search of VBA sorting procedures leads us to the bubble sort method. Although it’s not a fast technique, it’s easy to code. Blazing speed isn’t a requirement in this application.
The bubble sort method uses a nested For-Next loop to evaluate each array element. If the array element is greater than the next element, the two elements swap positions. The code includes a nested loop, so this evaluation is repeated for every pair of items (that is, n– 1 times).
Cross-Ref
In Chapter 7, you will explore some other sorting routines and compare them in terms of speed.
Here’s the sorting procedure pulled together with the help of a few examples found on the Internet.
Sub BubbleSort(List() As String)
' Sorts the List array in ascending order
Dim First As Long, Last As Long
Dim i As Long, j As Long
Dim Temp As String
First = LBound(List)
Last = UBound(List)
For i = First To Last - 1
For j = i + 1 To Last
If List(i) > List(j) Then
Temp = List(j)
List(j) = List(i)
List(i) = Temp
End If
Next j
Next i
End Sub
This procedure accepts one argument: a one-dimensional array named List. An array passed to a procedure can be of any length. It uses the LBound function to assign the lower bound of the array and the UBound function to assign the upper bound of the array to the variables First and Last, respectively.
Here’s a little temporary procedure we can use to test the BubbleSort procedure:
Sub SortTester()
Dim x(1 To 5) As String
Dim i As Long
x(1) ="dog"
x(2) ="cat"
x(3) ="elephant"
x(4) ="aardvark"
x(5) ="bird"
Call BubbleSort(x)
For i = 1 To 5
Debug.Print i, x(i)
Next i
End Sub
The SortTester routine creates an array of five strings, passes the array to BubbleSort, and then displays the sorted array in the Immediate window (see Figure 4-11). By the way, it’s often helpful to create temporary procedures for testing. Once you’re done with testing, you can simply delete them.
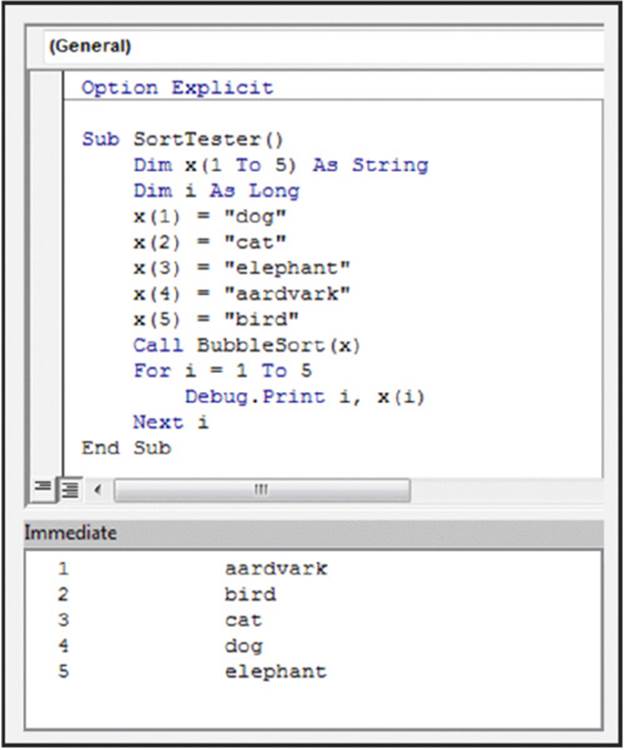
Figure 4.11 Using a temporary procedure to test the BubbleSort code.
Now that we’re satisfied that the BubbleSort procedure works reliably, we can modify SortSheets by adding a call to the BubbleSort procedure, passing the SheetNames array as an argument. At this point, our code looks like this:
Sub SortSheets()
Dim SheetNames() As String
Dim SheetCount as Long
Dim i as Long
SheetCount = ActiveWorkbook.Sheets.Count
ReDim SheetNames(1 To SheetCount)
For i = 1 To SheetCount
SheetNames(i) = ActiveWorkbook.Sheets(i).Name
Next i
Call BubbleSort(SheetNames)
End Sub
Sub BubbleSort(List() As String)
' Sorts the List array in ascending order
Dim First As Long, Last As Long
Dim i As Long, j As Long
Dim Temp As String
First = LBound(List)
Last = UBound(List)
For i = First To Last - 1
For j = i + 1 To Last
If List(i) > List(j) Then
Temp = List(j)
List(j) = List(i)
List(i) = Temp
End If
Next j
Next i
End Sub
When the SheetSort procedure ends, it contains an array that consists of the sorted sheet names in the active workbook. To verify this, we can display the array contents in the VBE Immediate window by adding the following code at the end of the SortSheets procedure (if the Immediate window is not visible, press Ctrl+G):
For i = 1 To SheetCount
Debug.Print SheetNames(i)
Next i
So far, so good. Next step: Write some code to rearrange the sheets to correspond to the sorted items in the SheetNames array.
The code that we recorded earlier proved useful. Remember the instruction that was recorded when I moved a sheet to the first position in the workbook?
Sheets("Sheet3").Move Before:=Sheets(1)
We can write a For-Next loop that would go through each sheet and move it to its corresponding sheet location, specified in the SheetNames array:
For i = 1 To SheetCount
Sheets(SheetNames(i)).Move Before:=Sheets(i)
Next i
For example, the first time through the loop, the loop counter i is 1. The first element in the sorted SheetNames array is (in this example) Sheet1. Therefore, the expression for the Move method in the loop evaluates to:
Sheets("Sheet1").Move Before:= Sheets(1)
The second time through the loop, the expression evaluates to:
Sheets("Sheet2").Move Before:= Sheets(2)
This is what the SortSheets procedure looks like with the added code:
Sub SortSheets()
Dim SheetNames() As String
Dim SheetCount as Long
Dim i as Long
SheetCount = ActiveWorkbook.Sheets.Count
ReDim SheetNames(1 To SheetCount)
For i = 1 To SheetCount
SheetNames(i) = ActiveWorkbook.Sheets(i).Name
Next i
Call BubbleSort(SheetNames)
For i = 1 To SheetCount
ActiveWorkbook.Sheets(SheetNames(i)).Move _
Before:=ActiveWorkbook.Sheets(i)
Next i
End Sub
Time to clean things up. Let’s make sure all the variables used in the procedures are declared. Let’s also add some comments and blank lines to make the code easier to read.
Sub SortSheets()
' This routine sorts the sheets of the
' active workbook in ascending order.
' Use Ctrl+Shift+S to execute
Dim SheetNames() As String
Dim SheetCount As Long
Dim i As Long
' Determine the number of sheets & ReDim array
SheetCount = ActiveWorkbook.Sheets.Count
ReDim SheetNames(1 To SheetCount)
' Fill array with sheet names
For i = 1 To SheetCount
SheetNames(i) = ActiveWorkbook.Sheets(i).Name
Next i
' Sort the array in ascending order
Call BubbleSort(SheetNames)
' Move the sheets
For i = 1 To SheetCount
ActiveWorkbook.Sheets(SheetNames(i)).Move _
Before:= ActiveWorkbook.Sheets(i)
Next i
End Sub
We can test the code by adding a few more sheets to Test.xlsx and changing some of the sheet names.
More testing
Just because the procedure works with the Test.xlsx workbook doesn’t mean it will work with all workbooks. To test it further, we can open a few other workbooks and try running the sort procedure on each workbook.
It soon becomes apparent that there are few issues with the code:
· Workbooks with many sheets take a long time to sort because the screen continually updates during the move operations.
· The sorting procedure we chose seems to be case-sensitive. For example, a sheet named SUMMARY (all uppercase) appears before a sheet named Sheet1. According to our BubbleSort procedure, an uppercase U is “greater than” a lowercase h.
· If there are no workbooks open, the code fails.
· If the workbook’s structure is protected, the Move method fails.
· After sorting, the last sheet in the workbook becomes the active sheet. Changing the user’s active sheet isn’t a good practice; it’s better to keep the user’s original sheet active.
· If the code is interrupted by pressing Ctrl+Break, VBA displays an error message.
· The macro can’t be reversed (that is, the Undo command is disabled when a macro is executed). If the user accidentally triggers the sorting procedure, the only way to get back to the original sheet order is by doing it manually.
Fixing the problems
Fixing the screen-updating problem is a breeze. We can insert the following instruction to turn off screen updating while the sheets are being moved:
Application.ScreenUpdating = False
This statement causes Excel’s windows to freeze while the macro is running. A beneficial side effect is that it also speeds up the macro considerably. After the macro completes its operation, screen updating is turned back on automatically.
It is also easy to fix the problem with the BubbleSort procedure. We can use VBA’s UCase function to convert the sheet names to uppercase for the comparison. This causes all the comparisons to be made by using uppercase versions of the sheet names. The corrected line reads as follows:
If UCase(List(i)) > UCase(List(j)) Then
Tip
Another way to solve the “case” problem is to add the following statement to the top of your module:
Option Compare Text
This statement causes VBA to perform string comparisons based on a case-insensitive text sort order. In other words, A is considered the same as a.
To prevent the error message that appears when no workbooks are visible, we can add a simple check to see if an active workbook is available. If no active workbook is available, we simply exit the procedure. This statement can go at the top of the SortSheetsprocedure:
If ActiveWorkbook Is Nothing Then Exit Sub
There’s usually a good reason that a workbook’s structure is protected. The best approach is to not attempt to unprotect the workbook. Rather, the code should display a message box warning and let the user unprotect the workbook and re-execute the macro. Testing for a protected workbook structure is easy — the ProtectStructure property of a Workbook object returns True if a workbook is protected.
' Check for protected workbook structure
If ActiveWorkbook.ProtectStructure Then
MsgBox ActiveWorkbook.Name &" is protected.", _
vbCritical,"Cannot Sort Sheets."
Exit Sub
End If
If the workbook’s structure is protected, the user sees a message box like the one shown in Figure 4-12.
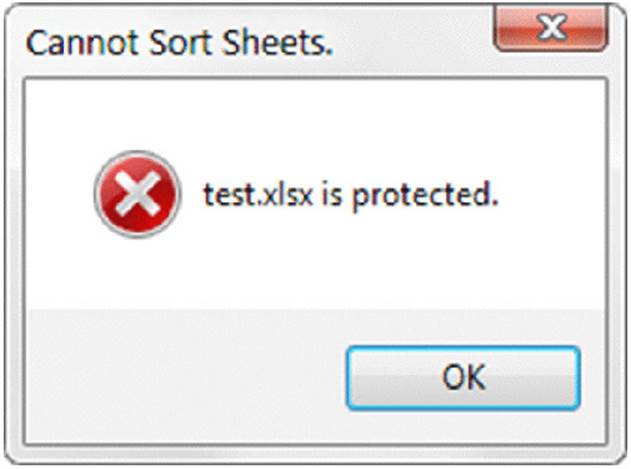
Figure 4.12 This message box tells the user that the sheets cannot be sorted.
To reactivate the original active sheet after the sorting is performed, we can add some code to assign the original sheet to an object variable (OldActiveSheet) and then activate that sheet when the routine is finished. Here’s the statement that assigns the variable:
Set OldActive = ActiveSheet
This statement activates the original active worksheet:
OldActive.Activate
Pressing Ctrl+Break normally halts a macro, and VBA usually displays an error message. But because we want to avoid VBA error messages, we can insert a command to prevent this situation. From the VBA Help system, we discover that the Application object has anEnableCancelKey property that can disable Ctrl+Break. So we can add the following statement at the top of the routine:
Application.EnableCancelKey = xlDisabled
Caution
Be careful when you disable the Cancel key. If your code gets caught in an infinite loop, you can’t break out of it. For best results, insert this statement only after you’re sure that everything is working properly.
To prevent the problem of inadvertently starting the sort procedure, we can add a simple message box asking the user to confirm the action. The following statement is placed before the Ctrl+Break key is disabled:
If MsgBox("Sort the sheets in the active workbook?", _
vbQuestion + vbYesNo) <> vbYes Then Exit Sub
When users execute the SortSheets procedure, they see the message box in Figure 4-13.
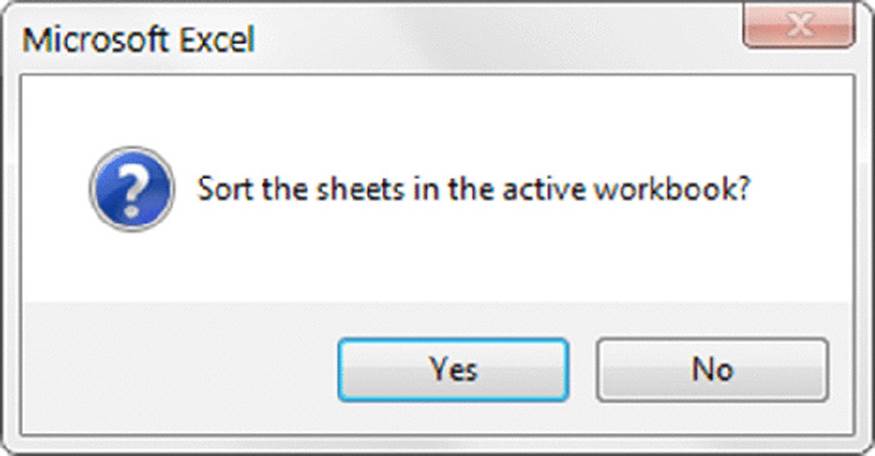
Figure 4.13 This message box appears before the sheets are sorted.
After all these adjustments are implemented, the SortSheets procedure looked like this:
Option Explicit
Sub SortSheets()
' This routine sorts the sheets of the
' active workbook in ascending order.
' Use Ctrl+Shift+S to execute
Dim SheetNames() As String
Dim i As Long
Dim SheetCount As Long
Dim OldActiveSheet As Object
If ActiveWorkbook Is Nothing Then Exit Sub ' No active workbook
SheetCount = ActiveWorkbook.Sheets.Count
' Check for protected workbook structure
If ActiveWorkbook.ProtectStructure Then
MsgBox ActiveWorkbook.Name &" is protected.", _
vbCritical,"Cannot Sort Sheets."
Exit Sub
End If
' Make user verify
If MsgBox("Sort the sheets in the active workbook?", _
vbQuestion + vbYesNo) <> vbYes Then Exit Sub
' Disable Ctrl+Break
Application.EnableCancelKey = xlDisabled
' Get the number of sheets
SheetCount = ActiveWorkbook.Sheets.Count
' Redimension the array
ReDim SheetNames(1 To SheetCount)
' Store a reference to the active sheet
Set OldActiveSheet = ActiveSheet
' Fill array with sheet names
For i = 1 To SheetCount
SheetNames(i) = ActiveWorkbook.Sheets(i).Name
Next i
' Sort the array in ascending order
Call BubbleSort(SheetNames)
' Turn off screen updating
Application.ScreenUpdating = False
' Move the sheets
For i = 1 To SheetCount
ActiveWorkbook.Sheets(SheetNames(i)).Move _
Before:=ActiveWorkbook.Sheets(i)
Next i
' Reactivate the original active sheet
OldActiveSheet.Activate
End Sub
Utility availability
Because the SortSheets macro is stored in the Personal Macro Workbook, it’s available whenever Excel is running. At this point, you can execute the macro by selecting the macro’s name from the Macro dialog box (Alt+F8 displays this dialog box) or by pressing Ctrl+Shift+S. Another option is to add a command to the Ribbon.
To add a command, follow these steps:
1. Right-click any area of the Ribbon and choose Customize the Ribbon.
2. In the Customize Ribbon tab of the Excel Options dialog box, choose Macros from the Choose Commands From drop-down list.
3. Click the item labeled PERSONAL.XLSB!SortSheets.
4. Use the controls in the box on the right to specify the Ribbon tab and create a new group. (You can’t add a command to an existing group.)
In Figure 4-14, we created a group named Sheets in the View tab, and renamed the new item to Short Sheets.
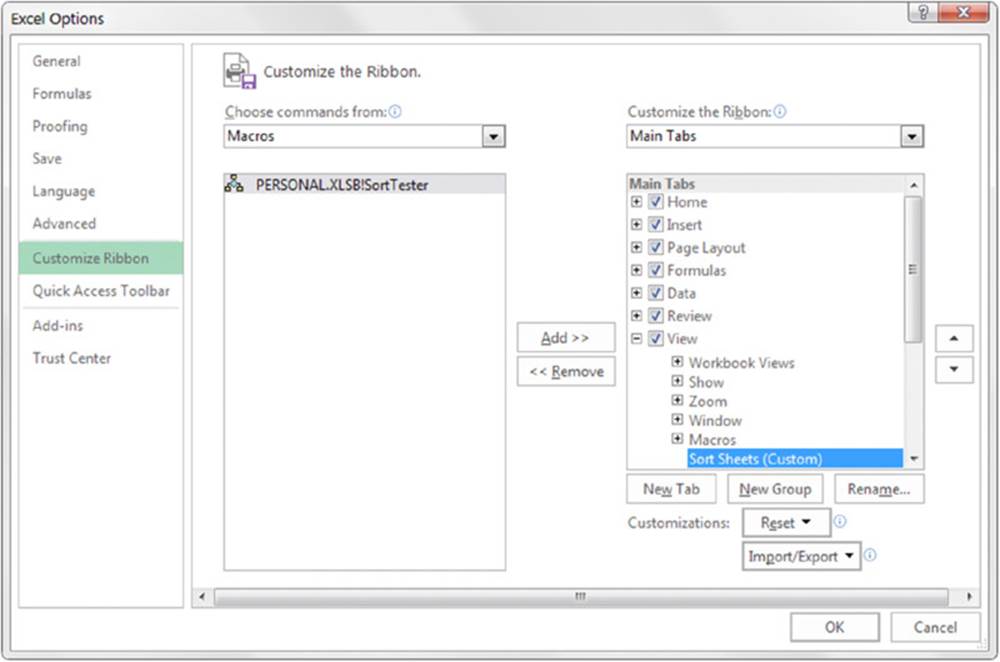
Figure 4.14 Adding a new command to the Ribbon.
Evaluating the project
So there you have it. The utility meets all the original project requirements: It sorts all sheets in the active workbook, it can be executed easily, and it’s always available for use with any workbook.
Note
The procedure still has one slight problem: The sorting is strict and may not always be “logical.” For example, after sorting, Sheet10 is placed before Sheet2. Most would want Sheet2 to be listed before Sheet10. Solving that problem is possible but beyond the scope of this introductory exercise.
All materials on the site are licensed Creative Commons Attribution-Sharealike 3.0 Unported CC BY-SA 3.0 & GNU Free Documentation License (GFDL)
If you are the copyright holder of any material contained on our site and intend to remove it, please contact our site administrator for approval.
© 2016-2026 All site design rights belong to S.Y.A.