Microsoft Excel 2016 BIBLE (2016)
Part I
Getting Started with Excel
Chapter 7
Understanding Excel Files
IN THIS CHAPTER
1. Creating a new workbook
2. Opening an existing workbook
3. Saving and closing workbooks
4. Sharing workbooks with people who use an older version of Excel
This chapter describes the operations that you perform with workbook files: opening, saving, closing, and so on. It discusses how Excel uses files and provides an overview of the various types of files. Most of the file operations discussed here occur in the Backstage view, the screen that you see when you click the File button above the Excel Ribbon.
Creating a New Workbook
When you start Excel 2016, it displays a Start Screen that lists recently used files and shows templates that you can use as the basis for a new workbook. One of the template options is Blank Workbook, which gives you an empty workbook.
Tip
If you prefer to skip the Start Screen and always start with an empty workbook, choose File ![]() Options. In the Excel Options dialog box, click the General tab and remove the check mark from the option labeled Show the Start Screen When This Application Starts.
Options. In the Excel Options dialog box, click the General tab and remove the check mark from the option labeled Show the Start Screen When This Application Starts.
After you start Excel, the empty workbook is called Book1. This workbook exists only in memory and hasn't been saved to disk. By default, this workbook contains three worksheets named Sheet1, Sheet2, and Sheet3. If you're starting a project from scratch, yovu can use this blank workbook. By the way, you can change the default number of sheets in a new workbook by using the General tab of the Excel Options dialog box.
While you're working in Excel, you can create a new (empty) workbook at any time. Excel provides two ways to create a new workbook:
· Choose File ![]() New, which displays a screen that lets you create a blank workbook or a workbook based on a template. To create a new blank workbook, click Blank Workbook.
New, which displays a screen that lets you create a blank workbook or a workbook based on a template. To create a new blank workbook, click Blank Workbook.
· Press Ctrl+N. This shortcut is the fastest way to start a new workbook if you're not using a template.
 See Chapter 8, “Using and Creating Templates,” for more information on using and creating templates.
Opening an Existing Workbook
Here are some of the ways to open a workbook that's already been saved:
· Choose File ![]() Open
Open ![]() Recent and then select the file you want from the list on the right. Only the most recently used files are listed. You can specify the number of files to display (maximum of 50) in the Advanced section of the Excel Options dialog box.
Recent and then select the file you want from the list on the right. Only the most recently used files are listed. You can specify the number of files to display (maximum of 50) in the Advanced section of the Excel Options dialog box.
· Choose File ![]() Open and choose a location from the list on the left. The locations will vary depending on which “places” you've set up. You may see cloud-based options. One of the options is always This PC. You can navigate your files directly using the list, or you can click Browse to display the Open dialog box, which gives you many more options. Locate the Excel workbook file via a Windows Explorer file list. Just double-click the filename (or icon), and the workbook opens in Excel. If Excel isn't running, Windows automatically starts Excel and loads the workbook file.
Open and choose a location from the list on the left. The locations will vary depending on which “places” you've set up. You may see cloud-based options. One of the options is always This PC. You can navigate your files directly using the list, or you can click Browse to display the Open dialog box, which gives you many more options. Locate the Excel workbook file via a Windows Explorer file list. Just double-click the filename (or icon), and the workbook opens in Excel. If Excel isn't running, Windows automatically starts Excel and loads the workbook file.
Tip
When you choose File ![]() Open
Open ![]() Recent, each file in the recent workbooks list displays a pushpin icon on the right when you hover the mouse pointer over the filename. Click the pushpin icon, and that file becomes “pinned” to the list and will always appear at the top of the list. This handy feature ensures that important files always appear on the recent workbooks list — even if you haven't opened the file recently.
Recent, each file in the recent workbooks list displays a pushpin icon on the right when you hover the mouse pointer over the filename. Click the pushpin icon, and that file becomes “pinned” to the list and will always appear at the top of the list. This handy feature ensures that important files always appear on the recent workbooks list — even if you haven't opened the file recently.
Also, notice that you can right-click a workbook in the list and choose Remove from List. Choose Clear Unpinned Workbooks to clear the list and start fresh.
To open a workbook from the Open dialog box, use the folder tree display on the left to locate the folder that contains the file, and then select the workbook file from the list on the right. You can resize the Open dialog box by using the control in the lower-right corner. After you locate and select the file, click Open, and the file opens. Or just double-click the filename to open it.
Notice that the Open button is actually a drop-down list. Click the arrow, and you see these additional options:
· Open: Opens the file normally.
· Open Read-Only: Opens the selected file in read-only mode. When a file is opened in this mode, you can't save changes with the original filename.
· Open as Copy: Opens a copy of the selected file. If the file is named budget.xlsx, the workbook that opens is named Copy(1)budget.xlsx.
· Open in Browser: Opens the file in your default web browser. If the file can't be opened in a browser, this option is disabled.
· Open in Protected View: Opens the file in a special mode that doesn't allow editing. In this view, most of the Excel Ribbon commands are disabled. Read more about this new feature in the nearby sidebar “About Protected View.”
· Open and Repair: Attempts to open a file that may be damaged and recover information contained in it.
Tip
In the Open dialog box, you can hold down the Ctrl key and select multiple workbooks. When you click Open, all the selected workbook files open.
Right-clicking a filename in the Open dialog box displays a shortcut menu with many extra Windows commands. For example, you can copy, delete, or rename the file; modify its properties; and so on.
About Protected View
Excel 2010 introduced a security feature known as Protected View. Although it might seem like Excel is trying to keep you from opening your own files, Protected View is all about protecting you from malware. Malware refers to something that can harm your system. Hackers have figured out several ways to manipulate Excel files in a way that harmful code can be executed. Protected View essentially prevents these types of attacks by opening a file in a protected environment (a “sandbox”).
If you open an Excel workbook that you downloaded from the Web, you'll see a colorful message above the Formula bar. In addition, the Excel title bar displays [Protected View]. Choose File ![]() Info to find out why Excel opened the file in Protected View.
Info to find out why Excel opened the file in Protected View.
If you're certain that the file is safe, click Enable Editing. If you don't enable editing, you'll be able to view the contents of the workbook, but you won't be able to make any changes to it.
If the workbook contains macros, you'll see another message after you enable editing: Security Warning. Macros have been disabled. If you're sure that the macros are harmless, click Enable Content.
Protected View, by default, kicks in for the following:
· Files downloaded from the Internet
· Attachments opened from Outlook
· Files open from potentially unsafe locations, such as your Temporary Internet Files folder
· File that are blocked by File Block Policy (a Windows feature that allows administrators to define potentially dangerous files)
· Files that have a digital signature that has expired
In some situations, you don't care about working with the document. You just want to print it. In that case, choose File ![]() Print, and then click the Enable Printing button.
Print, and then click the Enable Printing button.
Also, note that you can copy a range of cells from a workbook in Protected View and paste it into a different workbook.
You have some control over the types of files that trigger Protected View. To change the settings, choose File ![]() Options, and click Trust Center. Then click the Trust Center Settings button and click the Protected View tab in the Trust Center dialog box.
Options, and click Trust Center. Then click the Trust Center Settings button and click the Protected View tab in the Trust Center dialog box.
Filtering filenames
At the bottom of the Open dialog box is a button with a drop-down list. When the Open dialog box is displayed, this button shows All Excel Files (and a long list of file extensions). The Open dialog box displays only those files that match the extensions. In other words, you see only standard Excel files.
If you want to open a file of a different type, click the arrow in the drop-down list and select the file type that you want to open. This changes the filtering and displays only files of the type that you specify.
You can also type a filter directly in the File Name box. For example, typing the following will display only files that have an .xlsx extension (press Enter after typing the filter): *.xlsx.
Choosing your file display preferences
The Open dialog box can display your workbook filenames in several styles: as a list, with complete details, as icons, and so on. You control the style by clicking the More Options icon (in the upper-right corner) and then selecting a display style from the drop-down list.
Opening Workbooks Automatically
Many people work on the same workbooks each day. If this describes you, you'll be happy to know that Excel can open specific workbook files automatically whenever you start Excel. Any workbooks placed in the XLStart folder open automatically.
The location of the XLStart folder varies, depending on your Windows version. To determine the location of the XLStart folder on your system, follow these steps:
1. Choose File ![]() Options, and select the Trust Center tab.
Options, and select the Trust Center tab.
2. Click the Trust Center Settings button. The Trust Center dialog box appears.
3. In the Trust Center dialog box, select the Trusted Locations tab. You'll see a list of trusted locations.
4. Look in the path for the location described as User Startup. The path might look something like this:
C:\Users\<username>\AppData\Roaming\Microsoft\Excel\XLSTART\
Another XLStart folder may be located here:
C:\Program Files\Microsoft Office16\Root\Office16\XLStart\
Any workbook files (excluding template files) stored in either of these XLStart folders open automatically when Excel starts. If one or more files open automatically from an XLStart folder, Excel won't start with a blank workbook.
You can specify an alternate startup folder in addition to the XLStart folder. Choose File ![]() Options and select the Advanced tab. Scroll down to the General section and enter a new folder name in the At Startup, Open All Files In field. Then when you start Excel, it automatically opens all workbook files in both the XLStart folders and the alternate folder that you specified.
Options and select the Advanced tab. Scroll down to the General section and enter a new folder name in the At Startup, Open All Files In field. Then when you start Excel, it automatically opens all workbook files in both the XLStart folders and the alternate folder that you specified.
Saving a Workbook
When you're working in Excel, your workbook is vulnerable to day-ruining events such as power failures and system crashes. Therefore, you should save your work often. Saving a file takes only a few seconds, but re-creating hours of lost work takes many hours.
Excel provides four ways to save your workbook:
· Click the Save icon on the Quick Access toolbar. (It looks like an old-fashioned floppy disk.)
· Press Ctrl+S.
· Press Shift+F12.
· Choose File ![]() Save.
Save.
Caution
Saving a file overwrites the previous version of the file on your hard drive. If you open a workbook and then completely mess it up, don't save the file. Instead, close the workbook without saving it and then reopen the good copy.
If your workbook has already been saved, it's saved again using the same filename in the same location. If you want to save the workbook to a new file or to a different location, choose File ![]() Save As (or press F12).
Save As (or press F12).
If your workbook has never been saved, you'll be taken to the Save As pane in the Backstage view. Here you can specify a location, and you'll be prompted for a filename, which you specify in the Save As dialog box. A new (unsaved) workbook has a default name, such as Book1 or Book2. Although Excel allows you to use these generic workbook names for filenames, you'll almost always want to specify a more descriptive filename in the Save As dialog box.
The Save As dialog box is similar to the Open dialog box. Select the desired folder in the folder list on the left. After you select the folder, enter the filename in the File Name field. You don't need to specify a file extension — Excel adds it automatically, based on the file type specified in the Save as Type field. By default, files are saved in the standard Excel file format, which uses an .xlsx file extension.
Tip
To change the default file format for saving files, choose File ![]() Options to access the Excel Options dialog box. Click the Save tab and change the setting for the Save Files in This Format option. For example, if your workbooks must be compatible with older versions of Excel (versions before Excel 2007), you can change the default format to Excel 97–2003 Workbook (*.xls). Doing so eliminates the need to select the older file type every time you save a new workbook.
Options to access the Excel Options dialog box. Click the Save tab and change the setting for the Save Files in This Format option. For example, if your workbooks must be compatible with older versions of Excel (versions before Excel 2007), you can change the default format to Excel 97–2003 Workbook (*.xls). Doing so eliminates the need to select the older file type every time you save a new workbook.
Caution
If your workbook contains VBA macros, saving it with an .xlsx file extension will erase all the macros. It must be saved with an .xlsm extension (or saved in the XLS or XLSB format). If your workbook has macros, Excel will still propose to save it as an XLSX file. It other words, Excel suggests a file format that will destroy your macros! It will, however, warn you that the macros will be lost.
If a file with the same name already exists in the location that you specify, Excel asks whether you want to overwrite that file with the new file. Be careful! You can't recover the previous file after you overwrite it.
Using AutoRecover
If you've used computers for any length of time, you've probably lost some work. You forgot to save a file, or maybe the power went out and your unsaved work was lost. Or maybe you were working on something and didn't think it was important, so you closed it without saving — and later realized that it was important. Excel's AutoRecover feature might make these types of “d'oh!” moments less frequent.
As you work in Excel, your work is periodically saved, automatically. It happens in the background so you don't even know that it's happening. If necessary, you can access these autosaved versions of your work. This even applies to workbooks that you never explicitly saved.
The AutoRecover feature consists of two components:
· Versions of a workbook are saved automatically, and you can view them.
· Workbooks that you closed without saving are saved as draft versions.
Recovering versions of the current workbook
To see whether any previous versions of the active workbook are available, choose File ![]() Info. The Versions section lists the available old versions (if any) of the current workbook. In some cases, more than one autosaved version will be listed. In other cases, no autosaved versions will be available.
Info. The Versions section lists the available old versions (if any) of the current workbook. In some cases, more than one autosaved version will be listed. In other cases, no autosaved versions will be available.
You can open an autosaved version by clicking its name. Remember that opening an autosaved version won't automatically replace the current version of your workbook. Therefore, you can decide whether the autosaved version is preferable to the current version. Or you can just copy some information that may have been accidentally deleted and paste it to your current workbook.
When you close the workbook, the autosaved versions are deleted.
Recovering unsaved work
When you close a workbook without saving your changes, Excel asks whether you're sure. If that unsaved workbook has an autosaved version, the Are You Sure dialog box informs you of that fact.
To recover a workbook that you closed without saving, choose File ![]() Info
Info ![]() Manage Versions
Manage Versions ![]() Recover Unsaved Workbooks. You'll see a list of all draft versions of your workbooks. You can open them and (if you're lucky) recover something that you needed. Note that the unsaved workbooks are stored in the XLSB file format and are read-only files. If you want to save one of these files, you need to provide a new name.
Recover Unsaved Workbooks. You'll see a list of all draft versions of your workbooks. You can open them and (if you're lucky) recover something that you needed. Note that the unsaved workbooks are stored in the XLSB file format and are read-only files. If you want to save one of these files, you need to provide a new name.
Draft versions are deleted after four days or when you edit the file.
Configuring AutoRecover
Normally, AutoRecover files are saved every ten minutes. You can adjust the AutoRecover save time in the Save tab of the Excel Options dialog box. You can specify a save interval between 1 and 120 minutes.
If you work with sensitive documents, you might prefer that previous versions aren't saved automatically on your computer. The Save tab of the Excel Options dialog box lets you disable this feature completely or disable it just for a specific workbook.
File-Naming Rules
Excel workbook files are subject to the same rules that apply to other Windows files. A filename can be up to 255 characters, including spaces. This length enables you to give meaningful names to your files. You can't, however, use any of the following characters in your filenames:
|
|
You can use uppercase and lowercase letters in your names to improve readability, but the filenames aren't case sensitive. For example, My 2016 Budget.xlsx and MY 2016 BUDGET.xlsx are equivalent names.
Password-Protecting a Workbook
In some cases, you may want to specify a password for your workbook. When a user attempts to open a password-protected workbook, a password must be entered before the file is opened.
To set a password for a workbook, follow these steps:
1. Choose File ![]() Info, and click the Protect Workbook button. This button displays some additional options in a drop-down list.
Info, and click the Protect Workbook button. This button displays some additional options in a drop-down list.
2. Choose Encrypt with Password from the list. Excel displays the Encrypt Document dialog box, shown in Figure 7.1.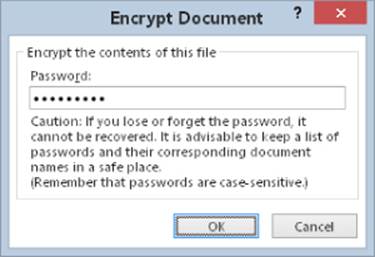
Figure 7.1 The Encrypt Document dialog box is where you specify a password for your workbook.
3. Enter the password, and then enter it again.
4. Click OK, and save the workbook.
When you reopen the workbook, you'll be prompted for a password.
Caution
Passwords are case sensitive. Be careful when using password protection because it's impossible to open the workbook (using normal methods) if you forget the password. Also, remember that Excel passwords can be cracked, so it's not a perfect security measure.
Organizing Your Files
If you have hundreds of Excel files, you might have a problem locating the workbook that you need. Using descriptive filenames can help. Using folders and subfolders (with descriptive names) also makes it easier to find the particular file you need. In some cases, though, that's not enough.
Fortunately, Excel lets you assign a variety of descriptive information (sometimes known as metadata) to a workbook. These are known as document properties. This information includes such items as the author, tags, and categories.
When you choose File ![]() Info, you can view (or modify) the document properties for the active workbook. This information is shown on the right side of the screen.
Info, you can view (or modify) the document properties for the active workbook. This information is shown on the right side of the screen.
Tip
To access even more properties for your workbook, click the down arrow on Properties and choose Advanced Properties.
Other Workbook Info Options
The Info pane of Backstage view displays more file-related options. To display this pane, choose File ![]() Info. These options, described in the following sections, may be useful if you plan to distribute your workbook to others. Note that not all workbooks display all the options described in the following sections. Only the relevant options are shown.
Info. These options, described in the following sections, may be useful if you plan to distribute your workbook to others. Note that not all workbooks display all the options described in the following sections. Only the relevant options are shown.
Protect Workbook options
The File ![]() Info
Info ![]() Protect Workbook drop-down list contains the following options:
Protect Workbook drop-down list contains the following options:
· Mark as Final: Use this option to designate the workbook as “final.” The document is saved as a read-only file to prevent changes. This isn't a security feature. Rather, the Mark as Final command is useful to let others know that you're sharing a completed version of a workbook.
· Encrypt with Password: Use this command to specify a password that is required to open the workbook. (See “Password-Protecting a Workbook,” earlier in this chapter.)
· Protect Current Sheet: This command lets you protect various elements of a worksheet. It displays the same dialog box as the Review ![]() Changes
Changes ![]() Protect Sheet command.
Protect Sheet command.
· Protect Workbook Structure: This command lets you protect the structure of a workbook. It displays the same dialog box as Review ![]() Changes
Changes ![]() Protect Workbook.
Protect Workbook.
· Add a Digital Signature: This command allows you to “sign” a workbook digitally.
See Chapter 30, “Protecting Your Work,” for more information about protecting worksheets, protecting workbooks, and using digital signatures.
Check for Issues options
The File ![]() Info
Info ![]() Check for Issues drop-down list contains the following options:
Check for Issues drop-down list contains the following options:
· Inspect Document: This command displays the Document Inspector dialog box. The Document Inspector can alert you to some potentially private information that may be contained in your workbook — perhaps information that's contained in hidden rows or columns or hidden worksheets. If you plan to make a workbook available to a large audience, it's an excellent idea to use the Document Inspector for a final check.
· Check Accessibility: This command checks the workbook for potential problems that might occur for people with disabilities. The results of the check are displayed in a task pane in the workbook.
· Check Compatibility: This command is useful if you need to save your workbook in an older file format. It displays a helpful Compatibility Checker dialog box that lists potential compatibility problems. This dialog box also appears when you save a workbook using an older file format. (For more information, see “Excel File Compatibility,” later in this chapter.)
Manage Versions options
If Excel automatically saved previous versions of your workbook, you can recover one of the earlier versions.
Browser View options
If your workbook will be viewed in a web browser, you can specify which sheets will be viewable.
Compatibility Mode section
If the active workbook is an old workbook opened in compatibility mode, you'll see the Compatibility Mode section in the Info pane. To convert the workbook to the current Excel file format, click the Convert button.
Caution
Be aware that this command deletes the original version of the file, which seems like a rather drastic measure. It's probably wise to make a copy of your workbook before you use this command.
Closing Workbooks
After you're finished with a workbook, you can close it to free the memory that it uses. Other workbooks will remain open. When you close the last open workbook, you also close Excel.
You can close a workbook by using any of the following methods:
· Choose File ![]() Close.
Close.
· Click the Close button (the X) in the right corner of the window's title bar.
· Double-click the Excel icon on the left side of the workbook's title bar.
· Press Ctrl+F4.
· Press Ctrl+W.
If you've made any changes to your workbook since it was last saved, Excel asks whether you want to save the changes to the workbook before closing it.
Safeguarding Your Work
Nothing is more frustrating than spending hours creating a complicated Excel workbook only to have it destroyed by a power failure, a hard drive crash, or even human error. Fortunately, protecting yourself from these disasters is not a difficult task.
Earlier in the chapter, I discussed the AutoRecover feature that makes Excel save a backup copy of your workbook at regular intervals (see “Using AutoRecover”). AutoRecover is a good idea, but it certainly isn't the only backup protection you should use. If a workbook is important, you need to take extra steps to ensure its safety. The following backup options help ensure the safety of individual files:
· Keep a backup copy of the file on the same drive. Although this option offers some protection if you make a mess of the workbook, it won't do you any good if the entire hard drive crashes.
· Keep a backup copy on a different hard drive. This method assumes, of course, that your system has more than one hard drive. This option offers more protection than the preceding method because the likelihood that both hard drives will fail is remote. If the entire system is destroyed or stolen, however, you're out of luck.
· Keep a backup copy on a network server. This method assumes that your system is connected to a server on which you can write files. This method is fairly safe. If the network server is located in the same building, however, you're at risk if the entire building burns down or is otherwise destroyed.
· Keep a backup copy on an Internet backup site. Several websites specialize in storing backup files.
· Keep a backup copy on a removable medium. This is probably the safest method. Using a removable medium, such as a USB drive, enables you to physically take the backup to another location. So if your system (or the entire building) is damaged, your backup copy remains intact.
Excel File Compatibility
It's important to understand the limitations regarding version compatibility. Even though your colleague is able to open your file, there is no guarantee that everything will function correctly or look the same.
Checking compatibility
If you save your workbook to an older file format (such as .xls, for versions prior to Excel 2007), Excel automatically runs the Compatibility Checker. The Compatibility Checker identifies the elements of your workbook that will result in loss of functionality or fidelity (cosmetics).
Figure 7.2 shows the Compatibility Checker dialog box. Click the Select Versions to Show button to limit the compatibility checking to a specific version of Excel.

Figure 7.2 The Compatibility Checker is a useful tool for those who share workbooks with other people.
The bottom part of the Compatibility Checker lists the potential compatibility problems. To display the results in a more readable format, click the Copy to New Sheet button.
Keep in mind that compatibility problems also can occur with Excel 2007, Excel 2010, and Excel 2013, even though these versions use the same file format as Excel 2016. You can't expect features that are new to a particular version of Excel to work in earlier versions. For example, if you use the new forecasting functions (a feature introduced in Excel 2016) and send it to a colleague who uses Excel 2013, functions will not be recognized. The Compatibility Checker identifies these types of problems.
Note
Excel 2016 can open all files created with earlier versions of Excel.
Recognizing the Excel 2016 file formats
The Excel file formats (all of which were introduced in Excel 2007) are
· XLSX: A workbook file that does not contain macros
· XLSM: A workbook file that contains macros
· XLTX: A workbook template file that does not contain macros
· XLTM: A workbook template file that contains macros
· XLSA: An add-in file
· XLSB: A binary file similar to the old XLS format but able to accommodate the new features
· XLSK: A backup file
With the exception of XLSB, these are all “open” XML files, which means that the file format is not proprietary and other applications can read and write these types of files.
Tip
XML files are actually zip-compressed text files. If you rename one of these files to have a .zip extension, you'll be able to examine the contents using any of several zip file utilities — including the zip file support built into Windows. An exception is if the workbook requires a password to open. Taking a look at the innards of an Excel workbook is an interesting exercise for curious-minded users.
Saving a file for use with an older version of Excel
To save a file for use with an older version of Excel, choose File ![]() Save As. In the Save As dialog box, select one of the following from the Save as Type drop-down list:
Save As. In the Save As dialog box, select one of the following from the Save as Type drop-down list:
· Excel 97–2003 Workbook (*.xls): If the file will be used by someone who has Excel 97, Excel 2000, Excel 2002, or Excel 2003
· Microsoft Excel 5.0/95 Workbook (*.xls): If the file will be used by someone who has Excel 5 or Excel 95
Make sure you run the Compatibility Checker first to ensure that nothing critical will be lost.
All materials on the site are licensed Creative Commons Attribution-Sharealike 3.0 Unported CC BY-SA 3.0 & GNU Free Documentation License (GFDL)
If you are the copyright holder of any material contained on our site and intend to remove it, please contact our site administrator for approval.
© 2016-2026 All site design rights belong to S.Y.A.