Pro Office 365 Development, Second Edition (2014)
Chapter 9. Authentication, Authorization, and Discovery Service
Office 365 APIs allow for developers to write software that consumes business data from the Cloud. Microsoft hosts the data and provides the client software to access this data. However, Office 365 API allows for non-Microsoft developers to build the client software to access this business data. That can be wonderful, but is it safe (see Figure 9-1)?
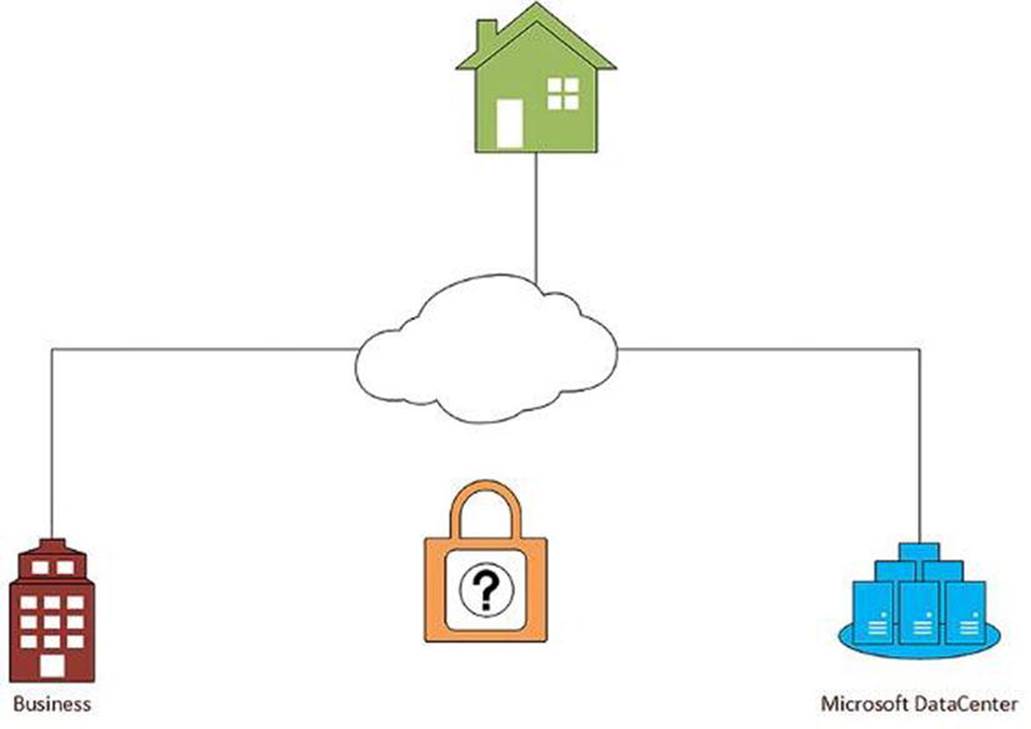
Figure 9-1. Are Office 365 APIs safe?
A business owner might be convinced that hosting their data on Microsoft servers on the internet is secure. When they use Outlook or Word or SharePoint, they are prompted for their Microsoft Account. They can trust that others cannot access their information.
Now, as a developer, we can provide custom applications and gain access through hand-crafted software using this Office 365 API “thing”. Can business owners trust that their developer will protect their data properly? What about “hackers”? What stops them from building their own hand-crafted software to access this same data? Is this safe?
Business owners and developers alike can rest assured that Microsoft takes security very seriously. In fact, it is Microsoft that handles security for all Office 365 API traffic. Protection is not left to the individual developer. In fact, developers can also rest easy knowing they do not have to carry this burden.
This chapter will explain how Microsoft handles security issues through the Office 365 APIs. It will explain how to setup security within Azure Active Directory and utilize this configuration in Visual Studio. It will also connect these concepts to the new Discovery Service and demonstrate how that works as well.
Authentication and Authorization
Security for data breaks down into two concepts: authentication and authorization.
· Authentication: The process of confirming the identity of a user.
· Authorization: The process of confirming a particular user is allowed access to particular resources.
For a comparison, consider a security badge for a building with a photo. For proper security, there would need to be a process to assess whether the person holding the badge is indeed the person depicted on the badge. This would be the Authentication process. Once the person is authenticated, they would then swipe their badge against the security locks in various areas within the building. They may gain access to some areas and not gain access to others. This is the Authorization process.
Azure Active Directory
Microsoft handles authentication and authorization through the Azure Active Directory Service. Accounts are created and given roles. Apps are registered and given access to Office 365 assets. All of this is managed through the Azure Portal. Doing things this way does allow for a Single Sign-On experience. Microsoft uses OAuth for the authentication process.
Associate Microsoft Azure Subscription with Office 365
The Office 365 account needs to be associated with a Microsoft Azure subscription in order to manage security. Once these are connected, users and apps can be managed within the Azure Active Directory.
![]() Note A Microsoft Azure Trial subscription might be available, depending on the type of Office 365 account being used. If it’s necessary to create a new Microsoft Azure subscription, try logging in with the Office 365 credentials to see if access is available. If this is available, the following process is not necessary. Otherwise, a separate subscription will need to be created and associated with the Office 365 account.
Note A Microsoft Azure Trial subscription might be available, depending on the type of Office 365 account being used. If it’s necessary to create a new Microsoft Azure subscription, try logging in with the Office 365 credentials to see if access is available. If this is available, the following process is not necessary. Otherwise, a separate subscription will need to be created and associated with the Office 365 account.
To associate your Office 365 account with your Azure subscription, complete the following steps:
1. Log in to the Microsoft Azure Management Portal (http://manage.windowsazure.com) with your existing Azure account.
2. Navigate to the Active Directory node.
3. Choose the Directory tab and click the Add at the bottom of the screen.
4. Select “Use existing directory” in the dialog box and check the box to sign out. Click the check mark in the bottom corner of the dialog.
5. Log in with your Office 365 credentials and continue through the screens that follow. Then choose, Sign out now. You will need to reaccess the Azure Portal with your Azure account, so you need to close your browser.
6. Open your browser again and reaccess the Azure Portal and login with your Azure account.
7. Navigate to the Active Directory node and you should see your Office 365 association under Directory.
Creating Users
The Single Sign-On process for Office 365 does not allow Microsoft Accounts for user authentication. For Office 365, organizational accounts must be created. These accounts are created directly within Azure Active Directory (see Figure 9-2) and managed within the Azure Portal.
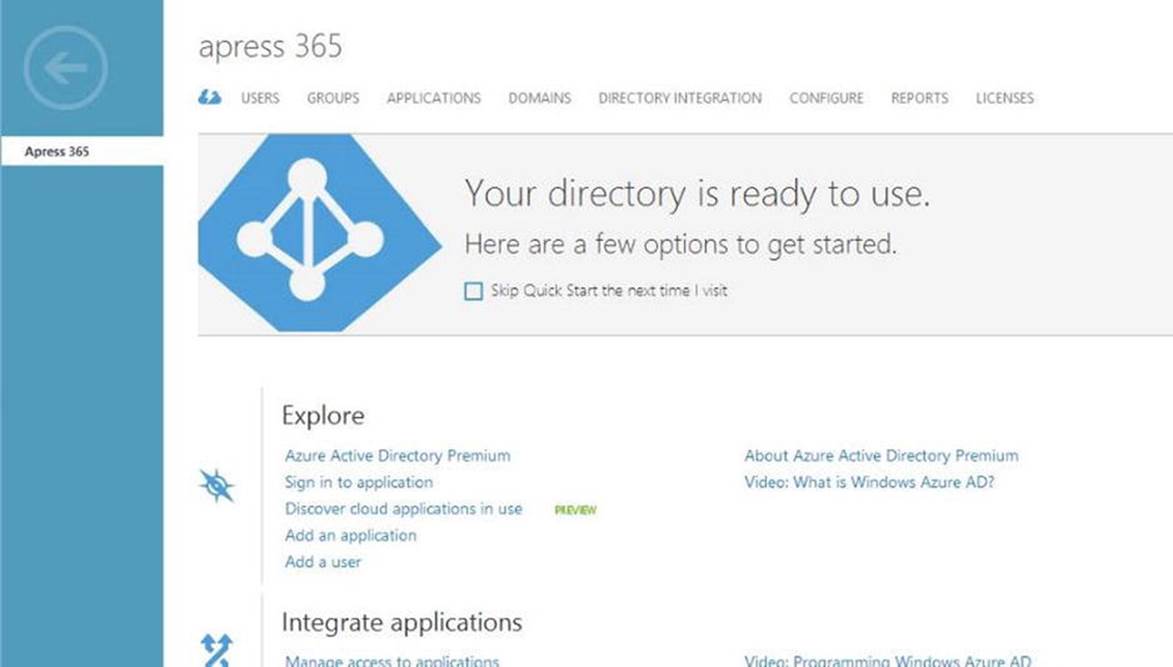
Figure 9-2. Office 365 Directory in Azure AD
1. Access your Azure Portal and navigate to the Active Directory node. Select your Office 365 Directory.
2. Click Add User and complete the dialog box that appears, as shown in Figure 9-3.
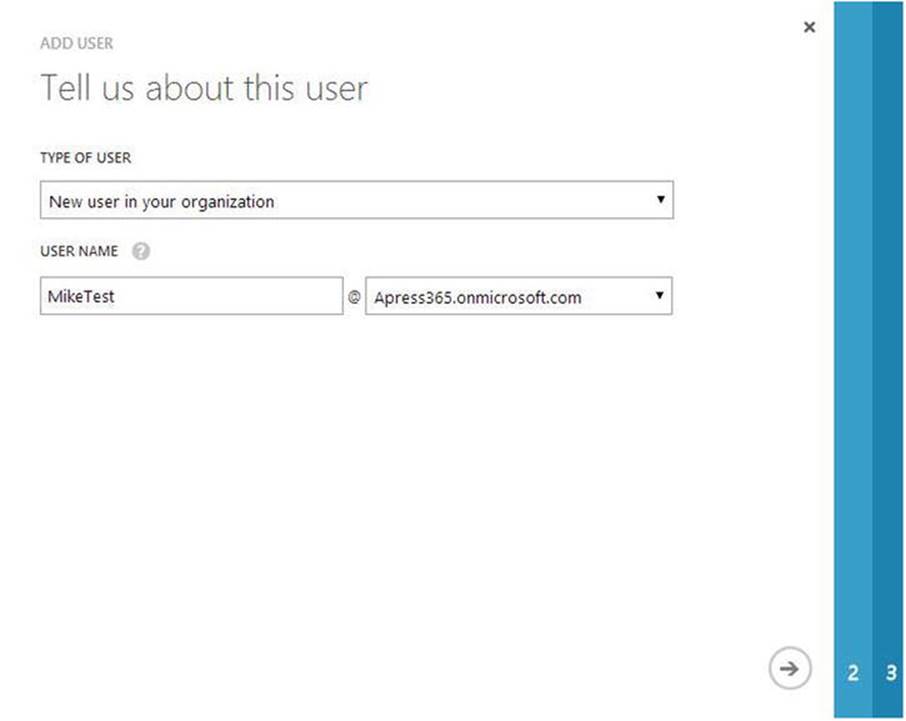
Figure 9-3. New user creation in Azure AD
3. Enter the User Profile details (see Figure 9-4). This includes the first and last name, and a display name for the user. For this first account, choose the Global Administrator role. Also, enter an alternate e-mail address.
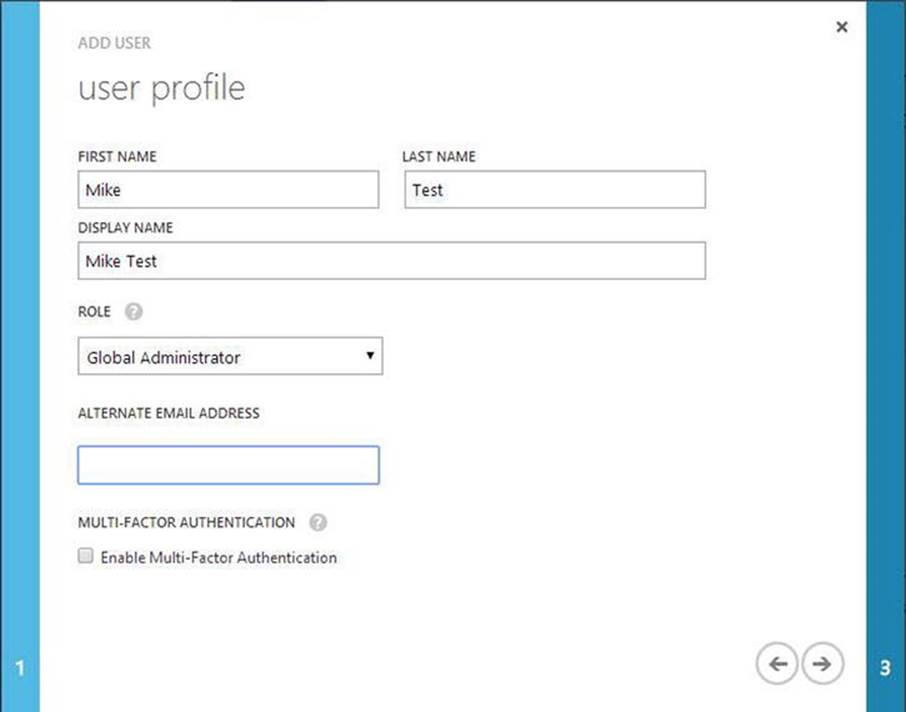
Figure 9-4. User Profile details for Azure AD
4. Create a temporary password for initial account access. Click the large green button and a password will be generated (see Figure 9-5).
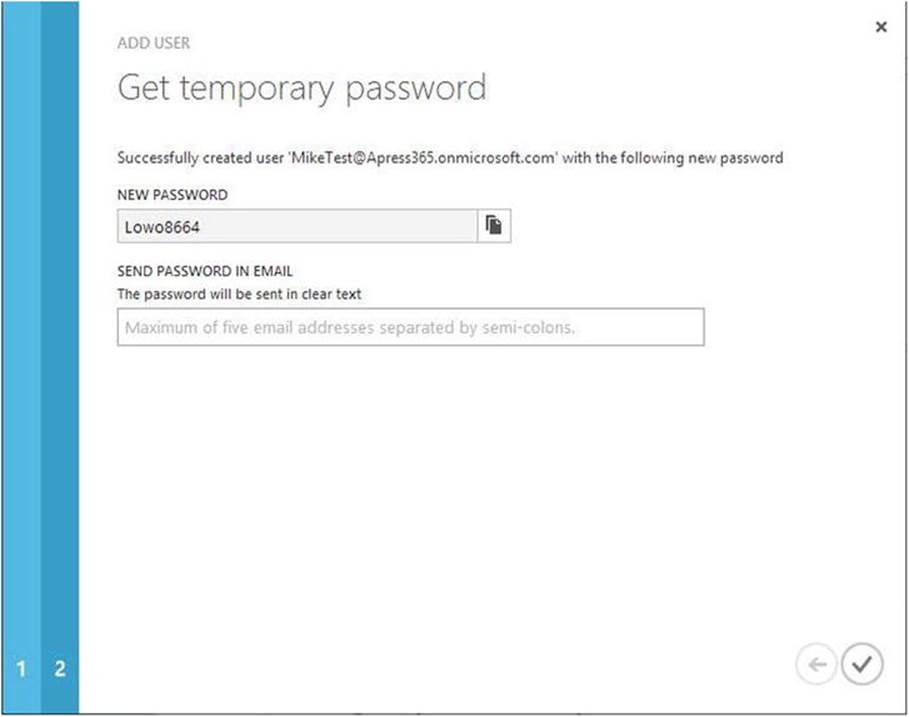
Figure 9-5. Temporary password for new account
5. Enter e-mail addresses for notification of this new account.
6. Click the check mark in the bottom corner of the screen. This will create the user.
Once the temporary password has been reset with a permanent one, this user can be used to access Office 365 assets. However, the user is not the only resource that requires management. It is important who accesses data, but it is also important how they access that data. The applications also have to be registered within Azure AD and managed.
Register App in Azure Portal
The Office 365 API Tools shown in the previous chapter will register the application when the service is connected to the project within Visual Studio. However, developers may also choose to manually register an application.
1. In a browser, go to the Azure Management Portal (https://manage.windowsazure.com) and log in.
2. Navigate to the Active Directory node and choose the Office 365 directory.
3. Click the Applications tab at the top of the screen. Then choose the Add icon at the bottom of the screen. The dialog shown in Figure 9-6 should display.
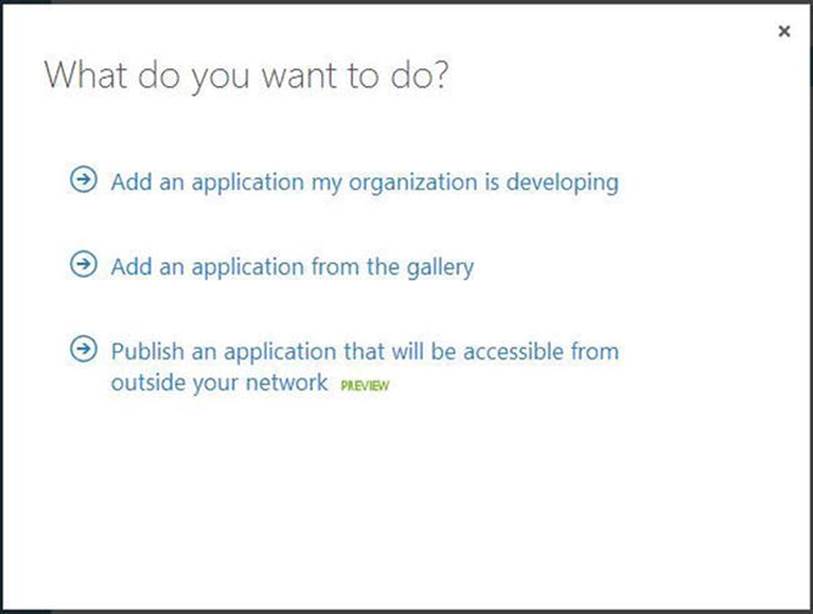
Figure 9-6. Register new app in Azure AD
4. Choose “Add an application my organization is developing” and enter the name of the application in the dialog (see Figure 9-7).
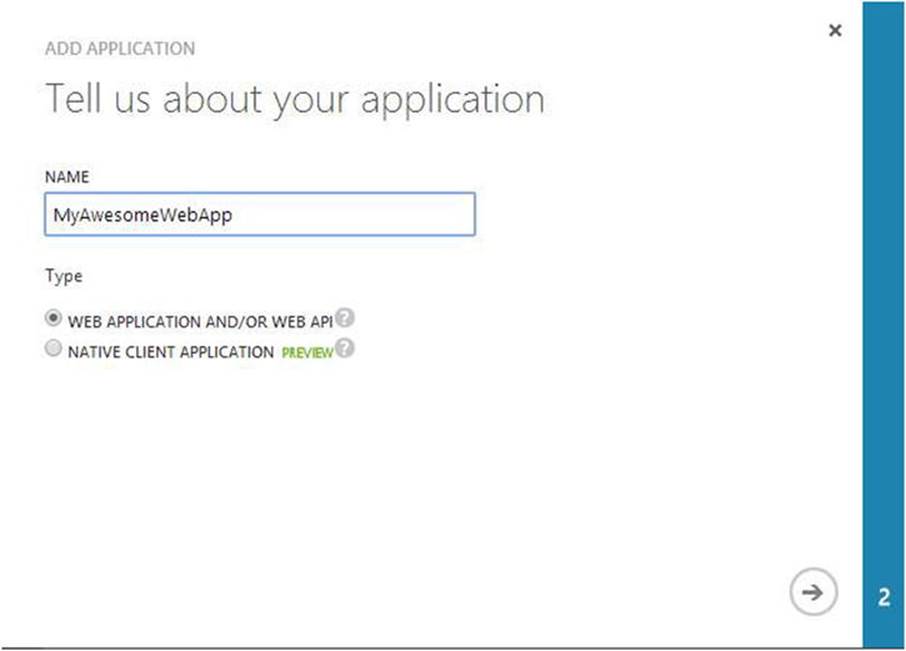
Figure 9-7. Application name for new app in Azure AD
5. Add the App Properties, including the sign-on URL and the App ID URL (see Figure 9-8).
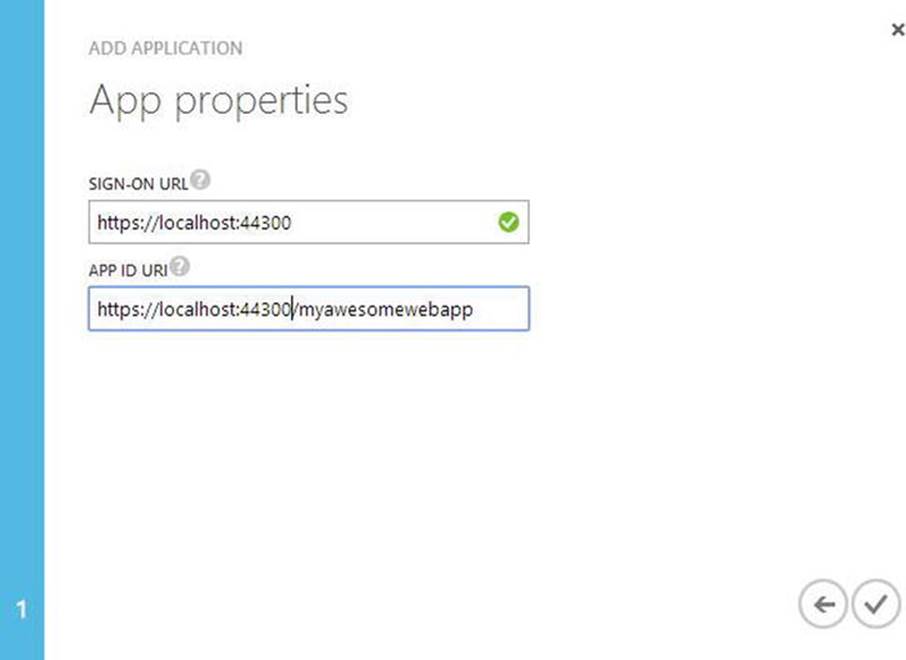
Figure 9-8. App Properties in Azure AD
6. Click the Configure tab. Take note of the Client ID. For web applications, a key needs to be generated for access. Under the “keys” section, select a duration such as 1 Year (see Figure 9-9).
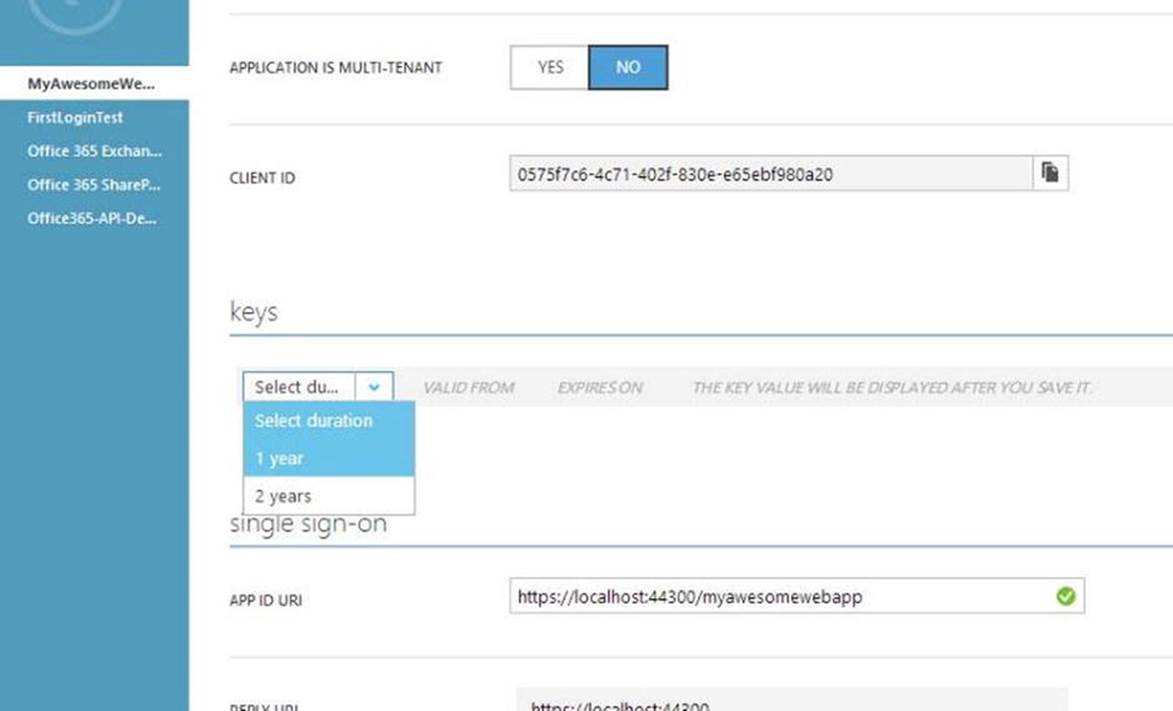
Figure 9-9. App Client ID and generating keys
7. Set the permissions for the app to access Office 365 APIs (see Figure 9-10).
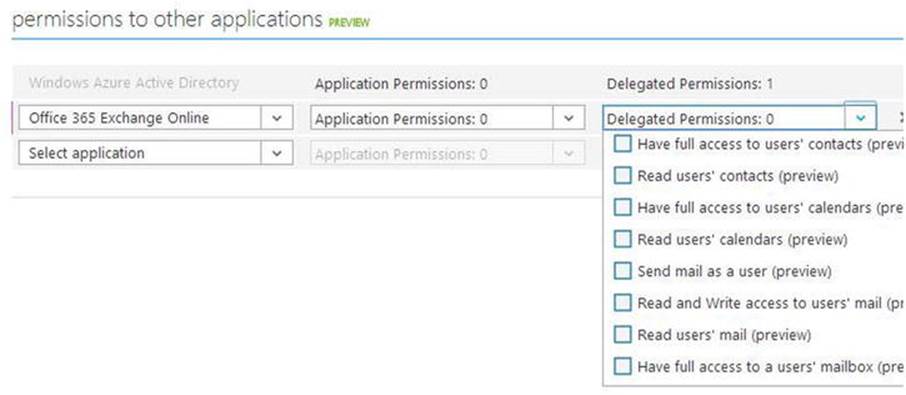
Figure 9-10. Setting permissions for Office 365 APIs app registration
Test Authentication Application in Visual Studio
Visual Studio and the Office 365 API Tools make things easy to get setup and handle authentication on their own. The developer simply has to enter the proper configuration to make things work.
1. Create a new Web Application in Visual Studio called TestAuthenticationApp.
2. Select MVC. Click Change Authentication to setup the project to use Office 365 authentication (see Figure 9-11).
a. Select Organization Accounts
b. Select Cloud - Single Organization
c. Enter your Office 365 domain
d. Set the Access Level to Single Sign On, Read directory data
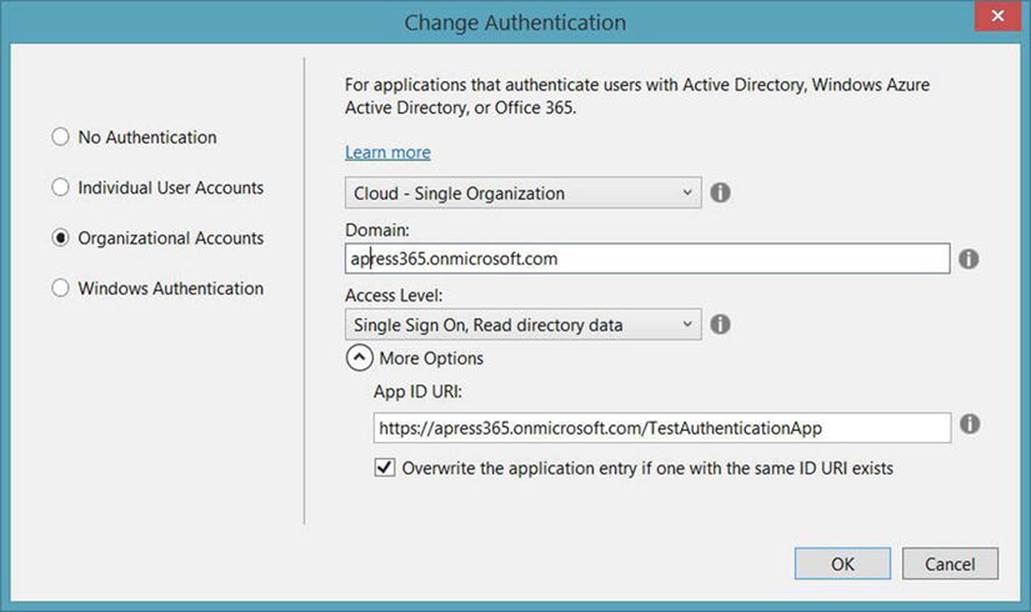
Figure 9-11. Configure project to use Office 365 authentication
3. Click OK. A prompt will appear for Office 365 credentials. Use the user account created earlier in this chapter (see Figure 9-12).
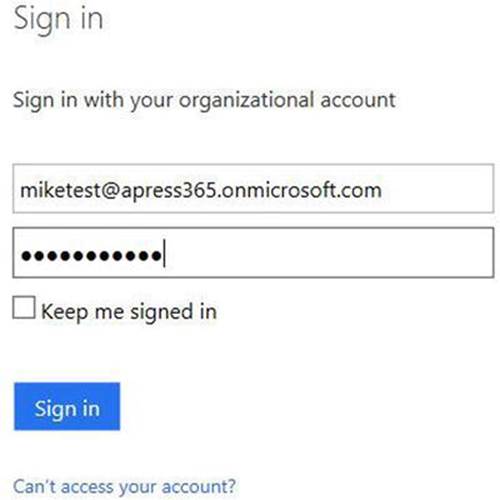
Figure 9-12. Authenticate Office 365 setup for new project
4. The project should now be configured. The New Project dialog should appear similar to Figure 9-13. Note the Authentication setting. Click OK.
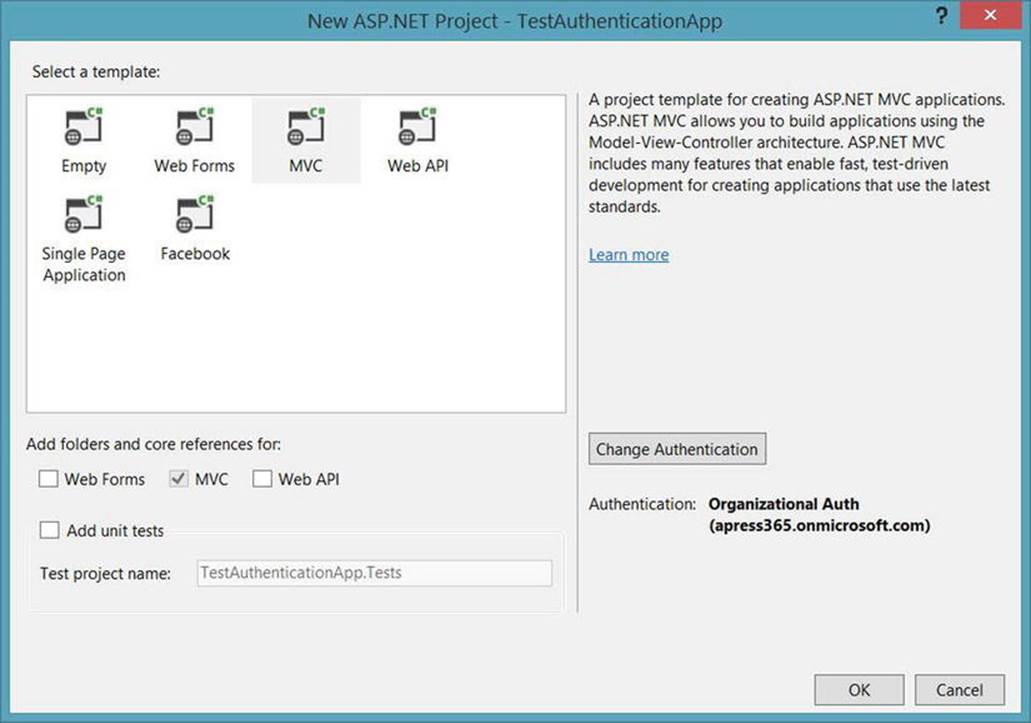
Figure 9-13. New project dialog for Office 365 authentication app
5. Multiple dialogs and progress screens may appear while the project is created and configured. Once Visual Studio stops processing, your application should be ready to authenticate through your Office 365 accounts. Run the web application. The first screen to appear should be a Microsoft login screen requesting an organizational account, as shown in Figure 9-14.
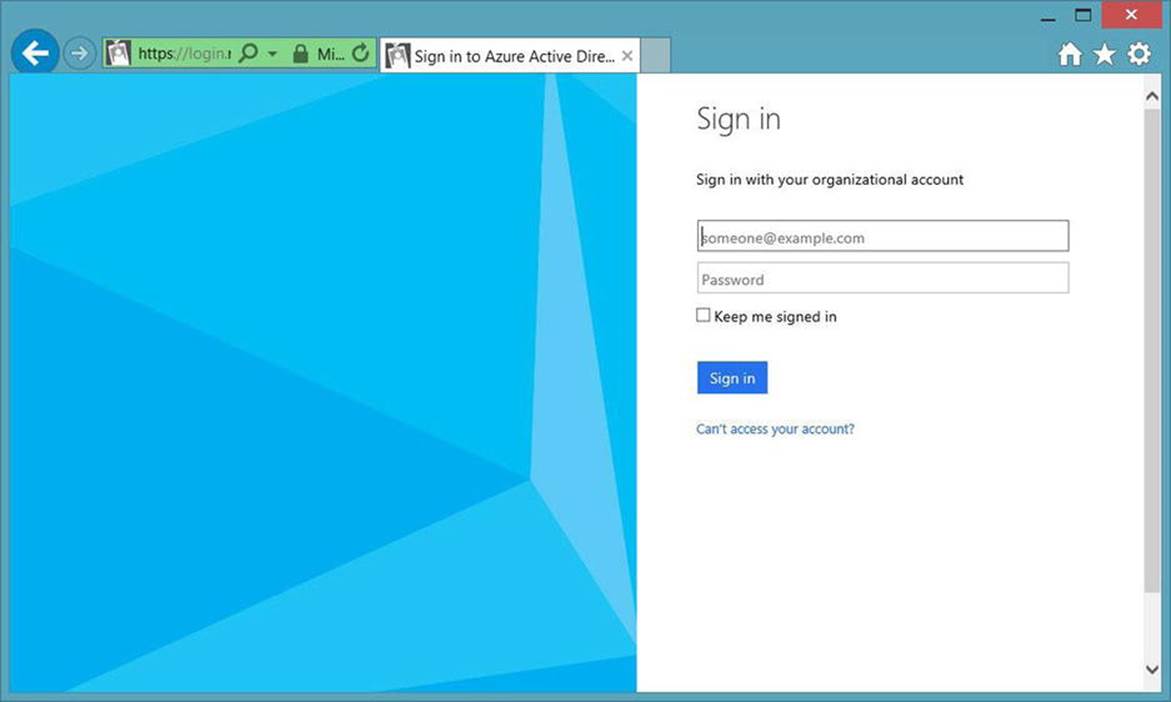
Figure 9-14. Authentication prompt for Office 365 organizational account
![]() Note The authentication process requires SSL. As such, the web application has been configured to use SSL, even if the site is being hosted through IIS Express. The certificate might not be fully trusted by the local machine, a warning message could appear on the screen about the certificate. Clicking continue anyway will allow the site to work and ignore the issues with the certificate. This arises due to the development environment. In production, the hosting sites should have proper SSL certificates and these warnings would not appear.
Note The authentication process requires SSL. As such, the web application has been configured to use SSL, even if the site is being hosted through IIS Express. The certificate might not be fully trusted by the local machine, a warning message could appear on the screen about the certificate. Clicking continue anyway will allow the site to work and ignore the issues with the certificate. This arises due to the development environment. In production, the hosting sites should have proper SSL certificates and these warnings would not appear.
6. Sign in with the Office 365 account created earlier. The next screen should be the default screen for the web application. Note the user in the top right area in Figure 9-15. This should be the organizational account from Azure Active Directory.
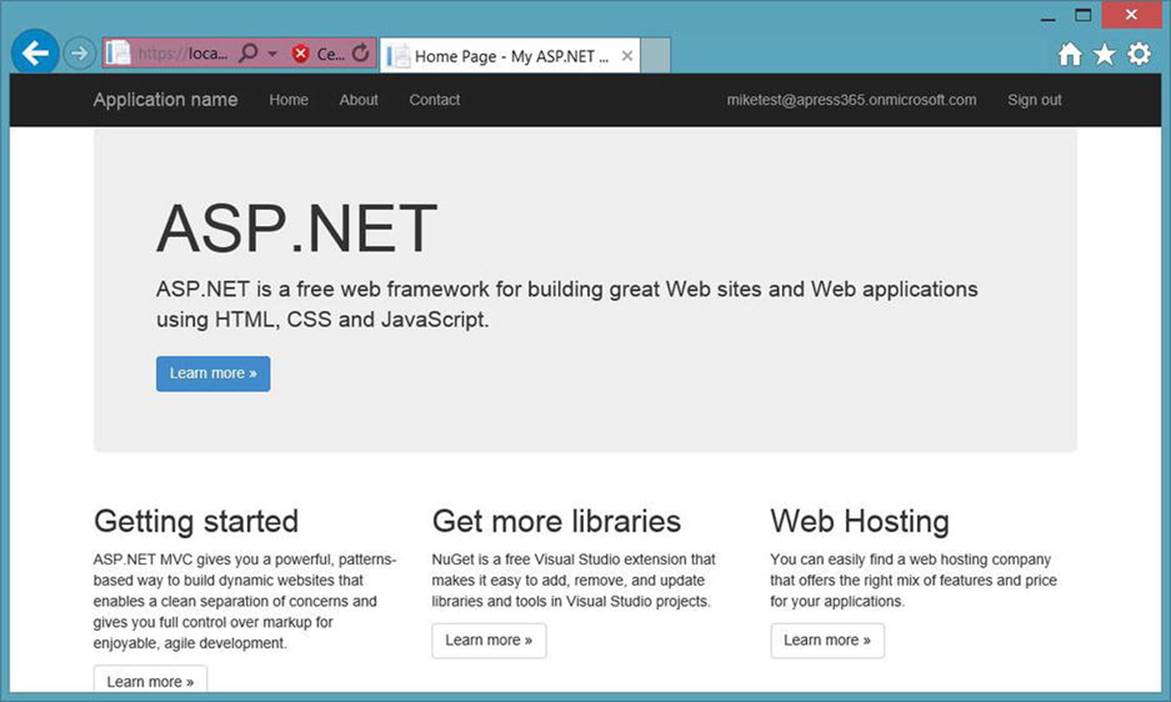
Figure 9-15. Web application screen with authenticated user
7. Click the logged-in user name and view the User Profile details of the current user. The screen should appear similar to Figure 9-16.
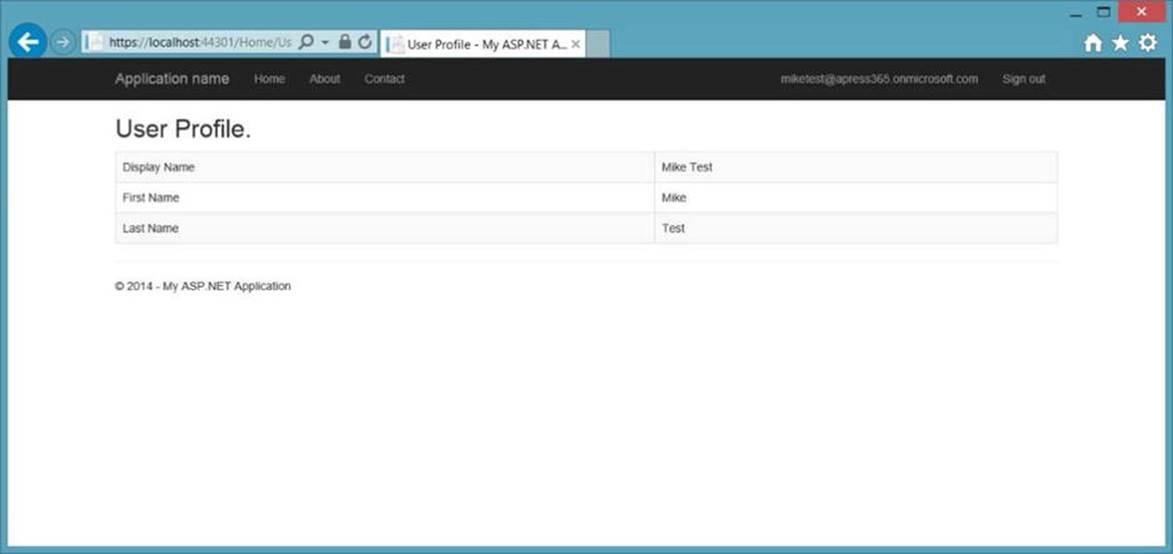
Figure 9-16. User Profile details after authentication
Authentication Uncovered
Setup and configuration for Office 365 authentication is simple. Developers like things simple so we can concentrate on the custom features of our apps. At the same time, it helps to know what is going on and how things work. Let's peel back the covers a bit and see what is going on here.
Authentication Configuration
First of all, the Office 365 API Tools altered the configuration of the web application to work with the authentication process. Find the web.config file in the Visual Studio application. Open it up and take a look. Several changes have been introduced concerning the Azure authentication. The first set of changes can be found in the appSettings section.
<add key="ida:FederationMetadataLocation" value="https://login.windows.net/apress365.onmicrosoft.com/FederationMetadata/2007-06/FederationMetadata.xml" />
<add key="ida:Realm" value="https://apress365.onmicrosoft.com/TestAuthenticationApp" />
<add key="ida:AudienceUri" value="https://apress365.onmicrosoft.com/TestAuthenticationApp" />
<add key="ida:ClientID" value="eccfbefa-3613-4229-9d05-f134e05cb4f7" />
<add key="ida:Password" value="" />
Another section added is the federationConfiguration section for the system.identityModel.services.
<system.identityModel.services>
<federationConfiguration>
<cookieHandler requireSsl="true" />
<wsFederation passiveRedirectEnabled="true"
issuer="https://login.windows.net/apress365.onmicrosoft.com/wsfed"
realm="https://apress365.onmicrosoft.com/TestAuthenticationApp" requireHttps="true" />
</federationConfiguration>
</system.identityModel.services>
These configuration changes point the application to the proper URLs for login and supply the necessary information for accessing the Azure subscription and directory settings that enable the authentication flow to work properly.
User Profile Details
During the project setup, the Office 365 API Tools added a method to the Home controller called UserProfile. This method calls into Azure Active Directory and returns the user profile. This method demonstrates how to use the authenticated user to access resources in the cloud.
Home Controller Setup
Before looking at the UserProfile() method, take a look at the top of the HomeController.cs file within the project. A few constants and static properties have been added to the class.
private const string TenantIdClaimType = "http://schemas.microsoft.com/identity/claims/tenantid";
private const string LoginUrl = "https://login.windows.net/{0}";
private const string GraphUrl = "https://graph.windows.net";
private const string GraphUserUrl = "https://graph.windows.net/{0}/users/{1}?api-version=2013-04-05";
private static readonly string AppPrincipalId = ConfigurationManager.AppSettings["ida:ClientID"];
private static readonly string AppKey = ConfigurationManager.AppSettings["ida:Password"];
Note that most of these values are URLs to locations in the cloud where the application will need to access resources for authentication and information. A couple of the values, namely the AppPrincipalId and the AppKey, are pulled from the web.config file through the ConfigurationManager.
User Profile Method
Now take a look at the UserProfile() method.
[Authorize]
public async Task<ActionResult> UserProfile()
{
string tenantId = ClaimsPrincipal.Current.FindFirst(TenantIdClaimType).Value;
// Get a token for calling the Windows Azure Active Directory Graph
AuthenticationContext authContext = new AuthenticationContext(String.Format(CultureInfo.InvariantCulture, LoginUrl, tenantId));
ClientCredential credential = new ClientCredential(AppPrincipalId, AppKey);
AuthenticationResult assertionCredential = authContext.AcquireToken(GraphUrl, credential);
string authHeader = assertionCredential.CreateAuthorizationHeader();
string requestUrl = String.Format(
CultureInfo.InvariantCulture,
GraphUserUrl,
HttpUtility.UrlEncode(tenantId),
HttpUtility.UrlEncode(User.Identity.Name));
HttpClient client = new HttpClient();
HttpRequestMessage request = new HttpRequestMessage(HttpMethod.Get, requestUrl);
request.Headers.TryAddWithoutValidation("Authorization", authHeader);
HttpResponseMessage response = await client.SendAsync(request);
string responseString = await response.Content.ReadAsStringAsync();
UserProfile profile = JsonConvert.DeserializeObject<UserProfile>(responseString);
return View(profile);
}
This method accesses the Azure Active Directory and returns the User Profile details. This code is generated by the Office 365 API Tools. At this point, no code has been written. When first working with Office 365 APIs, it is helpful to look through this generated code to see what is being done and how information is passed between the application and the cloud in order to retrieve data from the web services.
The method is annotated with the [Authorize] attribute. This means that only authorized users will be allowed to run this method. If the user is not already authenticated, the application will send them through the authentication process. This is important because the method is written expecting an authenticated user.
The code then finds and sets the tenantId from the ClaimsPrincipal.Current set. This uses the constant TenantIdClaimType, set up during code generation. This claim exists as part of the data sent during the authentication process. The method simply searches through the set of claims sent during authentication to find the tenantId.
The tenantId is then used in the next few lines of code to call various pieces of data, including the AuthenticationContext and the ClientCredential that are needed to finally call the authContext.AcquireToken(GraphUrl, credential) method. This receives a token that is necessary for accessing protected resources using OAuth. This AuthenticationResult is then used to generate the authentication header for an HTTP request. Along with the header, the request URL is generated as well.
The requestUrl and the authHeader are used to send a request through HTTP and receive a JSON response. If successfully authenticated, the User Profile details will be returned as a JSON string. This string is deserialized into the UserProfile object and passed to the View for presentation.
It is important to remember this code is generated during the project setup process. This is not custom authentication code for any specific scenario. These changes are handled through the Office 365 API Tools. When the proper information is provided through the dialogs during setup, the application is automatically setup to handle authentication through Microsoft Azure AD. This is extremely convenient for the developer. Simplifying the process allows the application to remain the focus of the development process. Also, security handled by Microsoft provides a more consistent and secure experience for the end-user.
However, there are scenarios where the Office 365 API Tools cannot handle the configuration. For one, this is only available in Visual Studio. Other development tools do not have this available to them. iOS development and web-client app development requires programmers to handle the authentication configuration. Thankfully, Microsoft provides the Discovery service to help simplify these scenarios.
![]() There are Azure SDKs for developers outside of Visual Studio. These are not specifically for Office 365, but they could help with authentication. These SDKs are not within the scope of this chapter. Many can be found at http://azure.microsoft.com/en-us/downloads.
There are Azure SDKs for developers outside of Visual Studio. These are not specifically for Office 365, but they could help with authentication. These SDKs are not within the scope of this chapter. Many can be found at http://azure.microsoft.com/en-us/downloads.
Discovery Service
Microsoft's Discovery Service provides the single starting point for accessing online services, including Office 365 APIs. These are used for authentication, the primary hosting location for services as well as the specific service endpoints. Regardless of the need, it all starts at the Discover Service API Endpoint.
https://api.office.com/discovery/me
Overview
As with any application, the users must be created within Azure AD and the application must be registered. The proper permissions and access must be configured within the Azure Management Portal. Once that is complete, the application is ready to use the services.
Accessing these services will need to follow the proper flow. Office 365 resources are accessed using OAuth. The Discovery Service provides a consistent way to navigate through gaining the tokens needed for accessing resources.
1. First Sign-In
2. Authorization for Discovery
3. Discovery
4. Authorization for the Resource Service
5. Access the Service APIs
First Sign In
The application/user must begin the discovery process with an initial authorization. This allows the authentication process to complete and delivers the proper information to continue with discovery and authorization. Discovery begins with the FirstSignIn API.
GET /FirstSignIn
Parameters
· scope: capability.operations tokens in space-delimited list;
· redirect_uri: location to send user when authorization is complete
Response: The authentication process occurs within the browser. The user is taken to a sign-in page. Multiple calls are made between the browser and the services. After authorization is complete, the user is sent to the redirect_uri location. The following information is also sent to that URI.
user_email
account_type
authorization_service
token_service
scope
discovery_service
discovery_resource
The process can be as simple as sending the end-user to a URL similar to the following:
https://api.office.com/discovery/me/FirstSignIn?redirect_uri={appURI}&scope=MyFiles.Read
The screen will prompt for an e-mail address as seen in Figure 9-17.
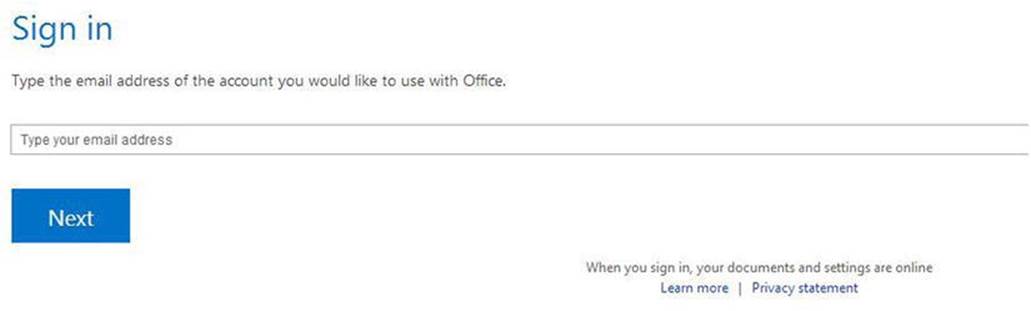
Figure 9-17. Discovery service e-mail address prompt
This prompt expects an Office 365 e-mail address. Once provided, the end-user is authenticated and sent to the redirect URL provided in the parameter. The response information is sent along to this location as well.
Authorization
The process for authorization will depend on whether the application needs access to more than one resource or not. For a single resource, the Authorization API can return an access token directly. The application would then use this token for authorization and access the necessary service. For the rest, the Token service and the Refresh Tokens are used for authorization.
Not every user has permission to every service. So, before Discovery can continue, authorization must occur.
GET /Authorization
Parameters
response_type: "code" or "token", depending on the desired response
client_id: unique client ID
client_secret: client's secret
scope: scope from the sign-in step
resource: the ID of the resource desired
redirect_uri: the location to send the user after authorization
Response
code OR token, depending on the request
Once /SignIn completes, the application then calls the /Authorization API and passes the discovery_resource, along with the other required application details, to gain either the access token or the authorization code. If the authorization code is requested, the application then needs to call the /Token API to request an access token. Otherwise, the application can call the /Services API using the access token returned from the /Authorization service.
Token
The remaining services all require an access token for authorization. The Token service provides these access tokens. The Token service also provides Refresh Tokens.
Refresh Tokens
Many, if not most, applications will need to gain access into more than one Office 365 resource. Custom development occurs often for that primary purpose: to consolidate Office 365 information into a single application. Authorization for this type of access follows a different path. Rather than requesting a token directly, the Authorization service returns an authorization code. The application uses this code to then call the Token service. This response will contain an access token along with a refresh token. The refresh token is used to gain access to subsequent service, after the initial authorization.
POST /Token
Headers
content-type: application/x-www-form-urlencoded
Parameters
grant_type: "authorization_code" is the only accepted value
client_id: the client ID used in the authorization API
client_secret: the client secret used in the authorization API
code: the authorization code returned from the authorization API
redirect_uri: the location to send the user after authorization
Response
access_token
refresh_token
The access token is used in the /Services API. If the application needs to access more than one service, the refresh token is passed into the /Token API to gain a new access token for additional services.
Services
Once authenticated, or signed in, the application is now ready to continue with the discovery process. The functionality of the application dictates which services or resources are needed. Discovery provides the location of those services. The Services APIs provides the service details.
![]() Note The /Services APIs follow the OData protocol. For more information on accessing OData resources, see http://www.odata.org/docs/.
Note The /Services APIs follow the OData protocol. For more information on accessing OData resources, see http://www.odata.org/docs/.
GET /Services
Headers
authorization: access token obtained from the token service
accept: format of the response - application/json;odata=verbose
Parameters (standard OData operators)
$select: filters the properties that are returned
$filter: filters the services that are returned
Response
list of ServiceInfo items
ServiceInfo Fields
Capability
ServiceId
ServiceName
ServiceEndpointUri
ServiceResourceId
Calling the Services APIs will return the details matching the submitted criteria. The application now has the information it needs to access the needed resources. However, the application has only been authorized for Discovery, not for access to the given resource. The next step is to gain authorization for the desired service. The ServiceResourceId must be submitted into the /Authorization service to gain an access token. That token is then used to access the specified service.
Following this process, the application begins at the Discovery Service Endpoint. The application then follows the returned data through the process to gain access to the necessary services. The application does not store the specific URLs for the services it needs.
Summary
All applications attempting to gain access to Office 365 APIs must begin with Authorization and Authentication. Microsoft handles the security, but the application must guide the user through the process.
Microsoft provides the necessary services to authenticate users. They even make things simple by configuring and setting up application through the Visual Studio Office 365 API Tools. Specific development is often not necessary to get an application working with simple authentication.
Regarding service access, Microsoft also provides the Discovery Service help developers write applications against the Office 365 APIs without unnecessary concern with service locations and URIs. The Discovery Service provides the details for gaining access to the information and provides the necessary means for locating where these services are hosted.
The next chapter will dive into the details of the Office 365 APIs. A custom web application using ASP.NET MVC coded to access the Office 365 APIs will be the focus. As with any application, authentication, authorization, and discovery are necessary. However, the focus will be on the APIs themselves now that these other topics have been covered.
All materials on the site are licensed Creative Commons Attribution-Sharealike 3.0 Unported CC BY-SA 3.0 & GNU Free Documentation License (GFDL)
If you are the copyright holder of any material contained on our site and intend to remove it, please contact our site administrator for approval.
© 2016-2026 All site design rights belong to S.Y.A.