My Office 2016 (2016)
1. Getting Started with Office 2016
In this chapter, you learn about starting the Office 2016 programs, working with documents, and saving your work. Topics include the following:
![]() Understanding Office 365 and Office 2016
Understanding Office 365 and Office 2016
![]() Taking your first steps with Office 2016
Taking your first steps with Office 2016
![]() Creating a new document
Creating a new document
![]() Preserving your work
Preserving your work
![]() Working with documents
Working with documents
Most of this book deals with the specific features of six Office 2016 applications—Word, Excel, PowerPoint, Outlook, OneNote, and Access—and a bit later you learn all the most useful and practical techniques that these powerful programs have to offer. However, these programs also have many features in common, and some of these tools and techniques are the most useful and the most important. Sample techniques that fall into these categories include creating documents, saving documents, and duplicating documents.
This chapter takes you through all these techniques, but you begin with an overview of Office 365 and Office 2016 (the Windows version, that is; this book does not cover Office 2016 for Mac).
Understanding Office 365 and Office 2016
We live in a world in which smartphones and tablets garner most of the attention of the technical (and even mainstream) press. This isn’t a surprise because technologists and industry insiders have fawned over the latest gadgets for as long as there has been a technology industry. However, gadgets come and go, but one thing has stayed the same over that time: People still need to write, calculate, and present, whether for business or for pleasure.
Microsoft Office is a suite of programs designed to help people do just that. Whether you have a memo to write, a budget to build, a presentation to create, or some notes to jot down, the Office programs have the tools to help you get the job done. Unfortunately, Office is expensive (between $139 and $249, depending on the suite) and difficult to maintain, so most home users have shied away from it.
That is now changing with the introduction of Office 365, which enables everyday folks like you and me to use the Office programs without breaking the bank and without requiring an in-house tech support department.
Learning How Office 365 Works
Office 365 is a subscription-based service that gives you access to the latest Office programs. There are several options for Office 365 subscriptions, but the most popular is Office 365 Home Premium, which offers Word, Excel, PowerPoint, OneNote, Outlook, Publisher, and Access for $10 per month or $99 per year (as of this writing). You’re allowed to install these programs on up to five computers, and you can install Office for iPad—a scaled-down version of Office that includes the iPad versions of Word, Excel, PowerPoint, and OneNote—on up to five tablets. Up to five different people can use Office 365, and each person gets 1 TB of storage on OneDrive, Microsoft’s online file storage service.
To use Office 365, you (and each person who uses Office 365 in your household) need to have a Microsoft account. This is an email address (it can be one of your existing addresses) that you associate with your Office 365 subscription. By signing in to your account on each computer and tablet where you use Office 365, you get immediate access to your Office 365 settings, customizations, and files. This means, for example, that you can work on a document using a desktop Office program at home, save the document to OneDrive, and then continue working on the document when you take your notebook or iPad to the local coffee shop.
Try Office 365 Free
If you are not sure whether you want to subscribe to Office 365, you do not have to decide right away. Microsoft offers a free trial that gives you a month to use full-featured versions of each program.
Taking Your First Steps with Office 2016
If you want to use Office 2016 for more than just viewing your documents, you must sign in or create a Microsoft account, and use that account to purchase an Office 365 subscription, if you haven’t done so already. This book assumes that you have already downloaded the Office 2016 programs from the Internet and installed them.
Sign In to Your Microsoft Account
Having a Microsoft account means you can save Office documents online in your OneDrive and have your account and application settings follow you from the desktop to the iPad and back. So begin your Office 2016 journey by signing in to your account, if you have one.
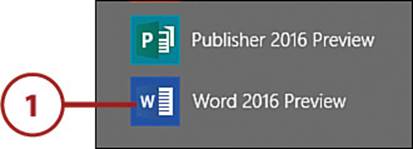
1. On your Windows computer (which needs to be connected to the Internet for these steps), open any Office 2016 program. The first time you do this, you see a couple of initial screens that give you an overview; then the sign in dialog box appears.
It’s Not All Good: Sharing Usage Data with Microsoft
The initial screen you see when you first start any Office 2016 program asks whether you want to send information to Microsoft. This means sharing data about how you use the Office 2016 applications, as well as statistics generated automatically when an application crashes. This data is anonymous and does not include any personal information, so it’s safe to share. However, if you elect to share the data and then later change your mind, you can stop the sharing. To do this, select File, Options; select the Trust Center tab and then select Trust Center Settings. Select the Privacy Options tab and then select to deactivate the Sign Up for the Office Personalized Experience Program check box.
2. Select Sign In. If you need to create an account instead, see the next section, “Create a Microsoft Account.”

3. Type your Microsoft account email address.
4. Select Next.

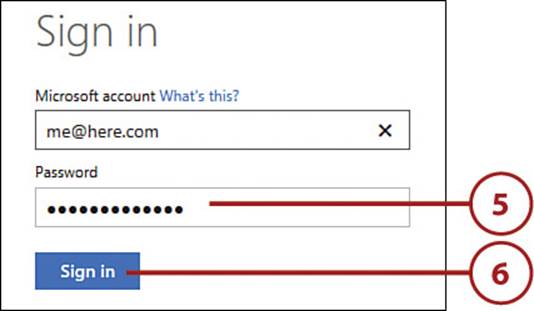
5. Type your account password.
6. Select Sign In.
7. Follow the rest of the introductory screen that appears until you see the Office 2016 application you launched in step 1.
Create a Microsoft Account
If you don’t have a Microsoft account, you need to create one to get the most out of Office 2016. You can use an existing email address for the account or create a new address.
1. On your Windows computer (which needs to be connected to the Internet for these steps), open any Office 2016 program. The first time you do this, you see a couple of initial screens that give you an overview; then the sign in dialog box appears.

2. Select Sign In.

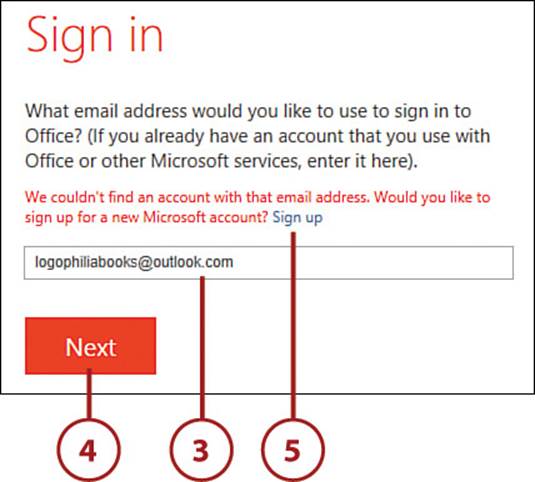
3. Type the email address you want to use (you can change this later if you are creating a new address).
4. Select Next. Microsoft recognizes that your address is not associated with an account.
5. Select Sign Up.
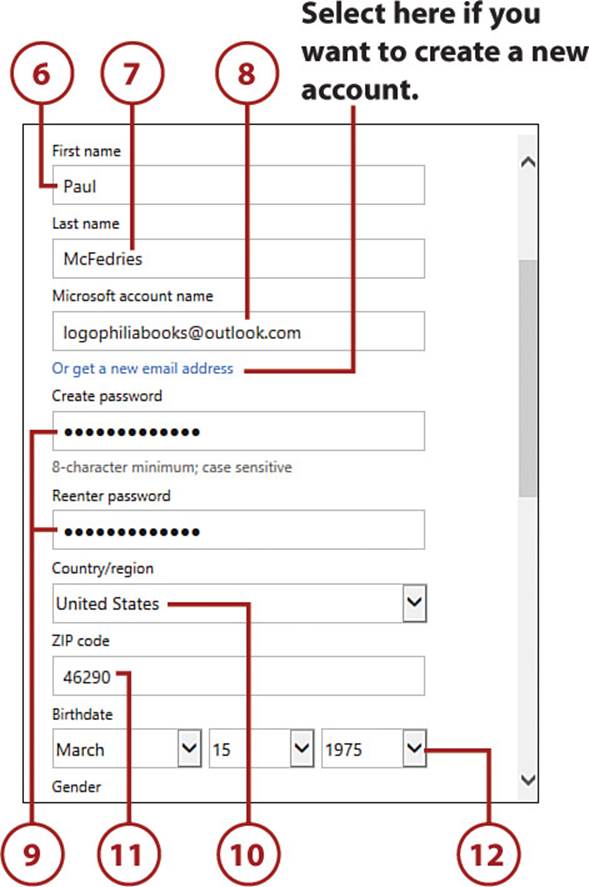
6. Type your first name.
7. Type your last name.
8. Type the email address you want to use.
Creating a New Address
If you don’t want to use an existing email address for your Microsoft account, select Or Get a New Email Address, and then specify the address you want.
9. Type the password you want to use.
10. Select your country.
11. Type your ZIP or postal code.
12. Specify your date of birth.
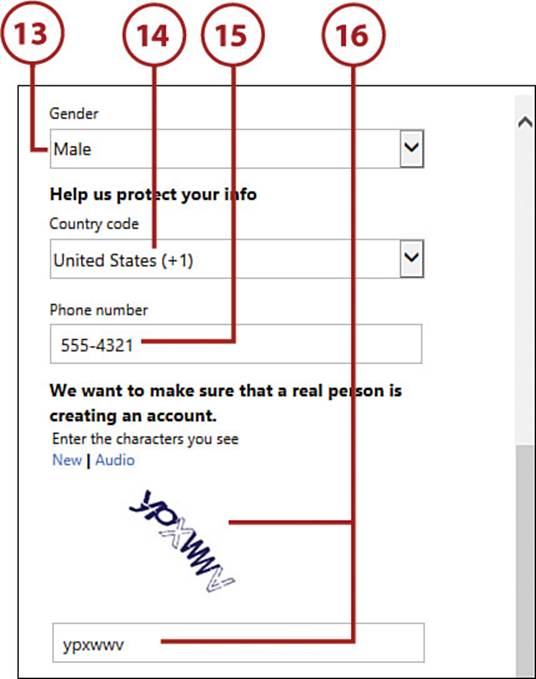
13. Select your gender.
14. Select your phone number country code.
15. Type your phone number.
16. Type the characters your see. This is to prove that you’re a real person and not some automated program trying to create the account.
>>>Go Further: Your Phone Number
You need to provide Microsoft with a phone number as a security precaution. If you access your Microsoft account from a new device, Microsoft doesn’t know whether it’s you trying to access the account or some unauthorized person. To make sure, Microsoft doesn’t allow access at first. Instead, it sends a text message to the phone number you provided (or an email message to the address you provided), and you must enter the code from the text message to prove that you’re not an intruder.
17. Select Create Account.

Sign Out of Your Microsoft Account
If someone else will be using your PC, you might want to sign out of your Microsoft account so that person can’t access your online documents and settings.
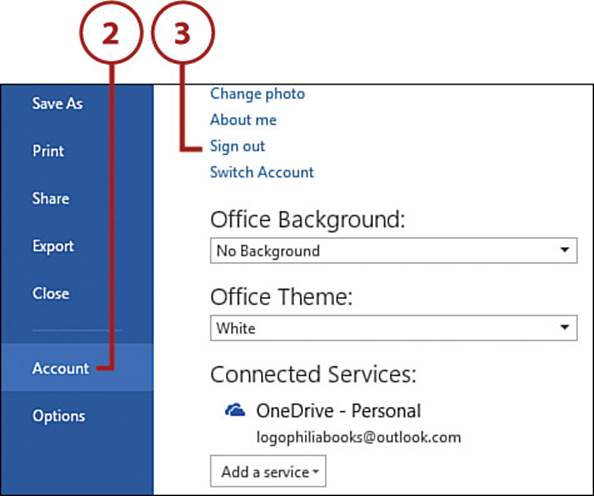
1. Select File.

2. Select Account.
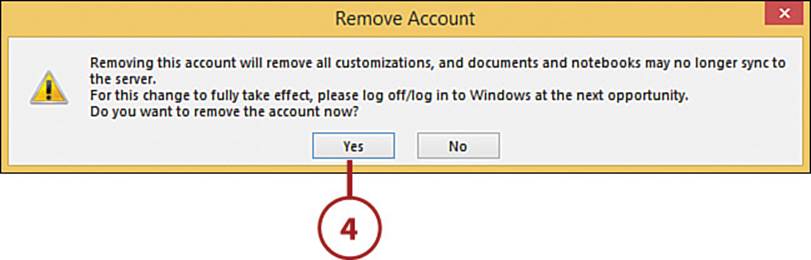
3. Select Sign Out. The application asks you to confirm.
4. Select Yes.
Signing Back In
When you’re ready to reconnect to your Microsoft account, select File, select Account, select Sign In, and type your account address. Then select Next, type your account password, and then select Sign In.
Switch Between Office 2016 Applications
Your PC supports multitasking, which means you can have more than one Office 2016 application open at the same time. If you run multiple Office applications, you need to know how to switch between them.
1. Hold down the Alt key and press Tab until the Office application to which you want to switch is selected.
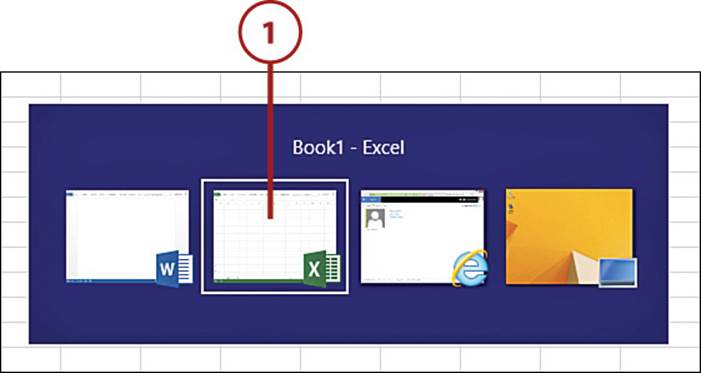
2. Release Alt. Your PC switches to the application. You can also switch to another Office application either by selecting its taskbar button or by selecting any visible part of the application window.
>>>Go Further: Switching Apps with Gestures
If you are running Office 2016 on a tablet running Windows 8 or later, you can also switch applications by sliding your finger into the screen from the left edge of the tablet.
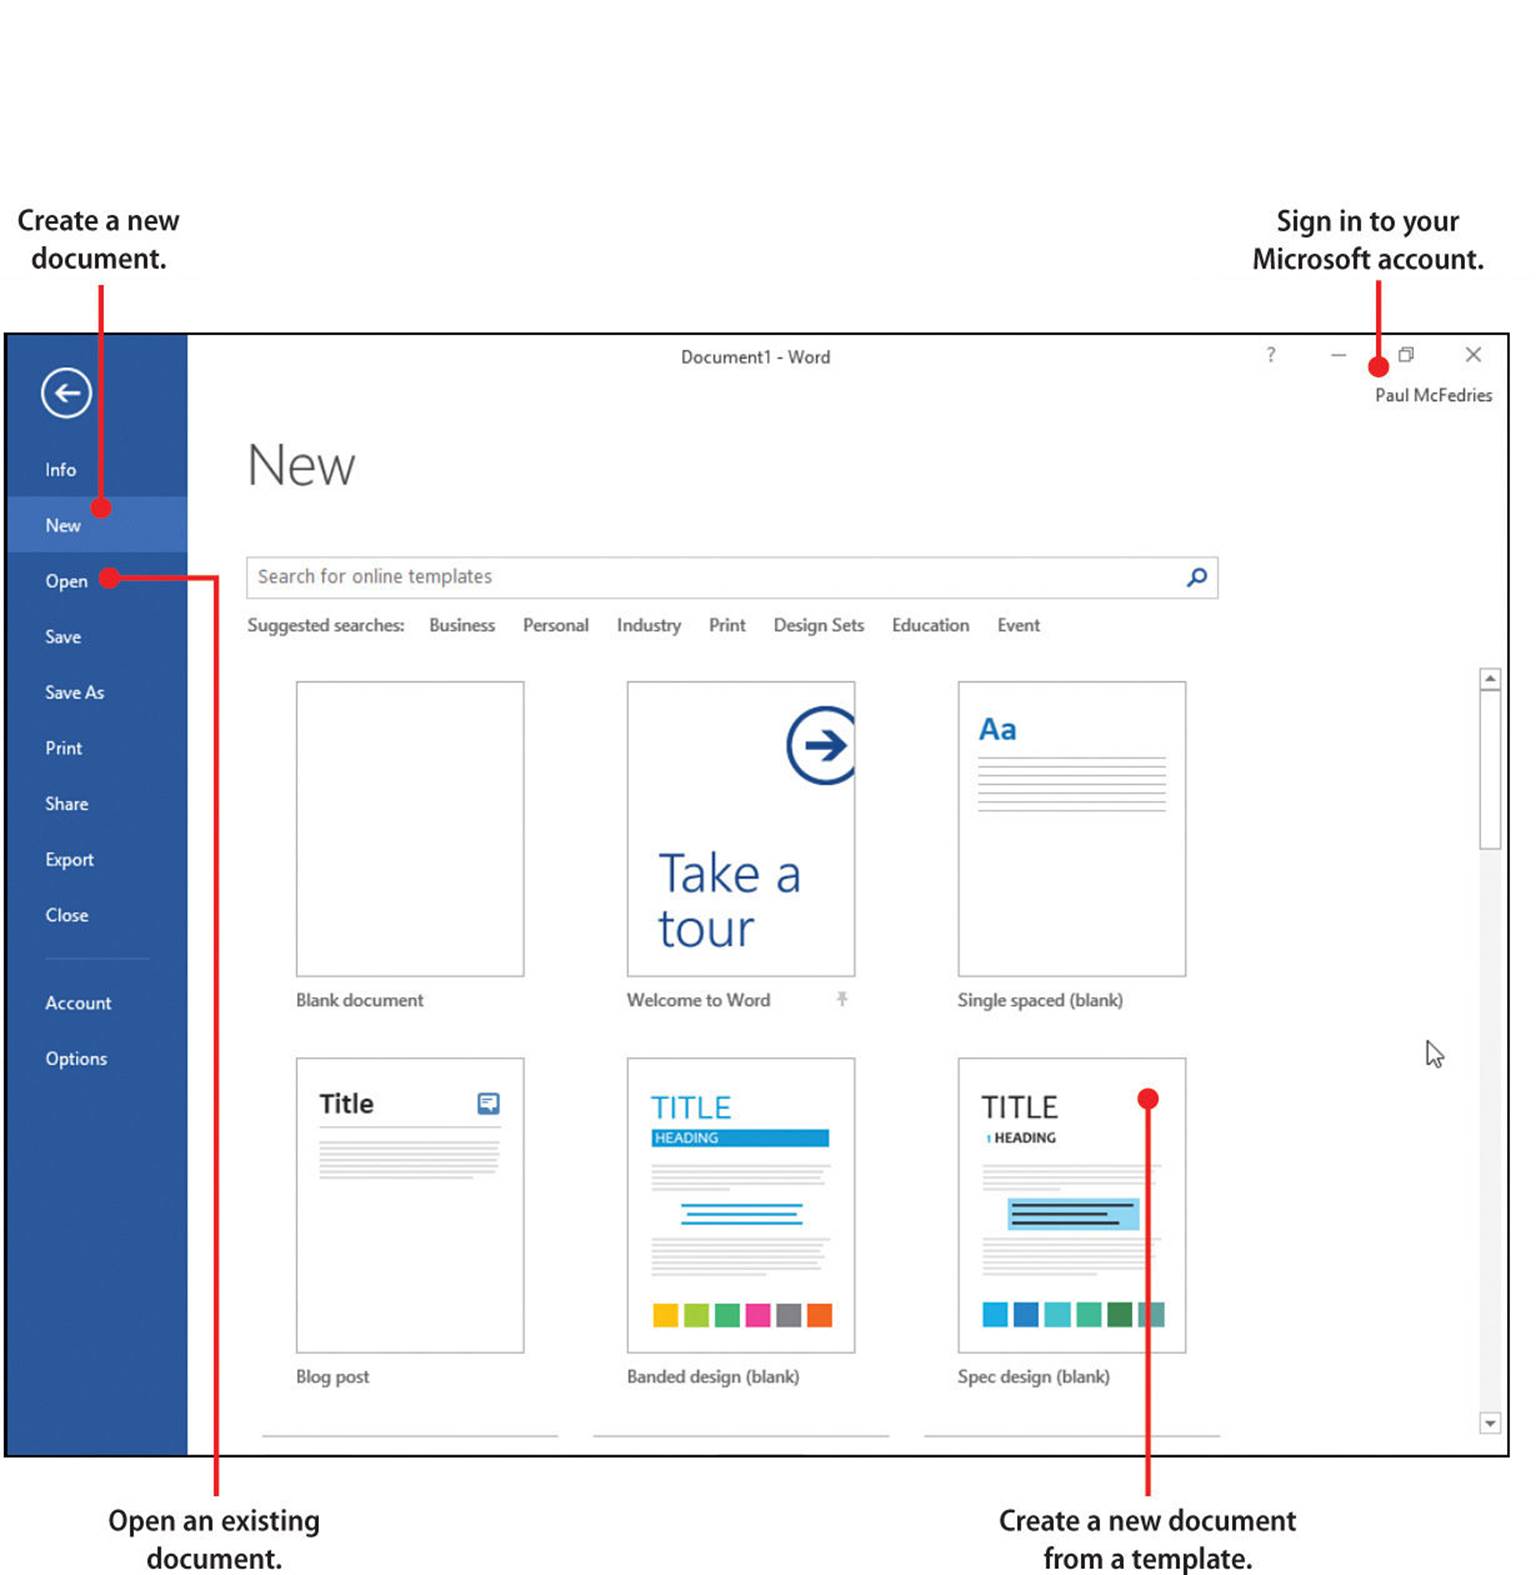
Creating a New Document
To perform work in an Office 2016 program, you must first either create a new document or open an existing document. In this section, you learn about creating new documents.
Although OneNote creates a notebook for you to use as soon as you start the program, Word, Excel, and PowerPoint don’t create a new document for you automatically. Instead, if you don’t need to open an existing document, you must create a new document by hand when you launch these applications. In each case, you can either create a blank document devoid of data and formatting, or you can create a document from a template, which is a special file that includes prefabricated content and formatting.
>>>Go Further: Saving Time with Templates
One secret to success in the business world is to let the experts do whatever it is they are good at. Let the salespeople sell, the copywriters write, and the designers design. If you try to do these things yourself, chances are it will take you longer and the results will not be as good.
You can apply the same idea to the Office world. Why spend endless hours tweaking the design and layout of a brochure when a professionally designed brochure is just a few screen clicks or taps away? I am talking about using templates, special documents that come with predefined layouts, color schemes, graphics, and text.
Create a Blank Document at Startup
You can create a new, blank document as soon as you start Word, Excel, or PowerPoint.
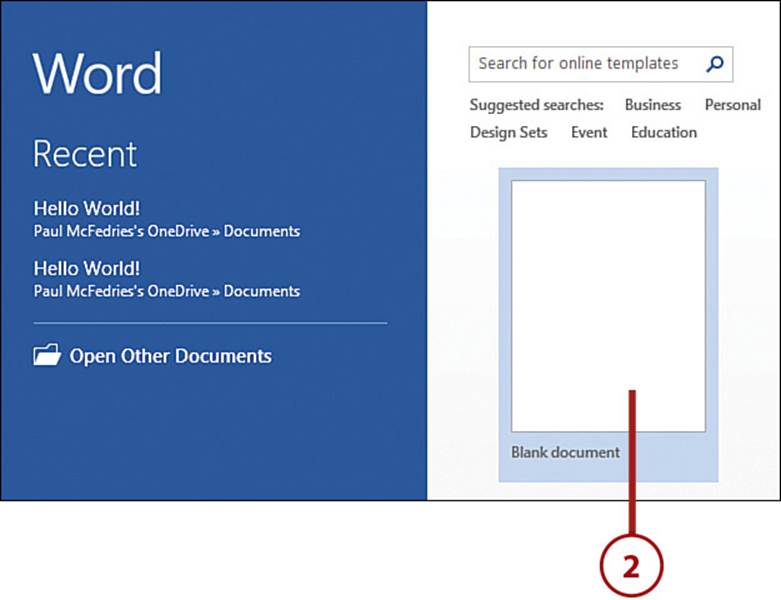
1. Start the application you want to use.
2. Select the blank option, such as Word’s Blank Document icon.
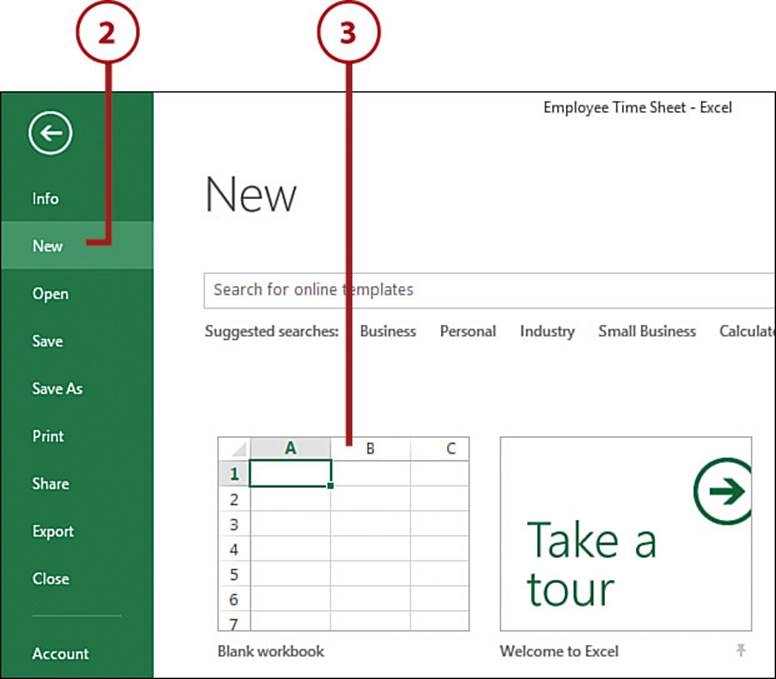
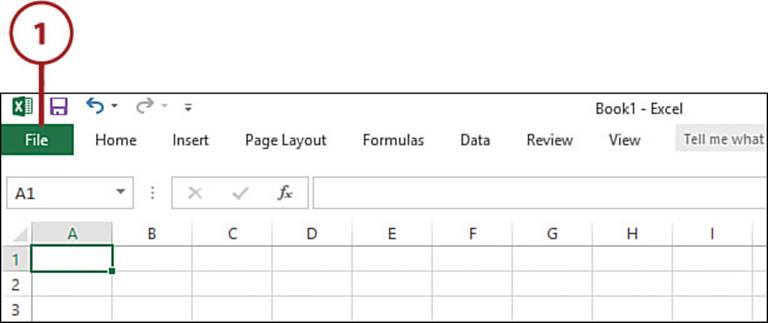
Create a Blank Document After an Office 2016 Application Is Running
If you are already using Word, Excel, or PowerPoint, you can create a new, blank document from within the application.
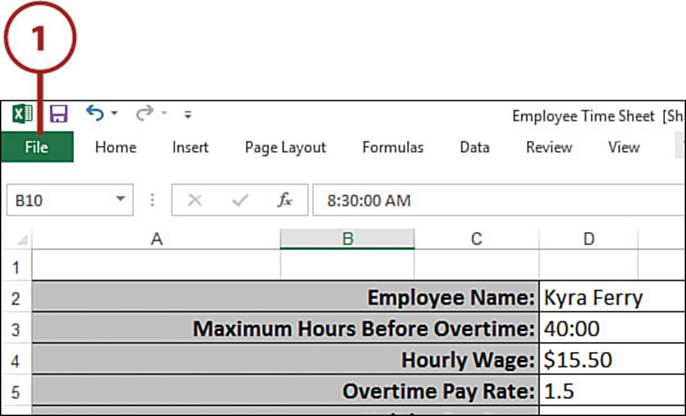
1. Select File.
Saving a New Document
If the document you’re currently working on is new and has never been saved, the application prompts you to save or delete the document. See “Save a New Document” later in this chapter.
2. Select New to display the New tab.
3. Select the blank option, such as Excel’s Blank Workbook icon.
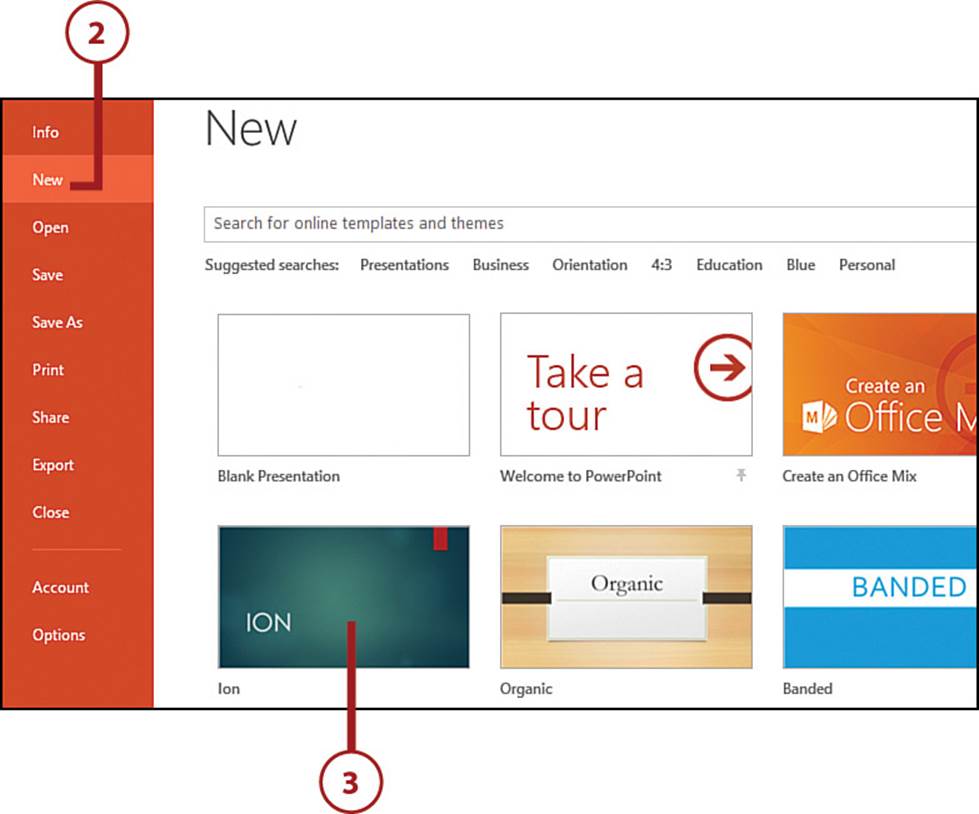
Creating a Document from a Template or Theme
Word and Excel 2016 each come with a few templates that contain preformatted text, images, and other elements that enable you to quickly create great-looking documents such as newsletters, invoices, and budgets. PowerPoint 2016 comes with a few themes, each of which offers preset colors, fonts, and backgrounds for each slide layout.
These were all created by professional designers and most are quite striking. Of course, after you create a document based on a template or theme, you can tweak the layout, design, and text to suit your needs.
1. Select File.

2. Select New to display the New tab.
3. Select a template (in Word or Excel) or a theme (in PowerPoint, which is what’s shown here).
Preserving Your Work
Losing precious data due to a system crash is a constant, nagging worry for PC users. Why is it such a problem? The main reason is that when you work with a document, your PC takes a copy of the document from the hard drive and loads that copy into memory. This makes it much faster to work with the file, but the downside is that all the data loaded into memory is lost when your PC crashes or loses power. This means that if you’ve made changes to your document, those changes are lost when the memory is wiped.
This is much less of a problem with Office 2016. Yes, the applications still load documents into memory either from the computer’s hard drive or from your OneDrive, but the Office 2016 applications have a feature called AutoRecover that automatically saves your data every 10 minutes as you work. The only time you could potentially lose a great deal of work is when you edit a new document that hasn’t been saved, or if you perform a great deal of work between automatic saves, so it’s important both to save new documents as soon as possible and to save as you work as often as possible.
Save a New Document
To avoid losing work, you should save a new document either immediately, or as soon as you’re sure you want to preserve the data you have added to the document.
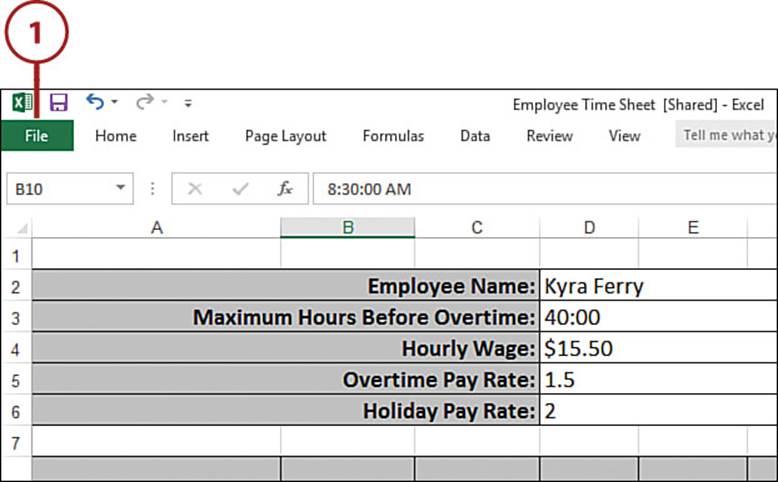
1. Select File to open the File tab.
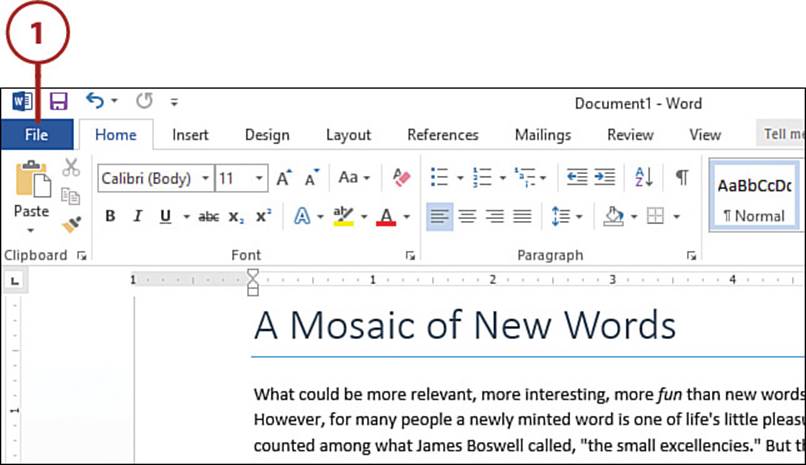
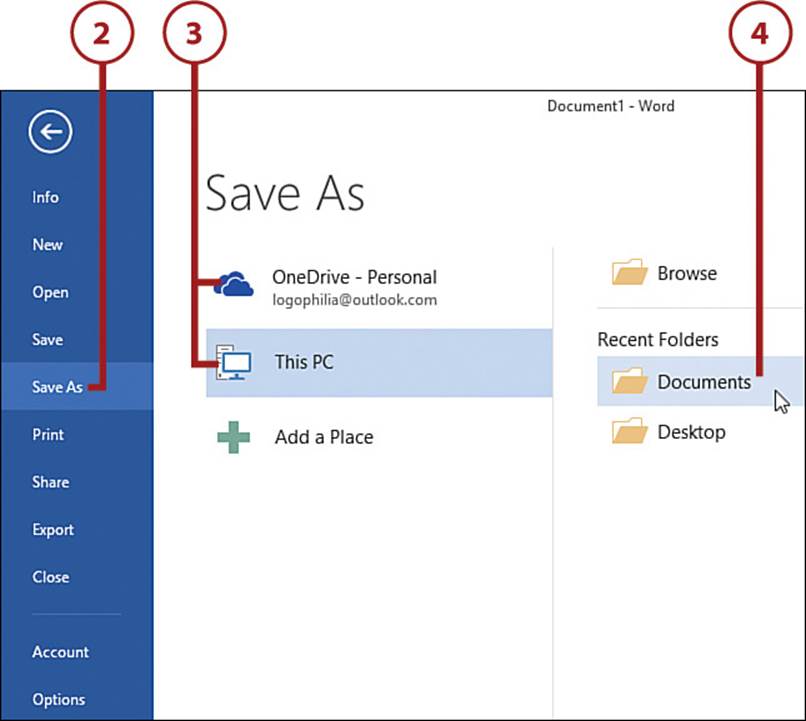
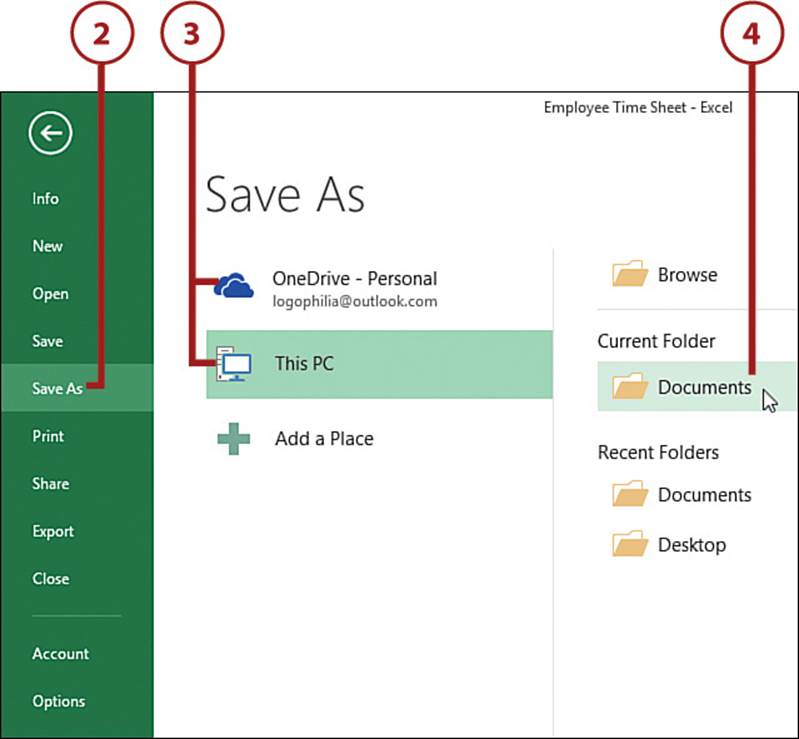
2. Select Save As. (You can also select Save.)
3. Select a location, such as OneDrive or your PC.
4. Select a folder within that location. The Save As dialog appears.
Checking AutoRecover
This is a good time to double-check that the AutoRecover is activated. Select File and then select Options to open the program’s Options dialog box. Select the Save tab and then make sure the Save AutoRecover Information Every X Minutes check box is activated. Also, you can use the spin box to set the time interval the program uses to save your work. A shorter interval makes it less likely you’ll lose work but might be more taxing on your system.
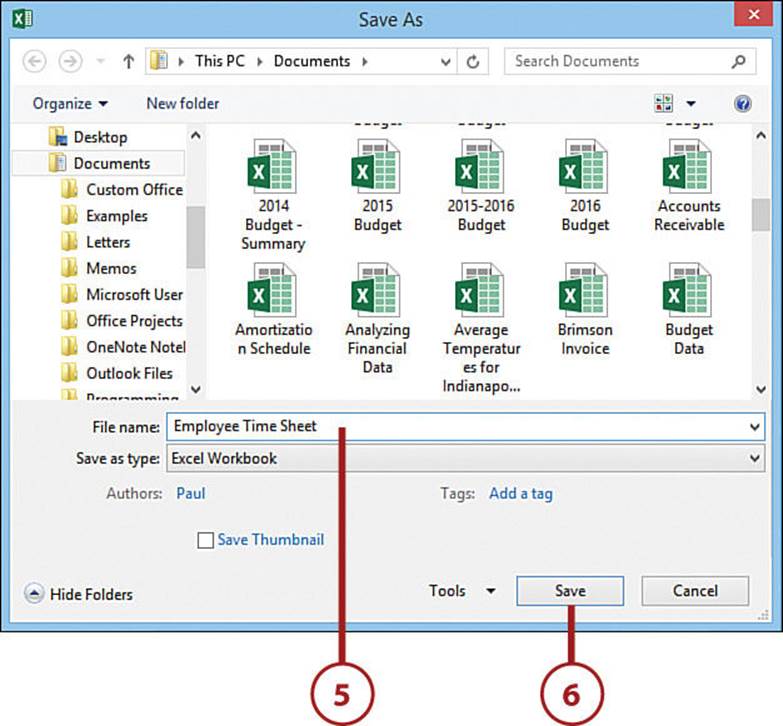
5. Type a name for the document.
6. Select Save.
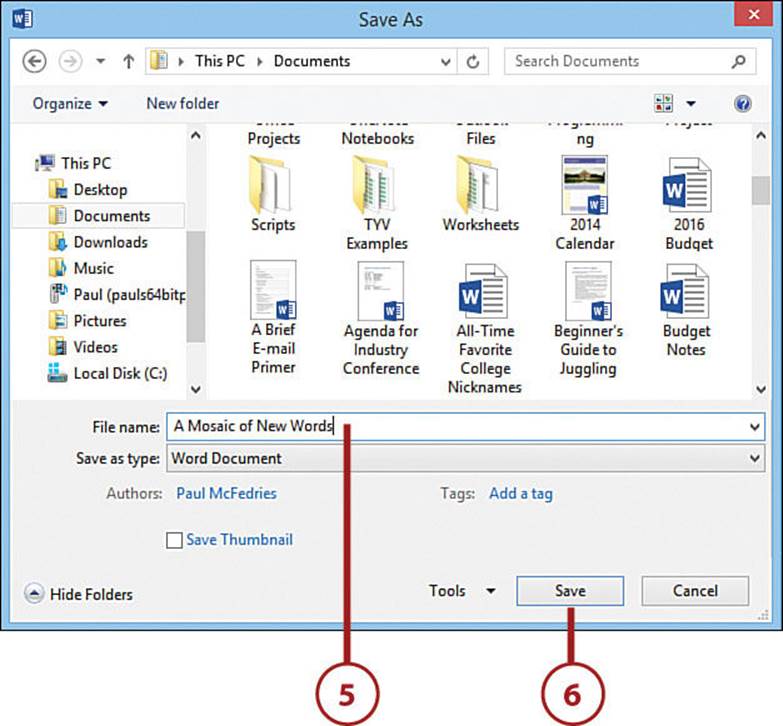
>>>Go Further: File Naming Guidelines
The complete pathname for any document must not exceed 255 characters. The pathname includes not only the filename, but also the location of the document, including the drive letter, colon, folder name (or names), and backslashes. The filename can include any alphanumeric character, one or more spaces, and any of the following characters:
~ ` @ # $ % ^ & ( ) _ - + = { } [ ] ; , . ‘
The filename must not include any of the following characters:
* | \ : “ < > ?
Create a Duplicate of a Document
One of the best ways to save time and increase your efficiency is to, as the saying goes, avoid reinventing the wheel. With Office 2016, this means that if you need to create a document similar to an existing document, don’t build the new document from scratch. Instead, create a copy of the existing document and then modify the copy as needed.
1. Select File.
2. Select Save As.
3. Select the location where you want the duplicate document saved: your OneDrive or your PC.
4. Select the folder that you want to use to store the duplicate document. The Save As dialog box appears.
Safely Saving the Duplicate
To avoid overwriting the existing document, make sure you select a different folder, specify a different filename, or both.
5. Type a name for the copy.
6. Select Save.
Convert a Document to the Latest Format
Word, Excel, and PowerPoint 2016 can open any document that uses a relatively recent Office file format, which means anything created with Office 97 and later. However, to get the most out of Office 2016, you should use one of the Office Open XML file formats introduced in Office 2007.
1. Open a document that uses an older Office file format.
2. Select File.
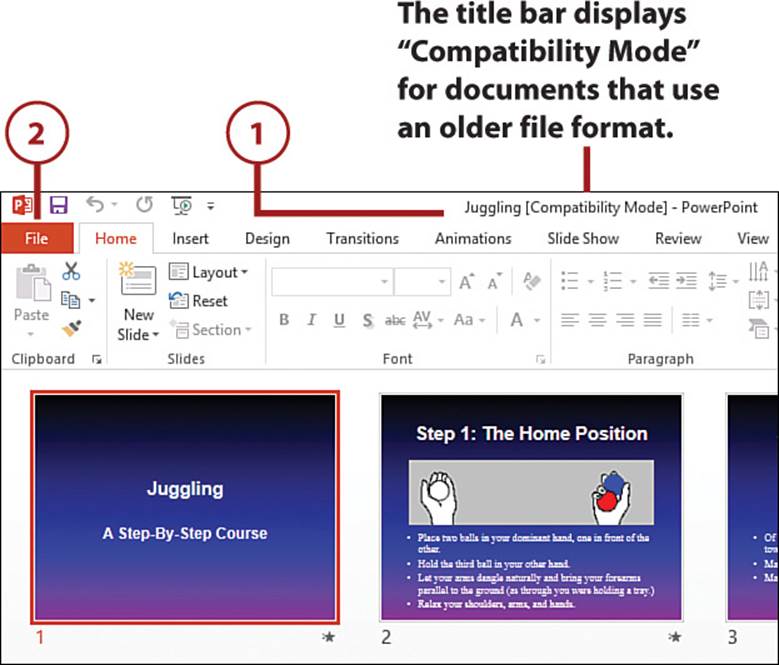
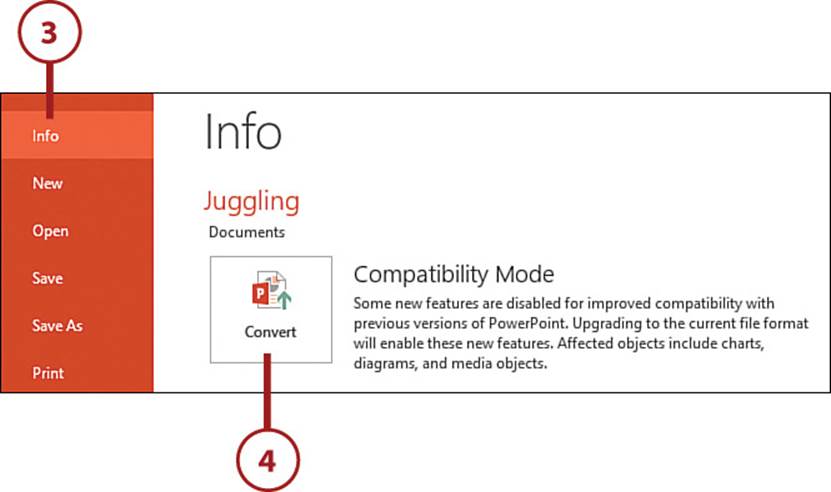
3. Select Info.
4. Select Convert. In some Office applications, you see the Save As dialog box.
5. Select Save. The application converts the document to the latest format.
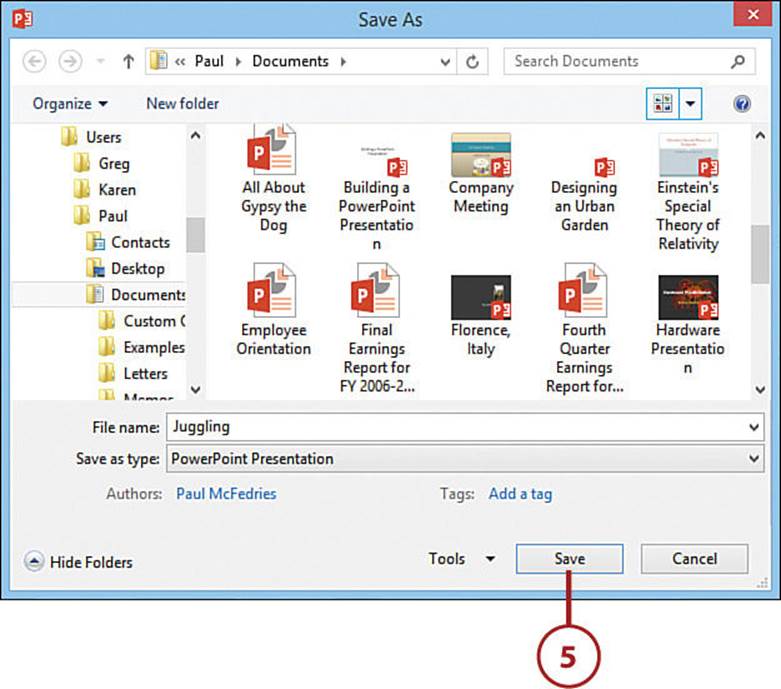
It’s Not All Good: Converting Creates a Copy
If you see the Save As dialog box when Office 2016 converts the document to the latest file format, it means the applications creates a copy and leaves the original document untouched. This means it will appear as though you have two documents with the same name. What you actually have is one document (the original) named something.doc (to use a Word document as an example) and a second document (the converted copy) named something.docx. Office 2016 hides file extensions (the .doc and .docx part of the name), so these two files appear the same, which can be confusing. One way to tell them apart is to examine the icon that appears to the left of each file in the Open dialog. If the icon is the same as the one that appears with the application on the Start screen, then the document uses the latest file format. To avoid this kind of confusion, consider moving the older version of the file to another location.
Working with Documents
You’ll spend almost all your Office 2016 time writing, editing, and formatting documents, but you’ll also regularly face more mundane document chores, such as opening documents. The rest of this chapter takes you through these day-to-day document tasks.
Open a Document
When you launch an Office 2016 app, the program first displays a window that includes a Recent list, which shows the last few documents that you’ve worked with in the application. You can reopen a document by selecting it from that list. If you don’t see the document you want, you need to use the Open list to select the file.
1. Select File.
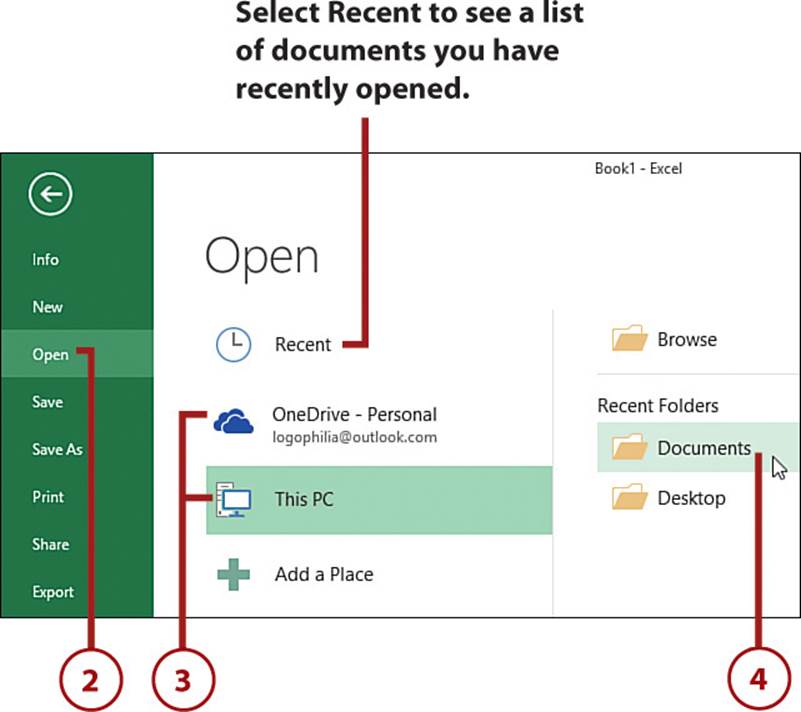
2. Select Open to display the Open tab.
Open a Recent Document
If the document is one that you’ve worked on recently, it might appear on the Recent tab for easy access. Select Recent to see whether the document appears in the list.
3. Select the location where your document resides: your OneDrive or your PC.
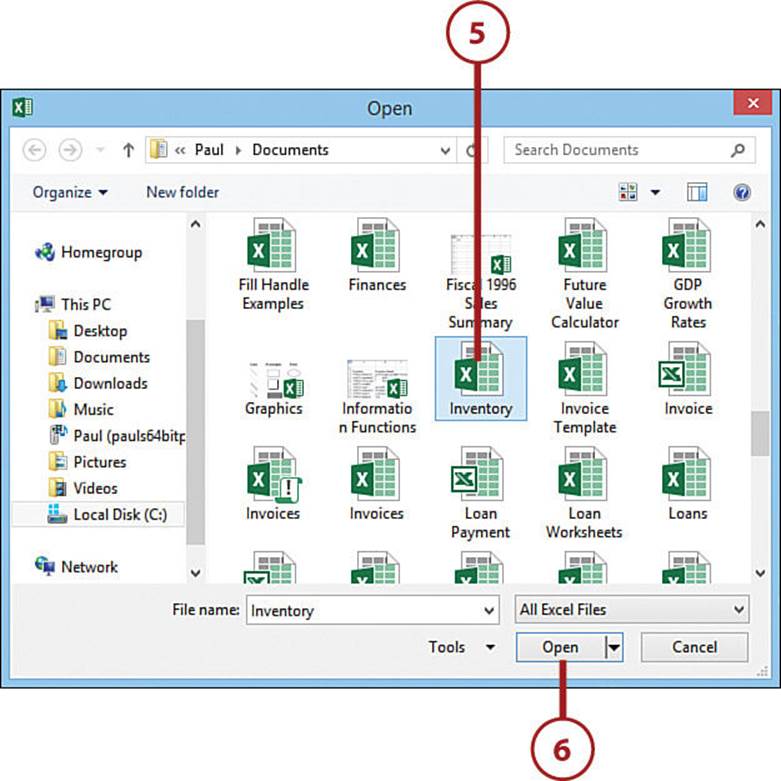
4. Select the folder that stores the document. The Open dialog box appears.
5. Select the document.
6. Select Open.
Pin a Document to the Recent Tab
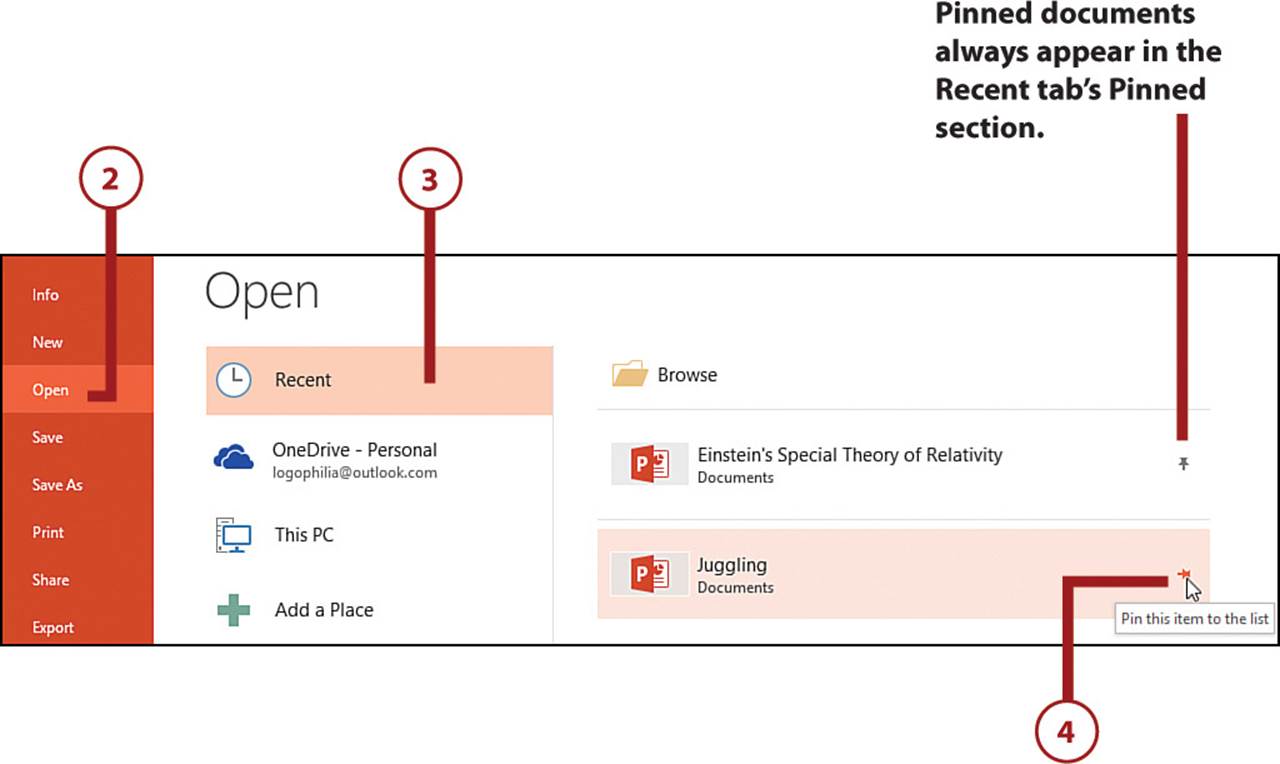
You can make Office 2016 a little more convenient by pinning the documents you use most often to the Recent tab, which ensures they’re always no more than three clicks or taps away.
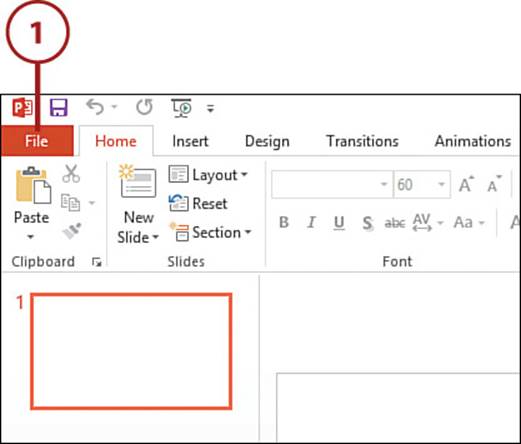
1. Select File.
2. Select Open.
3. Select Recent to display the Recent tab.
4. Select the pin icon next to the document you want to pin.
Print a Document
If you prefer to read or edit a document on paper, or you want to file a hard copy, you can print the document.
1. Select File.
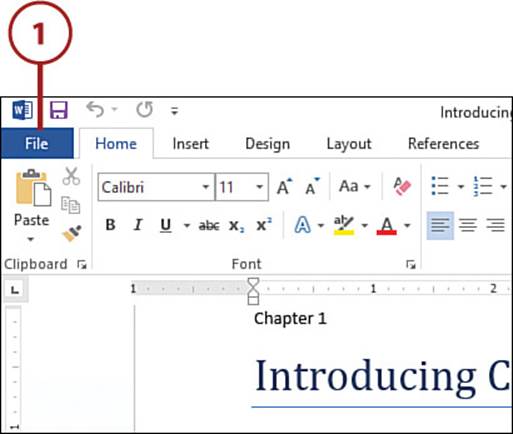
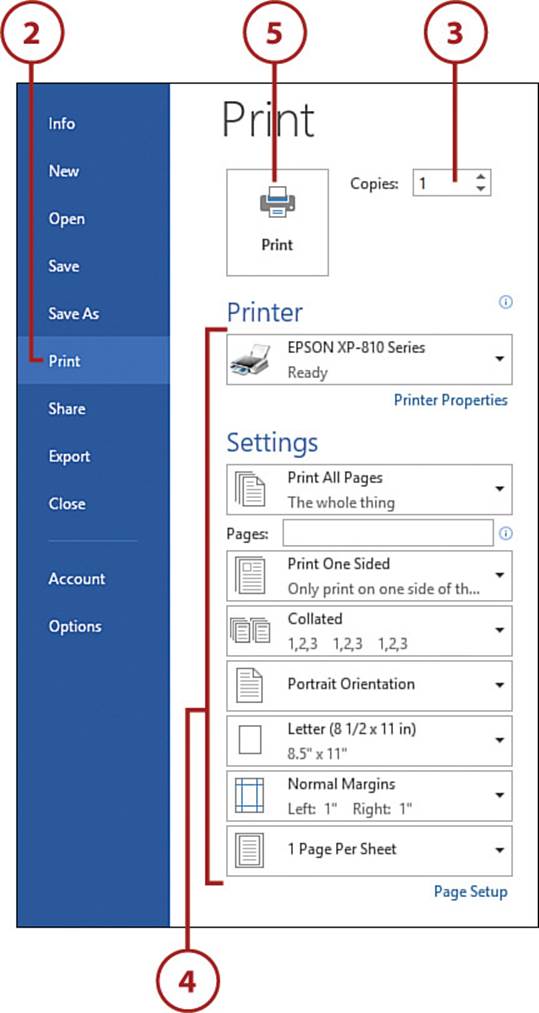
2. Select Print to open the Print tab.
Keyboard Shortcut
You can also open the Print tab by pressing Ctrl+P.
3. Select the number of copies you want to print.
4. Select other print settings, as needed.
5. Select Print. Windows prints the document.
All materials on the site are licensed Creative Commons Attribution-Sharealike 3.0 Unported CC BY-SA 3.0 & GNU Free Documentation License (GFDL)
If you are the copyright holder of any material contained on our site and intend to remove it, please contact our site administrator for approval.
© 2016-2026 All site design rights belong to S.Y.A.