My Office 2016 (2016)
2. Formatting Documents
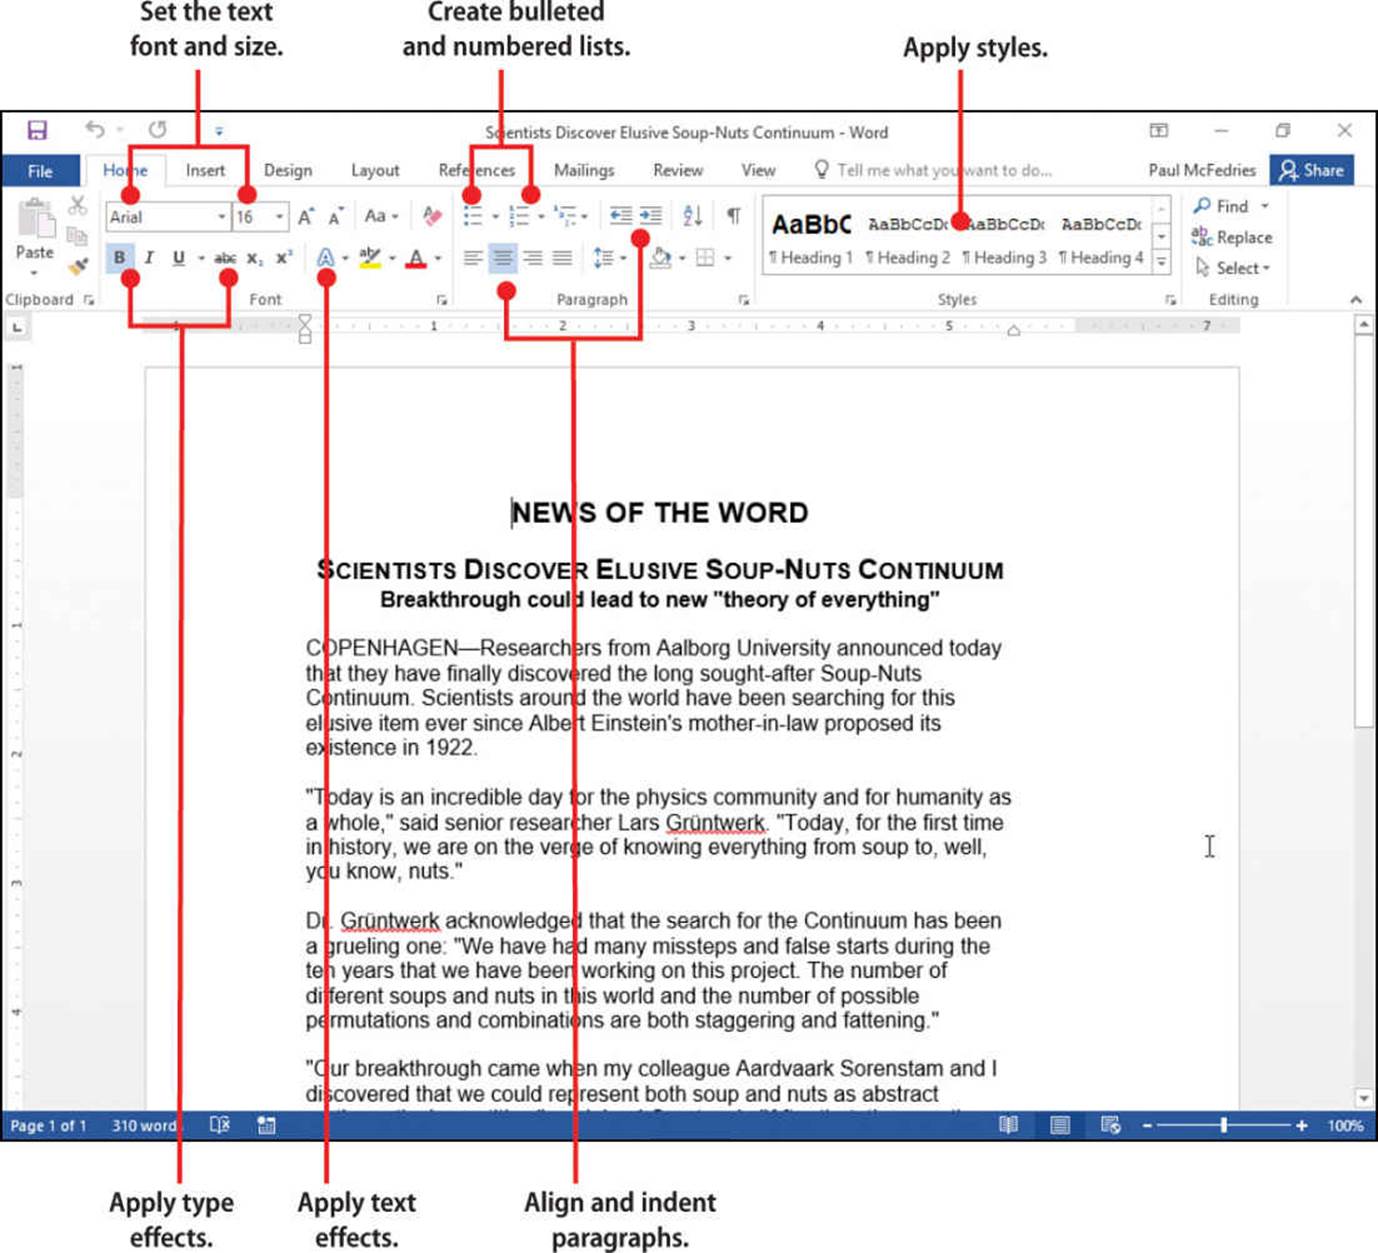
In this chapter, you learn various ways to format your Office documents, including changing the font, creating bulleted and numbered lists, and applying styles. Topics include the following:
![]() Setting the typeface, type size, and other font effects
Setting the typeface, type size, and other font effects
![]() Building bulleted and numbered lists
Building bulleted and numbered lists
![]() Working with indentation and alignment
Working with indentation and alignment
![]() Applying styles to document text
Applying styles to document text
![]() Clearing formatting
Clearing formatting
One of the consequences of the domination enjoyed by Microsoft Office in the productivity suite market is that people—particularly businesspeople—now have high expectations. That is, because so many users have access to powerful formatting techniques, people expect the documents they read to have a relatively high level of visual appeal. Send people a plain, unformatted memo and, although they might not throw it away without a glance, they’re likely to look down their noses at such a ragtag specimen. So, although you need to always ensure your content is up to snuff (accurate, grammatically correct, and so on), you also need to spend some time making sure that the content looks its best.
When you work with formatting in the Office applications, it helps to remember that there are only three main types of formatting and only two main methods for applying formatting.
Here are the three main types of formatting:
• Font formatting—This is also called character formatting and it refers to attributes applied to individual characters, including the font (or typeface), type size, text effects (such as bold, italic, and underline), and text color.
• Paragraph formatting—This refers to attributes applied to paragraphs as a whole, including indenting, alignment, line spacing, spacing before and after the paragraph, bullets, numbering, background shading, and borders.
• Document formatting—This refers to attributes applied to the document as a whole, including margins, headers, footers, columns, page orientation, paper size, columns, line numbers, and hyphenation.
Here are the two main methods for applying font and paragraph formatting in the Office applications:
• Directly—With this method, you select individual font and paragraph attributes. If you selected text beforehand, the app applies the formatting to the selection; otherwise, it applies the formatting to the current cursor position.
• Styles—A style is a predefined collection of formatting options. With this method, when you apply a style to text, the Office application applies all the style’s formatting options at once. Also, if you change a formatting option within a style, all the text that uses that style is automatically updated with the new formatting. You learn more about this feature later in this chapter in the “Apply Styles” section.
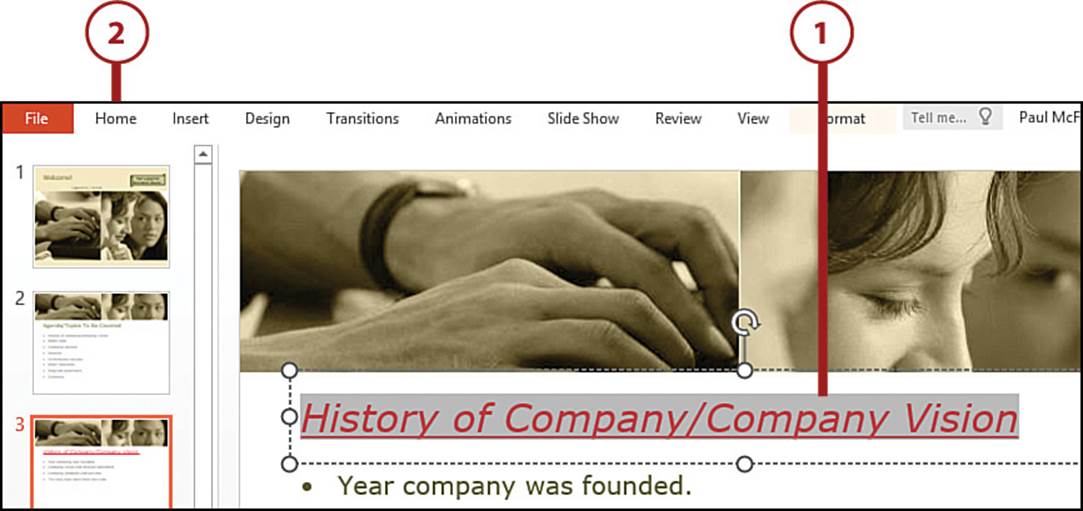
Selecting Text
Before you can do anything with text in the Office applications—that is, before you can change the font, format paragraphs, apply styles, and so on—you need to tell the app which text you want to work with. You do that by selecting the text, which then appears on the screen with a gray background. This applies to text in Word, PowerPoint, and OneNote, as well as to text within an Excel cell. (To learn how to select multiple Excel cells, see “Selecting a Range” in Chapter 7, “Getting More Out of Excel Ranges.”)
Select Text with a Mouse
Although you can use a keyboard to select text, in most cases it is easiest to use the mouse.
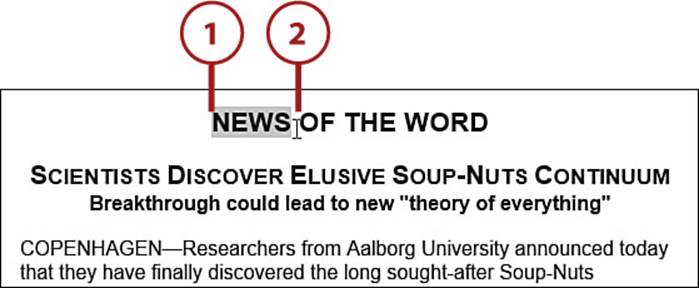
1. Click to the left of the first word you want to include in the selection. This places the insertion point at the beginning of that word.
2. Drag the mouse to the right. As you drag, the program highlights each letter as the mouse passes over it.
Selecting Text in Excel
Before you can select text in Excel, you must first open the cell for editing by double-clicking the cell. However, if you want to work with the entire cell, you can just click the cell.
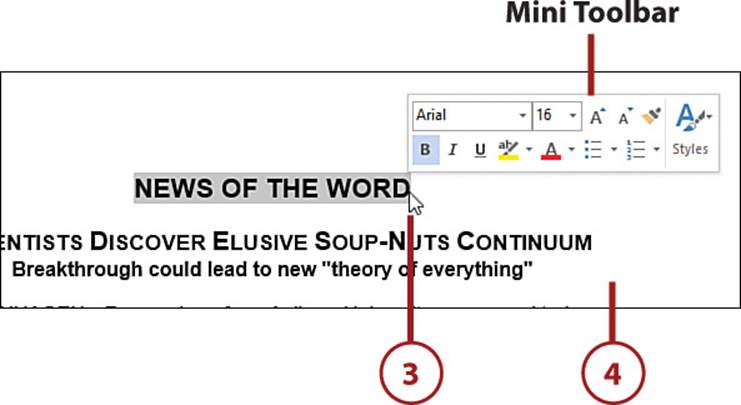
3. When the last character you want to include in the selection is highlighted, release the mouse button. The program displays the Mini Toolbar.
4. When you no longer require the text to be selected, click somewhere else in the document.
Text Selection Tricks
In all the Office applications, you can select a single word by double-clicking that word. In Word, PowerPoint, and OneNote, you can select an entire paragraph by triple-clicking anywhere within that paragraph.
It’s Not All Good: Selected Text Is Easily Deleted Text
When you select text—whether just a few characters, a word or two, or one or more paragraphs—the Office applications treat that selection as a single item. That’s normally a good thing because it means that when you perform an operation such as applying formatting, the app applies the format to the entire selection. On the downside, it also means that you can easily delete the selection by mistake. If you have text selected when you press a character, the app immediately deletes the selected text and replaces it with that character! So exercise caution around a keyboard while you have text selected. If you do accidentally delete the selected text, immediately click Undo on the Ribbon.
Changing the Font
Windows has turned many otherwise ordinary citizens into avid amateur typographers. Users at cocktail parties the world over debate the relative merits of “serif” versus “sans serif” fonts, expound the virtues of typefaces with names like Calibri and Arial, and throw around font jargon terms such as ascender, feet, and points. (If many, or even all, of these terms are new to you, not to worry: I explain them all in this chapter.)
Okay, so most of us don’t take fonts to that extreme. However, we certainly appreciate what they do to jazz up our reports, spreadsheets, and presentations. There’s nothing like a well-chosen font to add just the right tone to a document and to make our work stand out from the herd.
I always like to describe fonts as the “architecture” of characters. When you examine a building, certain features and patterns help you identify the building’s architectural style. A flying buttress, for example, is usually a telltale sign of a Gothic structure. Fonts, too, are distinguished by a unique set of characteristics. Specifically, four items define the architecture of any character: typeface, type size, type effects, and type color. I discuss all four characteristics in the sections that follow and show you how to apply them using the Office applications.
Understanding Typefaces
A typeface is a distinctive design common to any related set of letters, numbers, and symbols. This design gives each character a particular shape and thickness (or weight, as it’s called in type circles) that’s unique to the typeface and difficult to classify. However, four main categories serve to distinguish all typefaces:
• Serif—A serif (rhymes with sheriff) typeface contains fine cross strokes (called feet) at the extremities of each character. These subtle appendages give the typeface a traditional, classy look that’s most often used for titles and headings. The Office applications come with several serif typefaces, including Cambria and Times New Roman.
• Sans serif—A sans serif typeface doesn’t contain cross strokes on the extremities of characters. As a result, sans serif typefaces usually have a cleaner, more modern look that works best for regular text. The default Office typeface for document text, Calibri, is a sans serif typeface.
• Fixed-width—A fixed-width typeface—also called a monospace typeface—uses the same amount of space for each character, so skinny letters such as i and l take up as much space as wider letters such as m and w. This is useful for text such as programming code, but since these fonts tend to look as if they were produced with a typewriter, the resulting text is unattractive for most other uses. Courier New is an example of a fixed-width typeface.
• Decorative—Decorative typefaces are usually special designs that are supposed to convey a particular effect. So, for example, if your document needs a fancy, handwritten effect, a font like Snell Roundhand is perfect.
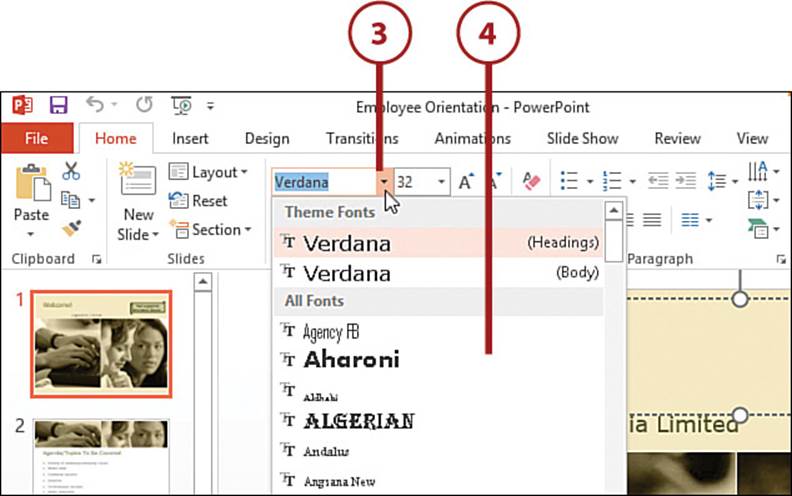
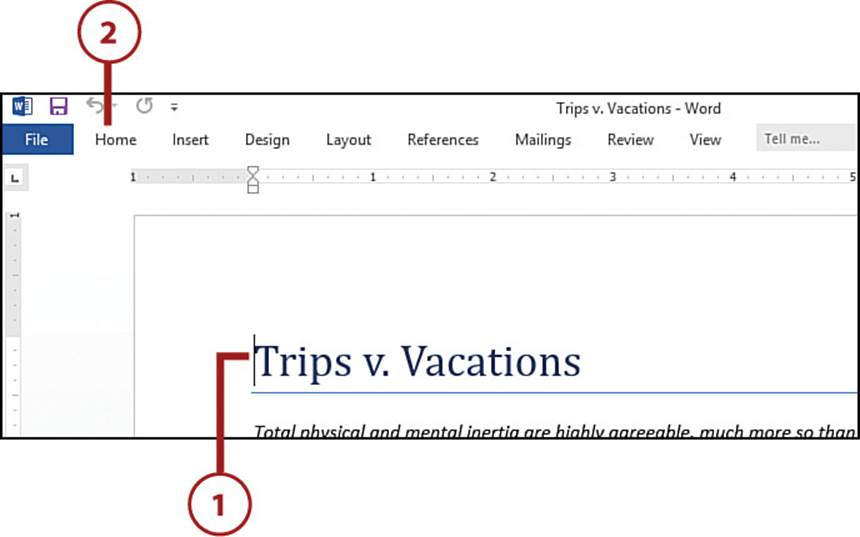
Set the Typeface
When setting the typeface, you can apply it either to existing text or to text that you’re about to add to the document.
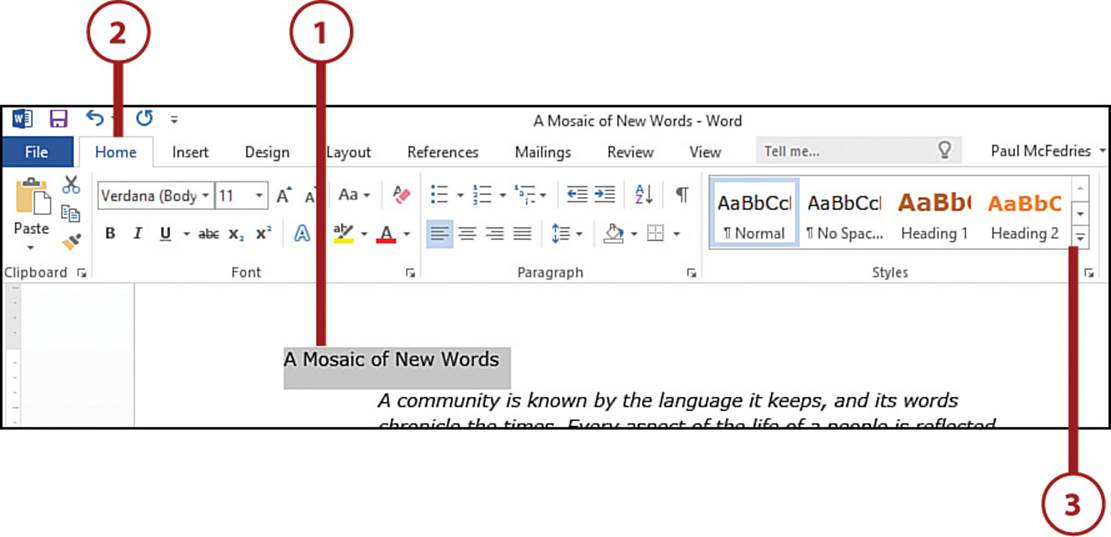
1. Select the text you want to format. Or if you want to format the next text you type, position the cursor where you want the text to appear.
2. Click the Home tab.
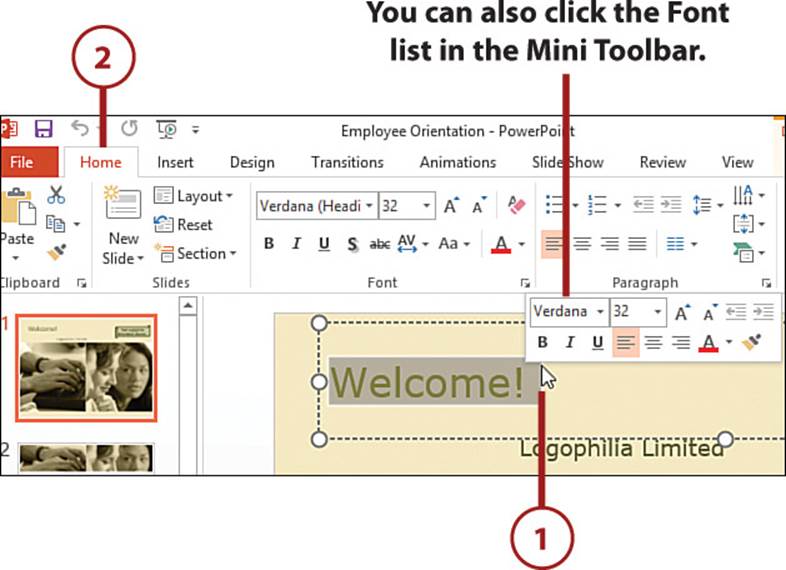
3. Drop down the Font list.
4. Click the typeface you want to use. The program applies the typeface to the selected text.
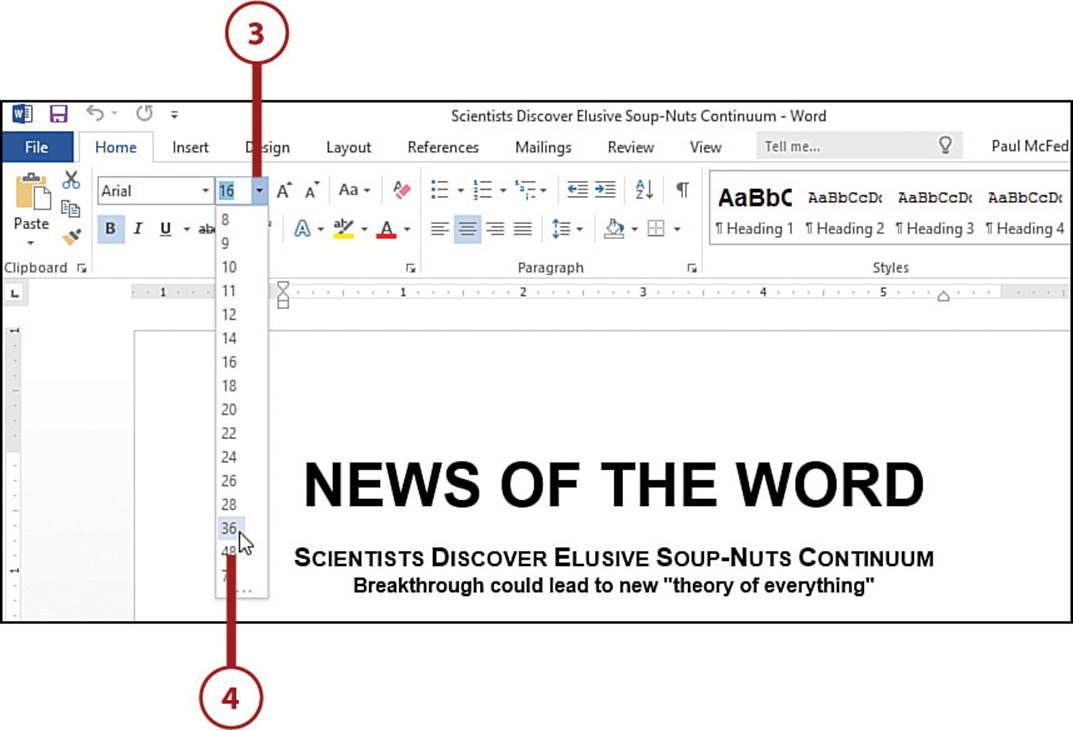
Change the Type Size
You can use type sizes to gain more control over the display of a document. For example, if you want to emphasize a title or heading, you can increase the type size. Similarly, if you want to fit more text into a particular area—such as a worksheet cell or a PowerPoint text box—you can decrease the type size.
1. Select the text you want to format. Or if you want to format the next text you type, position the cursor where you want the text to appear.
2. Click the Home tab.
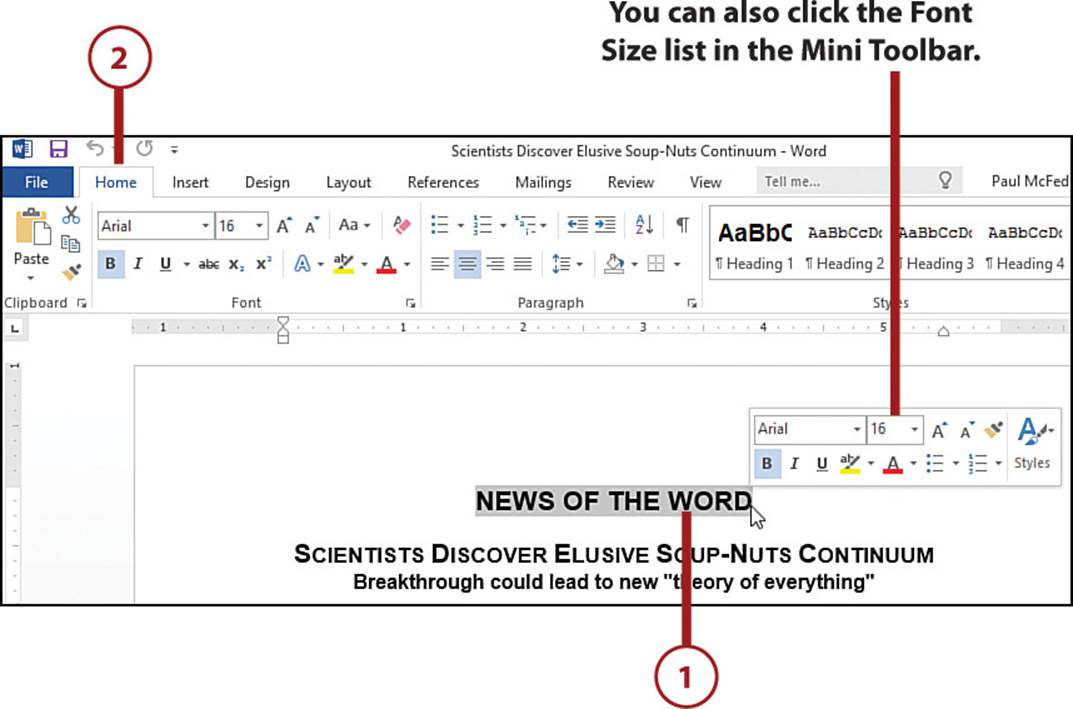
3. Drop down the Font Size list.
4. Click the type size you want to use. The Office application applies the type size to the text.
>>>Go Further: Understanding Type Size
The type size measures the height of a font. The standard unit of measurement is the point, where there are 72 points in one inch. So, for example, the letters in a 24-point font are twice as tall as those in a 12-point font. Technically, type size is measured from the highest point of any letter with an ascender, which is the top part of a letter that extends above the letter body (such as the lowercase f and h), to the lowest point of a letter with a descender, which is the bottom part of a letter that extends below the letter baseline (such as the lowercase g ory). (In case you’re wondering, this book is laid out in a 10-point Myriad Pro font.)
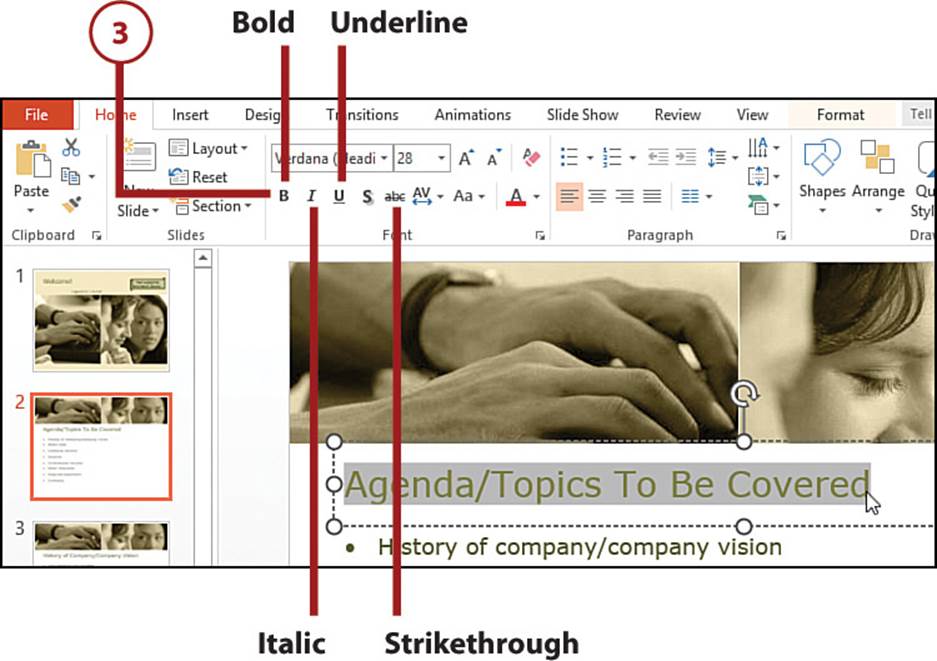
Apply Type Effects
The type effects of a font refer to extra attributes added to the typeface, such as bold and italic. Other type effects (often called type styles) include underline and strikethrough. You normally use these styles to highlight or add emphasis to text.
1. Select the text you want to format. Or if you want to format the next text you type, position the cursor where you want the text to appear.
2. Click the Home tab.
3. Click the icons to select the type effects you want to apply.
Set Text Colors
You can add some visual interest to your documents by changing the color of the document text. In most cases, you want to set the color of just the text. However, in Word and OneNote, you can also highlight sections of a document by applying a color to the text background. As with fonts, the colors you have available in Word, Excel, and PowerPoint depend on the theme applied to the document: Each theme comes with a palette of 60 colors. However, you can also choose a color from the app’s palette of 10 standard colors.
1. Select the text you want to format. Or if you want to format the next text you type, position the cursor where you want the text to appear.
2. Click the Home tab.
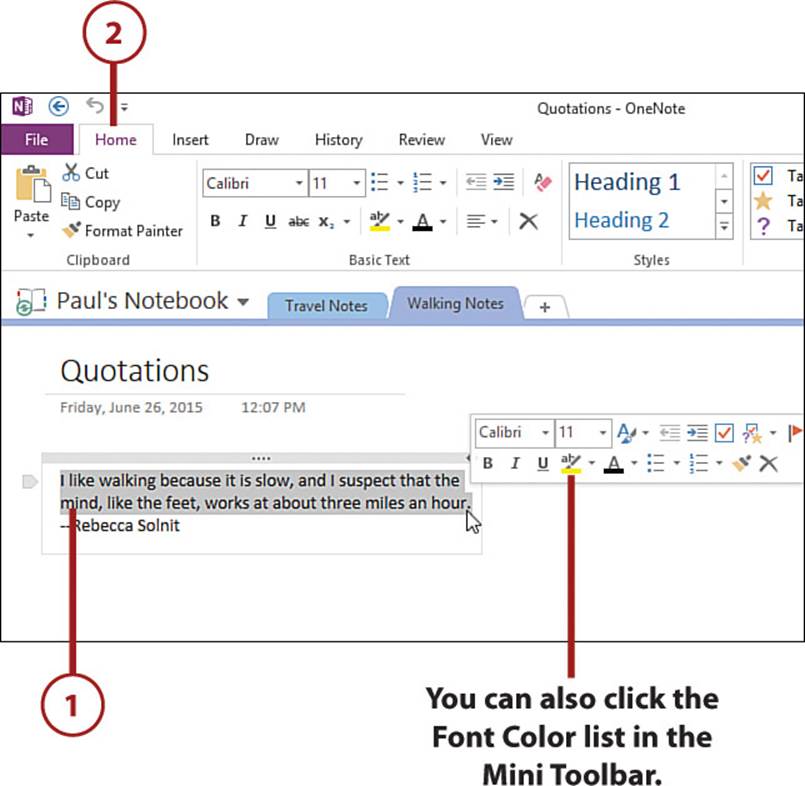
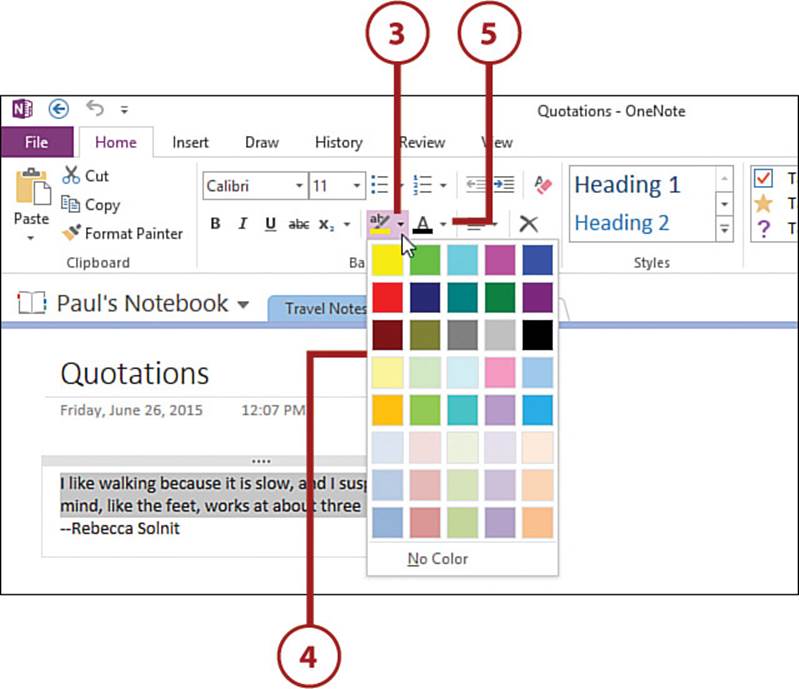
3. Click the Font Color list.
4. Click the color you want to apply.
5. In Word and OneNote, you can also click the Text Highlight Color list to apply a highlight to the text.
>>>Go Further: Getting Creative with a Custom Color
The 60 colors that appear in the Theme Colors tab and the 10 standard colors that appear on the More Colors tab seem like a large palette, but you might not find the color that’s just right for your needs. In that case, you take matters into your own hands and create the color you want. In Word, Excel, and PowerPoint, display the Font Color list, click More Colors, and then click the Custom tab. Use the Colors palette to click the basic color you want to use. In the smaller palette on the right, click and drag the bar to indicate how much gray you want in the custom color. Drag the bar up for a lighter hue (that is, less gray), or drag the bar down for a darker hue (more gray).
Formatting Paragraphs
Word, PowerPoint, and OneNote are simple programs in the sense that it’s easy to get started with them: You just create a new document or open an existing document and then start typing. Of course, not all documents consist of basic text. For example, you might require a bulleted or numbered list, or you might need to adjust the indentation or alignment of a paragraph. This section shows you how to perform these tasks in Word, PowerPoint, and OneNote.
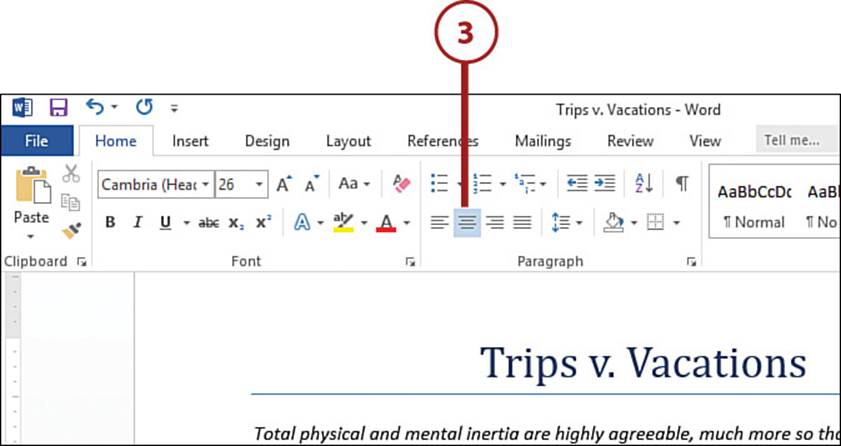
Align Paragraphs
You can make a document easier to read by aligning its text horizontally. You can align the text with the left margin (this is the default alignment), with the right margin, or with the center of the document. In Word, you can also justify a paragraph’s text, which means the text gets aligned with both the left and right margins.
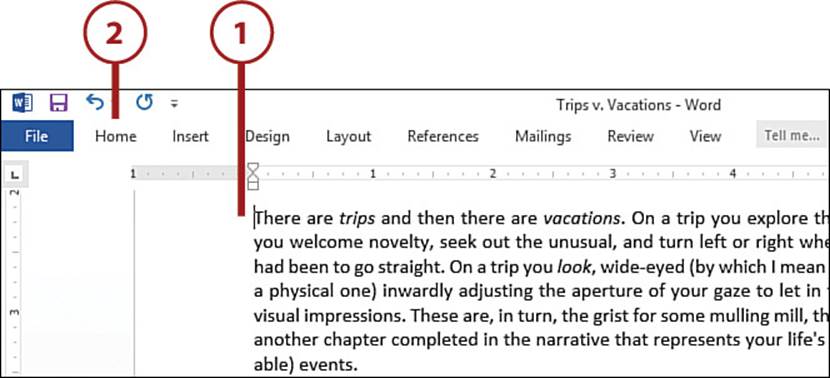
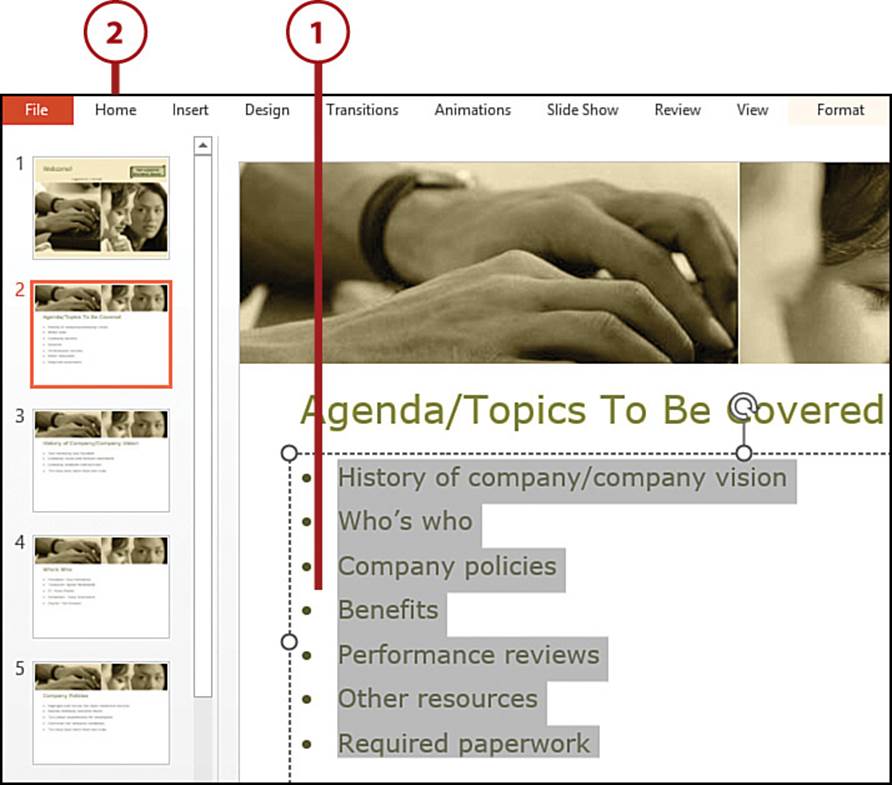
1. Click inside the paragraph or cell you want to align. If you want to align multiple items, select some or all of the text in each of the paragraphs or select each cell.
2. Click the Home tab.
3. Click the alignment you want to apply.
Applying Alignment
You can apply these alignments to one or more paragraphs in a Word document, to one or more cells in an Excel worksheet, to text in a PowerPoint slide, or to paragraphs in a OneNote page.
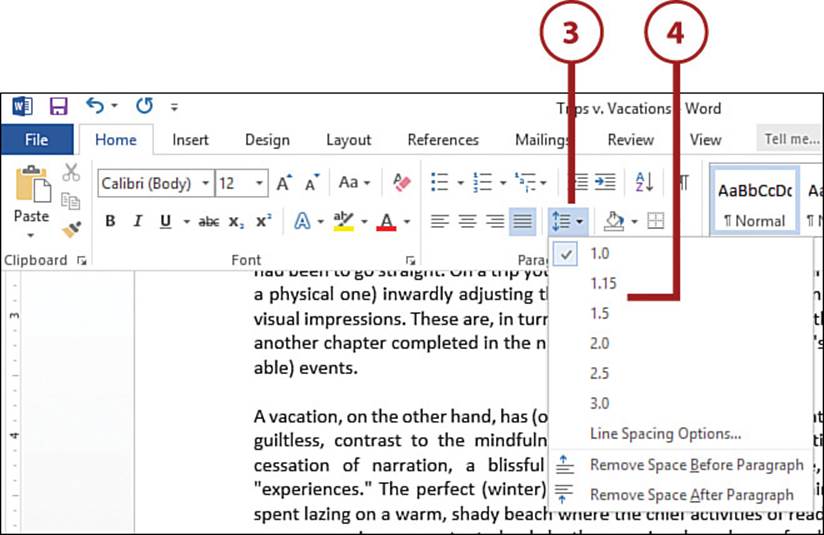
Set the Line Spacing
You can improve the look of your document’s slides by adjusting the line spacing, which determines the amount of space between each line in a paragraph. For example, double spacing leaves twice as much space between the lines as the standard single spacing. Increasing the spaces creates more white space in the document, which can make the document easier to read.
You can apply these alignments to one or more paragraphs in a Word document, to one or more cells in an Excel worksheet, to text in a PowerPoint slide, or to paragraphs in a OneNote page.
1. Click inside the paragraph you want to format. If you want to set the spacing for multiple paragraphs, select some or all the text in each of the paragraphs.
2. Click the Home tab.
3. Click Line Spacing.
4. Click the line spacing value that you want to apply.
Applying Line Spacing
You can adjust line spacing to one or more paragraphs in a Word document. However, the line spacing feature is not available in Excel, PowerPoint, and OneNote.
Build a Bulleted List
You can make a list of items more prominent and more readable by formatting those items as a bulleted list. When you do, the app formats the items slightly indented from the regular text, with a small character—called the bullet, which is usually a black dot—in front of each item.
You can either create a bulleted list from scratch or convert an existing list of items to a bulleted list. You also have a choice of several different bullet characters.
1. If you want to convert existing text to a bulleted list, select the text.
Converting Text to a Bulleted List
If you’re selecting text to convert to a bulleted list, the text must be a series of items, of any length, each in its own paragraph.
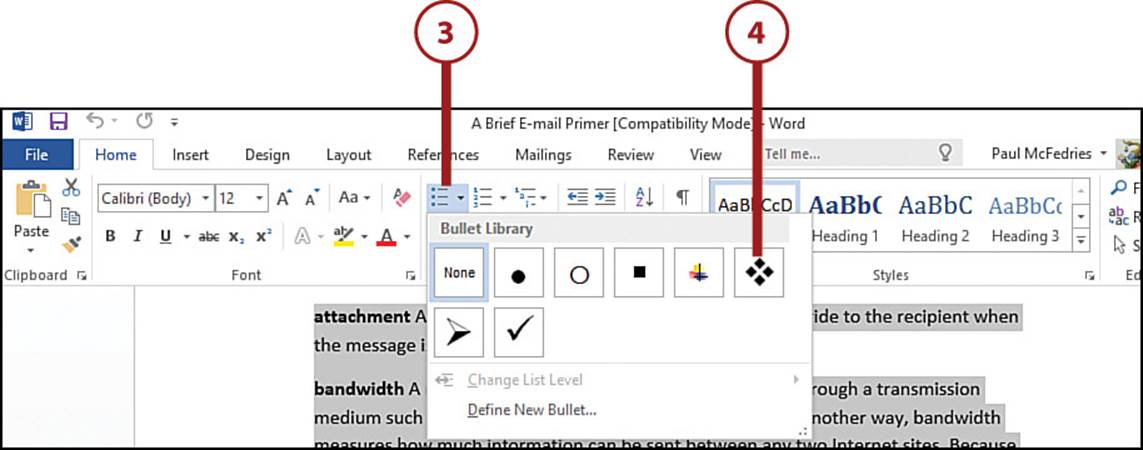
2. Click the Home tab.
3. Click Bullets.
4. Click the bullet style you want to use. If you selected text in advance, the program converts the text to a bulleted list.
5. If you selected text in advance, click at the end of the last item. The insertion point moves to the end of the item.
6. Press Enter. The program creates a new item in the bulleted list.
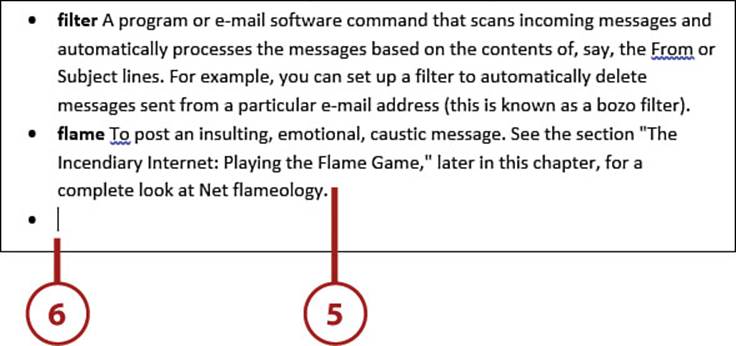
7. Type the text for the new list item.
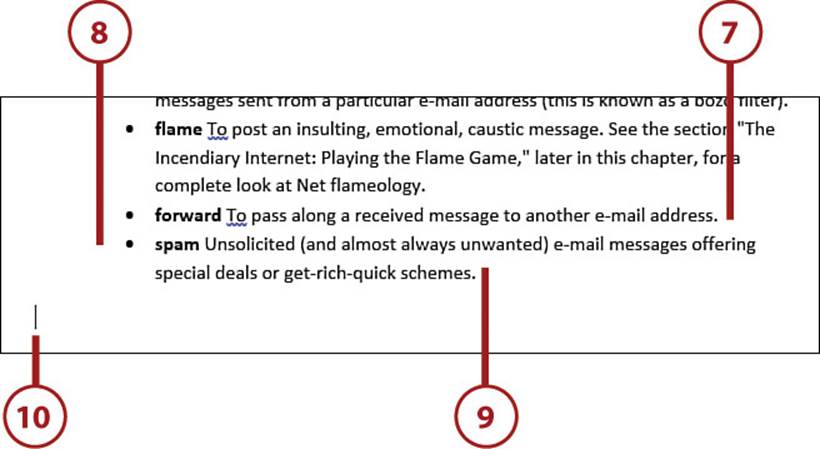
8. Repeat steps 6 and 7 until you complete the bulleted list.
Creating Subbullets
If you want to shift a list item so that it’s a subbullet of the item above it, click at the beginning of the item and then press Tab or click Increase Indent. To return the item to its previous level, press Shift+Tab or click Decrease Indent.
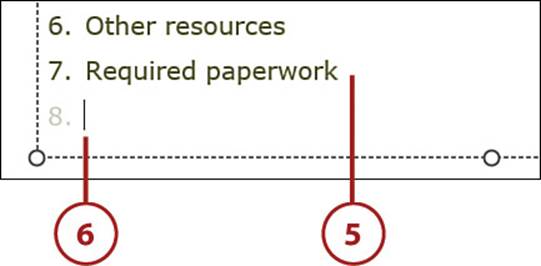
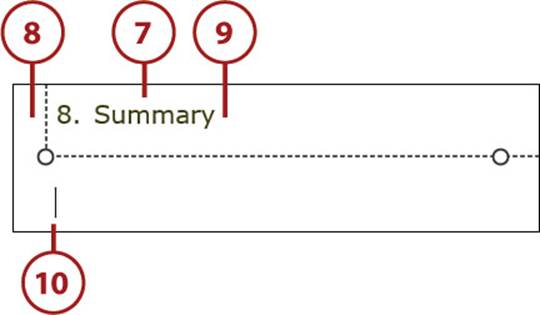
9. Click at the end of the last item.
10. Press Return twice to end the bulleted list.
Create a Numbered List
You can make a set of steps or an ordered list more readable and easier to follow by formatting those items as a numbered list. When you do, the app formats the items slightly indented from the regular text, with a number in front of each item. The numbers increase sequentially, usually from 1 to the total number of items in the list.
You can either create a numbered list from scratch or convert an existing list of items to a numbered list. You also have a choice of several different numbering characters.
1. If you want to convert existing text, in this case a bulleted list, to a numbered list, select the text.
Converting Text to a Numbered List
If you’re selecting text to convert to a numbered list, the text must be a series of items, of any length, each in its own paragraph.
2. Click the Home tab.
3. Click Numbering.
4. Click the number format you want to use. If you selected text in advance, the app converts the text to a numbered list.

Number Formats
The number formats are available only in Word and PowerPoint. In OneNote, when you click Numbering, the app applies a default numbered list format.
5. If you selected text in advance, click at the end of the last item. The insertion point moves to the end of the item.
6. Press Enter. The app creates a new item in the numbered list.
7. Type the text for the new list item.
8. Repeat steps 6 and 7 until you complete the numbered list.
9. Click at the end of the last item.
10. Press Return twice to end the numbered list. (If you still see the next number in PowerPoint, click Backspace to delete it.)
Set the Indentation
You can set off a paragraph from the rest of the text by indenting the paragraph. For example, if a document includes a lengthy quotation, you can indent the quotation to make it stand out. In Word, PowerPoint, and OneNote, you can indent a paragraph from the left.
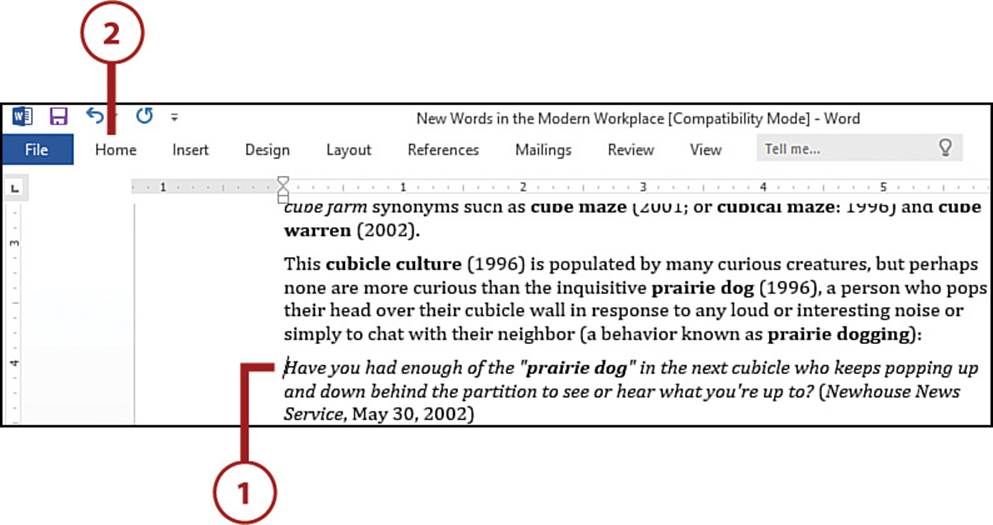
1. Click inside the paragraph you want to indent. If you want to indent multiple paragraphs, select some or all the text in each of the paragraphs.
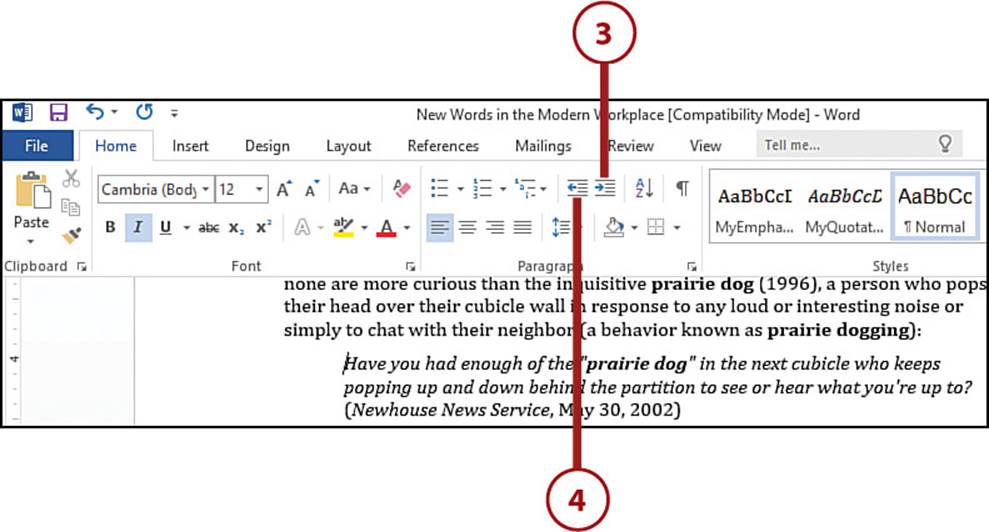
2. Click the Home tab.
3. Click Increase Indent. The app shifts the entire paragraph away from the left margin.
4. Repeat step 3 until the paragraph is indented the amount you want. If you indent a paragraph too much, you can shift the text back toward the left margin by clicking Decrease Indent.
Working with Formatting
Working with text and paragraph formatting can be time-consuming and labor-intensive. It’s almost always worth the extra effort to make your Office documents look their best, but that doesn’t mean you should waste time performing your formatting chores. The Office applications offer a few handy features that can help reduce the amount of time and effort you expend on your formatting, and the rest of this chapter covers these useful tools.
Apply Styles
You can save time and effort when formatting your documents by taking advantage of the predefined styles available in the Office applications. A style is a collection of formatting options, usually including some or all the following: typeface, type size, text color, text effects, and paragraph alignment. When you apply a style to some text, the app applies all the style’s formatting at once.
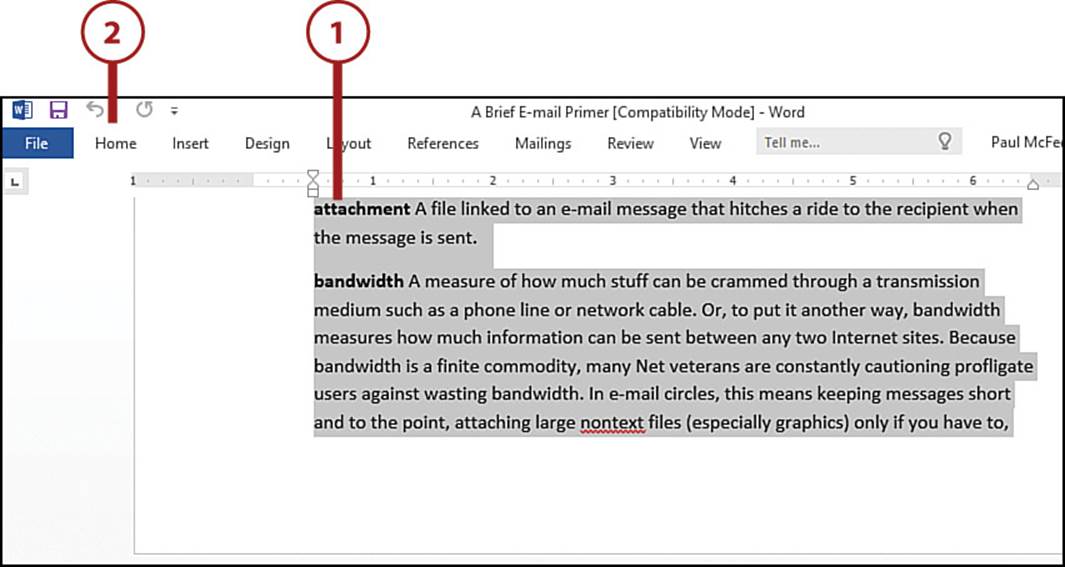
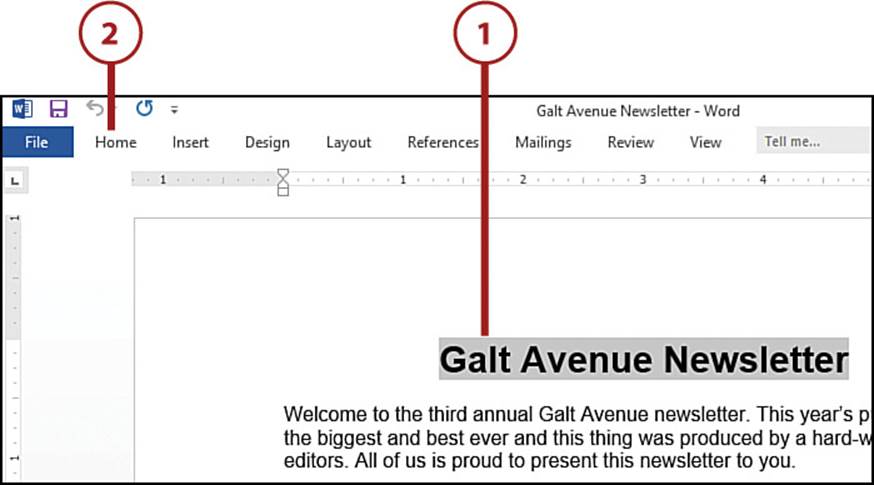
1. Select the text you want to format.
2. Select the Home tab.
3. Open the Styles gallery.
4. Click the style you want to use. The Office app applies the style’s formatting to the text.

Applying Styles by App
The Styles gallery is available in Word, PowerPoint, and OneNote. In Excel, click Cell Styles, instead.
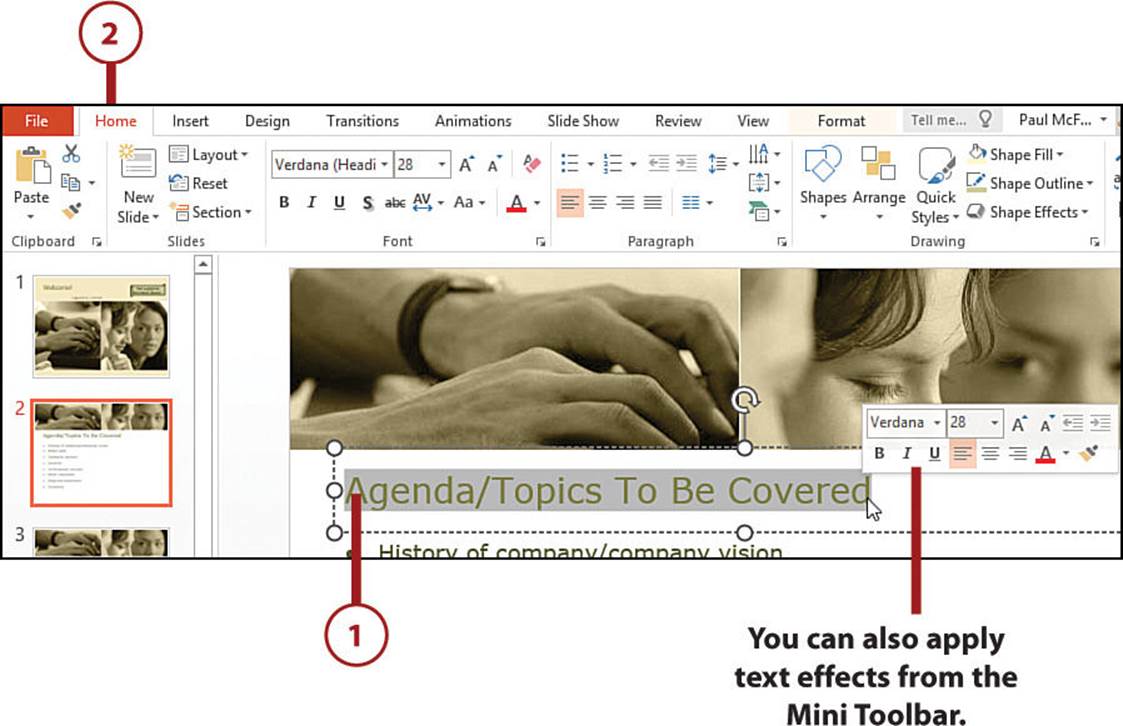
Apply Text Effects
The Office styles apply standard font formatting such as bold, font size, and font color. If you’re looking for something with a bit more pizzazz, you can format your words with a text effect, which is a preset style that applies more advanced formatting such as reflections, textures, and 3-D effects.
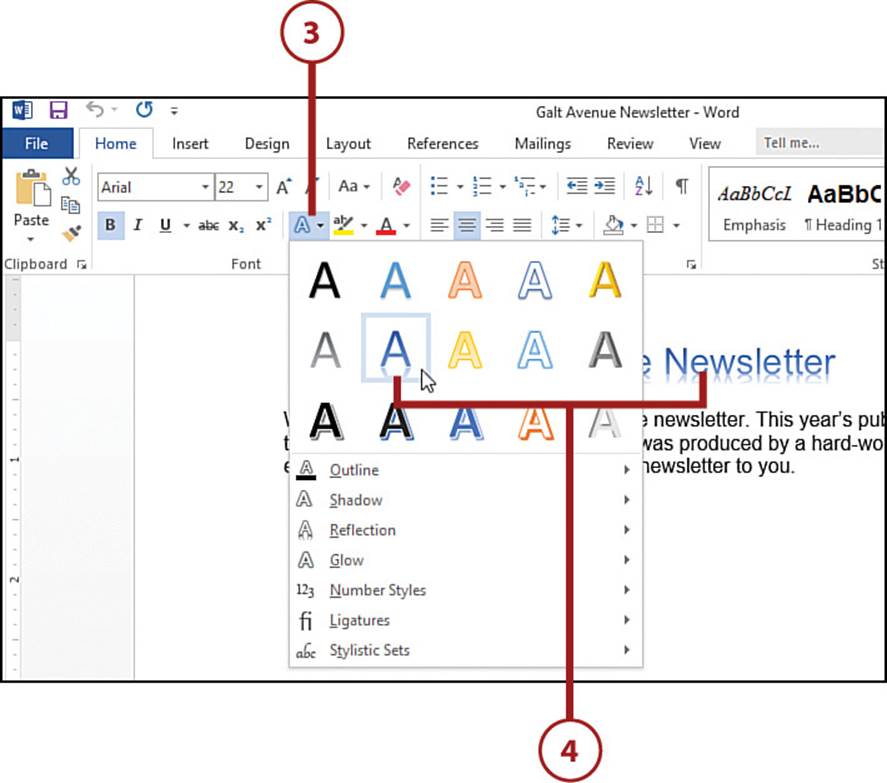
1. Select the text you want to format.
2. Click the Home tab.
3. Click Text Effects.
4. Click a text effect. Word applies the effect to the selected text.
Text Effects Are Word-Only
The Text Effects feature is available only in Word. In PowerPoint, you can use the Home tab’s Text Shadow command to apply a shadow to the selected text.
Clear Formatting
If you apply a number of font formats, paragraph options, or styles to some text, you might decide later that you no longer want any of that formatting. Although it’s possible to turn off or remove each of the formatting options individually, Word and PowerPoint offer a much easier method: the Clear Formatting command. Selecting this command removes all formatting from the selected text, so this method is much easier than trying to clear the formatting options one by one.
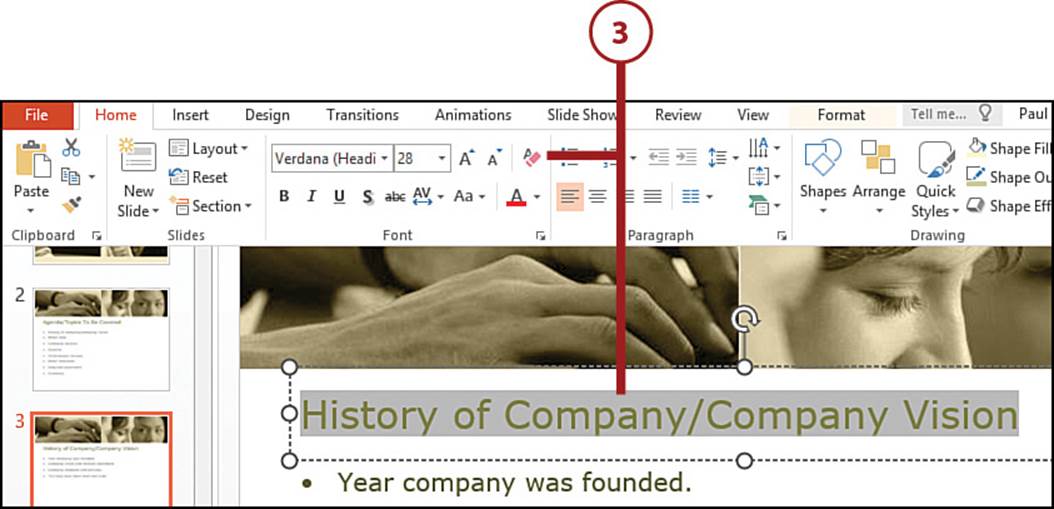
1. Select the text you want to clear.
2. Click the Home tab.
3. Click Clear Formatting. The Office program clears all formatting from the text.
All materials on the site are licensed Creative Commons Attribution-Sharealike 3.0 Unported CC BY-SA 3.0 & GNU Free Documentation License (GFDL)
If you are the copyright holder of any material contained on our site and intend to remove it, please contact our site administrator for approval.
© 2016-2026 All site design rights belong to S.Y.A.