PowerShell in Depth, Second Edition (2015)
Part 4. Advanced PowerShell
Chapter 38. Building a GUI
This chapter covers
· Using Windows Forms
· Using WPF and ShowUI
· Leveraging a GUI
Although PowerShell is obviously all about the command line, there may well be times when you want to create a script that displays a graphical user interface (GUI), perhaps for less technically proficient colleagues or end users. Fortunately, PowerShell is built atop the .NET Framework, which offers not one but two ways of displaying a GUI.
As with some of the other chapters in the latter part of this book, we need to set some expectations. Creating and programming a GUI is pure .NET Framework programming, plain and simple. Entire, massive books exist on the topic, so there’s no way we can cover all that material in this chapter. Instead, we’ll show you how PowerShell connects to these technologies and uses them. If you’d like to explore further, we recommend that you pick up a dedicated book on the topic. One thing we’re going to make sure we cover, though, is some tips for translating the C#-based examples you’ll run into elsewhere (including in Microsoft’s documentation) into PowerShell’s scripting language. That way, as you start to explore beyond the simple examples here, you’ll be ready to leverage the enormous set of examples that other folks have already written.
For Windows Forms programming, which is what we’ll cover first, we recommend Programming Microsoft Windows Forms by Charles Petzold (Microsoft Press, 2005). It’s an older book, but still very accurate. Another title is Windows Forms in Action, Second Edition by Erik Brown (Manning, 2006). For Windows Presentation Foundation, the topic of this chapter’s second half, consider WPF in Action with Visual Studio 2008 by Arlen Feldman and Maxx Daymon (Manning, 2008).
As those book titles imply, PowerShell has two means of raising a GUI: Windows Forms, which is the original GUI technology built into .NET, and Windows Presentation Foundation (WPF), which is a newer technology introduced in .NET Framework 3.5. WPF is more modern, more modular, and somewhat more complex; Windows Forms (or WinForms) is a bit more classic, a bit simpler to use, and still very much in use by all kinds of developers. We’ll start with it.
38.1. WinForms via PowerShell Studio
In WinForms, you create your GUI programmatically—that is, you create instances of objects like buttons, windows, check boxes, and so forth and set their properties to position them on the screen. This gets tedious, especially in PowerShell where you spend a lot of trial-and-error time tweaking positions and so on. To make the process easier, we tend to use PowerShell Studio (formerly known as PrimalForms) from SAPIEN Technologies (http://primaltools.com). This is a commercial product, meaning you have to pay for it, although you might still be able to find the free Community Edition on the SAPIEN site. The free edition provides a lot of functionality but obviously not all the bells and whistles of the commercial product. If you need to develop graphical PowerShell scripts, this tool is well worth your investment.
We’ll focus on the basics and create a simple GUI tool. You can do a lot more with PowerShell Studio (and WinForms), and the product’s documentation provides a good starting point. You’ll also find the company’s blog to be an excellent source of examples (http://www.sapien.com/blog/) for PrimalForms, aka PowerShell Studio, including complex tasks like building data grids and other GUI elements.
Note
PowerShell Studio projects can become terrifically complex, including multiple windows and lots of GUI elements. We’ll keep it simple, just to illustrate the basics and cover some of what you can do. Otherwise, this chapter could easily become its own book!
By the way, it’s completely possible to create an entire WinForms-based script without a tool like PowerShell Studio. PowerShell Studio just makes it a million times easier. But, toward the end of our upcoming example, we’ll show you what the final code looks like and walk you through some key pieces of it. That’ll get you started on hand-coding a GUI, if you’d prefer to take that time-consuming, laborious, and highly manual approach. Which we obviously wouldn’t do ourselves!
Warning
Like many third-party tools, PowerShell Studio does quite a bit when it installs. One of the things it sets up is a set of Windows Firewall exceptions. Just make sure you review what it’s done after it installs, and be sure you’re comfortable with those changes. Obviously, you can disable or remove anything you don’t like, but you may impact certain product features. We don’t work for SAPIEN, but we do find their support team to be responsive, so if you run into trouble with the application, start at http://support.sapien.com for help.
38.1.1. Creating the GUI
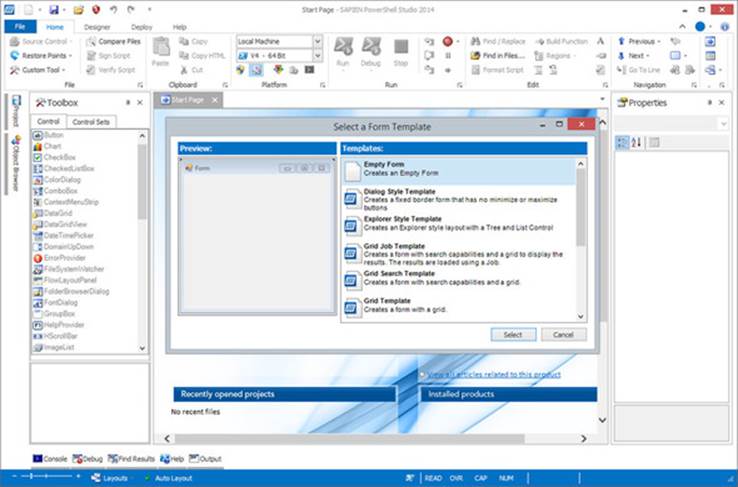
Your first step, after installing the product, will be to start a new project and create a GUI. You do need to plan ahead a bit. What will your final script do? What information will you need to collect, and how will you display it? You might even sit down with a pencil and paper and sketch out your GUI in advance so that you can work more efficiently once you begin in earnest. When you’re ready, start by creating a new Form Project, as shown in figure 38.1. We’re using a beta version of PowerShell Studio 2014, so your results might vary.
Figure 38.1. Creating a new form
Tip
We strongly recommend you have a PowerShell script or function that already works from the command console. You’ll find it much easier to build a GUI that incorporates your code than trying to create the graphical elements and your code at the same time. You’ll also end up with two versions of the same tool, one for console use and one graphical, which is exactly the PowerShell model.
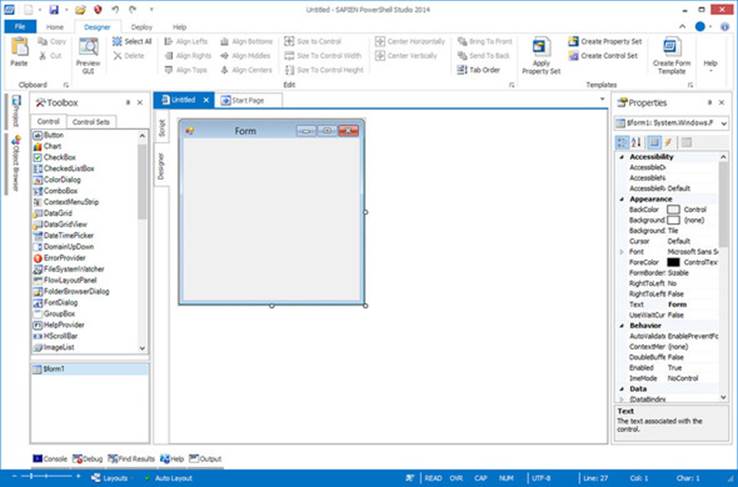
PowerShell Studio offers a number of form templates. We started with a totally blank slate, as shown in figure 38.2.
Figure 38.2. An empty form
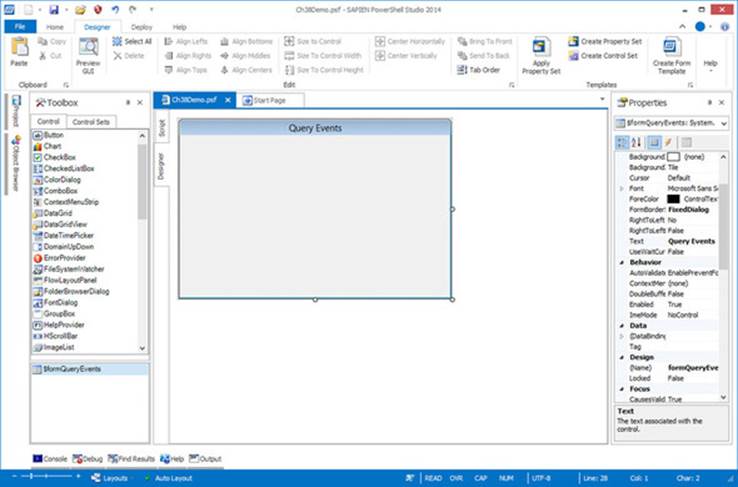
Use the right-hand Properties Explorer to set properties of the form itself. For this example, set ControlBox to False, FormBorderStyle to FixedDialog, and Start Position to CenterScreen, and type QueryEvents for the Text property. Also pin open the Toolbox on the left-hand side, as shown in figure 38.3. Use the Toolbox to configure element properties.
Figure 38.3. Set properties of the form to control its appearance, startup position, and so on.
Now you’ll add several controls to the form to create the display shown in figure 38.4. Drag and drop the individual controls from the Toolbox to the form. For this example:
Figure 38.4. Getting the rest of the GUI in place. You can rearrange and resize until you’re happy with the results.
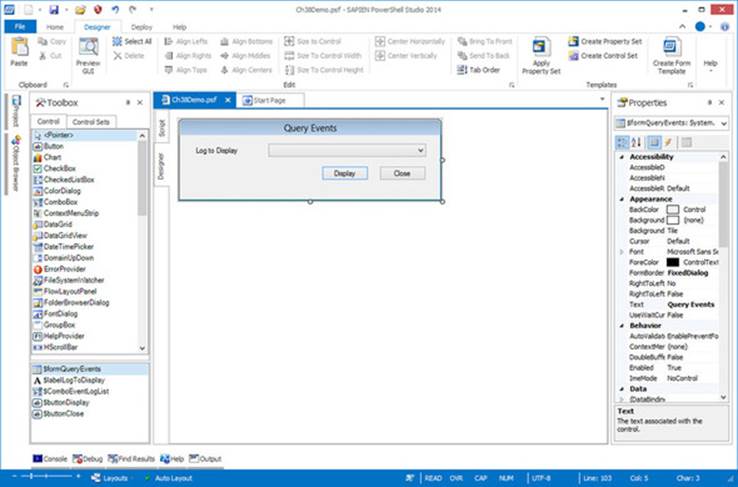
· Add a Label, and set the following:
o TextAlign to MiddleRight
o Text to Log to Display
· Add a Combo Box, and set the following:
o Name to comboEventLogList
o DropDownStyle to DropDownList
· Add a button, and set the following:
o Text to Display (which causes PowerShell Studio to set Name to button-Display automatically)
· Add a second button, and set the following:
o Text to Close (which causes PowerShell Studio to set Name to buttonClose automatically)
· Resize the form by dragging its edges. Then, set the following in the Form properties under Misc:
o AcceptButton to buttonDisplay (which will activate buttonDisplay if the user presses Enter)
o CancelButton to buttonClose (which will activate buttonClose if the user presses Esc)
The GUI after the completion of these steps is shown in figure 38.4.
The Name properties are crucial. Any control that a user might interact with needs a meaningful name. PowerShell Studio will create variables that make each control easier to reference; the variable names come from the control’s Name property. So your buttonDisplay button will be referenced via a $buttonDisplay variable. If you don’t set the name, you get meaningless variable names like $combobox1, which are a lot harder to work with when you get into the code.
38.1.2. Adding the code
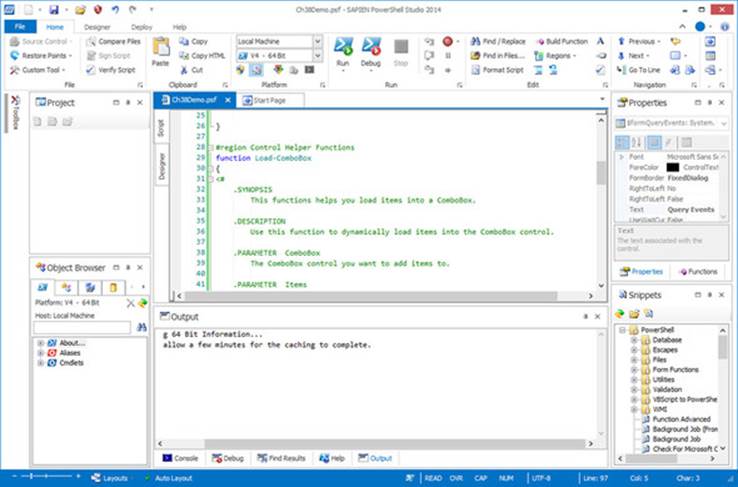
After you’ve finished drawing the GUI, you can start adding code and PowerShell commands to make it function. The first thing you’ll do is right-click the form and select Edit Default Event to open a code editor with the form’s Load event. Here you’ll add the commands that you want to run when the form loads (see figure 38.5); that’s when you start the GUI application.
Figure 38.5. You can unpin the side panels to give yourself more room for code.
When this form loads, you want to populate that combo box with whatever event logs are present on the local computer. Use this command to do so:
PS C:\> Get-EventLog –List
Max(K) Retain OverflowAction Entries Log
------ ------ -------------- ------- ---
20,480 0 OverwriteAsNeeded 9,817 Application
20,480 0 OverwriteAsNeeded 0 HardwareEvents
512 7 OverwriteOlder 0 Internet Explorer
20,480 0 OverwriteAsNeeded 0 Key Management Service
128 0 OverwriteAsNeeded 175 OAlerts
20,480 0 OverwriteAsNeeded 31,223 Security
20,480 0 OverwriteAsNeeded 4,979 System
15,360 0 OverwriteAsNeeded 17,668 Windows PowerShell
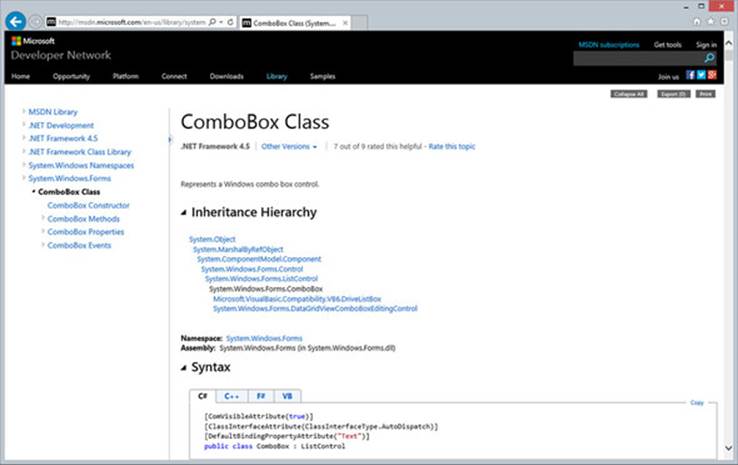
So it’s the Log property that you want added to the list. You need to figure out how to do that, so in your favorite search engine enter msdn winforms combobox (MSDN gets you to Microsoft’s site, WinForms narrows you down to a particular technology, and ComboBox is the name of the control you’re trying to manipulate). The result is http://msdn.microsoft.com/en-us/library/system.windows.forms.combobox.aspx, shown in figure 38.6. Looking at the list of methods, you don’t see anything that looks like “add an item to the list.” Back in the Properties list, you do see Items, which “Gets an object representing the collection of items contained in this ComboBox.”
Figure 38.6. Figuring out how to use a ComboBox in WinForms
Clicking the Items property takes you to http://msdn.microsoft.com/en-us/library/system.windows.forms.combobox.items.aspx, which lists a handy C# code example for adding items to the box:
private void addButton_Click(object sender, System.EventArgs e) {
comboBox1.Items.Add(textBox1.Text);
}
This looks like an example of how to have an item added when a button is clicked. The single line of code within that function is the only part you care about. It looks like you refer to the combo box (which in your PowerShell project will be $combo-EventLogList, because that’s the name you gave it). You refer to its Items property, execute the Add() method, and pass in the text you want to add.
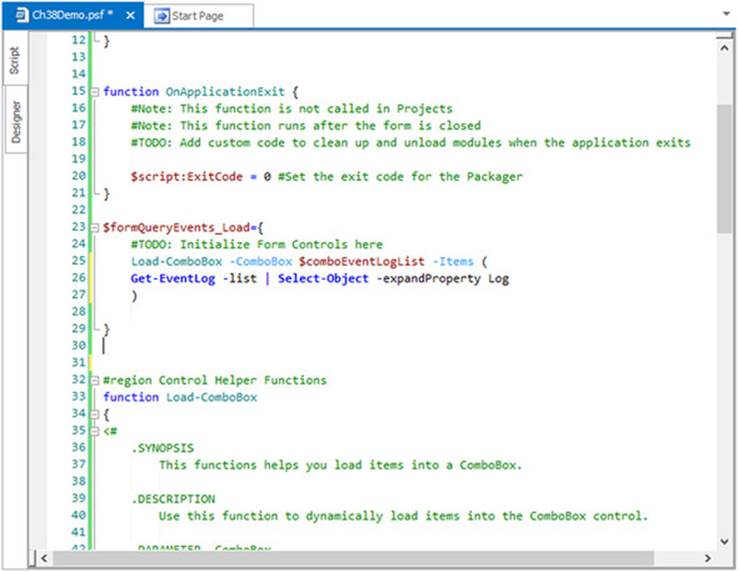
When you read down in the PowerShell code a bit, you realize that PowerShell Studio has created a Load-ComboBox function for you. Wow. Reading the comment-based help, it looks like all you need to do is provide a –ComboBox parameter and a list of items to add. PowerShell Studio has a built-in place to add code like this to initialize controls when the form is loaded.
$formQueryEvents_Load={
#TODO: Initialize Form Controls here
Load-ComboBox -ComboBox $comboEventLogList -Items (
Get-EventLog -list | Select-Object -expandProperty Log
)
}
Figure 38.7 shows your code.
Figure 38.7. Adding code that’ll run when the form loads
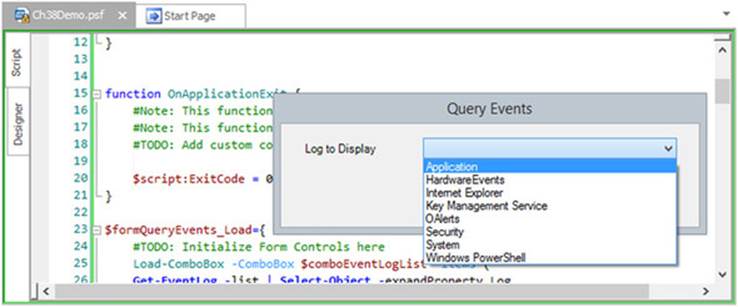
All you have to do now is test what you have so far by clicking Run Project in the Ribbon. As you can see in figure 38.8, your list populated correctly.
Figure 38.8. Testing the project as you complete each step is a good way to avoid complex bugs.
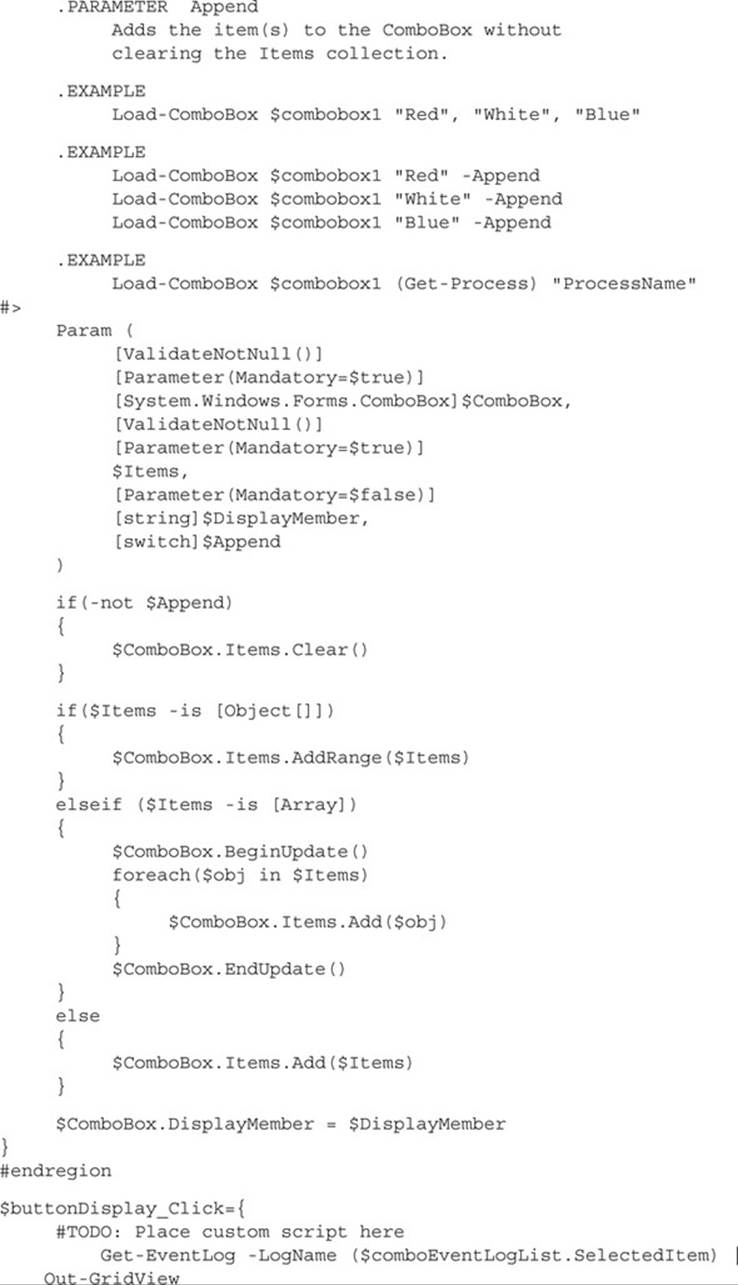
Now you need to do something with whatever log the person selects. That’ll happen when they click the Display button you created. So, stop the script (there’s a button in the Ribbon for this action) or click the Close button because you’ve already told the form that’s the default Cancel button. Then go back to the Designer tab to display your form. Right-click the Display button and choose Edit Default Event. Or because this is a simple form, you can scroll down in the Script pane until you find the $buttonDisplay_Click script block.
You’ll need to access whatever item has been selected in the combo box. In the MDSN documentation, you’ll find a SelectedItem property that’ll contain whatever item is currently selected, so you’ll use that:
$buttonDisplay_Click={
Get-EventLog -LogName ($comboEventLogList.SelectedItem) |
Out-GridView
}
Notice that you’re piping the result to Out-GridView. Doing so gives you an easy way of displaying the results, but it does require that the Windows PowerShell ISE be installed on the system. For this example, we’ll assume you’ve already done that, so you’re good to go. In this particular scenario, you probably don’t need to define it, but your last step might be to make the Close button do something:
$buttonClose_Click={
$MainForm.Close()
}
With that, you’ve made the entire thing work.
Note
PowerShell Studio provides the ability to run scripts in both 32-bit and 64-bit shells. You have to be careful to select the right one, especially if your script will use extensions that are available in only one architecture. A dropdown box in the Ribbon lets you select one or the other each time you run.
38.1.3. Using the script
Obviously, you don’t want your users to have to install PowerShell Studio just to run your script, so you’ll need to export your project. Your two main choices are to create a stand-alone script or to create a packaged executable. Either route still requires PowerShell to be installed on users’ machines in order to run; this isn’t compilation à la Visual Studio. Use the Deploy tab in the Ribbon. The following listing shows the complete, deployed script from our example.
Listing 38.1. Our example project code
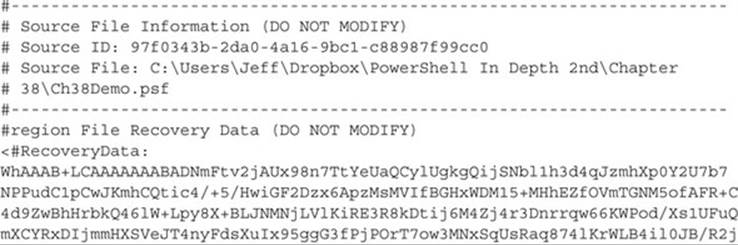
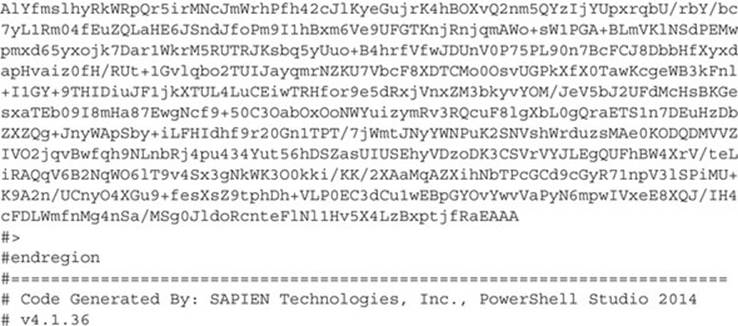

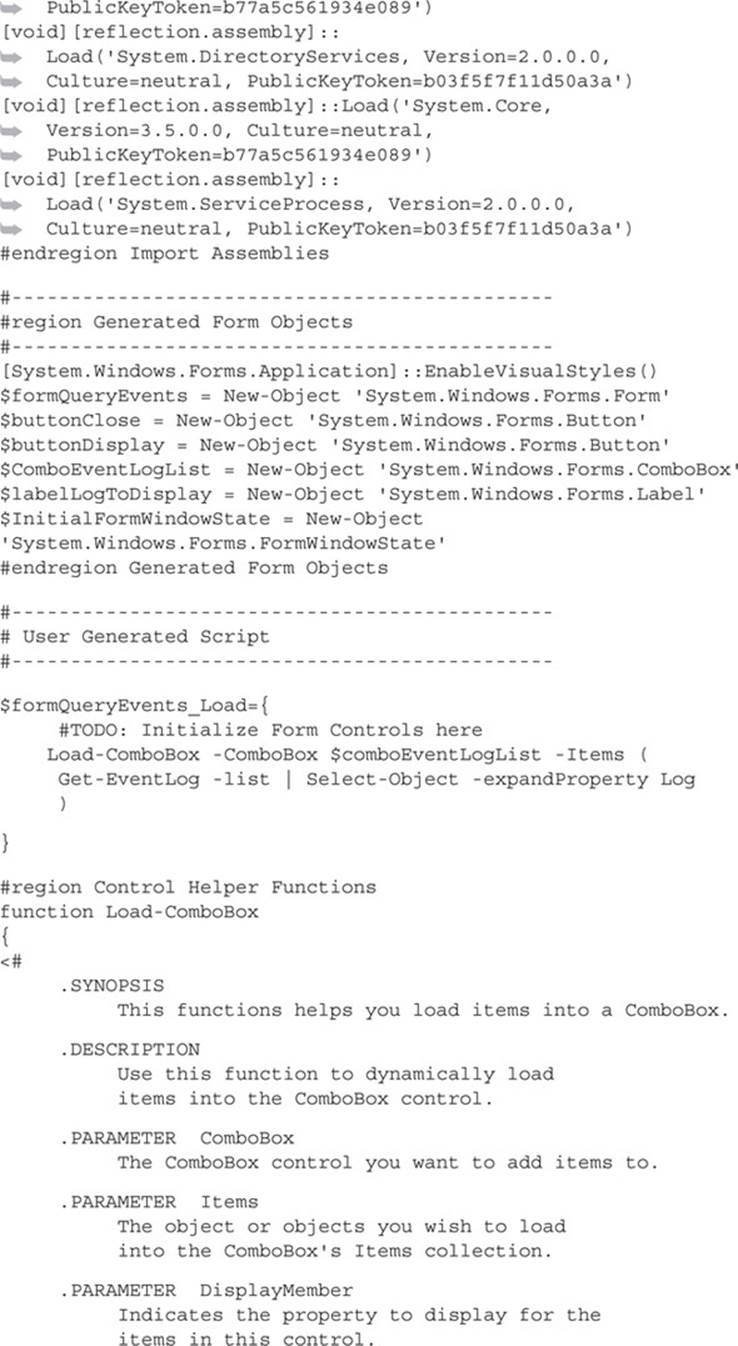
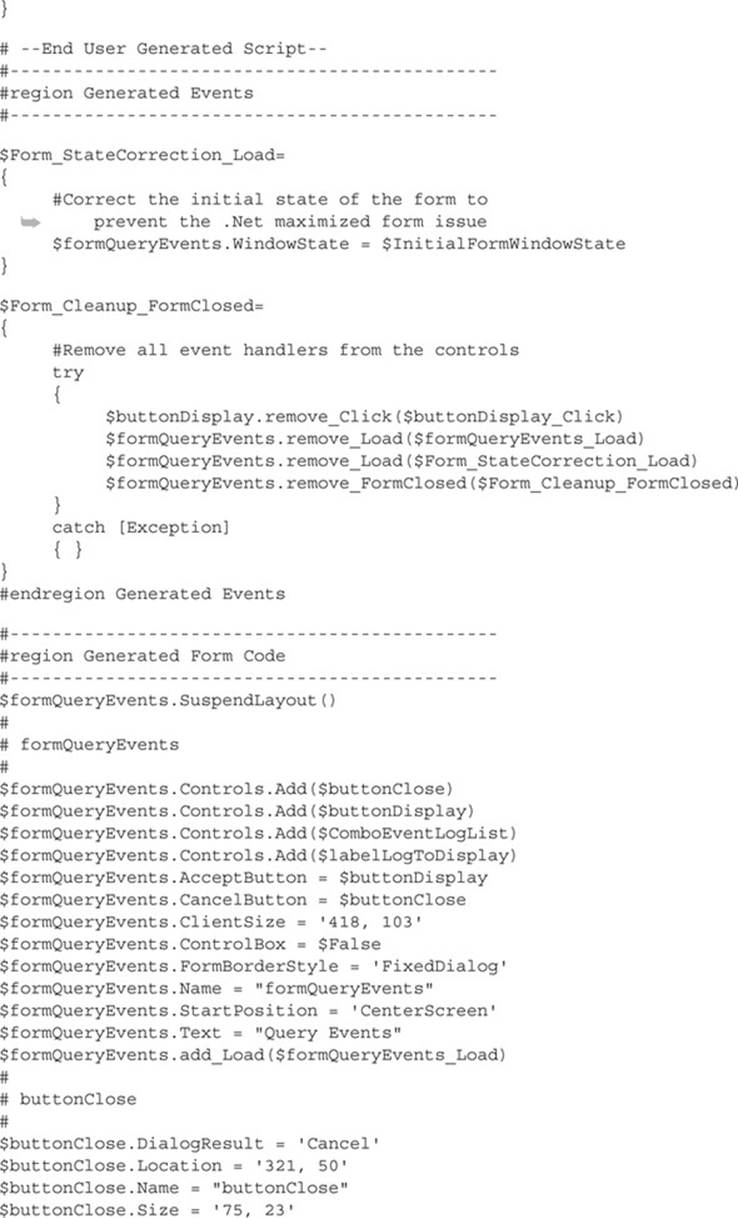
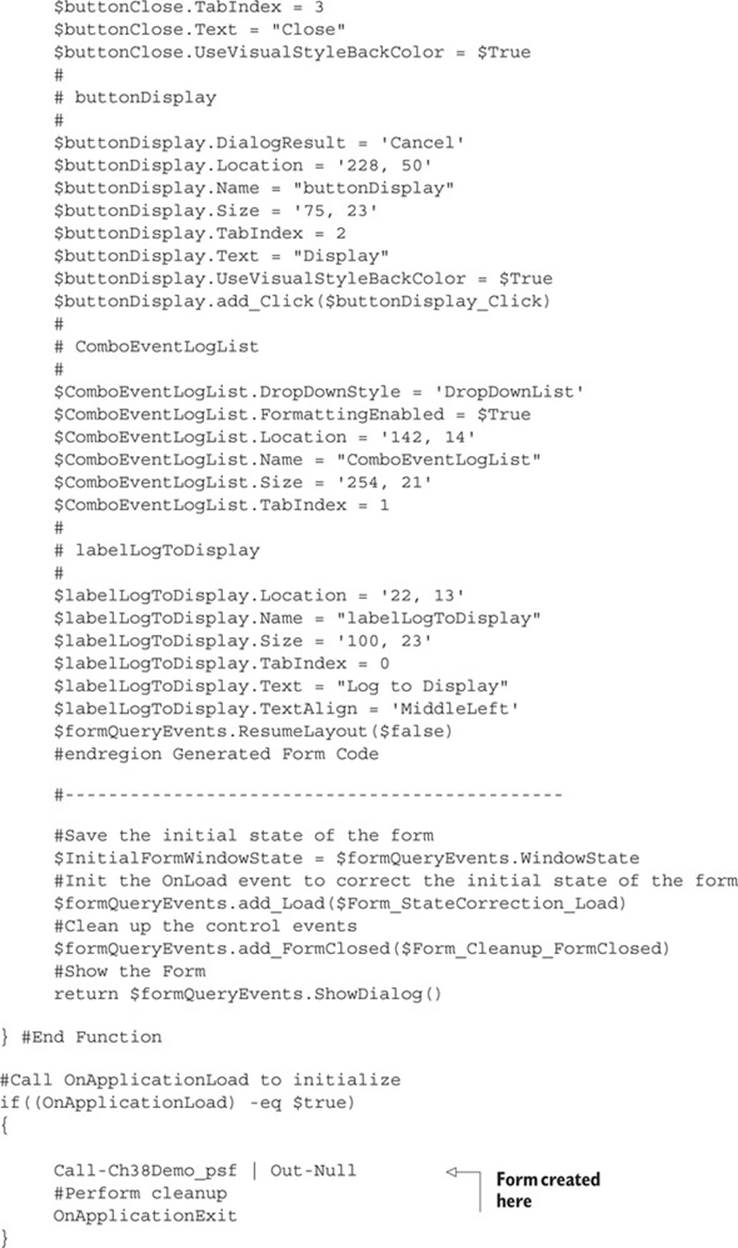
You can see what a massive amount of code PowerShell Studio has created. In particular, notice the area of code where the GUI is programmatically created. Without a tool like PowerShell Studio, this is what you’re left to create by hand—no thank you!
Note
Your own project scripts will look a lot different. PowerShell Studio adds “control helper functions,” like the LoadComboBox function we used, based on the controls you add to your form. Add different controls and you’ll pick up different helper functions, so it’s worth browsing the code listing in PowerShell Studio to see what it’s added. We’ll include our PowerShell Studio source file as part of the chapter downloads if you want to load it up and try it out yourself.
At this point, all you need to do is distribute the PS1 file and it can be executed like any other PowerShell script.
38.2. Windows Presentation Foundation (WPF) and ShowUI
WPF is the other, newer means of producing a GUI in .NET. We’re not aware of a tool exactly like PowerShell Studio for WPF, but you may not feel you need one. You see, WPF doesn’t create the GUI programmatically like WinForms does. Instead, the GUI definition is contained in an XML file (technically, the specific XML format is called XAML, for Extensible Application Markup Language). You can get any of the free “Express” editions of Visual Studio and use their built-in WPF forms-building tool, which looks a lot like PowerShell Studio, to produce the XAML file. Then, you just tell PowerShell (well, you tell .NET) to load the XAML and do something with it.
The next listing shows an example of what we’re talking about.
Listing 38.2. Sample XAML
<?xml version="1.0" encoding="utf-16"?>
<Window
xmlns="http://schemas.microsoft.com/winfx/2006/xaml/presentation"
xmlns:x="http://schemas.microsoft.com/winfx/2006/xaml"
Title="Newest 100" Height= "200" Width="400"
>
<Canvas Width="300" Height="100"
xmlns:sma="clr-namespace:System.Management.Automation;assembly=
System.Management.Automation"
>
<Canvas.Resources>
</Canvas.Resources>
<Label Canvas.Left="45" Canvas.Top="10">
<Label.Resources>
</Label.Resources>log to display</Label>
<ComboBox IsEditable="False" Text="Application"
Name="comboBoxLogName" Canvas.Left="130" Canvas.Top="10">
<ComboBox.Resources>
</ComboBox.Resources>
</ComboBox>
<Button IsDefault="True" Canvas.Left="50" Canvas.Top="50"
Name="Display" ToolTip="Show last 100 entries">
<Button.Resources>
</Button.Resources>Display</Button>
<Button Canvas.Left="175" Canvas.Top="50" Name="Close"
ToolTip="Quit">
<Button.Resources>
</Button.Resources>Close</Button>
</Canvas>
</Window>
Creating the XML in listing 38.2 isn’t easy for most IT pros. And to run it takes even more work, as shown in the following listing.
Listing 38.3. Running sample WPF
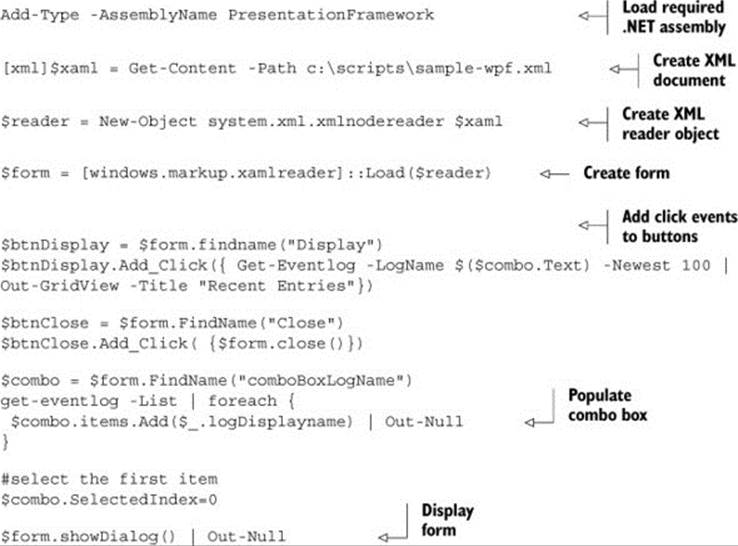
But you don’t have to mess with XAML if you don’t want to—and frankly we don’t. An easier way to integrate WPF into PowerShell is the free ShowUI module, available at http://showui.codeplex.com/. This module contains a bunch of commands like New-Label and New-ComboBox that let you run PowerShell-like commands to output WPF GUIs.
The website for the project has some quick examples, so we’ll let you go straight there to get them. They’ll be more up-to-date than anything we could put into this book. But, for the sake of comparison, we put together a ShowUI version of the WinForms script in the next listing.
Listing 38.4. A ShowUI script
<#
This must be run in the ISE or in a PowerShell console session started
with –STA
#>
Import-Module ShowUI
New-Canvas -ControlName "Newest 100" -Height 100 -Width 300 -children {
New-Label -content "log to display" -left 45 -top 10
New-ComboBox -IsEditable:$false -SelectedIndex 0
![]() -Top 10 -left 130 -Name comboBoxLogName
-Top 10 -left 130 -Name comboBoxLogName
![]() -ItemsSource @(Get-eventlog -list |
-ItemsSource @(Get-eventlog -list |
Select -ExpandProperty Log)
New-Button "Display" -isDefault -Top 50 -left 50 -On_Click {
Get-Eventlog -logname $($comboBoxLogName.SelectedItem)
![]() -Newest 100 |
-Newest 100 |
Out-GridView –Title "Newest 100"
}
New-Button "Close" -Top 50 -left 175 -On_Click { Close-Control}
} -Show
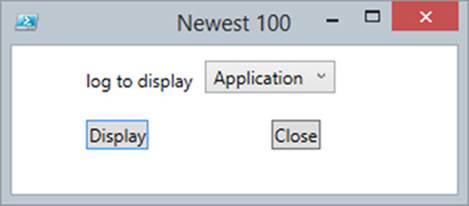
There’s still quite a bit of trial and error to position all the elements, but when you run the script in listing 38.4 you get a form like figure 38.9. This is the same thing you’d have seen if you’d run the “native” WPF sample in listing 38.3.
Figure 38.9. A ShowUI form
If you want to use WPF, we think a tool like ShowUI is essential, but expect to invest some time in figuring out how to use it.
38.3. WinForms vs. WPF
One advantage of WPF is that it’s a bit more self-contained and modular than WinForms, and using XAML lets you separate your GUI (which is defined in the XML) from the code and commands that make the GUI functional. But as a PowerShell admin, you just might not care—that kind of “separation of layers” is something developers love to go on about, but for simple admin utilities it’s kind of a pointless argument. But keep in mind that in the latest version of Windows Server, you can’t rely on a GUI being present at all. And, when the operating system’s Minimal Server GUI mode is enabled, only WPF is supported—not WinForms. So if you need to make a GUI that must run on a server, WPF might be a better selection. That said, you shouldn’t be writing GUIs to run on servers. Write the GUI to run on your client and send commands to the server via Remoting. That’s Microsoft’s model going forward, and you should adopt it, too.
Apart from those considerations, from the perspective of an admin, there aren’t going to be a lot of differences between WinForms and WPF. With a great WinForms tool like PowerShell Studio, you might feel that WinForms is the way to go—and we’d have trouble arguing you out of it. Don’t get us wrong: Some of our fellow MVPs and PowerShell enthusiasts will argue for hours about WinForms versus WPF, each raising perfectly valid arguments. But those respected colleagues are developers, and about 5 minutes into the argument we’re usually at the bar ordering a refill or three while they go on and on about stuff we can barely comprehend. Ask us which to choose, and the answer is, “Whichever gets the job done faster, and another glass of wine, please.”
The one advantage we’ll admit to regarding WPF is that, because it’s newer, it gets more attention. That means there are a ton of third-party add-in controls—graphs, charts, slick-looking buttons, you name it—that you could use. But again, from an admin perspective, you’re unlikely to be using those things. If you’re sticking purely with the basic controls—text boxes, labels, check boxes, buttons, lists, and the like—either WinForms or WPF will get the job done.
38.4. Ideas for leveraging a GUI tool
One of the main reasons we see administrators creating GUI tools is to give end users, or less-privileged technicians, the ability to perform some task that they wouldn’t ordinarily have permission to perform. This is where the packaging capabilities of a product like PowerShell Studio can come in handy: You can have the package run under previously specified credentials, and users can perform only what the GUI enables them to do.
PowerShell’s remoting capabilities (which we discussed in chapter 10) raise other, interesting possibilities. For example, consider this approach:
1. On a server, set up a custom remoting endpoint. Limit the commands available within the endpoint to just those commands needed to complete some specific task.
2. Configure the endpoint to use Run As credentials (you do this by using Register-PSSessionConfiguration or Set-PSSessionConfiguration). Also configure the security descriptor on the endpoint to allow the necessary users to connect.
3. You probably don’t want to teach your users how to manually enter a remoting session and run commands, but your GUI can do that. Run the GUI on users’ computers, and have the GUI establish a remoting connection to your custom endpoint.
4. Your GUI can then send commands to the custom endpoint for execution. They’ll run under the endpoint’s Run As credentials, meaning you can run commands that a user couldn’t normally run. Because the endpoint is restricted to a limited set of commands, it doesn’t matter if some clever user bypasses your GUI and connects to the endpoint manually; they’ll still only have the capabilities that the GUI ordinarily surfaces.
We think there are a lot of clever possibilities here, and you’re going to see Microsoft and other software vendors taking advantage of this approach. Why not use it yourself?
38.5. Summary
In this chapter, we’ve presented you with an overview of two means of creating a GUI from a PowerShell script. Although we realize there’s a huge amount of additional exploration and explanation you might be hungry for, we feel that you should first choose one of these two methods, WinForms or WPF, to focus on. Then, set yourself up with some good training or books on that specific method. Given what we’ve shown you about connecting those technologies to PowerShell, you should be ready to start expanding your skills and capabilities and creating ever-more-complex GUIs.
All materials on the site are licensed Creative Commons Attribution-Sharealike 3.0 Unported CC BY-SA 3.0 & GNU Free Documentation License (GFDL)
If you are the copyright holder of any material contained on our site and intend to remove it, please contact our site administrator for approval.
© 2016-2026 All site design rights belong to S.Y.A.