Windows 10. Absolute Beginner’s Guide (2016)
Part III: Being Productive
19. Sharing Your Windows Computer with Others
In This Chapter
• Learning About Windows 10 Account Types
• Adding a New User
• Creating a PIN or Picture Password
• Removing a User Account
• Securing Your Device and Using Strong Passwords
Some people feel the easiest way to share a Windows 10 computer with other users is to provide the username and password they use to whomever they want to share with. Even worse, they might choose to not use a password at all, essentially leaving the device open for anyone to pick up and use. It is increasingly common to see devices used for online purchases and bill paying; you might even have credit card information stored for Windows or Xbox purchases. Additionally, you may have photos, documents, and login access saved for various social networks. Given all these variables, it makes sense to keep your device secure and limit access to individuals you trust. Rather than employing the risky methods mentioned previously, take advantage of some of the built-in security features of Windows 10. Your wallet and online identity may thank you later!
The best way to share your Windows 10 computer is to create a separate account for anyone to whom you want to provide access. The process to create an account is easy, with just a few settings that require some thought. This chapter also shows you how to choose between and configure the various password options available in Windows 10 and how to remove an account and keep your computer secure.
Windows 10 Users and Account Basics
You can give as many persons access to your Windows 10 computer as needed. The portrait for every user account you’ve configured appears on the Sign-in screen for each new user, as shown in Figure 19.1.
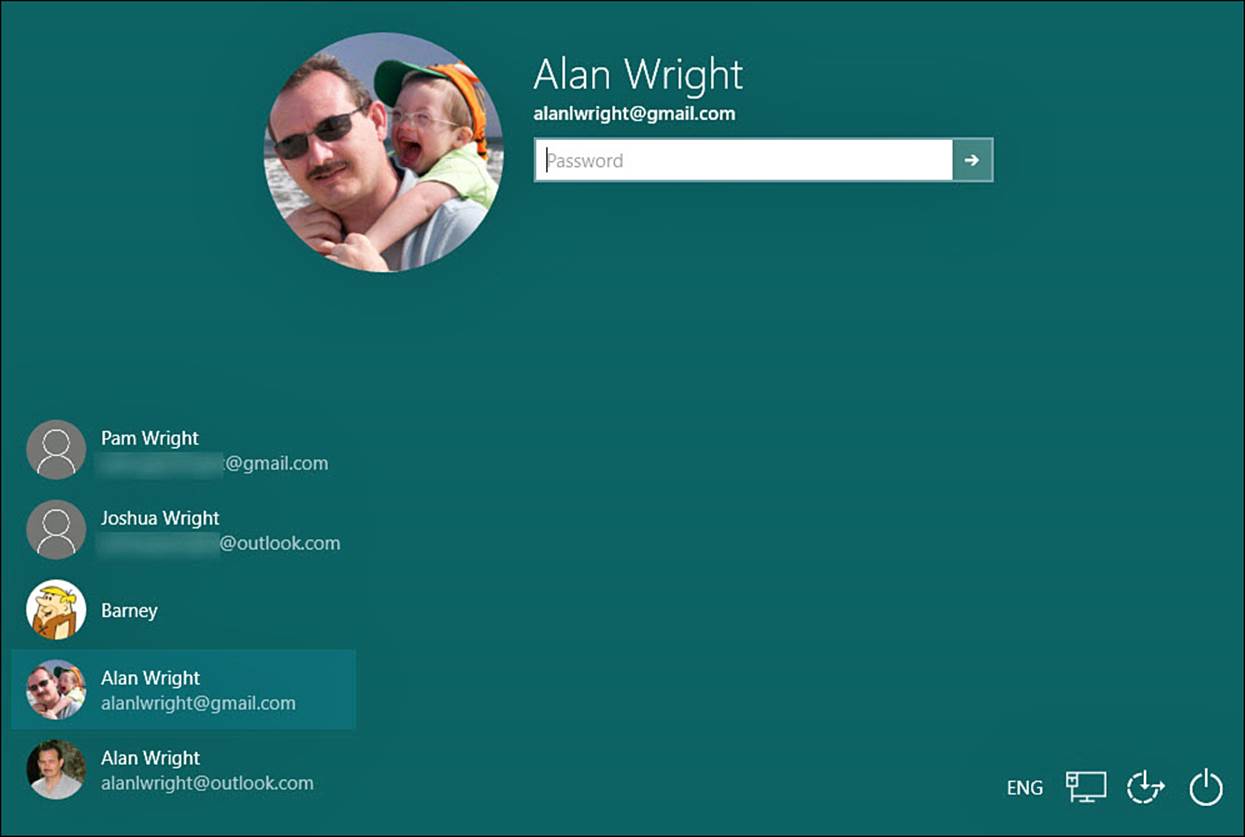
FIGURE 19.1 You might have a number of persons sharing your Windows 10 computer.
A new user in Windows 10 is automatically created as a standard user. A standard user contrasts with an administrator in that the standard user does not have access to some of the more sensitive settings, including those related to security. This means only an administrator can add new users to Windows 10.
To try out and then put to use the instructions and walk-throughs in this chapter, you must be logged in as an administrator-type user. If you are not sure if your account is an administrator type, select the search box on the taskbar, type “account,” and select Manage Your Account. Your account type will be indicated below your name. If you find your account is not an administrator type, try one of these fixes:
• If you were not the person who set up your computer, ask the person who did to change your account to an administrator type. (You cannot promote yourself to an administrator.)
• If you did set up Windows 10, the account you created when you installed Windows is an administrator type. Sign in with that account.
Any person who wants to use Windows 10 must sign in with a valid account and a password. The account can be one of two types. A local account is used only with the computer where it was created. A Microsoft account is tied to an email address and is stored with Microsoft on its servers across the Internet. This means that if you’re authorized to log in to the device beforehand by an administrator, you can use a Microsoft account on any Windows 10 device anywhere, including servers, desktops, laptops, phones, and tablets.
If you are the person who installs Windows, you can select which type of account to use to sign in to Windows 10 the first time. If someone creates an account for your use with Windows 10, be sure you understand which type of account is created for you. If you have a choice, it makes sense to use a Microsoft account. Here’s why:
• All your Windows 10 preferences and settings, such as the color of the Start screen, a record of all the apps you downloaded, and the tiles pinned to your Start menu, are stored with your Windows 10 account. This means your preferences can be applied to any Windows 10 devices you sign in to. You don’t need to spend time setting up any new computer you use. Refer to Chapter 8, “Tweaking Windows to Reflect Your Personality,” to learn how to specify which settings and preferences are saved with your account.
• Installing apps from the Windows Store requires a Microsoft account even if they are free. While you can add credentials for a Microsoft account to an app using its settings pane, it generally makes more sense to just log in to the device with a Microsoft account
• Signing in to Windows 10 with a Microsoft account automatically signs you in to any app you downloaded from the Windows Store that requires you to sign in.
• Signing in to Windows 10 with a Microsoft account automatically signs you in to any website that requires a Microsoft account. If you start Internet Explorer and browse to a site such as www.outlook.com, you do not need to sign in to those sites.
• If you forget your password, you can always reset it through Microsoft account services. If you forget the password to a local account and you cannot recall it through one of the reminder features, you might need to create a new local account.
You can create a Microsoft account before you begin to install Windows 10 by visiting signup.live.com (see Figure 19.2). If you already have an Outlook.com or Live account, you are ready to sign in to Windows 10. Use the same credentials you use to sign in to those Microsoft online services to sign in to Windows 10. Your account must first be added to the Windows 10 device to which you intend to sign in. This is covered next, in the “Adding a New User” section.
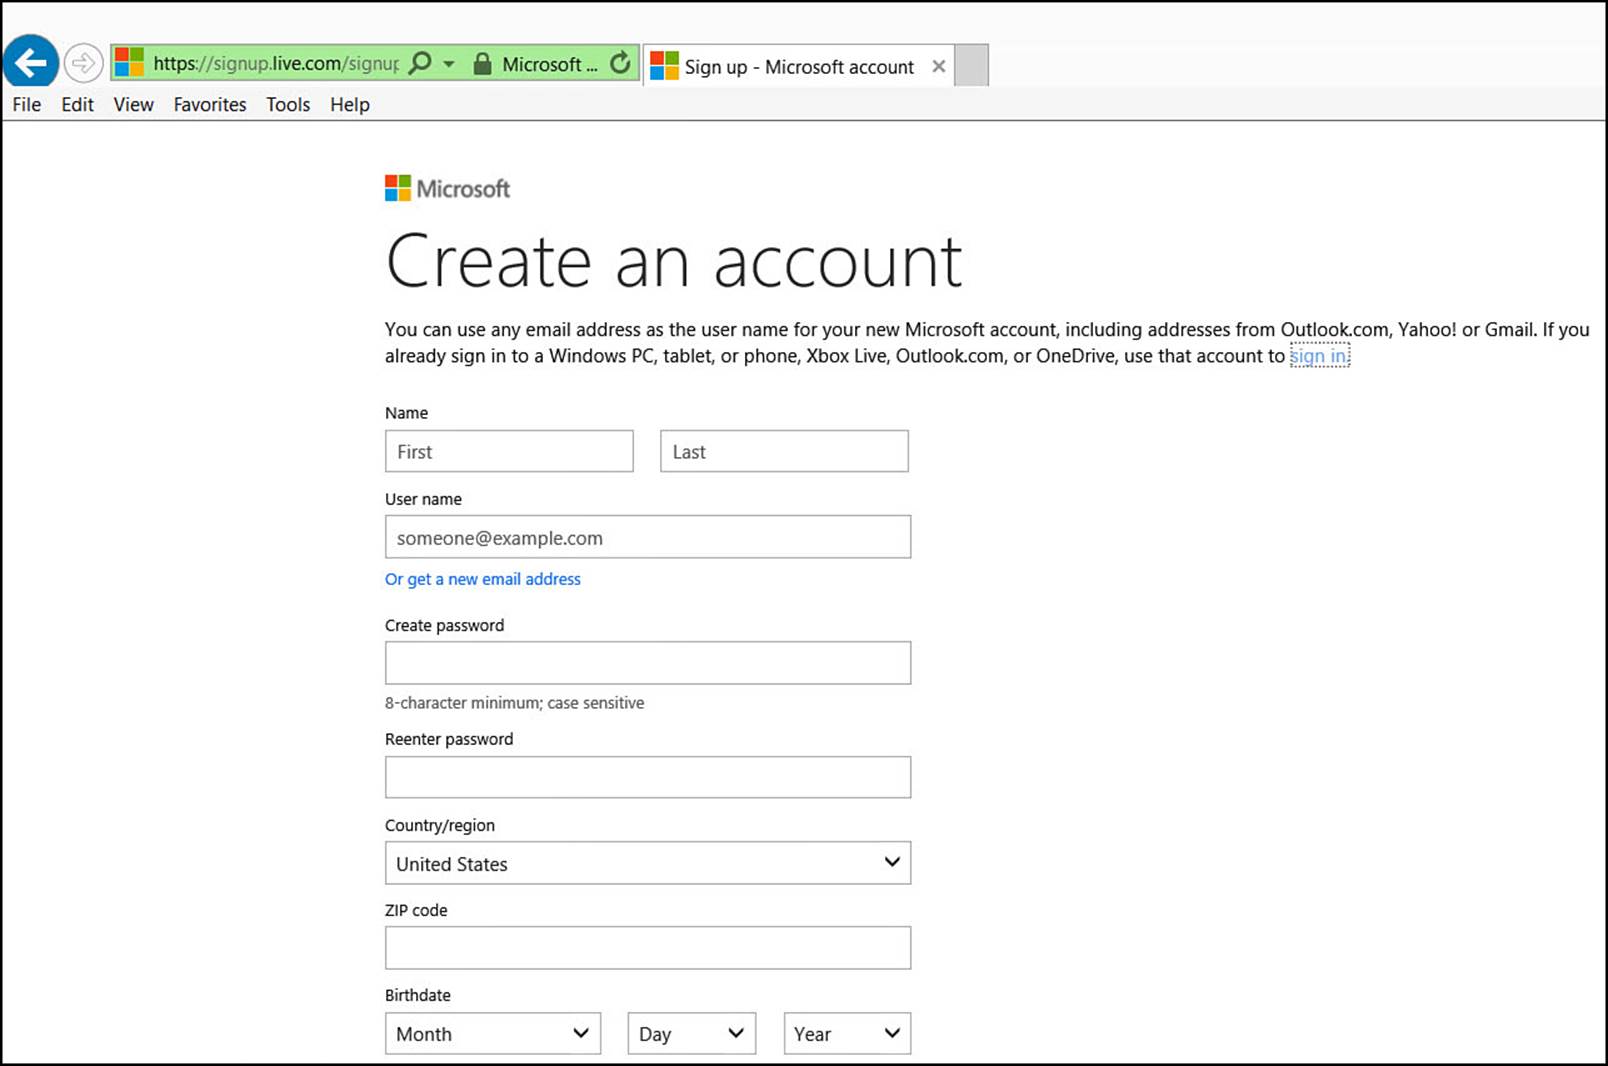
FIGURE 19.2 You can create a Microsoft account before you add the account to your Windows 10 device.
 Note
Note
If you installed Windows 10, you are granted administrator rights, which means Windows 10 enables you to do anything with the software. Most relevant with administrator rights is that you can add new accounts, thereby giving other people access to Windows 10.
Adding a New User
Before you start the process of adding a new user to Windows 10, you should keep a few things in mind:
• You must be signed in with an administrator-type account. For information about administrator-type accounts, see the “Changing a User’s Type” section later in this chapter.
• You must select whether the new user has a Microsoft account or a local account. You can find information about account types earlier in the “Windows 10 Users and Account Basics” section.
Because there are differences in the process to create a local account versus a Windows 10 account, there are separate walk-throughs for each in the next two sections.
Adding a New User with a Local Account
To add a new user account that will be recognized only on a single Windows 10 device, create a local account by following these steps:
1. From the Start menu, select Settings to open the Settings app.
2. Select Accounts from the settings categories.
3. Select Family & Other Users. As shown in Figure 19.3, you will see two groups of users: Your Family and Other Users.
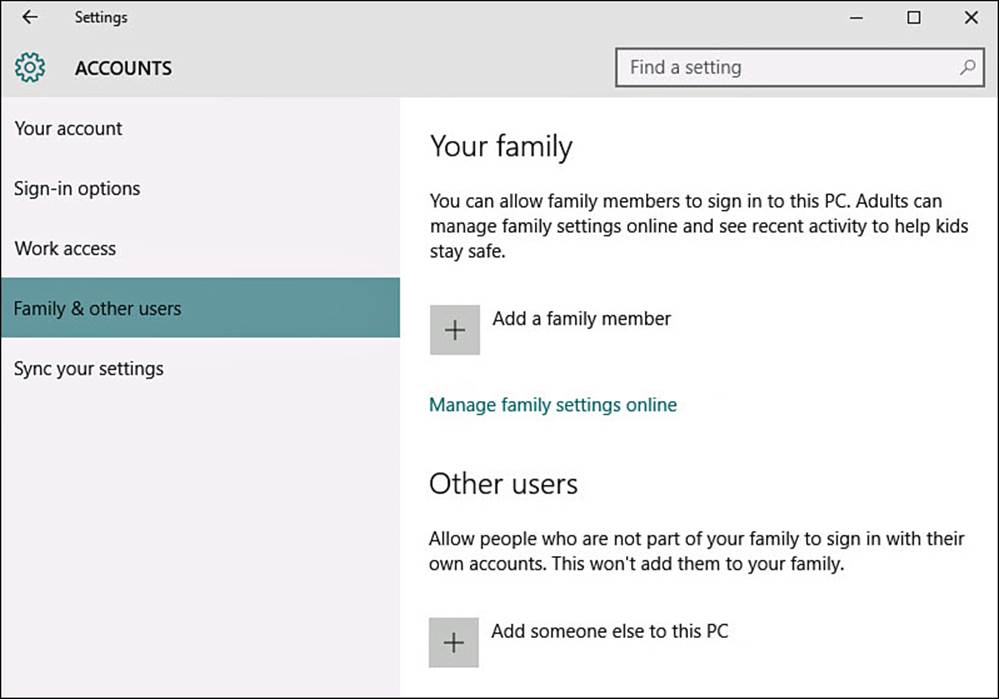
FIGURE 19.3 Adding new local accounts to your device starts with adding someone under Other Users in the Settings app.
4. Under Other Users select Add Someone Else to This PC.
5. Under How Will This Person Sign In, you will be asked for an email address of the new user. Since this is a local account, select the text below that says: The Person I Want to Add Doesn’t Have an Email Address.
6. Under Let’s Create Your Account, you are invited to set up a new email address. Instead, select the Add a User Without a Microsoft Account link at the bottom of the screen, as shown in Figure 19.4. Although Microsoft does not recommend this, it is not dangerous, and in some situations a local account is actually required.
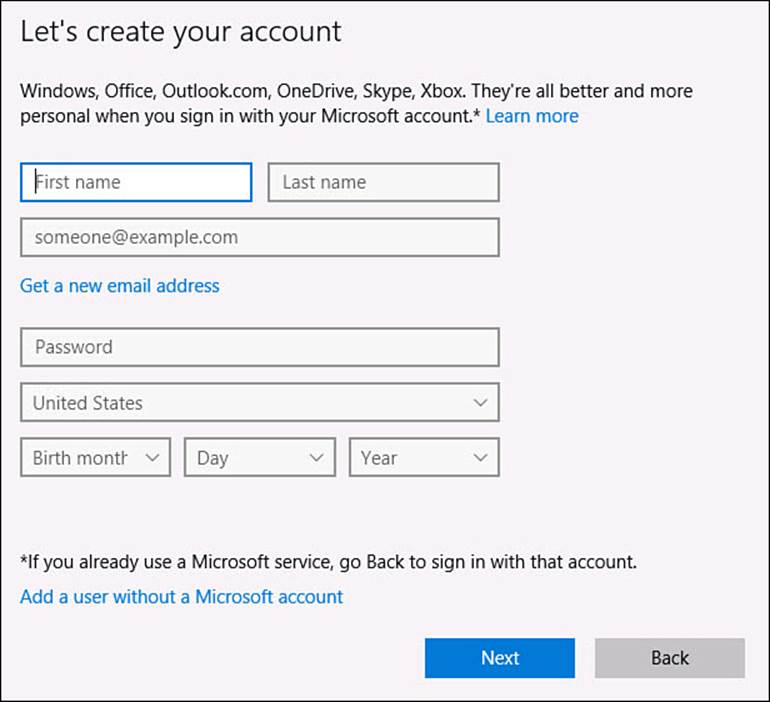
FIGURE 19.4 You might feel like you are living dangerously when choosing to log in without using a Microsoft account.
7. As shown in Figure 19.5, enter a username (20 characters max; any combination of numbers and letters, including spaces; no /\[]”:;|<>+=,?*%@), a password (any characters, including numbers, letters, spaces, and symbols), and a password hint into the fields provided. Select Next.

FIGURE 19.5 You need to supply a username, password, and password hint to create a local account.
8. You return to the Family & Other Users screen that appeared with step 3. The listing should now include your new user.
Adding a New User with a Microsoft Account
There are two scenarios in which you add a new user to your Windows 10 computer with a Microsoft account. You can add an account that already has been created, or you can add a user and create the user’s Microsoft account at the same time. Both scenarios are covered in this walk-through.
To add an account that can be used with any Windows 10 device, follow these steps to create a Microsoft account:
1. From the Start menu, select Settings to open the Settings app.
2. Select Accounts from the settings categories.
3. Select Family & Other Users. You will see two groups of users: Family and Other Users. If you have added a local user following the steps in the previous section, your screen should look something like the one shown in Figure 19.6.
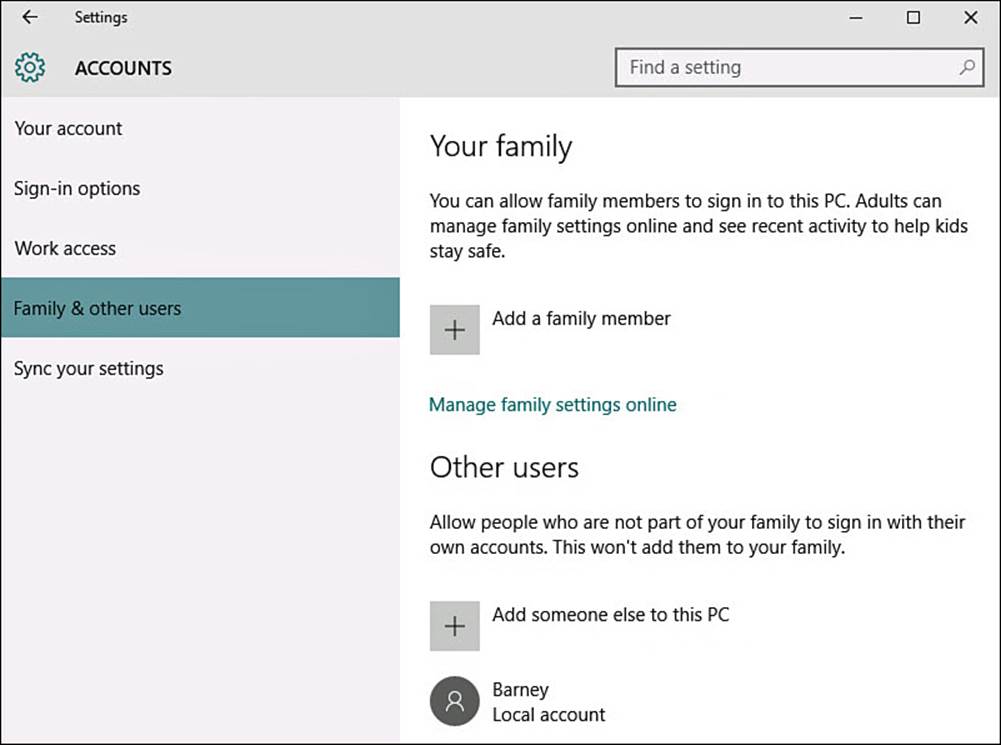
FIGURE 19.6 The Family & Other Users screen enables you to manage most aspects of the accounts authorized to use your Windows 10 device.
4. Under Other Users, select Add Someone Else to This PC.
5. Under How Will This Person Sign In, you will be asked for an email address of the new user. If the user you want to add does not have a Microsoft account and you would like to create one, select The Person I Want to Add Doesn’t Have an Email Address. Then skip to step 7.
If the user already has a Microsoft account, type the email address associated with that account into the Email address box. Then click Next. Windows attempts to verify the email address you entered.
6. If Windows does not recognize the email you entered, you are prompted to create a new Microsoft account. If you want to create a Microsoft account with this email address, skip to step 7. If you want to change or correct the email address you entered, click Cancel. You will be returned to the screen described in step 3.
If the email address is verified, the screen shown in Figure 19.7 appears. Select Finish; then skip to step 11.
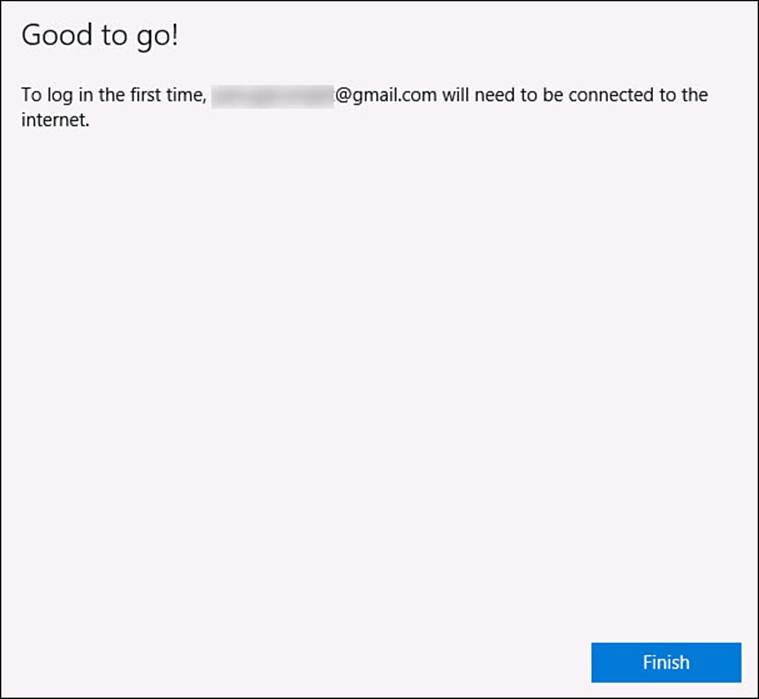
FIGURE 19.7 Your work is done if you enter an email address associated with a working Microsoft account.
7. To create a new Microsoft account, you are prompted to provide your name, email, and password (see Figure 19.8). The email can be an existing email account that is not currently linked to a Microsoft account, or you can create a new Outlook.com account. You must provide a birth date, which is used to determine age appropriate content for the user. Click Next.
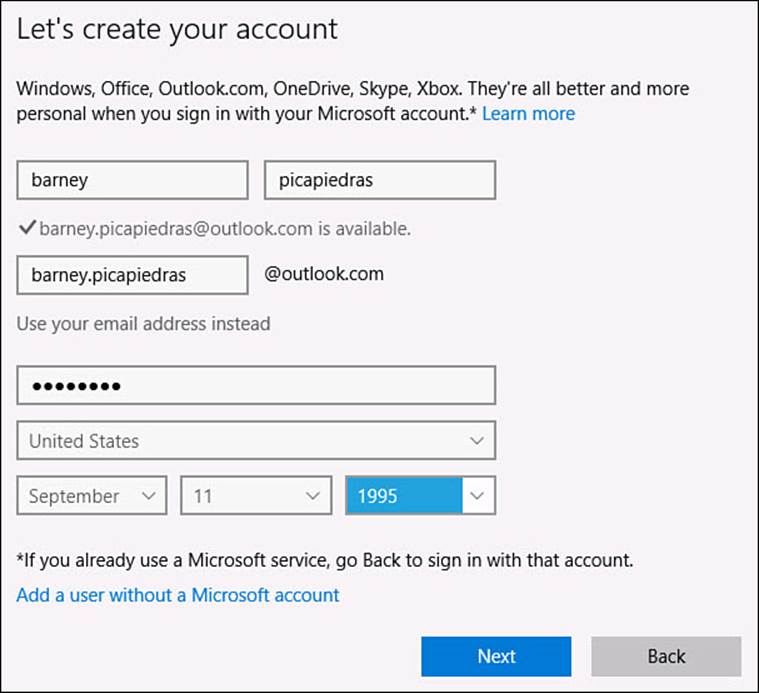
FIGURE 19.8 You can create a new Microsoft account from scratch.
8. You are prompted to add security info. This can be a phone number or alternate email that can be used to verify your identity. This is used for account security—at least one alternative contact option is required. Click Next.
9. You are asked to allow Microsoft to use your account information to provide enhanced advertising and to subscribe to promotional offers from Microsoft. Leave these selected to allow this or uncheck the boxes to avoid extra emails and targeted advertising. Select Next to agree to Microsoft’s terms of use and create the new Microsoft account.
10. You are returned to the screen where you started at step 3. You should see the new account you created in the Other Users list.
When adding new accounts to your device, you can also use the category of Family. Accounts created as Family users will be linked to your Microsoft account, and they will appear automatically in the list of Family users on other Windows devices that you sign into. Enabling access is a simple matter of selecting their account and then clicking Allow.
Family users can also be created as Child accounts. Child accounts are designed to have restricted permissions on the device, and you can configure settings for child accounts that are managed by your Microsoft account when accessing your online Microsoft account. Settings include blocking inappropriate websites, blocking specific websites, blocking inappropriate apps and games based on their age, setting limits on screen time for each day of the week, and getting weekly reports sent to your email showing their activity and websites they have visited. This can be an excellent tool for parents who are concerned about how much time their children spend with electronic devices and the dangers that exist on the Internet.
Creating a PIN or Picture Password
When you create your new account in Windows 10, you need to supply a password, but you can use one of two newer sign-in options, replacing the use of the password after you initially supply it. These two options are PIN and picture password. Besides saving you the repetitive stress of entering your password often, these two new options are impressive, and you’ll want to use them to impress your friends!
Note
In some cases you might not see the options to use a PIN or picture password. This generally is caused by a stricter password policy required for using Exchange or Office 365 accounts. This is intentional because complex passwords are considered more secure and harder to guess. In other cases you may have been invited to create a PIN when first signing into a new device.
Adding a PIN to Your Account
A PIN is a 4-digit number you use to identify yourself when you sign in to Windows. Any 4-digit combination of numerals is acceptable, including repeats such as 9999. A PIN is particularly useful to tablet users who normally don’t have a physical keyboard. On a tablet, a virtual keyboard appears on the screen as you sign in to Windows, enabling you to enter just your PIN to access Windows.
To add a PIN to your account, follow these steps:
1. From the Start menu, select Settings to open the Settings app.
2. Select Accounts from the settings categories.
3. Select Sign-In Options.
4. Select Add under PIN.
5. You first must verify your password. Enter your password and click OK. The Set Up a PIN screen appears, as shown in Figure 19.9.
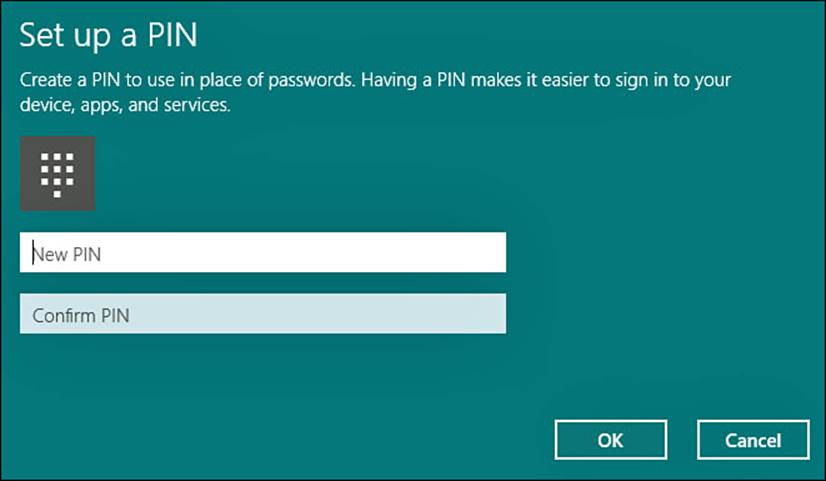
FIGURE 19.9 You can enter a PIN (and confirm it) to use as a substitute for your password.
6. Enter your PIN, and then enter it again in the Confirm PIN box.
7. Select Finish.
Adding a Picture Password to Your Account
If you enjoy drawing mustaches and other funny shapes on pictures of your friends, family, and pets, this is the password option for you. A picture password is a combination of a picture and touch gestures. To set up a picture password, you choose a picture from your Pictures folder and then make three gestures, which can be your choice of tapping or drawing a line or circle. Windows records the position of the gestures, as well as the order in which you made them. This combination creates the picture password.
 Tip
Tip
It’s helpful if you have a picture in mind to use as your picture password. If you don’t, you should locate or take a new photo and then load it onto your computer before you start this process. A good candidate photo has a number of recognizable items, as opposed to a broad, landscape photo. This way, it’s easier to remember the objects on which you drew the required symbols.
To use a picture password with your Windows 10 account, follow these steps:
1. From the Start menu, select Settings to open the Settings app.
2. Select Accounts from the settings categories.
3. Select Sign-In Options.
4. Under Picture Password, select Add.
5. You first must verify your password, as shown in Figure 19.10. Enter your password and click OK.
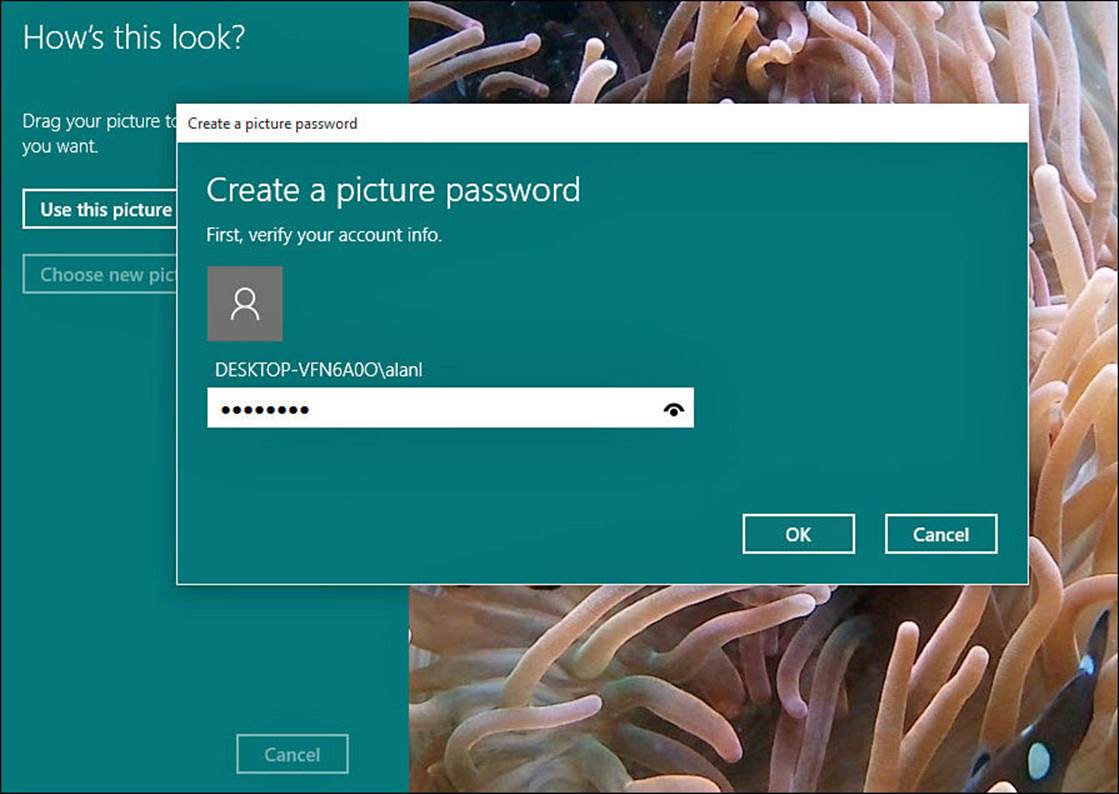
FIGURE 19.10 The first step in creating a picture password is to verify you are the owner of the account.
6. Select Choose New Picture.
7. Your screen displays the photos in your Picture folders. Look through the photos to find one to use as your picture password. Select the photo to use, and then select Open.
8. The picture you selected should be on the screen. The picture password screen uses only about three-quarters of the picture you chose. Click and drag or touch and drag the picture directly on the screen to a position you like. Select Use This Picture.
9. The Set Up Your Gesture screen should be visible. This is the screen where you draw the three gestures. Windows asks you to draw them twice to be sure you can recall what they are and where they are drawn. Draw the three gestures. The large number highlights itself with each gesture you draw. Figure 19.11 shows the second gesture is being confirmed.
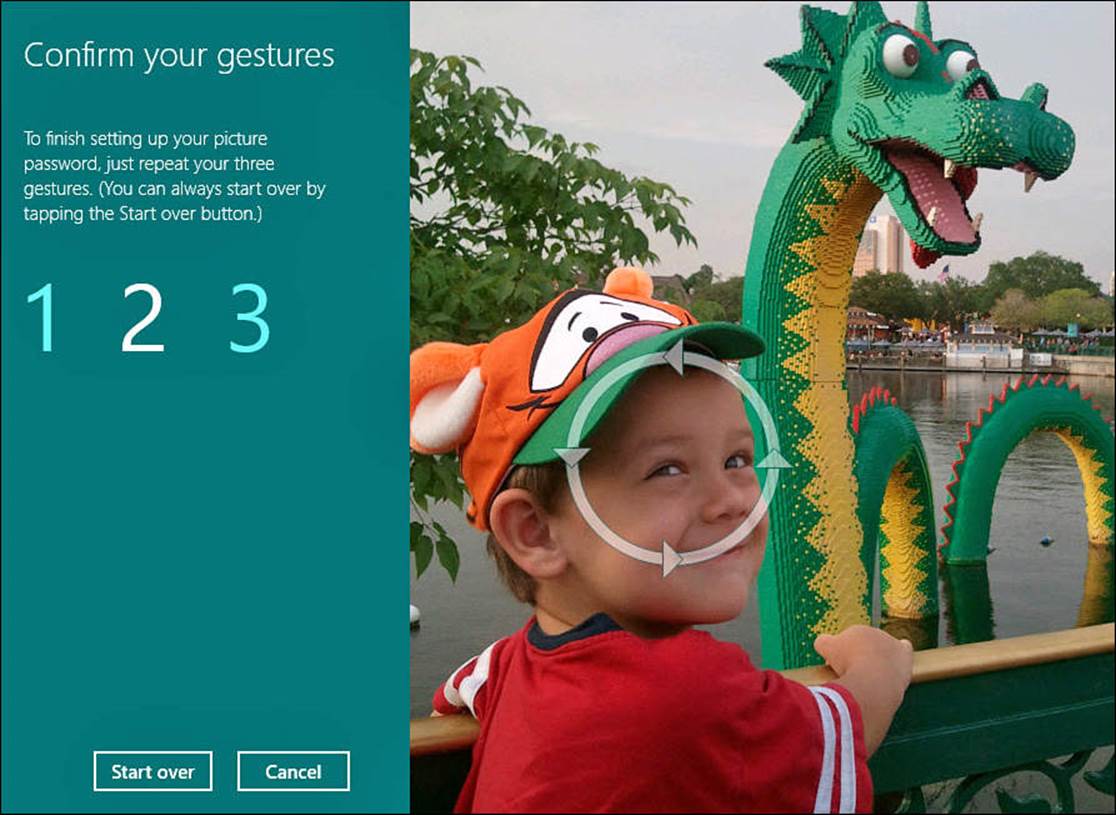
FIGURE 19.11 You can see the gestures on the screen when you redraw each as part of the verification step.
Select Start Over if you want to redraw all the gestures. If you want to save creating a picture password for another time, click Cancel.
10. After you confirm the three gestures for the picture password, you will see a Congratulations screen. Click Finish, and you are then returned to your account setting screen. You can sign out to try your new picture password.
Making Changes to User Accounts
After you’ve created an account and a user has used the account to sign in to Windows 10, you can still make changes to it. You can change the account to an administrator from a standard type, or vice versa. You can also remove an account.
Changing a User’s Type
You might want to give certain users administrative access to Windows 10 so they can install software or change security settings. Closely related, you might want to remove an individual’s administrator rights and instead give them standard user capabilities. Making either change is easy.
Tip
Best practice is to leave new users as standard users. This prevents someone from making changes to the way your computer behaves and can avoid accidently exposing your device to malware or viruses that depend on an unwary user with administrator-type access clicking OK to install something you will regret. Standard users also cannot snoop into data that belongs to other users.
To change a user’s type, follow these steps:
1. From the Start menu, select Settings to open the Settings app.
2. Select Accounts from the Settings categories.
3. Select Family & Other Users. Users who can sign into your device will be listed (refer to Figure 19.6).
4. Select the account to change, which will expand the account to reveal a Change Account Type button and a Remove button, as shown in Figure 19.12. Select Change Account Type.
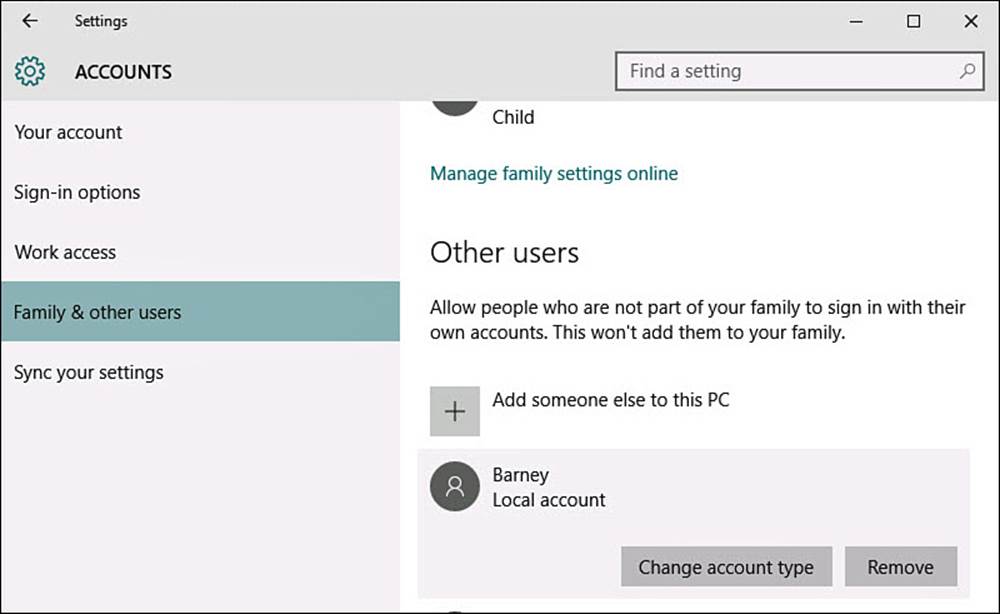
FIGURE 19.12 You can change important aspects of an account by selecting an account in the Family & Other Users screen.
5. A Change Account Type user window will appear. Select the current User Type to reveal a drop-down menu, as shown in Figure 19.13. You can select between Administrator or Standard User. Make your choice and then select OK.
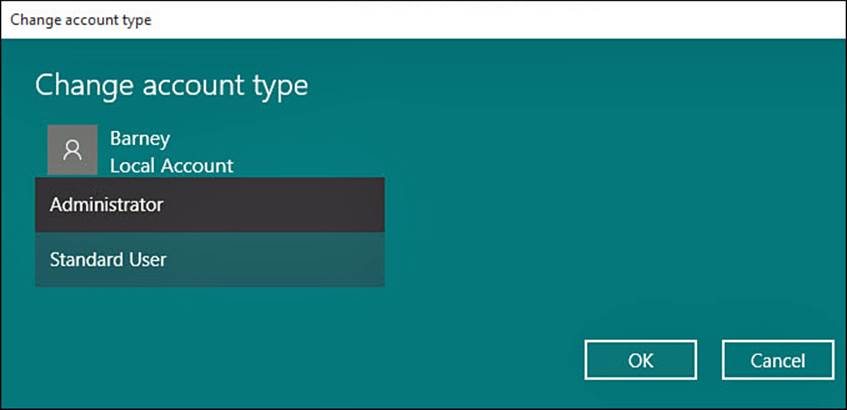
FIGURE 19.13 Assign the appropriate account type to a user using the Settings app.
6. You are returned to the screen where you started at step 3. You should see the account with its new account type displayed in the Other Accounts list.
Removing a User Account
You might need to remove an account from Windows 10. Perhaps the person who is associated with the account no longer should have access to this Windows 10 device, or perhaps the account was created in error. Regardless of the reason, it is easy to remove the account. You must be signed in with an administrator account to remove an account.
To remove a user account and the associated data, follow these steps:
1. From the Start menu, select Settings to open the Settings app.
2. Select Accounts from the settings categories.
3. Select Family & Other Users. Users who can sign into your device will be listed (refer to Figure 19.6).
4. Select the account to delete, which will expand the account to reveal a Change Account Type button and a Remove button (refer to Figure 19.12).
5. Select Remove.
6. The Delete Account and Data window appears, as shown in Figure 19.14. In this case, you are not offered a way to retain any data associated with the account besides what might have been backed up by the user. To delete the account and all the account files, click Delete Account and Data.
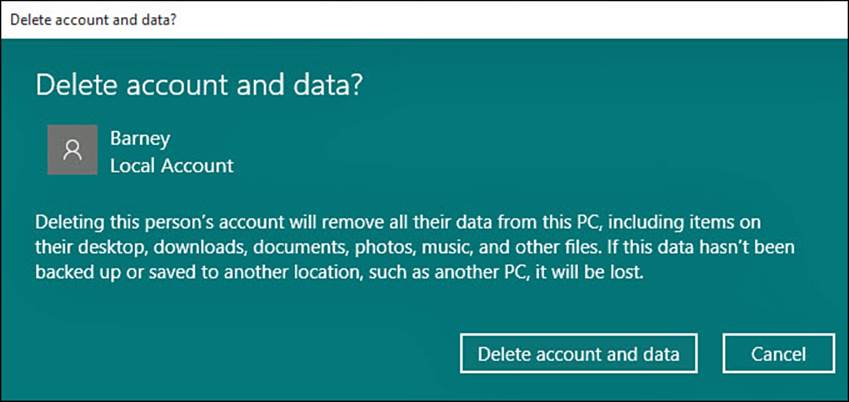
FIGURE 19.14 You have few options related to user data when removing an account in the Settings app.
7. You are returned to the screen where you started at step 3. You will no longer see the account displayed in the Other Accounts list.
If you are concerned about losing all the data that might have belonged to an account that needs to be removed from your device, there is another method you could use to remove the account that will enable you to save the data. Removing the account using the Control Panel applet for User Accounts provides more settings related to user accounts, and many of the steps in this chapter for creating or changing accounts can also be managed using this applet.
To remove an account using the User Accounts applet, follow these steps:
1. From the taskbar, start typing user account in the Search field. Select User Accounts from the search results, as shown in Figure 19.15.
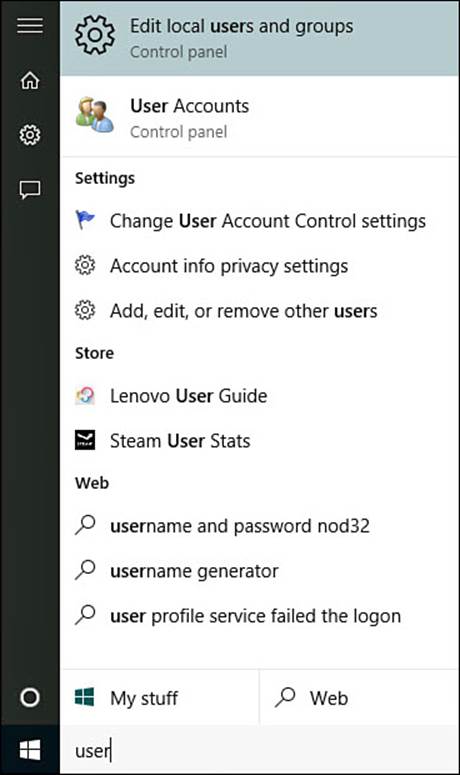
FIGURE 19.15 For greater control when removing an account, search for the User Accounts applet that is located in the Control Panel.
2. The User Accounts window opens. Under the main title of Make Changes to Your User Account, select the link Manage Another Account.
3. All user accounts for this Windows 10 device will be listed in Manage Accounts, as shown in Figure 19.16. Select the account you want to remove.
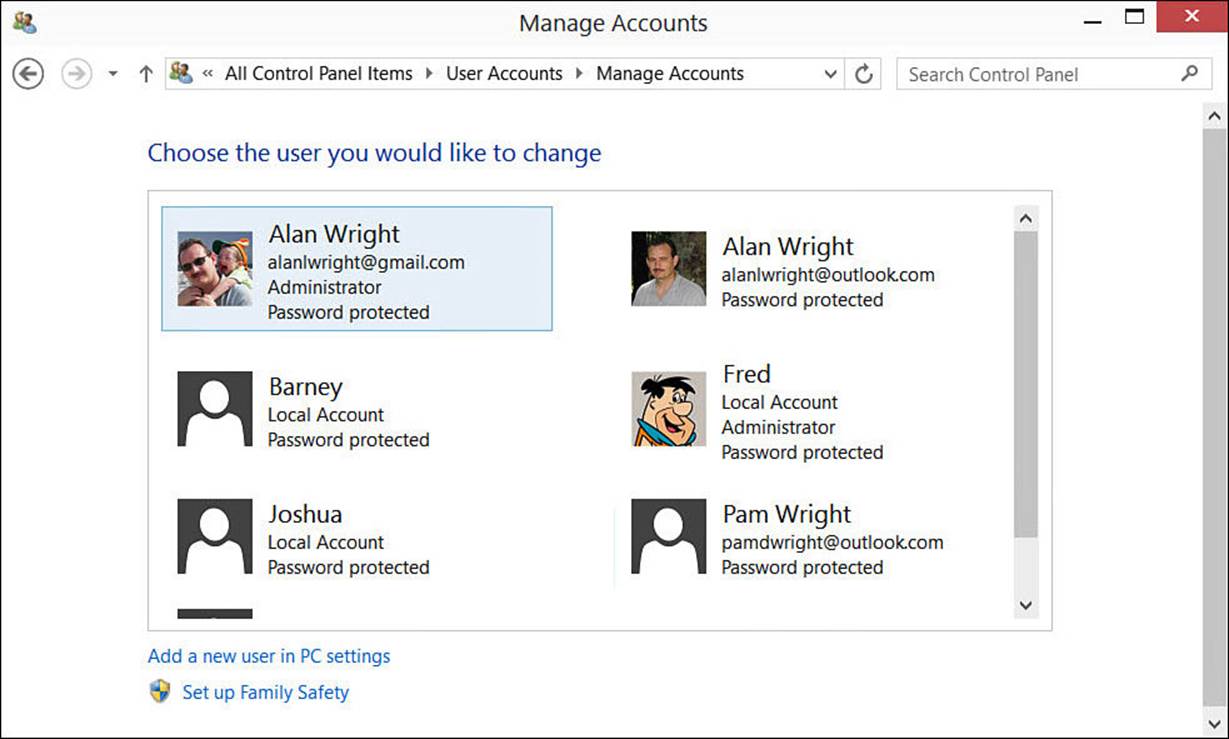
FIGURE 19.16 Manage Accounts provides you with another way to take control of user accounts on your device.
4. The Change an Account window appears. Select Delete the Account from the list of options for this account.
5. As shown in Figure 19.17, the Delete Account window appears. Select Keep Files to copy the files from the user account desktop, Documents, Favorites, Music, Pictures and Video folders. (To delete everything, click Delete Files.)
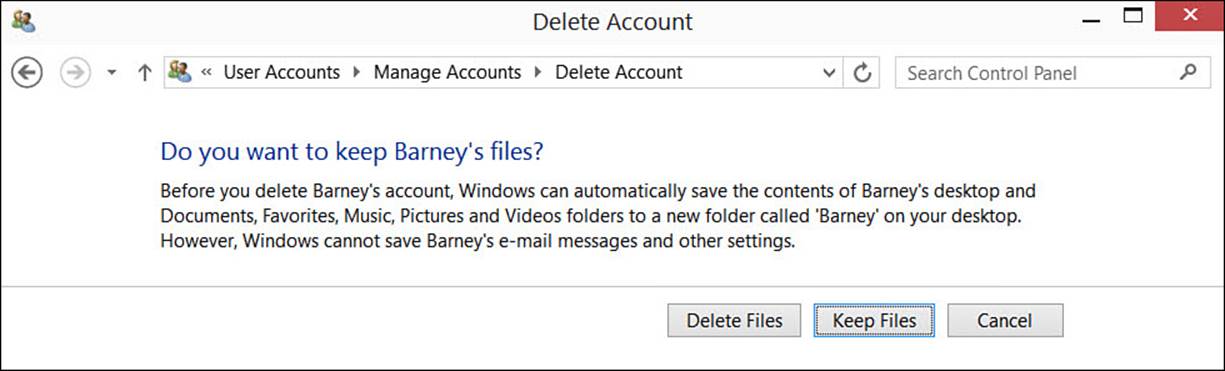
FIGURE 19.17 You have options related to user data when removing an account using the User Accounts applet.
6. Windows asks you to confirm your choice. Click Delete Account. To keep the account, click Cancel.
7. You are returned to the Manage Accounts window. You can close the window if you choose. If the user actually had any data on the device, on the desktop you will now find a new folder containing the data files from the user who was just removed. You can copy the data to give to that person or go through the files to ensure nothing needs to be saved before deleting the data files.
Maintaining Security
This section focuses on user account security. Perhaps you use a laptop or tablet away from home on occasion. If a curious workmate or acquaintance were to open or wake up your device, would it be secure, or would it reveal unwanted details? If your device is lost, will it reveal sensitive information to others?
Windows 10 is the most secure operating system to date, encrypting your data by default. All the built-in security is useless, however, if you unwittingly leave your device open or reveal the password needed to unlock it. It is surprising how often data and identities are stolen because users themselves granted access to their information.
Consider a few practical suggestions to help you maintain security on your Windows 10 device. Obviously, it is not a good practice to write a password on a sticky note stuck to the side of your Windows 10 device. PIN numbers and even the picture passwords might not be practical in public places where social engineers can watch over your shoulder as you log in to your device. And never—ever—should you reply to an email, no matter who it appears to be from, requesting your system’s login credentials.
Windows Hello
With Windows 10, Microsoft has integrated a new set of biometric tools that allow you to use fingerprints, facial recognition, or iris scans to sign into your device and even complete purchases.
The capability to use these alternate sign-in methods will depend on the hardware available to your device. Although inexpensive fingerprint scanners that use a USB connection to connect to your device can be purchased, the facial recognition requires special cameras that manufacturers have only recently started to offer. If these devices are not present, you will not be able to set them up.
Follow these steps when setting up a fingerprint scanner with Windows Hello:
1. From the Start menu, select Settings to open the Settings app.
2. Select Accounts from the settings categories.
3. Select Sign-In Options.
4. To set up your fingerprint scanner, select Setup under Fingerprint. Follow the prompts to swipe the same finger over the scanner a few times until a good scan has been compiled. When finished, you can enroll other fingers by selecting Add Another and then following the same procedure.
5. Select Remove if you need to delete fingerprint scans.
After you have enrolled a fingerprint, you will see that option available when signing into Windows. Swipe your finger the same way you did during setup, and you will be signed in. When Windows needs to authenticate you for administrative tasks or purchases, you will be prompted to swipe your finger on the fingerprint reader.
Using the Screensaver to Add Security
In the Desktop environment, you can enable and adjust a setting to engage a screensaver and require a password to wake up a device after a time interval you establish. To use this setting, follow these steps:
1. From the Start menu, start typing screen saver in the Search field. Select Change Screen Saver from the search results.
2. The Screen Saver Settings dialog box opens on your Desktop (see Figure 19.18). You can also navigate here using the Control Panel.
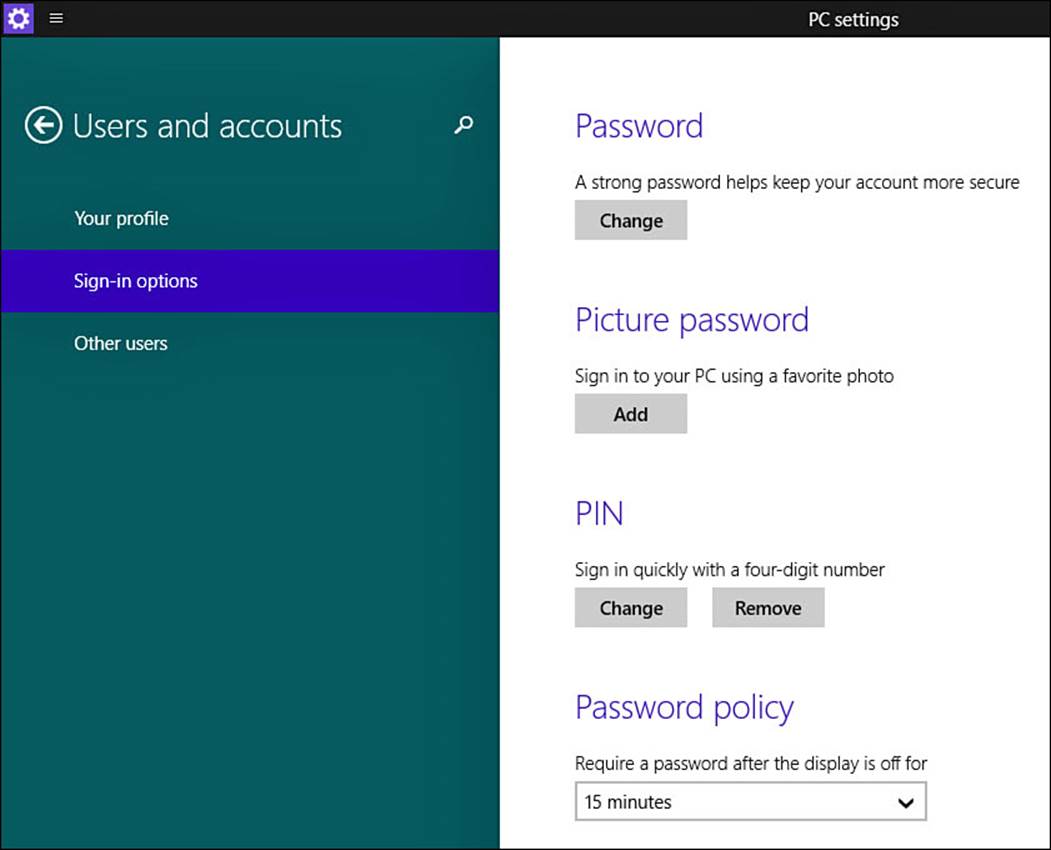
FIGURE 19.18 Enable the screensaver settings to require a login with password to increase security.
3. Select a screensaver from the drop-down menu and a wait time. Enable the check box On Resume, Display Logon Screen.
4. Click OK.
Note
Some devices might not have these settings. Some tablets, for example, do not use a screensaver.
Two-Step Verification
A newer security feature Microsoft has introduced provides an added layer of security for Microsoft accounts. In addition to the password you will have set up for your Microsoft account, you are prompted for a code that can be generated and supplied using email, SMS, or an authenticator app on your smart phone that is paired with your Microsoft account. The number generated will expire, which makes it very difficult for a hacker who knows your password to also know the code. As an example, the Microsoft Authenticator app for Windows Phone generates a new six-digit code every 60 seconds.
Setting this up is managed from your online Microsoft account profile. You can log in to this account using the link https://account.live.com/proofs/Manage. After logging in, you will find the option to enable two-step verification under the security settings for your account.
Once enabled, you will be prompted to supply a code in addition to your password the first time you use a new device, use a new app, or log in to a Microsoft website using your Microsoft account. Figure 19.19 shows a request for a code when signing into a new device for the first time.

FIGURE 19.19 Enabling two-step verification provides you with additional security for your Microsoft account.
The Absolute Minimum
Keep these points in mind as you wrap up this chapter:
• To give others access to your Windows 10 device, you should add an additional account to Windows 10. This is also known as “adding a user” in Windows 10. Best practice is to create this new user as a standard user to avoid the possibility of unwanted changes to your device.
• There are many practical reasons to use a Microsoft account when adding the new account. A Microsoft account includes information about your settings and preferences. If you sign in to Windows 10 running on a computer other than your own, all your settings and preferences are applied to this new computer. This won’t happen if you create a local account instead.
• A picture password replaces the standard password. To sign in with a picture password, swipe or tap three times on a picture you choose. Windows checks your gestures against what it recorded when you created the picture password.
• You can also use a PIN to substitute for a password.
• Set up Windows Hello if you have a fingerprint scanner or a Windows Hello compatible camera.
• Consider using a two-step verification with your Microsoft account to provide additional security.
All materials on the site are licensed Creative Commons Attribution-Sharealike 3.0 Unported CC BY-SA 3.0 & GNU Free Documentation License (GFDL)
If you are the copyright holder of any material contained on our site and intend to remove it, please contact our site administrator for approval.
© 2016-2026 All site design rights belong to S.Y.A.