Windows 10. Absolute Beginner’s Guide (2016)
Part IV: Having Fun
25. Having Fun with Movies and TV Shows
In This Chapter
• Learning About the Movies & TV App
• Adding Your Videos to the Movies & TV App’s Library
• Browsing Through Your Video Collection
• Purchasing and Renting Movies and TV Shows
If you watch movies or TV shows on your computer, you should begin a friendship with the Movies & TV app that uses Microsoft’s Xbox Video service. The app is easy to use, yet it has enough new features and capabilities to meet many of your needs. Certainly some folks with a bit more experience in integrating digital media with personal computers might bellyache at the lack of interesting features in the app, but you cannot argue with the price (free) or the ease of adding your content to the library. This chapter covers all the basics, from navigating through all the movies and TV shows offered in the marketplace to renting or purchasing a selection that interests you.
Getting Started with the Movies & TV App
The Movies & TV app is an easy-to-use modern Windows app that enables you to watch videos from both your private collection and the enormous selection available in the Windows Store. If you are looking to add to your collection, you can purchase videos offered in the Windows Store. If you don’t want to make a purchase commitment, you can rent one or more of the videos offered. If you don’t have the time to watch a full movie, you can always occupy a few minutes by watching the many movie trailers that are available.
To start the Movies & TV app, select the tile, as shown in Figure 25.1. If you cannot locate the tile, select the search box on the taskbar. Type tv or movie, and then select the Movies & TV app from the list of results.
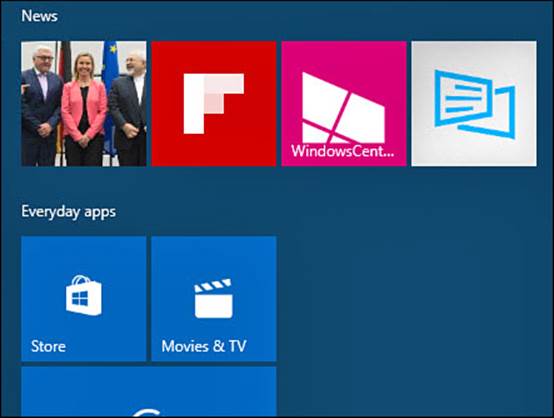
FIGURE 25.1 Launch the Movies & TV app from the tile on the Start menu.
 Note
Note
The Movies & TV app is a universal Windows app. As such, it can be updated at any time, and its appearance and features can be altered from what is shown in this chapter through automatic updates in the Windows Store.
Navigating the Movies & TV App
Moving around in the Movies & TV app is accomplished using the prominent hamburger menu and the back arrow that are always visible on the title bar. (The back arrow appears next to the Start button on touchscreen devices in tablet mode.) The hamburger menu, shown in Figure 25.2, lets you jump between three sections of your collection: Movies, TV, and Videos. As you purchase movies and TV programs, they will appear in those sections of your collection; videos saved to the Videos folder of your device will appear in the Videos section.
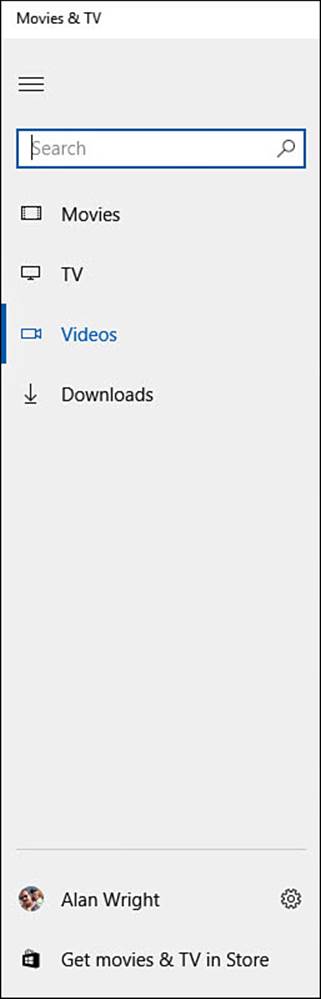
FIGURE 25.2 Navigate your collection using the hamburger menu of the Movies & TV app.
Use the search tool in the hamburger menu to quickly locate videos in your collection. As shown in Figure 25.3, links also are available to continue your search in the Windows Store.
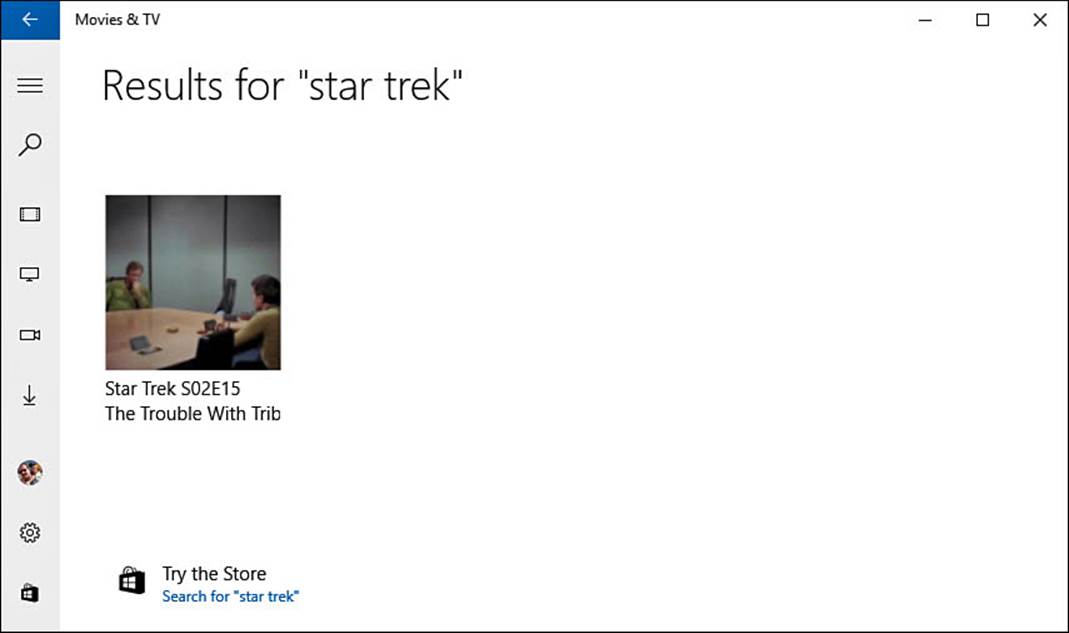
FIGURE 25.3 Search for videos in your video collection.
The Movies & TV app includes some basic settings and links to manage your purchases. You can set a default download quality as well as manage devices that can view video purchases and rentals.
Follow these steps to view and manage your settings:
1. Open the Movies & TV app.
2. Select Settings from the hamburger menu. Settings will appear, as shown in Figure 25.4.
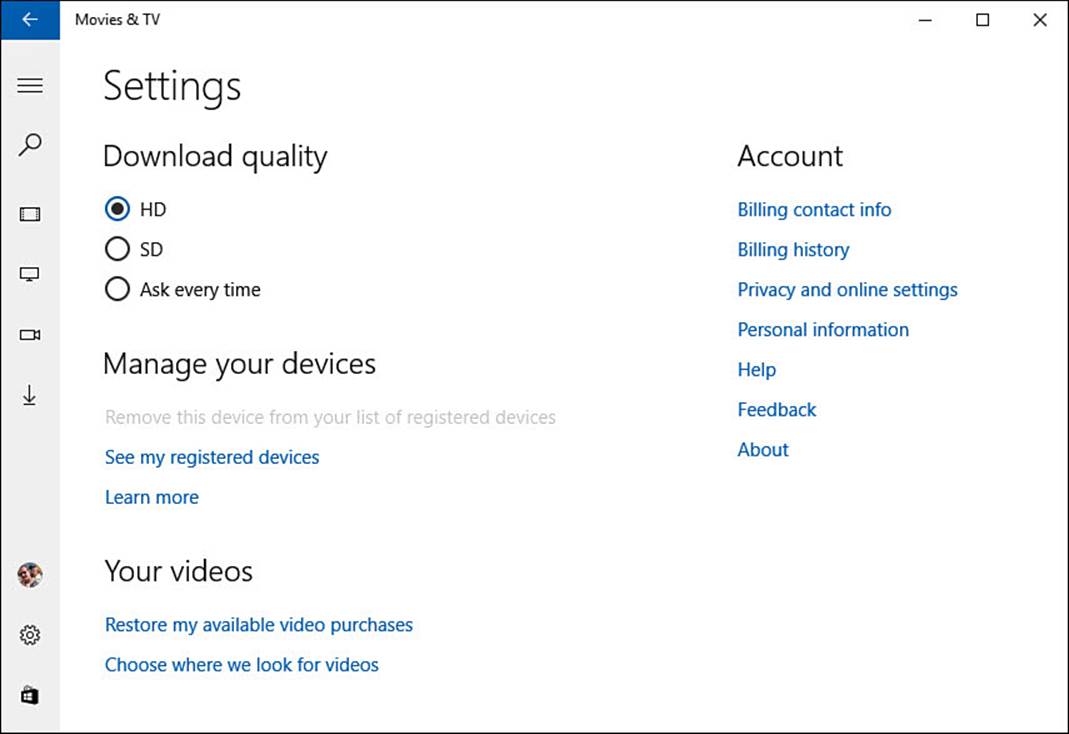
FIGURE 25.4 Manage settings for the Movies & TV app.
3. Under Download Quality, choose between HD and SD as your default video quality or leave the default setting as Ask Every Time. Choosing HD or SD enables you to save a step when downloading video you have already purchased.
4. If you are signed in to your device with a Microsoft account, you will see a section named Manage Your Devices. Select See My Registered Devices to manage multiple devices that you can work with using your Microsoft account.
5. If you are signed in to your device with a Microsoft account, you will see links under Account that take you to your online Microsoft account. From there, you can manage settings related to purchases and methods of payment. Chapter 24, “Using Your Microsoft Account for Purchases,” covers in more detail the process of setting up your Microsoft account for purchases. If you are using a local account, you will see links for the app itself, such as Help and About.
Note
You might wonder how much difference there is between SD and HD video quality. SD video playback is 480p resolution, while HD is 720p. This can make a big difference on a large high-def flatscreen television. If you are playing your movie on a tablet or smaller display, then the SD quality will display pretty well. Another factor that may affect your decision is that streaming HD will require more bandwidth and will involve more data being downloaded than would streaming in SD quality.
Adding Your Videos to the Videos Library
You can add your previously acquired movies, TV shows, and videos to the Videos Library. You also can load videos you’ve recorded into Windows 10. By loading all your video content into Windows 10, you can access all your onscreen digital content from one place. Until you add your own content to the Movies & TV app, the screen shown in Figure 25.5 appears.
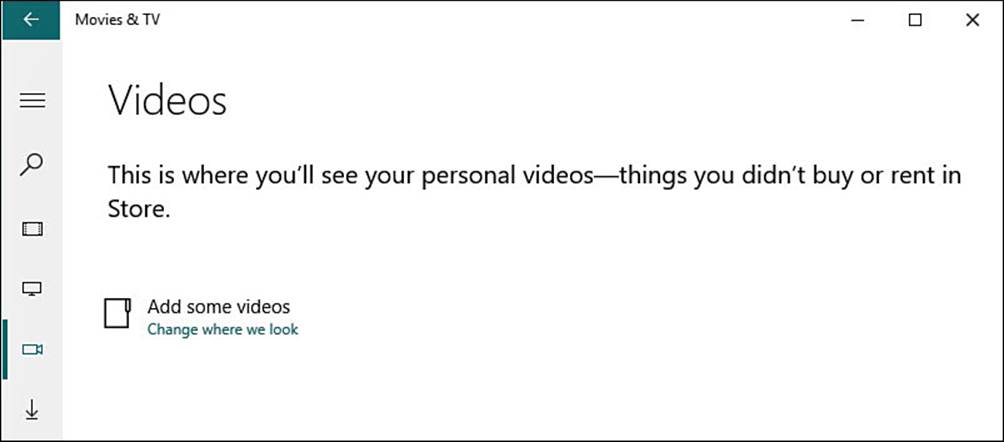
FIGURE 25.5 This message almost begs you to get some videos on your device!
If you have no digital videos—that is, you have never purchased videos online and have never imported videos into your computer—you can skip this section. If you do own movies, TV shows, home movies, and other videos, you can link their locations to the Videos folder in Windows 10. The Xbox Movies & TV app uses that folder—which is actually a special folder sometimes referred to as a library—as its source for your videos. You can learn about libraries in Chapter 21, “File and Folder Basics.”
 Caution
You must maintain the link to your video collection’s location, such as across your home network or to a removable hard drive, for your videos to be available. If your Windows 10 computer is a laptop, it’s likely you’ll move that computer to a location away from the network or drive where those videos are located. If your computer stays in one place, of course, you won’t have this problem. In addition, Windows must be able to index the folder. If indexing is not possible, the Movies & TV app will not add external folders to the video collection.
 Tip
Tip
To find your personal videos easily, you should name them. A name like “WIN_20130818_190138” is much harder to remember than “Joshua’s first bike ride.” Earlier in this chapter, you saw how to use search in the Movies & TV app. The easiest way to rename files is to use File Explorer, which we covered back in Chapter 21.
Follow these steps to link your collection of videos to Windows 10 and the Movies & TV app:
1. Open the Movies & TV app and select Settings—the small gear next to your name—from the hamburger menu (refer to Figure 25.2).
2. Select the link shown in Figure 25.4, labeled Choose Where We Look for Videos.
3. A pop-up screen, shown in Figure 25.6, appears that invites you to build your collection. It points to the Videos library and contains the same folder list that appears if you were to open the Videos folder in File Explorer. To add a new folder containing videos, select the button with a large plus sign (+). This opens File Explorer, which enables you to choose locations on your hard device, OneDrive, or your network. Find a folder and select it; then select Add This Folder to Videos to add it to your folder list. If you have videos scattered in different locations, either consolidate all the content to one place or repeat these steps for each location where videos are stored.
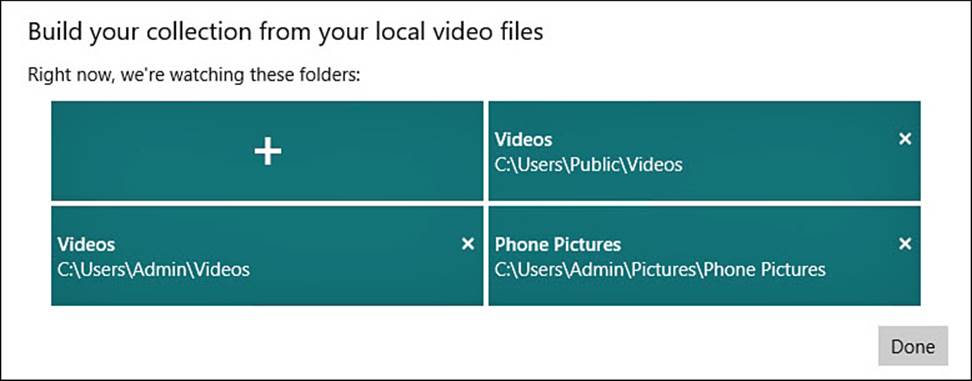
FIGURE 25.6 Add the location of your videos to the Windows 10 Video library.
4. Select Videos to verify that your videos are present.
5. To remove a video file, select it and then select Delete. The video file is deleted—not just from your collection, but from the folder as well.
Caution
Exercise caution when deleting videos from the Movies & TV app. Videos deleted in this way normally go to the Recycle bin, from which they can be recovered or restored, but large files such as movie files might be permanently deleted due to their size.
After adding new folders to the Videos library, it can take a minute or two for these videos to appear in your videos collection, especially when there is a lot of content to sort through. After videos are added to the Videos library, they appear alphabetized as folders or videos (see Figure 25.7).
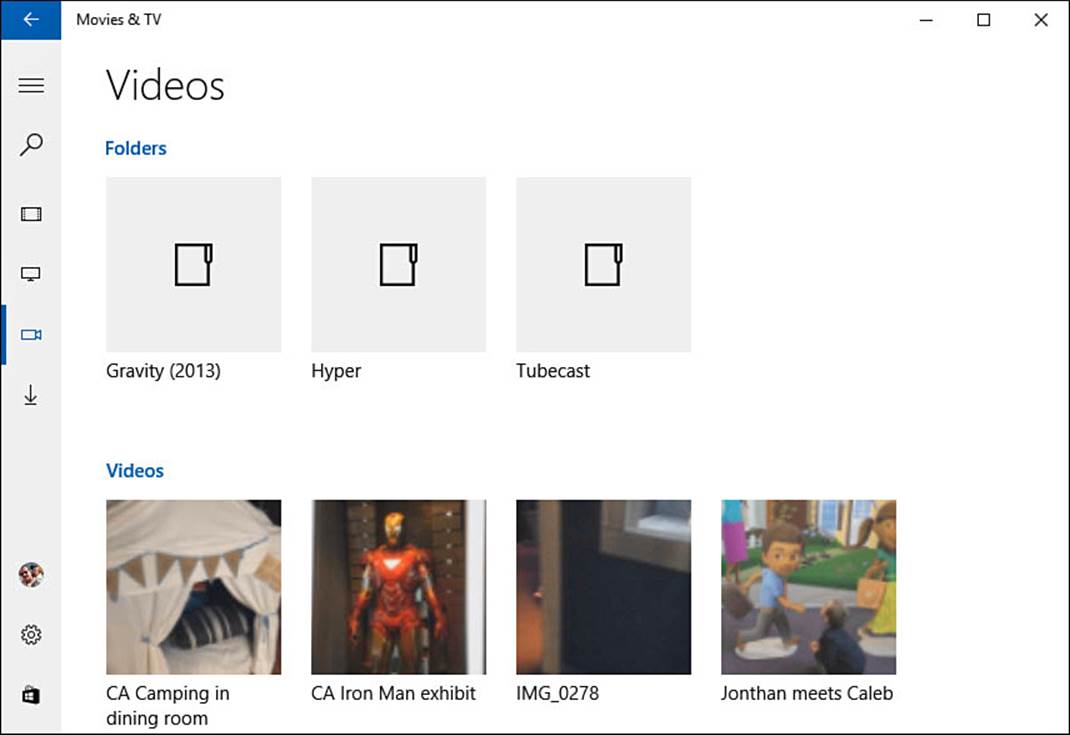
FIGURE 25.7 Video files appear alphabetized as folders and videos in the Movies & TV app.
Tip
You will likely find that personal videos taken with tablets and smartphones are placed in a camera roll and saved with your photos. These files tend to appear only in the Photos app—which is able to play videos as well. If you do want to see them in your Movies & TV app, you will need to do some housework and either: 1) move your video files from your Photos library to the Videos library; or 2) add your folder containing photos mixed with videos to the Videos library, too. The Movies & TV app will ignore any photos and see the video files.
Note
There are many different video formats, each offering certain advantages. Windows 10 and the Movies & TV app include support for the most common formats, including WMV, AVI, MOV, MP4, and MKV. If you experience problems with playback for videos you have in a less common format, try some of the alternative video apps mentioned in Bonus Chapter 1, “These Are a Few of My Favorite Apps.”
Playing Videos in the Movies & TV App
Playing a video is pretty intuitive in the Movies & TV app. Select a video file, and video play begins automatically. Controls appear briefly, as shown in Figure 25.8, and then they hide from view. Select the video to make the controls reappear.
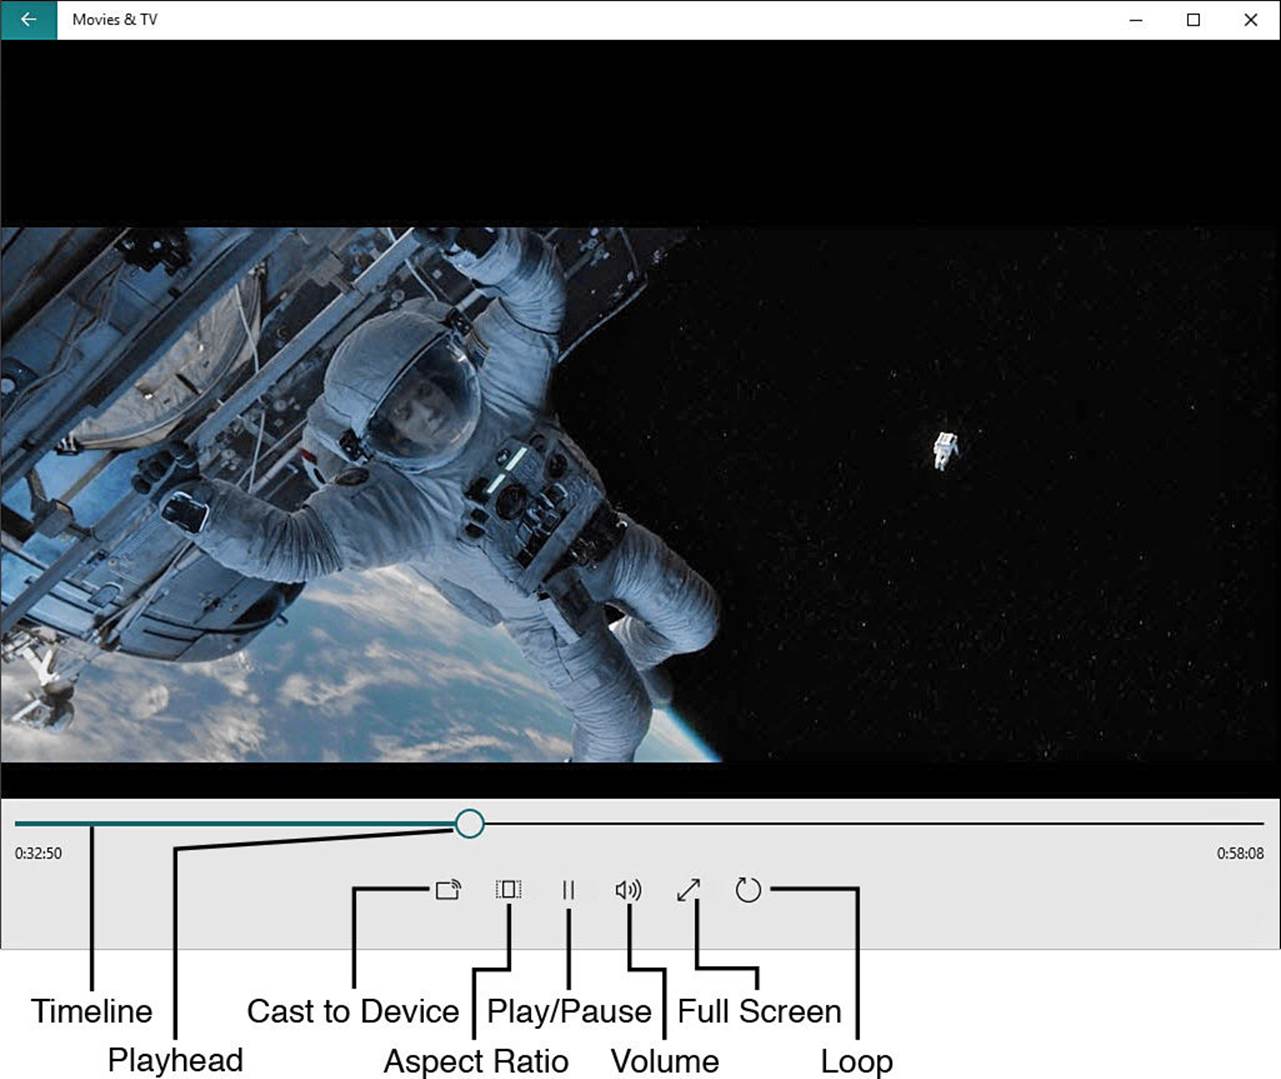
FIGURE 25.8 Playback controls are kept to the essentials in the Movies & TV app.
Video controls include
• Timeline—The timeline lets you see how far you are into a video and how much time is remaining. A touch-friendly control handle enables you to select and drag the playhead to a different point on the timeline.
• Cast to Device—This button searches your network and other possible connections for devices that could display your video, as shown in Figure 25.9. Select a device to start playing the video to that device. In some cases, the video format may prevent casting to that device.

FIGURE 25.9 Connecting to a device.
• Aspect Ratio—Select this button to toggle between a letterbox 16:9 format and a 4:3 display. Depending on the video file, you might see black bars or have to sacrifice the left and right edges of a video when changing the aspect ratio.
• Play/Pause—Select once to pause; select again to resume playback.
• Volume—Select the volume button and then use a slider to adjust the volume level.
• Full Screen—Select the Full Screen button to fill your display with video playback goodness; select it again to exit full-screen display.
• Loop—Loop will simply keep playing the current video in a loop. Select the button once to enable looped playback and again to disable.
Note
You might be wondering about devices that are compatible with Cast to Device. Cast to Device includes connected screens using traditional video cables, wireless devices that can use Bluetooth and Miracast, as well as devices on your network that support DLNA. Common devices that can be used include the Xbox One and Chromecast.
Shopping for Videos
You can browse through the movies and TV shows in the Windows Store with an eye toward buying or renting. You usually have a choice between standard-definition (SD) and high-definition (HD) versions of a video, and you can generally choose to download or stream either selection.
Note
As of this writing, you cannot rent TV shows. Only movies are available as online rentals.
If you are unfamiliar with the idea of renting or purchasing a digital movie or TV show, this section explains how that works. Purchases will require that you have a Microsoft account and that you have a method of payment associated with your account. Keep in mind that the screens and options used to process your purchase or rental certainly can change, so what you see here may have some variation compared to your own experience.
Making a Purchase
The Movies & TV app makes it easy to browse for movies and TV programs. With the release of Windows 10, Microsoft has combined many types of media into the Windows Store, making it a one-stop place for shopping from your device. Movies and TV programs are new additions to the Windows Store. You will find prices clearly indicated for both purchases and rentals.
To purchase a movie or TV show in the Windows Store, follow these steps:
1. From the Movies & TV app, select Get Movies & TV in Store from the hamburger menu. The Windows Store will open to the Movies & TV section, as shown in Figure 25.10.
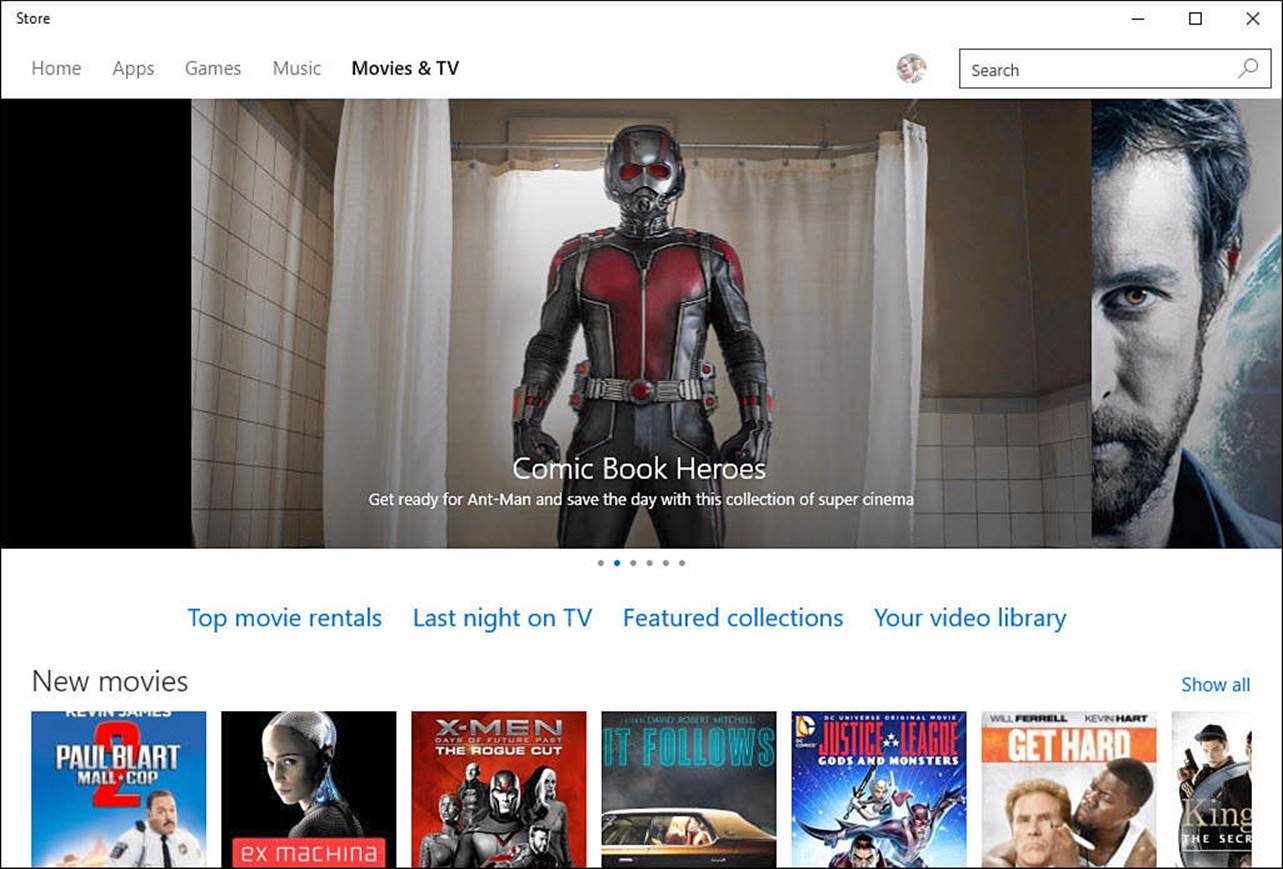
FIGURE 25.10 Browse for movies and television shows to purchase in the Windows Store.
2. Below the prominent sliding viewer of featured movies and TV shows, four links are provided to help you with navigation:
• Top Movie Rentals—Provides a long list of movies ranked by current rentals, as shown in Figure 25.11. Under Refine, you can filter the results. Under Chart, select the drop-down menu to view New Movies, Top Rentals, Top-Rated Movies, or Top-Selling Movies. Genre is another intuitive way to filter your results. Finally, under Refine, a list of movie studios listed under Studio can be used to filter results.
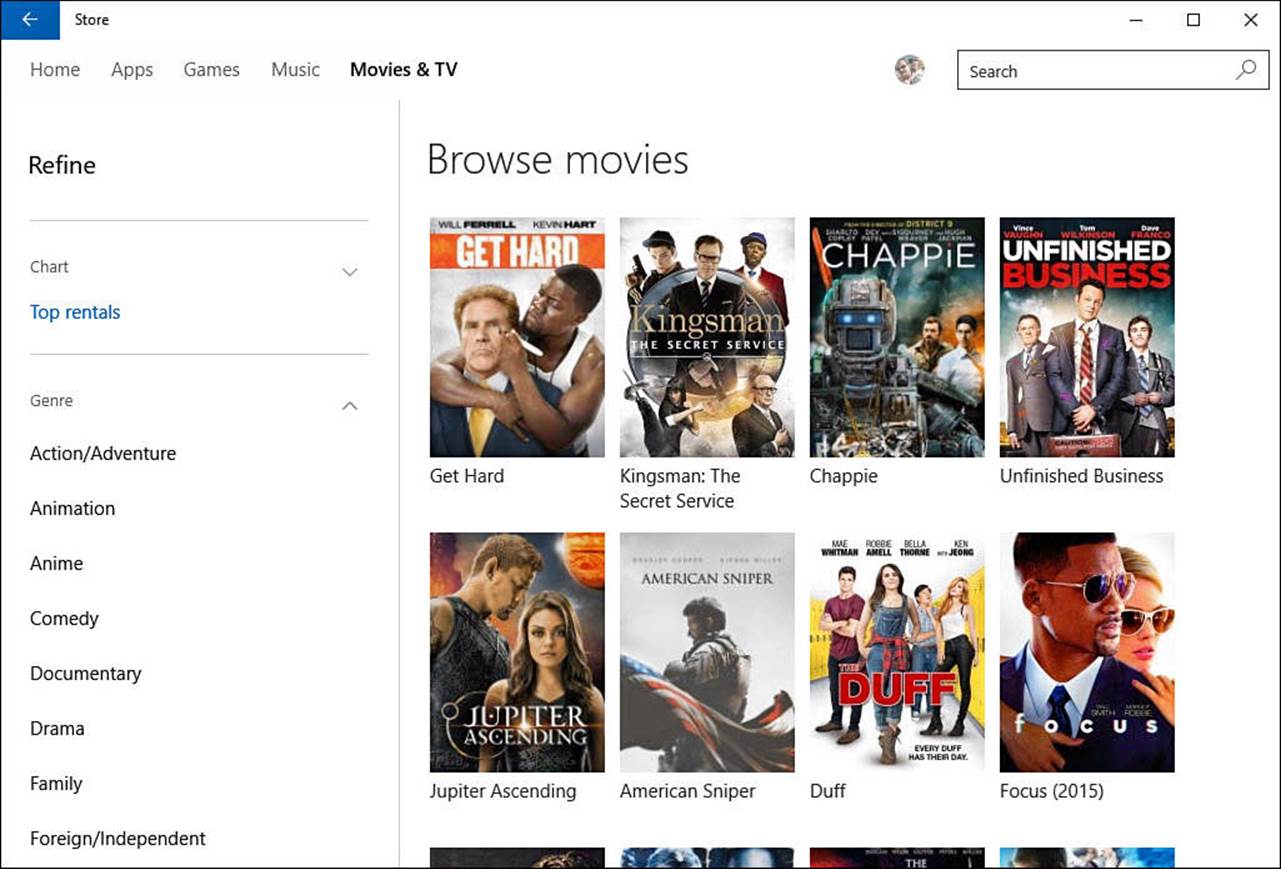
FIGURE 25.11 Use filters and categories to find movies or television shows to watch.
• Last Night on TV—Opens a list of current television programs. Select a TV show to view episodes and air dates. Episodes can be purchased, or you can purchase a season pass for the show, which will include future episodes as they are released.
• Featured Collections—Presents you with themed collections of movies or television programs. Use this to get your fix of categories like Bond, James Bond; Top Gear; Family TV; or videos that feature Xbox SmartGlass.
• Your Video Library—Returns you to the Movies & TV app.
3. From the home page of the Movies & TV section of the Windows Store, you can browse featured selections or scroll down to view lists of new, top-selling, or featured movies and TV shows.
4. Select a movie or TV show to learn more about it. Ratings and runtimes are shown. You can read a synopsis about it, and in some cases trailers can be available to watch. Episodes are listed for television shows, and reviews are provided for movies. Other information is also provided, such as similar movies or TV shows and other shows from a specific television studio.
5. Select the video quality—SD or HD—and then select Buy to start a purchase. You will most likely be prompted to reenter your Microsoft account password and select Sign In as a security feature. You will see a summary of the amount, and the default linked method of payment for your Microsoft account will be indicated, as shown in Figure 25.12. If everything looks correct, select Buy to complete the transaction. You can now play the movie or television show. Purchased items will no longer show a price; instead, you can select Play to stream the purchase.
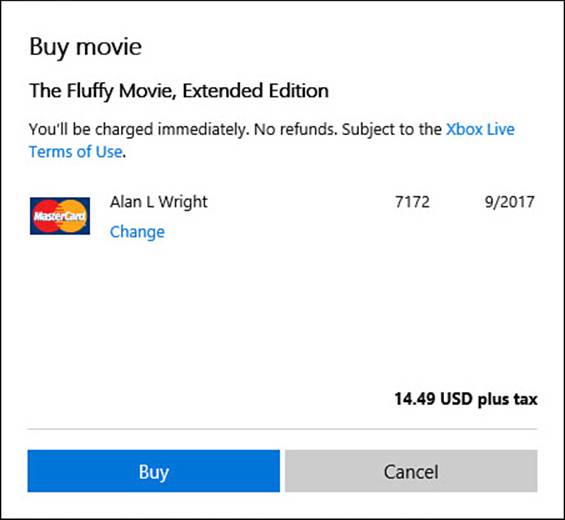
FIGURE 25.12 Purchasing a movie takes just a couple clicks in the Windows Store.
6. Return to the Movies & TV app, and then select Movies or TV to view your purchase. As shown in Figure 25.13, purchases can be streamed or downloaded for viewing later.
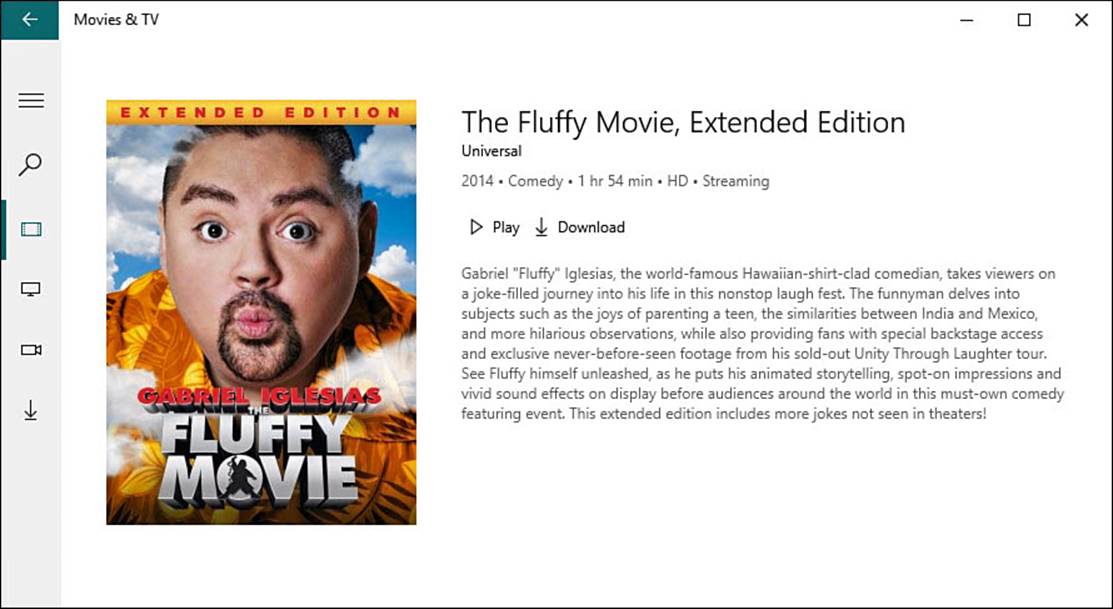
FIGURE 25.13 Purchases can be streamed or downloaded to a device in the Movies & TV app.
If you know what you are looking for, then the search tool in the Windows Store is your friend. Searches within the Windows Store will give relevant results from the apps, music, and video categories. Purchases made in the Windows Store can be downloaded to up to five other Windows 10 devices you use with your Microsoft account.
Renting a Selection
If you prefer not to make your purchase permanent, you can rent most movie titles. The process for renting is very similar to the steps outlined in the preceding section for purchasing a video. The only minor difference is that in step 5, instead of selecting Buy, select Rent.
Terms tend to change on an unannounced basis, so you should certainly read the terms indicated for your rental before confirming your purchase (refer to Figure 25.14). Read the terms carefully because you are charged immediately, and no refunds are given. Following are other details regarding rentals that you should consider:
• You have 14 days to watch a rented video.
• Downloading the video for playback offline might not be offered. You will see this whether this option is available as soon as you select Rent.
• After you start playback of a rental, you must complete watching it in 24 hours before the rental becomes nonfunctional.
• Renting is much cheaper than purchasing a movie, especially one you only expect to watch once.
• During the 24-hour rental period, you can watch the movie as many times as you like.
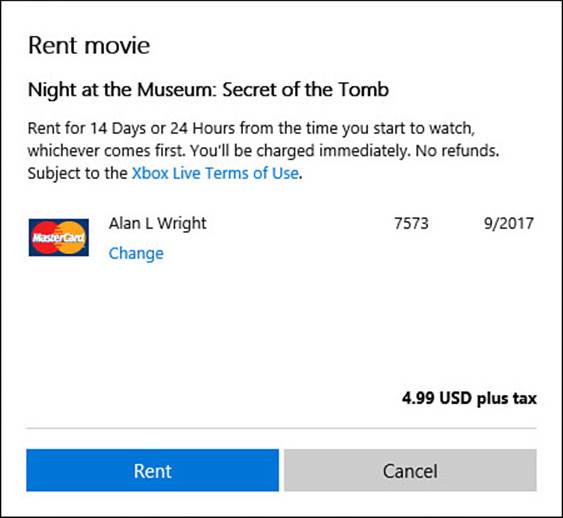
FIGURE 25.14 Read the terms carefully when renting or purchasing video content before confirming a rental.
Note
Currently, the Xbox Video policy on www.xboxlive.com regarding video rentals includes a viewing period of 14 days from the time of your order or 48 hours from the time you start to watch, whichever comes first. However, as you can see in Figure 25.14, the rental terms for this HD download of a movie allow only 24 hours for viewing, and this is consistently the policy stated at the time of rental.
The Absolute Minimum
• Move your existing videos to the Videos folder on your Windows 10 device so that they can be integrated into the video collection. Doing so also enables you to watch your videos whenever you choose.
• You can also consider linking to the existing location of your videos by adding the physical folder location of your videos to the Videos library by letting the Movies & TV app know where to watch for videos. This is an easier option than moving your videos, but you can’t access this content if you move your computer to a place where it can no longer connect with your video library’s location.
• If you plan to purchase or rent a video in the Windows 10 Movies & TV app, be sure to set up your Microsoft account for purchasing before you start. It can save you some time by doing it upfront.
All materials on the site are licensed Creative Commons Attribution-Sharealike 3.0 Unported CC BY-SA 3.0 & GNU Free Documentation License (GFDL)
If you are the copyright holder of any material contained on our site and intend to remove it, please contact our site administrator for approval.
© 2016-2026 All site design rights belong to S.Y.A.