Windows 10. Absolute Beginner’s Guide (2016)
Part IV: Having Fun
26. Enjoying Music
In This Chapter
• Understanding the Groove Music App’s Capabilities
• Reviewing Your Music Library
• Bringing Music into Your Music Library
• Creating Playlists
• Purchasing Music
• Importing Music from a CD Using Windows Media Player
• Burning Music to a CD with Windows Media Player
The Groove Music app in Windows 10 is fun to use, attractive to look at, and generally does everything you’d expect it to do. You can play music you’ve purchased in the past, and you can buy new music. The Groove Music app isn’t full-featured, though. You might want to play music that resides on a CD, or someone else in your home might want to play tunes on your computer. These and a few other features are not available in the Groove Music app; however, other tools in Windows can substitute for the Music app for these tasks. In this chapter, you learn the basics—playing music, setting up and looking through your library, shopping for music online—and learn when you must use another tool.
Getting Started with the Groove Music App
You can use the Groove Music app to play and manage your music in Windows 10. You can bring into the Music app the music you’ve already purchased online or imported from CDs, listen to music that is stored on your OneDrive, and purchase new music.
 Note
Note
The Groove Music app has experienced some name changes, including Xbox Music and simply the Music app. Microsoft explains that this latest name for the Music app uses Groove because this describes what people feel and do with music and is more intuitive for Windows 10 customers on what they’ll find with the app. Because of the name changes and the fact that Xbox Music service has been around for many years, do not be confused if you still see references to Xbox Music—especially if you use links that take you online to websites from the Groove Music app.
To start the Groove Music app, select the tile, as shown in Figure 26.1. If you cannot locate the tile, open the search box on the Desktop taskbar and enter music into the search box. Select the Groove Music tile from the list of results.
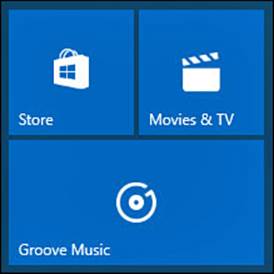
FIGURE 26.1 Select the Groove Music app from the Start menu.
Note
The Groove Music app is a universal Windows app. As such, it can be updated at any time, and its appearance and features can be altered from what is shown in this chapter through updates in the Windows Store.
Learning What’s Where in the Groove Music App
When you first open the Groove Music app, it will invite you to start setting things up right away, as shown in Figure 26.2. As you add music to your collection, the Music app lets you view your collection using three groupings: Albums, Artists, and Songs. Each way of viewing your collection allows you to sort and filter your collection.
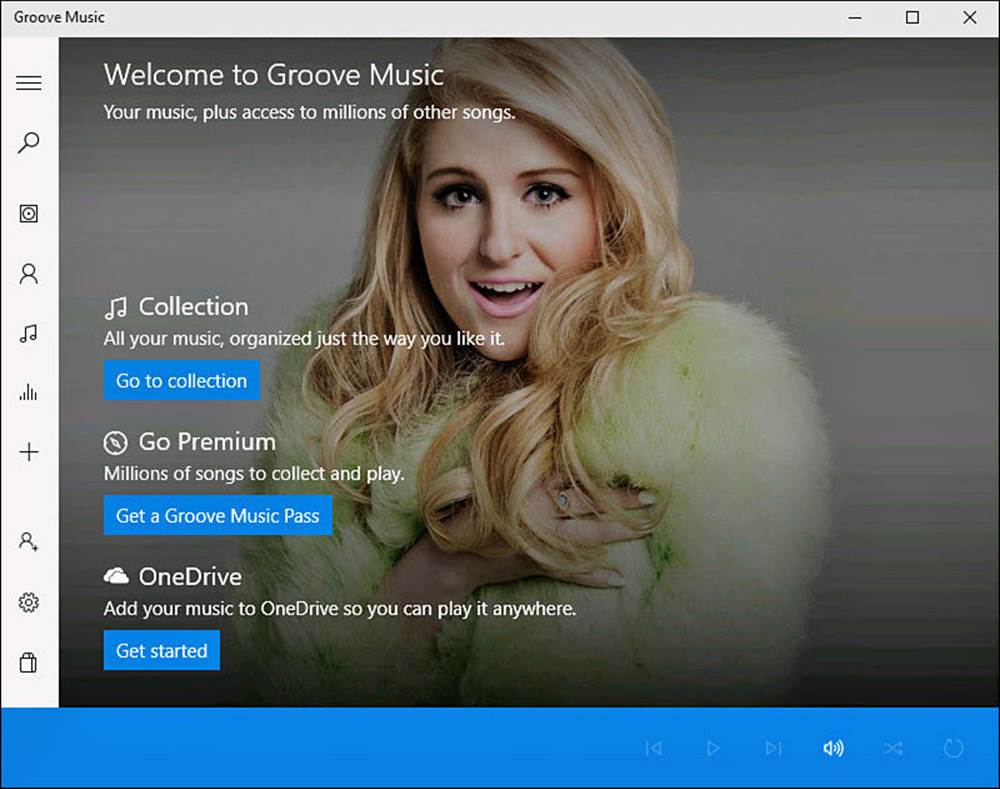
FIGURE 26.2 The Groove Music app can start out pretty barren until you begin adding music.
The hamburger menu of the Music app contains all the navigation tools you will need for moving around within the Music app (see Figure 26.3):
• Search—Allows you to search for music within your collection. Use artist, album, or song queries.
• Albums—Shows whole or partial albums you have added to your collection. Albums can be sorted by date added, release year, alphabetically, genre, or artist.
• Artists—Lets you arrange your collection alphabetically.
• Songs—Lists every song in your collections; you can sort by date added, alphabetically, genre, artist, or album.
• Radio—Only visible if you have a Groove Music subscription, Radio allows you to stream online music from Microsoft’s Groove Music service.
• Explore—Only visible if you have a Groove Music subscription, Explore allows you to find new artists from Microsoft’s Groove Music online catalog.
• Now Playing—Displays album art for the currently playing song track, which can be used as an impromptu screensaver by selecting the full screen icon that appears on the album art.
• Playlists—These are listed as well as an icon to create a new playlist. Depending on a few factors, some playlists will sync with other devices that you use running Windows 10 as well.
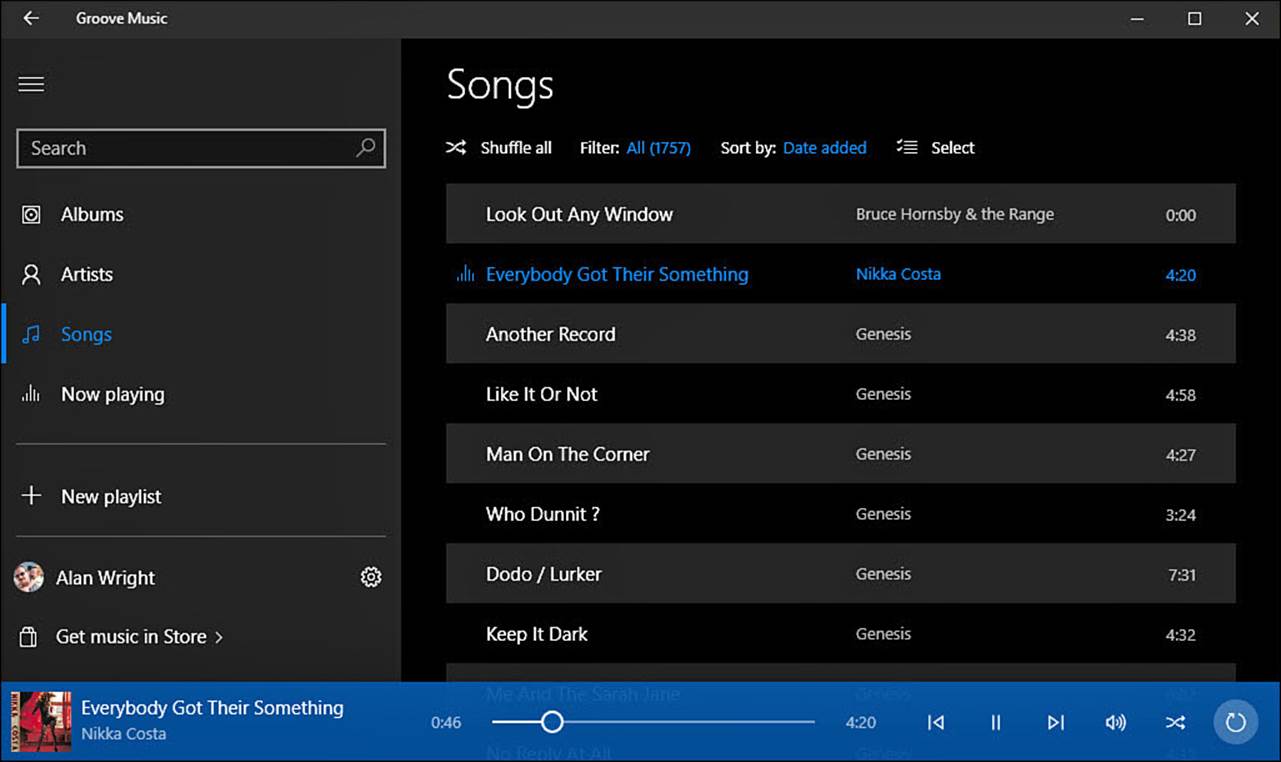
FIGURE 26.3 The hamburger menu of the Groove Music app, shown here with the dark theme, enables you to view your collection in different ways.
While you’re playing music, the Groove Music app displays a music player bar across the bottom that is always visible and presents the exact commands you need, no matter what you’re doing in the app. For example, as shown in Figure 26.4, when you play music, the music player bar presents commands to play the next song, repeat the current song, control volume, and more. Select the album portrait to jump to the album view.

FIGURE 26.4 The music player bar gives you access to commands you would see on an MP3 player as you play music in the Groove Music app.
 Tip
Tip
The Groove Music app includes two color themes: light and dark. To switch between these themes, select Settings and scroll to the bottom of the Settings pane. Under Background select the drop-down menu to select Light or Dark.
Adding Music to the Groove Music App
When you first open the Groove Music app, your collection can appear rather empty, as shown in Figure 26.5. The whole point of the Music app is to listen to your music, right? Before doing so, you need to bring your music into the Groove Music app collection. Digital music includes music you have purchased online or imported from CDs onto your computer. Thankfully, the Groove Music app makes it incredibly easy to buy new music.
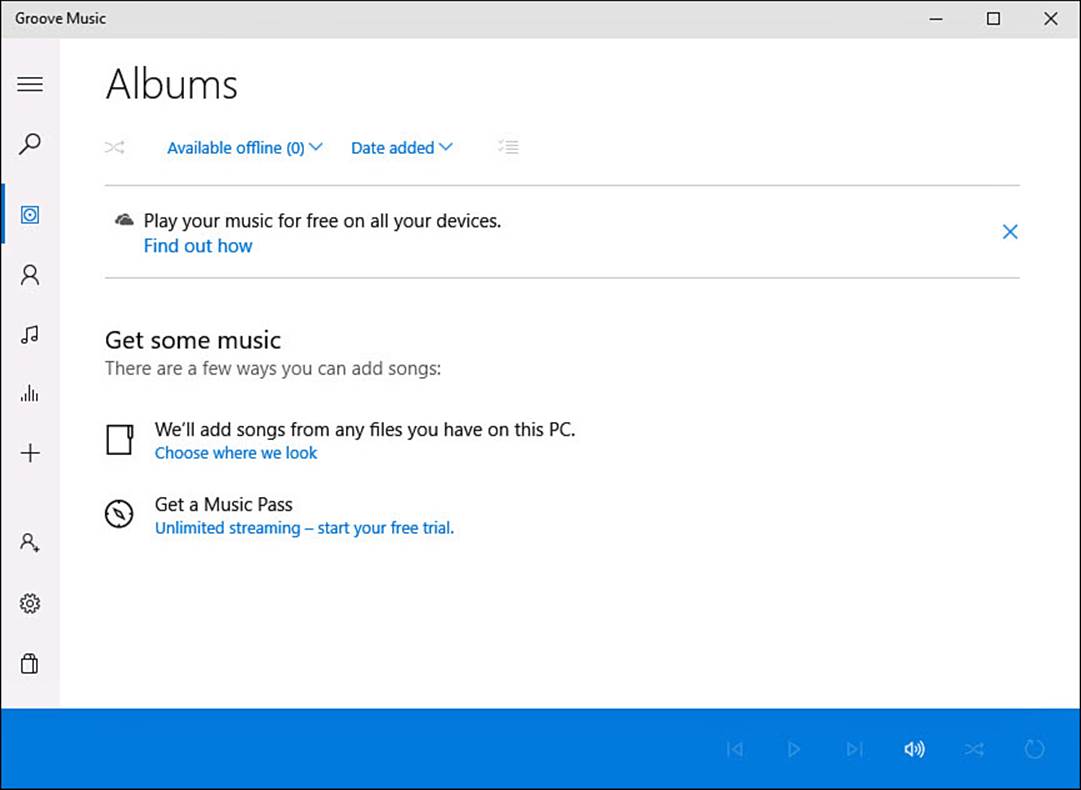
FIGURE 26.5 You might start with very little to listen to in the Music app on a new device.
The Groove Music app does a lot with a little. The app presents an attractive, well-laid-out, informative, and well-organized library of music. The Groove Music app is very flexible when adding music, allowing you to specify where your music collection is located rather than moving your music to a specific directory.
You have two basic options to bring your existing music into the Groove Music app:
• You can link to your existing collection of music, even if it’s on another computer, a removable drive, or OneDrive.
• You can either copy or move your entire collection from a different system to the device running Windows 10.
The following two sections explain how to connect your music to Windows 10 using these approaches.
How to Link Your Music
Linking to your music takes advantage of the libraries function in File Explorer. A library is a special folder type that consolidates folders from different locations on your computer to make all the folders appear to be in the same location. The Music folder is actually one of several built-in libraries in Windows 10. The Groove Music app uses the music library to populate the music collection. You can find detailed information in Chapter 21, “File and Folder Basics,” for instructions on working with libraries.
To manage the music in your collection, follow these steps:
1. Open the Groove Music app. If you see a link inviting you to add music to your PC (refer to Figure 26.5), select the link Choose Where We Look, and jump to step 4.
2. Select Settings from the hamburger menu to open to the Settings pane of the Groove Music app, as shown in Figure 26.6.
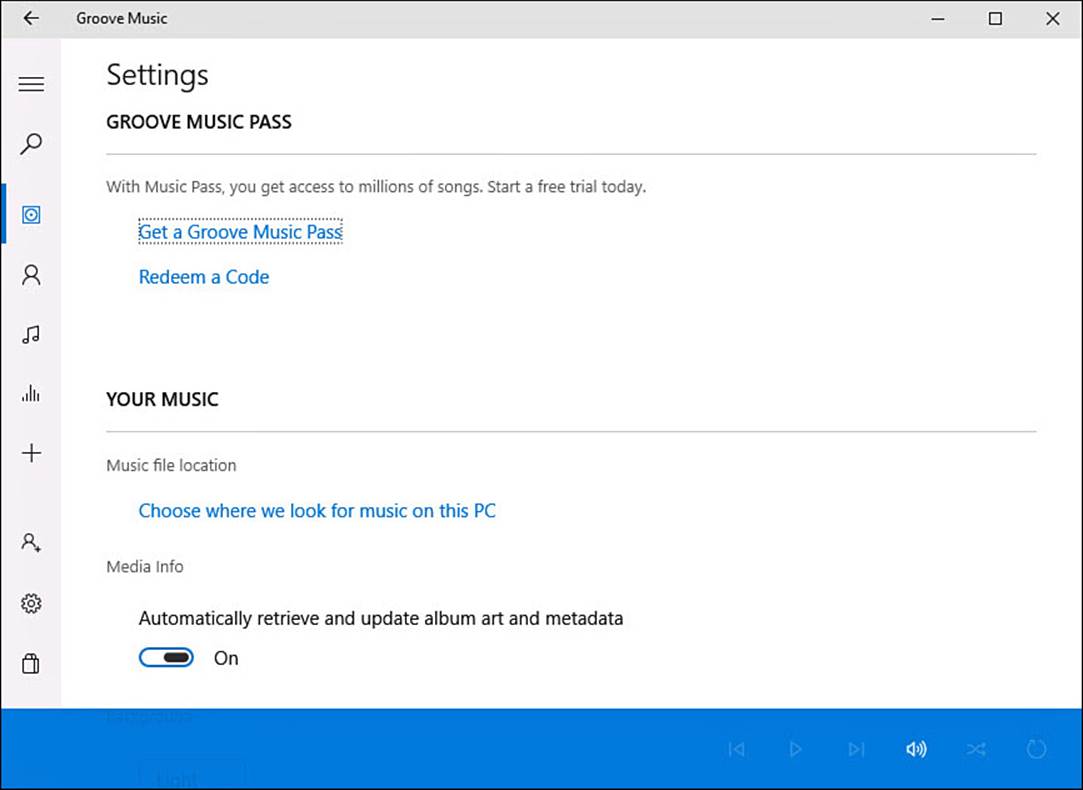
FIGURE 26.6 The Settings pane of the Groove Music app provides you with ways to add music.
3. Under Your Music, select the link Choose Where We Look for Music on This PC.
4. The pop-up shown in Figure 26.7 will appear. Locations that the Groove Music app is aware of that should contain music files will be included (your Windows Music library). You might also see a folder from your OneDrive included.
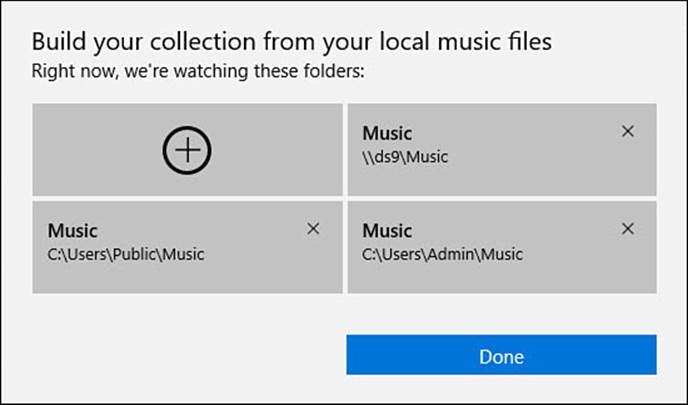
FIGURE 26.7 The Groove Music app collection uses the Music library of Windows and even allows you to update the library from within the Music app.
5. To add a new folder containing music, select the first folder placeholder (+). File Explorer will open. Navigate to the folder you want to add to your collection, and select it. Select the button Add This Folder to Music. The folder will now be included in the Music library and will appear as a separate folder in the list shown in step 4.
6. To remove a folder, select the X that appears on the folder (refer to Figure 26.7). A pop-up will appear, as shown in Figure 26.8. Select Remove Folder to confirm or Cancel to leave it. If you select Remove Folder, the folder is removed from the library container but continues to exist as a normal folder—nothing is deleted.
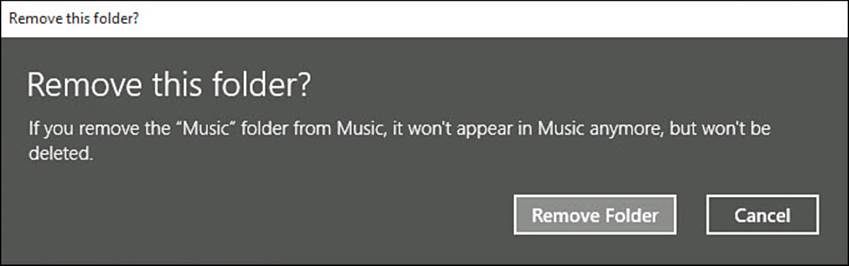
FIGURE 26.8 Remove folders that you no longer want the Groove Music app to monitor.
7. Select Done when you are finished to return to the Groove Music app.
 Caution
Keep in mind that if you cannot reach the network or cannot travel with your removable drive, you will not have access to your entire collection of music. Also, network locations that Windows 10 cannot index for one reason or another are not added to your Music library.
Another unique way to link music with Windows 10 is from the cloud, as indicated by the invitation to add your music to OneDrive (refer to Figure 26.2). OneDrive contains a Music folder designed for music files, and this folder is automatically included in the Groove Music app as a folder that is watched (see Figure 26.9). Although uploading your music collection to OneDrive has many advantages for those who live with easy Internet access, it does include some caveats.
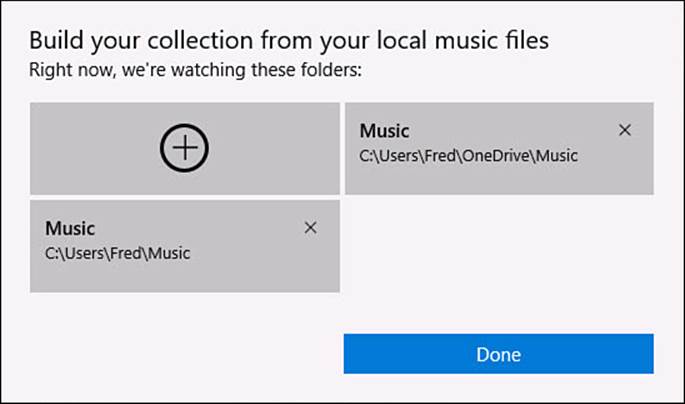
FIGURE 26.9 The Groove Music app works very well with music saved to your OneDrive.
Currently, OneDrive reserves local hard drive space to sync OneDrive content to your device. This can be an issue for devices with limited hard drive space. Chapter 22, “Working with OneDrive,” covers how to use OneDrive with the Groove Music app in more detail.
You might notice that some songs have an icon next to the song title. Icons indicate one of the following when they appear next to a song or an album:
![]() This icon indicates that a song is available for streaming only while connected to the Internet. It cannot be played while offline unless downloaded to the device.
This icon indicates that a song is available for streaming only while connected to the Internet. It cannot be played while offline unless downloaded to the device.
![]() This icon indicates that information is available; select it to reveal information. In the Groove Music app, this generally appears when a song is located on a different device that you use and cannot be played from this device. This icon sometimes appears in playlists that have been synced when you do not have the same music on each device.
This icon indicates that information is available; select it to reveal information. In the Groove Music app, this generally appears when a song is located on a different device that you use and cannot be played from this device. This icon sometimes appears in playlists that have been synced when you do not have the same music on each device.
How to Move Your Music
If linking folders and cloud options are not for you, follow these steps to move your music to the computer running Windows 10:
1. The first step is to prepare your music. It will be easier, but not required, to move your music if all your music is in a single folder or grouped in subfolders within a single folder.
2. Check that your Windows 10 computer has enough free disk space to accommodate your music. Ensure that you have more than 10% of the total drive capacity available after copying your library.
For example, suppose your music takes up 10GB, you have a 250GB hard drive, and 50GB is free. When you add your music to your hard drive, you have just 40GB free space remaining, but 40GB is greater than 10%, so in this example, you are okay.
3. Move or copy your music folder to the Music folder on the Windows 10 computer. You might need to use a removable drive to move the folder, or you can use a homegroup network to complete it.
4. Open the Groove Music app. Inspect your collection to verify that your music is present.
Using Album View
Album view provides a few important tools that you should be aware of when working with your music. Some of these tools are available in other views; others are available only in Album view.
To use Album view tools, follow these steps:
1. Select an album in the Groove Music app.
2. To play all tracks of an album, select the upper Play icon.
3. To add all tracks of an album to a playlist or to create a new playlist with this album, select Add To. A drop-down menu will open, as shown in Figure 26.10, with existing playlists. Select New Playlist to create a new playlist. Type in a name for the playlist, and then select Save.
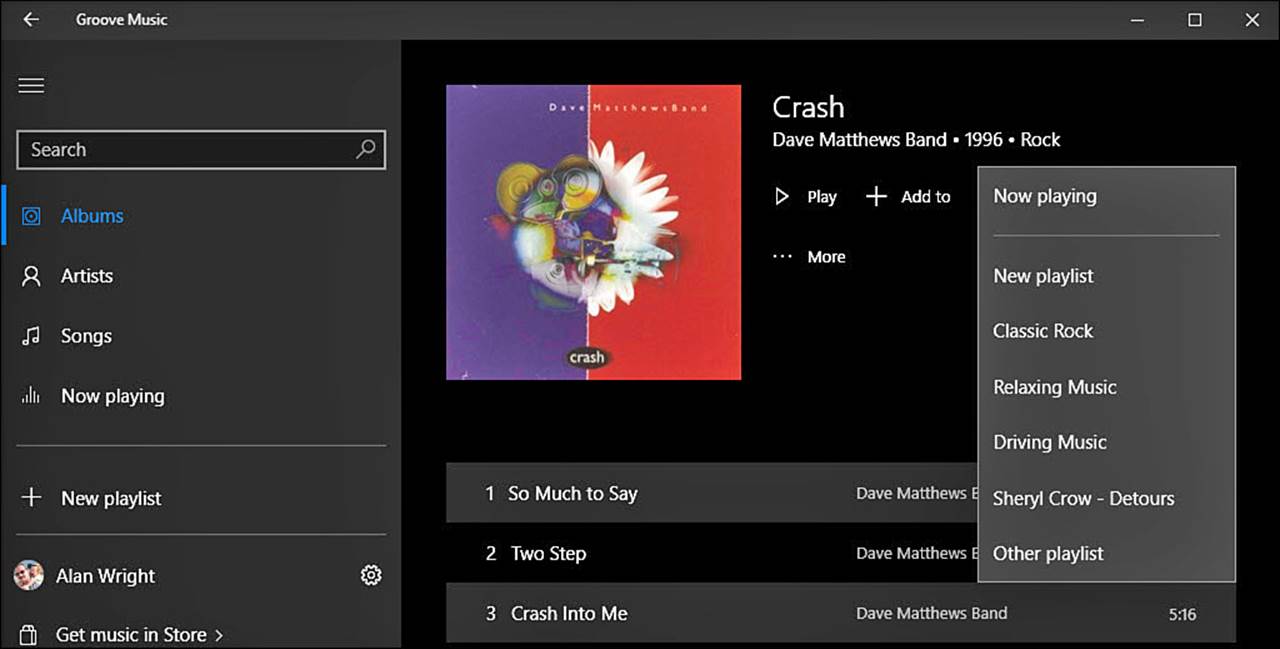
FIGURE 26.10 Create playlists or add music to an existing playlist in the Groove Music app.
4. Select Explore Artist to jump to Artist view. You might have other albums by that artist that can be accessed easily from Artist view.
5. Select More to reveal additional tools, as shown in Figure 26.11.
• Pin to Start—Allows you to add a tile for that album to the Start menu. Selecting the pinned album opens the Groove Music app, and that album will begin playing.
• Delete—Presents a pop-up asking you to confirm that you want to permanently delete the album from your library. Select Delete to proceed or Cancel to keep the album.
• Find Album Info—Does an impressive job of updating metadata for unidentified or poorly tagged albums and songs. The Groove Music app compares the album and songs to online sources, and possible albums are presented with checkmarks indicating tracks that can have their metadata automatically updated. Song names, album art, genre, and artist are all fields that are corrected if you find the right album. Select Finish to update metadata tags for the album and selected songs.
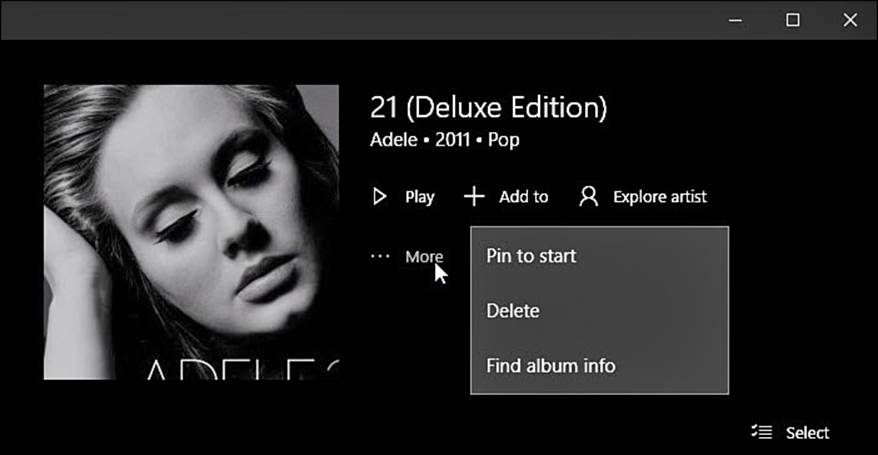
FIGURE 26.11 Use tools from Album view within the Groove Music app to pin albums to the Start menu or update metadata for songs.
6. Select the Select tool located above the songs, and then select a song if you’re using a touchscreen (refer to Figure 26.13). With a mouse, just right-click a song within the album to open the context menu and select Properties. Detailed information for a song is revealed, as shown inFigure 26.12. File location and streaming status are useful details if you will be without Internet access or if you need to locate the actual song file.
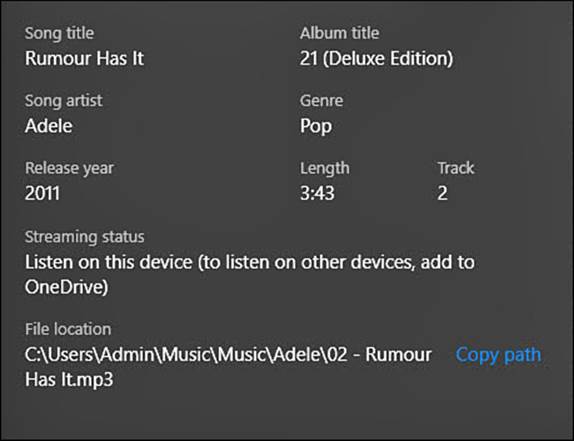
FIGURE 26.12 Review details about song files by selecting Properties for the song in the Groove Music app.
Most of these tools are available when right-clicking a song, an album, or an artist within the Groove Music app. On a touchscreen you need to use the Select tool to enter selection mode. Selected items bring up a lower app bar from the bottom of the app, as shown in Figure 26.13. SelectCancel to exit selection mode.
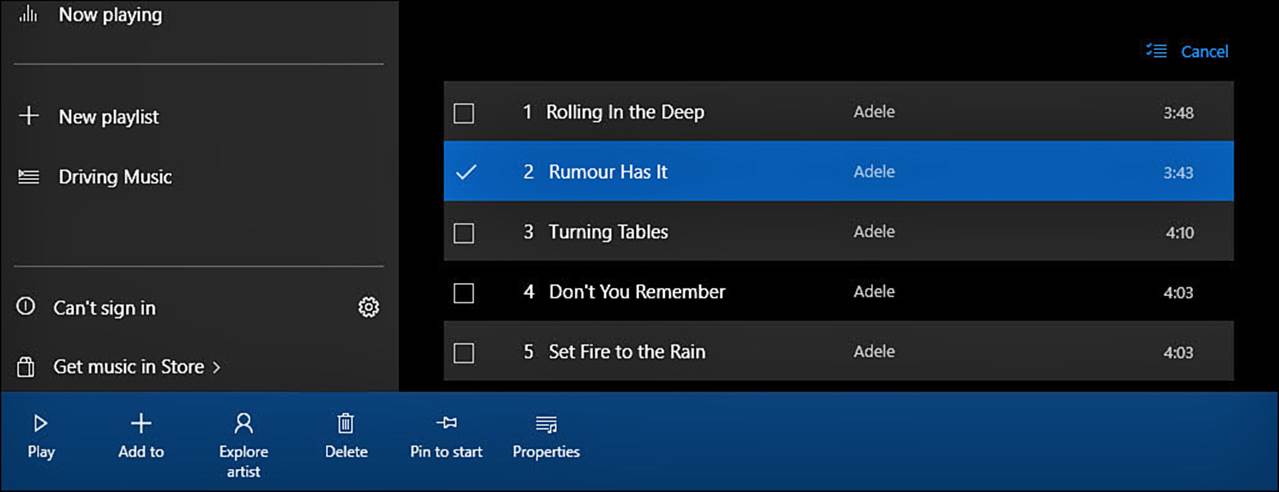
FIGURE 26.13 Using the Select tool will reveal actions for selected artists, albums, or songs.
Tip
Metadata refers to additional information that can be added to media files such as music and is sometimes referred to as tagging. This metadata can be critical when trying to keep a music collection organized. Different formats can be used, and editing tags is not always easy. The Music app updates metadata used by the Music app, but this is not always visible in other music players. If you are looking for a good tool for this, MP3TAG is a free application that can be downloaded and used to tag your music files.
Caution
Deleting music from your library also deletes the music files that are stored on your device. The files will be placed in the Recycle bin. Deleting songs stored on your OneDrive results in those music files being deleted from OneDrive and placed in the OneDrive Recycle bin.
Creating Playlists
A big part of playing music is the playlist. If you’ve used a previous version of iTunes or Windows Media Player, you probably know about creating playlists. Playlists are custom song selections that you pick to play together. Maybe it’s a “best of” Tom Petty mix or a selection of your favorite classical music. The Groove Music app has made it much easier to create and manage playlists. To create a playlist from your collection or add a song to an existing one, select the + sign when a song is selected; then choose an existing playlist or select New Playlist (see Figure 26.14). Playlists that are created on other Windows 10 devices you use are synced by default.
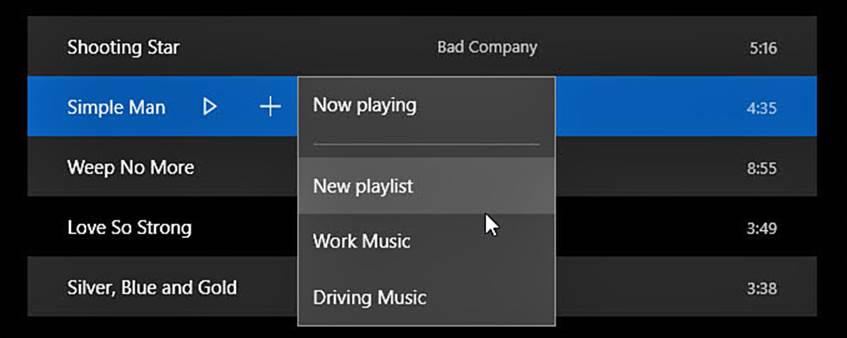
FIGURE 26.14 Add songs to an existing playlist or create new ones on-the-fly.
Note
Currently, there is no tool available to import playlists created using other applications. Hopefully, this feature will make its way into the Groove Music app by means of a future update.
Purchasing Music
There are two ways to purchase music through the Groove Music app. You can purchase a music streaming subscription, or you can purchase digital music through the Windows Store. Both choices are explained in the following sections.
Using Groove Music Pass
There are many competitors in the streaming music service industry. Microsoft continues to promote the Groove Music Pass streaming service that contains millions of songs, no ads, and smooth integration into the Groove Music app; this is an attractive option to anyone owning a Windows 10 device. Music Pass has long been associated with Xbox services, so you might see it referred to as Xbox Music occasionally. Activating a Groove Music Pass subscription adds Radio and Explore features to the Groove Music app, as shown in Figure 26.15.
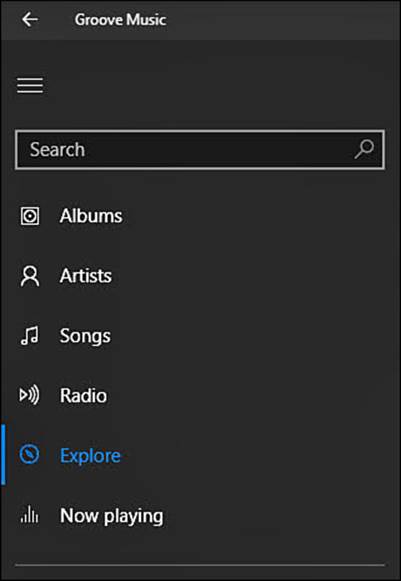
FIGURE 26.15 Activating a Groove Music Pass subscription unlocks additional features of the Groove Music app.
Although Groove Music Pass no longer offers a free ad-driven subscription as it had in the past, there is a free 30-day trial that lets you get an idea if this service is worth the current subscription rate of $9.99 per month. A Groove Music Pass code can be purchased at retailers and redeemed later, or you can activate a subscription with a few clicks. You should have billing information in place with your Microsoft account. Chapter 24, “Using Your Microsoft Account for Purchases,” discusses how to ensure that your Microsoft account is ready for making purchases.
To activate a Groove Music Pass subscription, follow these steps:
1. Open the Groove Music app and select Settings from the hamburger menu.
2. From the Groove Music Pass section of Settings, select Get a Groove Music Pass or Redeem a Code (refer to Figure 26.6).
3. When selecting Get a Groove Music Pass, you will see a few payment options, as shown in Figure 26.16. Select one of the pass options presented. Unless you are purchasing the discounted annual subscription, select the Free Music Pass Trial if offered—no need to throw away 30 free days. (Just be sure to cancel the subscription before the trial ends, then purchase the discounted 12-month music pass.)

FIGURE 26.16 Choose a Groove Music Pass option to start enjoying streamed music in the Groove Music app.
4. You will be prompted to enable or disable password prompts for purchases. I recommend you leave this On. Select Next to continue.
5. A summary of your purchase will be presented showing the amount to be charged to your default payment method that is linked to your Microsoft account. Select Confirm to make the purchase.
6. The Groove Music app is updated, enabling new features associated with Groove Music Pass.
With a Groove Music Pass subscription, you can enjoy radio stations based on artists you enjoy. Select Radio from the hamburger menu, select Start a Station, and then indicate an artist. The Groove Music app will remember radio stations you have created, and music will be streamed by a variety of artists that fit into the same genre as the artist you indicated.
Other benefits of Groove Music Pass include
• Search now includes artist, album, and song choices from your collection as well as the deep Groove Music Pass library.
• Selecting songs playing in the radio includes links to purchase the album in the Windows Store.
• Explore Artist reveals other albums by the artist, related artists, top songs, and bio information.
• Songs added to playlists from Groove Music Pass content are automatically downloaded locally for playing when not connected to the Internet.
Purchasing Music in the Windows Store
Windows 10 has combined many types of media into the Windows Store, making it a one-stop place for shopping from your device. Music is a very new addition to the Windows Store. You will find prices clearly indicated for both albums and songs. Purchases in the Windows Store require that billing information be linked to your Microsoft account.
To purchase music in the Windows Store, follow these steps:
1. From the Groove Music app, select Get Music in Store from the hamburger menu. The Windows Store will open to the Music section, as shown in Figure 26.17.
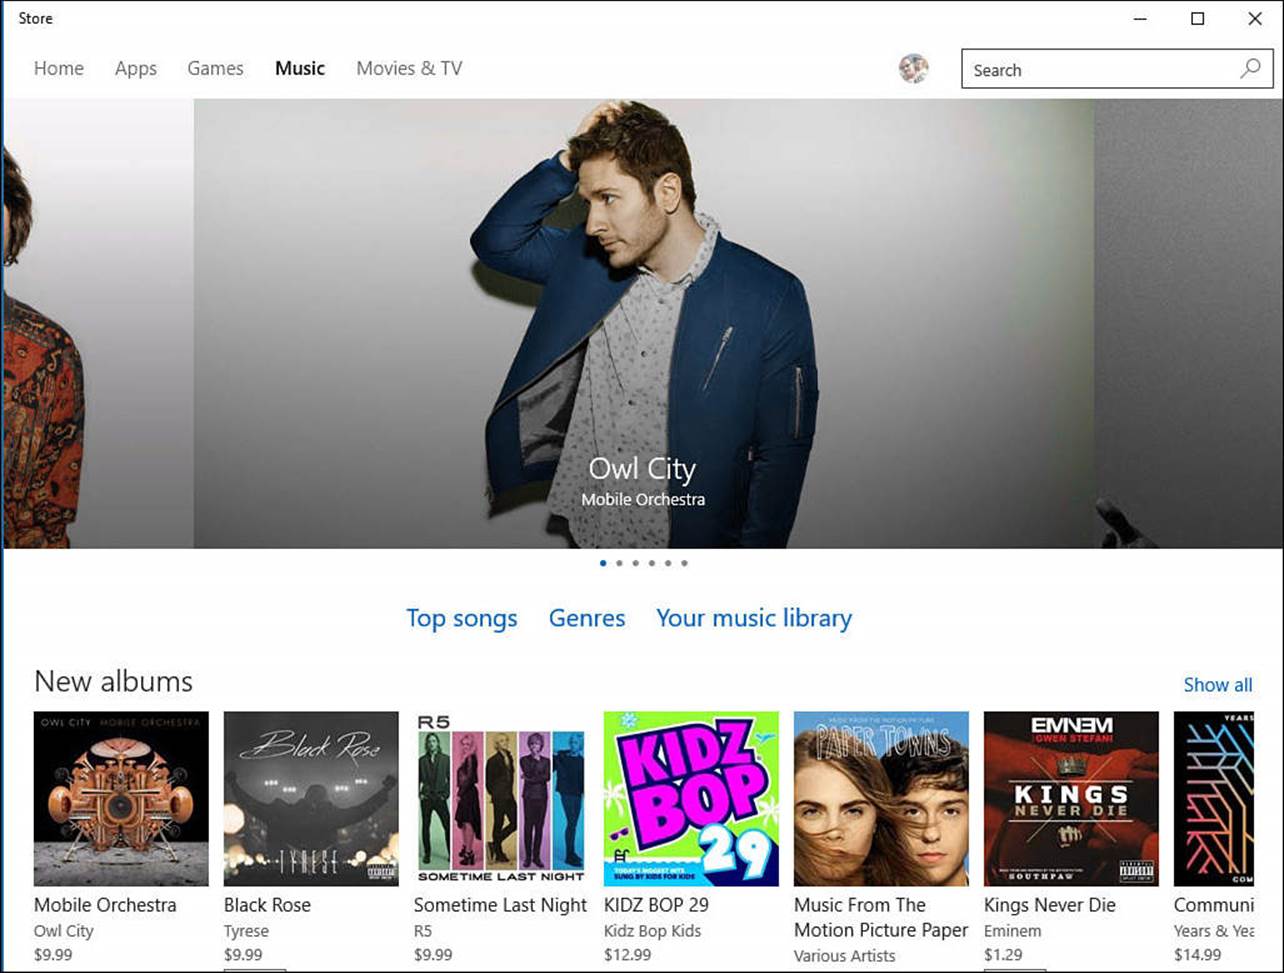
FIGURE 26.17 Browse for new music and make purchases in the Windows Store.
2. Below the prominent sliding viewer of featured albums, three links are provided to help you with navigation:
• Top Songs—Provides a long list of hundreds of songs ranked by sales. Select from genres to filter the list when looking for top-selling songs.
• Genres—Opens a list of genres from which to choose. Select a genre and further filter your browsing by selecting New Albums or Top Albums from the Chart filter.
• Your Music Library—Returns you to your music collection in the Music app.
3. From the home page of the Music section of the Windows Store, you can browse featured albums or scroll down to view lists of top-selling albums, songs, and artists.
4. Select an album or artist to learn more about it. When viewing an album, you can read information about the album, listen to short previews of songs, find additional music from the artist, and check out related artists. Artist pages include bios, latest albums and singles, top-selling songs, and related artists.
5. Select the price button for a song or an album to start a purchase. You will most likely be prompted to reenter your Microsoft account password and select Sign In as a security feature. You will see a summary of the amount, and the default linked method of payment for your Microsoft account will be indicated, as shown in Figure 26.18. If everything looks correct, select Buy to complete the transaction. The Groove Music app will begin downloading your purchase. Purchased music will not show a price; instead, you can select the link View in My Musicto jump back to the Groove Music app.
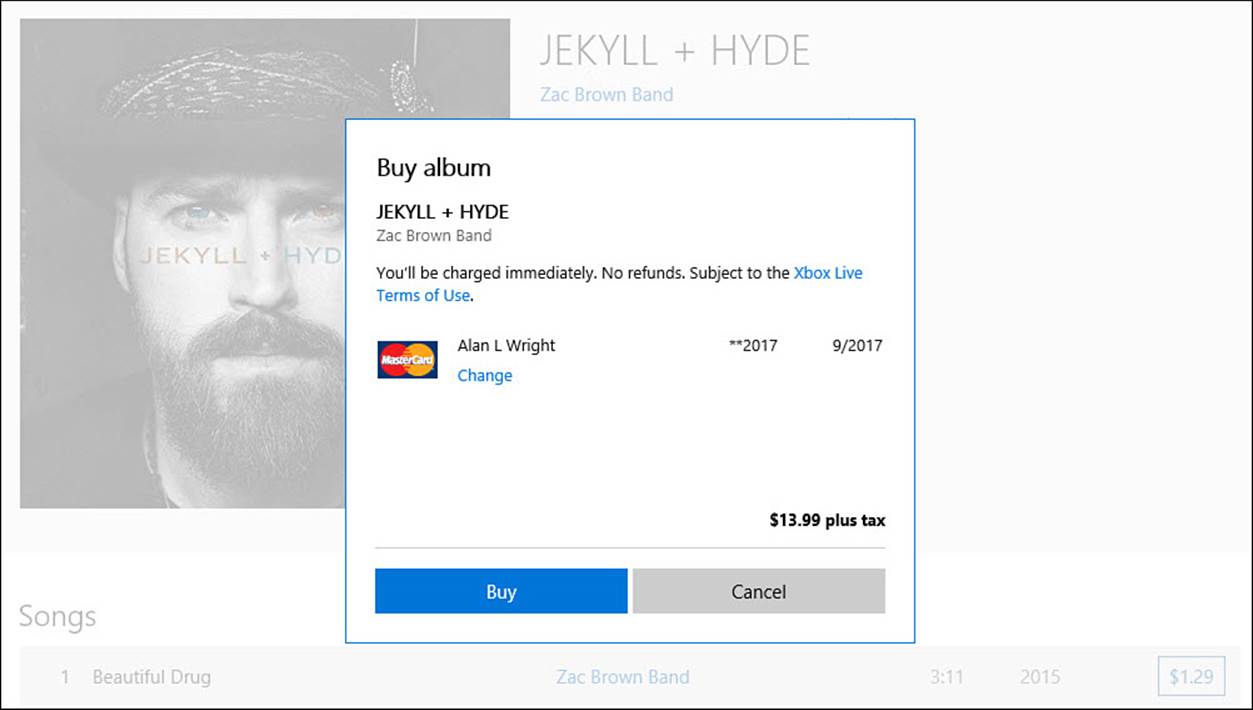
FIGURE 26.18 Purchasing music requires a couple steps to confirm a transaction, which should avoid accidental charges.
If you know what you are looking for, then the search tool in the Windows Store is your friend. Searches within the Windows Store will give relevant results from apps, music, and video categories. Purchases made in the Windows Store can be downloaded to other Windows 10 devices you use with your Microsoft account.
Importing Music and Creating Music CDs
So far in this chapter, you’ve read about managing digital music stored on your computers and hard drives, as well as streamed music and music purchased through the Windows Store. With all the great music in your library, you might want to create a music CD of your own design. It’s also a good bet that you’ll purchase new CDs or come across CDs in your home or office whose music you want to add to your library. These two likely scenarios are the focus of this section.
As mentioned in the beginning of this chapter, the Groove Music app isn’t up to the task of addressing all your music enjoyment needs. To import a new CD into your library or to create a new CD, use the desktop application Windows Media Player. Users of past Windows versions probably know the Windows Media Player, which is a handy tool that can also be used to manage all your music.
Importing Music from a CD
Windows Media Player is included with Windows 10. Besides listening to music, you also can import songs from music CDs using Windows Media Player. The music you import becomes part of your music library. In almost all cases—and as long as you have an active Internet connection—Windows can identify the CD. The name of the artist, the name of the album, and the name of each selection are automatically loaded into the library. If not, you must enter that information manually.
Tip
If you find that you need to use Windows Media Player often, it’s not a bad idea to pin it to your Start screen. Just search for Windows Media Player using the Windows taskbar Search box, right-click (or tap and hold) it in the search results, and select Pin to Start.
Follow these steps to import music from a CD:
1. Open the Windows Media Player. You might find it easiest to use the Windows search box on the taskbar to quickly locate it by name.
2. Load your CD and wait for Windows to recognize it. Do not press any buttons for a few moments.
3. The CD’s tracks plus a snapshot of the cover artwork associated with the CD appear, as shown in Figure 26.19.
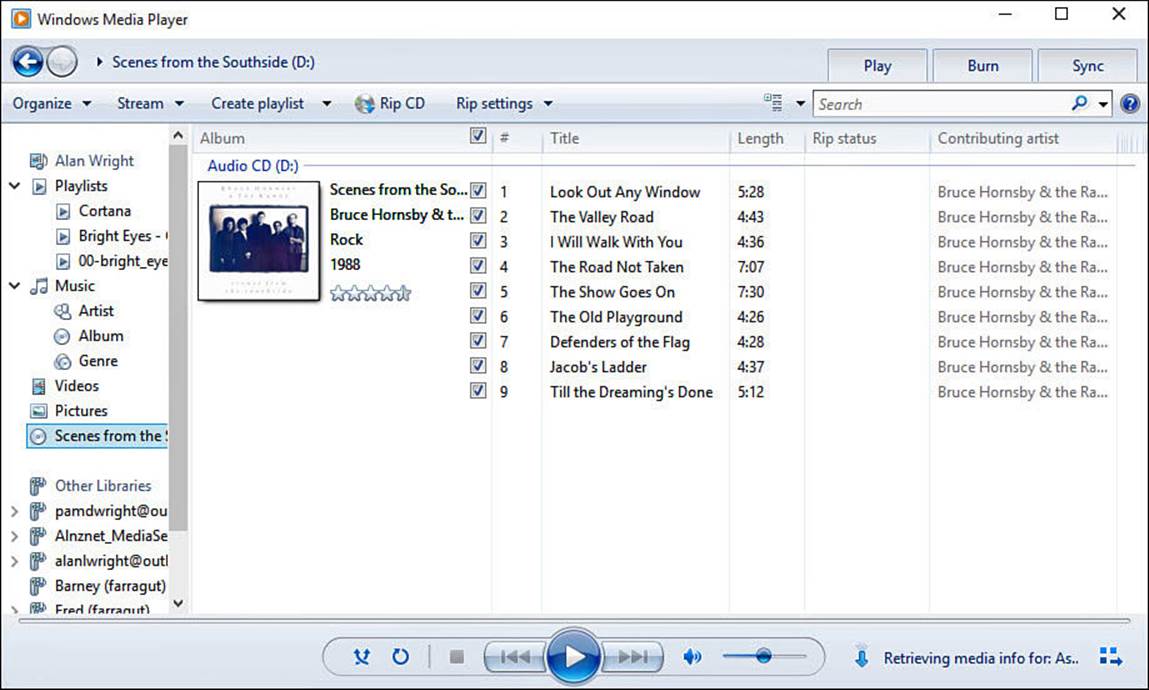
FIGURE 26.19 The CD’s contents appear, enabling you to use the checkbox to deselect songs you do not want to import.
4. Select Rip Settings from the menu bar if you want to adjust any quality settings; otherwise, select Rip CD to begin.
5. Wait for each track’s Rip Status to become Ripped to Library. You can eject the CD when complete.
Creating a Music CD
Burning a CD using Windows Media Player is just an extension of creating a playlist, although any playlists you create in the Music app don’t appear in Windows Media Player. So, to burn a CD, you first need to create a playlist. Follow these steps to create a music CD based on a playlist you’ve created:
1. Open Windows Media Player. Note the tree structure of your media on your computer on the left side of the screen (refer to Figure 26.19). This is known as the Navigation Tree.
2. Select the Burn tab located toward the upper-right corner of the application window (refer to Figure 26.19). The area below the tabs displays a blank burn list.
3. Under Music in the Navigation Tree, click Artist, Album, or Genre to choose music to burn to the CD. Drag songs to the burn list. If you have a playlist you want to burn to a CD, you can drag the playlist to the burn list; the individual songs will appear in the list.
4. To remove any songs from the burn list, right-click them and select Remove from List.
5. Insert a blank, writable CD into a drive on your computer capable of burning CDs.
6. From the top of the Burn tab, select Start Burn.
7. Remove the CD when Windows Media Player reports that the CD is complete.
The Absolute Minimum
• You can play existing music in the Groove Music app either by moving the music directly into the Music folder on your Windows 10 device or by indicating where the music is located within the Music app.
• You also can connect to a music source over a home network, but this solution will fail when you move your computer out of range of the network or if the network location cannot be indexed by Windows.
• Have a method of payment linked to your Microsoft account for Groove Music Pass subscriptions or to purchase music in the Windows Store.
• You need to use Windows Media Player if you want to import music into your library from a CD or want to burn music to a CD.
All materials on the site are licensed Creative Commons Attribution-Sharealike 3.0 Unported CC BY-SA 3.0 & GNU Free Documentation License (GFDL)
If you are the copyright holder of any material contained on our site and intend to remove it, please contact our site administrator for approval.
© 2016-2026 All site design rights belong to S.Y.A.