Windows 10. Absolute Beginner’s Guide (2016)
Part V: Online Bonus Content
Bonus Chapter 2. Working with Other Windows Apps
In This Chapter
• Learning about Windows MSN Apps
• Customizing Apps to Reflect Your Interests
• Learning About Core Utility Apps
When you hear the term Swiss Army knife, you probably visualize a compact device with an incredible array of tools that equip a person for just about anything that might present itself. Your Windows 10 device has a similar array of built-in tools that will help you handle anything from daily tasks to planning that annual family vacation.
This chapter introduces you to many of the apps included with Windows 10 that are built for very specific tasks or interests that do not have a dedicated chapter elsewhere in this book. You might have used applications such as Paint in the past, while others might be completely new to you. Take a few minutes to try all the apps and consider ways that they could be useful to you. I will endeavor to point out their uses and notable features to help you get the most out of your Windows 10 Swiss Army knife.
Getting to Know the MSN Apps
Imagine trying to find useful information on the Internet without any tools or services to search and filter everything. In recent years, Microsoft developed Bing services to examine and aggregate the incredible amount of data that composes the Internet. One result of this has been the development and refinement of popular categories of Internet content that can be channeled into interest-specific apps. With the release of Windows 10, apps that had been designed to work with Bing services have been rebranded as MSN apps to better identify these apps with the Microsoft name.
 Note
Note
Although Bing had a catchy name and had intense advertising campaigns, it did not catch on quickly. In the end, MSN is a more widely recognized brand that has existed since 1995. MSN simply stands for The Microsoft Network. Microsoft had added the MSN branding to the apps but then removed it during the months leading up to the release of Windows 10. You might still see the apps listed in the Windows Store with MSN branding.
The MSN apps considered in this section include News, Money, Sports, and Weather (see Figure BC2.1). Even though you might not see the MSN branding, these apps have many similarities in both style and structure and are customizable, enabling you to pick and choose specific interests and sources of information to suit your taste. For this reason, pay special attention to the following section on navigating in and customizing the News app because these same methods will apply to other MSN apps. It should also be noted that these apps require an Internet connection to present updated information and articles.
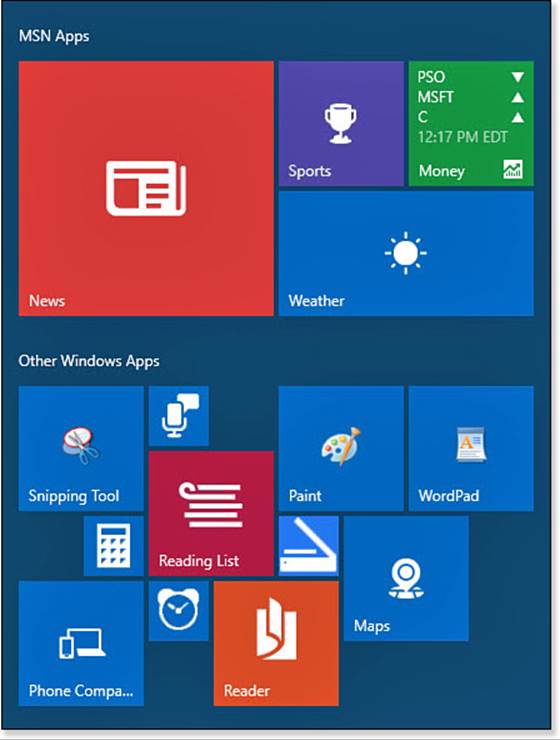
FIGURE BC2.1 MSN apps cover many interests and can perform an important role in keeping track of your activities.
Note
Microsoft has announced support for three additional MSN apps; Travel, Food & Drink, and Health & Fitness will be discontinued by November 2015. Due to this, there is no consideration of these apps in this chapter.
The News App
The News app is designed to be a one-stop destination for local and world news. It also has sections devoted to all the basic news categories you would expect to find in a daily newspaper. Selecting the News app will open it to the current top trending news story, as shown in Figure BC2.2.
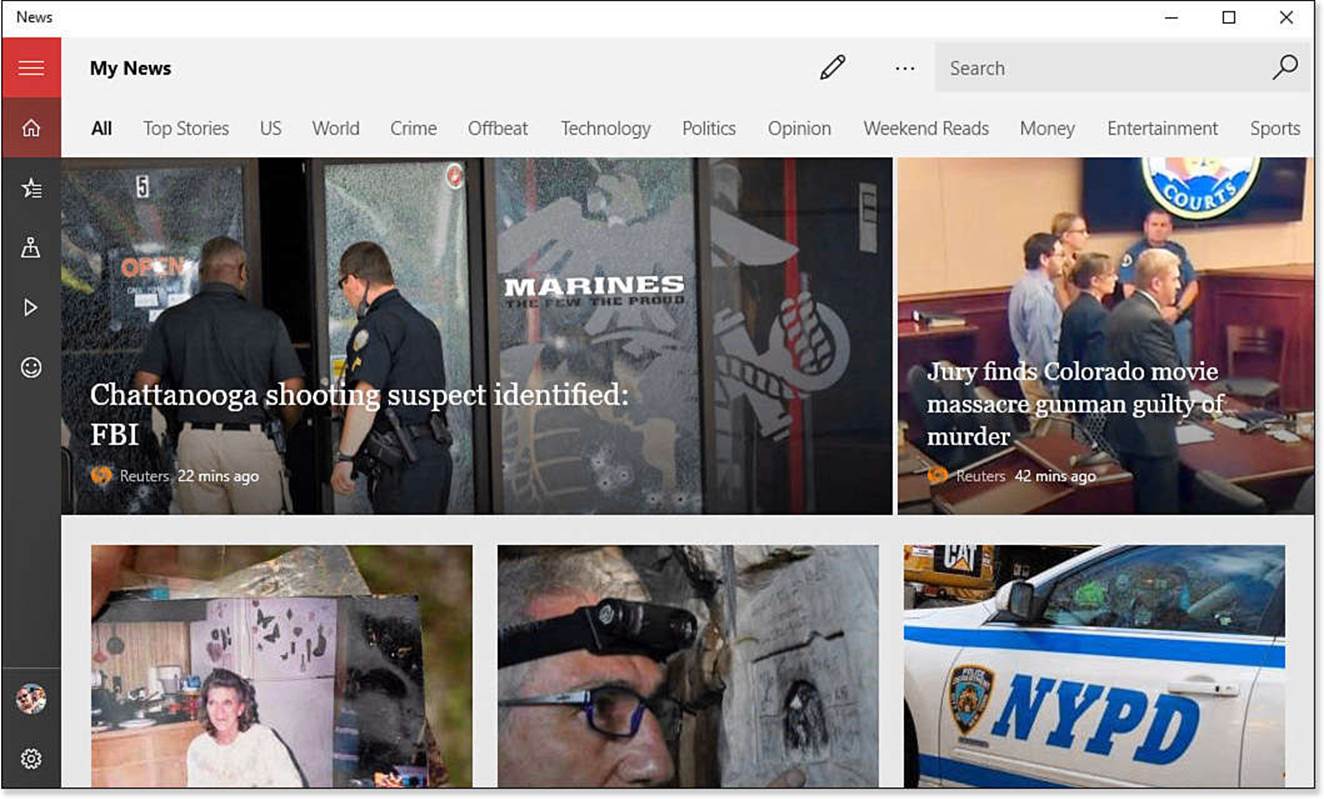
FIGURE BC2.2 The News app provides an intuitive presentation of the current trending news stories from across the Internet.
The MSN News app helps you keep track of news in various ways:
• My News—My News is the home page of the News app. It presents you with All news articles by default. You can use the categories such as sports or science you have indicated in Interests to filter the news stories that are shown.
• Interests—Interests lets you take control of which news interests are shown. You can even create a topic you care about, such as the town you live in or a specific business or person.
• Local—Local allows location services to find news near where you are, or you can indicate a location that will be used to pull together news stories related to that location.
• Videos—A section that lets you see some of the top videos currently trending on the news sources you have selected.
When reading news articles, you might find something that is interesting enough that you want to share it with others. At the top of articles, you will find the option to do so. Select Share to open the Share pane, and then select the app to which you would like to share the news article, as shown in Figure BC2.3. Generally, an editable blurb with a link is sent or listed via the selected app.

FIGURE BC2.3 Sharing is easy from the News app.
Navigating in the News App
Navigation is easy: to scan the news sections, you simply scroll up and down using your mouse wheel, by swiping on a touch screen, or by using the arrow keys on a keyboard. Articles indicate their source and how long it has been since they were published. Select an article or a headline to read the full article.
The News app has a powerful search tool that is visible at the top of the any page you might be viewing. Start typing a search query, and you will see filtered results begin to appear. Select one to jump to a collection of news articles for that query.
When you are viewing an article, it is easy to jump to another section in the News app using the hamburger menu or other navigation buttons. Just use one of these methods:
• Select the hamburger menu as shown in Figure BC2.4, and select My News or one of the other areas of the News app.
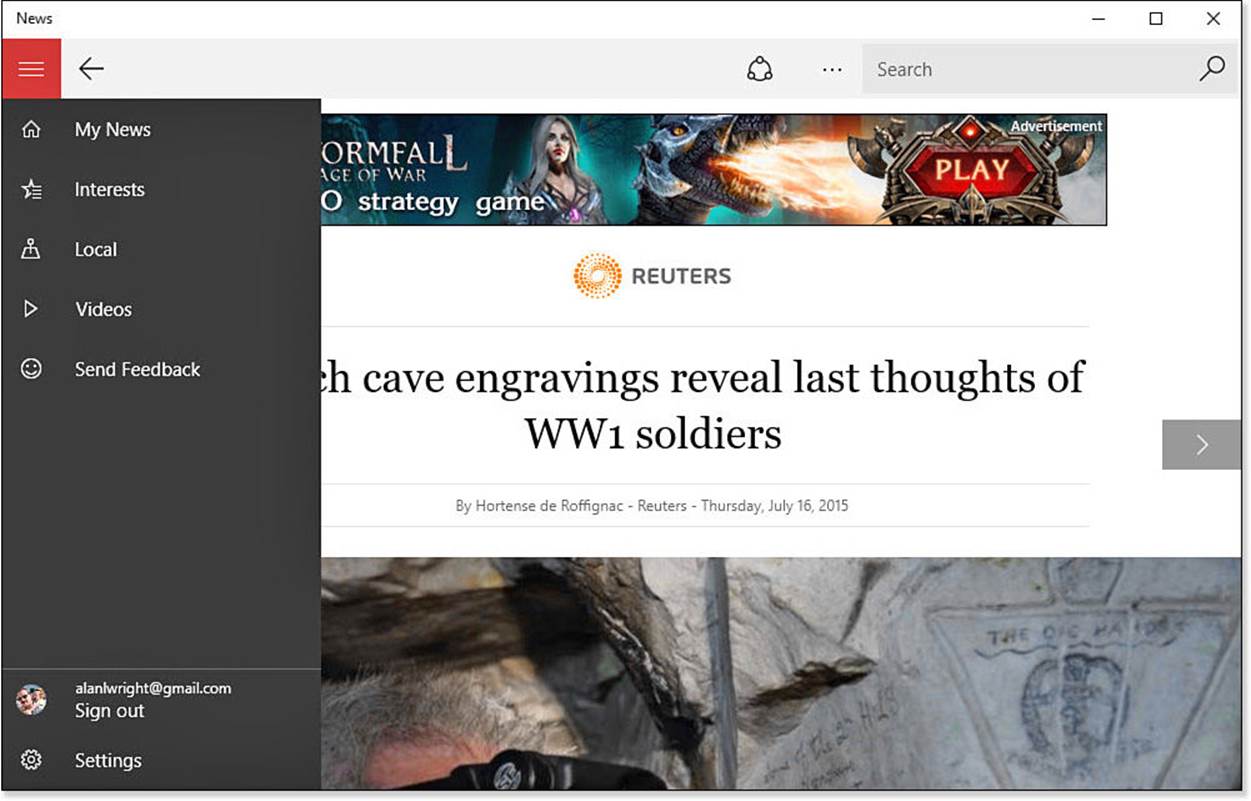
FIGURE BC2.4 From the hamburger menu of the News app, you can jump to other areas of the app or return home.
• Select the Back arrow to return to the previous page in the app. The back arrow appears at the top of the app in Desktop mode and next to the Start button when your device is in Tablet mode.
• Select the left or right arrows to jump to the previous or the next article in this category. These arrows appear halfway up the left and right sides of an article. With a touch device you can swipe left or right.
• Scroll to the bottom of the article to see links to other articles in the same category.
Customizing the News App
The News app allows you to sign in with a Microsoft account, which can be beneficial if you intend to customize the types of news that you will see in the app. There are some important ways that you can customize the News app. Selecting a preferred content and language combination will determine the news articles that are gathered by the News app. You can change this preference at any time by selecting Settings from the hamburger menu and then selecting from the dropdown menu under Choose Edition, as shown in Figure BC2.5.
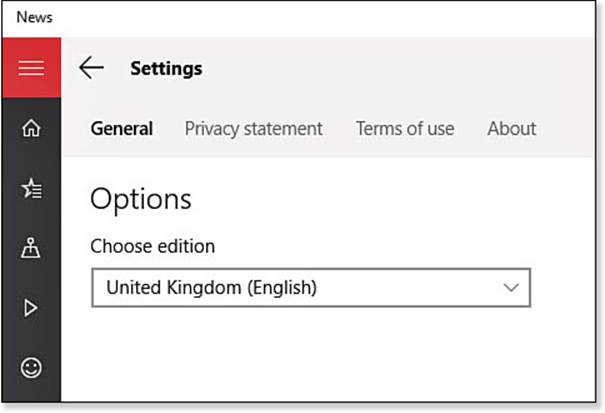
FIGURE BC2.5 Customize the News app by first selecting your language and content preference.
There are many ways to customize the contents of the News app using the Interests tool. To use this tool, follow these steps:
1. From the hamburger menu of the News app (refer to Figure BC2.4), select Interests. A list of high-level grouped interests is presented, such as Entertainment and Sports.
2. Select a group of interests to review the specific interests available, or select All Interests to check out everything. Select the + symbol to add an interest to the My Interests group, and select check-marked interests to deselect them, as shown in Figure BC2.6.

FIGURE BC2.6 Choose from common interests to customize the news articles that you will see in the home page of the News app.
3. Select the + symbol (Add an Interest) above the interests to create a unique news interest. Start typing in the text field to see possible interest categories, as shown in Figure BC2.7.
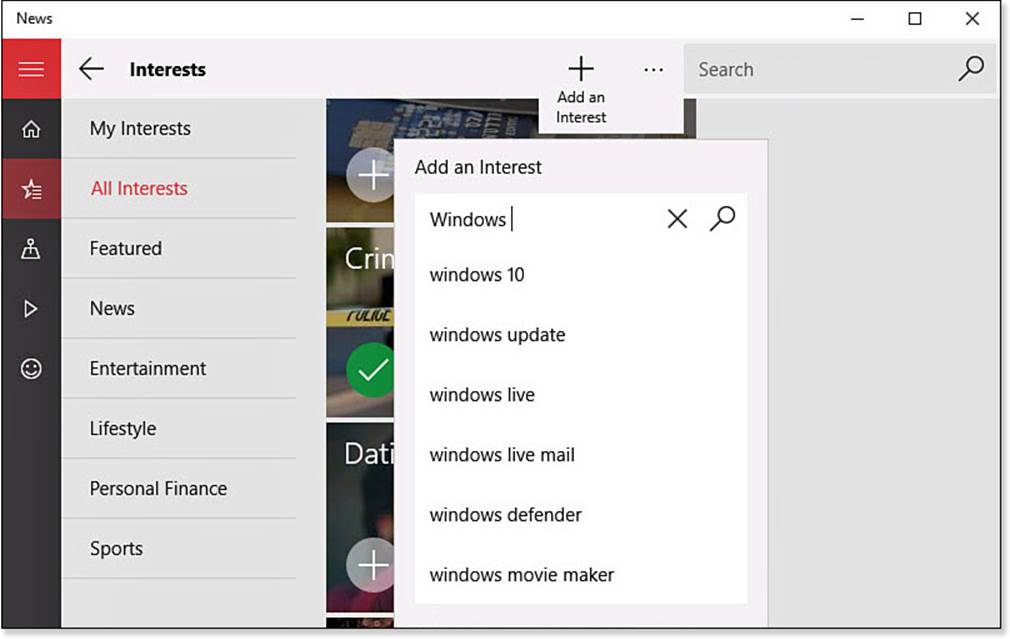
FIGURE BC2.7 Create your own news interests in the News app.
4. Return to the My News home page and scroll through the interest categories that are shown across the top. Your interests will now be shown.
The Money App
If you are even casually interested in setting up your portfolio or tracking market trends, this well-designed app will be a useful tool. Besides the expected news information and current action in the market, it has a deep set of tools you can use to monitor investments. Search for information by Symbol, Company, or Index. Use the hamburger menu to jump between the many sections to be found in this app (see Figure BC2.8).
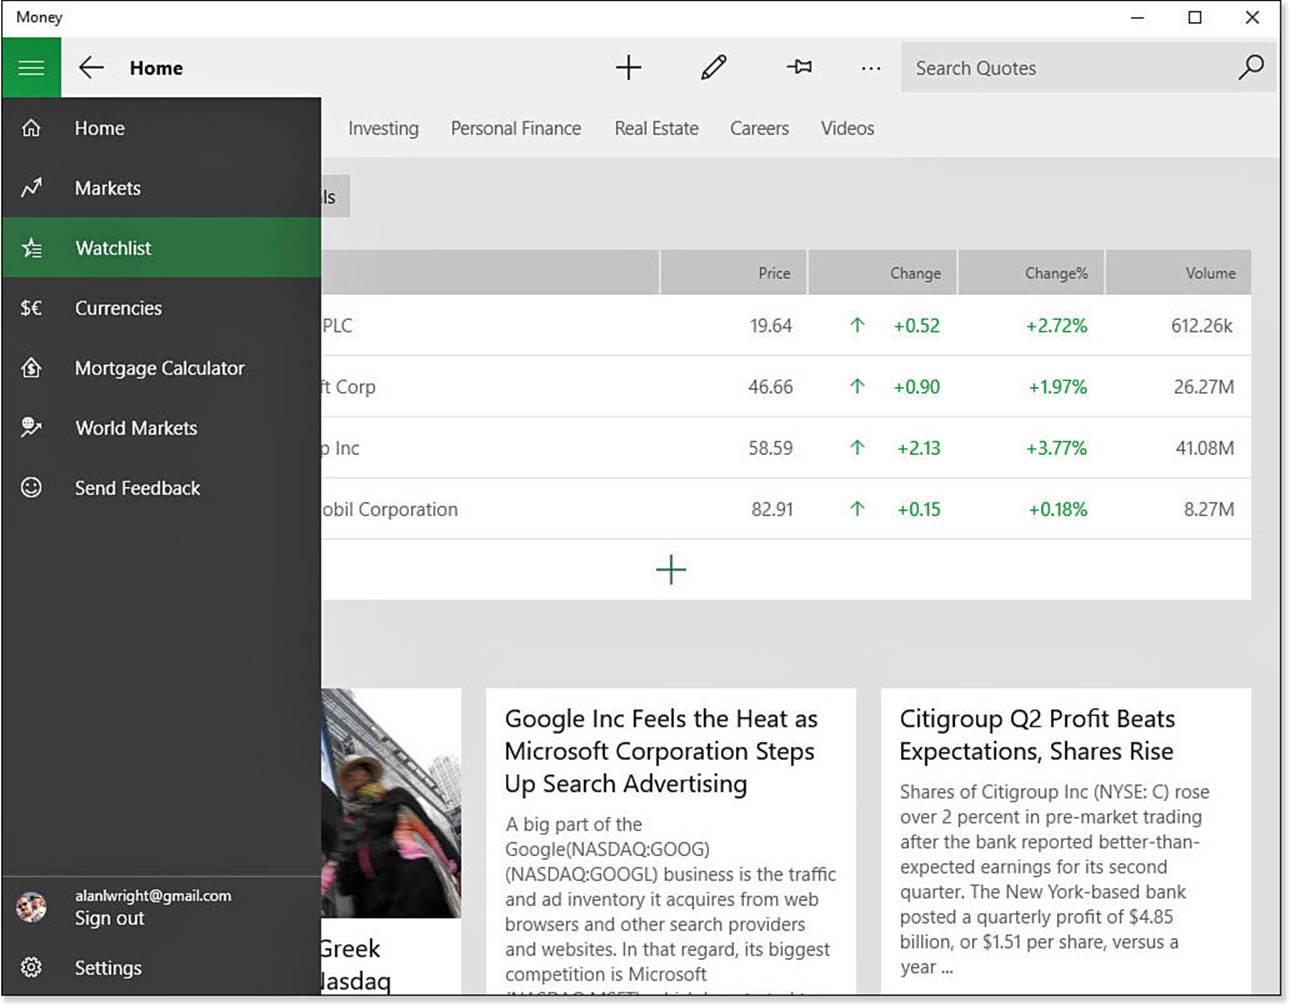
FIGURE BC2.8 With all the tools available in the Money app, you will need to rely on the hamburger menu to get around.
Here are some of the features you can use:
• News—From the Home page, read up on news stories from top financial news sources across various categories that are influencing the economy. Find tips and suggestions on practical issues that affect your money, such as education, budget, real estate, and retirement.
• Markets—See how world markets are doing and which stocks are moving. Keep tabs on movers, commodities, rates, and more.
• Watchlist—Add companies here to keep their movements in the market front and center. Select a company to view the company profile and check financials.
• Currencies—Use the Currency Converter or just check currency rates from around the globe.
• Mortgage Calculator—Use the built-in mortgage calculator to see the mortgage terms you enter presented in a chart or a schedule.
• World Markets—Jump to the different world markets to check rates and see who is currently open.
The Sports App
The MSN Sports app is designed to help you track your sports and teams, and it does this very well. Use this app for schedules, league standings, and tracking leading teams and players. Many sports are represented, and all have unique features that relate to the sport. The Sports app includes the following common features:
• News—Trending news topics affecting the world of sports.
• Scoreboard—Scores for a league or division are broken down with your favorite teams at the top.
• My Favorites—Dashboard view of teams you have tagged as favorites. Select a favorite team to check out news, schedules, and standings for your team, as shown in Figure BC2.9.
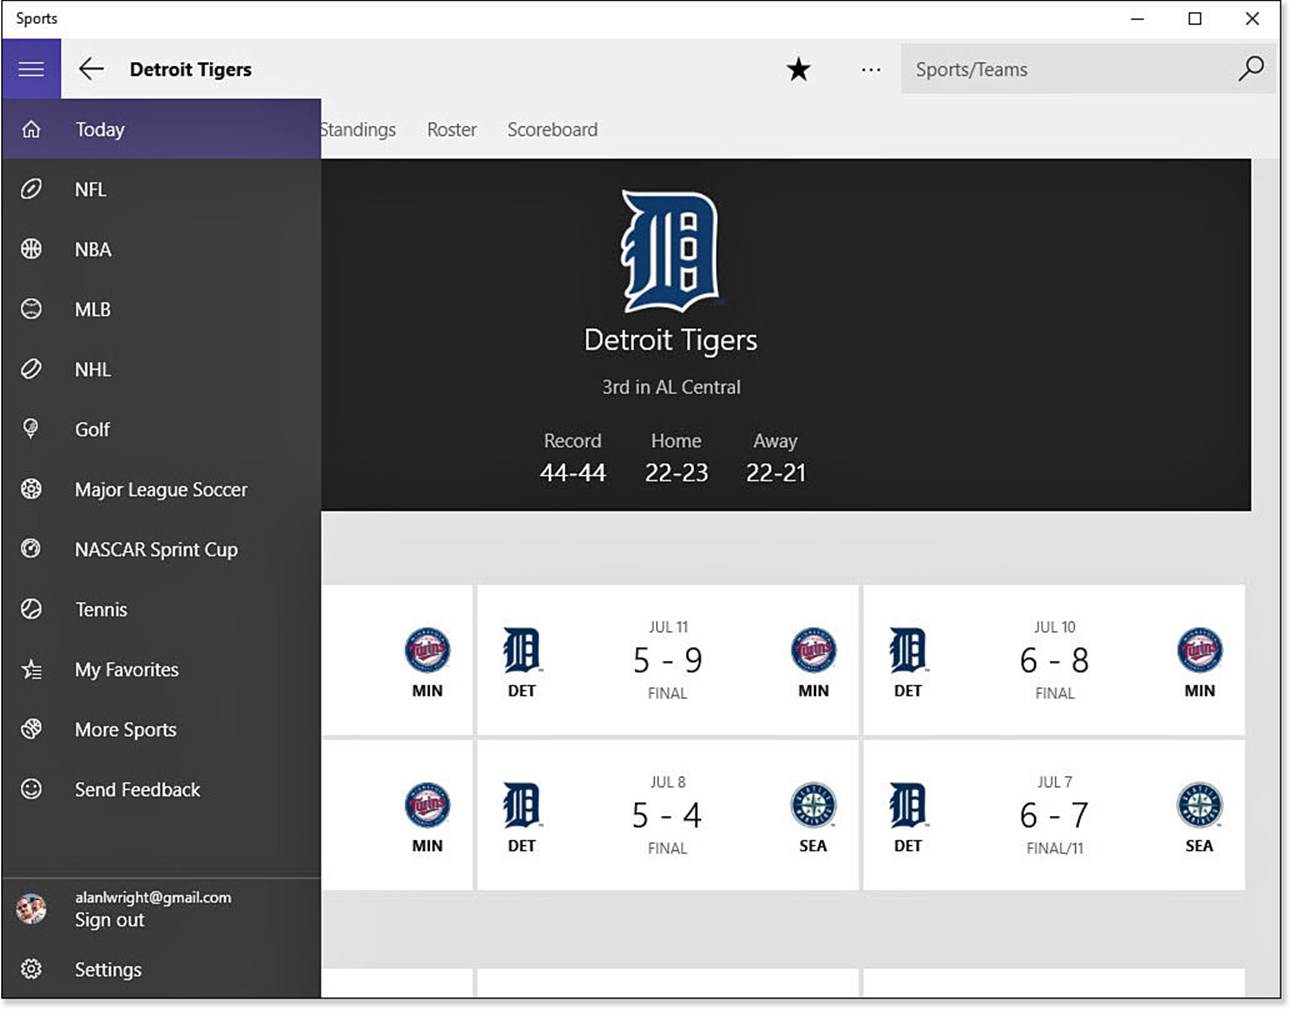
FIGURE BC2.9 Keep track of schedules and standing of your favorites teams.
• Slideshows—High-quality images compiled from various sport photographers and news sources.
The Weather App
You will find the Weather app to be a solid app delivering current weather as well as a 10-day forecast right on the title page, as shown in Figure BC2.10. Add additional favorite places, and designate your Home to make it easy to jump between locations using the App Commands menu.
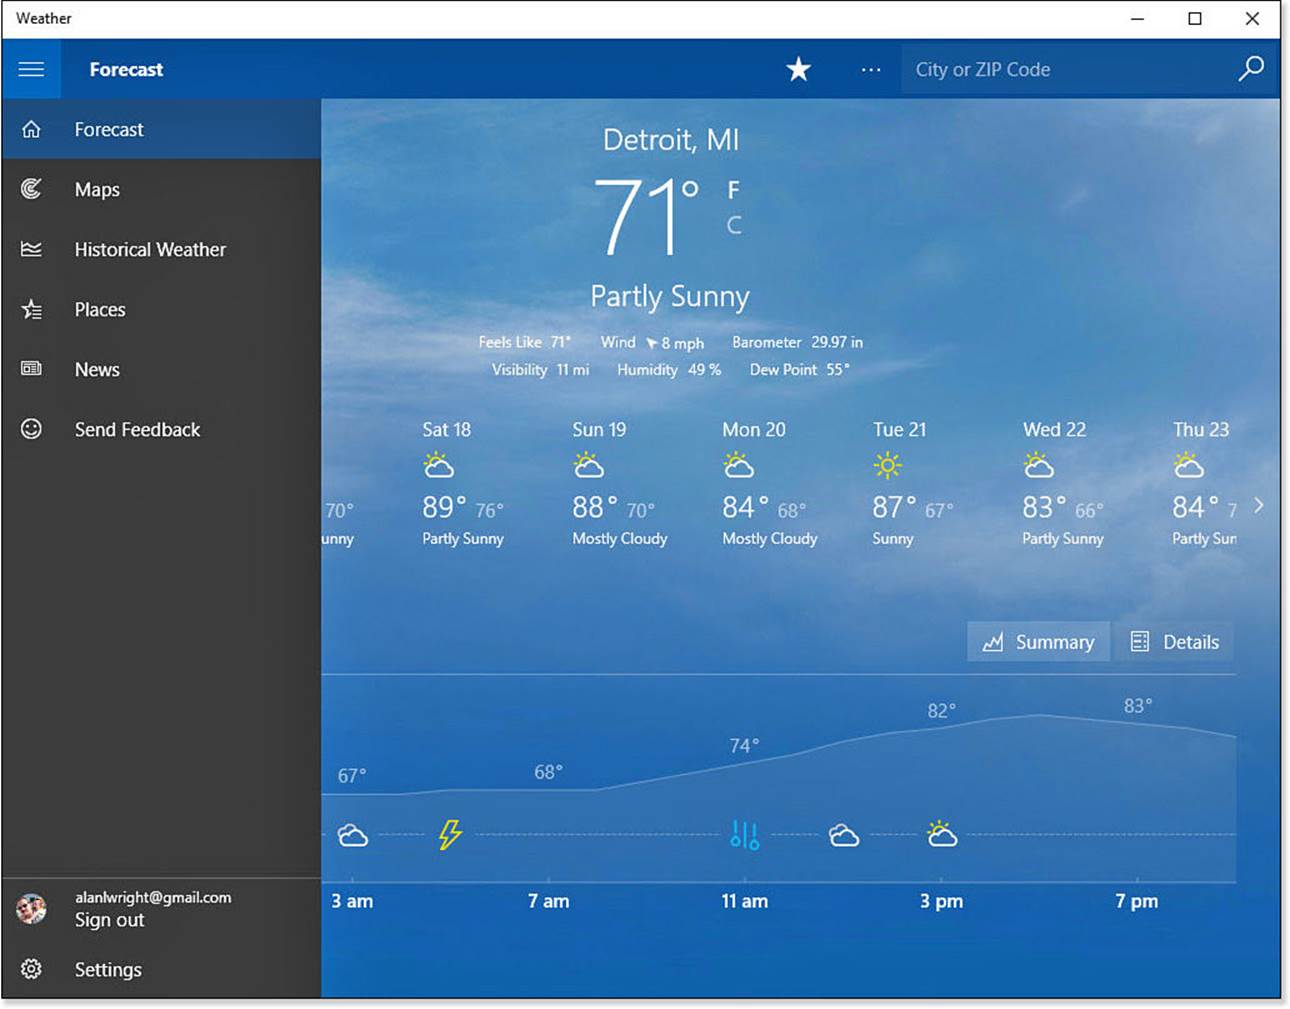
FIGURE BC2.10 Check weather locally or in other parts of the world with the Weather app.
Your Home weather will also appear on the live tile if you have pinned the app to your Start menu. For a given location, the app provides you with an hourly forecast, a variety of animated maps, a UV index, precipitation, humidity, and historical weather information. Select Maps from the hamburger menu to see animated weather maps for the location currently selected.
Using Other Windows 10 Core Apps
Besides the MSN apps included with Windows 10, you will find many practical utilities that have been designed to help you tackle common tasks. Some are very task specific, and you might not see a use for them in your daily routine. Not to worry, though; they will be there if needed.
Maps
The Maps app has been redesigned for Windows 10 and features a minimalistic, touch-friendly design that is capable of hiding a practical set of features that might be missed at first glance. Keeping the focus on the map, navigation is accomplished primarily through the use of a Search field, a vertical hamburger menu on the left, and six floating control buttons on the right.
The Maps app can be useful for getting directions and reviews or investigating nearby points of interest for search results, as shown in Figure BC2.11. Information can be shared or saved for future reference. Locations saved to your Favorites will be synced to your other Windows 10 devices when you are using a Microsoft account. Updateable maps can be downloaded for offline access.
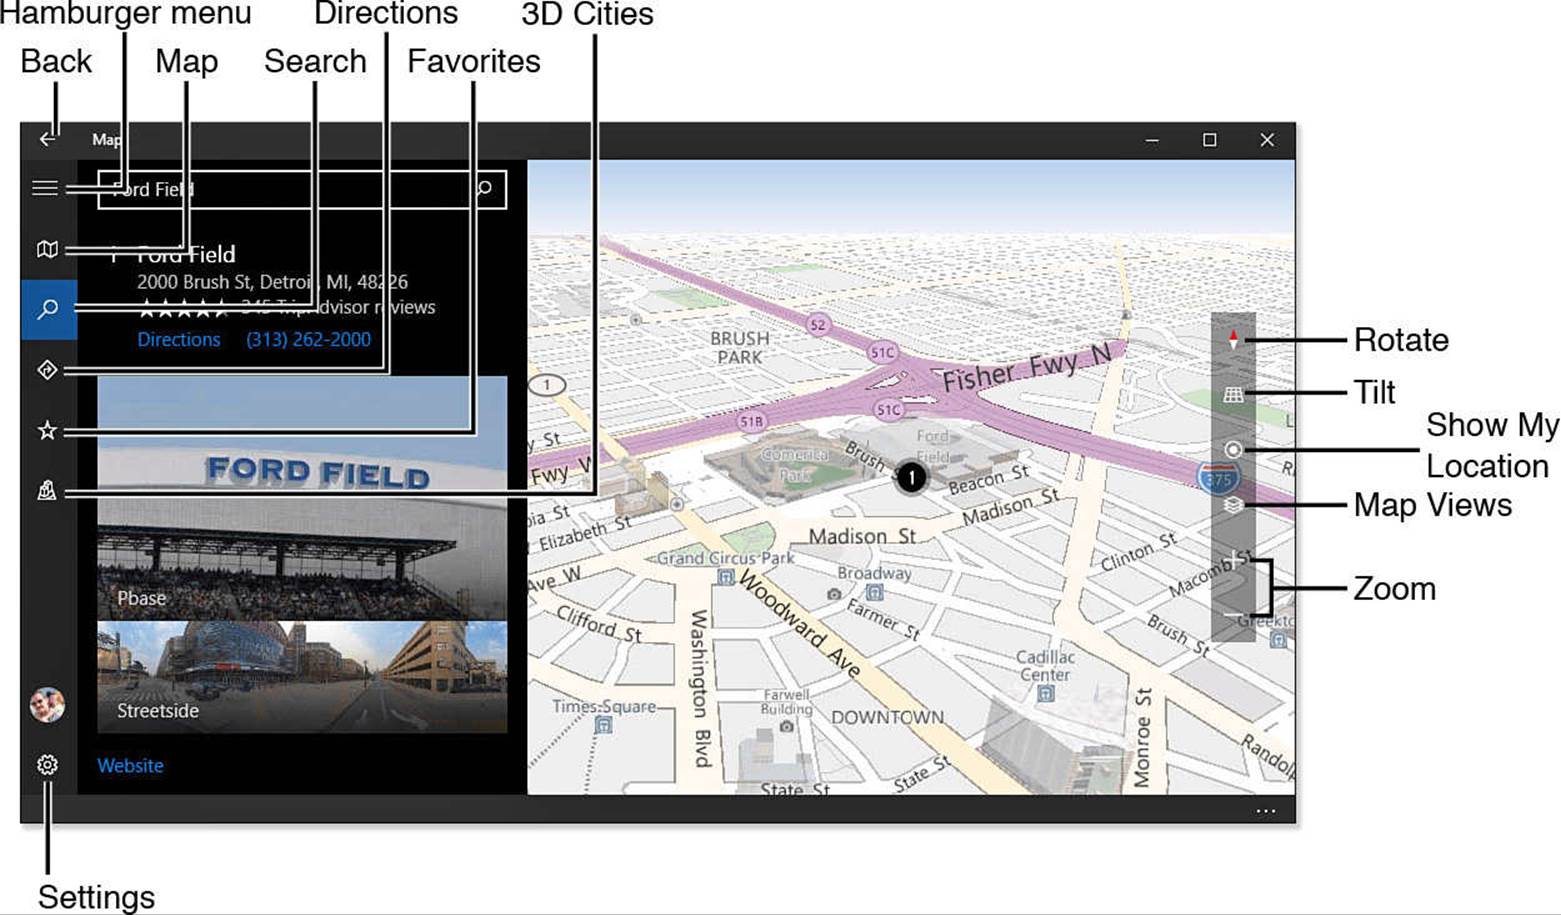
FIGURE BC2.11 Search for locations and points of interest in the Maps app.
Settings include the following:
• Rotate—Click the Rotate button on the right to change the orientation of the map or bring it to the default North Is Up with a click or tap.
• Tilt—Hover or tap and hold the Tilt button to reveal Tilt Up or Tilt Down. Select up or down to increase the degree of tilt with each click or tap. Click the center Tilt button to return to the default overhead view.
• Show My Location—Click the button on the right with the location dot to jump to your current geographical location.
• Map Views—Select Map Views and then enable Show Aerial View (photographic imagery) or Traffic on the current map. Select again to disable.
• Zoom—Using the two lower-right buttons in the map interface, you can zoom in and out. You can also control zoom using a scroll wheel on a mouse or pinch-to-zoom on a touch display.
• Search—Select the magnifying glass or the Search field to expand the Search pane from the vertical menu on the left. Your search history will also appear. Enter an address or a location, and select from possible search targets that appear as you enter characters in the search field. Select Back to minimize the Search pane. Search results can be added to favorites or shared. Additionally, you can click the Nearby icon to select from a list of common point of interest types.
• Directions—Indicate beginning and ending locations, and then refine the directions given by choosing driving, transit, or walking as your transportation method. Click Options from the top of the Directions pane to select between Fastest or Shortest routes and choose items to avoid, such as Traffic or Unpaved Roads. After your route has been calculated, you will see time and distance information with a list of turns, and the map will display the route. You can click icons to Print or Share the route information.
• Favorites—View any favorite locations that you have added to your profile.
• Settings—Select Settings to change units of measurement used in the Maps app. Choices include Metric, Imperial, and US units. Change your default travel method by selecting Preferred Directions and selecting Driving, Transit, or Walking. Toggle the setting under Search to remember search history or not. Turn-by-Turn Navigation allows you to specify a Day, Night, or Automatic map background. Under Privacy you can change whether the app has permission to use current location information.
Offline maps can be downloaded to your device, which is a nice feature if you do not want to rely on having an Internet connection just to find information in the Maps app. Maps can be large—from 100Mbs to 200Mbs—and they can quickly consume limited storage in smaller and more portable devices. To add or delete maps, follow these steps:
1. Select Settings from the Maps app.
2. Select Download or Update Maps from the General group of settings. The Settings app will open to Offline Maps.
3. To add a new offline map, select Download Maps and select continents and regions until you locate the map you want to download. The size of the map file will be indicated. Select the map to start the download.
4. To delete an offline map, select the map in the list of Offline Maps in the Settings app and click the Delete button. To remove all downloaded maps, you can click the Delete All Maps button located below the Offline Maps list.
 Tip
Tip
The Settings app includes a Metered Connection setting for Offline Maps. This allows you to indicate to Windows whether maps should be updated or downloaded when the Internet connection is tagged as a metered connection. Wi-Fi connections can be tagged as Metered connections under Network & Internet settings to indicate a connection that has a quota or data limit.
Phone Companion
The Phone Companion app is a completely new app designed for Windows 10. The app allows you to sync with your smartphone or tablet, regardless of whether you happen to own a Windows, Android, or Apple device. When you are using a Windows phone that has the same Microsoft account, it is just a matter of connecting the phone to your device, and everything about your device is shown, as you can see in Figure BC2.12. If you connect a non-Windows device, your device may ask you to trust the computer it is connected to before you will be able to sync content.
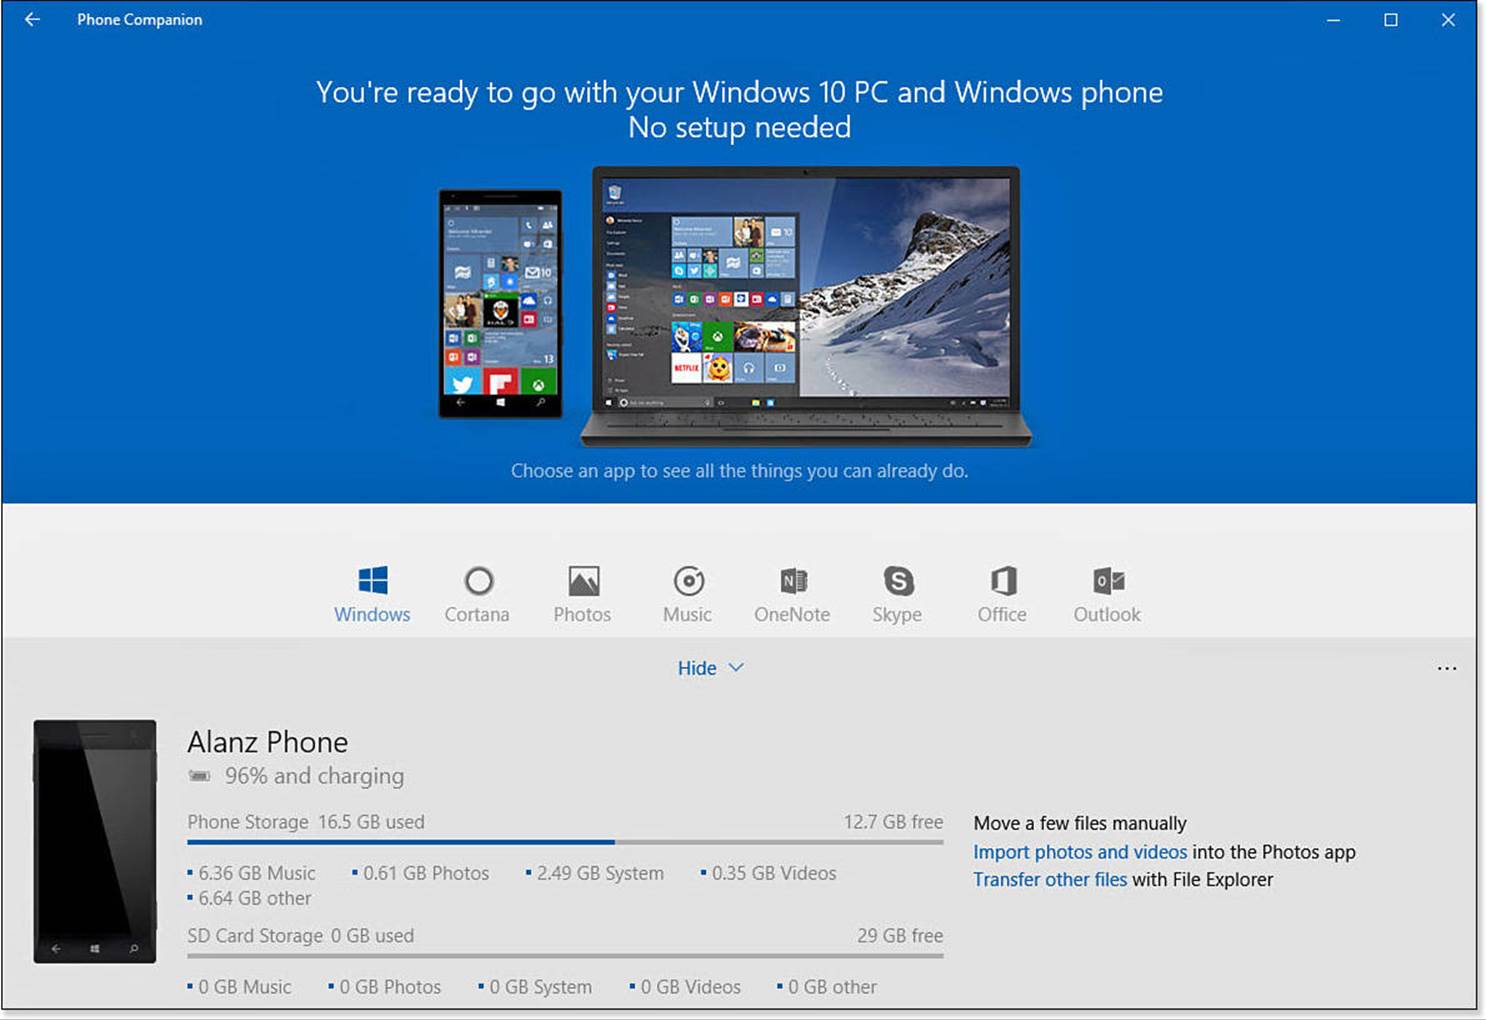
FIGURE BC2.12 Examine your device and transfer content using the Phone Companion app.
When a phone or tablet is connected to your Windows 10 device, the device is shown in the lower portion of the Phone Companion app. Two links appear off to the right that allow you to move files manually. To import photos to your Windows 10 device, you can select Import Photos and Videos. This will launch the Photos app, which will now feature an Import button in the upper toolbar. Selecting the Import button will launch a scan of the attached device for photos and video that can be imported as shown in Figure BC2.13. Select Import to save these to the indicated location.
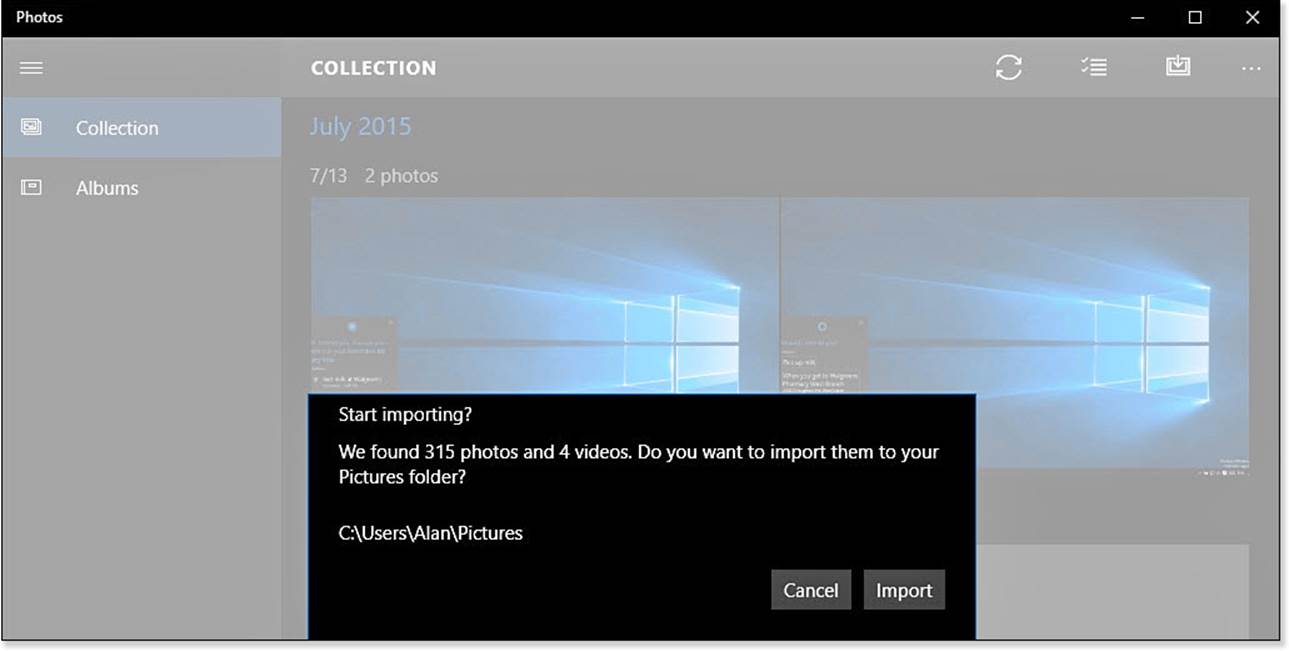
FIGURE BC2.13 The Phone Companion app hands off the task of importing photos and videos to the Photos app.
When you have connected a phone or tablet to your Windows 10 device, you can also manually transfer files by selecting Transfer Other Files. This will open File Explorer. For non-Windows devices, you may only see the directory that contains photos when examining the device’s storage. This allows you to import selected files or even manually export photos to the attached device. If you’re connecting to a Windows phone, you will have more options—the Documents, Downloads, Music, Pictures, Ringtones, and Videos folders all appear by default.
The Phone Companion app will also highlight apps that can be installed on connected non-Windows devices. Apps like OneDrive, Cortana, Word, Excel, and OneNote allow you to benefit from synchronized content and preferences, extending your Windows 10 experience to any device you use.
Reading List
The Reading List app has been designed to make it easy to take website information with you and to find it later for reading or rereading. Articles can be added to the Reading List app using the Share feature that is found everywhere in Windows 10. Simply select Share and then Reading List from the list of apps that work with Share. Items that have been shared can be saved into included categories, or you can create your own. Open the Reading List app to look at items that have been saved, as shown in Figure BC2.14. The origin of the entry is indicated; selecting the item will take you to a website that contains the information that was shared.
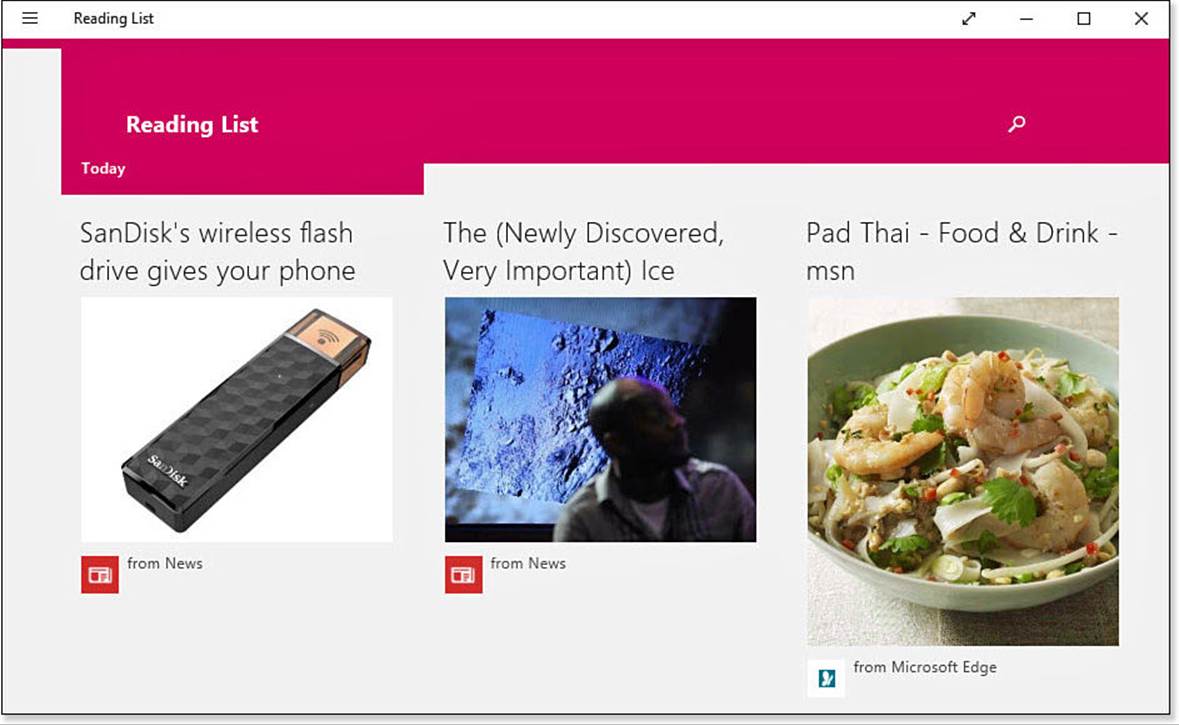
FIGURE BC2.14 The Reading List app helps you keep track of online content you want to look over later.
Reader
The Reader app was developed for viewing and working with PDF-, TIFF-, and XPS-formatted files. The PDF format is commonly used for electronic publications because it allows publishers to control the appearance of the published document. This format provides many other features to a publisher, such as security settings and the ability to create fillable forms—which has made this format widely accepted and used. XPS is similar in many ways to the PDF format, enabling searchable text to be locked into compositions with images. The TIFF format is basically an image that can show text, but it really is just part of the image and cannot be searched. Use the Reader app to read, view, search, and print PDF- and XPS-formatted files. TIFF files can be viewed and printed; however, copying and annotating are not supported for this format.
There are not too many settings here that require explanation. Open the App Commands bar to open new documents, search for words in the document, change how many pages are displayed at a time, rotate the page, print, and get information about the file. If you’re working with a PDF file, you can highlight, add notes, or copy by simply selecting a portion of the document and right-clicking (or select and hold if using a touch device), as shown in Figure BC2.15.
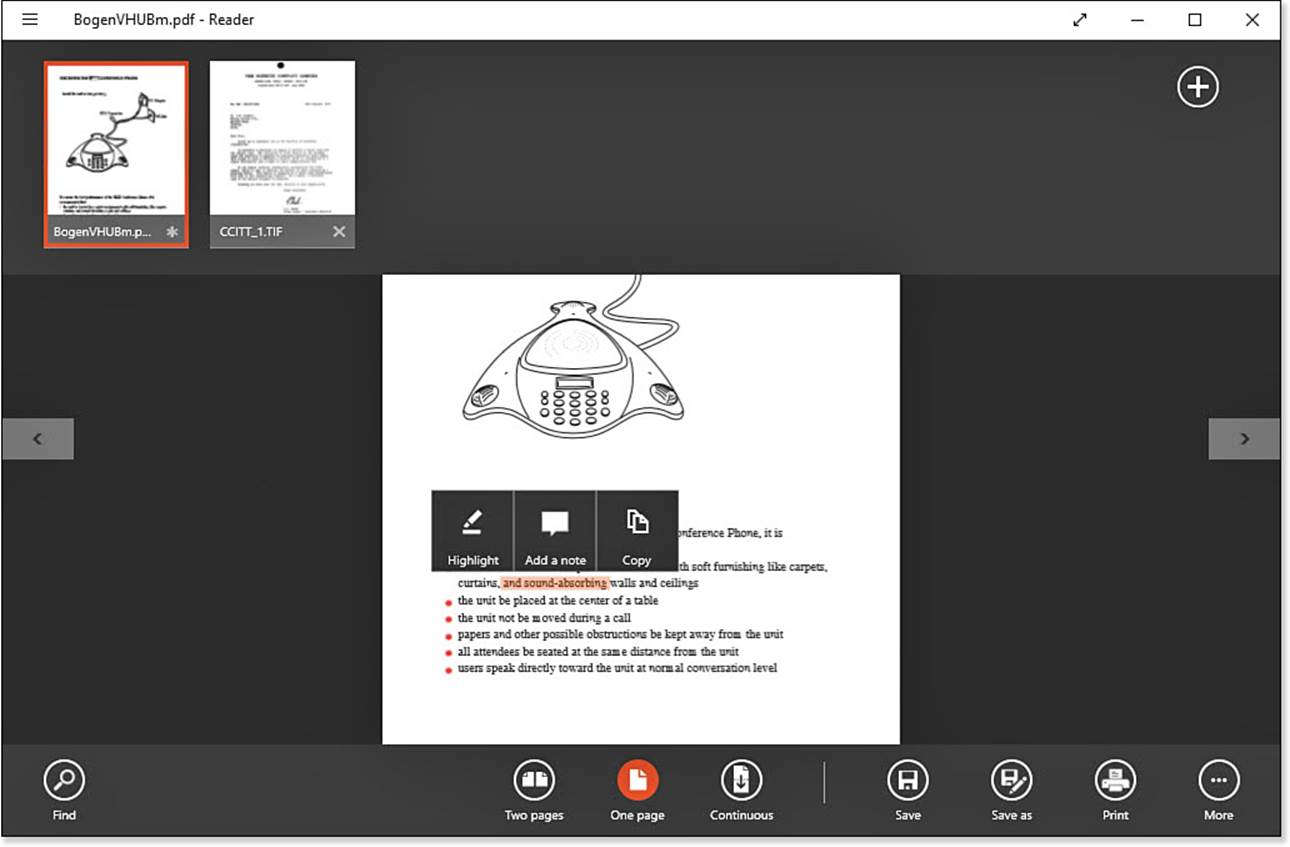
FIGURE BC2.15 The Reader app provides you with the ability to perform basic annotations when viewing a PDF-formatted file.
Calculator
Windows has long included a simple calculator application, and if that is all you were expecting to find here, you will be pleasantly surprised with the Calculator app. With large, touch-friendly number keys (see Figure BC2.16); a deep set of converters; and three calculator sets, it is hard to imagine a need to download a new app to handle this task. Use the hamburger menu to select between the Standard, Scientific, or Programmer calculator mode. You can also pick a converter from 12 different categories of converters, such as volume, length, and temperature.
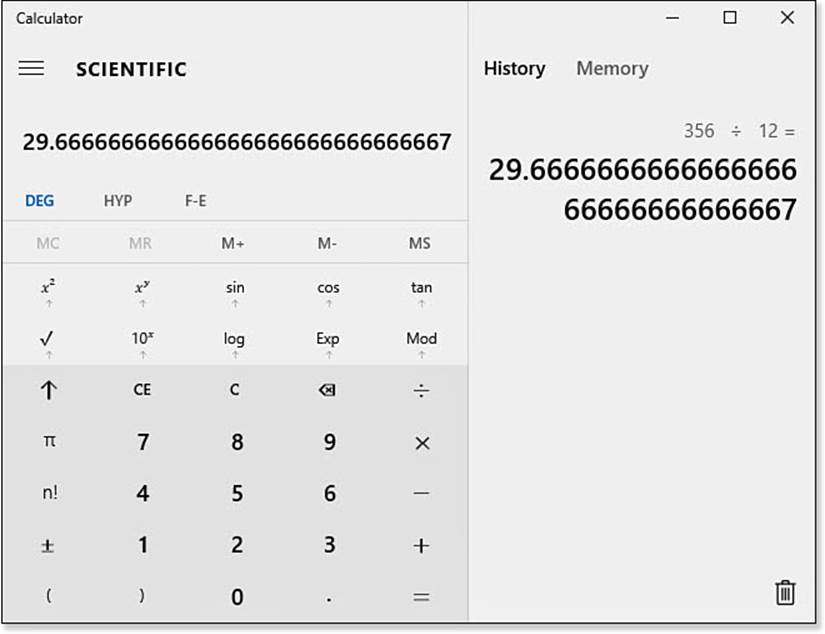
FIGURE BC2.16 The Calculator app is a pleasant surprise with a simple touch-friendly interface.
Tip
The Calculator app includes a History pane that is not shown by default. Make sure you expand the Calculator app width-wise to see the History pane.
Scan
Scan is a simple and effective interface for working with a connected scanner. Open the Scan app and select the output format into which you want to save your scanned document. Available choices include JPEG, PNG, TIFF, Bitmap, OpenXPS, XPS, and PDF. You can also select settings for Color and Resolution (DPI) and indicate your preferred save location. Documents can be previewed to ensure that the settings look good and to change the target of the scan from the entire area to a cropped area. After scanning, you can view or close the saved file.
One task that can be easily accomplished directly from the Scan app is to share a scanned document using your chosen format options and select Share from the Commands menu on the title bar of the app. You cannot currently scan multiple pages, nor can you directly scan to a printer from the Scan app.
Paint
The Paint application covers you for basic image editing and supports Bitmap, PNG, JPEG, TIFF, and GIF formats. You can work with basic tools that enable you to create shapes from a shape library, draw with a pencil or various brushes, and add text. This application cannot compare to the features available in a $600 photo editing application, but it is very capable of handling basic editing tasks. You can work with images that are already saved to your computer or choose to scan images directly into Paint.
Note
The Paint application is a Desktop application and not a modern Windows app. It is located within the Windows Accessories folder under All Apps. You can quickly find it by simply searching for paint.
Wordpad
I think Wordpad is one of the more often overlooked applications that are included with Windows. It provides you with plenty of basic word processing power to create letters and text documents. As you can see in Figure BC2.17, the Home tab includes tools for fonts, text formatting, paragraph tools, and inserting images and other objects. There is no need to run out and buy an expensive document suite when you just need to work with the occasional text document.
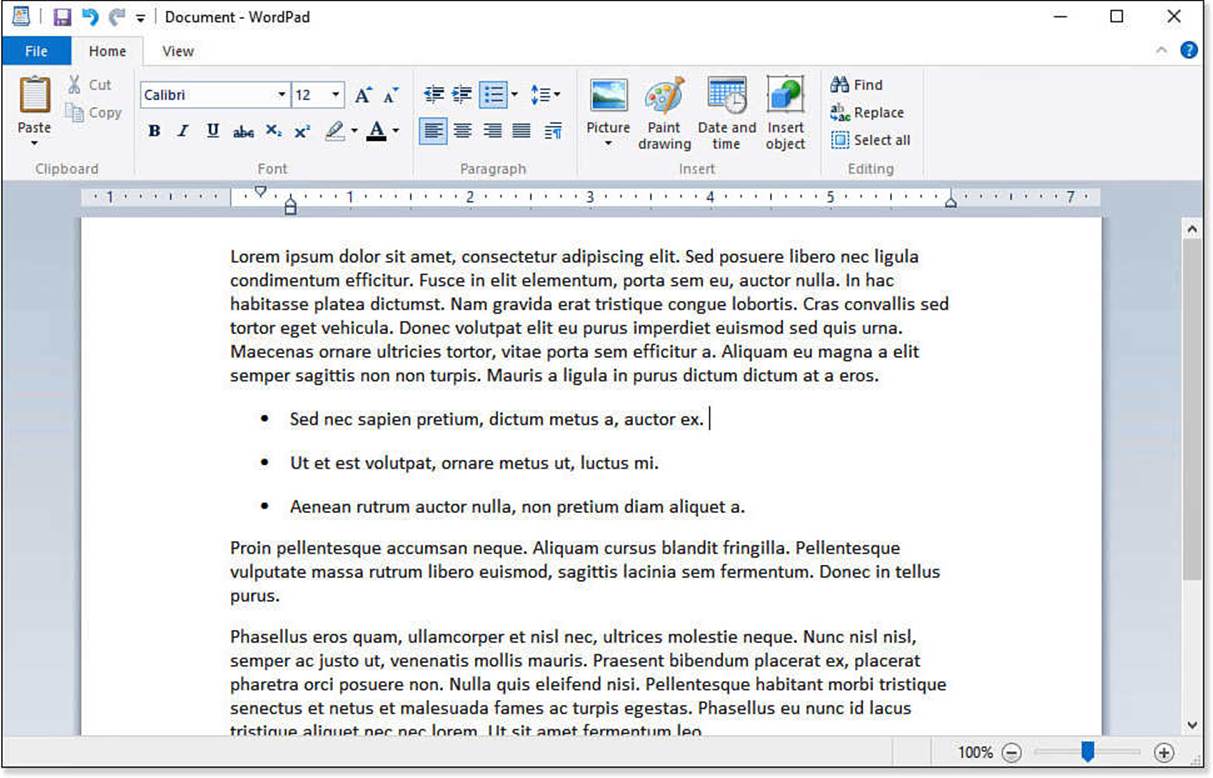
FIGURE BC2.17 Wordpad provides you with a tool for creating basic text documents.
Note
The Wordpad application is a Desktop application and not a modern Windows app. It is located within the Windows Accessories folder under All Apps. You can quickly find it by simply searching for wordpad.
Snipping Tool
If you have ever wished that you could get a picture of something that you can see on your computer screen to show someone else, then this tool is what you needed. Windows has long included the ability to save the entire desktop as an image in the Clipboard that can then be pasted into another application. However, with the Snipping Tool app, you can do much more. By default, the Snipping Tool lets you grab a portion of the screen to select a point and drag to establish an area of selection called a snip. Recently a Delay feature was added that allows you to select a delay from 0 to 5, which will give you time to select New and then move or otherwise prepare the subject of your snip.
The snip, or image, appears in the Snipping Tool app, as shown in Figure BC2.18. You can annotate using a colored pen or highlight portions of the snip. When finished, you can send the snip in an email; copy it to your Clipboard; or save your snip as an HTML-, PNG-, GIF-, or JPEG-formatted file.
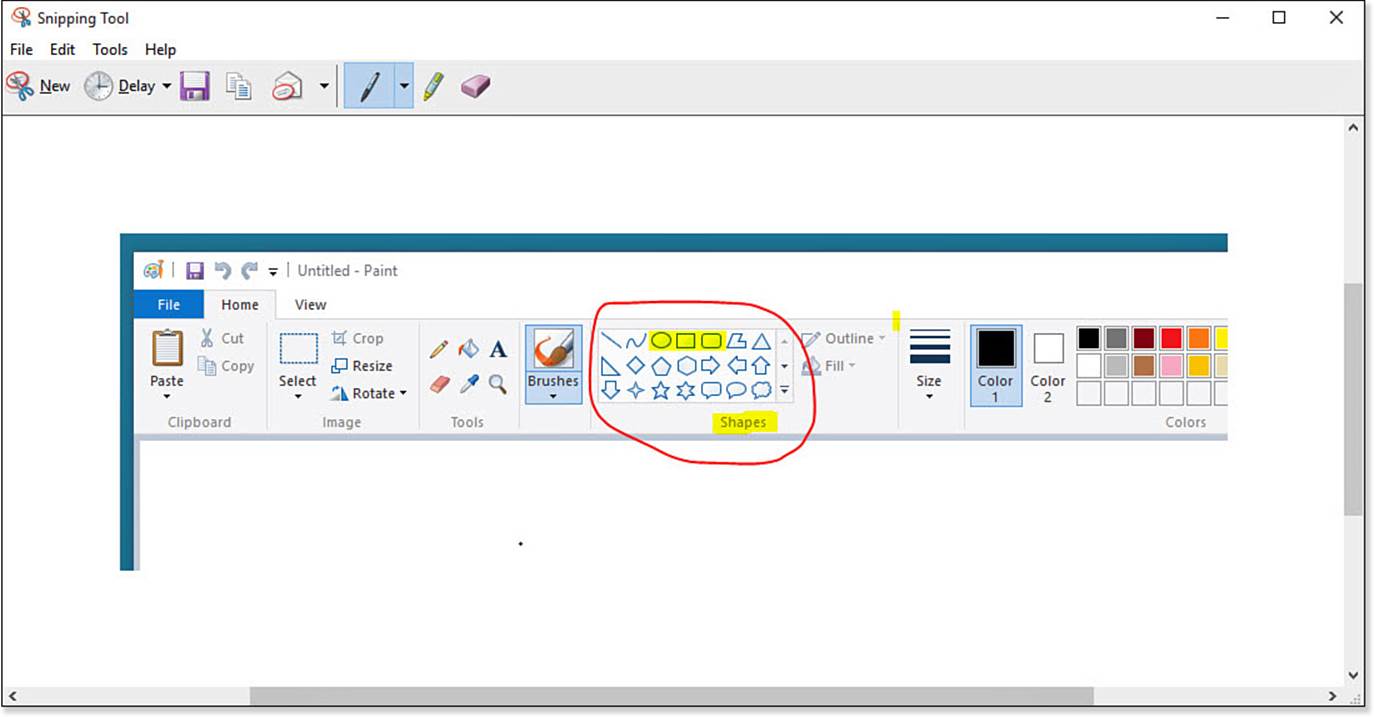
FIGURE BC2.18 Use the Snipping Tool app to grab a quick screen capture and even annotate it.
Alarms
The Alarms app provides you with a simple interface that has a few basic tools for managing your time organized into four tabbed panes:
• Alarm—The Alarm pane provides you with a way to set up alarms that can either be recurring or set for a single use. Alarms can be toggled On or Off in the Alarm pane. Use the App Commands bar to create new alarms, delete alarms, or edit current ones.
• World Clock—The World Clock pane features a day and night world map to which you can add or remove key cities. There is also a tool to calculate time in different places on a specific date and time in the past or the future.
• Timer—The Timer pane enables you to create countdown timers and even pin these individually to your Start menu.
• Stopwatch—The Stopwatch pane features a fully functioning stopwatch that includes readouts for Lap and Split. The results can be shared, and the Stopwatch can be pinned directly to the Start menu.
Voice Recorder
The Voice Recorder app has some nice features for recording through the microphone your computer or tablet uses. Simply click the Record button that has a microphone icon. During the recording, you can flag specific moments in the recording and jump to these during playback. The finished recording can be trimmed, named, and shared to other apps such as the Mail app. Recordings are saved by default in the M4A format to the Sound Recordings folder located in your Documents folder.
The Absolute Minimum
• Get to know the core apps. Many of these apps can appear simple at first glance, but you will find that they often have features that make them very powerful and effective for the task they were designed for.
• Spend some time configuring the News app to get the most from its features. Try using Share and saving an article or two to the Reading List app.
• The Money app can be useful for everyone, even if you don’t feel you have a lot of it. Information and tips are provided for saving and budgeting.
• You will not regret discovering the Phone Companion app. Use the import tool to bring your photos and videos into the Photos app.
• Pin core apps to the Start menu to keep them handy for tasks you regularly need.
All materials on the site are licensed Creative Commons Attribution-Sharealike 3.0 Unported CC BY-SA 3.0 & GNU Free Documentation License (GFDL)
If you are the copyright holder of any material contained on our site and intend to remove it, please contact our site administrator for approval.
© 2016-2026 All site design rights belong to S.Y.A.