Windows 10. Absolute Beginner’s Guide (2016)
Part I: Getting Started
3. Optimizing the Start Menu
In This Chapter
• Working with Tiles
• Resizing Tiles
• Using Groups in the Start Menu
• Customizing the Navigation Menu
Because the Start menu serves as your dashboard to access the many features and applications contained within Windows 10, you should spend some time organizing and customizing how it looks. There are endless possibilities of tile arrangements using different tile sizes. You can also name organized groups of tiles, or applications, using logical labels.
Organizing All Those Tiles
In Chapter 1, “Meet Windows 10,” you had a quick introduction to the Start menu and became familiar with some basic features. By now you have no doubt begun to pin applications to your Start menu, and you might notice that it can become a free-for-all very quickly, as shown in Figure 3.1.
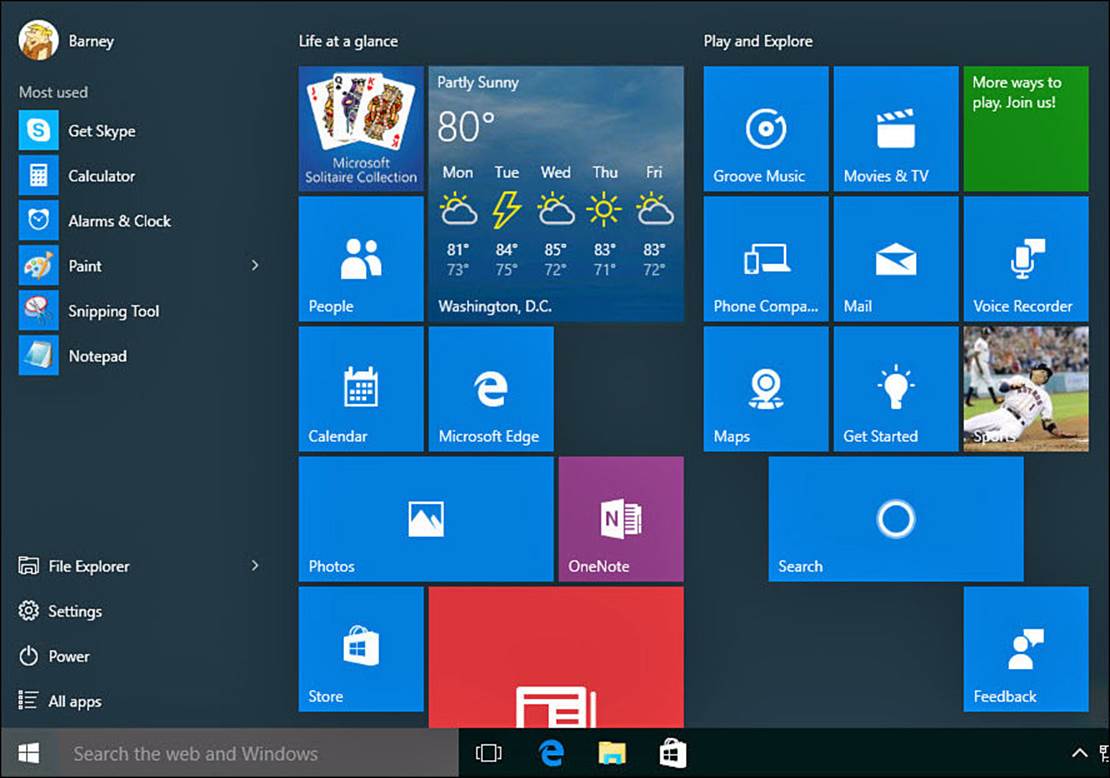
FIGURE 3.1 The Start menu can begin to look like a random mess.
In this section you will find out how to change the look and feel of the Start menu while maintaining some order. The key to the Start menu is to make things easy to find without pinning so many applications that you are frustrated when hunting for an application.
 Note
Note
Refer to Chapter 1 for steps on how to pin applications to the Start menu.
Accessing the Context Menu of a Tile
Before you change any tile’s appearance or function, you need to open the context menu for that tile. This is different from selecting the tile and opening the application.
The context menu will vary a bit between Desktop applications and Windows apps such as the one shown in Figure 3.2. To open the context menu, do one of the following based on the device you use:
![]() Touch and hold a tile for a second or two until an ellipsis appears in the lower-right corner of the tile. Select the ellipsis to reveal the touch-friendly context menu.
Touch and hold a tile for a second or two until an ellipsis appears in the lower-right corner of the tile. Select the ellipsis to reveal the touch-friendly context menu.
![]() Use your left- and right- or up- and down-arrow keys to move across the Start menu. As you do so, a checkered border appears around tiles as you pass over them. Press the menu key when you have moved to the tile you want to select.
Use your left- and right- or up- and down-arrow keys to move across the Start menu. As you do so, a checkered border appears around tiles as you pass over them. Press the menu key when you have moved to the tile you want to select.
![]() Right-click the tile.
Right-click the tile.
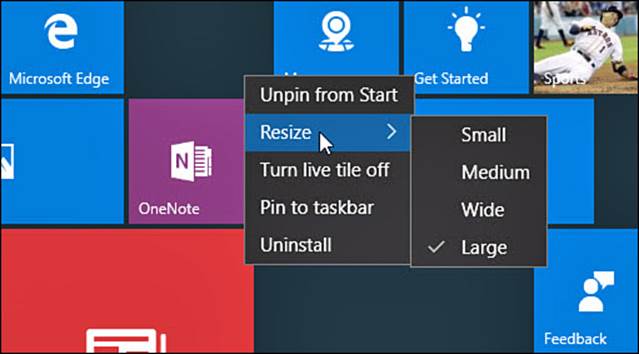
FIGURE 3.2 The context menu provides a few tools for organizing your tiles.
Making a Tile Bigger or Smaller
With the context menu you can select the size for any tile. There are four sizes for Windows apps: large, wide, medium, and small (refer to Figure 3.2). Desktop applications that are pinned to the Start menu will offer only two size choices: small and medium. You might prefer smaller tiles to fit more tiles on the screen. Other tiles that have live tile capabilities will work better when a larger size is used. You also can use size to indicate priority or importance to your routine. For example, apps you use often, such as Calendar and Mail, might be represented by large tiles, and apps you use to pass the time, such as a social media app, could be represented with small tiles. The size of the tiles can be changed to suit your individual preference—there is no right or wrong tile size.
To change a tile’s size, follow these steps:
1. Open the context menu for the tile using the methods outlined in the previous section.
2. Select Resize. Choose from the size options indicated.
3. As you make changes to tile sizes, the surrounding tiles will move to accommodate the new size. Figure 3.3 shows a mosaic composed of four different sizes.
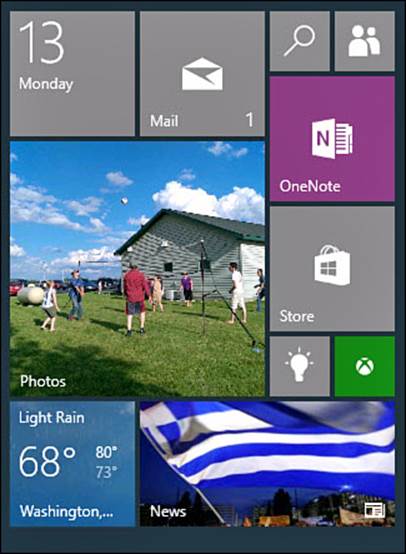
FIGURE 3.3 Use different tile sizes to make certain tiles more prominent.
Controlling Live Tiles
Many Windows apps are designed to provide updates, images, and information through the use of Live tiles. This can be distracting in some cases, and you can even feel that your Start menu has become too busy with so many tiles morphing and changing constantly.
Live tiles can be disabled very easily by following these steps:
1. Open the context menu for the tile using the methods outlined earlier in this chapter.
2. Select Turn Live Tile Off (refer to Figure 3.2).
Live tiles are generally designed to display more content with larger sizes and usually will not function when set to the smallest size. Some Windows apps also include Live tile options within the app that can provide settings for transparency, images, or which information from the app will appear in the Live tile.
Moving a Tile
You can reorganize the tiles on the Start menu as you like. No rules dictate where certain tiles should appear, so you can move a tile to whatever position you like.
To move a tile, do one of the following based on the device you use:
![]() Touch and hold on the tile to be moved, and immediately drag it to its new location.
Touch and hold on the tile to be moved, and immediately drag it to its new location.
![]() Click and drag the tile to its new location. Notice when you click and hold the tile that the other tiles dim and shrink slightly. Also notice how the other tiles on the Start menu seem to move out of the way and open an empty spot as you drag a tile across the screen (see Figure 3.4).
Click and drag the tile to its new location. Notice when you click and hold the tile that the other tiles dim and shrink slightly. Also notice how the other tiles on the Start menu seem to move out of the way and open an empty spot as you drag a tile across the screen (see Figure 3.4).
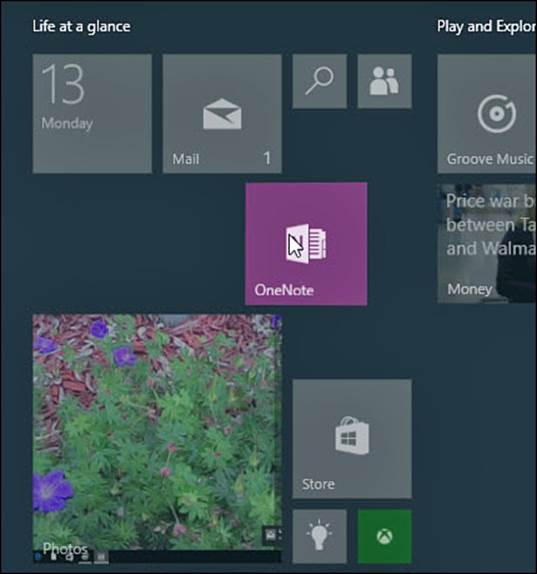
FIGURE 3.4 Moving a tile.
Show More Tiles
One result of pinning more tiles to your Start menu is that your screen can only display so many tiles at a time before you need to scroll down to see additional tiles you have pinned. This is especially noticeable on devices with smaller screens. For this reason, devices like tablets running in Tablet mode will display the Start menu full screen, and the navigation menu will be reduced to a hamburger menu icon.
Having larger screens, desktop and laptop computers will run in Desktop mode by default with a Start menu that takes up just a portion of the screen and an expanded navigation menu. You actually can manually change the size of the Start menu or make it full screen.
To show more tiles, follow these steps:
1. From the Start menu, hover your mouse cursor over one of the two edges of the Start menu. The cursor will turn into a two-sided adjustment arrow. Select the edge and drag it to reposition the size of the Start menu. The horizontal adjustment will depend on your screen resolution. Release the edge when it is in the correct position.
2. From the Start menu, select Settings to open the Settings app.
3. Select Personalization and then Start from the navigation pane.
4. Under Start, slide the switch to On for Use Start Full Screen, as shown in Figure 3.5. The Start menu will now be full screen with a condensed navigation menu similar to Tablet mode.
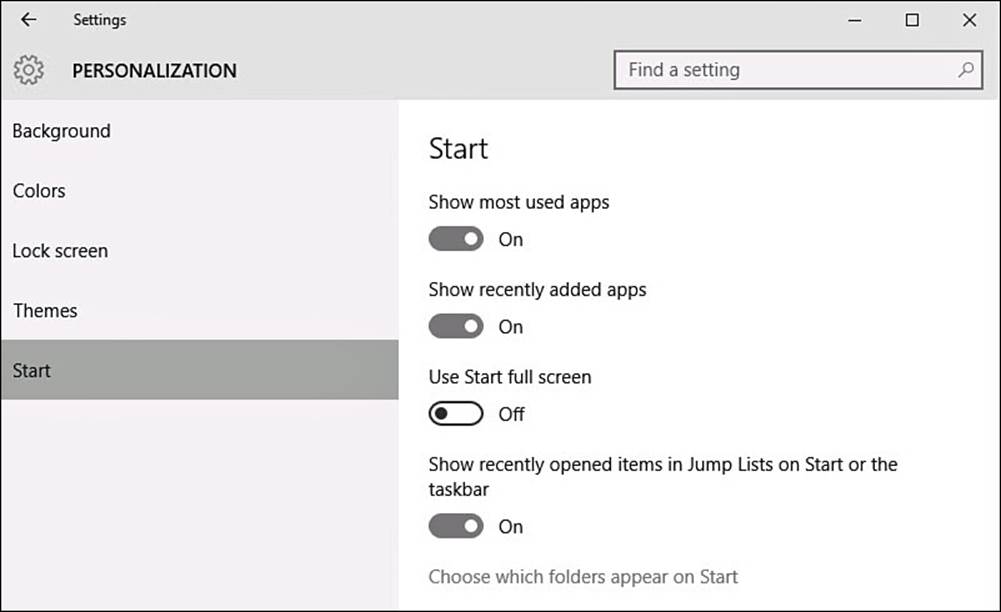
FIGURE 3.5 You can use a full-screen Start menu while in Desktop mode if that is what you want.
Personalizing Tile Groups
Your collection of tiles is bound to grow as you install new programs and apps. You also can pin documents and web pages to the Start menu, so it’s likely you will add many, many tiles to the Start menu in a short period of time. To help keep track of tiles and easily locate them, you can organize tiles into groups of your own design.
For example, you might create a group of tiles of all your photo-related applications. The groups are organized into columns on the Start menu. A wider margin separates one group from another. You can move your tile groups when you like, and you can place a name above each group. An example of a number of tile groups appears in Figure 3.6.

FIGURE 3.6 You can organize the tiles on the Start menu into groups.
Creating a Tile Group
Tile groups, as the name implies, are tiles grouped into a collection where there isn’t any separation by margins or blank space. Within these groups you can adjust tile size and where they appear within the group. Sometimes it is easier to break out particular tiles into a separate group so they are easier to find or to where they make more sense from an organizational standpoint. Windows puts its default tiles into somewhat logical groups, but they might not appeal to you.
To create a tile group, follow these steps:
1. From the Start menu, select a tile and drag it to an area below a group or between two groups. Tiles will move and shift to allow you to add the tile to an existing group; however, you will drop it into a new group when you see a horizontal title bar appear for the new group name, as shown in Figure 3.7. Release the tile to create the group.
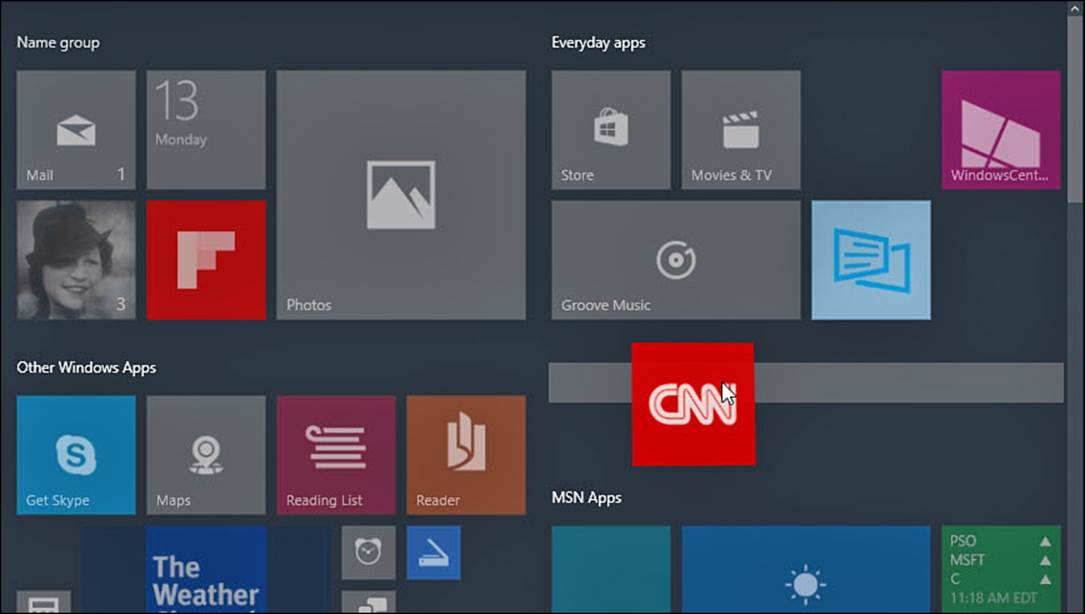
FIGURE 3.7 Dragging a tile to create a new group.
2. Drag additional tiles to the group.
Figure 3.8 shows that you have created a new group with several tiles separated by margins on either side.
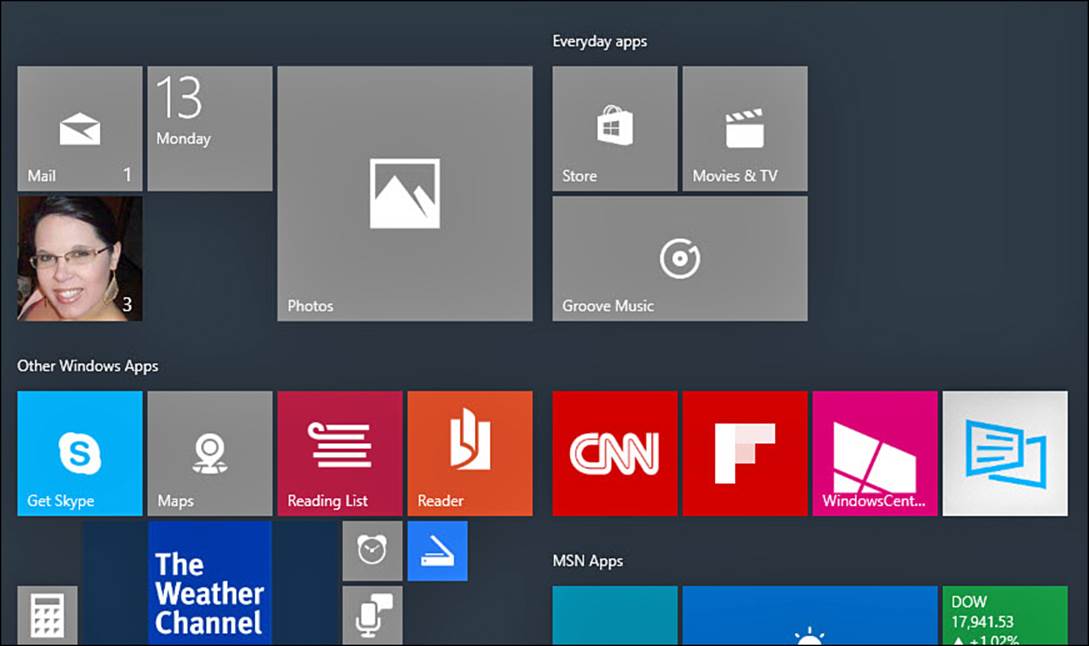
FIGURE 3.8 A newly created group.
Moving Tile Groups
You might want to change the order of your groups so that frequently accessed tiles require less scrolling or if you have changed your organizational structure.
To move a tile group, follow these steps:
1. From the Start menu, locate a tile group you would like to move.
2. Select the title bar, which currently might be an empty space above the group, and drag it to a new location in the Start menu. The group will condense to just the title bar for the group.
3. As shown in Figure 3.9, groups will shift to make space for the group and a space holder will appear to indicate possible locations for the group. Release the group when you are satisfied.
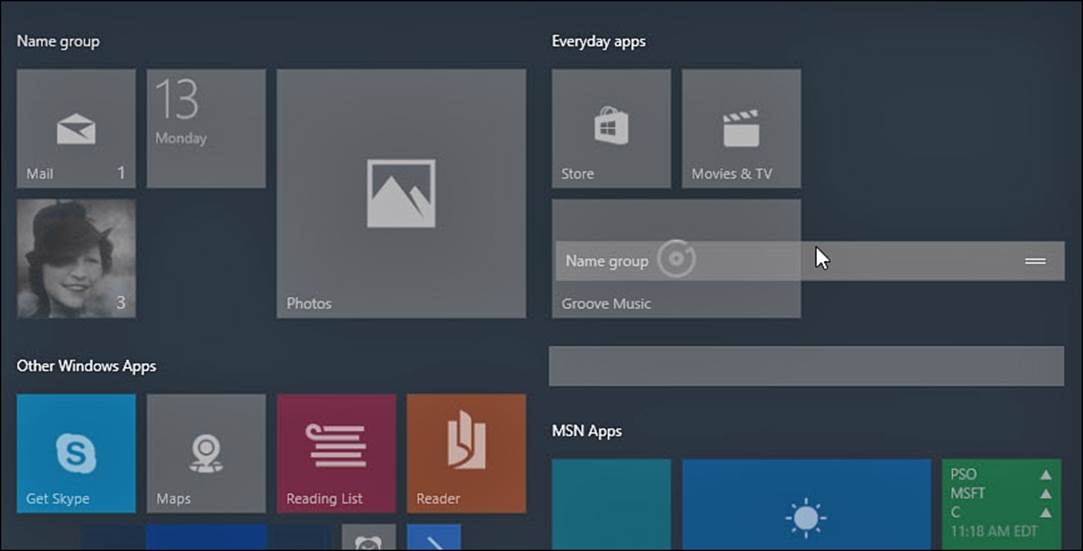
FIGURE 3.9 By dragging the title bar of a group, you can easily rearrange tile groups.
Naming a Tile Group
It might make sense for you to name your groups so you can easily locate your tiles, rather than trying to remember into which group you put a tile.
To label a tile group, follow these directions based on the device you use:
![]() Select the title bar for a group you want to name. Your cursor will appear in a text field with the current name. If no name has yet been provided, it will simply say Name Group. Type the name of the group in the box that appears, as shown in Figure 3.10.
Select the title bar for a group you want to name. Your cursor will appear in a text field with the current name. If no name has yet been provided, it will simply say Name Group. Type the name of the group in the box that appears, as shown in Figure 3.10.
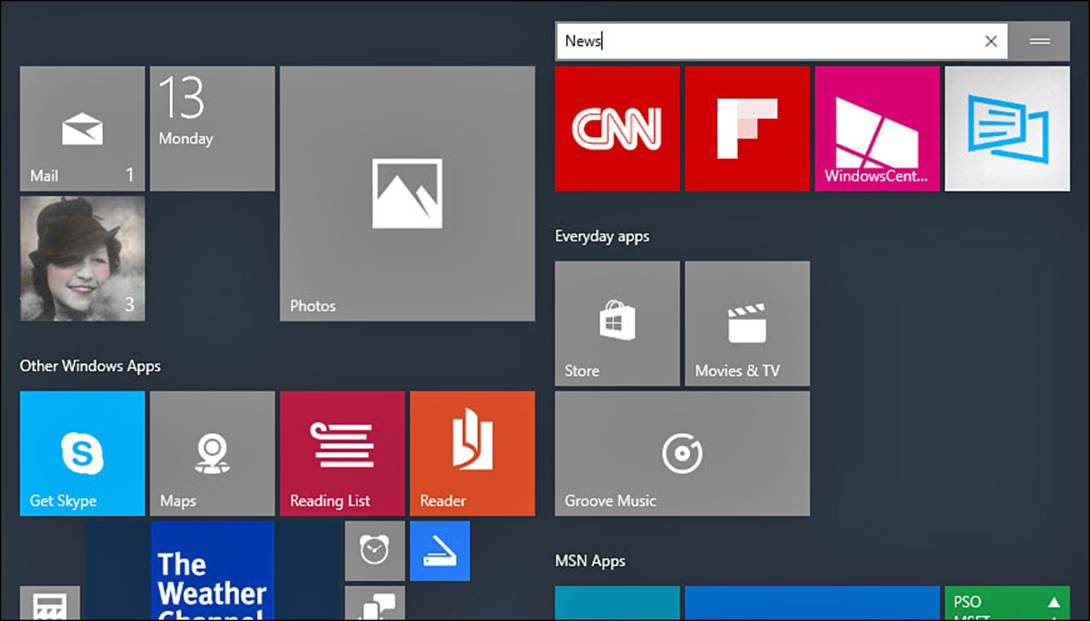
FIGURE 3.10 You enter the name of the tile group in the text box that appears when you select the title bar for the group.
![]() Tap and hold the title bar for a group you want to name. Your cursor will appear in a text field with the current name. If no name has yet been provided, it will simply say Name Group. Just like the step for using a mouse, type the name of the group in the box that appears, as shown in Figure 3.10.
Tap and hold the title bar for a group you want to name. Your cursor will appear in a text field with the current name. If no name has yet been provided, it will simply say Name Group. Just like the step for using a mouse, type the name of the group in the box that appears, as shown in Figure 3.10.
You can repeat these steps for another group or click or tap anywhere on the screen to return to the normal Start menu.
Organizing the Navigation Menu of the Start Menu
The Start menu includes a customizable navigation menu that features your most frequently used apps by default. In turn, jump lists will appear for many apps in this list showing recent files or web pages accessed by the application. Some will appreciate the ability to remove items that appear in these lists. To remove an application from the Most Used list or from a jump list, simply right-click the item you want to remove and select Remove from This List, as shown in Figure 3.11. Notice that you can pin an item to a jump list as well.
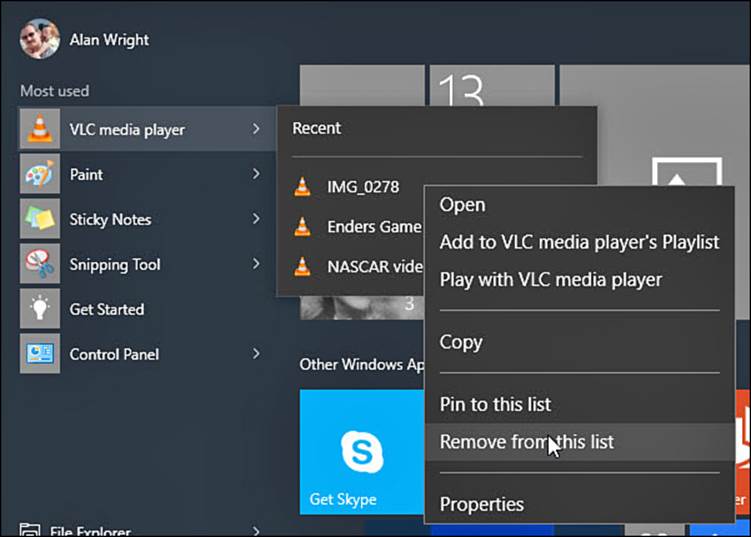
FIGURE 3.11 You can remove items from lists that appear in the Start menu.
Some important settings are available that you can use to customize the navigation menu of the Start menu. They will influence what appears here.
To customize the navigation menu, follow these steps:
1. From the Start menu, select Settings to open the Settings app.
2. Select Personalization and then Start from the vertical navigation menu of the Settings app (refer to Figure 3.5).
3. Under Start there are three switches that determine what can appear in the navigation menu:
• Show Most Used Apps—This switch enables the Most Used list. Apps will appear and disappear from this list based on your usage. Turn this switch to Off to prevent this.
• Show Recently Added Apps—This list will appear occasionally when you have installed new applications on your device.
• Show Recently Opened Items in Jump Lists on Start or the Taskbar—This allows Windows to use jump lists that will list the most recently files that have been opened by an application. (Figure 3.11 shows an example of a Jump List for the VLC Media Player application.) If you want to disable the jump list feature for some reason, slide the switch Store and Display Recently Opened Items in Start and the Taskbar to Off. Notice that this will also prevent jump lists from working on the taskbar for pinned applications such as File Explorer.
4. Select the text Choose Which Folders Appear on Start to see a list of additional features that can be added to the navigation menu. The Settings app will shift its focus to the list shown in Figure 3.12. Permanently add shortcuts to the navigation menu immediately above the Start button using switches. Switch anything that you would like to see when opening the Start menu to On. (In Tablet mode you will still need to expand the hamburger menu, so you might prefer to pin these to the Start menu as a tile instead.) To see these changes take effect, you may need to sign out and then sign back in to your device.
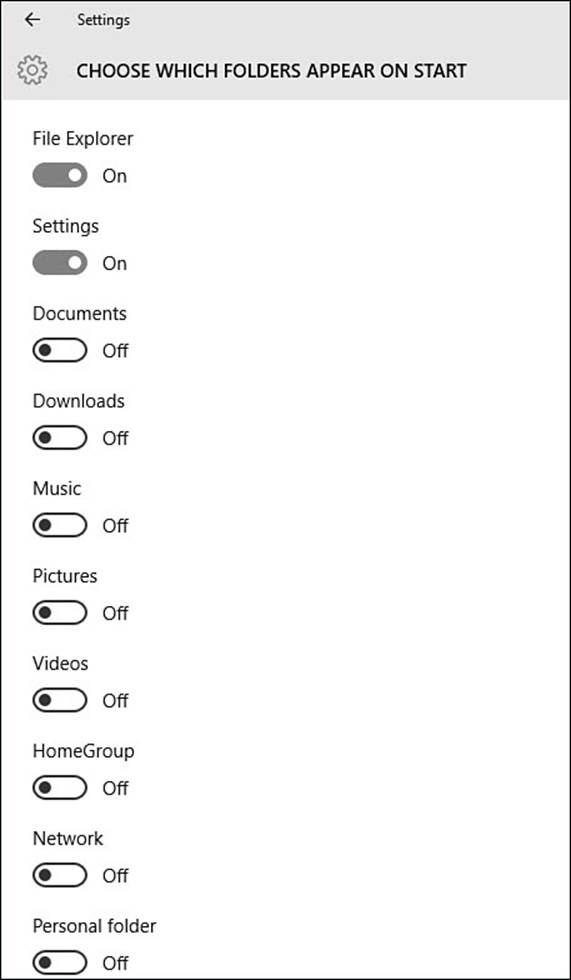
FIGURE 3.12 You can permanently add key shortcuts to the Start menu from the Settings app.
The Absolute Minimum
• You can customize the appearance of the tiles on the Start menu by changing their sizes and moving them around.
• Leverage the ability to pin apps so that applications are easy to locate on your Start menu.
• Change the size of your Start menu when in Desktop mode to show more apps and prevent the need to scroll when hunting for a tile.
• You can create new groups for tiles, add names to groups, or rearrange groups of tiles.
• Pin documents or websites within jump lists to keep them handy.
• Customize the navigation menu by adding folders that you often access.
All materials on the site are licensed Creative Commons Attribution-Sharealike 3.0 Unported CC BY-SA 3.0 & GNU Free Documentation License (GFDL)
If you are the copyright holder of any material contained on our site and intend to remove it, please contact our site administrator for approval.
© 2016-2026 All site design rights belong to S.Y.A.