Windows 10. Absolute Beginner’s Guide (2016)
Part V: Online Bonus Content
Bonus Chapter 3. Advanced File and Folder Management
In This Chapter
• Navigating Through Your File System
• Learning to Select Single, Multiple, Adjacent, and Nonadjacent Files and Folders
• Completing Common Tasks
It can seem confusing for a beginner to smoothly navigate around in all of the seemingly endless folders and files that appear in File Explorer. In Chapter 21, “File and Folder Basics,” you learned some of the basic landmarks that will help you navigate in File Explorer. In this chapter we will build on that knowledge and examine basic navigation and some of the tools that are built in to File Explorer that will keep any feelings of panic to a minimum when performing common tasks.
Navigating Through Your Folders
Whether you are a casual computer user who spends most of your time checking email and surfing the Web or a power user who is all about productivity, you will need to get your hands dirty and work directly with your folders and files from time to time. There are many potential reasons for you to work hands-on with your folders and files. You may need to move to a folder to copy a file to another folder. There might be an occasion when you must locate a file on your system, although you are not sure of its exact name or location. You might need to move a folder from a removable hard drive to the hard drive on your device, or vice versa. Perhaps you have decided to organize some of the folders on your computer to store information for a new project. For these reasons and numerous others, you must know how to move through your file system.
 Tip
Tip
In several places in this chapter, you can read instructions to reach certain locations in Windows 10, particularly files and folders. What might not always be clear is where you are starting from or which folder you happen to be in. The File Explorer title bar always shows the name of the folder you are currently in.
This section of the chapter doesn’t show every possible way to navigate through your files and folders because there are several, but you do learn the simplest ways to get around.
Following are some often-overlooked tips for navigating using tools located in File Explorer:
• To navigate quickly to a different folder, you may be able to use the address bar. In the path that is displayed, use the pointers to reveal drop-downs of child folders from any step in the path, as shown in Figure BC3.1. Select a different folder or device to jump directly into that directory.
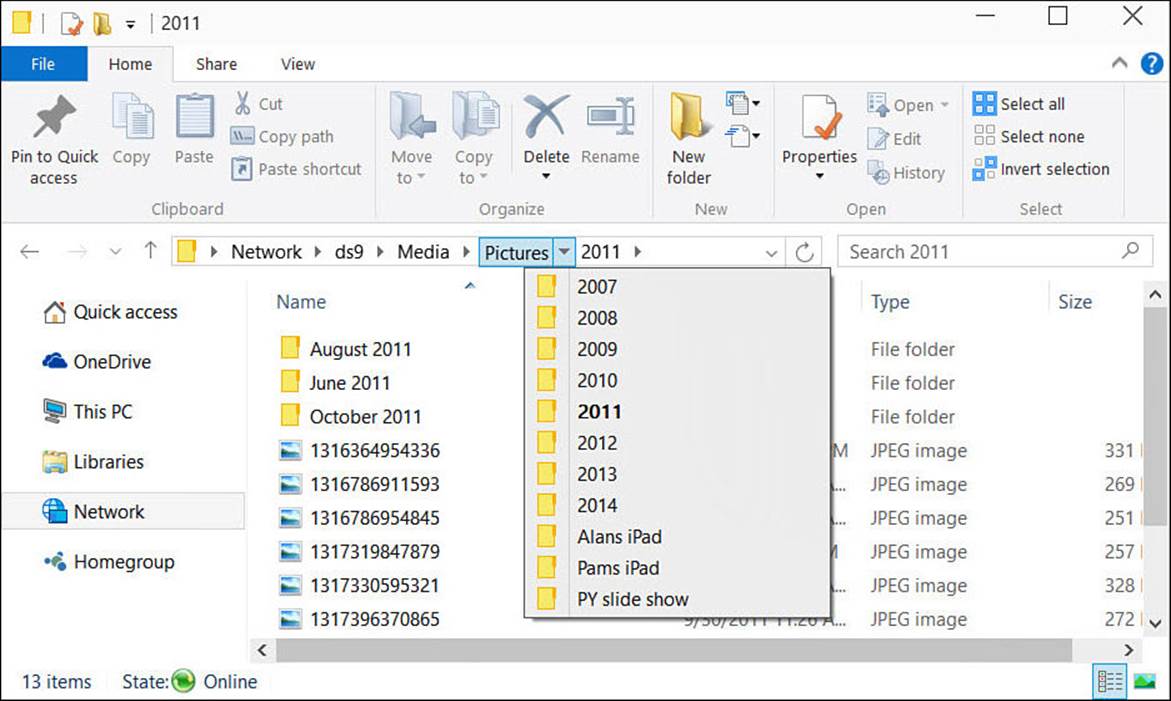
FIGURE BC3.1 You can quickly jump to a folder by using the pointers in the address bar.
• To navigate to a folder you recently opened, on the right end of the address bar, tap or click the down arrow and then select the folder from the list (see Figure BC3.2).
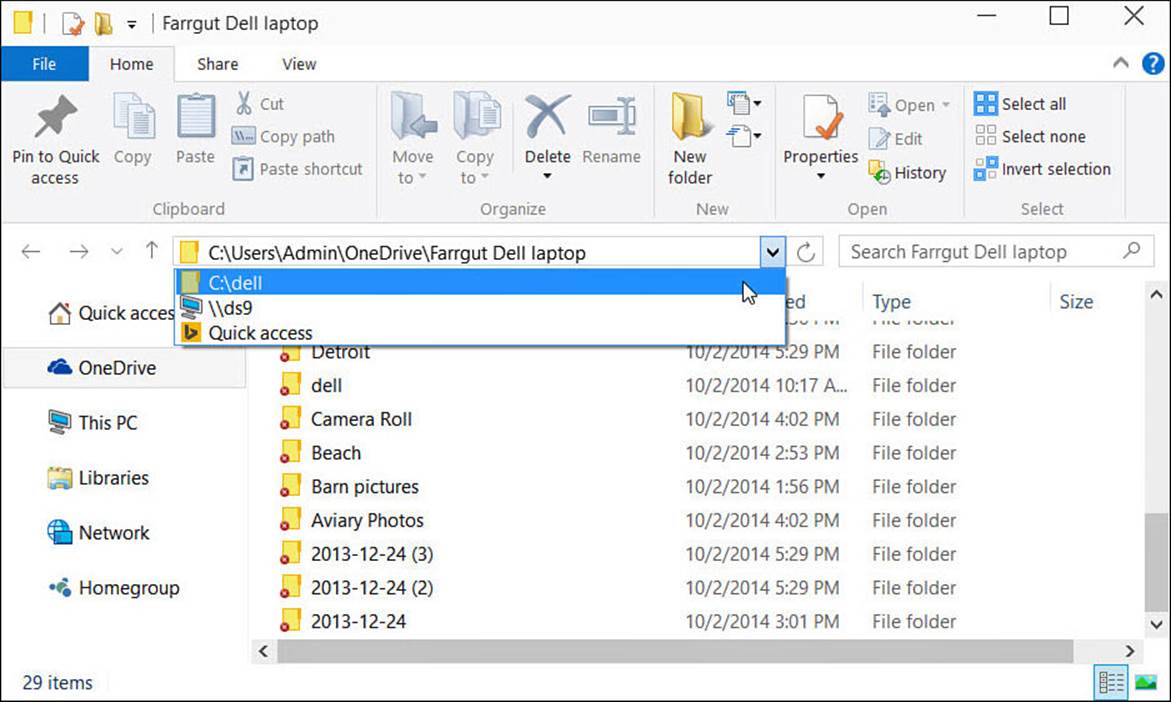
FIGURE BC3.2 You can quickly navigate to a folder you visited previously by selecting the folder from a list of recently visited folders.
• To navigate to the folder you most recently opened, click the back arrow button or click the Recent Locations button next to the Back and Forward buttons and select from the list (see Figure BC3.3).
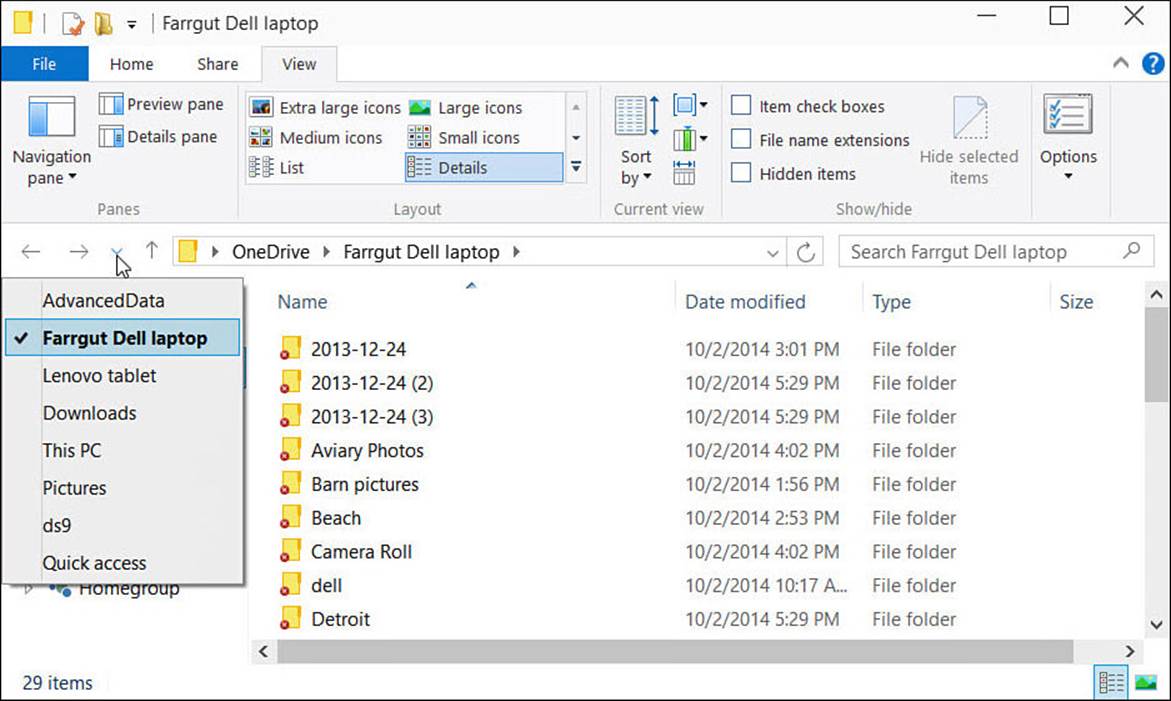
FIGURE BC3.3 Click the Recent Locations button to move to any of the previous locations you have visited.
• To navigate to the parent folder of the current folder, tap or click the Navigate Up arrow adjacent to the address bar.
• To navigate down a branch through the folder tree, in the Navigation pane, click any folder that you believe is higher in the hierarchy than the folder you’re looking for. In the Content pane, double-click/tap a folder to reveal its content, and so on.
• Double-click a folder in the Navigation pane to expand the folders and reveal what’s in the folder.
• Select a folder name in the address bar to display its children folders in the Content pane.
Selecting Files and Folders
One of the most important Windows skills to learn, particularly for use with File Explorer, is how to select files. As sophisticated as Windows 10 is, it cannot yet read your mind (though developers may be working on this feature), so you need to let Windows 10 know specifically which files you might want to delete, copy, move to a thumb drive, burn to a CD, and so on. It’s easy to select just one file and only slightly complicated to select multiple files, but there’s no doubt you can learn to select files like an expert.
 Note
Note
You can use the following techniques to select both files as well as folders.
Selecting a Single File at a Time
To select one file, first navigate to the folder where the file is located. Then select the file in the Content pane using one of the following methods based on the device you use:
![]() Tap once on the file.
Tap once on the file.
![]() Press the arrow keys to move the cursor to the file. If the cursor doesn’t seem to be moving, press the Tab key repeatedly until the cursor appears in the Content pane.
Press the arrow keys to move the cursor to the file. If the cursor doesn’t seem to be moving, press the Tab key repeatedly until the cursor appears in the Content pane.
![]() Click once on the file.
Click once on the file.
Selecting Multiple Contiguous Files
To select multiple contiguous files (next to one another), first navigate to the folder where the files are located and then do one of the following based on the device you use:
![]() Touch the screen and drag to establish two opposite corners of a rectangular area over the list of files to select them. Be careful not to strike the screen when you start to pan; otherwise, Windows will interpret the start of the pan as a tap.
Touch the screen and drag to establish two opposite corners of a rectangular area over the list of files to select them. Be careful not to strike the screen when you start to pan; otherwise, Windows will interpret the start of the pan as a tap.
![]() Press the arrow keys to move the cursor to the first file in the list of those to select. If the cursor doesn’t seem to be moving, press Tab repeatedly until the cursor appears in the Content pane. With the cursor over the first file, press and hold down the Shift key while you use the arrow keys to highlight the files.
Press the arrow keys to move the cursor to the first file in the list of those to select. If the cursor doesn’t seem to be moving, press Tab repeatedly until the cursor appears in the Content pane. With the cursor over the first file, press and hold down the Shift key while you use the arrow keys to highlight the files.
![]() Click and drag the mouse pointer over all the files and folders to select. To do so, point to a spot slightly above and to the left of the group of files and then drag until all are highlighted, as shown in Figure BC3.4. This process is easier if you use the Medium Icons view.
Click and drag the mouse pointer over all the files and folders to select. To do so, point to a spot slightly above and to the left of the group of files and then drag until all are highlighted, as shown in Figure BC3.4. This process is easier if you use the Medium Icons view.
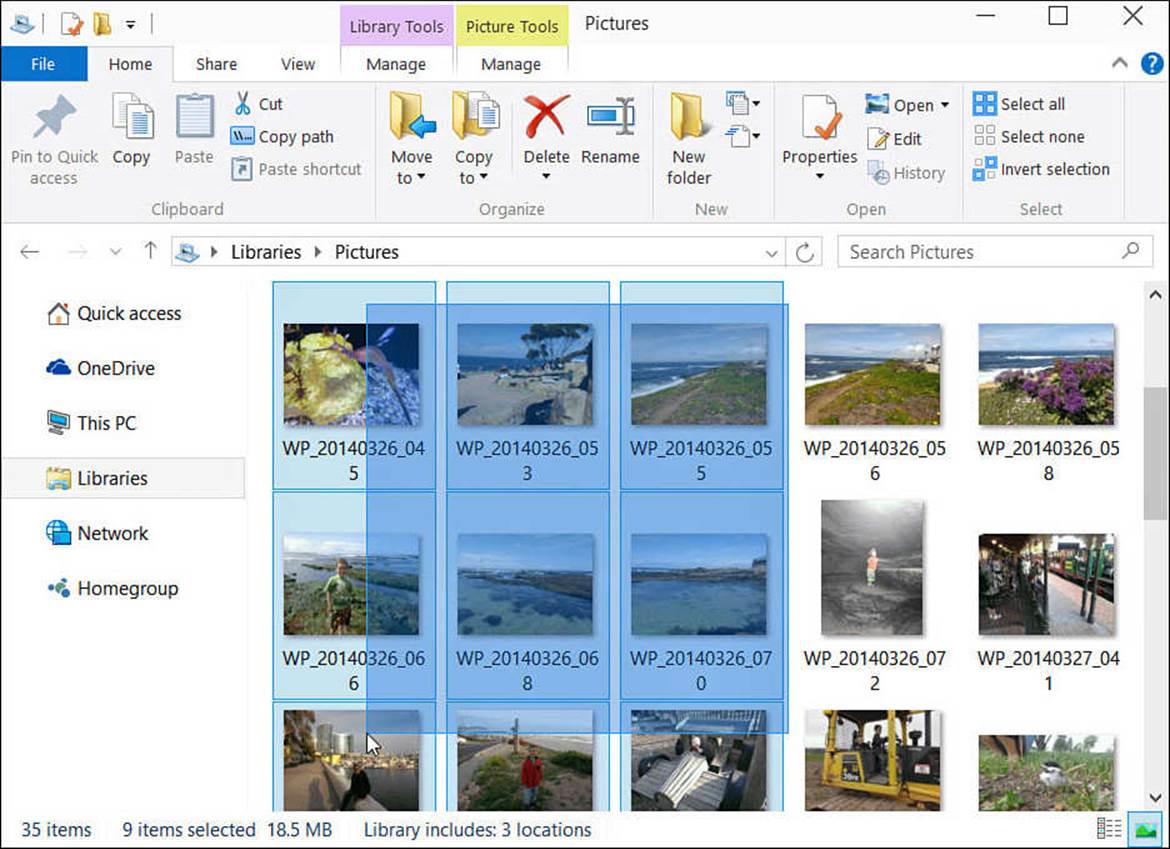
FIGURE BC3.4 Select the files with your mouse by dragging over the entire group.
Tip
It is easier to select multiple files when the contents of the Preview pane display in List or Details view. Read the section “Exploring the Preview and Details Pane” from Chapter 21 to learn about changing the view.
Selecting Multiple Noncontiguous Files
To select multiple noncontiguous files (not next to one another), first navigate to the folder where the files are located. Then do one of the following based on the device you use:
![]() Select the Use check box to select the option described in Table 21.1 in Chapter 21. Tap the check box for each file to select, as shown in Figure BC3.5.
Select the Use check box to select the option described in Table 21.1 in Chapter 21. Tap the check box for each file to select, as shown in Figure BC3.5.
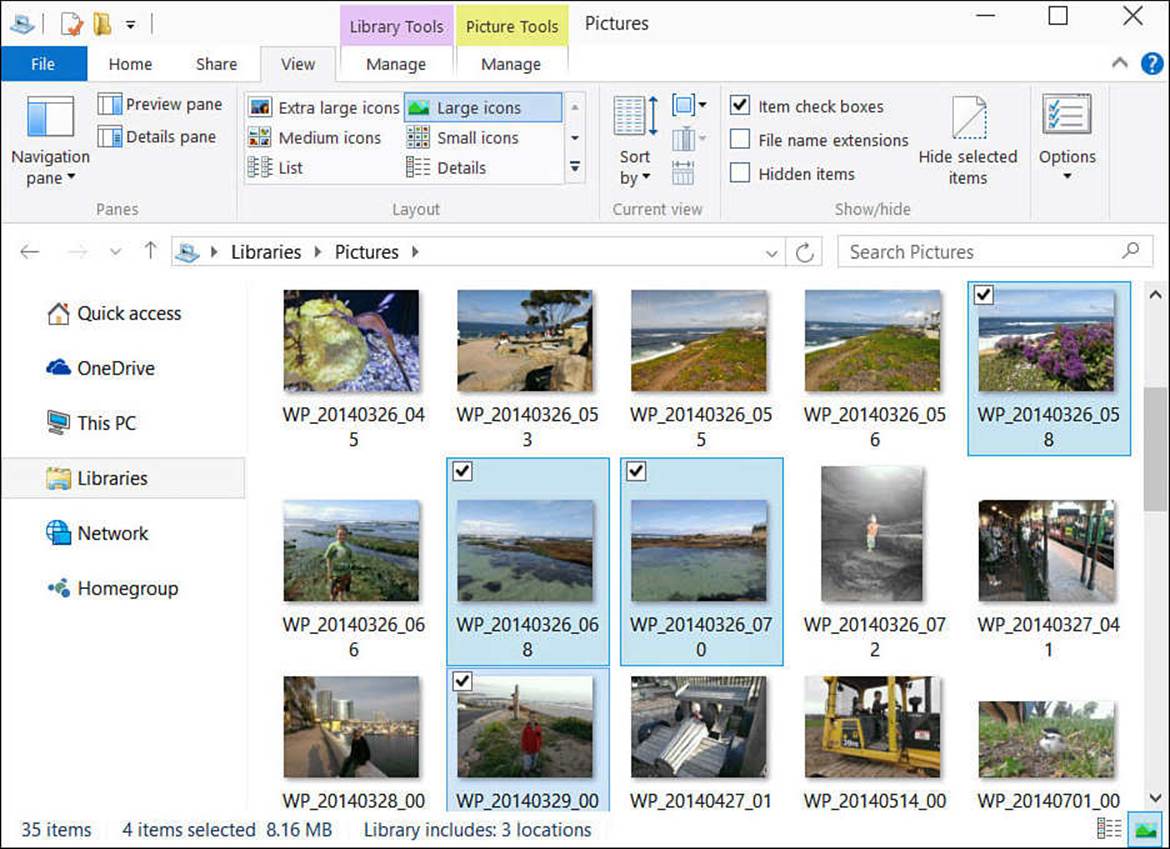
FIGURE BC3.5 The Use Check Boxes option lets you easily select files.
![]() Press the arrow keys to move the cursor to each file in the list. If the cursor doesn’t seem to be moving, press Tab repeatedly until the cursor appears in the Explorer pane. With the cursor over the first file in the list, press and hold the Ctrl key while using the arrow keys to move the cursor to other files you want to select. When you reach a file to select, press the spacebar. Repeat this process for each file, remembering to hold down the Ctrl key.
Press the arrow keys to move the cursor to each file in the list. If the cursor doesn’t seem to be moving, press Tab repeatedly until the cursor appears in the Explorer pane. With the cursor over the first file in the list, press and hold the Ctrl key while using the arrow keys to move the cursor to other files you want to select. When you reach a file to select, press the spacebar. Repeat this process for each file, remembering to hold down the Ctrl key.
![]() Click once on the first file. Next, press and hold Ctrl while you click each of the remaining files. Do not release Ctrl until you have clicked each of the files you intend to select.
Click once on the first file. Next, press and hold Ctrl while you click each of the remaining files. Do not release Ctrl until you have clicked each of the files you intend to select.
Tip
Selecting multiple files not adjacent to one another can be tricky. If you accidentally release the Ctrl key before you have selected all the files you are interested in, you must start over. An alternative to using the Ctrl+click technique is to use the Use Check Boxes to Select Items option highlighted in Table 21.1 in Chapter 21.
Typical Files and Folders Tasks
If you have been reading straight through this chapter, you’ve read about navigating and selecting files and folders. At this point, you can put together the skills you read about to finish some basic tasks in Windows.
Each of the following tasks is completed with File Explorer using techniques covered earlier in this chapter as well as navigation techniques considered in Chapter 21. Although you will see different techniques indicated, you might notice that the same tools are often located on the ribbon and within the context menu for the same task. In the end, feel free to try both, and stick with the method that is the most efficient for you.
If you are copying or moving several files, or if the files you are copying or moving are large, a message might appear onscreen showing the progress (see Figure BC3.6). The message displays a status bar that indicates progress on completing the current task. You can see more information about the task by selecting the More Details button.
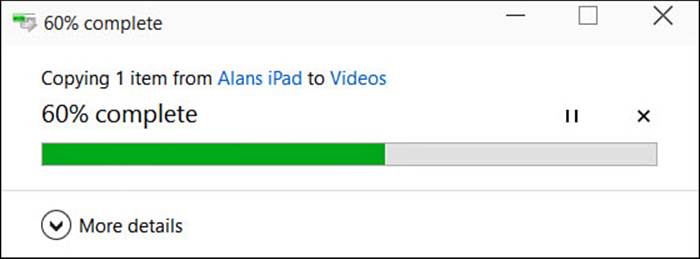
FIGURE BC3.6 A dialog box appears when you copy or move large files, helping you monitor progress, as well as giving you the opportunity to pause or cancel the process.
If you start another copy or move a task while an earlier one is running, the new task is added to the status screen.
Tip
In each of the following instructions, you can also use simple keyboard combinations to cut (Ctrl+X), copy (Ctrl+C), or paste (Ctrl+V).
Copying One or More Files or Folders
1. Navigate to the folder where the files and/or folders to be copied are located.
2. Select the files and/or folders to be copied.
3. From the ribbon, on the Home tab and in the Clipboard group, select Copy.
4. Navigate to the folder to which the file and/or folder will be copied. Be sure not to select a folder or file in the Explorer pane.
5. From the ribbon, on the Home tab and in the Clipboard group, select Paste.
Moving One or More Files or Folders
1. Navigate to the folder where the files and/or folders to be copied are located.
2. Select the files and/or folders to be copied.
3. Right-click with your mouse, or with your finger, press and hold on top of one of the items being moved. Select Cut from the menu that appears.
4. Navigate to the folder to which the file and/or folder will be moved. Be sure not to select a folder or file in the Explorer pane.
5. Right-click with your mouse, or with your finger, press and hold any blank spot on the Explorer pane. Select Paste from the menu that appears.
Renaming a File or Folder
1. Navigate to the folder where the file or folder to be renamed is located.
2. From the ribbon, on the Home tab and in the Organize group, select Rename. A small border around the existing name of the file or folder appears, enabling you to edit the text, as shown in Figure BC3.7.
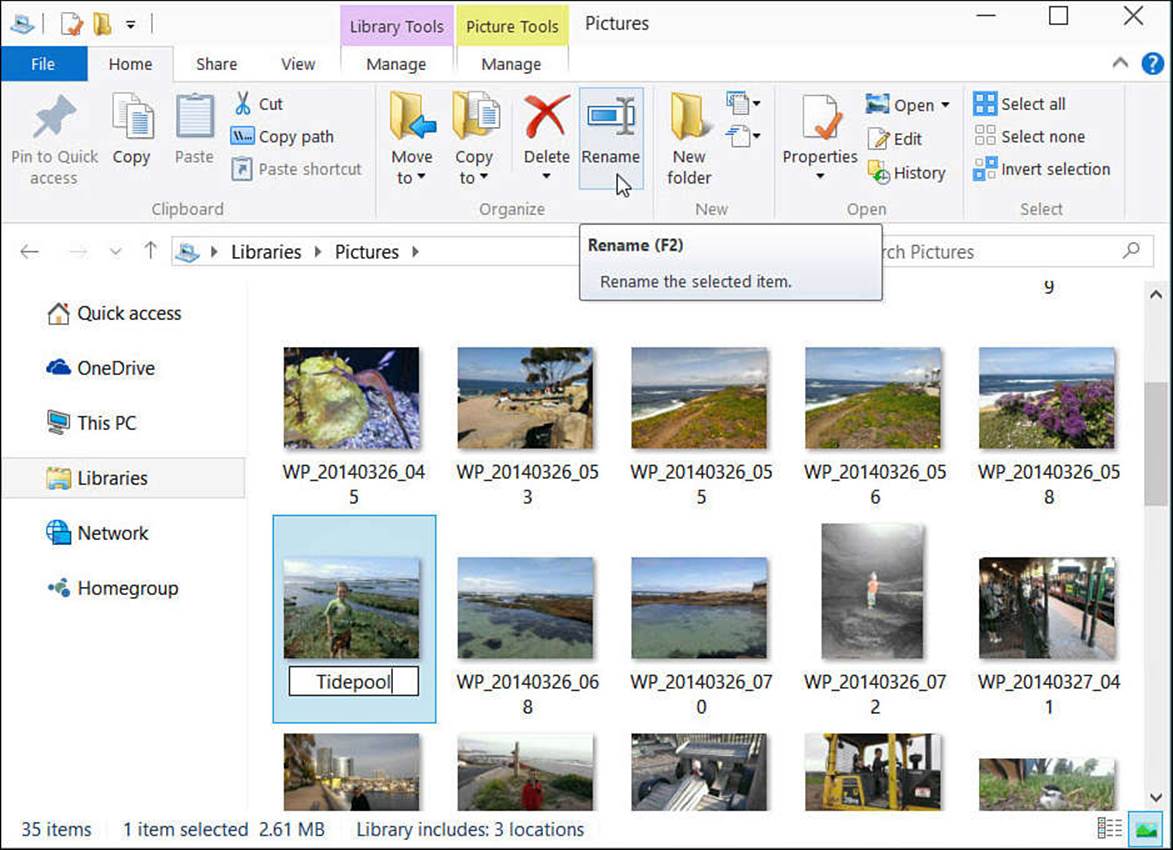
FIGURE BC3.7 Rename files and folders to provide structure or to help identify them later.
3. Type the new name and press Enter.
Creating a Folder
1. Navigate to the folder where the new folder is to be created.
2. Right-click with your mouse, or press and hold with your finger, on an empty spot in the Explorer pane.
3. Select New and then Folder from the menu that appears. A new folder appears with its label highlighted.
4. Type the name for the new folder, and press Enter.
Deleting a File or Folder
1. Navigate to the folder where the file or folder to be deleted is located.
2. Select the file(s) and/or folder(s).
3. From the ribbon, on the Home tab in the Organize group, click the arrow below the Delete icon.
4. Select Recycle to delete the file(s) and/or folder(s) with the chance to recover them if you find you made a mistake. To delete the file(s) and/or folder(s) with no chance to recover them, select Permanently Delete.
The Absolute Minimum
• File Explorer, which runs in the Desktop app, is the tool used to manage your user files. You can start File Explorer from a tile on the Start screen. You should locate the tile and then pin it to the Start screen if you anticipate using File Explorer often.
• If you work with photos, music files, or work files on a regular basis, you’ll work with File Explorer.
• The organization of the folders in Windows, plus the location of your files in your system, is known as your file system. You use specific techniques with your mouse, stylus, finger, or keyboard to navigate through your file system.
• You must select those files that you need to interact with, such as to copy or move. You use specific techniques to select files (and folders).
All materials on the site are licensed Creative Commons Attribution-Sharealike 3.0 Unported CC BY-SA 3.0 & GNU Free Documentation License (GFDL)
If you are the copyright holder of any material contained on our site and intend to remove it, please contact our site administrator for approval.
© 2016-2026 All site design rights belong to S.Y.A.