Using Windows 8.1: Return of the Start Button (2014)
Chapter 7. Computer Maintenance
Regular computer maintenance will extend its life. Let’s review some of the better options available and practices to adhere to.
Anti-Virus Software
A lot of this software comes pre-installed on the machine you buy and is offered on a subscription basis, so you have to pay to update the software.
Buying this software for home computers isn’t necessary these days, as there are options available on the Internet that are just as good. Plus Windows 8 comes with its own version of anti-virus protection called Windows Defender. Microsoft Security Essentials is another option and is free to download and use on a home computer. Note that if you are running Windows 8, you don’t need to install Security Essentials.
Open your web browser and go to the Security Essentials website:
www.microsoft.com/en-gb/security/pc-security/mse.aspx
There you can download and run the installation. Simply follow the instructions on screen.
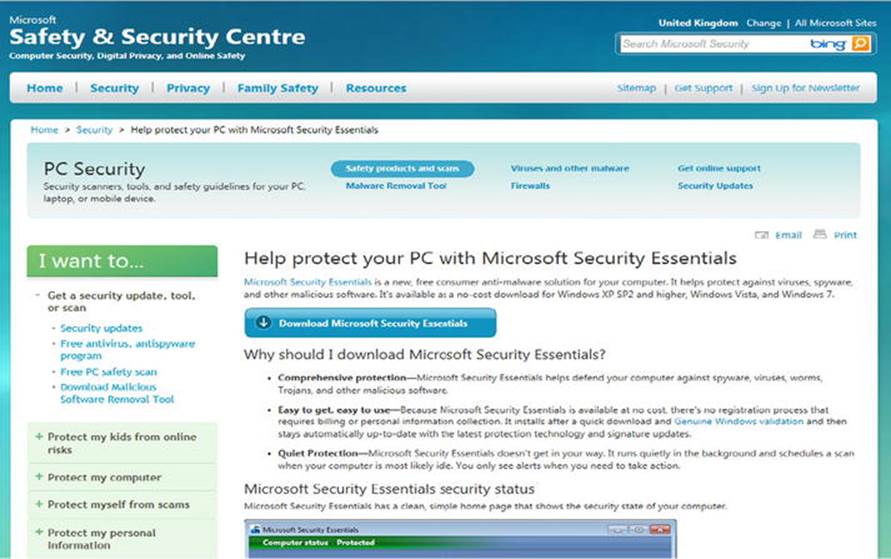
When you click Download you will get a prompt similar to the one below; make sure you click Run.

Then follow the instructions on the screen.
Backing Up
If you have ever lost data because of a computer glitch or crash, you know how frustrating it can be. We all need a good backup strategy. I’m going to go through the strategy that has worked well for me over the years.
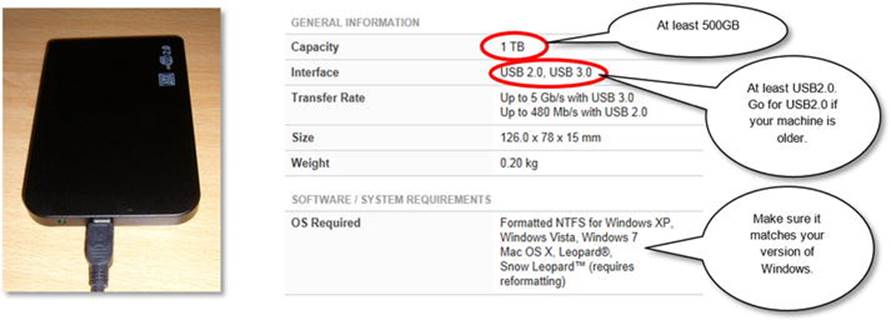
First of all, go buy yourself a good external hard disk. This is a small device that plugs into a USB port on your computer. The following image shows a typical specification for an external hard disk.
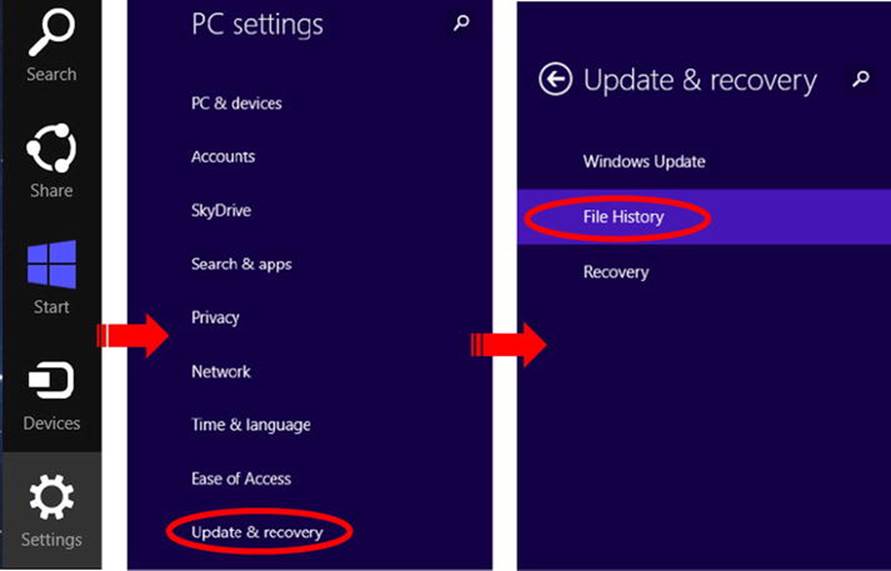
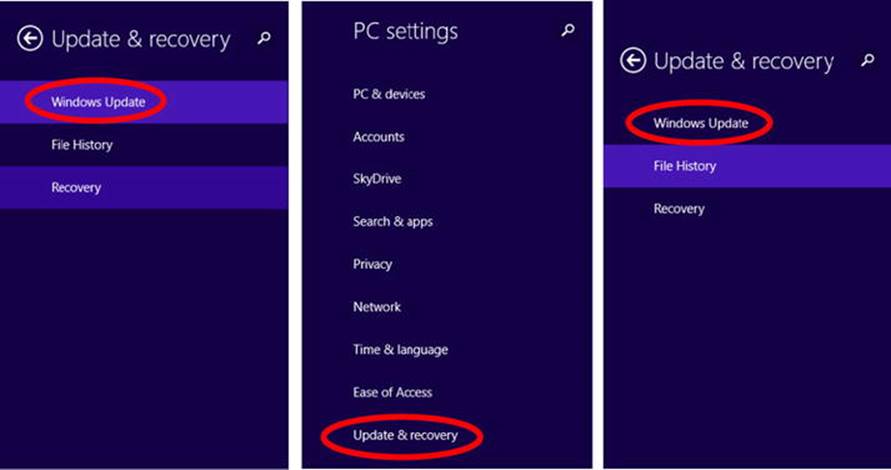
Plug your external drive into an open USB port. Activate Charms Bar, select PC Settings, and click Update & Recovery. Then select File History.
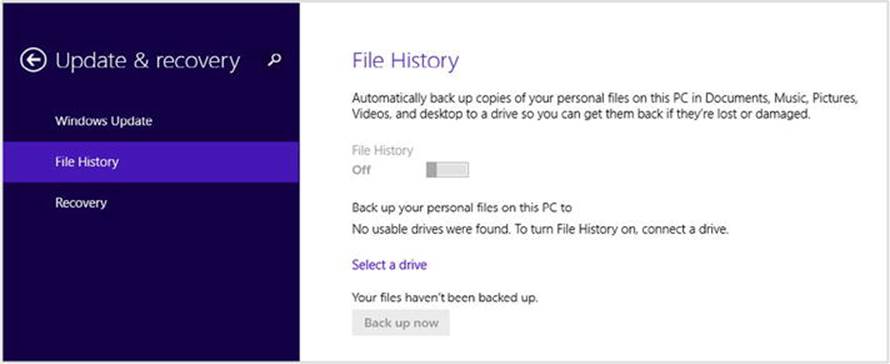
To activate file history click “Select a drive,” shown in the screen below. Make sure you have your external drive plugged in.
Restore Files
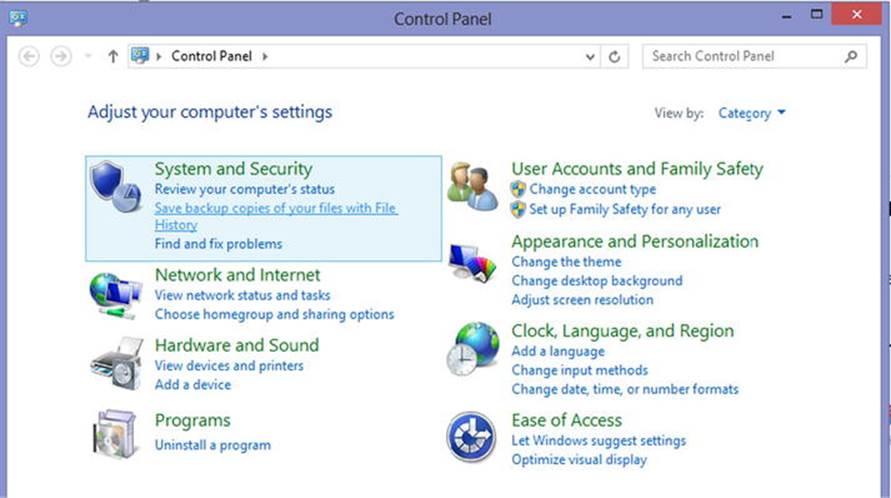
To restore files click Restore Personal Files. Go to your desktop and activate the Charms Bar, then select Control Panel. Select “Save backup copies of your files with File History.”
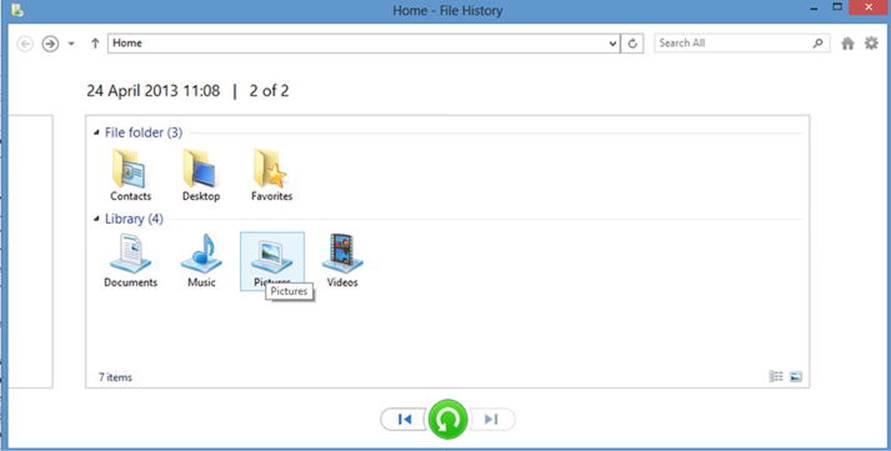
Click Restore Personal Files on the left-hand side of the window that appears. Use the left and right arrows at the bottom to navigate to the date backed up when you know your file was still okay.
Then, in the library section, double click on the folder the file was in (e.g., Pictures if you lost a photo).
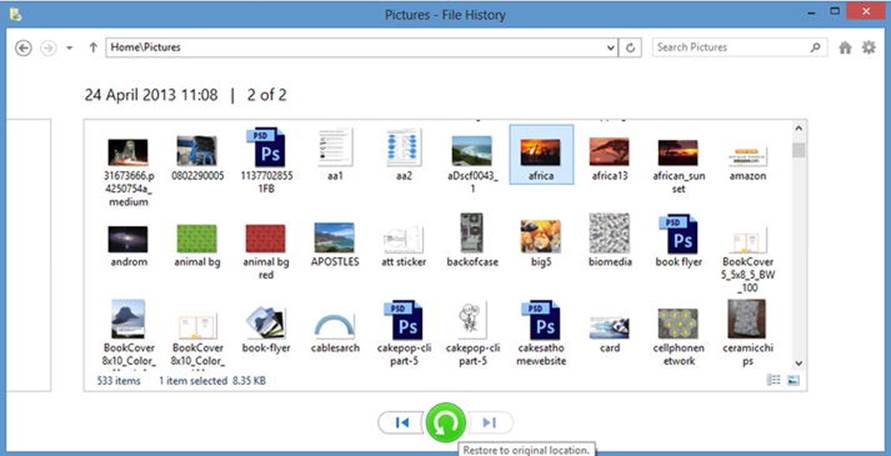
Select the photo and, to restore it, click the green button at the bottom of the window.
Flash Drives and Memory Sticks
Also as an extra line of defense, important files can be saved onto a flash drive or memory stick like any of the ones shown here.

These devices don’t hold as much data as an external hard disk but can be useful to hold important documents or photos. They can hold 1GB to 64GB.
These devices are also great for moving files to another computer. For example, if you have a photograph or document you want to load onto a friend’s computer.
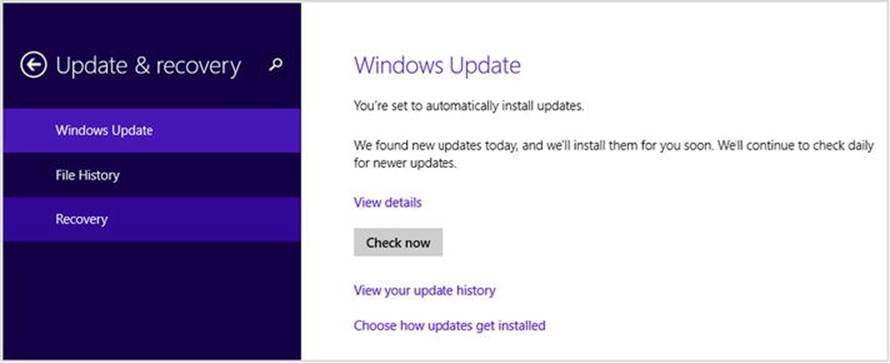
Windows Update
Windows Update usually automatically downloads and installs all updates available for Windows.
Click Check Now to force Windows to update. Or you can click View Details to see what updates have already been installed.
This automatic installation can sometimes be a nuisance if you are working and Windows wants to download and install updates, so I set it to manual install so I can decide when to install updates. If you don’t want to worry about it, I would leave it on auto.
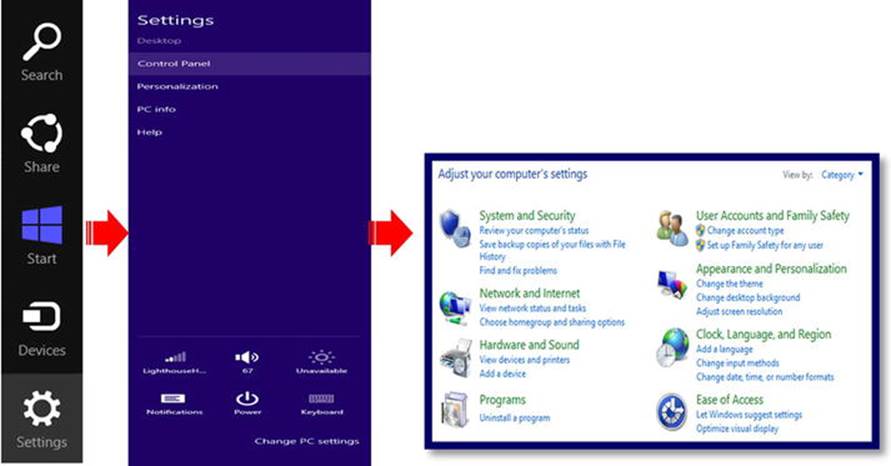
If you want to change the settings, go to your desktop, activate the Charms Bar, and select Control Panel. Select System and Security, then select ”Turn automatic updating on or off.”
To prevent Windows from automatically installing updates, select “Download updates but let me choose whether to install them.”
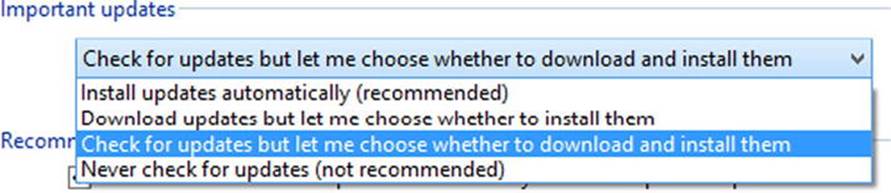
Windows will now download all available updates, but it will ask you when it’s convenient to install them.
Disk Defragmentation
Data is saved in blocks, called clusters, on the surface of the disk. When a computer saves your file, it writes the data to the next empty cluster on the disk, even if the clusters are not adjacent. This allows faster performance, and usually the disk is spinning fast enough that this has little effect on the time it takes to open the file.
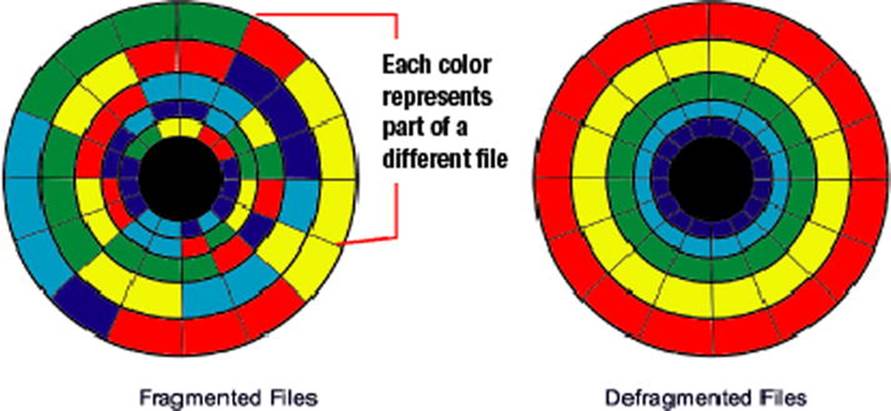
However, as more and more files are created, saved, deleted, or changed, the data becomes fragmented across the surface of a disk, and it takes longer to access. This can cause problems when launching software (because it will often load many different files as it launches), so bad fragmentation just makes every operation on the computer take longer. Eventually, fragmentation can cause applications to crash, hang, or even corrupt the data.
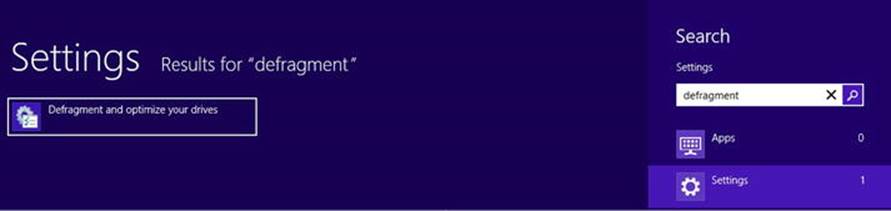
To defragment the disk in Windows 8, activate Search and type "defragment." Make sure you click Settings to tell Windows to search in the system apps, as shown in the following screen.
Select the drive your system is installed on; this is usually C. Click Optimize.
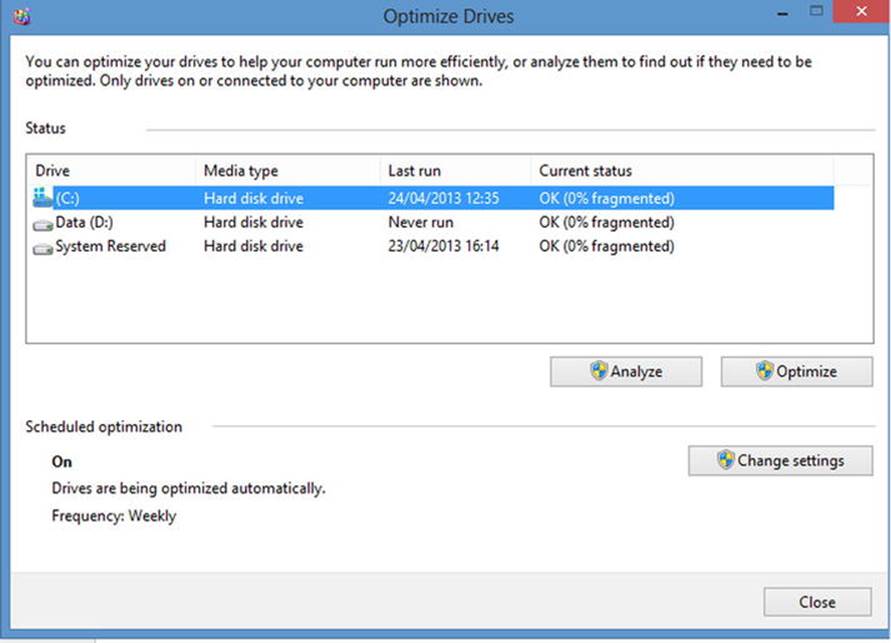
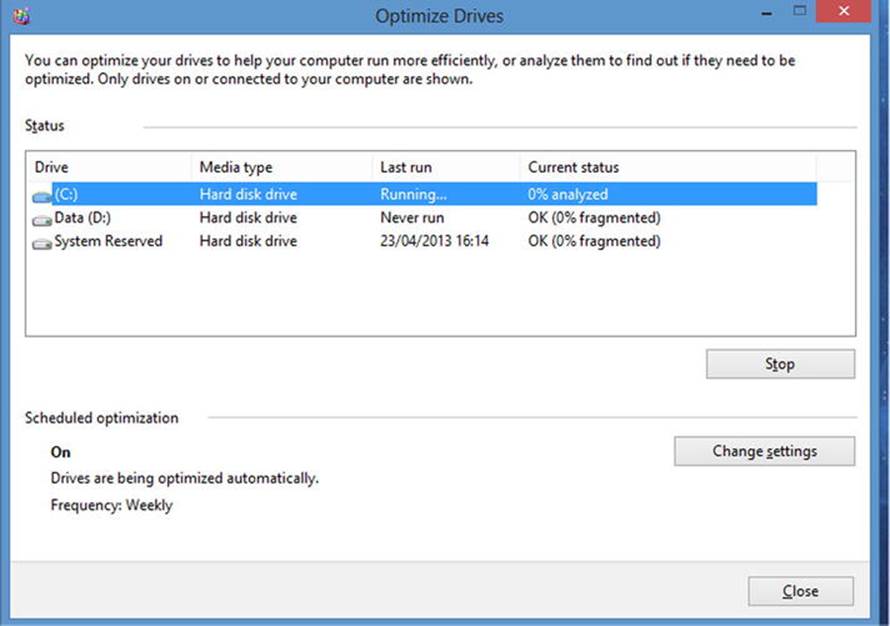
This will start defragmenting your disk.
Manually Checking Hard Drive for Errors
In Windows 8, Microsoft changed the way we fix corruptions so as to minimize the downtime due to disk checks.
A new file system was introduced, called ReFS, which does not require a manual disk check to repair corruptions.
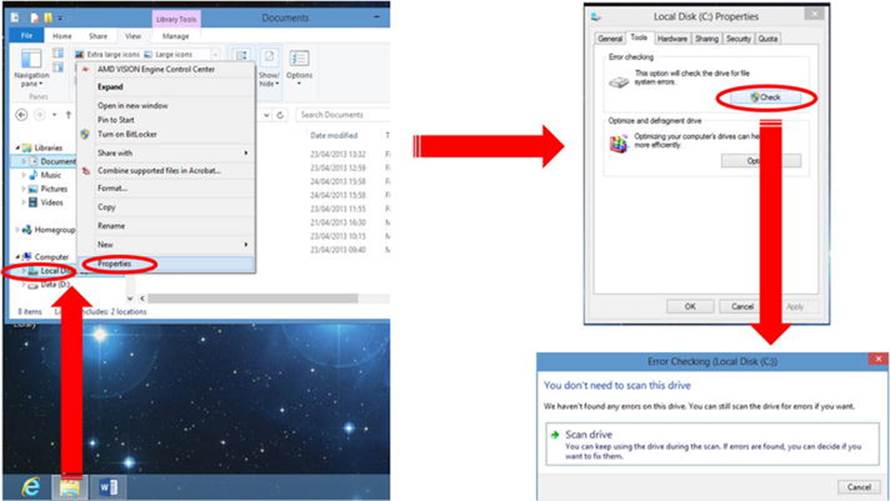
From the desktop click the File Explorer icon on the taskbar, right click on Local Disk, click Properties, select Tools tab, click Check, then click Scan Drive.
Disk Clean-Up
Over time, Windows gets clogged up with temporary files from browsing the Internet, installing and un-installing software, and general everyday usage.
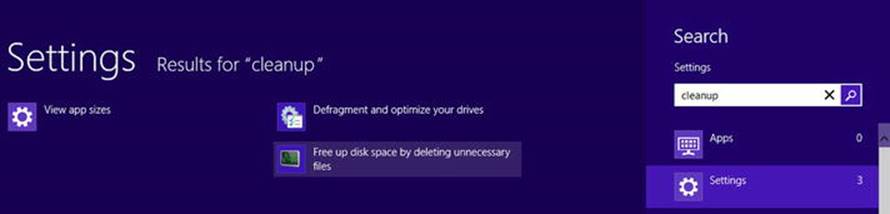
Open up Search and type "cleanup," making sure you select Settings to tell Windows to search in System Utilities. Click "Free up disk space by deleting unnecessary files."
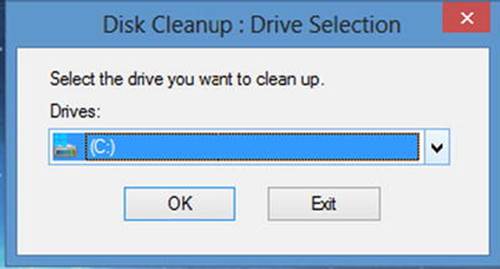
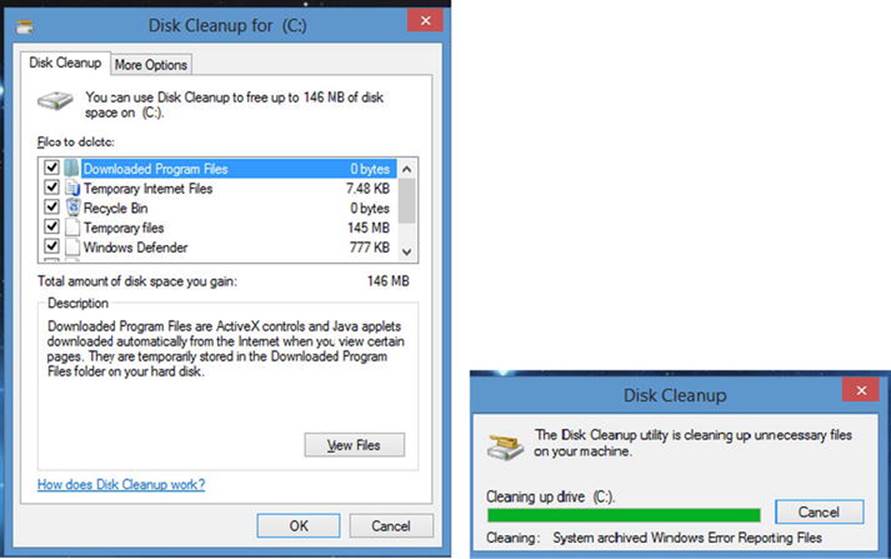
In the window that appears, you can see a list of all the different files and caches. It is safe to select all these for clearing. Once you are done, click OK, and Windows will clear out all those old files.
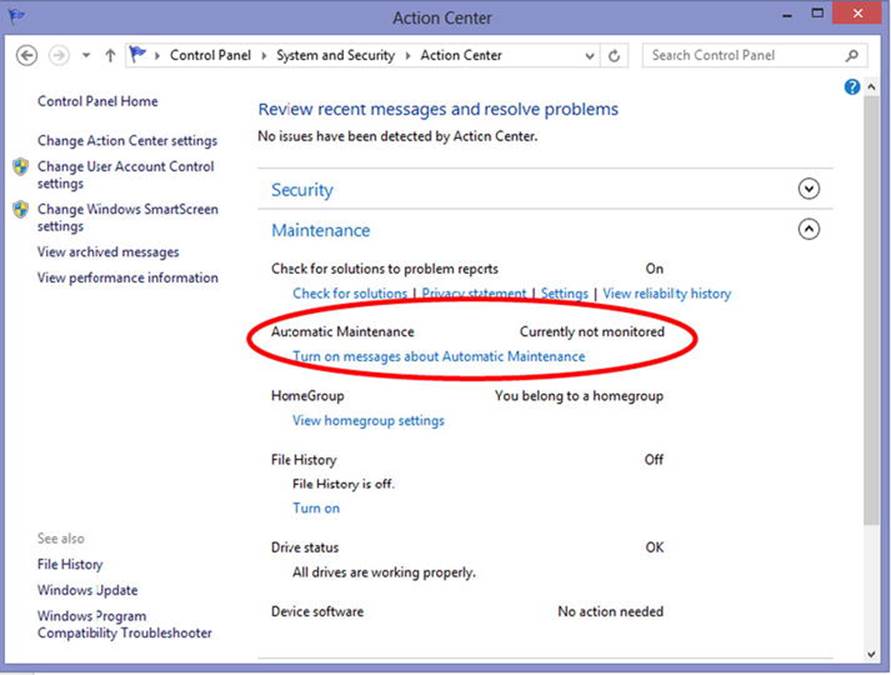
Automatic Maintenance
Windows 8 introduces a new feature that allows you to schedule and run Automatic Maintenance on your computer, such as security updating and scanning, Windows software updates, disk defragmentation, disk volume errors, system diagnostics, etc.
Start-Up Programs
Hit control-alt-delete on your keyboard and select Task Manager from the menu.
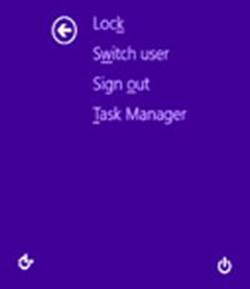
Click More Details if you don’t see the following screen. Click on the Startup tab. Most of these programs can be disabled with the exception of your sound, video, and network devices.
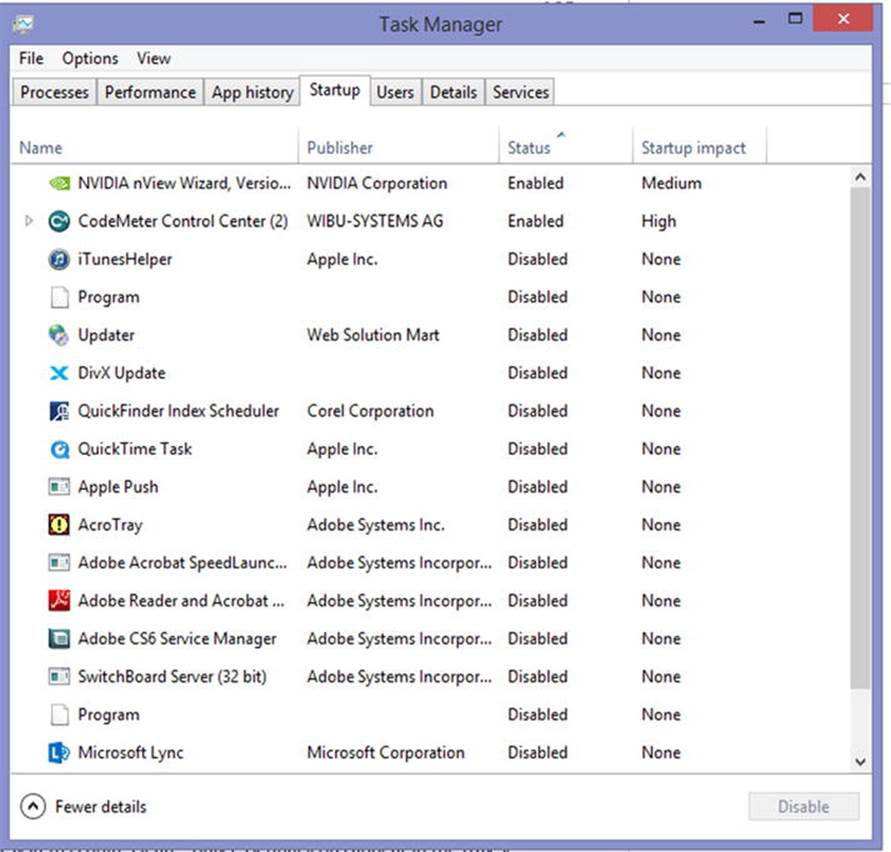
You will also see the startup impact, which shows how much the program slows the machine down. These are the programs that show up in your system tray on the bottom right-hand side of your screen. As you can see below, this system is quite clean—only essential icons appear in the tray.

System Recovery
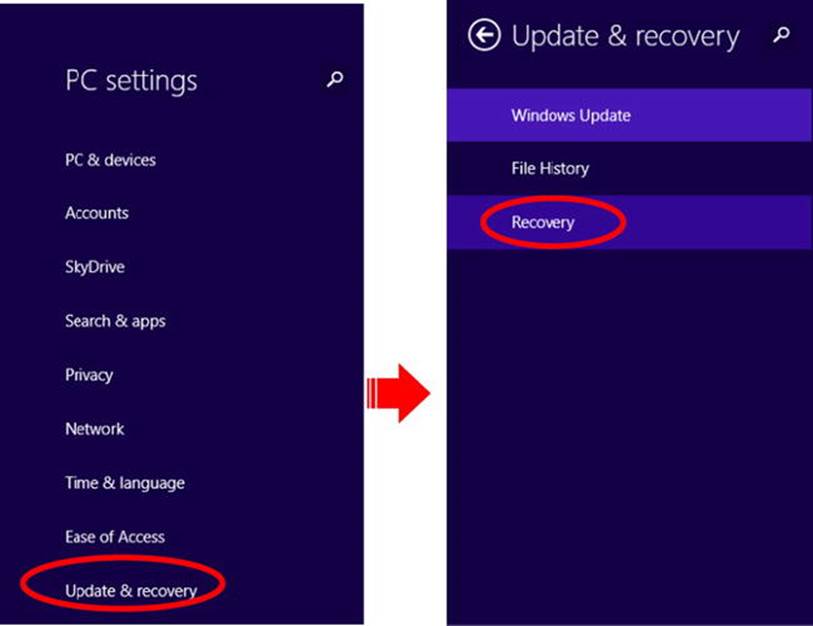
Windows 8.1 has a feature called Update & Recovery to help you maintain your machine and recover your system if it should fail.
From your Charms Bar, select Settings and Change Computer Settings. Then click Update & Recovery, as shown below.
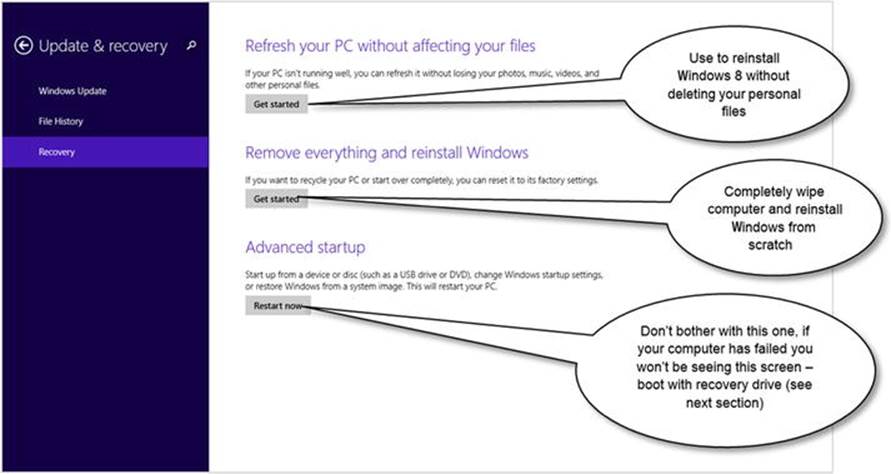
From the screen that appears you can choose a number of options, mainly the first two.
Create a Recovery Drive
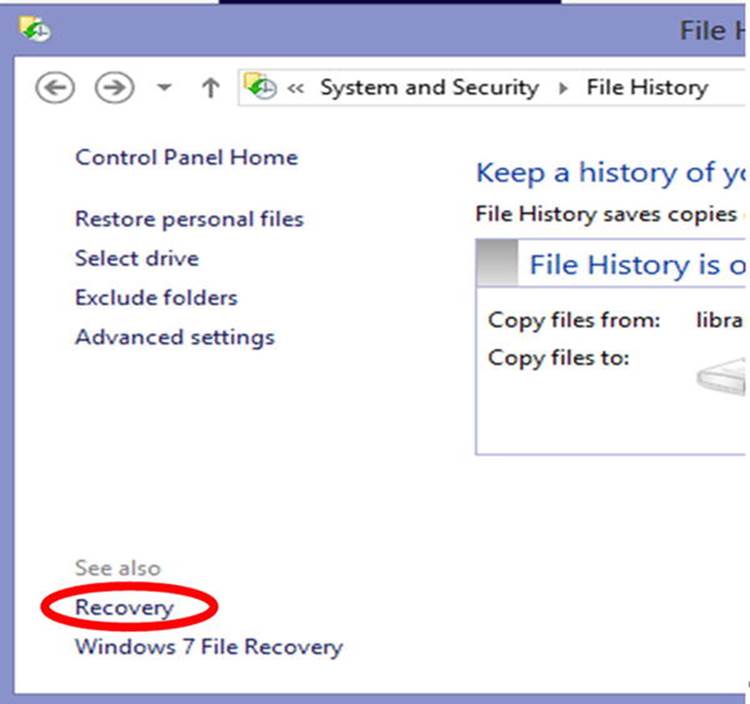
To create a recovery drive go to your desktop and activate the Charms Bar, then select Control Panel. From Control Panel select "Save backup copies of your files with file history," and in the window that appears click Recovery on the bottom left.
Click "Create a recovery drive." Then select "Create a system repair disc with CD or DVD."
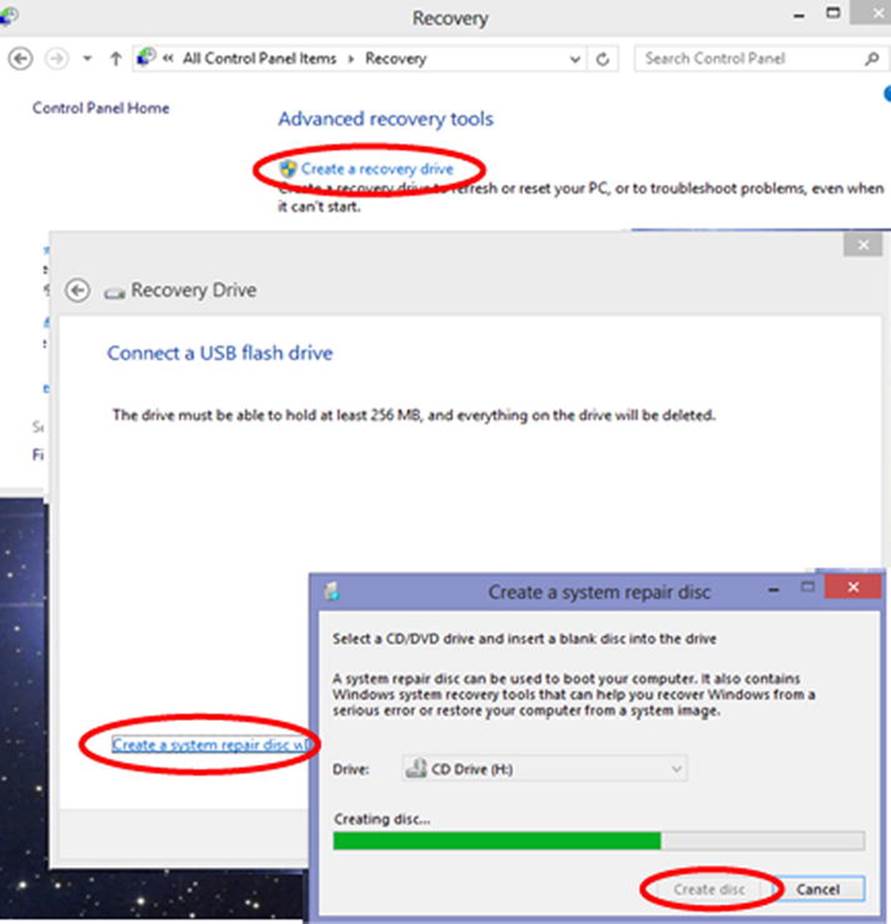
Insert a DVD into your DVD burner and click Create Disc. You can also use a USB stick if you prefer or if you don't have a DVD burner.
You will be able to start Windows with this disc if your computer fails.
Keep Your Computer Physically Clean
After constant use, your computer can get pretty dirty—dust on the monitor, grime and grease on the keyboard and mouse. It is good practice to keep all these components clean. We will take a look at some strategies and cleaning materials for cleaning different components.
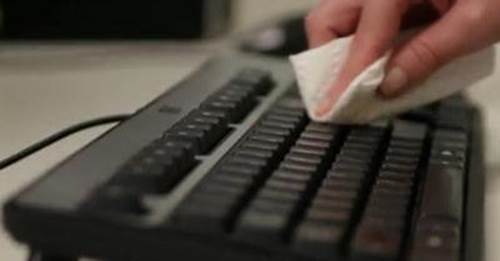
Cleaning Keyboards
To clean your keyboard, unplug it from the computer, use a paper towel dabbed with rubbing alcohol (or diluted hand soap) and run the paper towel over the keys to remove all the dirt.
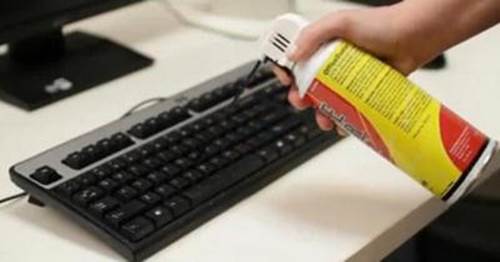
To clear dirt from in between the keys, a can of compressed air is a good method.
Cleaning Computer Mice
First, unplug your mouse from the computer. Older mice have a ball inside that tracks the movement; you can remove the ball by twisting the cover ring counter-clockwise.
Remove the ball and, with rubbing alcohol, rub it to remove dirt and grease. Also clean the little rollers inside with your paper towel.
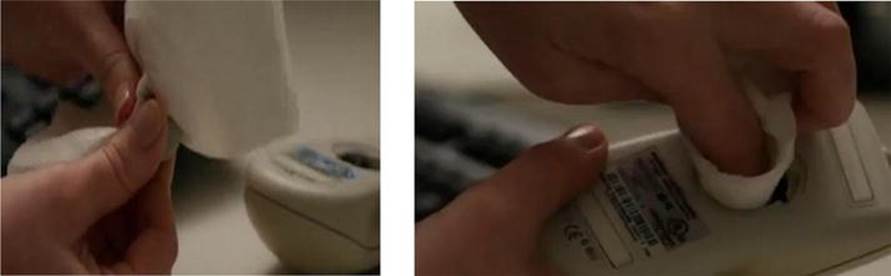
Put the cover back on and plug your mouse back in.
Newer mice are known as optical mice and do not have track balls. Cleaning these is much simpler. Unplug your mouse. Wipe the optical window with a paper towel and alcohol, as shown here.

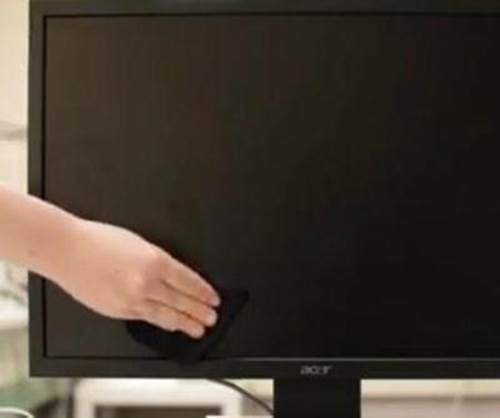
Cleaning Your Monitor
Modern LCD screens can be quite fragile on the surface, so take care when cleaning the screen.
First, unplug the monitor from the main power and, with a soft cloth dampened with some diluted hand soap, start to gently wipe the surface, making sure you remove dust and finger marks.
Dealing with Spills
If you spill liquid on a keyboard, the best thing I found to do is to quickly shut down the computer, disconnect the keyboard, and hold it upside down over a sink and allow the liquid to drain.
If the liquid is a fizzy drink, tea, or coffee, you will need to hold the keyboard on its side under warm running water to rinse off the sticky liquid.
At this point, the keyboard may not be repairable, but rinsing the sticky liquid off is the only chance for it to be usable again.
You will need to let the keyboard dry thoroughly for a few days before plugging it back in. After this kind of accident some keys may stick. This can be difficult to repair, depending on how bad the spill was. Fortunately, keyboards are cheap nowadays.
The best way to avoid this situation is to keep drinks away from the computer area.
All materials on the site are licensed Creative Commons Attribution-Sharealike 3.0 Unported CC BY-SA 3.0 & GNU Free Documentation License (GFDL)
If you are the copyright holder of any material contained on our site and intend to remove it, please contact our site administrator for approval.
© 2016-2026 All site design rights belong to S.Y.A.