PHP Advanced and Object-Oriented Programming (2013)
Visual Quickpro Guide
2. Developing Web Applications
In This Chapter
Modularizing a Web Site
Improved SEO with mod_rewrite
Affecting the Browser Cache
Review and Pursue
The career of a PHP programmer normally starts with writing individual scripts, each dedicated to a single purpose. From there you begin using more and more files, building up Web applications. Eventually you might develop sites on your own server and, if you’re lucky, balanced over multiple servers. No matter how large your projects are, learning new and improved ways to develop Web applications is an important part of the life of the PHP programmer.
In this chapter, the focus is on developing Web applications beyond the beginner or intermediate level. We begin with an explanation of how to modularize a Web site. Then you’ll learn a bit about the Apache Web server, including using its mod_rewrite feature that makes Search Engine Optimization (SEO)-friendly URLs. The chapter ends with a discussion of controlling the browser caching.
Modularizing a Web Site
In my experience, the arc of a program-mer’s development starts with writing one-page applications that do just a single thing. Over time, the work will evolve into multipage sites, involving templates and state management. After more and more experience, some seasoned PHP developers start doing the same amount of work in fewer pages, such as having the same script both display and handle a form instead of using two separate files. Or, conversely, the advanced PHP programmer may start generating exponentially more scripts, each of which doing far less, by focusing each script on a particular task. This last approach is the premise behind modularizing a Web site.
For an example of modularizing a site, I’ll create a dummy Web site (i.e., it won’t do much) that’s broken into its individual components. The new knowledge here will be how those components are separated, organized, and put back together. Instead of having individual pages (contact.php,about.php, index.php, etc.), the entire application will also be run through one index page. That page will include the appropriate content module based on values passed in the URL.
Creating the Database File
I have not, for this application, created a database configuration file, because the dummy site does not use a database. But if a database were required, I would write a mysql.inc.php (or postgresql.inc.php or db.inc.php or whatever) file that establishes the database connection. Such a file should also define any functions that involve the database application.
This file could also be stored in the includes directory but would preferably be stored outside of the Web directory. The config.inc.php file has a constant named DB that should be an absolute path to this file on the server.
Any page that needs a database connection could then include it by just using
require(DB);
Because DB represents an absolute path to that file, it wouldn’t matter if the including script was in the main folder or a subdirectory.
Creating the configuration file
Every Web application I build begins with a configuration file. Configuration files serve several purposes, the four most important being:
• Defining constants
• Establishing sitewide settings
• Creating user functions
• Managing errors
Basically, any piece of information that every page in a site might need to access should be stored in a configuration file. (As a side note, if a function would not likely be used by the majority of site pages, I would put it in a separate file, thereby avoiding the extra overhead of defining it on pages where it won’t be called.)
To create the configuration file
1. Begin a new PHP script in your text editor or IDE, to be named config.inc.php (Script 2.1):
<?php # Script 2.1 - config.inc.php
Script 2.1. The configuration file is the key back-end script. It defines sitewide constants and dictates how errors are handled.
1 <?php # Script 2.1 - config.inc.php
2
3 /*
4 * File name: config.inc.php
5 * Created by: Larry E. Ullman
6 * Contact: Larry@LarryUllman.com, LarryUllman.com
7 * Last modified: June 5, 2012
8 *
9 * Configuration file does the following things:
10 * - Has site settings in one location.
11 * - Stores URLs and URIs as constants.
12 * - Sets how errors will be handled.
13 */
14
15 # ******************** #
16 # ***** SETTINGS ***** #
17
18 // Errors are emailed here:
19 $contact_email = 'address@example.com';
20
21 // Determine whether we're working on a local server
22 // or on the real server:
23 $host = substr($_SERVER['HTTP_HOST'], 0, 5);
24 if (in_array($host, array('local', '127.0', '192.1'))) {
25 $local = TRUE;
26 } else {
27 $local = FALSE;
28 }
29
30 // Determine location of files and the URL of the site:
31 // Allow for development on different servers.
32 if ($local) {
33
34 // Always debug when running locally:
35 $debug = TRUE;
36
37 // Define the constants:
38 define('BASE_URI', '/path/to/html/folder/');
39 define('BASE_URL', 'http://localhost/directory/');
40 define('DB', '/path/to/mysql.inc.php');
41
42 } else {
43
44 define('BASE_URI', '/path/to/live/html/folder/');
45 define('BASE_URL', 'http://www.example.com/');
46 define('DB', '/path/to/live/mysql.inc.php');
47
48 }
49
50 /*
51 * Most important setting!
52 * The $debug variable is used to set error management.
53 * To debug a specific page, add this to the index.php page:
54
55 if ($p == 'thismodule') $debug = TRUE;
56 require('./includes/config.inc.php');
57
58 * To debug the entire site, do
59
60 $debug = TRUE;
61
62 * before this next conditional.
63 */
64
65 // Assume debugging is off.
66 if (!isset($debug)) {
67 $debug = FALSE;
68 }
69
70 # ***** SETTINGS ***** #
71 # ******************** #
72
73
74 # **************************** #
75 # ***** ERROR MANAGEMENT ***** #
76
77 // Create the error handler:
78 function my_error_handler($e_number, $e_message, $e_file, $e_line, $e_vars) {
79
80 global $debug, $contact_email;
81
82 // Build the error message:
83 $message = "An error occurred in script '$e_file' on line $e_line: $e_message";
84
85 // Append $e_vars to the $message:
86 $message .= print_r($e_vars, 1);
87
88 if ($debug) { // Show the error.
89
90 echo '<div class="error">' . $message . '</div>';
91 debug_print_backtrace();
92
93 } else {
94
95 // Log the error:
96 error_log ($message, 1, $contact_email); // Send email.
97
98 // Only print an error message if the error isn't a notice or strict.
99 if ( ($e_number != E_NOTICE) && ($e_number < 2048)) {
100 echo '<div class="error">A system error occurred. We apologize for the inconvenience.</div>';
101 }
102
103 } // End of $debug IF.
104
105 } // End of my_error_handler() definition.
106
107 // Use my error handler:
108 set_error_handler('my_error_handler');
109
110 # ***** ERROR MANAGEMENT ***** #
111 # **************************** #
2. Add some comments discussing the nature and purpose of this page:
/*
* File name: config.inc.php
* Created by: Larry E. Ullman
* Contact: Larry@LarryUllman.com, LarryUllman.com
* Last modified: June 5, 2012
*
* Configuration file does the following things:
* - Has site settings in one location.
* - Stores URLs and URIs as constants.
* - Sets how errors will be handled.
*/
Because the configuration file is a common file, it ought to be one of the best-documented scripts in a site.
3. Set the email address to be used for errors:
$contact_email = 'address@example.com';
For live sites, I prefer to be emailed when errors occur. To that end, I declare a variable with the “to” email address for any general communications. This may be my address while developing a site but a client’s once the site goes live.
4. Determine whether the script is running on the live server or a test server:
$host = substr($_SERVER ['HTTP_HOST'], 0, 5);
if (in_array($host, array('local', '127.0', '192.1'))) {
$local = TRUE;
} else {
$local = FALSE;
}
I almost always develop on a local server and then upload the completed site to the live server. The two different environments will each have its own server-specific settings. Ideally, the configuration file ought to automatically switch the server-specific settings based on the environment.
To test if the site is running locally, I first grab a reference to the opening five characters in $_SERVER['HTTP_HOST']. I then check if that value is one of a number of possible combinations:
• The word local (as in http://localhost)
• The start of an IP address, 192.1, or 127.0, both of which indicate local networks
You’ll need to adjust this list to values that work best for your local environment.
Whether that conditional is true or not, a $local variable is assigned a Boolean value, for reference later in the script.
5. Set the server-specific constants:
if ($local) {
$debug = TRUE;
define('BASE_URI', '/path/to/html/folder/');
define('BASE_URL', 'http://localhost/directory/');
define('DB', '/path/to/mysql.inc.php');
} else {
define('BASE_URI', '/path/to/live/html/folder/');
define('BASE_URL', 'http://www.example.com/');
define('DB', '/path/to/live/mysql.inc.php');
}
I often use these three constants in my Web applications. The BASE_URI is the absolute file system path to where the site’s root folder is on the server. This constant makes it easy to use absolute references when any script includes a file. If you’re using, for example, XAMPP on Windows, this value might be C:\xampp\htdocs\ch02.
The BASE_URL constant is the host-name and directory (if applicable). On a test server, that might be just http://localhost/ch02/.
Finally, the DB constant is the absolute path to the file that contains the database connectivity information. For security purposes, it’s best to keep this stored outside of the Web directory.
Note that each constant is represented twice: once for a test server and once for the live server. If this is a test server (if $local is TRUE), I also turn on debugging, which will mean more to you shortly.
6. Set the debugging level:
if (!isset($debug)) {
$debug = FALSE;
}
I use a $debug variable to indicate how errors should be handled. If the site is being run locally, $debug will be TRUE by this point. Otherwise, debugging is disabled by default.
To debug a live site, a page would need to use the line
$debug = TRUE;
prior to including the configuration file.
7. Begin a function for handling errors:
function my_error_handler ($e_number, $e_message, $e_file, $e_line, $e_vars) {
global $debug, $contact_email;
PHP allows you to define your own function for handling errors, rather than using the built-in behavior. For more information on this process or the syntax, see the PHP manual or my PHP and MySQL for Dynamic Web Sites: Visual QuickStart Guide book (Peach-pit Press, 2012).
Two global variables will be used in this function.
8. Build up the error message:
$message = "An error occurred in script '$e_file' on line $e_line: $e_message";
$message .= print_r($e_vars, 1);
For debugging purposes, the error message should be as informative as possible. To start, it will include the name of the file where the error occurred and on what line. Then, every existing variable is added. This can be a lot of data  , but that’s a good thing when you need to find and fix a problem.
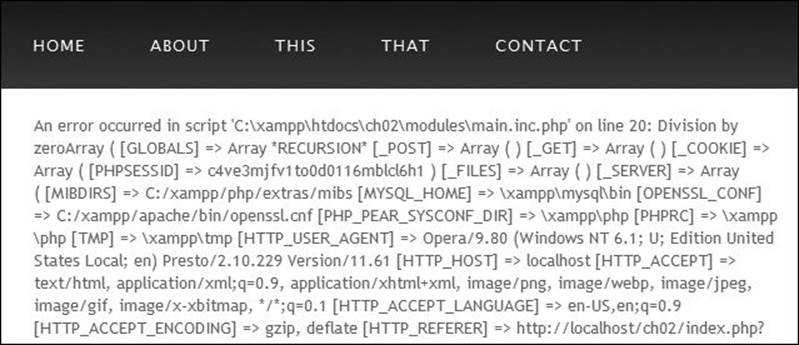
How errors appear when debugging a page.
9. If debugging is turned on, print the error and a backtrace:
if ($debug) { // Show the error.
echo '<div class="error">' . $message . '</div>';
debug_print_backtrace();
If debugging is turned on, then the full message will appear in the Web browser  . This is great when developing a site but a huge security flaw on a live site. This specific code will show that information within a DIV that has a class value of error, which presumably matches the corresponding CSS. You can edit this code to fit into your site’s design, whether that means creating a special DIV or whatnot.
Along with the custom error message, a backtrace is printed. A backtrace is a hierarchy of function calls to that point in the program.
Site Structure
Much like your code structure and documentation, another overarching issue when developing larger Web applications is that of site structure: how the files are organized and stored on the server. Proper site structure is intended to improve security and administration of a site, as well as promote scalability, portability, and ease of modifications.
The key to site structure is to break up your code and applications into different pages and directories according to use, purpose, and function. Within the primary Web documents folder, which I’ll call html, you would have one directory for images (almost everyone does this, at least), another for classes (if using object-oriented programming), another for functions, and so forth. Further, I suggest that you use your own personalized folder names for security purposes. Any time that a malicious user is blind to the names of folders and documents, the better. If you use the name admin for the administration section of a site, you’re not doing yourself any favors, security-wise.
10. If debugging is turned off, send the message in an email and print a default message:
} else {
error_log ($message, 1, $contact_email);
if ( ($e_number != E_NOTICE) && ($e_number < 2048)) {
echo '<div class="error"> A system error occurred. We apologize for the inconvenience.</div>';
}
} // End of $debug IF.
For a live site, the detailed error message should not be shown (unless debugging is temporarily enabled for that page) but should be emailed instead. The error_log() function will do this, if provided with the number 1 as its second argument. But the user probably needs to know that something didn’t go right, so a generic message is displayed  . If the error happens to be a notice or a strict error (having a value of 2048), no message should be printed, as the error is likely not interfering with the operation of the page.
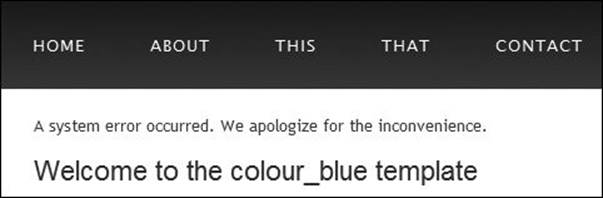
On a live site, errors are handled more modestly (and securely).
11. Complete the function, tell PHP to use this error handler, and complete the page:
} // End of my_error_handler() definition.
set_error_handler('my_error_handler');
12. Save the file as config.inc.php and place it in your Web directory (in an includes subfolder).
See  for the directory layout I’ll use for this site. Note that I’m not using a closing PHP tag. This is acceptable in PHP and recommended for any file that is to be included by other scripts (because it helps to prevent headers already sent errors, for starters).
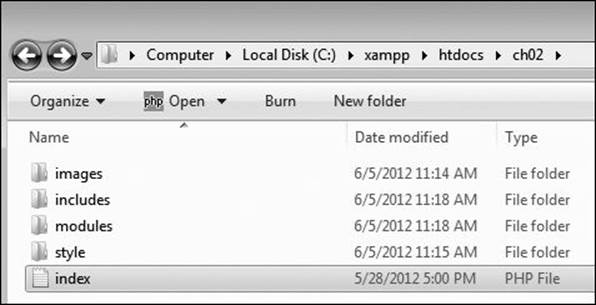
The root folder is where the site’s index page may be found. Within the root folder, other subfolders—such as images, includes, and modules—would be used.
Creating the HTML template
Using an HTML template is a virtual certainty with any larger-scale application. You can use Smarty (http://www.smarty.net) or any other templating systems, but I often use just two simple files: a header that contains everything in a page up until the page-specific content, and a footer that contains the rest of the page. The style sheet handles all of the cosmetics and layout, of course.
For this template, I’ll use the Colour Blue HTML5 design created by HTML5 Web Templates (www.html5webtemplates.co.uk), and gratefully used with their kind permission.
To create the template pages
1. Design an HTML page in your text or WYSIWYG editor.
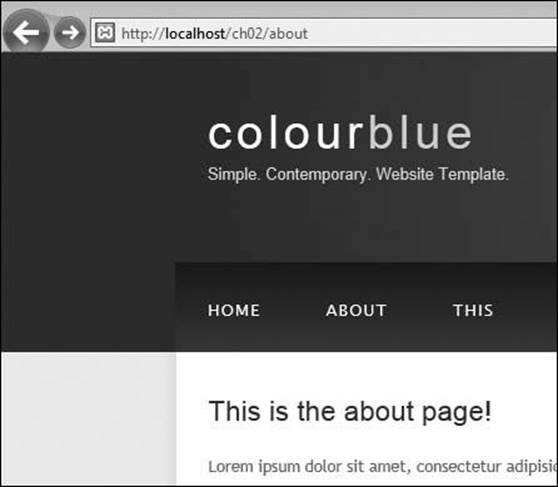
To start creating a template for a Web site, design the layout like a standard HTML page, independent of any PHP code. For this example, as I already said, I’ll be using the Colour Blue design  .
.
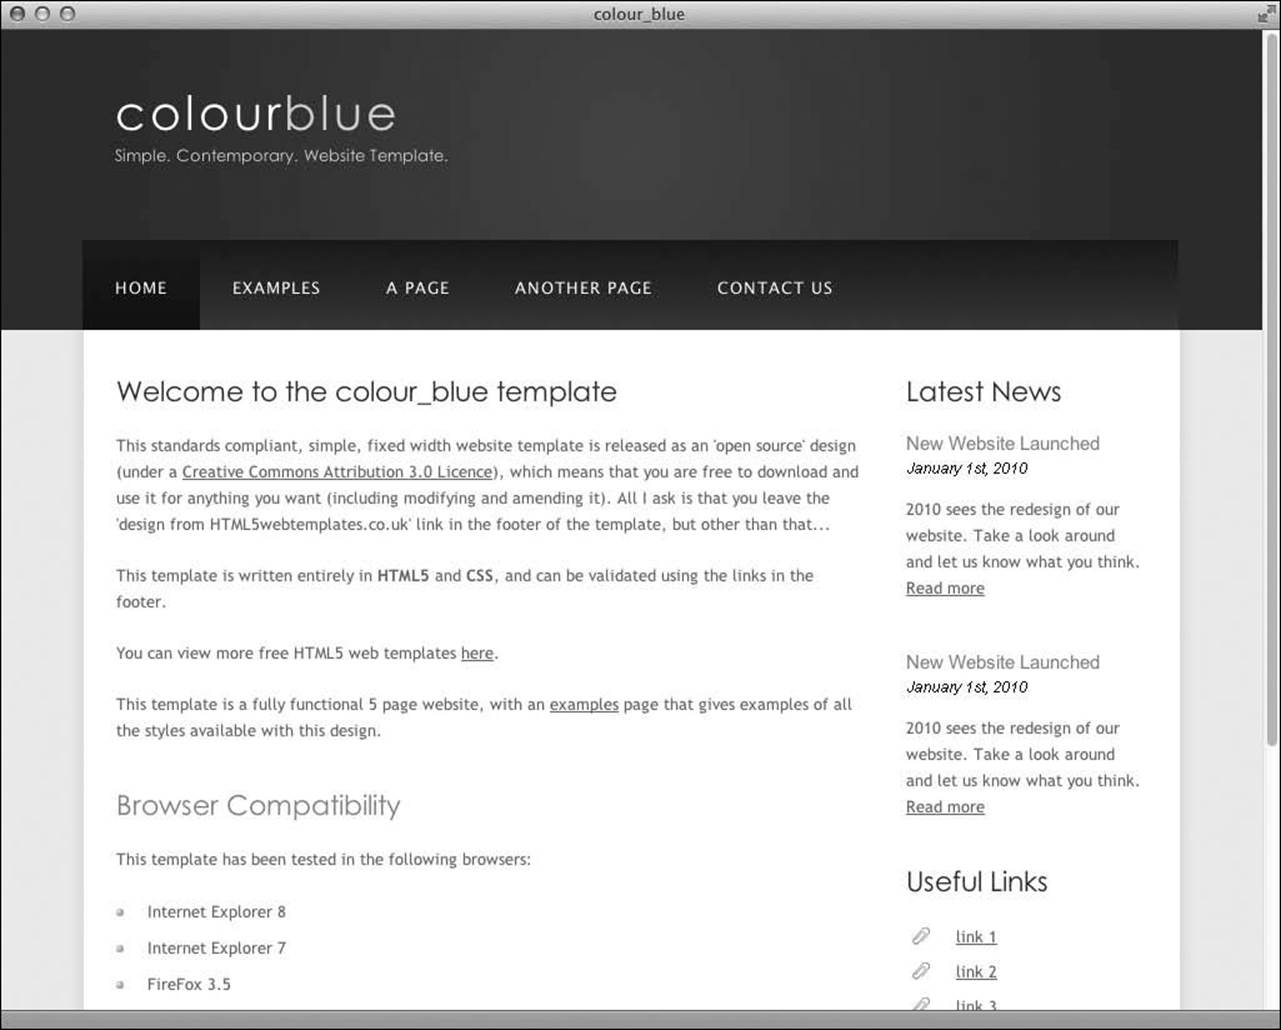
The template this site will use for all its pages.
Note: In order to save space, the CSS file for this example (which controls the layout) is not included in the book. You can download the file through the book’s supporting Web site (www.LarryUllman.com, see the downloads page for this book).
2. Copy everything from the first line of the layout’s source to just before the page-specific content and paste it in a new document (Script 2.2). That is, start from
<!DOCTYPE HTML>
and continue through
<div id="content">
This first file will contain the initial HTML tags (from DOCTYPE through the head and into the beginning of the page body). It also has the code that makes the column of links on the top of the browser window and the sidebar on the right (see  ). I’ve omitted a good chunk of the HTML from this step. For the complete code, see Script 2.2 or just download the file from the book’s Web site.
3. Change the page’s title line to read:
<title><?php echo $page_title;?></title>
I’ll want the page title (which appears at the top of the Web browser; colour_blue in to be changeable on a page-by-page basis. To do so, I set this as a variable that will be printed out by PHP.
Script 2.2. The header file begins the HTML template. It also includes the CSS file and uses a PHP variable for the browser window’s title.
1 <?php # Script 2.2 - header.html
2 // This page begins the HTML header for the site.
3
4 // Check for a $page_title value:
5 if (!isset($page_title)) $page_title = 'Default Page Title';
6 ?><!DOCTYPE HTML>
7 <html>
8
9 <head>
10 <title><?php echo $page_title; ?></title>
11 <link rel="stylesheet" type="text/css" href="style/style.css" title="style" />
12 </head>
13
14 <body>
15 <div id="main">
16 <div id="header">
17 <div id="logo">
18 <div id="logo_text">
19 <h1><a href="index.html">colour<span class="logo_colour">blue</span></a></h1>
20 <h2>Simple. Contemporary. Website Template.</h2>
21 </div>
22 </div>
23 <div id="menubar">
24 <ul id="menu">
25 <li><a href="index.php">Home</a></li>
26 <li><a href="index.php?p=about">About</a></li>
27 <li><a href="index.php?p=this">This</a></li>
28 <li><a href="index.php?p=that">That</a></li>
29 <li><a href="index.php?p=contact">Contact</a></li>
30 </ul>
31 </div>
32 </div>
33 <div id="site_content">
34 <div class="sidebar">
35 <h3>Latest News</h3>
36 <h4>New Website Launched</h4>
37 <h5>January 1st, 2010</h5>
38 <p>2010 sees the redesign of our website. Take a look around and let us know what you think.<br /><a href="#">Read more</a></p>
39 <h3>Useful Links</h3>
40 <ul>
41 <li><a href="#">link 1</a></li>
42 <li><a href="#">link 2</a></li>
43 </ul>
44 <h3>Search</h3>
45 <form method="get" action="index.php" id="search_form">
46 <p>
47 <input type="hidden" name="p" value="search" />
48 <input class="search" type="text" name="terms" value="Search..." />
49 <input name="search" type="image" style="border: 0; margin: 0 0 -9px 5px;" src="style/search.png" alt="Search" title="Search" />
50 </p>
51 </form>
52 </div>
53 <div id="content">
54 <!-- End of header. -->
4. Before any HTML, create a PHP section that checks for a $page_title:
<?php # Script 2.2 - header.html
if (!isset($page_title)) $page_title = 'Default Page Title'; ?>
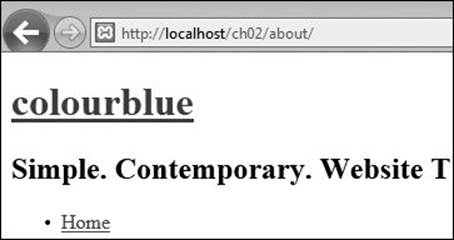
Just in case a PHP script includes the header file without having set a $page_title first, this PHP code declares a default page title (which you’ll likely want to make more meaningful). If you don’t do this and error reporting is turned on, the browser title could get messy  .
.

Make sure that a $page_title value is set, or else the error reporting system will end up printing a detailed error message in the browser title area instead.
5. Save the file as header.html.
Included files can use just about any extension for the filename. Some programmers like to use .inc to indicate that a file is used as an include. In this case, you could also use .inc.html, which would indicate that it’s both an include and an HTML file (to distinguish it from includes full of PHP code).
6. Copy everything in the original template from the end of the page-specific content to the end of the page and paste it in a new file (Script 2.3):
<!-- # Script 2.3 - footer.html -->
</div>
</div>
<div id="content_footer"></div>
<div id="footer">
Copyright © colour_blue | <a href="http://validator.w3.org/check?uri=referer"> HTML5</a> | <a href="http://jigsaw.w3.org/css-validator/check/referer">CSS</a> | <a href="http://www.html 5webtemplates.co.uk">design from HTML5webtemplates.co.uk</a>
</div>
</div>
</body>
</html>
The footer file contains the remaining formatting for the page body, including the page’s footer, and then closes the HTML document.
7. Save the file as footer.html.
8. Place both files in the Web server’s includes directory.
Script 2.3. The footer file completes the HTML template.
1 <!-- # Script 2.3 - footer.html -->
2 </div>
3 </div>
4 <div id="content_footer"></div>
5 <div id="footer">
6 Copyright © colour_blue | <a href="http://validator.w3.org/check?uri=referer">HTML5</a> | <a href="http://jigsaw.w3.org/css-validator/check/referer">CSS</a> | <a href="http://www.html5webtemplates.co.uk">design from HTML5webtemplates.co.uk</a>
7 </div>
8 </div>
9 </body>
10 </html>
Creating the index page
The index page is the main script in the modularized application. In fact, it’s the only page that should ever be loaded in the Web browser. The technical term for this construct is a bootstrap file, and it’s also the common approach in framework-based sites.
The index page has but a single purpose: to assemble all the proper pieces to make the complete Web page. Accomplishing this might involve:
• Including a configuration file
• Including a database connectivity file
• Incorporating an HTML template
• Determining and including the proper content module
Bootstrap files do not, conventionally, contain any HTML at all, because the requisite HTML will be placed in included files.
To create the main page
1. Begin a new PHP script in your text editor or IDE, to be named index.php (Script 2.4):
<?php # Script 2.4 - index.php
2. Include the configuration file:
require('./includes/config.inc.php');
The configuration file defines many important things, so it should be included first.
Script 2.4. The index page is the script through which everything happens. It determines what module should be included, requires the configuration file, and pulls together the HTML template.
1 <?php # Script 2.4 - index.php
2
3 /*
4 * This is the main page.
5 * This page includes the configuration file,
6 * the templates, and any content-specific modules.
7 */
8
9 // Require the configuration file before any PHP code:
10 require('./includes/config.inc.php');
11
12 // Validate what page to show:
13 if (isset($_GET['p'])) {
14 $p = $_GET['p'];
15 } elseif (isset($_POST['p'])) { // Forms
16 $p = $_POST['p'];
17 } else {
18 $p = NULL;
19 }
20
21 // Determine what page to display:
22 switch ($p) {
23
24 case 'about':
25 $page = 'about.inc.php';
26 $page_title = 'About This Site';
27 break;
28
29 case 'contact':
30 $page = 'contact.inc.php';
31 $page_title = 'Contact Us';
32 break;
33
34 case 'search':
35 $page = 'search.inc.php';
36 $page_title = 'Search Results';
37 break;
38
39 // Default is to include the main page.
40 default:
41 $page = 'main.inc.php';
42 $page_title = 'Site Home Page';
43 break;
44
45 } // End of main switch.
46
47 // Make sure the file exists:
48 if (!file_exists('./modules/' . $page)) {
49 $page = 'main.inc.php';
50 $page_title = 'Site Home Page';
51 }
52
53 // Include the header file:
54 include('./includes/header.html');
55
56 // Include the content-specific module:
57 // $page is determined from the above switch.
58 include('./modules/' . $page);
59
60 // Include the footer file to complete the template:
61 include('./includes/footer.html');
62
63 ?>
3. Validate the page being shown:
if (isset($_GET['p'])) {
$p = $_GET['p'];
} elseif (isset($_POST['p'])) {
$p = $_POST['p'];
} else {
$p = NULL;
}
The specific content being shown will be based on a value received by this page. When the user clicks links, the value will be passed in the URL. When most forms are submitted, the value will be sent in $_POST. If neither is the case, $p is set to NULL.
4. Begin a switch conditional that determines the page title and the file to include:
switch ($p) {
case 'about':
$page = 'about.inc.php';
$page_title =
'About This Site';
break;
Each module has a name of something.inc.php, which is my way of indicating that it’s both a PHP script and also an included file. Due to the way computers handle extensions, only the final extension really matters (i.e., if you were to run the file directly, it would be treated as a PHP script).
For each module, the page’s title (which will appear in the browser window) is also set.
5. Complete the switch:
case 'contact':
$page = 'contact.inc.php';
$page_title = 'Contact Us';
break;
case 'search':
$page = 'search.inc.php';
$page_title = 'Search Results';
break;
default:
$page = 'main.inc.php';
$page_title = 'Site Home Page';
break;
} // End of main switch.
For each possible content module, another switch case is provided. For security purposes, the default case is critical. If $p does not have any value or does not have a valid value—one of the specific cases—then the main.inc.php file will be used. This is a necessary security step because some ill-intended person will see that your site has a URL like index.php?p=contact and will attempt to do something like index.php?p=/path/to/secret/file. In such a case, the page’s main content will be included, and not the bad thing the hacker was trying to see.
6. Confirm that the module file exists:
if (!file_exists('./modules/' . $page)) {
$page = 'main.inc.php';
$page_title = 'Site Home Page';
}
This isn’t absolutely necessary as long as the right module file exists for each case in the switch. However, including this code provides an extra layer of security.
7. Include the header file:
include('./includes/header.html');
This is the start of the HTML template.
8. Include the module:
include('./modules/' . $page);
This brings in all the specific content.
9. Include the footer file:
include('./includes/footer.html');
This completes the HTML template.
10. Complete the page:
?>
11. Save the file as index.php and place it in your Web directory.
You can’t test this script until you’ve created some of the content modules (at least main.inc.php).
Tip
The switch conditional that validates proper $p values is an important security measure. Another is using a separate variable for the name of the included file (i.e., $page). The following code would be highly insecure:
include($_GET['p']);
Creating content modules
Now that all the legwork has been done and the configuration, template, and index files have been written, it’s time to start creating the actual content modules. With this bootstrap system, a content module is stunningly simple to implement. The content files do not need to include the configuration or the template files, because the main script already does that. And since all the content files are includes, they can contain literal HTML or PHP code.
There is one catch: the modules should not be loadable directly. If you were to directly access main.inc.php (or any other module) in your Web browser, you’d see the result without the HTML template  , without the proper error management, and possibly without the database connectivity. To prevent this, every module should have some code that redirects the user to the proper page, if accessed directly. (Later in this chapter, you’ll learn how to prevent direct access using the Web server itself.)
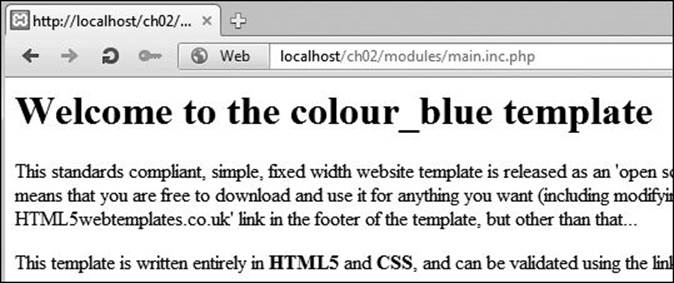
Content modules shouldn’t be accessed directly through a URL, since they would then lack the HTML template (among other things).
To create the main module
1. Begin a new PHP script in your text editor or IDE, to be named main.inc.php (Script 2.5):
<?php # Script 2.5 - main.inc.php
2. Check that this page has not been accessed directly:
if (!defined('BASE_URL')) {
There are any number of things you could check for to test if the module is being accessed directly, like whether $page or $p is set. Instead, I’ll see if a constant is defined. This constant is created in the configuration file, which should be included first thing in the index file, prior to including this page.
Script 2.5. The first content module has the HTML for the main page. Some PHP code redirects the Web browser if this script was accessed directly.
1 <?php # Script 2.5 - main.inc.php
2
3 /*
4 * This is the main content module.
5 * This page is included by index.php.
6 */
7
8 // Redirect if this page was accessed directly:
9 if (!defined('BASE_URL')) {
10
11 // Need the BASE_URL, defined in the config file:
12 require('../includes/config.inc.php');
13
14 // Redirect to the index page:
15 $url = BASE_URL . 'index.php';
16 header ("Location: $url");
17 exit;
18
19 } // End of defined() IF.
20 ?>
21 <h1>Welcome to the colour_blue template</h1>
22 <p>This standards compliant, simple, fixed width website template is released as an 'open source' design (under a <a href="http://creativecommons.org/licenses/by/3.0">Creative Commons Attribution 3.0 Licence</a>), which means that you are free to download and use it for anything you want (including modifying and amending it). All I ask is that you leave the 'design from HTML5webtemplates.co.uk' link in the footer of the template, but other than that...</p>
23 <p>This template is written entirely in <strong>HTML5</strong> and <strong>CSS</strong>, and can be validated using the links in the footer.</p>
24 <p>You can view more free HTML5 web templates <a href="http://www.html5webtemplates.co.uk">here</a>.</p>
25 <p>This template is a fully functional 5 page website, with an <a href="examples.html">examples</a> page that gives examples of all the styles available with this design.</p>
26 <h2>Browser Compatibility</h2>
27 <p>This template has been tested in the following browsers:</p>
28 <ul>
29 <li>Internet Explorer 8</li>
30 <li>Internet Explorer 7</li>
31 <li>FireFox 3.5</li>
32 <li>Google Chrome 6</li>
33 <li>Safari 4</li>
34 </ul>
3. Redirect the user:
$url = BASE_URL . 'index.php';
header ("Location: $url");
exit;
If this page is being accessed directly, then the user should be redirected to the index page. Because an absolute URL redirection is desired (which is best), the configuration file must be included to get the BASE_URL value.
4. Complete the PHP section:
} // End of defined() IF.
?>
5. Add your content:
<h1>Welcome to the colour_blue template</h1>
<p>This standards compliant, simple, fixed width website template...
This can be any combination of HTML and PHP, just like any other PHP page. I’m omitting some of the content from this step, but you can find it in the downloadable version of the script.
6. Save the file as main.inc.php, place it in your Web directory (in the modules folder, ), and test by going to index.php in your Web browser  .
.
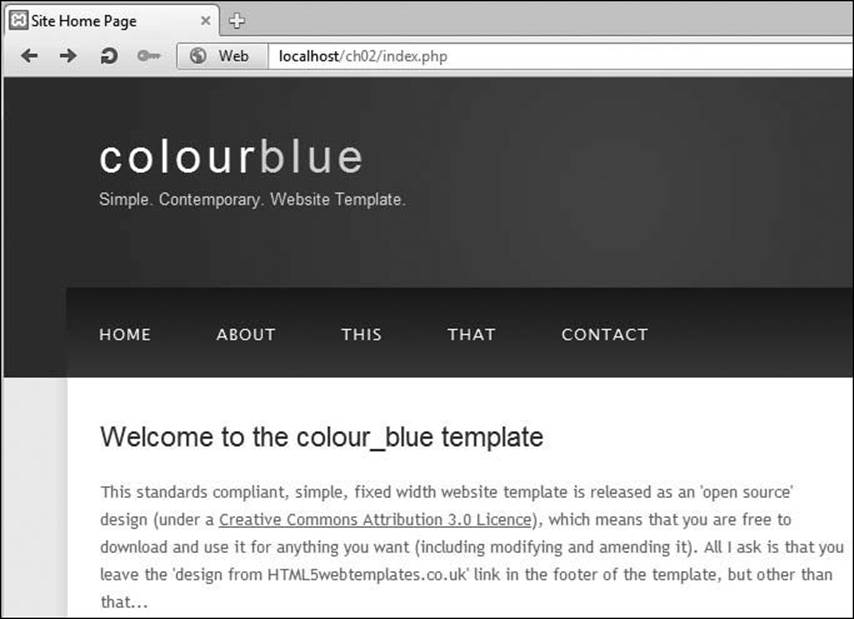
The complete, modularized, template-driven site home page.
Creating the search module
As a demonstration of a PHP-driven module, I’ll sketch out a search feature. Keep in mind that, having no real content and no database back end, this example makes it impossible to implement a real search. But that’s not important in this case anyway. The focus here is on how you would use PHP to handle forms within the modular structure. Once again, I think you’ll be surprised by how uncomplicated it is.
For this specific template, the search form is already present in the sidebar, created by header.html:
<form method="get" action="index.php" id="search_form">
<p>
<input type="hidden" name="p" value="search" />
<input class="search" type="text" name="terms" value="Search..." />
<input name="search" type="image" src="style/search.png" alt="Search" title="Search" />
</p>
</form>
As you can see, the form uses the GET method, which is common for search forms. The action attribute points to index.php, because all page requests go through the bootstrap file. But to work within the modularized system, the hidden input is required, with a name of p and a value of search. This one line effectively tells the bootstrap file to load the search module when the form is submitted.
If you had a different form that used POST, such as a contact form, a hidden input with the proper value would work just the same.
To create the search module
1. Begin a new PHP script in your text editor or IDE, to be named search.inc.php (Script 2.6):
<?php # Script 2.6 - search.inc.php
2. Redirect the browser if the page has been accessed directly:
if (!defined('BASE_URL')) {
require('../includes/config.inc.php');
$url = BASE_URL . 'index.php?p=search';
if (isset($_GET['terms'])) {
$url .= '&terms=' . urlencode($_GET['terms']);
}
header ("Location: $url");
exit;
} // End of defined() IF.
The bulk of the code here is like that in main.inc.php, with two changes. First, the redirection URL is changed to BASE_URL plus index.php?p=search. This technique, which can be used for any module, allows the user to be immediately redirected to the page they want—via index.php. Second, if for some inexplicable reason the user arrived on this page while submitting a form, then the search terms will be present in the URL. If so, those terms will be passed along as well. The end result will be that going directly to www.example.com/modules/search.inc.php?terms=blah still results in a valid search.
Script 2.6. The search module pretends to return some results as a way of demonstrating how easy it is to handle forms, even in a modularized structure.
1 <?php # Script 2.6 - search.inc.php
2
3 /*
4 * This is the search content module.
5 * This page is included by index.php.
6 * This page expects to receive $_GET['terms'].
7 */
8
9 // Redirect if this page was accessed directly:
10 if (!defined('BASE_URL')) {
11
12 // Need the BASE_URL, defined in the config file:
13 require('../includes/config.inc.php');
14
15 // Redirect to the index page:
16 $url = BASE_URL . 'index.php?p=search';
17
18 // Pass along search terms?
19 if (isset($_GET['terms'])) {
20 $url .= '&terms=' . urlencode($_GET['terms']);
21 }
22
23 header ("Location: $url");
24 exit;
25
26 } // End of defined() IF.
27
28 // Print a caption:
29 echo '<h1>Search Results</h1>';
30
31 // Display the search results if the form
32 // has been submitted.
33 if (isset($_GET['terms']) && ($_GET['terms'] != 'Search...') ) {
34
35 // Query the database.
36 // Fetch the results.
37 // Print the results:
38 for ($i = 1; $i <= 10; $i++) {
39 echo <<<EOT
40 <h4><a href="#">Search Result #$i</a></h4>
41 <p>This is some description. This is some description. This is some description. This is some description.</p>\n
42 EOT;
43 }
44
45 } else { // Tell them to use the search form.
46 echo '<p class="error">Please use the search form to search this site.</p>';
47 }
3. Print a caption:
echo '<h1>Search Results</h1>';
4. Check for a proper search term:
if (isset($_GET['terms']) && ($_GET['terms'] != 'Search...') ) {
The database search would only take place if a search term were passed along in the URL. The search box uses Search... as the default value, so that needs to be ruled out, too.
5. Print the search results:
for ($i = 1; $i <= 10; $i++) {
echo <<<EOT
<h4><a href="#">Search Result #$i</a></h4>
<p>This is some description. This is some description. This is some description. This is some description.</p>\n
EOT;
}
Since there’s no database to search, I’ll just use a for loop to print 10 search results. I’m using the heredoc syntax here, as described in Chapter 1, “Advanced PHP Techniques.”
6. Complete the page:
} else {
echo '<p class="error">Please use the search form to search this site.</p>';
}
This conditional applies if no valid search terms were entered  .
.

No search is performed without a term being submitted.
7. Save the file as search.inc.php, place it in your Web directory (in the modules folder), and test by submitting the form  .
.
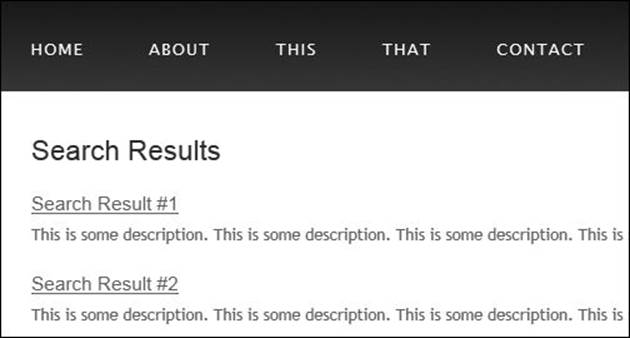
Any search term will turn up these dummy results.
Improved SEO with mod_rewrite
The modularized site as written has a number of benefits, starting with the fact that it will be easier to maintain and expand as needed. One downside is that the URLs required by this approach are awkward and unappealing:
• index.php?p=about
• index.php?p=contact
• index.php?p=this
The standard solution in these situations is to use the Apache Web server’s mod_rewrite module to allow for “prettier” URLs. mod_rewrite is a tool that lets you instruct the server that when the user goes to one URL, the server should provide another resource. mod_rewrite makes use of regular expressions, so the matching pattern and resulting actual URL can be as complex as needed.
These, and other changes to Apache’s behavior, can be made in two ways: by editing the primary Apache configuration file or by creating directory-specific files. The primary configuration file is httpd.conf, found within a conf directory, and it dictates how the entire Apache Web server runs (where the httpd.conf file is on your system will depend on many things). An .htaccess file (pronounced “H-T access”) is placed within a Web directory and is used to affect how Apache behaves within just that folder and subfolders.
Generally speaking, it’s preferable to make changes in the httpd.conf file, since this file needs to be read only by the Web server each time the server is started. Conversely, .htaccess files must be read by the Web server once for every request to which an .htaccess file might apply. For example, if you have www.example.com/somedir/.htaccess, any request to www.example.com/somedir/whatever requires reading the .htaccess file, as well as reading an .htaccess file that might exist in www.example.com/. On the other hand, in shared hosting environments, individual users are not allowed to customize the entire Apache configuration, but they may be allowed to use .htaccess to make changes that only affect their sites. And changes to the primary configuration file do require restarting Apache to take effect.
Tip
To be safe, I’d recommend making a backup copy of your original Apache configuration file before pursuing any of the subsequent edits.
Allowing for .htaccess overrides
As already stated, all Apache configuration can actually be accomplished within the httpd.conf file. In fact, doing so is preferred. But the configuration file is not always available for you to edit, so it’s worth also knowing how to use .htaccess files to change how a site functions.
An .htaccess file is just a plain-text file, with the name .htaccess. Like .htconf, there is no file extension, and the initial period makes this a hidden file on the system. When placed within a Web directory, the directives defined in the .htaccess file will apply to that directory and its subdirectories.
A common hang-up when using .htaccess files is that permission has to be granted to allow .htaccess to make server behavior changes. Depending on the installation and configuration, Apache, on the strictest level of security, will not allow .htaccess files to change Apache behavior. This is accomplished with code like the following, in httpd.conf:
<Directory />
AllowOverride None
</Directory>
The Directory directive is used within httpd.conf to modify Apache’s behavior within a specific directory. In the previous code, the root directory (/) is the target, meaning that Apache will not allow over-rides—changes—made within any directories on the computer at all. Prior to creating.htaccess files, then, the main configuration file must be set to allow overrides in the applicable Web directory (or directories).
The AllowOverride directive takes one or more flags indicating what, specifically, can be overridden:
• AuthConfig, for using authorization and authentication
• FileInfo, for performing redirects and URL rewriting
• Indexes, for listing directory contents
• Limit, for restricting access to the directory
• Options, for setting directory behavior, such as the ability to execute CGI scripts or to index folder contents
• All
• None
For example, to allow AuthConfig and FileInfo to be overridden within the site directory, the httpd.conf file should include:
<Directory /path/to/site>
AllowOverride AuthConfig FileInfo
</Directory>
As long as this code comes after any AllowOverride None block, an .htaccess file in the site directory will be able to make some changes to Apache’s behavior when serving files from that directory (and its subdirectories).
To allow .htaccess overrides
1. Open httpd.conf in any text editor or IDE.
If you’re using XAMPP on Windows, the file to open is C:\xampp\apache\conf\httpd.conf (assuming XAMPP is installed in the root of the C drive). If you’re using MAMP on Mac OS X, the file to open is /Applications/MAMP/ conf/apache/httpd.conf.
If you aren’t using either of these but are using Apache, you’ll need to hunt around for your httpd.conf file.
2. At the end of the file, add
<Directory "/path/to/directory">
</Directory>
The Directory tag is how you customize Apache behavior for a specific directory or its subdirectories. Within the opening tag, provide an absolute path to the directory in question, such as C:\xampp\htdocs\somedir or /Applications/MAMP/htdocs/somedir.
If your configuration file has a VirtualHost tag for the site in question, you’d want to add the Directory within that.
3. Within the Directory tags, add :
AllowOverride All
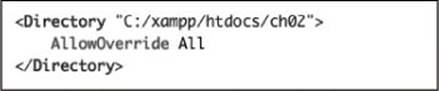
The modified configuration file should now allow for .htaccess overrides within the site’s directory.
This is a heavy-handed solution but will do the trick. On a live, publicly available server, you’d want to be more specific about what exact settings can be overridden, but on your home computer, this won’t be a problem.
4. Save the configuration file.
5. Restart Apache.
Tip
If a directory has an .htaccess file but is not allowed to override a setting, the .htaccess file will just be ignored.
Tip
Anything accomplished within an .htaccess file can also be achieved using a Directory tag within httpd.conf.
Tip
Apache will not display .htaccess files in the Web browser by default, which is a smart security approach.
Tip
When creating .htaccess files, make sure your text editor or IDE is not secretly adding a .txt extension. Notepad, for example, will do this. You can confirm this has happened if you can load www.example.com/.htaccess.txt in your Web browser. In Notepad, you can prevent the added extension by quoting the file name and saving it as type “All files.”
Protecting Directories
Another common use of an .htaccess file is to protect the contents of a directory. There are two possible scenarios:
• Denying all access
• Restricting access to authorized users
Strange as it may initially sound, there are plenty of situations in which files and folders placed in the Web directory should be made unavailable. For example, the modules directory in this site could reasonably be blocked, as could any directory you use to store sensitive PHP scripts or uploaded files. In all of these cases, the contents of the directory would not be meant for direct access, but rather PHP scripts in other directories would reference that content as needed.
To deny all access to a directory’s contents, place this code in an .htaccess file in that folder (comments indicate what each line does):
# Disable directory browsing:
Options All -Indexes
# Prevent folder listing:
IndexIgnore *
# Prevent access to any file:
<FilesMatch "^.*$">
Order Allow,Deny
Deny from all
</FilesMatch>
Again, this code just prevents direct access to that directory’s contents via a Web browser. A PHP script could still use include(), require(), readfile(), and other functions to access that content.
There are a couple of ways of restricting access to authorized users, with the mod_auth module being the most basic and common. It’s not hard to use mod_auth, but you have to invoke a secondary Apache tool to create the credentials file. If you want to pursue this route, just do a search online for Apache mod_auth.
Enabling URL Rewriting
Finally we get to our destination: implementing URL rewriting. URL rewriting has gained attention as part of the overbearing focus on search engine optimization (SEO), but URL rewriting has been a useful tool for years. With a dynamically driven site, such as an e-commerce project, a value will often be passed to a page in the URL to indicate what products to display, resulting in URLs such as www.example.com/category.php?id=23. The PHP script, category.php, would then use the value of $_GET['id'] to know what products to pull from the database and show.
With URL rewriting applied, the URL shown in the browser, visible to the end user and referenced in search engine results, can be transformed into something more obviously meaningful, such as www.example.com/category/23/ or, better yet, www.example.com/category/garden+gnomes/. Apache, via URL rewriting, takes the more user-friendly URL and parses it into something usable by the PHP scripts. This is made possible by the Apache mod_rewrite module. To use it, the .htaccess file must first check for the module and turn on the rewrite engine:
<IfModule mod_rewrite.c>
RewriteEngine on
</IfModule>
After enabling the engine, and before the closing IfModule tag, you add rules dictating the rewrites. The syntax is
RewriteRule match rewrite
For example, you could do the following:
RewriteRule somepage.php otherpage.php
With that code, any time a user goes to somepage.php, the user will be shown the contents of otherpage.php, although the browser will still display somepage.php in the address bar.
To be clear, that’s not actually a good use of mod_rewrite, as a literal redirection could be accomplished with the less complex mod_alias module instead. However, a line like that does represent an easy way to test that mod_rewrite is working.
Part of the complication with performing URL rewrites is that Perl-Compatible Regular Expressions (PCRE) are needed to most flexibly find matches. For example, to treat www.example.com/category/23 as if it were www.example.com/category.php?id=23, you would have the following rule:
RewriteRule ^category/([0-9]+)/?$
category.php?id=$1
The initial caret (^) says that the expression must match the beginning of the string. After that should be the word category, followed by a slash. Then, any quantity of digits follows, concluding with an optional slash (allowing for both category/23 and category/23/). The dollar sign closes the match, meaning that nothing can follow the optional slash. That’s the pattern for the example match (and it’s a simple pattern at that, really).
The rewrite part is what will actually be executed, unbeknownst to the Web browser and the end user. In this line, that’s category.php?id=$1. The $1 is a backreference to the first parenthetical grouping in the match (e.g., 23). Thus, www.example.com/category/23 is treated by the server as if the URL was actually www.example.com/category.php?id=23.
With all of this in mind, in the particular case of this modularized site, the goal is to use, say, www.example.com/about/ instead of www.example.com/index.php?p=about. Not only is this aesthetically better, but there can be an SEO benefit, considering the impact that URLs have on SEO rankings: an apparent directory name—about—is more significant than the index.php script being passed an argument of p with a value of about.
As you’ll see in the following series of steps, the fact that the URL will appear to reference a subdirectory will have other implications that you’ll need to address. But having identified the specific syntax to be addressed, you can configure Apache to make those dynamic changes.
To implement mod_rewrite
1. Create a new file, to be named .htaccess, in your text editor or IDE (Script 2.7):
# Script 2.7 - .htaccess
Be certain to create the file without any extension, and watch that your text editor or IDE does not secretly create one.
Alternatively, you can edit a Directory element within the main httpd.conf file, if you’d rather.
The pound sign (or number sign, or hash) can be used to create comments within this file.
2. Add the following:
<IfModule mod_rewrite.c>
</IfModule>
The IfModule tag is how you add rules that would apply only if a named module has been loaded. In this case, that’s the mod_rewrite module.
Script 2.7. The redirection rules set within this .htaccess file will allow the site to use nicer URLs.
1 # Script 2.7 - .htaccess
2 <IfModule mod_rewrite.c>
3
4 # Turn on the engine:
5 RewriteEngine on
6
7 # Set the base to this directory:
8 RewriteBase /ch02/
9
10 # Redirect certain paths to index.php:
11 RewriteRule ^(about|contact|this|that|search)/?$ index.php?p=$1
12
13 </IfModule>
3. Within the IfModule tags, add
RewriteEngine on
RewriteBase /ch02/
The first line turns the rewrite engine on, if it is not already. The second identifies the URL base to which redirection matches should apply. This is a useful setting when redirections are taking place within a subdirectory (e.g., if you’re using http://localhost/ch02/ as the URL).
4. On the next line, but before the closing IfModule tag, add
RewriteRule ^(about|contact|this|that|search)/?$ index.php?p=$1
The goal is to rewrite certain URLs back to index.php, passing along the specific page requested. Rather than redirect everything—because other valid directories may exist, I’m only redirecting certain values: about, contact, this, that, and search.
In case you’re not terribly familiar with PCRE, the caret (^) indicates that this pattern must match the beginning of the URL, starting after the RewriteBase value. Then, within the parentheses, literal strings are enumerated using the pipe character (|). In other words, match something that begins with about or contact or...
Then the slash is optional, but if present, can only exist once, as dictated by the question mark. This will provide matches for either www.example.com/about or www.example.com/about/. The dollar sign after the question mark indicates the end of the match.
Matches will be redirected to index.php?p=X, where X is whatever matched the strings within the parentheses (i.e., this is a backreference to a grouping).
5. Save the configuration file in your Web site’s directory.
6. Test in your Web browser .
The new about page, being accessed through a nicer-looking URL.
Note that in order to test other pages, such as an about page, you’ll need to create the corresponding module script.
Tip
Once you adopt this system, you’d want to change the URLs for the links (in the HTML), and the action attribute of the search form.
Tip
Because it will appear as if some URLs reference subdirectories (e.g., www.example.com/about/), you’ll need to change references to external resources in your HTML to be absolute, instead of relative :
<link rel="stylesheet" type="text/css" href="/style/style.css" title="style" />
Because the browser thinks it’s within the about directory, it cannot find the referenced CSS file until I change the reference to it.
Affecting the Browser Cache
Web browsers and proxy servers (something ISPs and other corporations create to improve network efficiency) habitually cache Web pages. Caching a page is a matter of storing its content (or part of its content, like an image or video) and then providing that stored version, rather than the version on the server, when a request is made.
For most end users, this is not a problem. In fact, if done properly, the users will not be aware that they are receiving a cached version of a page or image. But if while developing a site you’ve struggled to get your Web browser (let’s face it: the likely culprit is Internet Explorer) to recognize changes you know you’ve made in a page, then you’ve seen the dark side of caching. With your dynamic, PHP-driven sites, sometimes you want to make certain that end users are getting the most up-to-date version of your pages.
Caching—both in Web browsers and proxy servers—can be affected using PHP’s header() function. Four header types are involved:
• Last-Modified
• Expires
• Pragma
• Cache-Control
The first three header types are part of the HTTP 1.0 standard. The Last-Modified header uses a UTC (Coordinated Universal Time) date-time value. If a caching system sees that the Last-Modified value is more recent than the date on the cached version of the page, it knows to use the new version from the server.
Expires is used as an indicator as to when a cached version of the page should no longer be used (in Greenwich Mean Time). Setting an Expires value in the past should always force the page from the server to be used:
header("Expires: Mon, 26 Jul 1997 05:00:00 GMT");
Pragma is just a declaration for how the page data should be handled. To avoid caching of a page, use
header("Pragma: no-cache");
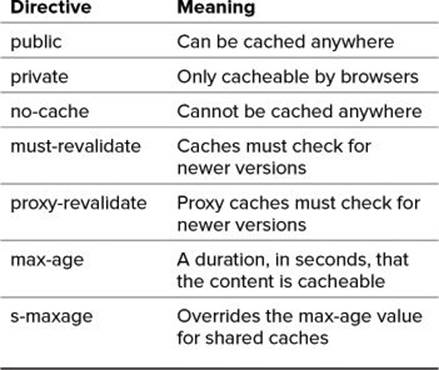
The Cache-Control header was added in HTTP 1.1 and is a more finely tuned option. (You should still use the HTTP 1.0 headers as well.) There are numerous Cache-Control settings (Table 2.1).
Table 2.1. Cache-Control Directives
Putting all this information together, to keep all systems from caching a page, you would use these headers:
header("Last-Modified: Thu, 5 Jun 2012 14:26:00 GMT"); // Right now!
header("Expires: Mon, 26 Jul 1997 05:00:00 GMT"); // Way back when!
header("Pragma: no-cache");
header("Cache-Control: no-cache");
While all too common, this is a heavy-handed approach. Certainly not every PHP script you use is uncacheable. Even the most active site could cache some of its scripts for a minute or more (and a very active site would get many requests within a minute; the cached version would save the server all those hits). As a more focused and proper use of these concepts, let’s rewrite the view_tasks.php page (Script 1.3) from Chapter 1.
To affect caching
1. Open view_tasks.php in your text editor or IDE.
2. Before anything is sent to the Web browser, add the initial PHP tag (Script 2.8):
<?php # Script 2.8 - view_tasks.php
As you hopefully know, the header() function can only be called before anything is sent to the Web browser, including plain text, HTML, or even a blank space.
3. Connect to the database:
$dbc = mysqli_connect('localhost', 'username', 'password', 'test');
To accurately determine when this page was last modified, the script will look at the database it uses.
Script 2.8. This modified version of Chapter 1’s view_tasks.php page (Script 1.3) uses the header() function to make caching recommendations.
1 <?php # Script 2.8 - view_tasks.php
2
3 // Connect to the database:
4 $dbc = mysqli_connect('localhost', 'username', 'password', 'test');
5
6 // Get the latest dates as timestamps:
7 $q = 'SELECT UNIX_TIMESTAMP(MAX(date_added)), UNIX_TIMESTAMP(MAX(date_completed)) FROM tasks';
8 $r = mysqli_query($dbc, $q);
9 list($max_a, $max_c) = mysqli_fetch_array($r, MYSQLI_NUM);
10
11 // Determine the greater timestamp:
12 $max = ($max_a > $max_c) ? $max_a : $max_c;
13
14 // Create a cache interval in seconds:
15 $interval = 60 * 60 * 6; // 6 hours
16
17 // Send the headers:
18 header("Last-Modified: " . gmdate ('r', $max));
19 header("Expires: " . gmdate ("r", ($max + $interval)));
20 header("Cache-Control: max-age=$interval");
21 ?><!doctype html>
22 <html lang="en">
23 <head>
24 <meta charset="utf-8">
25 <title>View Tasks</title>
26 <link rel="stylesheet" href="style.css">
27 </head>
28 <body>
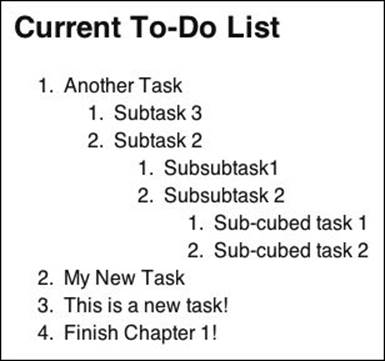
29 <h2>Current To-Do List</h2>
30 <?php
31 function make_list($parent) {
32 global $tasks;
33 echo '<ol>'; // Start an ordered list.
34 foreach ($parent as $task_id => $todo) {
35 echo "<li>$todo";
36 if (isset($tasks[$task_id])) {
37 // Call this function again:
38 make_list($tasks[$task_id]);
39 }
40 echo '</li>'; // Complete the list item.
41 } // End of FOREACH loop.
42 echo '</ol>'; // Close the ordered list.
43 } // End of make_list() function.
44 $q = 'SELECT task_id, parent_id, task FROM tasks WHERE date_completed="0000-00-00 00:00:00" ORDER BY parent_id, date_added ASC';
45 $r = mysqli_query($dbc, $q);
46 $tasks = array();
47 while (list($task_id, $parent_id, $task) = mysqli_fetch_array($r, MYSQLI_NUM)) {
48 $tasks[$parent_id][$task_id] = $task;
49 }
50 make_list($tasks[0]);
51 ?>
52 </body>
53 </html>
4. Get the latest date values from the table:
$q = 'SELECT UNIX_TIMESTAMP (MAX(date_added)), UNIX_TIMESTAMP(MAX (date_completed)) FROM tasks';
$r = mysqli_query($dbc, $q);
list($max_a, $max_c) = mysqli_fetch_array ($r, MYSQLI_NUM);
$max = ($max_a > $max_c) ? $max_a : $max_c;
The tasks table contains two date/ time columns—date_added and date_completed. Any time the page’s content is updated, these two values are set to the current date and time (there is no delete option). The query returns the largest date_added and date_completed values. Because they would be returned in a less usable format , the UNIX_TIMESTAMP() function is applied to make them both integers . Then, the ternary operator is used to assign the largest value (and therefore the most recent date) to the $max variable.
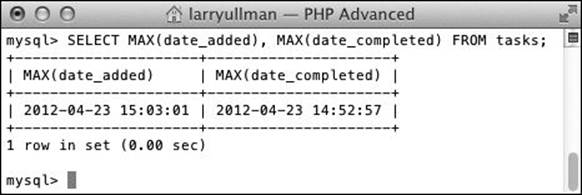
How the timestamp fields would ordinarily be returned by the query.
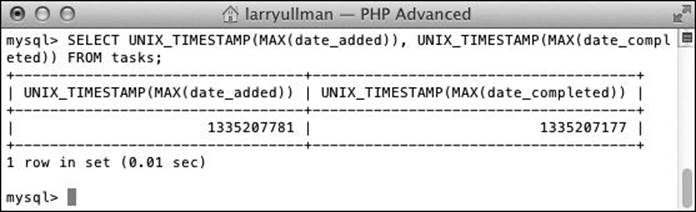
The query result used by this script.
5. Define a reasonable caching interval:
$interval = 60 * 60 * 6;
“Reasonable” depends on your page, how many visitors you get (i.e., the server load), and how often it’s updated. For this value, which is in seconds, I use six hours (60 seconds times 60 minutes times 6).
6. Send the Last-Modified header:
header("Last-Modified: " . gmdate ('r', $max));
This header sets the modification date of this script as the last time the database was updated. The “r” gmdate() (and date()) option will return the date formatted per the HTTP specifications.
7. Set the Expires header:
header("Expires: " . gmdate ("r", ($max + $interval)));
The expiration value is the current time plus the defined interval.
8. Set the Cache-Control header:
header("Cache-Control: max-age=$interval");
?>
This is just the HTTP 1.1 equivalent of the Expires header. Instead of giving a date value, set max-age in seconds.
9. Delete the database connection that existed later on in the original script.
This has been moved to the top of the script in Step 3.
10. Save the file as view_tasks.php, place in your Web directory, and test in your Web browser  .
.
The cache-controlled Web page.
Tip
Note that caching is, in theory, a very good thing, designed to minimize unnecessary server requests. If properly controlled, caches are great for both the server and the client.
Tip
If you have cURL installed on your system, you can run this command to see a page’s headers  :
:
curl --head http://www.example.com/page.php
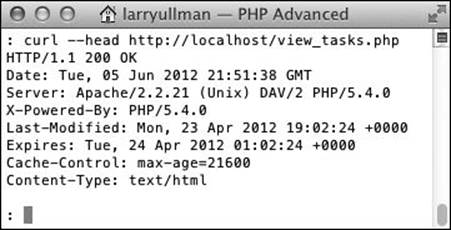
Using cURL to view the headers returned by the view_tasks.php page.
Curl is discussed in Chapter 10, “Networking with PHP.”
Tip
Page caching can also be affected using the META tags, placed within an HTML document’s head. This may not work as reliably with some browsers as the header() method.
Tip
This section of the chapter specifically discusses controlling browser caching. Chapter 4, “Basic Object-Oriented Programming,” covers server-side caching.
Review and Pursue
If you have any problems with these sections, either in answering the questions or pursuing your own endeavors, turn to the book’s supporting forum (www.LarryUllman.com/forums/).
Review
• What is a bootstrap file? (See page 57.)
• Why is it important that all user requests go through the bootstrap file (i.e., why shouldn’t the individual modules be accessed directly)? (See page 61.)
• Why is the following line of code highly insecure? (See page 60.)
include($_GET['p']);
• What two files are used to configure how the Apache Web server runs? How do the two files differ? (See page 67.)
• How can you test if mod_rewrite is available to use within a specific directory? (See page 71.)
• Why do relative references to external resources, such as images, JavaScript, and style sheets, cause problems when using mod_rewrite? (See page 74.)
• What is caching? Why is caching useful? When can caching be problematic? (See page 75.)
• What PHP function can be used to affect the caching of a page? (See page 76.)
Pursue
• Add more modules to the sample site to flesh it out.
• If you have an actual project to modularize using the techniques explained in this chapter, do so, adding in a database configuration file.
• Practice creating errors within the modularized Web site, in both live and development modes, to test the error-handling process.
• If you want, create a validation/redirection includable file that checks if a module is accessed directly and, if so, redirects the user. Then have each module include this new file.
• Modify the search page so that it shows the submitted search terms, too.
• Learn more about configuring Apache and what other features the Web server application has to offer.
• If you’re using mod_rewrite, change the HTML so that none of the links or forms reference index.php anymore.
• Learn more about caching.
All materials on the site are licensed Creative Commons Attribution-Sharealike 3.0 Unported CC BY-SA 3.0 & GNU Free Documentation License (GFDL)
If you are the copyright holder of any material contained on our site and intend to remove it, please contact our site administrator for approval.
© 2016-2026 All site design rights belong to S.Y.A.
In This Chapter
Modularizing a Web Site
Improved SEO with mod_rewrite
Affecting the Browser Cache
Review and Pursue
The career of a PHP programmer normally starts with writing individual scripts, each dedicated to a single purpose. From there you begin using more and more files, building up Web applications. Eventually you might develop sites on your own server and, if you’re lucky, balanced over multiple servers. No matter how large your projects are, learning new and improved ways to develop Web applications is an important part of the life of the PHP programmer.
In this chapter, the focus is on developing Web applications beyond the beginner or intermediate level. We begin with an explanation of how to modularize a Web site. Then you’ll learn a bit about the Apache Web server, including using its mod_rewrite feature that makes Search Engine Optimization (SEO)-friendly URLs. The chapter ends with a discussion of controlling the browser caching.
Modularizing a Web Site
In my experience, the arc of a program-mer’s development starts with writing one-page applications that do just a single thing. Over time, the work will evolve into multipage sites, involving templates and state management. After more and more experience, some seasoned PHP developers start doing the same amount of work in fewer pages, such as having the same script both display and handle a form instead of using two separate files. Or, conversely, the advanced PHP programmer may start generating exponentially more scripts, each of which doing far less, by focusing each script on a particular task. This last approach is the premise behind modularizing a Web site.
For an example of modularizing a site, I’ll create a dummy Web site (i.e., it won’t do much) that’s broken into its individual components. The new knowledge here will be how those components are separated, organized, and put back together. Instead of having individual pages (contact.php,about.php, index.php, etc.), the entire application will also be run through one index page. That page will include the appropriate content module based on values passed in the URL.
Creating the Database File
I have not, for this application, created a database configuration file, because the dummy site does not use a database. But if a database were required, I would write a mysql.inc.php (or postgresql.inc.php or db.inc.php or whatever) file that establishes the database connection. Such a file should also define any functions that involve the database application.
This file could also be stored in the includes directory but would preferably be stored outside of the Web directory. The config.inc.php file has a constant named DB that should be an absolute path to this file on the server.
Any page that needs a database connection could then include it by just using
require(DB);
Because DB represents an absolute path to that file, it wouldn’t matter if the including script was in the main folder or a subdirectory.
Creating the configuration file
Every Web application I build begins with a configuration file. Configuration files serve several purposes, the four most important being:
• Defining constants
• Establishing sitewide settings
• Creating user functions
• Managing errors
Basically, any piece of information that every page in a site might need to access should be stored in a configuration file. (As a side note, if a function would not likely be used by the majority of site pages, I would put it in a separate file, thereby avoiding the extra overhead of defining it on pages where it won’t be called.)
To create the configuration file
1. Begin a new PHP script in your text editor or IDE, to be named config.inc.php (Script 2.1):
<?php # Script 2.1 - config.inc.php
Script 2.1. The configuration file is the key back-end script. It defines sitewide constants and dictates how errors are handled.
1 <?php # Script 2.1 - config.inc.php
2
3 /*
4 * File name: config.inc.php
5 * Created by: Larry E. Ullman
6 * Contact: Larry@LarryUllman.com, LarryUllman.com
7 * Last modified: June 5, 2012
8 *
9 * Configuration file does the following things:
10 * - Has site settings in one location.
11 * - Stores URLs and URIs as constants.
12 * - Sets how errors will be handled.
13 */
14
15 # ******************** #
16 # ***** SETTINGS ***** #
17
18 // Errors are emailed here:
19 $contact_email = 'address@example.com';
20
21 // Determine whether we're working on a local server
22 // or on the real server:
23 $host = substr($_SERVER['HTTP_HOST'], 0, 5);
24 if (in_array($host, array('local', '127.0', '192.1'))) {
25 $local = TRUE;
26 } else {
27 $local = FALSE;
28 }
29
30 // Determine location of files and the URL of the site:
31 // Allow for development on different servers.
32 if ($local) {
33
34 // Always debug when running locally:
35 $debug = TRUE;
36
37 // Define the constants:
38 define('BASE_URI', '/path/to/html/folder/');
39 define('BASE_URL', 'http://localhost/directory/');
40 define('DB', '/path/to/mysql.inc.php');
41
42 } else {
43
44 define('BASE_URI', '/path/to/live/html/folder/');
45 define('BASE_URL', 'http://www.example.com/');
46 define('DB', '/path/to/live/mysql.inc.php');
47
48 }
49
50 /*
51 * Most important setting!
52 * The $debug variable is used to set error management.
53 * To debug a specific page, add this to the index.php page:
54
55 if ($p == 'thismodule') $debug = TRUE;
56 require('./includes/config.inc.php');
57
58 * To debug the entire site, do
59
60 $debug = TRUE;
61
62 * before this next conditional.
63 */
64
65 // Assume debugging is off.
66 if (!isset($debug)) {
67 $debug = FALSE;
68 }
69
70 # ***** SETTINGS ***** #
71 # ******************** #
72
73
74 # **************************** #
75 # ***** ERROR MANAGEMENT ***** #
76
77 // Create the error handler:
78 function my_error_handler($e_number, $e_message, $e_file, $e_line, $e_vars) {
79
80 global $debug, $contact_email;
81
82 // Build the error message:
83 $message = "An error occurred in script '$e_file' on line $e_line: $e_message";
84
85 // Append $e_vars to the $message:
86 $message .= print_r($e_vars, 1);
87
88 if ($debug) { // Show the error.
89
90 echo '<div class="error">' . $message . '</div>';
91 debug_print_backtrace();
92
93 } else {
94
95 // Log the error:
96 error_log ($message, 1, $contact_email); // Send email.
97
98 // Only print an error message if the error isn't a notice or strict.
99 if ( ($e_number != E_NOTICE) && ($e_number < 2048)) {
100 echo '<div class="error">A system error occurred. We apologize for the inconvenience.</div>';
101 }
102
103 } // End of $debug IF.
104
105 } // End of my_error_handler() definition.
106
107 // Use my error handler:
108 set_error_handler('my_error_handler');
109
110 # ***** ERROR MANAGEMENT ***** #
111 # **************************** #
2. Add some comments discussing the nature and purpose of this page:
/*
* File name: config.inc.php
* Created by: Larry E. Ullman
* Contact: Larry@LarryUllman.com, LarryUllman.com
* Last modified: June 5, 2012
*
* Configuration file does the following things:
* - Has site settings in one location.
* - Stores URLs and URIs as constants.
* - Sets how errors will be handled.
*/
Because the configuration file is a common file, it ought to be one of the best-documented scripts in a site.
3. Set the email address to be used for errors:
$contact_email = 'address@example.com';
For live sites, I prefer to be emailed when errors occur. To that end, I declare a variable with the “to” email address for any general communications. This may be my address while developing a site but a client’s once the site goes live.
4. Determine whether the script is running on the live server or a test server:
$host = substr($_SERVER ['HTTP_HOST'], 0, 5);
if (in_array($host, array('local', '127.0', '192.1'))) {
$local = TRUE;
} else {
$local = FALSE;
}
I almost always develop on a local server and then upload the completed site to the live server. The two different environments will each have its own server-specific settings. Ideally, the configuration file ought to automatically switch the server-specific settings based on the environment.
To test if the site is running locally, I first grab a reference to the opening five characters in $_SERVER['HTTP_HOST']. I then check if that value is one of a number of possible combinations:
• The word local (as in http://localhost)
• The start of an IP address, 192.1, or 127.0, both of which indicate local networks
You’ll need to adjust this list to values that work best for your local environment.
Whether that conditional is true or not, a $local variable is assigned a Boolean value, for reference later in the script.
5. Set the server-specific constants:
if ($local) {
$debug = TRUE;
define('BASE_URI', '/path/to/html/folder/');
define('BASE_URL', 'http://localhost/directory/');
define('DB', '/path/to/mysql.inc.php');
} else {
define('BASE_URI', '/path/to/live/html/folder/');
define('BASE_URL', 'http://www.example.com/');
define('DB', '/path/to/live/mysql.inc.php');
}
I often use these three constants in my Web applications. The BASE_URI is the absolute file system path to where the site’s root folder is on the server. This constant makes it easy to use absolute references when any script includes a file. If you’re using, for example, XAMPP on Windows, this value might be C:\xampp\htdocs\ch02.
The BASE_URL constant is the host-name and directory (if applicable). On a test server, that might be just http://localhost/ch02/.
Finally, the DB constant is the absolute path to the file that contains the database connectivity information. For security purposes, it’s best to keep this stored outside of the Web directory.
Note that each constant is represented twice: once for a test server and once for the live server. If this is a test server (if $local is TRUE), I also turn on debugging, which will mean more to you shortly.
6. Set the debugging level:
if (!isset($debug)) {
$debug = FALSE;
}
I use a $debug variable to indicate how errors should be handled. If the site is being run locally, $debug will be TRUE by this point. Otherwise, debugging is disabled by default.
To debug a live site, a page would need to use the line
$debug = TRUE;
prior to including the configuration file.
7. Begin a function for handling errors:
function my_error_handler ($e_number, $e_message, $e_file, $e_line, $e_vars) {
global $debug, $contact_email;
PHP allows you to define your own function for handling errors, rather than using the built-in behavior. For more information on this process or the syntax, see the PHP manual or my PHP and MySQL for Dynamic Web Sites: Visual QuickStart Guide book (Peach-pit Press, 2012).
Two global variables will be used in this function.
8. Build up the error message:
$message = "An error occurred in script '$e_file' on line $e_line: $e_message";
$message .= print_r($e_vars, 1);
For debugging purposes, the error message should be as informative as possible. To start, it will include the name of the file where the error occurred and on what line. Then, every existing variable is added. This can be a lot of data ![]() , but that’s a good thing when you need to find and fix a problem.
, but that’s a good thing when you need to find and fix a problem.
![]() How errors appear when debugging a page.
How errors appear when debugging a page.
9. If debugging is turned on, print the error and a backtrace:
if ($debug) { // Show the error.
echo '<div class="error">' . $message . '</div>';
debug_print_backtrace();
If debugging is turned on, then the full message will appear in the Web browser ![]() . This is great when developing a site but a huge security flaw on a live site. This specific code will show that information within a DIV that has a class value of error, which presumably matches the corresponding CSS. You can edit this code to fit into your site’s design, whether that means creating a special DIV or whatnot.
. This is great when developing a site but a huge security flaw on a live site. This specific code will show that information within a DIV that has a class value of error, which presumably matches the corresponding CSS. You can edit this code to fit into your site’s design, whether that means creating a special DIV or whatnot.
Along with the custom error message, a backtrace is printed. A backtrace is a hierarchy of function calls to that point in the program.
Site Structure
Much like your code structure and documentation, another overarching issue when developing larger Web applications is that of site structure: how the files are organized and stored on the server. Proper site structure is intended to improve security and administration of a site, as well as promote scalability, portability, and ease of modifications.
The key to site structure is to break up your code and applications into different pages and directories according to use, purpose, and function. Within the primary Web documents folder, which I’ll call html, you would have one directory for images (almost everyone does this, at least), another for classes (if using object-oriented programming), another for functions, and so forth. Further, I suggest that you use your own personalized folder names for security purposes. Any time that a malicious user is blind to the names of folders and documents, the better. If you use the name admin for the administration section of a site, you’re not doing yourself any favors, security-wise.
10. If debugging is turned off, send the message in an email and print a default message:
} else {
error_log ($message, 1, $contact_email);
if ( ($e_number != E_NOTICE) && ($e_number < 2048)) {
echo '<div class="error"> A system error occurred. We apologize for the inconvenience.</div>';
}
} // End of $debug IF.
For a live site, the detailed error message should not be shown (unless debugging is temporarily enabled for that page) but should be emailed instead. The error_log() function will do this, if provided with the number 1 as its second argument. But the user probably needs to know that something didn’t go right, so a generic message is displayed ![]() . If the error happens to be a notice or a strict error (having a value of 2048), no message should be printed, as the error is likely not interfering with the operation of the page.
. If the error happens to be a notice or a strict error (having a value of 2048), no message should be printed, as the error is likely not interfering with the operation of the page.
![]() On a live site, errors are handled more modestly (and securely).
On a live site, errors are handled more modestly (and securely).
11. Complete the function, tell PHP to use this error handler, and complete the page:
} // End of my_error_handler() definition.
set_error_handler('my_error_handler');
12. Save the file as config.inc.php and place it in your Web directory (in an includes subfolder).
See ![]() for the directory layout I’ll use for this site. Note that I’m not using a closing PHP tag. This is acceptable in PHP and recommended for any file that is to be included by other scripts (because it helps to prevent headers already sent errors, for starters).
for the directory layout I’ll use for this site. Note that I’m not using a closing PHP tag. This is acceptable in PHP and recommended for any file that is to be included by other scripts (because it helps to prevent headers already sent errors, for starters).
![]() The root folder is where the site’s index page may be found. Within the root folder, other subfolders—such as images, includes, and modules—would be used.
The root folder is where the site’s index page may be found. Within the root folder, other subfolders—such as images, includes, and modules—would be used.
Creating the HTML template
Using an HTML template is a virtual certainty with any larger-scale application. You can use Smarty (http://www.smarty.net) or any other templating systems, but I often use just two simple files: a header that contains everything in a page up until the page-specific content, and a footer that contains the rest of the page. The style sheet handles all of the cosmetics and layout, of course.
For this template, I’ll use the Colour Blue HTML5 design created by HTML5 Web Templates (www.html5webtemplates.co.uk), and gratefully used with their kind permission.
To create the template pages
1. Design an HTML page in your text or WYSIWYG editor.
To start creating a template for a Web site, design the layout like a standard HTML page, independent of any PHP code. For this example, as I already said, I’ll be using the Colour Blue design ![]() .
.
![]() The template this site will use for all its pages.
The template this site will use for all its pages.
Note: In order to save space, the CSS file for this example (which controls the layout) is not included in the book. You can download the file through the book’s supporting Web site (www.LarryUllman.com, see the downloads page for this book).
2. Copy everything from the first line of the layout’s source to just before the page-specific content and paste it in a new document (Script 2.2). That is, start from
<!DOCTYPE HTML>
and continue through
<div id="content">
This first file will contain the initial HTML tags (from DOCTYPE through the head and into the beginning of the page body). It also has the code that makes the column of links on the top of the browser window and the sidebar on the right (see ![]() ). I’ve omitted a good chunk of the HTML from this step. For the complete code, see Script 2.2 or just download the file from the book’s Web site.
). I’ve omitted a good chunk of the HTML from this step. For the complete code, see Script 2.2 or just download the file from the book’s Web site.
3. Change the page’s title line to read:
<title><?php echo $page_title;?></title>
I’ll want the page title (which appears at the top of the Web browser; colour_blue in ![]() to be changeable on a page-by-page basis. To do so, I set this as a variable that will be printed out by PHP.
to be changeable on a page-by-page basis. To do so, I set this as a variable that will be printed out by PHP.
Script 2.2. The header file begins the HTML template. It also includes the CSS file and uses a PHP variable for the browser window’s title.
1 <?php # Script 2.2 - header.html
2 // This page begins the HTML header for the site.
3
4 // Check for a $page_title value:
5 if (!isset($page_title)) $page_title = 'Default Page Title';
6 ?><!DOCTYPE HTML>
7 <html>
8
9 <head>
10 <title><?php echo $page_title; ?></title>
11 <link rel="stylesheet" type="text/css" href="style/style.css" title="style" />
12 </head>
13
14 <body>
15 <div id="main">
16 <div id="header">
17 <div id="logo">
18 <div id="logo_text">
19 <h1><a href="index.html">colour<span class="logo_colour">blue</span></a></h1>
20 <h2>Simple. Contemporary. Website Template.</h2>
21 </div>
22 </div>
23 <div id="menubar">
24 <ul id="menu">
25 <li><a href="index.php">Home</a></li>
26 <li><a href="index.php?p=about">About</a></li>
27 <li><a href="index.php?p=this">This</a></li>
28 <li><a href="index.php?p=that">That</a></li>
29 <li><a href="index.php?p=contact">Contact</a></li>
30 </ul>
31 </div>
32 </div>
33 <div id="site_content">
34 <div class="sidebar">
35 <h3>Latest News</h3>
36 <h4>New Website Launched</h4>
37 <h5>January 1st, 2010</h5>
38 <p>2010 sees the redesign of our website. Take a look around and let us know what you think.<br /><a href="#">Read more</a></p>
39 <h3>Useful Links</h3>
40 <ul>
41 <li><a href="#">link 1</a></li>
42 <li><a href="#">link 2</a></li>
43 </ul>
44 <h3>Search</h3>
45 <form method="get" action="index.php" id="search_form">
46 <p>
47 <input type="hidden" name="p" value="search" />
48 <input class="search" type="text" name="terms" value="Search..." />
49 <input name="search" type="image" style="border: 0; margin: 0 0 -9px 5px;" src="style/search.png" alt="Search" title="Search" />
50 </p>
51 </form>
52 </div>
53 <div id="content">
54 <!-- End of header. -->
4. Before any HTML, create a PHP section that checks for a $page_title:
<?php # Script 2.2 - header.html
if (!isset($page_title)) $page_title = 'Default Page Title'; ?>
Just in case a PHP script includes the header file without having set a $page_title first, this PHP code declares a default page title (which you’ll likely want to make more meaningful). If you don’t do this and error reporting is turned on, the browser title could get messy ![]() .
.
![]()
![]() Make sure that a $page_title value is set, or else the error reporting system will end up printing a detailed error message in the browser title area instead.
Make sure that a $page_title value is set, or else the error reporting system will end up printing a detailed error message in the browser title area instead.
5. Save the file as header.html.
Included files can use just about any extension for the filename. Some programmers like to use .inc to indicate that a file is used as an include. In this case, you could also use .inc.html, which would indicate that it’s both an include and an HTML file (to distinguish it from includes full of PHP code).
6. Copy everything in the original template from the end of the page-specific content to the end of the page and paste it in a new file (Script 2.3):
<!-- # Script 2.3 - footer.html -->
</div>
</div>
<div id="content_footer"></div>
<div id="footer">
Copyright © colour_blue | <a href="http://validator.w3.org/check?uri=referer"> HTML5</a> | <a href="http://jigsaw.w3.org/css-validator/check/referer">CSS</a> | <a href="http://www.html 5webtemplates.co.uk">design from HTML5webtemplates.co.uk</a>
</div>
</div>
</body>
</html>
The footer file contains the remaining formatting for the page body, including the page’s footer, and then closes the HTML document.
7. Save the file as footer.html.
8. Place both files in the Web server’s includes directory.
Script 2.3. The footer file completes the HTML template.
1 <!-- # Script 2.3 - footer.html -->
2 </div>
3 </div>
4 <div id="content_footer"></div>
5 <div id="footer">
6 Copyright © colour_blue | <a href="http://validator.w3.org/check?uri=referer">HTML5</a> | <a href="http://jigsaw.w3.org/css-validator/check/referer">CSS</a> | <a href="http://www.html5webtemplates.co.uk">design from HTML5webtemplates.co.uk</a>
7 </div>
8 </div>
9 </body>
10 </html>
Creating the index page
The index page is the main script in the modularized application. In fact, it’s the only page that should ever be loaded in the Web browser. The technical term for this construct is a bootstrap file, and it’s also the common approach in framework-based sites.
The index page has but a single purpose: to assemble all the proper pieces to make the complete Web page. Accomplishing this might involve:
• Including a configuration file
• Including a database connectivity file
• Incorporating an HTML template
• Determining and including the proper content module
Bootstrap files do not, conventionally, contain any HTML at all, because the requisite HTML will be placed in included files.
To create the main page
1. Begin a new PHP script in your text editor or IDE, to be named index.php (Script 2.4):
<?php # Script 2.4 - index.php
2. Include the configuration file:
require('./includes/config.inc.php');
The configuration file defines many important things, so it should be included first.
Script 2.4. The index page is the script through which everything happens. It determines what module should be included, requires the configuration file, and pulls together the HTML template.
1 <?php # Script 2.4 - index.php
2
3 /*
4 * This is the main page.
5 * This page includes the configuration file,
6 * the templates, and any content-specific modules.
7 */
8
9 // Require the configuration file before any PHP code:
10 require('./includes/config.inc.php');
11
12 // Validate what page to show:
13 if (isset($_GET['p'])) {
14 $p = $_GET['p'];
15 } elseif (isset($_POST['p'])) { // Forms
16 $p = $_POST['p'];
17 } else {
18 $p = NULL;
19 }
20
21 // Determine what page to display:
22 switch ($p) {
23
24 case 'about':
25 $page = 'about.inc.php';
26 $page_title = 'About This Site';
27 break;
28
29 case 'contact':
30 $page = 'contact.inc.php';
31 $page_title = 'Contact Us';
32 break;
33
34 case 'search':
35 $page = 'search.inc.php';
36 $page_title = 'Search Results';
37 break;
38
39 // Default is to include the main page.
40 default:
41 $page = 'main.inc.php';
42 $page_title = 'Site Home Page';
43 break;
44
45 } // End of main switch.
46
47 // Make sure the file exists:
48 if (!file_exists('./modules/' . $page)) {
49 $page = 'main.inc.php';
50 $page_title = 'Site Home Page';
51 }
52
53 // Include the header file:
54 include('./includes/header.html');
55
56 // Include the content-specific module:
57 // $page is determined from the above switch.
58 include('./modules/' . $page);
59
60 // Include the footer file to complete the template:
61 include('./includes/footer.html');
62
63 ?>
3. Validate the page being shown:
if (isset($_GET['p'])) {
$p = $_GET['p'];
} elseif (isset($_POST['p'])) {
$p = $_POST['p'];
} else {
$p = NULL;
}
The specific content being shown will be based on a value received by this page. When the user clicks links, the value will be passed in the URL. When most forms are submitted, the value will be sent in $_POST. If neither is the case, $p is set to NULL.
4. Begin a switch conditional that determines the page title and the file to include:
switch ($p) {
case 'about':
$page = 'about.inc.php';
$page_title =
'About This Site';
break;
Each module has a name of something.inc.php, which is my way of indicating that it’s both a PHP script and also an included file. Due to the way computers handle extensions, only the final extension really matters (i.e., if you were to run the file directly, it would be treated as a PHP script).
For each module, the page’s title (which will appear in the browser window) is also set.
5. Complete the switch:
case 'contact':
$page = 'contact.inc.php';
$page_title = 'Contact Us';
break;
case 'search':
$page = 'search.inc.php';
$page_title = 'Search Results';
break;
default:
$page = 'main.inc.php';
$page_title = 'Site Home Page';
break;
} // End of main switch.
For each possible content module, another switch case is provided. For security purposes, the default case is critical. If $p does not have any value or does not have a valid value—one of the specific cases—then the main.inc.php file will be used. This is a necessary security step because some ill-intended person will see that your site has a URL like index.php?p=contact and will attempt to do something like index.php?p=/path/to/secret/file. In such a case, the page’s main content will be included, and not the bad thing the hacker was trying to see.
6. Confirm that the module file exists:
if (!file_exists('./modules/' . $page)) {
$page = 'main.inc.php';
$page_title = 'Site Home Page';
}
This isn’t absolutely necessary as long as the right module file exists for each case in the switch. However, including this code provides an extra layer of security.
7. Include the header file:
include('./includes/header.html');
This is the start of the HTML template.
8. Include the module:
include('./modules/' . $page);
This brings in all the specific content.
9. Include the footer file:
include('./includes/footer.html');
This completes the HTML template.
10. Complete the page:
?>
11. Save the file as index.php and place it in your Web directory.
You can’t test this script until you’ve created some of the content modules (at least main.inc.php).
Tip
The switch conditional that validates proper $p values is an important security measure. Another is using a separate variable for the name of the included file (i.e., $page). The following code would be highly insecure:
include($_GET['p']);
Creating content modules
Now that all the legwork has been done and the configuration, template, and index files have been written, it’s time to start creating the actual content modules. With this bootstrap system, a content module is stunningly simple to implement. The content files do not need to include the configuration or the template files, because the main script already does that. And since all the content files are includes, they can contain literal HTML or PHP code.
There is one catch: the modules should not be loadable directly. If you were to directly access main.inc.php (or any other module) in your Web browser, you’d see the result without the HTML template ![]() , without the proper error management, and possibly without the database connectivity. To prevent this, every module should have some code that redirects the user to the proper page, if accessed directly. (Later in this chapter, you’ll learn how to prevent direct access using the Web server itself.)
, without the proper error management, and possibly without the database connectivity. To prevent this, every module should have some code that redirects the user to the proper page, if accessed directly. (Later in this chapter, you’ll learn how to prevent direct access using the Web server itself.)
![]() Content modules shouldn’t be accessed directly through a URL, since they would then lack the HTML template (among other things).
Content modules shouldn’t be accessed directly through a URL, since they would then lack the HTML template (among other things).
To create the main module
1. Begin a new PHP script in your text editor or IDE, to be named main.inc.php (Script 2.5):
<?php # Script 2.5 - main.inc.php
2. Check that this page has not been accessed directly:
if (!defined('BASE_URL')) {
There are any number of things you could check for to test if the module is being accessed directly, like whether $page or $p is set. Instead, I’ll see if a constant is defined. This constant is created in the configuration file, which should be included first thing in the index file, prior to including this page.
Script 2.5. The first content module has the HTML for the main page. Some PHP code redirects the Web browser if this script was accessed directly.
1 <?php # Script 2.5 - main.inc.php
2
3 /*
4 * This is the main content module.
5 * This page is included by index.php.
6 */
7
8 // Redirect if this page was accessed directly:
9 if (!defined('BASE_URL')) {
10
11 // Need the BASE_URL, defined in the config file:
12 require('../includes/config.inc.php');
13
14 // Redirect to the index page:
15 $url = BASE_URL . 'index.php';
16 header ("Location: $url");
17 exit;
18
19 } // End of defined() IF.
20 ?>
21 <h1>Welcome to the colour_blue template</h1>
22 <p>This standards compliant, simple, fixed width website template is released as an 'open source' design (under a <a href="http://creativecommons.org/licenses/by/3.0">Creative Commons Attribution 3.0 Licence</a>), which means that you are free to download and use it for anything you want (including modifying and amending it). All I ask is that you leave the 'design from HTML5webtemplates.co.uk' link in the footer of the template, but other than that...</p>
23 <p>This template is written entirely in <strong>HTML5</strong> and <strong>CSS</strong>, and can be validated using the links in the footer.</p>
24 <p>You can view more free HTML5 web templates <a href="http://www.html5webtemplates.co.uk">here</a>.</p>
25 <p>This template is a fully functional 5 page website, with an <a href="examples.html">examples</a> page that gives examples of all the styles available with this design.</p>
26 <h2>Browser Compatibility</h2>
27 <p>This template has been tested in the following browsers:</p>
28 <ul>
29 <li>Internet Explorer 8</li>
30 <li>Internet Explorer 7</li>
31 <li>FireFox 3.5</li>
32 <li>Google Chrome 6</li>
33 <li>Safari 4</li>
34 </ul>
3. Redirect the user:
$url = BASE_URL . 'index.php';
header ("Location: $url");
exit;
If this page is being accessed directly, then the user should be redirected to the index page. Because an absolute URL redirection is desired (which is best), the configuration file must be included to get the BASE_URL value.
4. Complete the PHP section:
} // End of defined() IF.
?>
5. Add your content:
<h1>Welcome to the colour_blue template</h1>
<p>This standards compliant, simple, fixed width website template...
This can be any combination of HTML and PHP, just like any other PHP page. I’m omitting some of the content from this step, but you can find it in the downloadable version of the script.
6. Save the file as main.inc.php, place it in your Web directory (in the modules folder, ![]() ), and test by going to index.php in your Web browser
), and test by going to index.php in your Web browser ![]() .
.
![]() The complete, modularized, template-driven site home page.
The complete, modularized, template-driven site home page.
Creating the search module
As a demonstration of a PHP-driven module, I’ll sketch out a search feature. Keep in mind that, having no real content and no database back end, this example makes it impossible to implement a real search. But that’s not important in this case anyway. The focus here is on how you would use PHP to handle forms within the modular structure. Once again, I think you’ll be surprised by how uncomplicated it is.
For this specific template, the search form is already present in the sidebar, created by header.html:
<form method="get" action="index.php" id="search_form">
<p>
<input type="hidden" name="p" value="search" />
<input class="search" type="text" name="terms" value="Search..." />
<input name="search" type="image" src="style/search.png" alt="Search" title="Search" />
</p>
</form>
As you can see, the form uses the GET method, which is common for search forms. The action attribute points to index.php, because all page requests go through the bootstrap file. But to work within the modularized system, the hidden input is required, with a name of p and a value of search. This one line effectively tells the bootstrap file to load the search module when the form is submitted.
If you had a different form that used POST, such as a contact form, a hidden input with the proper value would work just the same.
To create the search module
1. Begin a new PHP script in your text editor or IDE, to be named search.inc.php (Script 2.6):
<?php # Script 2.6 - search.inc.php
2. Redirect the browser if the page has been accessed directly:
if (!defined('BASE_URL')) {
require('../includes/config.inc.php');
$url = BASE_URL . 'index.php?p=search';
if (isset($_GET['terms'])) {
$url .= '&terms=' . urlencode($_GET['terms']);
}
header ("Location: $url");
exit;
} // End of defined() IF.
The bulk of the code here is like that in main.inc.php, with two changes. First, the redirection URL is changed to BASE_URL plus index.php?p=search. This technique, which can be used for any module, allows the user to be immediately redirected to the page they want—via index.php. Second, if for some inexplicable reason the user arrived on this page while submitting a form, then the search terms will be present in the URL. If so, those terms will be passed along as well. The end result will be that going directly to www.example.com/modules/search.inc.php?terms=blah still results in a valid search.
Script 2.6. The search module pretends to return some results as a way of demonstrating how easy it is to handle forms, even in a modularized structure.
1 <?php # Script 2.6 - search.inc.php
2
3 /*
4 * This is the search content module.
5 * This page is included by index.php.
6 * This page expects to receive $_GET['terms'].
7 */
8
9 // Redirect if this page was accessed directly:
10 if (!defined('BASE_URL')) {
11
12 // Need the BASE_URL, defined in the config file:
13 require('../includes/config.inc.php');
14
15 // Redirect to the index page:
16 $url = BASE_URL . 'index.php?p=search';
17
18 // Pass along search terms?
19 if (isset($_GET['terms'])) {
20 $url .= '&terms=' . urlencode($_GET['terms']);
21 }
22
23 header ("Location: $url");
24 exit;
25
26 } // End of defined() IF.
27
28 // Print a caption:
29 echo '<h1>Search Results</h1>';
30
31 // Display the search results if the form
32 // has been submitted.
33 if (isset($_GET['terms']) && ($_GET['terms'] != 'Search...') ) {
34
35 // Query the database.
36 // Fetch the results.
37 // Print the results:
38 for ($i = 1; $i <= 10; $i++) {
39 echo <<<EOT
40 <h4><a href="#">Search Result #$i</a></h4>
41 <p>This is some description. This is some description. This is some description. This is some description.</p>\n
42 EOT;
43 }
44
45 } else { // Tell them to use the search form.
46 echo '<p class="error">Please use the search form to search this site.</p>';
47 }
3. Print a caption:
echo '<h1>Search Results</h1>';
4. Check for a proper search term:
if (isset($_GET['terms']) && ($_GET['terms'] != 'Search...') ) {
The database search would only take place if a search term were passed along in the URL. The search box uses Search... as the default value, so that needs to be ruled out, too.
5. Print the search results:
for ($i = 1; $i <= 10; $i++) {
echo <<<EOT
<h4><a href="#">Search Result #$i</a></h4>
<p>This is some description. This is some description. This is some description. This is some description.</p>\n
EOT;
}
Since there’s no database to search, I’ll just use a for loop to print 10 search results. I’m using the heredoc syntax here, as described in Chapter 1, “Advanced PHP Techniques.”
6. Complete the page:
} else {
echo '<p class="error">Please use the search form to search this site.</p>';
}
This conditional applies if no valid search terms were entered ![]() .
.
![]() No search is performed without a term being submitted.
No search is performed without a term being submitted.
7. Save the file as search.inc.php, place it in your Web directory (in the modules folder), and test by submitting the form ![]() .
.
![]() Any search term will turn up these dummy results.
Any search term will turn up these dummy results.
Improved SEO with mod_rewrite
The modularized site as written has a number of benefits, starting with the fact that it will be easier to maintain and expand as needed. One downside is that the URLs required by this approach are awkward and unappealing:
• index.php?p=about
• index.php?p=contact
• index.php?p=this
The standard solution in these situations is to use the Apache Web server’s mod_rewrite module to allow for “prettier” URLs. mod_rewrite is a tool that lets you instruct the server that when the user goes to one URL, the server should provide another resource. mod_rewrite makes use of regular expressions, so the matching pattern and resulting actual URL can be as complex as needed.
These, and other changes to Apache’s behavior, can be made in two ways: by editing the primary Apache configuration file or by creating directory-specific files. The primary configuration file is httpd.conf, found within a conf directory, and it dictates how the entire Apache Web server runs (where the httpd.conf file is on your system will depend on many things). An .htaccess file (pronounced “H-T access”) is placed within a Web directory and is used to affect how Apache behaves within just that folder and subfolders.
Generally speaking, it’s preferable to make changes in the httpd.conf file, since this file needs to be read only by the Web server each time the server is started. Conversely, .htaccess files must be read by the Web server once for every request to which an .htaccess file might apply. For example, if you have www.example.com/somedir/.htaccess, any request to www.example.com/somedir/whatever requires reading the .htaccess file, as well as reading an .htaccess file that might exist in www.example.com/. On the other hand, in shared hosting environments, individual users are not allowed to customize the entire Apache configuration, but they may be allowed to use .htaccess to make changes that only affect their sites. And changes to the primary configuration file do require restarting Apache to take effect.
Tip
To be safe, I’d recommend making a backup copy of your original Apache configuration file before pursuing any of the subsequent edits.
Allowing for .htaccess overrides
As already stated, all Apache configuration can actually be accomplished within the httpd.conf file. In fact, doing so is preferred. But the configuration file is not always available for you to edit, so it’s worth also knowing how to use .htaccess files to change how a site functions.
An .htaccess file is just a plain-text file, with the name .htaccess. Like .htconf, there is no file extension, and the initial period makes this a hidden file on the system. When placed within a Web directory, the directives defined in the .htaccess file will apply to that directory and its subdirectories.
A common hang-up when using .htaccess files is that permission has to be granted to allow .htaccess to make server behavior changes. Depending on the installation and configuration, Apache, on the strictest level of security, will not allow .htaccess files to change Apache behavior. This is accomplished with code like the following, in httpd.conf:
<Directory />
AllowOverride None
</Directory>
The Directory directive is used within httpd.conf to modify Apache’s behavior within a specific directory. In the previous code, the root directory (/) is the target, meaning that Apache will not allow over-rides—changes—made within any directories on the computer at all. Prior to creating.htaccess files, then, the main configuration file must be set to allow overrides in the applicable Web directory (or directories).
The AllowOverride directive takes one or more flags indicating what, specifically, can be overridden:
• AuthConfig, for using authorization and authentication
• FileInfo, for performing redirects and URL rewriting
• Indexes, for listing directory contents
• Limit, for restricting access to the directory
• Options, for setting directory behavior, such as the ability to execute CGI scripts or to index folder contents
• All
• None
For example, to allow AuthConfig and FileInfo to be overridden within the site directory, the httpd.conf file should include:
<Directory /path/to/site>
AllowOverride AuthConfig FileInfo
</Directory>
As long as this code comes after any AllowOverride None block, an .htaccess file in the site directory will be able to make some changes to Apache’s behavior when serving files from that directory (and its subdirectories).
To allow .htaccess overrides
1. Open httpd.conf in any text editor or IDE.
If you’re using XAMPP on Windows, the file to open is C:\xampp\apache\conf\httpd.conf (assuming XAMPP is installed in the root of the C drive). If you’re using MAMP on Mac OS X, the file to open is /Applications/MAMP/ conf/apache/httpd.conf.
If you aren’t using either of these but are using Apache, you’ll need to hunt around for your httpd.conf file.
2. At the end of the file, add
<Directory "/path/to/directory">
</Directory>
The Directory tag is how you customize Apache behavior for a specific directory or its subdirectories. Within the opening tag, provide an absolute path to the directory in question, such as C:\xampp\htdocs\somedir or /Applications/MAMP/htdocs/somedir.
If your configuration file has a VirtualHost tag for the site in question, you’d want to add the Directory within that.
3. Within the Directory tags, add ![]() :
:
AllowOverride All
![]() The modified configuration file should now allow for .htaccess overrides within the site’s directory.
The modified configuration file should now allow for .htaccess overrides within the site’s directory.
This is a heavy-handed solution but will do the trick. On a live, publicly available server, you’d want to be more specific about what exact settings can be overridden, but on your home computer, this won’t be a problem.
4. Save the configuration file.
5. Restart Apache.
Tip
If a directory has an .htaccess file but is not allowed to override a setting, the .htaccess file will just be ignored.
Tip
Anything accomplished within an .htaccess file can also be achieved using a Directory tag within httpd.conf.
Tip
Apache will not display .htaccess files in the Web browser by default, which is a smart security approach.
Tip
When creating .htaccess files, make sure your text editor or IDE is not secretly adding a .txt extension. Notepad, for example, will do this. You can confirm this has happened if you can load www.example.com/.htaccess.txt in your Web browser. In Notepad, you can prevent the added extension by quoting the file name and saving it as type “All files.”
Protecting Directories
Another common use of an .htaccess file is to protect the contents of a directory. There are two possible scenarios:
• Denying all access
• Restricting access to authorized users
Strange as it may initially sound, there are plenty of situations in which files and folders placed in the Web directory should be made unavailable. For example, the modules directory in this site could reasonably be blocked, as could any directory you use to store sensitive PHP scripts or uploaded files. In all of these cases, the contents of the directory would not be meant for direct access, but rather PHP scripts in other directories would reference that content as needed.
To deny all access to a directory’s contents, place this code in an .htaccess file in that folder (comments indicate what each line does):
# Disable directory browsing:
Options All -Indexes
# Prevent folder listing:
IndexIgnore *
# Prevent access to any file:
<FilesMatch "^.*$">
Order Allow,Deny
Deny from all
</FilesMatch>
Again, this code just prevents direct access to that directory’s contents via a Web browser. A PHP script could still use include(), require(), readfile(), and other functions to access that content.
There are a couple of ways of restricting access to authorized users, with the mod_auth module being the most basic and common. It’s not hard to use mod_auth, but you have to invoke a secondary Apache tool to create the credentials file. If you want to pursue this route, just do a search online for Apache mod_auth.
Enabling URL Rewriting
Finally we get to our destination: implementing URL rewriting. URL rewriting has gained attention as part of the overbearing focus on search engine optimization (SEO), but URL rewriting has been a useful tool for years. With a dynamically driven site, such as an e-commerce project, a value will often be passed to a page in the URL to indicate what products to display, resulting in URLs such as www.example.com/category.php?id=23. The PHP script, category.php, would then use the value of $_GET['id'] to know what products to pull from the database and show.
With URL rewriting applied, the URL shown in the browser, visible to the end user and referenced in search engine results, can be transformed into something more obviously meaningful, such as www.example.com/category/23/ or, better yet, www.example.com/category/garden+gnomes/. Apache, via URL rewriting, takes the more user-friendly URL and parses it into something usable by the PHP scripts. This is made possible by the Apache mod_rewrite module. To use it, the .htaccess file must first check for the module and turn on the rewrite engine:
<IfModule mod_rewrite.c>
RewriteEngine on
</IfModule>
After enabling the engine, and before the closing IfModule tag, you add rules dictating the rewrites. The syntax is
RewriteRule match rewrite
For example, you could do the following:
RewriteRule somepage.php otherpage.php
With that code, any time a user goes to somepage.php, the user will be shown the contents of otherpage.php, although the browser will still display somepage.php in the address bar.
To be clear, that’s not actually a good use of mod_rewrite, as a literal redirection could be accomplished with the less complex mod_alias module instead. However, a line like that does represent an easy way to test that mod_rewrite is working.
Part of the complication with performing URL rewrites is that Perl-Compatible Regular Expressions (PCRE) are needed to most flexibly find matches. For example, to treat www.example.com/category/23 as if it were www.example.com/category.php?id=23, you would have the following rule:
RewriteRule ^category/([0-9]+)/?$
category.php?id=$1
The initial caret (^) says that the expression must match the beginning of the string. After that should be the word category, followed by a slash. Then, any quantity of digits follows, concluding with an optional slash (allowing for both category/23 and category/23/). The dollar sign closes the match, meaning that nothing can follow the optional slash. That’s the pattern for the example match (and it’s a simple pattern at that, really).
The rewrite part is what will actually be executed, unbeknownst to the Web browser and the end user. In this line, that’s category.php?id=$1. The $1 is a backreference to the first parenthetical grouping in the match (e.g., 23). Thus, www.example.com/category/23 is treated by the server as if the URL was actually www.example.com/category.php?id=23.
With all of this in mind, in the particular case of this modularized site, the goal is to use, say, www.example.com/about/ instead of www.example.com/index.php?p=about. Not only is this aesthetically better, but there can be an SEO benefit, considering the impact that URLs have on SEO rankings: an apparent directory name—about—is more significant than the index.php script being passed an argument of p with a value of about.
As you’ll see in the following series of steps, the fact that the URL will appear to reference a subdirectory will have other implications that you’ll need to address. But having identified the specific syntax to be addressed, you can configure Apache to make those dynamic changes.
To implement mod_rewrite
1. Create a new file, to be named .htaccess, in your text editor or IDE (Script 2.7):
# Script 2.7 - .htaccess
Be certain to create the file without any extension, and watch that your text editor or IDE does not secretly create one.
Alternatively, you can edit a Directory element within the main httpd.conf file, if you’d rather.
The pound sign (or number sign, or hash) can be used to create comments within this file.
2. Add the following:
<IfModule mod_rewrite.c>
</IfModule>
The IfModule tag is how you add rules that would apply only if a named module has been loaded. In this case, that’s the mod_rewrite module.
Script 2.7. The redirection rules set within this .htaccess file will allow the site to use nicer URLs.
1 # Script 2.7 - .htaccess
2 <IfModule mod_rewrite.c>
3
4 # Turn on the engine:
5 RewriteEngine on
6
7 # Set the base to this directory:
8 RewriteBase /ch02/
9
10 # Redirect certain paths to index.php:
11 RewriteRule ^(about|contact|this|that|search)/?$ index.php?p=$1
12
13 </IfModule>
3. Within the IfModule tags, add
RewriteEngine on
RewriteBase /ch02/
The first line turns the rewrite engine on, if it is not already. The second identifies the URL base to which redirection matches should apply. This is a useful setting when redirections are taking place within a subdirectory (e.g., if you’re using http://localhost/ch02/ as the URL).
4. On the next line, but before the closing IfModule tag, add
RewriteRule ^(about|contact|this|that|search)/?$ index.php?p=$1
The goal is to rewrite certain URLs back to index.php, passing along the specific page requested. Rather than redirect everything—because other valid directories may exist, I’m only redirecting certain values: about, contact, this, that, and search.
In case you’re not terribly familiar with PCRE, the caret (^) indicates that this pattern must match the beginning of the URL, starting after the RewriteBase value. Then, within the parentheses, literal strings are enumerated using the pipe character (|). In other words, match something that begins with about or contact or...
Then the slash is optional, but if present, can only exist once, as dictated by the question mark. This will provide matches for either www.example.com/about or www.example.com/about/. The dollar sign after the question mark indicates the end of the match.
Matches will be redirected to index.php?p=X, where X is whatever matched the strings within the parentheses (i.e., this is a backreference to a grouping).
5. Save the configuration file in your Web site’s directory.
6. Test in your Web browser ![]() .
.
![]() The new about page, being accessed through a nicer-looking URL.
The new about page, being accessed through a nicer-looking URL.
Note that in order to test other pages, such as an about page, you’ll need to create the corresponding module script.
Tip
Once you adopt this system, you’d want to change the URLs for the links (in the HTML), and the action attribute of the search form.
Tip
Because it will appear as if some URLs reference subdirectories (e.g., www.example.com/about/), you’ll need to change references to external resources in your HTML to be absolute, instead of relative ![]() :
:
<link rel="stylesheet" type="text/css" href="/style/style.css" title="style" />
![]() Because the browser thinks it’s within the about directory, it cannot find the referenced CSS file until I change the reference to it.
Because the browser thinks it’s within the about directory, it cannot find the referenced CSS file until I change the reference to it.
Affecting the Browser Cache
Web browsers and proxy servers (something ISPs and other corporations create to improve network efficiency) habitually cache Web pages. Caching a page is a matter of storing its content (or part of its content, like an image or video) and then providing that stored version, rather than the version on the server, when a request is made.
For most end users, this is not a problem. In fact, if done properly, the users will not be aware that they are receiving a cached version of a page or image. But if while developing a site you’ve struggled to get your Web browser (let’s face it: the likely culprit is Internet Explorer) to recognize changes you know you’ve made in a page, then you’ve seen the dark side of caching. With your dynamic, PHP-driven sites, sometimes you want to make certain that end users are getting the most up-to-date version of your pages.
Caching—both in Web browsers and proxy servers—can be affected using PHP’s header() function. Four header types are involved:
• Last-Modified
• Expires
• Pragma
• Cache-Control
The first three header types are part of the HTTP 1.0 standard. The Last-Modified header uses a UTC (Coordinated Universal Time) date-time value. If a caching system sees that the Last-Modified value is more recent than the date on the cached version of the page, it knows to use the new version from the server.
Expires is used as an indicator as to when a cached version of the page should no longer be used (in Greenwich Mean Time). Setting an Expires value in the past should always force the page from the server to be used:
header("Expires: Mon, 26 Jul 1997 05:00:00 GMT");
Pragma is just a declaration for how the page data should be handled. To avoid caching of a page, use
header("Pragma: no-cache");
The Cache-Control header was added in HTTP 1.1 and is a more finely tuned option. (You should still use the HTTP 1.0 headers as well.) There are numerous Cache-Control settings (Table 2.1).
Table 2.1. Cache-Control Directives
Putting all this information together, to keep all systems from caching a page, you would use these headers:
header("Last-Modified: Thu, 5 Jun 2012 14:26:00 GMT"); // Right now!
header("Expires: Mon, 26 Jul 1997 05:00:00 GMT"); // Way back when!
header("Pragma: no-cache");
header("Cache-Control: no-cache");
While all too common, this is a heavy-handed approach. Certainly not every PHP script you use is uncacheable. Even the most active site could cache some of its scripts for a minute or more (and a very active site would get many requests within a minute; the cached version would save the server all those hits). As a more focused and proper use of these concepts, let’s rewrite the view_tasks.php page (Script 1.3) from Chapter 1.
To affect caching
1. Open view_tasks.php in your text editor or IDE.
2. Before anything is sent to the Web browser, add the initial PHP tag (Script 2.8):
<?php # Script 2.8 - view_tasks.php
As you hopefully know, the header() function can only be called before anything is sent to the Web browser, including plain text, HTML, or even a blank space.
3. Connect to the database:
$dbc = mysqli_connect('localhost', 'username', 'password', 'test');
To accurately determine when this page was last modified, the script will look at the database it uses.
Script 2.8. This modified version of Chapter 1’s view_tasks.php page (Script 1.3) uses the header() function to make caching recommendations.
1 <?php # Script 2.8 - view_tasks.php
2
3 // Connect to the database:
4 $dbc = mysqli_connect('localhost', 'username', 'password', 'test');
5
6 // Get the latest dates as timestamps:
7 $q = 'SELECT UNIX_TIMESTAMP(MAX(date_added)), UNIX_TIMESTAMP(MAX(date_completed)) FROM tasks';
8 $r = mysqli_query($dbc, $q);
9 list($max_a, $max_c) = mysqli_fetch_array($r, MYSQLI_NUM);
10
11 // Determine the greater timestamp:
12 $max = ($max_a > $max_c) ? $max_a : $max_c;
13
14 // Create a cache interval in seconds:
15 $interval = 60 * 60 * 6; // 6 hours
16
17 // Send the headers:
18 header("Last-Modified: " . gmdate ('r', $max));
19 header("Expires: " . gmdate ("r", ($max + $interval)));
20 header("Cache-Control: max-age=$interval");
21 ?><!doctype html>
22 <html lang="en">
23 <head>
24 <meta charset="utf-8">
25 <title>View Tasks</title>
26 <link rel="stylesheet" href="style.css">
27 </head>
28 <body>
29 <h2>Current To-Do List</h2>
30 <?php
31 function make_list($parent) {
32 global $tasks;
33 echo '<ol>'; // Start an ordered list.
34 foreach ($parent as $task_id => $todo) {
35 echo "<li>$todo";
36 if (isset($tasks[$task_id])) {
37 // Call this function again:
38 make_list($tasks[$task_id]);
39 }
40 echo '</li>'; // Complete the list item.
41 } // End of FOREACH loop.
42 echo '</ol>'; // Close the ordered list.
43 } // End of make_list() function.
44 $q = 'SELECT task_id, parent_id, task FROM tasks WHERE date_completed="0000-00-00 00:00:00" ORDER BY parent_id, date_added ASC';
45 $r = mysqli_query($dbc, $q);
46 $tasks = array();
47 while (list($task_id, $parent_id, $task) = mysqli_fetch_array($r, MYSQLI_NUM)) {
48 $tasks[$parent_id][$task_id] = $task;
49 }
50 make_list($tasks[0]);
51 ?>
52 </body>
53 </html>
4. Get the latest date values from the table:
$q = 'SELECT UNIX_TIMESTAMP (MAX(date_added)), UNIX_TIMESTAMP(MAX (date_completed)) FROM tasks';
$r = mysqli_query($dbc, $q);
list($max_a, $max_c) = mysqli_fetch_array ($r, MYSQLI_NUM);
$max = ($max_a > $max_c) ? $max_a : $max_c;
The tasks table contains two date/ time columns—date_added and date_completed. Any time the page’s content is updated, these two values are set to the current date and time (there is no delete option). The query returns the largest date_added and date_completed values. Because they would be returned in a less usable format ![]() , the UNIX_TIMESTAMP() function is applied to make them both integers
, the UNIX_TIMESTAMP() function is applied to make them both integers ![]() . Then, the ternary operator is used to assign the largest value (and therefore the most recent date) to the $max variable.
. Then, the ternary operator is used to assign the largest value (and therefore the most recent date) to the $max variable.
![]() How the timestamp fields would ordinarily be returned by the query.
How the timestamp fields would ordinarily be returned by the query.
![]() The query result used by this script.
The query result used by this script.
5. Define a reasonable caching interval:
$interval = 60 * 60 * 6;
“Reasonable” depends on your page, how many visitors you get (i.e., the server load), and how often it’s updated. For this value, which is in seconds, I use six hours (60 seconds times 60 minutes times 6).
6. Send the Last-Modified header:
header("Last-Modified: " . gmdate ('r', $max));
This header sets the modification date of this script as the last time the database was updated. The “r” gmdate() (and date()) option will return the date formatted per the HTTP specifications.
7. Set the Expires header:
header("Expires: " . gmdate ("r", ($max + $interval)));
The expiration value is the current time plus the defined interval.
8. Set the Cache-Control header:
header("Cache-Control: max-age=$interval");
?>
This is just the HTTP 1.1 equivalent of the Expires header. Instead of giving a date value, set max-age in seconds.
9. Delete the database connection that existed later on in the original script.
This has been moved to the top of the script in Step 3.
10. Save the file as view_tasks.php, place in your Web directory, and test in your Web browser ![]() .
.
![]() The cache-controlled Web page.
The cache-controlled Web page.
Tip
Note that caching is, in theory, a very good thing, designed to minimize unnecessary server requests. If properly controlled, caches are great for both the server and the client.
Tip
If you have cURL installed on your system, you can run this command to see a page’s headers ![]() :
:
curl --head http://www.example.com/page.php
![]() Using cURL to view the headers returned by the view_tasks.php page.
Using cURL to view the headers returned by the view_tasks.php page.
Curl is discussed in Chapter 10, “Networking with PHP.”
Tip
Page caching can also be affected using the META tags, placed within an HTML document’s head. This may not work as reliably with some browsers as the header() method.
Tip
This section of the chapter specifically discusses controlling browser caching. Chapter 4, “Basic Object-Oriented Programming,” covers server-side caching.
Review and Pursue
If you have any problems with these sections, either in answering the questions or pursuing your own endeavors, turn to the book’s supporting forum (www.LarryUllman.com/forums/).
Review
• What is a bootstrap file? (See page 57.)
• Why is it important that all user requests go through the bootstrap file (i.e., why shouldn’t the individual modules be accessed directly)? (See page 61.)
• Why is the following line of code highly insecure? (See page 60.)
include($_GET['p']);
• What two files are used to configure how the Apache Web server runs? How do the two files differ? (See page 67.)
• How can you test if mod_rewrite is available to use within a specific directory? (See page 71.)
• Why do relative references to external resources, such as images, JavaScript, and style sheets, cause problems when using mod_rewrite? (See page 74.)
• What is caching? Why is caching useful? When can caching be problematic? (See page 75.)
• What PHP function can be used to affect the caching of a page? (See page 76.)
Pursue
• Add more modules to the sample site to flesh it out.
• If you have an actual project to modularize using the techniques explained in this chapter, do so, adding in a database configuration file.
• Practice creating errors within the modularized Web site, in both live and development modes, to test the error-handling process.
• If you want, create a validation/redirection includable file that checks if a module is accessed directly and, if so, redirects the user. Then have each module include this new file.
• Modify the search page so that it shows the submitted search terms, too.
• Learn more about configuring Apache and what other features the Web server application has to offer.
• If you’re using mod_rewrite, change the HTML so that none of the links or forms reference index.php anymore.
• Learn more about caching.
All materials on the site are licensed Creative Commons Attribution-Sharealike 3.0 Unported CC BY-SA 3.0 & GNU Free Documentation License (GFDL)
If you are the copyright holder of any material contained on our site and intend to remove it, please contact our site administrator for approval.
© 2016-2026 All site design rights belong to S.Y.A.