Web Programming for Business - PHP Object-Oriented Programming with Oracle
7 XML Database Transformation and AJAX
Overview
Both XML and relational databases store data, and both have established techniques for extracting the data they contain. Relational databases have mature management systems that can efficiently and reliably maintain large quantities of structured data, so they are better for handling large volumes of data within a multiuser system. XML databases have no equivalent XML management system, but they contain both the data and the informative relationship structuring of that data that both machines and people can read. Relational database systems should therefore be considered for managing large data stores in a multiuser environment, while XML should be considered for data delivered to client programs and between components of a distributed system. Creating XML documents from relational database queries and vice versa is a natural way to combine the benefits of both technologies.
Learning Objectives
After completing this chapter, you will gain skills in creating XML from a database and vice versa, and creating AJAX-driven applications that generate reports from XML documents. The following objectives summarize the skills the chapter will help you develop:
1. Learn how to create XML from a database table
2. Learn how to create a database table from XML.
3. Learn how to create a sophisticated XML generation application.
4. Learn about AJAX and how it works.
5. Learn how to create an AJAX ‘DOM’ application for XML reports.
6. Learn how to create an AJAX ‘SimpleXML’ application for XML reports.
7. Learn how to create an application to display XML trees.
8. Learn how to incorporate ‘iframes’ into the XML tree application.
Extracting XML from a Database Table
It is relatively easy to extract XML from a database table because each row becomes a top-level node and individual fields in each row populate child elements. In this section, I use the ‘dbGeneral’ class first introduced in Chapter 3 for database interaction. I include the class in this section for your convenience. If you need to review the class, consult Chapter 3 for a detailed explanation.
PHP file ‘dbGeneral.php’ holds the ‘dbGeneral’ class. Be sure to add your username, password, and host server to the ‘setParms()’ method.
1 <?php
2 // File dbGeneral.php
3 class dbGeneral
4 {
5 private $_schema;
6 private $_password;
7 private $_host;
8 private $_query;
9 private $_conn;
10 public $result;
11 function __construct($sql)
12 {
13 $this->_query = $sql;
14 $this->setParms();
15 $this->connDB();
16 }
17 function setParms()
18 {
19 $this->_schema = '';
20 $this->_password = '';
21 $this->_host = '';
22 }
23 function connDB()
24 {
25 if(!$this->_conn = oci_connect($this->_schema,
26 $this->_password, $this->_host))
27 { echo 'error connecting'; }
28 }
29 function parse()
30 {
31 if(!$parse = oci_parse($this->_conn, $this->_query))
32 { echo 'error parsing'; }
33 else
34 { $this->result = $parse; }
35 }
36 function bind($bind, $choice, $length)
37 {
38 oci_bind_by_name($this->result, $bind,
39 $choice, $length);
40 }
41 function exe()
42 {
43 oci_execute($this->result);
44 }
45 }
46 ?>
Briefly, ‘dbGeneral’ contains five ‘private’ properties (lines 5–9), one ‘public’ property (line 10), a constructor (lines 11–16), and five methods. The constructor sets an incoming SQL statement to ‘$this->_query’ (line 13) and invokes the ‘setParms()’ and ‘connDB()’ methods (lines 14 and 15). Method ‘setParms()’ (lines 17–22) sets the username, password, and server needed to interact with Oracle. Method ‘connDB()’ (lines 23–28) connects to Oracle. Method ‘parse()’ (lines 29–35) prepares (parses) the SQL statement for processing. Method ‘bind()’ (lines 36–40) binds a value to a bind variable. Finally, method ‘exe()’ (lines 41–44) runs the SQL statement.
PHP file ‘db_to_xml.php’ creates and displays an XML document from the ‘web_site’ table created in Chapter 3. If you have not created the ‘web_site’ table, review Chapter 3 for details and instructions. The ‘web_site’ table contains four fields: ‘vid’, ‘vuser’, ‘pwd’, and ‘lvl’.
1 <?php
2 // File db_to_xml.php
3 require_once 'dbGeneral.php';
4 $newXML = new SimpleXMLElement('<root></root>');
5 $query = "SELECT * FROM web_site";
6 $connect = new dbGeneral($query);
7 $connect->parse();
8 $stmt = $connect->result;
9 $connect->exe();
10 while($row = oci_fetch_assoc($stmt))
11 {
12 $login = $newXML->addChild('schema');
13 $login->addChild('vid',$row['VID']);
14 $login->addChild('vuser',$row['VUSER']);
15 $login->addChild('pwd',$row['PSWD']);
16 $login->addChild('lvl',$row['LVL']);
17 }
18 header ('Content-Type: text/xml');
19 echo $newXML->asXML();
20 ?>
I begin by creating an instance of ‘SimpleXML’ as ‘$newXML’ (line 4) with ‘<root></root>’ as parameter (to create a container for the XML document). Next, I create a new instance of ‘dbGeneral’ (line 6) with an SQL statement (line 5) as parameter. I use methods ‘parse()’ and ‘exe()’ (lines 7–9) from ‘dbGeneral’ to retrieve data into ‘$stmt’ from the ‘web_site’ table.
From each row of data returned from the table, I contain each node with ‘<schema>’ (line 12). I use method ‘addChild()’ (lines 13–16) to place field values into their respective XML elements. Finally, I display results (lines 18 and 19).
Load ‘db_to_xml.php’ in a browser. Figure 7.1 shows the first ‘schema’ node. Five ‘schema’ nodes are actually displayed in the browser.
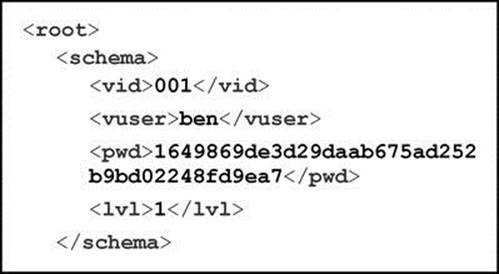
Figure 7.1 Display Showing Partial XML Document Created from a Database Table
To save the newly created XML document, check permissions. To ensure that the document is saved, use the most unrestrictive permissions (consult your IT expert with questions regarding permissions). Run the following command (I assume that the current location is ‘public_html’).
chmod 777 xml_docs
PHP file ‘db_to_xml_save.php’ creates XML from the table and saves results.
1 <?php
2 // File db_to_xml_save.php
3 require_once 'dbGeneral.php';
4 $newXML = new SimpleXMLElement('<root></root>');
5 $query = "SELECT * FROM web_site";
6 $connect = new dbGeneral($query);
7 $connect->parse();
8 $stmt = $connect->result;
9 $connect->exe();
10 while($row = oci_fetch_assoc($stmt))
11 {
12 $login = $newXML->addChild('schema');
13 $login->addChild('vid',$row['VID']);
14 $login->addChild('vuser',$row['VUSER']);
15 $login->addChild('pwd',$row['PSWD']);
16 $login->addChild('lvl',$row['LVL']);
17 }
18 ob_start();
19 $dom = new DomDocument();
20 $dom->preserveWhiteSpace = false;
21 $dom->formatOutput = true;
22 $dom->loadXML($newXML->asXML());
23 $dom->save('xml_docs/new_db.xml');
24 ob_end_clean();
25 ?>
The logic is exactly the same as ‘db_to_xml.php’ prior to line 18. In line 18, I start an output buffer session. By doing this, anything that I wish to display is sent to a buffer. When I close the buffer, its contents are displayed in a browser. Using a buffer is a good idea in web programming, because the programmer controls when output is displayed. In line 19, I create a new ‘DOMDocument’ object as ‘$dom’. I continue by turning off whitespace, turning on formatting, loading the newly created XML into ‘$dom’, and saving the XML to a file (lines 20–23). I end by closing the buffer (line 24). Check the contents of ‘new_db.xml’ to verify that the XML was saved properly.
Creating a Database Table from XML
The first step is to create a new database table to hold data from XML. So, open ‘Oracle SQL Developer’ and run the following code (without line numbers):
1 CREATE TABLE menu
2 (
3 NAMES VARCHAR2(30 BYTE),
4 PRICES VARCHAR2(10 BYTE),
5 DESCRIPTIONS VARCHAR2(100 BYTE),
6 CALORIES NUMBER(4,0)
7 );
Start by issuing ‘CREATE TABLE menu’ (line 1) with its corresponding fields (lines 3–6). Table ‘menu’ should now be created. Data type ‘VARCHAR2’ is a variable-length string (see lines 3–5). So, ‘NAMES’ (line 3) can be anywhere from 0 to 30 characters long. Data type ‘NUMBER’ is a number (line 6). So, ‘CALORIES’ (line 6) can be up to four digits with no decimal places.
Create XML document ‘menu.xml’ in the ‘xml_docs’ directory (the XML document is available on the companion website).
<?xml version="1.0"?>
<breakfast_menu>
<food>
<name>Belgian Waffles</name>
<price>$5.95</price>
<description>two of our famous Belgian Waffles with plenty of real maple syrup</description>
<calories>650</calories>
</food>
<food>
<name>Strawberry Belgian Waffles</name>
<price>$7.95</price>
<description>light Belgian waffles covered with strawberries and whipped cream</description>
<calories>900</calories>
</food>
<food>
<name>Berry-Berry Belgian Waffles</name>
<price>$8.95</price>
<description>light Belgian waffles covered with an assortment of fresh berries and whipped cream</description>
<calories>900</calories>
</food>
<food>
<name>French Toast</name>
<price>$4.50</price>
<description>thick slices made from our homemade sourdough bread</description>
<calories>600</calories>
</food>
<food>
<name>Homestyle Breakfast</name>
<price>$6.95</price>
<description>two eggs, bacon or sausage, toast, and our ever-popular hash browns</description>
<calories>950</calories>
</food>
</breakfast_menu>
PHP file ‘xml_to_db.php’ adds the XML data to the ‘menu’ table with the SQL ‘INSERT’ statement. Be sure that ‘menu.xml’ is available in the directory.
1 <?php
2 // File xml_to_db.php
3 require_once 'dbGeneral.php';
4 $xml = simplexml_load_file('xml_docs/menu.xml');
5 foreach($xml->food as $food)
6 {
7 $name = $food->name;
8 $price = $food->price;
9 $description = $food->description;
10 $calories = $food->calories;
11 $query = "INSERT INTO menu VALUES
12 ('$name', '$price', '$description', '$calories')";
13 $connect = new dbGeneral($query);
14 $connect->parse();
15 $connect->result;
16 $connect->exe();
17 }
18 ?>
I begin by placing ‘menu.xml’ in a ‘SimpleXML’ object as ‘$xml’ (line 4). I use a ‘foreach’ loop (lines 5–17) to add each XML element to the ‘menu’ table in the database. With lines 7–10, I grab element values from each XML node. With lines 11 and 12, I place the SQL ‘INSERT’ statement into ‘$query’. I then create a new instance of ‘dbGeneral’ with ‘$query’ as parameter (line 13). I continue by processing the query (lines 14–16).
Load ‘xml_to_db.php’ into a web browser. Use ‘Oracle SQL Developer’ to verify that the data was added properly. There should be five records in the ‘menu’ table.
XML Generation Application
To create an XML generation application, I use three classes – ‘dbAggregation’, ‘dbIterator’, and ‘xmlOutput’. Classes ‘dbAggregation’ and ‘dbIterator’ were introduced and fully explained in Chapter 6, so refer back to this chapter if you need a detailed explanation of the logic.
The ‘dbAggregation’ class sets the username, password, and host server (lines 16–18) in the ‘setParms()’ method. It also connects to the Oracle database (lines 22 and 23) in the ‘connDB()’ method, instantiates a new ‘dbIterator’ instance and returns (gets) the result back to the calling environment (lines 27 and 28) in the ‘getResultSet()’ method.
1 <?php
2 // File dbAggregation.php
3 class dbAggregation
4 {
5 private $_schema;
6 private $_password;
7 private $_host;
8 protected $_connection;
9 public function __construct()
10 {
11 $this->setParms();
12 $this->connDB();
13 }
14 public function setParms()
15 {
16 $this->_schema = '';
17 $this->_password = '';
18 $this->_host = '';
19 }
20 public function connDB()
21 {
22 $this->_connection = oci_connect($this->_schema,
23 $this->_password, $this->_host);
24 }
25 public function getResultSet($sql)
26 {
27 $results = new dbIterator($sql, $this->_connection);
28 return $results;
29 }
30 }
31 ?>
The ‘dbIterator’ class implements an Iterator interface (line 3). Its constructor accepts the connection to Oracle from ‘dbAggregation’ (line 10) and processes the SQL (lines 12–17). The class also contains the Iterator interface logic (lines 19–53), including methods ‘next()’ (lines 19–26), ‘current()’ (lines 27–30), ‘valid()’ (lines 33–36), and ‘rewind()’ (lines 37–53). The ‘key()’ method is included with no logic because Oracle doesn’t use it. However, the ‘key()’ method must be present because it is required in an Iterator interface.
1 <?php
2 // File dbIterator.php
3 class dbIterator implements Iterator
4 {
5 public $sql;
6 public $connection;
7 protected $_result = array();
8 protected $_valid;
9 private $_stmt;
10 public function __construct($sql,$connection)
11 {
12 $this->sql = $sql;
13 $this->connection = $connection;
14 if(!$this->_stmt = oci_parse($connection,$sql))
15 { echo "failed to parse"; };
16 if(!oci_execute($this->_stmt))
17 {echo "failed to execute"; }
18 }
19 public function next()
20 {
21 $this->_result = oci_fetch_assoc($this->_stmt);
22 if(!$this->_result)
23 { $this->_valid = false; }
24 else
25 { $this->_valid = true; }
26 }
27 public function current()
28 {
29 return $this->_result;
30 }
31 public function key()
32 { }
33 public function valid()
34 {
35 return $this->_valid;
36 }
37 public function rewind()
38 {
39 if(!($this->_result))
40 {
41 oci_free_statement($this->_stmt);
42 if(!$this->_stmt =
43 oci_parse($this->connection, $this->sql))
44 { echo "failed to parse"; };
45 if(!oci_execute($this->_stmt))
46 {echo "failed to execute"; }
47 }
48 $this->_result = oci_fetch_assoc($this->_stmt);
49 if(!$this->_result)
50 { $this->_valid = false; }
51 else
52 { $this->_valid = true; }
53 }
54 }
55 ?>
The ‘xmlOutput’ class (lines 3–42) accepts the result set created by classes ‘dbAggregation’ and ‘dbIterator’, and creates the XML document. The class uses four ‘private’ properties (lines 5–8). The constructor sets the result set, choice, and XML file name (lines 11–13) and invokes the ‘write()’ method (line 14). Specifically, the constructor sets the result set to ‘$this->_result’ (line 11), sets choice (display or save) to ‘$this->_choice’ (line 12), sets the XML document to ‘$this->_xmlfile’ (line 13), and invokes method ‘write()’ (line 14). The ‘write()’ method (lines 16–39) creates the XML.
The ‘write()’ method is pretty complex. It begins by creating a new instance of ‘XMLWriter’ (line 18), which is an extension that generates streams or files containing XML data. The ‘XMLWriter’ extension includes several methods to generate XML. If the choice is to display (‘see’) the XML, the ‘openMemory()’ method is invoked (line 20). If the choice is to save the XML, the ‘openUri()’ and ‘setIndent()’ methods are invoked (lines 23 and 24). The ‘write()’ method continues by building the XML document from the result set.
The ‘startDocument()’ method (line 26) begins the XML document. The startElement()’ method (line 27) creates the element tags. The ‘writeElement()’ method (line 33) adds element values from the database table. The ‘endElement()’ (lines 35 and 37) and ‘endDocument()’ (line 38) methods close the XML document.
The ‘flush()’ method (lines 40 and 41) is the final method in the ‘xmlOutput’ class. It displays the XML in a browser or saves the XML, depending on choice.
1 <?php
2 // File xmlOutput.php
3 class xmlOutput
4 {
5 private $_result;
6 private $_xml;
7 private $_choice;
8 private $_xmlfile;
9 public function __construct($result, $choice, $xmlfile)
10 {
11 $this->_result = $result;
12 $this->_choice = $choice;
13 $this->_xmlfile = $xmlfile;
14 $this->write();
15 }
16 public function write()
17 {
18 $this->_xml = new XMLWriter();
19 if($this->_choice == 'see')
20 { $this->_xml->openMemory(); }
21 else
22 {
23 $this->_xml->openUri($this->_xmlfile);
24 $this->_xml->setIndent(true);
25 }
26 $this->_xml->startDocument();
27 $this->_xml->startElement('root');
28 foreach($this->_result as $row)
29 {
30 $this->_xml->startElement('row');
31 foreach($row as $field => $value)
32 {
33 $this->_xml->writeElement($field, $value);
34 }
35 $this->_xml->endElement();
36 }
37 $this->_xml->endElement();
38 $this->_xml->endDocument();
39 }
40 public function flush()
41 { return $this->_xml->flush(); }
42 }
43 ?>
PHP file ‘xml_flush.php’ displays tXML based on the ‘menu’ table. It includes ‘dbAggregation’, ‘dbIterator’, and ‘xmlOutput’ classes to do its magic.
1 <?php
2 // File xml_flush.php
3 require_once 'dbAggregation.php';
4 require_once 'dbIterator.php';
5 require_once 'xmlOutput.php';
6 $tbl = "menu";
7 $query = "SELECT * FROM $tbl";
8 $conn = new dbAggregation();
9 $result = $conn->getResultSet($query);
10 $xml = new xmlOutput($result,'see','');
11 header('Content-Type: text/xml');
12 $see = $xml->flush();
13 echo $see;
14 ?>
I begin by creating a query (lines 6 and 7). I continue by creating a new instance of ‘dbAggregation’ as ‘$conn’ (line 8). I use ‘getResultSet()’ to get the database result set into ‘$result’ (line 9). I continue by creating a new instance of ‘xmlOutput’ as ‘$xml’ (line 10). Since the choice is ‘see’, I want to display the XML. So, I inform the browser (line 11), use ‘flush()’ (line 12), and display (line 13). Load ‘xml_flush.php’ in a browser. Figure 7.2 displays the first ‘row’ node. Five ‘row’ nodes are actually displayed in the browser.
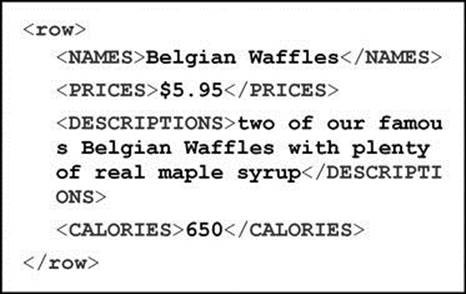
Figure 7.2 Generate XML with ‘dbAggregation’, ‘dbIterator’, and ‘xmlOutput’
Before attempting to save the XML document, be sure that the directory has ‘write’ permissions with the following commands (if necessary).
chmod 777 xml_docs
Since ‘menu.xml’ was created earlier in the chapter, delete it. The reason is that we want to create it and save it with the PHP program that follows.
rm-rf xml_docs/menu.xml
PHP file ‘xml_save.php’ saves the XML based on the ‘menu’ table.
1 <?php
2 // File xml_save.php
3 require_once 'dbAggregation.php';
4 require_once 'dbIterator.php';
5 require_once 'xmlOutput.php';
6 $tbl = "menu";
7 $query = "SELECT * FROM $tbl";
8 $conn = new dbAggregation();
9 $result = $conn->getResultSet($query);
10 $xml = new xmlOutput
11 ($result,'save','xml_docs/menu.xml');
12 $xml->flush();
13 ?>
The logic is the same as ‘xml_flush.php’ except that we don’t need the ‘header’ statement because our choice is ‘save’ (line 11). That is, we don’t need to tell the browser to do anything because we are saving rather than displaying. Verify that ‘menu.xml’ was created and saved in the ‘xml_docs’ directory.
AJAX
Asynchronous JavaScript and XML (AJAX) is a method of sending and receiving data asynchronously from a server-side application using JavaScript. With asynchronous data transmission, the web browser (and server) can continue doing other things while the AJAX data request is being fulfilled by the server.
AJAX is possible because web browsers offer objects that can make independent HTTP requests with the help of JavaScript. An AJAX application includes an HTML page that contains user interface elements that interact with JavaScript functions. JavaScript functions enable HTTP requests by communicating with the web browser. The web browser sends the HTTP request to the server and waits for a response. The server processes the request and can respond in XML markup, plain text, images or data from a database. Figure 7.3 depicts how AJAX works.
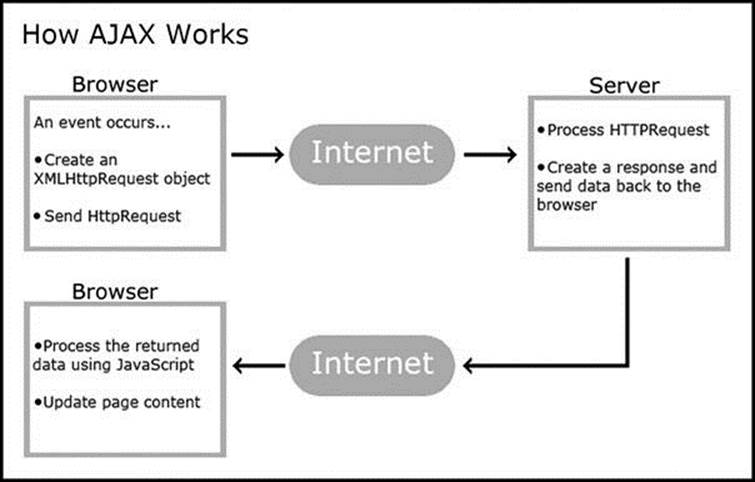
Figure 7.3 Graphical Representation of the AJAX Process (http://www.w3schools.com/ajax/ajax_intro.asp)
The AJAX process has six steps. First, the HTTP object is created. Second, the web browser sends the HTTP request to the server. Third, the server processes the HTTP request. Fourth, the server creates a response and sends it back to the web browser. Fifth, the web browser processes the response. Sixth, the web browser updates web page content.
JavaScript file ‘demo.js’ demonstrates AJAX. You don’t need to save this file because I use it for explanation purposes only.
1 // File demo.js
2 var xhr;
3 xhr = new XMLHttpRequest();
4 function showRpt(str)
5 {
6 var url="demo.php";
7 xhr.open("POST",url,true);
8 xhr.setRequestHeader("Content-Type",
9 "application/x-www-form-urlencoded");
10 xhr.onreadystatechange=function()
11 {
12 if (xhr.readyState==4 ||
13 xhr.readyState=="complete")
14 {document.getElementById("txtHint").innerHTML =
15 xhr.responseText;}
16 }
17 xhr.send("response="+str+"&sid="+Math.random());
18 }
First, I create a new instance of the HTTP request object and place it in variable ‘xhr’ (lines 2 and 3).
var xhr;
xhr = new XMLHttpRequest();
The ‘XMLHttpRequest’ object defines the API used to send HTTP or HTTPS requests directly to a web server and loads the server response data directly back to the PHP script (line 6).
var url="demo.php";
Next, I use the ‘open()’ method (line 7) to tell the web browser to send the HTTP request to the server.
xhr.open("POST",url,true);
The first argument tells the server whether to ‘get’ or ‘post’. In this case, I use method ‘post’. The second argument is the URL of the PHP file used by the server to generate the content of the request. The third argument tells the server how to process the request – ‘true’ for asynchronous and ‘false’ for synchronous.
Since I chose ‘post’, I must use method ‘setRequestHeader()’ to tell the server to include header information (lines 8 and 9).
xhr.setRequestHeader("Content-Type","application/x-www-form-urlencoded");
I use method ‘send()’ (line 17) to tell the server to process the request.
xhr.send("response="+str+"&sid="+Math.random());
I continue by checking the state of the request (line 10).
xhr.onreadystatechange=function()
JavaScript event ‘onreadystatechange’ is triggered every time property ‘readyState’ changes status.
I check if the request was processed (lines 12 and 13).
if (xhr.readyState==4 || xhr.readyState=="complete")
The ‘readyState’ property holds the status of the ‘XMLHttpRequest’ object. If ‘readyState’ is ‘4’, the request is finished and the response is ready.
I tell the web browser to finish the AJAX process by updating the contents of the web page (lines 14 and 15).
{document.getElementById("txtHint").innerHTML = xhr.responseText;}
The response created by the server is saved in property ‘responseText’. ‘document.getElementByID("txtHint").innerHTML’ updates web page content by using the DOM to place the response after the HTML tag with ‘id’ of ‘txtHint’.
AJAX DOM Application for XML Reports
To apply what we have learned so far, I build an application with a drop-down menu for choosing reports from two XML documents. I use the ‘DOMDocument’ class to extract data from XML.
The ‘DOMDocument’ class represents an entire HTML or XML document and serves as the root of the document tree. The XML documents used for this application are ‘customer.xml’ and ‘catalog.xml’. Both documents are available on the companion website. Owing to their large size, they are not provided in text.
Application Scripts for AJAX DOM
I use eight scripts in this application – ‘xml.php’, ‘select_xml.js’, ‘get_xml.php’, ‘all.php’, ‘cat.php’, ‘usa.php’, ‘uk.php’, and ‘eu.php’. PHP file ‘xml.php’ contains the drop-down logic and JavaScript event handler.
1 <?php
2 // File xml.php
3 ?>
4 <html><body style="background-color:BURLYWOOD;">
5 <head><script src="select_xml.js"></script></head>
6 <body><div style="text-align:center;">
7 <form>
8 <h3 style="color:crimson;">Select XML: </h3>
9 <select name="rpt" onchange="showRpt(this.value)">
10 <option value=999 selected="SELECTED">CHOOSE ONE</option>
11 <option value="All">All Customers</option>
12 <option value="Catalog">Entire Catalog</option>
13 <option value="USA">USA Catalog</option>
14 <option value="UK">UK Catalog</option>
15 <option value="EU">EU Catalog</option>
16 </select>
17 </form>
18 <p><div style="color:blue;" id="txtHint">
19 <b>XML info will be listed here.</b></div>
20</p></body></html>
Line 5 tells PHP where to find the AJAX script. Line 9 contains the JavaScript event handler, which invokes function ‘showRpt()’ when a selection is made from the drop-down menu. Lines 9–16 create the drop-down menu. The response from the HTTP request is placed after line 18 because it contains the ‘<div>’ tag with ‘id’ of ‘txtHint’.
The JavaScript event handler ‘onchange’ (line 9) is key. It is triggered when the state changes. In our case, the state changes when a menu selection is made. A choice from the menu tells PHP to run ‘showRpt()’ from ‘select_xml.js’, which creates an AJAX request. So, the state changes from processing ‘xml.php’ to ‘select_xml.js’. The parameter for ‘showRpt()’ is ‘this.value’, which indicates the current choice. The ‘this’ keyword in JavaScript serves the same purpose as the ‘this’ keyword in PHP.
<select name="rpt" onchange="showRpt(this.value)">
I use JavaScript file ‘select_xml.js’ to create and process the HTTP request. The ‘AJAX’ section (earlier in the chapter) explains how the code works in detail.
1 // File select_xml.js
2 var xhr;
3 xhr = new XMLHttpRequest();
4 function showRpt(str)
5 {
6 var url="get_xml.php";
7 xhr.open("POST",url,true);
8 xhr.setRequestHeader("Content-Type",
9 "application/x-www-form-urlencoded");
10 xhr.onreadystatechange=function()
11 {
12 if (xhr.readyState==4 ||
13 xhr.readyState=="complete")
14 {document.getElementById("txtHint").innerHTML =
15 xhr.responseText;}
16 }
17 xhr.send("response="+str+"&sid="+Math.random());
18 }
I begin by creating a new instance of ‘XMLHttpRequest’ as ‘xhr’ (line 3). I continue with function ‘showRpt()’ (lines 4–18). The function identifies the PHP file to use for the request (line 6), how to open the request (lines 7–9), how to check when the request is completed (lines 10–16), where to place the response (lines 14 and 15), and how to send the response (line 17).
The server calls PHP file ‘get_xml.php’ to process the response.
1 <?php
2 // File get_xml.php
3 $response = $_POST["response"];
4 if ($response == 999)
5 {
6 echo "<h3 style='color:RED;'>";
7 echo "Choose one of the reports Silly!</h3>";
8 }
9 else
10 {
11 if ($response == "All") { header('Location: all.php'); }
12 else if ($response == "Catalog") { header('Location: cat.php'); }
13 else if ($response == "USA") { header('Location: usa.php'); }
14 else if ($response == "UK") { header('Location: uk.php'); }
15 else if ($response == "EU") { header('Location: eu.php'); }
16 }
17 ?>
I begin by posting the response from the drop-down form (line 3). If an incorrect response was chosen from the menu, I display a message (lines 4–8). With lines 9–16, I redirect (based on the choice from the drop-down menu) to a PHP file that generates the appropriate response content.
PHP file ‘all.php’ creates a ‘DOMDocument’ object, parses the ‘customer.xml’ document, and displays data from ‘customer.xml’.
1 <?php
2 // File all.php
3 $xmlDoc = new DOMDocument();
4 $xmlDoc->load('xml_docs/customer.xml');
5 $x = $xmlDoc->getElementsByTagName('row');
6 for ($i=0; $i<($x->length); $i++)
7 {
8 $first = $x->item($i)->getElementsByTagName('FIRST_NAME')->
9 item(0)->childNodes->item(0)->nodeValue;
10 $last = $x->item($i)->getElementsByTagName('LAST_NAME')->
11 item(0)->childNodes->item(0)->nodeValue;
12 $addr = $x->item($i)->getElementsByTagName('ADDRESS')->
13 item(0)->childNodes->item(0)->nodeValue;
14 $phone = $x->item($i)->getElementsByTagName('PHONE')->
15 item(0)->childNodes->item(0)->nodeValue;
16 echo "<div style='text-align:center;'>";
17 echo "<p>" . $last . "," . $first . "<br>" . $addr .
18 ”<br>" . $phone . "</p></div>";
19 }
20 ?>
I begin by creating a ‘DOMDocument’ object as ‘$xmlDoc’ (line 3). I load ‘customer.xml’ into the object (line 4). I continue by placing all ‘row’ elements from the XML into ‘$x’ (line 5). I use a ‘for’ loop to process the XML document (lines 6–19).
To grab the value of ‘FIRST_NAME’ from each node, I use the ‘item’, ‘getElementsByTagName’, ‘childNodes’, and ‘nodeValue’ methods (lines 8 and 9). I use ‘item’ initially to grab the ith element. Within the ith element, I use method ‘getElementsByTagName’ to identify the element name and ‘item(0)’ to identify the element level. In our case, ‘FIRST_NAME’ is at the top level. Next, I use ‘childNodes-> item(0)->nodeValue’ to grab the value of ‘FIRST_NAME’. Whew! The DOM is very tough! I use the same logic to get the other element values.
PHP file ‘cat.php’ creates a ‘DOMDocument’ object, parses the ‘catalog.xml’ document, and displays data from ‘catalog.xml’.
1 <?php
2 // File cat.php
3 $xmlDoc = new DOMDocument();
4 $xmlDoc->load('xml_docs/catalog.xml');
5 $x = $xmlDoc->getElementsByTagName('CD');
6 for ($i=0; $i<($x->length); $i++)
7 {
8 $title = $x->item($i)->getElementsByTagName('TITLE')->
9 item(0)->childNodes->item(0)->nodeValue;
10 $artist = $x->item($i)->getElementsByTagName('ARTIST')->
11 item(0)->childNodes->item(0)->nodeValue;
12 $country = $x->item($i)->getElementsByTagName('COUNTRY')->
13 item(0)->childNodes->item(0)->nodeValue;
14 $company = $x->item($i)->getElementsByTagName('COMPANY')->
15 item(0)->childNodes->item(0)->nodeValue;
16 $price = $x->item($i)->getElementsByTagName('PRICE')->
17 item(0)->childNodes->item(0)->nodeValue;
18 $year = $x->item($i)->getElementsByTagName('YEAR')->
19 item(0)->childNodes->item(0)->nodeValue;
20 echo "<div style='text-align:center;'>";
21 echo "<p>" . $title . "<br>" . $artist . "<br>" . $country .
22 ”<br>" . $company . "<br>" . $price . "<br>". $year . "</p></div>";
23 }
24 ?>
I begin by creating a ‘DOMDocument’ object (line 3) and use method ‘load()’ from the object to load ‘catalog.xml’ (line 4). I continue by placing all ‘CD’ elements from the XML into ‘$x’ (line 5). Next, I extract all ‘catalog’ XML data (lines 8–19), and display it (lines 20–22). To grab the values from each element, I use the same logic presented in ‘all.php’ except the element names are different.
PHP file ‘usa.php’ creates a ‘DOMDocument’ object, parses the ‘catalog.xml’ document, and displays ‘catalog’ data for ‘USA’ only.
1 <?php
2 // File usa.php
3 $xmlDoc = new DOMDocument();
4 $xmlDoc->load('xml_docs/catalog.xml');
5 $x = $xmlDoc->getElementsByTagName('CD');
6 for ($i=0; $i<($x->length); $i++)
7 {
8 if($x->item($i)->getElementsByTagName('COUNTRY')->
9 item(0)->childNodes->item(0)->nodeValue == "USA")
10 {
11 $title = $x->item($i)->getElementsByTagName('TITLE')->
12 item(0)->childNodes->item(0)->nodeValue;
13 $artist = $x->item($i)->getElementsByTagName('ARTIST')->
14 item(0)->childNodes->item(0)->nodeValue;
15 $country = $x->item($i)->getElementsByTagName('COUNTRY')->
16 item(0)->childNodes->item(0)->nodeValue;
17 $company = $x->item($i)->getElementsByTagName('COMPANY')->
18 item(0)->childNodes->item(0)->nodeValue;
19 $price = $x->item($i)->getElementsByTagName('PRICE')->
20 item(0)->childNodes->item(0)->nodeValue;
21 $year = $x->item($i)->getElementsByTagName('YEAR')->
22 item(0)->childNodes->item(0)->nodeValue;
23 echo "<div style='text-align:center;'>";
24 echo "<p>" . $title . "<br>" . $artist . "<br>" . $country .
25 ”<br>" . $company . "<br>" . $price . "<br>". $year . "</p></div>";
26 }
27 }
28 ?>
The code follows the same logic as ‘cat.php’, but only displays data from ‘COUNTRY’ ‘USA’ using an ‘if’ statement (lines 8 and 9). I first create a ‘DOMDocument’ object (line 3) and use method ‘load()’ from the object to load ‘catalog.xml’ (line 4). I continue by placing all ‘CD’ elements from the XML into ‘$x’ (line 5). Next, I extract all ‘catalog’ XML data (lines 11–22), and display it (lines 23–25). To grab the values from each element, I use the same logic presented in ‘cat.php’.
PHP file ‘uk.php’ creates a ‘DOMDocument’ object, parses the ‘catalog.xml’ document, and displays ‘catalog’ data for ‘UK’ only.
1 <?php
2 // File uk.php
3 $xmlDoc = new DOMDocument();
4 $xmlDoc->load('xml_docs/catalog.xml');
5 $x = $xmlDoc->getElementsByTagName('CD');
6 for ($i=0; $i<($x->length); $i++)
7 {
8 if($x->item($i)->getElementsByTagName('COUNTRY')->
9 item(0)->childNodes->item(0)->nodeValue == "UK")
10 {
11 $title = $x->item($i)->getElementsByTagName('TITLE')->
12 item(0)->childNodes->item(0)->nodeValue;
13 $artist = $x->item($i)->getElementsByTagName('ARTIST')->
14 item(0)->childNodes->item(0)->nodeValue;
15 $country = $x->item($i)->getElementsByTagName('COUNTRY')->
16 item(0)->childNodes->item(0)->nodeValue;
17 $company = $x->item($i)->getElementsByTagName('COMPANY')->
18 item(0)->childNodes->item(0)->nodeValue;
19 $price = $x->item($i)->getElementsByTagName('PRICE')->
20 item(0)->childNodes->item(0)->nodeValue;
21 $year = $x->item($i)->getElementsByTagName('YEAR')->
22 item(0)->childNodes->item(0)->nodeValue;
23 echo "<div style='text-align:center;'>";
24 echo "<p>" . $title . "<br>" . $artist . "<br>" . $country .
25 ”<br>" . $company . "<br>" . $price . "<br>". $year . "</p></div>";
26 }
27 }
28 ?>
The code follows the same logic as ‘usa.php’, but only displays data from ‘COUNTRY’ ‘UK’ using an ‘if’ statement (lines 8 and 9). I first create a ‘DOMDocument’ object (line 3) and use method ‘load()’ from the object to load ‘catalog.xml’ (line 4). I continue by placing all ‘CD’ elements from the XML into ‘$x’ (line 5). Next, I extract all ‘catalog’ XML data (lines 11–22), and display it (lines 23–25). To grab the values from each element, I use the same logic presented in ‘cat.php’.
PHP file ‘eu.php’ creates a ‘DOMDocument’ object, parses the ‘catalog.xml’ document, and displays ‘catalog’ data for ‘EU’ only.
1 <?php
2 // File eu.php
3 $xmlDoc = new DOMDocument();
4 $xmlDoc->load('xml_docs/catalog.xml');
5 $x = $xmlDoc->getElementsByTagName('CD');
6 for ($i=0; $i<($x->length); $i++)
7 {
8 if($x->item($i)->getElementsByTagName('COUNTRY')->
9 item(0)->childNodes->item(0)->nodeValue == "EU")
10 {
11 $title = $x->item($i)->getElementsByTagName('TITLE')->
12 item(0)->childNodes->item(0)->nodeValue;
13 $artist = $x->item($i)->getElementsByTagName('ARTIST')->
14 item(0)->childNodes->item(0)->nodeValue;
15 $country = $x->item($i)->getElementsByTagName('COUNTRY')->
16 item(0)->childNodes->item(0)->nodeValue;
17 $company = $x->item($i)->getElementsByTagName('COMPANY')->
18 item(0)->childNodes->item(0)->nodeValue;
19 $price = $x->item($i)->getElementsByTagName('PRICE')->
20 item(0)->childNodes->item(0)->nodeValue;
21 $year = $x->item($i)->getElementsByTagName('YEAR')->
22 item(0)->childNodes->item(0)->nodeValue;
23 echo "<div style='text-align:center;'>";
24 echo "<p>" . $title . "<br>" . $artist . "<br>" . $country .
25 ”<br>" . $company . "<br>" . $price . "<br>". $year . "</p></div>";
26 }
27 }
28 ?>
The code follows the same logic as ‘usa.php’, but only displays data from ‘COUNTRY’ ‘EU’ using an ‘if’ statement (lines 8 and 9). I first create a ‘DOMDocument’ object (line 3) and use method ‘load()’ from the object to load ‘catalog.xml’ (line 4). I continue by placing all ‘CD’ elements from the XML into ‘$x’ (line 5). Next, I extract all ‘catalog’ XML data (lines 11–22), and display it (lines 23–25). To grab the values from each element, I use the same logic presented in ‘cat.php’.
I know that this seems like a lot of code. But did you notice that I reused code in many places? When I build an application, I try to reuse code wherever possible.
Before testing the application, be sure to save the files with the names provided – ‘xml.php’, ‘select_xml.js’, ‘get_xml.php’, ‘all.php’, ‘cat.php’, ‘usa.php’, ‘uk.php’, and ‘eu.php’. In addition, be sure that ‘customer.xml’ and ‘catalog.xml’ are saved in the ‘xml_docs’ directory. Load ‘xml.php’ in a browser. Figure 7.4 shows the initial screen display with the drop-down menu.
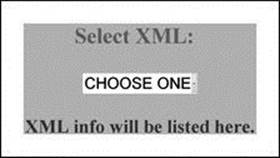
Figure 7.4 Display AJAX-Enabled Form with Drop-Down Menu of XML Data Options
Click the drop-down menu arrow and choose ‘All Customers’. Figure 7.5 shows partial results (there should be ten customers displayed). To view the entire catalog, USA entries, UK entries, or EU entries, click on the appropriate menu item.
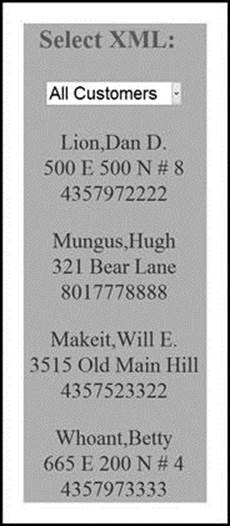
Figure 7.5 Output ‘All Customer’ Partial Data Using ‘DOMDocument’ Class
AJAX ‘SimpleXML’ Application for XML Reports
If you haven’t already noticed, using the ‘DOM’ is a royal pain! So, I am going to show you how to build the same application with much less code. The application provides a drop-down menu for choosing reports from two XML documents, but uses ‘SimpleXML’ instead of ‘DOM’. ‘SimpleXML’ makes XML extraction much easier.
Like the ‘DOM’ application, the XML documents I use are ‘customer.xml’ and ‘catalog.xml’. Both documents are available on the companion website.
Application Scripts for AJAX ‘SimpleXML’
I use eight scripts in this application – ‘xml_simple.php’, ‘select_simple.js’, ‘get_simple.php’, ‘all_simple.php’, ‘cat_simple.php’, ‘usa_simple.php’, ‘uk_simple.php’, and ‘eu_simple.php’.
PHP file ‘xml_simple.php’ contains the drop-down logic and JavaScript event handler.
1 <?php
2 // File xml_simple.php
3 ?>
4 <html><body style="background-color:BURLYWOOD;">
5 <head><script src="select_simple.js"></script></head>
6 <body><div style="text-align:center;">
7 <form>
8 <h3 style="color:crimson;">Select XML: </h3>
9 <select name="rpt" onchange="showRpt(this.value)">
10 <option value=999 selected="SELECTED">CHOOSE ONE</option>
11 <option value="All">All Customers</option>
12 <option value="Catalog">Entire Catalog</option>
13 <option value="USA">USA Catalog</option>
14 <option value="UK">UK Catalog</option>
15 <option value="EU">EU Catalog</option>
16 </select>
17 </form>
18 <p><div style="color:blue;"
19 id="txtHint"><b>XML info will be listed here.</b></div>
20 </p></body></html>
The logic in ‘xml_simple.php’ is almost the same as ‘xml.php’. The only difference is the name of the JavaScript file, which is ‘select_simple.js’ (line 5).
JavaScript file ‘select_simple.js’ instantiates the ‘XMLHttpRequest’ object and processes the HTTP request. The logic is the same as ‘select_xml.js’ except I use ‘get_simple.php’ to process the AJAX request (line 6).
1 // File select_simple.js
2 var xhr;
3 xhr = new XMLHttpRequest();
4 function showRpt(str)
5 {
6 var url="get_simple.php";
7 xhr.open("POST",url,true);
8 xhr.setRequestHeader("Content-Type",
9 "application/x-www-form-urlencoded");
10 xhr.onreadystatechange=function()
11 {
12 if (xhr.readyState==4 || xhr.readyState=="complete")
13 {document.getElementById("txtHint").innerHTML =
14 xhr.responseText;}
15 }
16 xhr.send("response="+str+"&sid="+Math.random());
17 }
PHP file ‘get_simple.php’ processes the request.
1 <?php
2 // File get_simple.php
3 $response = $_POST["response"];
4 if ($response == 999)
5 {
6 echo "<h3 style='color:RED;'>";
7 echo "Choose one of the reports Silly!</h3>";
8 }
9 else
10 {
11 if ($response == "All")
12 { header('Location: all_simple.php'); }
13 else if ($response == "Catalog")
14 { header('Location: cat_simple.php'); }
15 else if ($response == "USA")
16 { header('Location: usa_simple.php'); }
17 else if ($response == "UK")
18 { header('Location: uk_simple.php'); }
19 else if ($response == "EU")
20 { header('Location: eu_simple.php'); }
21 }
22 ?>
I begin by posting the response (line 3). I then check to see which menu item was selected from the drop-down menu (lines 11–20) and redirect to the appropriate PHP file for final processing.
PHP file ‘all_simple.php’ converts the XML into a ‘SimpleXML’ object, parses the ‘customer.xml’ document, and displays the data.
1 <?php
2 // File all_simple.php
3 $xml = simplexml_load_file('xml_docs/customer.xml');
4 echo "<html><head><style type='text/css'>";
5 echo "table.center{ margin-left:auto; margin-right:auto; }";
6 echo "<div style='text-align:center;'>";
7 echo "</style></head><table class='center'>";
8 foreach($xml->row as $row)
9 {
10 echo "<tr><td>";
11 echo $row->ID . ' ' . $row->FIRST_NAME . ' ' .
12 $row->LAST_NAME;
13 echo ' ' . $row->ADDRESS. ' ' . $row->PHONE . "<br />";
14 echo "</tr></td>";
15 };
16 echo "</table></div></html>";
17 ?>
I begin by creating a ‘SimpleXML’ object from ‘customer.xml’ as ‘$xml’ (line 3). I then use a ‘foreach’ loop (lines 8–15) to iterate through the object. Wow! Look how simple the code is compared with the ‘DOMDocument’ version! The only reason I would ever use the ‘DOMDocument’ version is if I needed its advanced features.
PHP file ‘cat_simple.php’ converts the XML into a ‘SimpleXML’ object, parses the ‘catalog.xml’ document, and displays the data.
1 <?php
2 // File cat_simple.php
3 $xml = simplexml_load_file('xml_docs/catalog.xml');
4 echo "<html><head><style type='text/css'>";
5 echo "table.center{ margin-left:auto; margin-right:auto; }";
6 echo "<div style='text-align:center;'>";
7 echo "</style></head><table class='center'>";
8 foreach($xml->CD as $cd)
9 {
10 echo "<tr><td>";
11 echo $cd->TITLE . ' ' . $cd->ARTIST . ' ' . $cd->COUNTRY;
12 echo ' ' . $cd->COMPANY . ' ' . $cd->PRICE . ' ' .
13 $cd->YEAR . "<br />";
14 echo "</tr></td>";
15 };
16 echo "</table></div></html>";
17 ?>
I begin by creating a ‘SimpleXML’ object from ‘catalog.xml’ as ‘$xml’ (line 3). I then use a ‘foreach’ loop (lines 8–15) to iterate through the object.
PHP file ‘usa_simple.php’ converts the XML into a ‘SimpleXML’ object, parses the ‘catalog.xml’ document, and displays the data for ‘USA’ only.
1 <?php
2 // File usa_simple.php
3 $xml = simplexml_load_file('xml_docs/catalog.xml');
4 echo "<html><head><style type='text/css'>";
5 echo "table.center{ margin-left:auto; margin-right:auto; }";
6 echo "<div style='text-align:center;'>";
7 echo "</style></head><table class='center'>";
8 foreach($xml->CD as $cd)
9 {
10 if($cd->COUNTRY == "USA")
11 {
12 $country = $cd->COUNTRY;
13 echo "<tr><td>";
14 echo $cd->TITLE . ' ' . $cd->ARTIST . ' ' . $cd->COUNTRY;
15 echo ' ' . $cd->COMPANY . ' ' . $cd->PRICE . ' ' .
16 $cd->YEAR . "<br />";
17 echo "</tr></td>";
18 }
19 }
20 echo "</table></div></html>";
21 ?>
I use the same logic as ‘cat_simple.php’ but only display data from ‘COUNTRY’ ‘USA’ by using an ‘if’ statement (line 10).
PHP file ‘uk_simple.php’ converts the XML into a ‘SimpleXML’ object, parses the ‘catalog.xml’ document, and displays the data for ‘UK’ only.
1 <?php
2 // File uk_simple.php
3 $xml = simplexml_load_file('xml_docs/catalog.xml');
4 echo "<html><head><style type='text/css'>";
5 echo "table.center{ margin-left:auto; margin-right:auto; }";
6 echo "<div style='text-align:center;'>";
7 echo "</style></head><table class='center'>";
8 foreach($xml->CD as $cd)
9 {
10 if($cd->COUNTRY == "UK")
11 {
12 $country = $cd->COUNTRY;
13 echo "<tr><td>";
14 echo $cd->TITLE . ' ' . $cd->ARTIST . ' ' . $cd->COUNTRY;
15 echo ' ' . $cd->COMPANY . ' ' . $cd->PRICE . ' ' .
16 $cd->YEAR . "<br />";
17 echo "</tr></td>";
18 }
19 }
20 echo "</table></div></html>";
21 ?>
I use the same logic as ‘cat_simple.php’ but only display data from ‘COUNTRY’ ‘UK’ by using an ‘if’ statement (line 10).
PHP file ‘eu_simple.php’ converts the XML into a ‘SimpleXML’ object, parses the ‘catalog.xml’ document, and displays the data for ‘EU’ only.
1 <?php
2 // File eu_simple.php
3 $xml = simplexml_load_file('xml_docs/catalog.xml');
4 echo "<html><head><style type='text/css'>";
5 echo "table.center{ margin-left:auto; margin-right:auto; }";
6 echo "<div style='text-align:center;'>";
7 echo "</style></head><table class='center'>";
8 foreach($xml->CD as $cd)
9 {
10 if($cd->COUNTRY == "EU")
11 {
12 $country = $cd->COUNTRY;
13 echo "<tr><td>";
14 echo $cd->TITLE . ' ' . $cd->ARTIST . ' ' . $cd->COUNTRY;
15 echo ' ' . $cd->COMPANY . ' ' . $cd->PRICE . ' ' .
16 $cd->YEAR . "<br />";
17 echo "</tr></td>";
18 }
19 }
20 echo "</table></div></html>";
21 ?>
I use the same logic as ‘cat_simple.php’ but only displays data from ‘COUNTRY’ ‘EU’ by using an ‘if’ statement (line 10).
Load ‘xml_simple.php’ to invoke the application. Click the drop-down menu arrow and choose ‘All Customers’. Figure 7.6 shows the results.
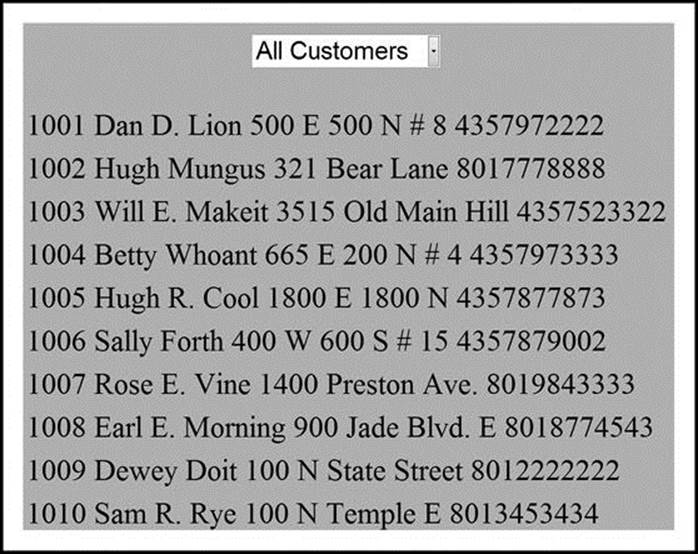
Figure 7.6 Output ‘All Customer’ Data Using ‘SimpleXMLElement’ Class
Notice that the display is a bit cleaner than the ‘DOMDocument’ application. This is because I added a bit of CSS. To view the entire catalog, USA entries, UK entries, or EU entries, click on the appropriate menu item.
XML Tree Application
The previous two applications extracted data from XML documents using the ‘DOMDocument’ and ‘SimpleXMLElement’ classes, respectively. The intention of the application I am about to build is to display the schema (tree) of an XML document. An XML tree is the structure of an XML document. XML documents form a tree structure that starts at the root and extends through branches to the leaves.
The XML documents I use are ‘customer.xml’ and ‘catalog.xml’. Both documents are available on the companion website.
Application Scripts for XML Tree
I use six scripts in this application – ‘tree.php’, ‘select_tree.js’, ‘get_tree.php’, ‘error.php’, ‘customer.php’, and ‘catalog.php’.
PHP file ‘tree.php’ provides a drop-down menu for choosing the XML tree to display and a JavaScript event handler to handle the event.
1 <?php
2 // File tree.php
3 ?>
4 <html><body style="background-color:BURLYWOOD;">
5 <head><script src="select_tree.js"></script></head>
6 <body><div style="text-align:center;">
7 <form>
8 <h3 style="color:crimson;">Select XML Tree: </h3>
9 <select name="rpt" onchange="showRpt(this.value)">
10 <option value=999 selected="SELECTED">CHOOSE ONE</option>
11 <option value="All">Customer Tree</option>
12 <option value="Catalog">Catalog Tree</option>
13 </select>
14 </form>
15 </div></body></html>
The JavaScript event handler (line 9) invokes function ‘showRpt()’ from ‘select_tree.js’ (line 5) when a menu choice is selected. The menu (lines 9–13) includes three options – ‘999’, ‘All’, and ‘Catalog’. If the ‘999’ option is chosen, a message is given to choose one of the other two options.
JavaScript file ‘select_tree.js’ processes the AJAX HTTP request.
1 // File select_tree.js
2 var xhr;
3 xhr = new XMLHttpRequest();
4 function showRpt(str)
5 {
6 var url="get_tree.php";
7 xhr.open("POST",url,true);
8 xhr.setRequestHeader("Content-Type",
9 "application/x-www-form-urlencoded");
10 xhr.onreadystatechange=function()
11 {
12 if (xhr.readyState==4 || xhr.readyState=="complete")
13 window.location = xhr.responseText;
14 }
15 xhr.send("response="+str+"&sid="+Math.random());
16 }
I begin by creating a new instance of ‘XMLHttpRequest’ as ‘xhr’ (lines 2 and 3). I continue with a function that processes the AJAX request (lines 4–16). I open a new request (line 7), set the request header information (line 8), test if the request is complete (lines 10–12), place the response in ‘window.location’ (line 13), and send the request (line 15). By using ‘window.location’, I tell the browser to replace what is currently being displayed with the tree structure of the XML document. The ‘window.location’ object allows you to redirect the browser from the current page address (URL) to a new page.
PHP file ‘get_tree.php’ processes the AJAX response.
1 <?php
2 // File get_tree.php
3 $response = $_POST["response"];
4 if ($response == 999)
5 { echo "error.php"; }
6 else
7 {
8 if ($response == "All") { echo "customer.php"; }
9 else if ($response == "Catalog") { echo "catalog.php"; }
10 }
11 ?>
I begin by posting ‘response’ into ‘$response’ (line 3). If ‘$response’ is ‘999’, I redirect to ‘error.php’ (lines 4 and 5). If not, I redirect either to ‘customer.php’ or ‘catalog.php’ (lines 6–10).
PHP file ‘error.php’ displays an error (lines 6 and 7) if the user chooses this item from the drop-down menu.
1 <?php
2 // File error.php
3 ?>
4 <html><body style="background-color:BURLYWOOD;">
5 <div style='text-align:center;'>
6 <h3 style='color:RED;'>
7 Choose one of the reports Silly!</h3>
8 </div>
9 </body></html>
PHP file ‘customer.php’ displays the tree structure of ‘customer.xml’.
1 <?php
2 // File customer.php
3 $xml = simplexml_load_file('xml_docs/customer.xml');
4 header('Content-Type: text/xml');
5 echo $xml->asXML();
6 ?>
I begin by placing ‘customer.xml’ in a ‘SimpleXML’ object as ‘$xml’ (line 3). I then tell the browser to display the contents of the object (lines 4 and 5).
PHP file ‘catalog.php’ displays the tree structure of ‘catalog.xml’.
1 <?php
2 // File catalog.php
3 $xml = simplexml_load_file('xml_docs/catalog.xml');
4 header('Content-Type: text/xml');
5 echo $xml->asXML();
6 ?>
I begin by placing ‘catalog.xml’ in a ‘SimpleXML’ object as ‘$xml’ (line 3). I then tell the browser to display the contents of the object (lines 4 and 5).
Load ‘tree.php’ to invoke the application. Figure 7.7 shows the initial menu.
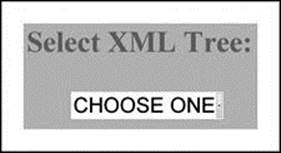
Figure 7.7 Display AJAX-Enabled Form with Drop-Down Menu of XML Tree Options
Click the drop-down menu arrow and choose ‘Customer Tree’. Figure 7.8 shows a partial display of the XML tree for ‘customer.xml’ (there should be ten ‘row’ nodes displayed).
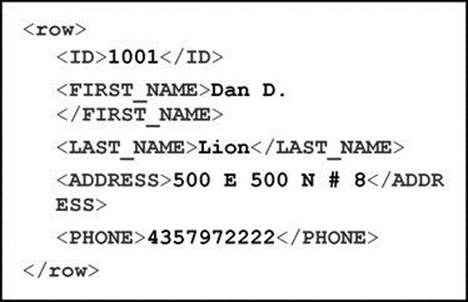
Figure 7.8 Output Showing Partial XML Tree of Customer Data
Click the ‘back’ arrow on the browser to return to the menu. Click the drop-down menu arrow and choose ‘Catalog Tree’. Figure 7.9 shows a partial display of the XML tree for ‘catalog.xml’ (all catalog contents should be displayed).
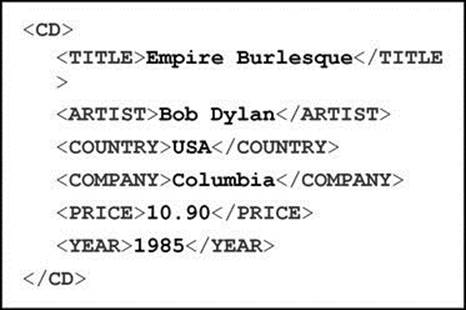
Figure 7.9 Output Showing Partial XML Tree of Catalog Data
The only drawback is that the displayed XML tree is outside the application. That is, once a choice is made from the drop-down menu, the application no longer controls processing. In the next section, I use ‘iframes’ to rectify this drawback.
Incorporate ‘iframes’ into the XML Tree Application
The ‘<iframe>’ tag specifies an inline frame. An inline frame is used to embed another document within the current HTML document. With ‘iframe’ technology, the tree display can be kept inside the application. The XML documents used are ‘customer.xml’ and ‘catalog.xml’. Both documents are available on the companion website.
Application Scripts for ‘iframes’
I use three scripts in this application – ‘iframe.php’, ‘customer.php’, and ‘catalog.php’.
PHP file ‘iframe.php’ provides a drop-down menu for choosing the XML tree to display, a JavaScript event handler, and the ‘iframe’ logic.
1 <?php
2 // File iframe.php
3 @$choice = $_POST['choice'];
4 ?>
5 <html>
6 <head>
7 <style type="text/css">
8 table.center {
9 margin-left:auto;
10 margin-right:auto;
11 }
12 </style>
13 <script type="text/javascript">
14 function clear_screen()
15 {
16 document.getElementById("area").innerHTML = "";
17 alert("Screen information cleared...");
18 }
19 </script>
20 </head>
21 <body style="background-color:burlywood;">
22 <div style="text-align:center;">
23 <form method="post" action="iframe.php">
24 <h3 style="color:crimson;">Select XML Tree: </h3>
25 <table class="center"><tr>
26 <td><select name="choice" onchange="this.form.submit()">
27 <option value="999" selected>Make a Choice</option>
28 <option value="1">Customer Tree</option>
29 <option value="2">Catalog Tree</option>
30 </td></select></tr>
31 </table>
32 </form>
33 <p>
34 <input type="button" onclick="clear_screen();"
35 value="Clear Screen" />
36 <div id="area">
37 <p>
38 <?php
39 if($choice == "1")
40 {
41 echo "<iframe src='customer.php' width='50%' height='85%' ";
42 echo "name='t1' id='t1'><p>iframes are not supported by your ";
43 echo "browser.</p></iframe>";
44 }
45 if($choice == "2")
46 {
47 echo "<iframe src='catalog.php' width='50%' height='85%' ";
48 echo "name='t1' id='t1'><p>iframes are not supported by your ";
49 echo "browser.</p></iframe>";
50 }
51 ?>
52 </div></div>
53 </body></html>
I begin by posting ‘choice’ as ‘$choice’. This is necessary because the page must submit to itself to enable creation of an ‘iframe’ within the current document. I include JavaScript function ‘clear_screen()’ (lines 14–18), which clears the screen. Within the drop-down menu (lines 26–30), I include a JavaScript event handler (line 34) that submits the form when a change is made.
Below the form, I use an ‘<input>’ tag (lines 34 and 35) to display the button that, when clicked, runs the ‘clear_screen()’ function. I continue by creating an ‘iframe’ that holds the ‘customer’ XML tree if the ‘choice’ is ‘1’ (lines 39–44) or an ‘iframe’ that holds the ‘catalog’ XML tree if the ‘choice’ is ‘2’ (lines 45–50). The ‘<iframe>’ tag identifies the PHP file that creates the XML tree through the ‘src’ attribute (lines 41 and 47).
PHP file ‘customer.php’, converts ‘customer.xml’ to an object and displays its tree structure.
1 <?php
2 // File customer.php
3 $xml = simplexml_load_file('xml_docs/customer.xml');
4 header('Content-Type: text/xml');
5 echo $xml->asXML();
6 ?>
PHP file ‘catalog.php’ converts ‘catalog.xml’ to an object and displays its tree structure.
1 <?php
2 // File catalog.php
3 $xml = simplexml_load_file('xml_docs/catalog.xml');
4 header('Content-Type: text/xml');
5 echo $xml->asXML();
6 ?>
Load ‘iframe.php’ to invoke the application. Figure 7.10 shows the initial menu. Click the drop-down menu arrow and choose ‘Customer Tree’. The tree structure is displayed inside the application. Click the drop-down menu arrow and choose ‘Catalog Tree’. The tree structure is displayed inside the application. Click the ‘Clear Screen’ button and click ‘OK’ to continue. By using ‘iframes’, I can maintain control of processing.
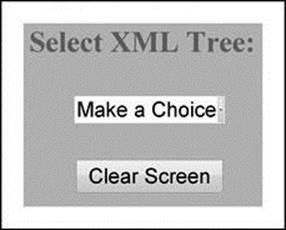
Figure 7.10 Display Showing Iframe-Enabled Form
Summary
The goal of this chapter was to gain skills in creating XML from a database and vice versa, and in creating AJAX-driven applications to generate reports from XML documents. By following the modular approach I present, you should be able to build other applications much more easily.
All materials on the site are licensed Creative Commons Attribution-Sharealike 3.0 Unported CC BY-SA 3.0 & GNU Free Documentation License (GFDL)
If you are the copyright holder of any material contained on our site and intend to remove it, please contact our site administrator for approval.
© 2016-2026 All site design rights belong to S.Y.A.