PHP, MySQL, JavaScript & HTML5 All-in-One For Dummies (2013)
Book VII: PHP and Templates
Chapter 2: Building a Templating System
In This Chapter
![]() Understanding how templates simplify global changes
Understanding how templates simplify global changes
![]() Building a template
Building a template
This chapter looks at template systems and how they can reduce the amount of work that you need to do to make a website. We tell you how to build a template that’s both simple and powerful for many uses, style the page, and then extend the template to other pages on the site.
After working your way through this chapter, you could further extend the templating system to add more specialized pages or even further abstract it so that you can add CSS and JavaScript elements on the fly, rather than through individual external files.
Understanding Template Systems
When you make a website, you frequently use the same layout for the entire site. You have a top portion, maybe with a menu; a main content area; and a bottom part, maybe with links or a copyright notice. Each and every page needs the same CSS and HTML to create this integrated look and feel throughout the website.
When your website has only a couple pages, it’s probably fine to keep the HTML and CSS separate. If you need to make a change, say to add a menu item or change the copyright year, you can just edit each file. But imagine if your website has dozens or even hundreds of pages. Now changing that copyright year or adding a menu item (or whatever) becomes quite a task. Making global changes like that, without a template, requires you to edit every file to make that change and ensure that you don’t make a mistake or typo in one of those edits.
Enter templates. A template is simply a file that contains standard or boilerplate information used to create other files. Templates are a way to reduce repeated code. For example, you can make a top portion and a bottom portion of the page that are common among your pages. You can easily include the header and footer on each page, and then if you need to make a global change to one of these areas, you make the change only once and it applies to all the common headers or footers.
 Not everything can be part of a template or is a good candidate for being a part of a template system. Areas of pages that are common across multiple pages, like the header or footer, are good candidates and can be templated easily. However, the main content area, which is typically different on every page, can’t really be templated.
Building a PHP Template
The remainder of the chapter builds a template system using PHP, along with the normal HTML, CSS, and JavaScript that go into a page. For this chapter, you build a simple HTML page. When you’re done, you will be able to create a page that looks like Figure 2-1.
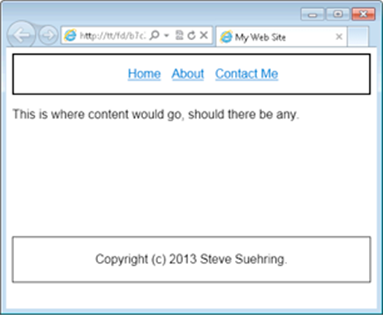
Figure 2-1: Converting a page into a template system.
This page has a header section containing a navigational menu with links to Home, About, and Contact Me. The page also has a main content area and a footer.
Creating a template class
The heart of the template system is a PHP class that's responsible for gathering together the various parts of a given page. The Page class includes a few methods and properties. You instantiate the Page class as part of building each page. Follow these steps for this exercise:
1. Open your text editor and create a new empty file.
2. Place the following PHP code in the file:
<?php
class Page
{
public $type = "default";
public $title = "My Web Site";
public $titleExtra = "";
} //end Page class
?>
3. Save the file as classPage.php in your document root.
Look how the first part of this code breaks down. The class Page is created and these three properties are declared:
![]() Type: This corresponds to the type of page being displayed. By adding a type property, you can change the behavior of the various methods based on whether the type is default or another type. (This example has only a default type.)
Type: This corresponds to the type of page being displayed. By adding a type property, you can change the behavior of the various methods based on whether the type is default or another type. (This example has only a default type.)
![]() Title: This appears in the browser’s menu bar.
Title: This appears in the browser’s menu bar.
![]() Extra title: Use this for additional pages, so that the pages can have different titles.
Extra title: Use this for additional pages, so that the pages can have different titles.
Creating the top of the page
The top of the page is one of the more complex sections for a template system to handle. The top of a web page contains the document type declaration (DTD) along with links to the CSS and any JavaScript that will be used on the page. The top of the page also contains the title and other meta information about the page.
Aside from the information in the <head> section of a page, the top of the page that you're using in this chapter as an example also contains the menu in Figure 2-1, with the links to other pages on the site.
The class that you will create in the initial exercise for this chapter has four methods for the top of the page, including both the <head> section and the menu. However, when using the class, you don't want to have to call (or remember to call) all the various methods in the correct order to create the top section of the page. All you care about is that you create a top section of the page. Therefore, there's only one public method, called getTop. The getTop method is responsible for gathering all the bits to make the entire top of the page.
1. Open classPage.php if it isn't already open.
2. Within classPage, just below the public $titleExtra = ""; line, enter the following code:
public function getTop() {
$output = "";
$output .= $this->_getDocType();
$output .= $this->_getHtmlOpen();
$output .= $this->_getHead();
$output .= file_get_contents("pageTop.txt");
return $output;
} //end function getTop()
3. Save classPage.php.
The getTop() method creates a variable for the output. This gives flexibility to add to or remove from the variable as you need to. The method calls three additional methods, grabs some plain HTML from a file called pageTop.txt, and returns the output.
4. Within classPage.php (open it if it isn't already), below the getTop() method's closing brace, enter the following code:
protected function _getDocType($doctype = "html5") {
if ($doctype == "html5") {
$dtd = "<!DOCTYPE html>";
}
return $dtd . "\n";
}
protected function _getHtmlOpen($lang = "en-us") {
if ($lang == "en-us") {
$htmlopen = "<html lang=\"en\">";
}
return $htmlopen . "\n";
}
protected function _getHead() {
$output = "";
$output .= file_get_contents("pageHead.txt");
if ($this->titleExtra != "") {
$title = $this->titleExtra . "|" . $this->title;
} else {
$title = $this->title;
}
$output .= "<title>" . $title . "</title>";
$output .= "</head>";
return $output;
} //end function _getHead()
The three methods that you add in Step 4 are responsible for building the <head> section of the page. The first method, _getDocType, returns the DTD, which for your case will be HTML5, but could be any other valid document type.
DTDs tell the browser what type of document to expect and what rules that document will honor. This helps the browser to make decisions about how to display the document.
The next method called is _getHtmlOpen(), which creates the <html> element of the page and sets the language. Like other methods, the language can be customized here if need be.
The final method called is the _getHead() method. This method incorporates another file, called pageHead.txt. The pageHead.txt file includes links to CSS and JavaScript. Remember that $type property that's set in the Page class? Here's one place where you might use it. If you have a special page type that requires additional CSS or JavaScript, you could add a conditional statement here like, "If type is special, then use pageSpecialHead.txt."
The _getHead() method is also where the title of the page is set; if the $titleExtra property is set, then it gets used here too.
Now you have the capability to build the top of the page, or close to it, anyway, because you still need the code for those two text files, pageHead.txt and pageTop.txt. You create those using the following steps.
1. Create a new empty file in your text editor.
2. Inside of the file, enter the following markup:
<head>
<link rel="stylesheet" href="style.css" type="text/css" />
3. Save the file as pageHead.txt in your document root and resist the temptation to close that <head> element!
The <head> element is opened in this file (though it could also be opened inside of the _getHead() method). However, because you need to add other elements, like the title, to the <head> section, don't close the <head> element in this file. Instead, leave that for the _getHead() method to do. This gives you the greatest flexibility for changes and additions later.
Now create the pageTop.txt file that creates the menu structure that you see in Figure 2-1 and is incorporated from the pageTop() method.
1. Create a new empty file in your text editor.
2. Inside of the file, add the following markup:
<body>
<div id="menu">
<ul>
<li><a href="home.php">Home</a></li>
<li><a href="about.php">About</a></li>
<li><a href="contact.php">Contact Me</a></li>
</ul>
</div> <!-- end menu -->
3. Save the file as pageTop.txt in your document root.
Creating the bottom of the page
With the top of the page created in template form, create the bottom by following these steps.
1. Open classPage.php if it isn't already opened.
2. Within classPage.php, place the following code, below the closing brace for the _getHead() method:
public function getBottom() {
return file_get_contents("pageBottom.txt");
} //end function getBottom()
3. Save the file.
This code simply retrieves the contents of a file called pageBottom.txt. Now's as good a time as any to build that file. Follow these steps:
1. Create a new empty file within your text editor.
2. Within the file, place the following HTML:
<div id="footer">
Copyright (c) 2013 Steve Suehring.
</div> <!-- end footer -->
</body>
</html>
3. Save the file as pageBottom.txt in your document root.
Connecting the top, bottom, and middle
The final classPage.php file should look like Listing 2-1.
Listing 2-1: The Final classPage.php File
<?php
class Page
{
public $type = "default";
public $title = "My Web Site";
public $titleExtra = "";
public function getTop() {
$output = "";
$output .= $this->_getDocType();
$output .= $this->_getHtmlOpen();
$output .= $this->_getHead();
$output .= file_get_contents("pageTop.txt");
return $output;
} //end function getTop()
protected function _getDocType($doctype = "html5") {
if ($doctype == "html5") {
$dtd = "<!DOCTYPE html>";
}
return $dtd . "\n";
}
protected function _getHtmlOpen($lang = "en-us") {
if ($lang == "en-us") {
$htmlopen = "<html lang=\"en\">";
}
return $htmlopen . "\n";
}
protected function _getHead() {
$output = "";
$output .= file_get_contents("pageHead.txt");
if ($this->titleExtra != "") {
$title = $this->titleExtra . "|" . $this->title;
} else {
$title = $this->title;
}
$output .= "<title>" . $title . "</title>";
$output .= "</head>";
return $output;
} //end function _getHead()
public function getBottom() {
return file_get_contents("pageBottom.txt");
} //end function getBottom()
} //end class Page
?>
You’re ready to create a page with your new templating system. Follow these steps:
1. Create a new empty file in your text editor.
2. Inside of the file, enter the following code and HTML:
<?php
require_once("classPage.php");
$page = new Page();
print $page->getTop();
print <<<EOF
<div id="mainContent">
<p>This is where content would go, should there be any.</p>
</div> <!-- end main content -->
EOF;
print $page->getBottom();
?>
3. Save the file as home.php in your document root.
This file instantiates a new instance of the Page class and then calls the getTop() method. With that done, the page being built will have everything it needs right up to the main content area. The main content area is provided in this file and is denoted with the print <<<EOF heredocstatement. This type of statement tells PHP to just simply output whatever follows right up until it sees the closing EOF, which appears on its own line, left-justified.
Finally, the getBottom() method is called to round out the page.
It's time to view the page. Open your web browser and point to http://localhost/home.php. When viewed in a web browser, the page looks like that in Figure 2-2.
Figure 2-2: The page, being served from a templating system.
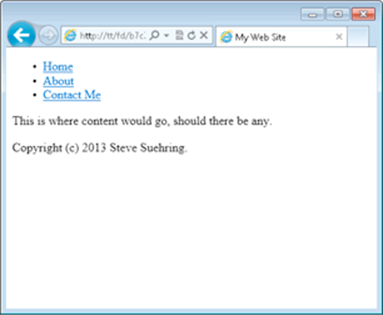
You may notice that the page shown in Figure 2-2 doesn’t look like that in Figure 2-1. You can tidy that up with a bit of CSS. Here are the steps:
1. Create a new empty text file in your editor.
2. Place the following CSS in the file:
#menu {
height: 20%;
border: 2px solid black;
}
#menu ul {
text-align: center;
}
#menu ul li {
display: inline;
list-style-type: none;
padding-right: 10px;
}
body {
font-family: arial, helvetica;
}
#footer {
text-align: center;
margin-top: 150px;
padding: 20px;
height: 15%;
border: 1px solid black;
}
3. Save the file as style.css in your document root.
4. Reload the home.php page in your browser.
The page now looks like that in Figure 2-1.
Extending the Template
With the first page built, you can turn your attention to another page for the site. The page you built links to two other pages, About and Contact Me, so now it’s time to build those two.
Building an About page
Building an About page is a simple matter of creating a new file, instantiating the Page class, and adding content. Follow these steps:
1. Create a new empty file in your editor.
2. In the file, place the following code:
<?php
require_once("classPage.php");
$page = new Page();
$page->titleExtra = "About";
print $page->getTop();
print <<<EOF
<div id="mainContent">
<p>It's all about me.</p>
</div> <!-- end main content -->
EOF;
print $page->getBottom();
?>
3. Save the file as about.php in your document root.
4. View the page in your browser by going to http://localhost/about.php.
The page should look like Figure 2-3. Notice the new title bar, as compared to Figure 2-2.
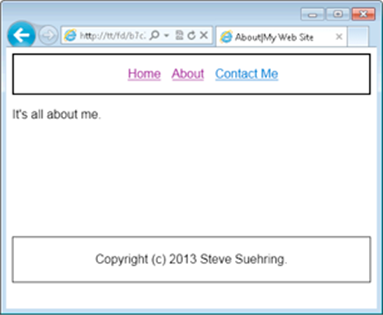
Figure 2-3: Creating a new page with the templating system.
Looking at the code that you created in this exercise, notice that it's similar to the code for the home page. The only changes are to set the titleExtra property and to change the actual HTML content of the page. That's the beauty of templating systems: You can now create many, many pages, quickly and easily. If you need to change something or add a new menu item, you can do so in one location and it will automatically and instantly be updated across all the pages.
Building a Contact page
Contact pages for websites sometimes include other elements, maybe a form or another way to interact. This means you might need to include another JavaScript file or different CSS. Luckily, you can do so by extending the templating class and using that type property discussed throughout this chapter. Follow these steps to create the Contact page:
1. Open classPage.php.
2. Inside of the _getHead() method, add a conditional for a new type of page.
The entire _getHead method should look like this:
protected function _getHead() {
$output = "";
if ($this->type == "contact") {
$output .= file_get_contents("pageHeadContact.txt");
} else {
$output .= file_get_contents("pageHead.txt");
}
if ($this->titleExtra != "") {
$title = $this->titleExtra . "|" . $this->title;
} else {
$title = $this->title;
}
$output .= "<title>" . $title . "</title>";
$output .= "</head>";
return $output;
} //end function _getHead()
This code checks to see if the type property ($this->type) is set to contact. If it is, then a new <head> section file is included. Otherwise, the normal <head> section is included.
3. Save classPage.php.
4. Create a new empty file in your text editor.
5. Inside of the file, add the following markup:
<head>
<link rel="stylesheet" href="style.css" type="text/css" />
<link rel="stylesheet" href="contact.css" type="text/css" />
<script type="text/javascript" src="https://ajax.googleapis.com/ajax/libs/jquery/1.8.3/jquery.min.js"></script>
6. Save the file as pageHeadContact.txt in your document root.
7. Create a new empty file in your text editor.
8. Inside of the file, place the following CSS:
.contactMethod {
font-style: italic;
font-weight: bold;
}
9. Save the file as contact.css in your document root.
10. Create a new empty file in your editor.
11. Within the file, place the following code and HTML:
<?php
require_once("classPage.php");
$page = new Page();
$page->type = "contact";
$page->titleExtra = "Contact Me";
print $page->getTop();
print <<<EOF
<div id="mainContent">
<h1>Contacting me is easy</h1>
<p class="contactMethod">suehring@braingia.com</p>
<p class="contactMethod">Twitter: @stevesuehring</p>
</div> <!-- end main content -->
EOF;
print $page->getBottom();
?>
12. Save the file as contact.php in your document root.
13. View the file in your browser
It should look like Figure 2-4.

Figure 2-4: The Contact page built using a template.
14. Click through each link: Home, About, and Contact Me.
The pages should work and link to each other.