Expert MySQL: Second Edition (2012)
Part II. Extending MySQL
Chapter 6. Embedded MySQL
The MySQL server is well known for its lightweight and high-performance features, but did you know it can also be used as an embedded database for your enterprise applications? This chapter explains the concepts of embedded applications and how to use the MySQL C API for creating your own embedded MySQL applications. I’ll introduce you to the techniques for compiling the embedded server and writing applications for both Linux and Windows.
Building Embedded Applications
Numerous applications have been built using lightweight database systems as internal data storage. If you use Microsoft Windows as your primary desktop operating system, the chances are you have seen or used at least one application that uses the Microsoft Access database engine. Even if the application doesn’t advertise the use of Access, you can usually tell with just a cursory peek at the installation directory.
Some embedded applications use existing database systems on the host computer (such as Access), while others use dedicated installations of larger database systems. Less obvious are those applications that include database systems compiled into the software itself.
What Is an Embedded System?
An embedded system is one that is contained within another system. Simply put, the embedded system is a slave to the host system. The purpose of the embedded system is to provide some functionality that the host system requires. This could be communication mechanisms, data storage and retrieval, or even graphical user displays.
Embedded systems have traditionally been thought of as dedicated hardware or electronics. For example, an automated teller machine (ATM) is an embedded system that contains dedicated hardware. Today, embedded systems include not only dedicated hardware but also dedicated software systems. Unlike embedded hardware that is difficult or impossible to modify, embedded software is often modified to work in the specific environment. Embedded hardware and software share the qualities of being self-contained and providing some service to the host system.
Embedded software systems are not typically the same applications as those you see and use on a daily basis. Some, such as those that use the embedded MySQL library, are adaptations of existing functionality rebuilt in order to work more efficiently inside another software system. Unlike its stand-alone server version, however, the embedded MySQL server is designed to operate at a programmatic level. That is, the calls to the server are done via a programming language and not as ad hoc queries. Methods are exposed in the embedded server to take ad hoc queries as parameters and to initiate the server to execute them.
This means that the embedded MySQL server can be accessed only via another application. As you will see in the next few sections, embedded software can exist in a number of applications ranging in their level of integration from a closed programmatic-only access to a fully functional system that is “hidden” by the host application. Let’s first look at the most common types of embedded systems.
Types of Embedded Systems
The many types of embedded systems can be difficult to classify because of the unique nature of their use. They generally fall into one (or more) of these categories:
Real-time: A system that is used in installations that require a response and action within a given threshold on the part of the host system. The feature most common to this set of systems is timing. The execution time of every command process must be minimized to achieve the goals of the system. Often, these systems are required to perform within events that occur externally rather than any internal-processing speed. An example of a real-time system would be a router or a telecommunications switch.
Reactive: A system that responds solely to external events. These events tend to be recurring and cyclical in nature, but they may also be in the form of user input (interactive systems are reactive systems). Reactive systems are designed to always be available for operation. Timing is usually secondary and limited only by the frequency of the cyclic operations. An example of a reactive system would be a safety-monitoring system designed to page or alert service personnel when certain events or thresholds occur.
Process control: A system designed to control other systems. These tend to be those designed to monitor and control hardware devices, such as robots and processing machinery. These systems are typically programmed to repeat a series of actions and generally do not vary from their intended programming or respond to external events or the threshold of status variables or conditions. An example of a process control system is the robot used on an automotive assembly line that assembles a specific component of the automobile.
Critical: A system that is used in installations that have a high cost factor, such as safety, medical, or aviation. These systems are designed so that they cannot fail (or should never fail). Often these systems include variants of the embedded systems described earlier. Examples of a critical system would include medical systems, such as a respirator or artificial circulatory system.
Embedded Database Systems
An embedded database system is a system designed to provide data to a host application or environment. This data is usually requested in-process, and therefore the database must respond to the request and return any information without delay. Embedded database systems are considered vital to the host application and the system as a whole. Thus, embedded database systems must also meet the timing requirements of the user. These requirements mean that embedded database systems are generally classified as reactive systems.
All but the most trivial applications that individuals and businesses use produce, consume, and store data. Many applications have data that is well structured and has intrinsic value to the customer. Indeed, in many cases, the data are persisted automatically, and the customer expects the data to be available whenever she needs it. Such applications have as a subsystem either access methods or connectivity to external file or data-handling systems, such as database servers.
Embedded systems that use files to access the data are faced with a number of problems, not the least of which is whether the data is accessible outside of the host application. In this case, the access restrictions may have to be created from scratch or added as yet another layer in the system. File systems often have very good performance and offer faster access times, but they are not as flexible as database systems. Database systems offer more flexibility in the form of the data being stored (as tables versus structured files) but usually incur slower access speeds.
While the reasons for protecting the data may be many and varied, the fundamental requirement is to store and retrieve the data in the most efficient manner possible without exposing the data to others. Many times this is simply a need for a database system. For example, an application such as Adobe Bridge manages a lot of data about the files, projects, photos, and so forth that are used in the Adobe Production suite of tools. These files need to be organized in a way that makes them easy to search for and retrieve. Adobe uses an embedded database (MySQL) to manage the metadata about the files stored by Adobe Bridge. In this case, the application uses the database system to handle the more difficult job of storing, searching, and retrieving the metadata about the objects it manages.
Since the data must be protected, the options for using an external database system become limiting, because it is not always easy or possible to fully protect (or hide) the data. An embedded database system allows applications to use the full power of a database system while hiding the mechanisms and data from external sources.
Embedding MySQL
MySQL engineers recognized early in the development of MySQL that many of its customers are systems integrators with a need for a robust, efficient, and programmatically accessible database system. They responded with not just an embedded library but also a fully functional client library. The client library allows you to create your own MySQL clients. For example, you could create your own version of the MySQL command-line client. The client library is named libmysql. If you would like to see how a typical MySQL client uses this library, check out the mysqlproject source files.
The MySQL embedded library is named libmysqld after the name of the server executable. You may see the library referred to as the embedded server or simply the C API. This chapter is dedicated to the embedded library (libmysqld), but, much of the access and connectivity is similar between the client and embedded-server libraries.
The embedded library provides numerous functions for accessing the database system via an application programming interface (API). The API provides a number of features that permit systems to take advantage of the MySQL server (programmatically). These features include:
· Connecting to and establishing a server instance
· Disconnecting from the server
· Shutting down the server using a controlled (safe) mechanism
· Manipulating server startup options
· Handling errors
· Generating DBUG trace files
· Issuing queries and retrieving the results
· Managing data
· Accessing the (near) full feature set of the MySQL server
This last point is one of the most significant differences between the stand-alone server and the embedded server. The embedded server does not use the full authentication mechanism and is disabled by default. This is one of the reasons an embedded MySQL system could be challenging to secure (see the later section “Security Concerns” for more details). You can turn on the authentication using the configuration option --with-embedded-privilege-control and recompile the embedded server, however. Other than that, the server behaves nearly identically to the stand-alone server with respect to features and capabilities.
What is really cool is that since the embedded library uses the same access methods as the stand-alone server, all of the databases and tables you create using the stand-alone server can be used with the embedded server. This allows you to create tables and test them using the stand-alone server, and then move them to the embedded system later. Although it is possible to have both servers access the same data directory, it is strictly discouraged and can result in loss of data and unpredictable behavior (you should never “share” data directories among MySQL server instances).
Does this mean you can have a stand-alone server executing on the same machine as an embedded server? Not only yes, but how many embedded servers would you like? As long as the embedded-server instances aren’t using the same data directory, you can have several running at the same time. The data each manages is separate from the data the others manage—no data is shared. I tried this out on my own system and it works. I’ve a 5.6.9 embedded application running right alongside my 5.1 (Generally Available) GA stand-alone server. At the time of this writing, MySQL 5.5 is the latest GA release. I didn’t have to stop or even interrupt the stand-alone to interact with the embedded server. How cool is that?
Methods of Embedding MySQL
There are many types of embedded applications. Embedded database applications typically fall into one of three categories. They are either partially hidden behind another interface (bundled embedding), or a system that wraps or contains the database server (deep embedding). The following sections describe each of these types with respect to embedding the MySQL system.
Bundled Server Embedding
Bundled server embedding is a system that is built with a stand-alone installation of the MySQL server. Instead of making MySQL available to anyone on the system or network, the server-level embedded system hides the MySQL server by turning off external (network) access. Thus, this form of an embedded MySQL system is simply a stand-alone server that has had its network access (TCP/IP) turned off.
This type of embedded MySQL system has the advantage that the server can be maintained using locally installed (and properly configured) client applications. So, rather than having to load data using external applications, the system integrators, administrators, and developers can use the normal set of administration and development tools to maintain the embedded MySQL server.
One example of a server-level embedded MySQL system is the LeapTrack software produced by LeapFrog (www.leapfrogschoolhouse.com/do/findsolution?detailPage=overview&name=ReadingPro). MySQL reports that LeapFrog chose MySQL for its cross-platform support, allowing LeapFrog to offer its product on a variety of platforms without changing the core database capabilities. Until then, LeapFrog had been using different proprietary database solutions for its various platforms.
Deep Embedding (libmysqld)
Deep embedding is even more restrictive than bundled embedding. This type of embedded system uses the MySQL system as an integral component. That means that not only is the MySQL system inaccessible from the network, but it is also inaccessible from the normal set of client applications. Rather, the system is built using the special embedded library provided by Oracle called libmysqld. Most embedded MySQL systems will fall into this category.
Since this type of embedded system still uses a MySQL mechanism for data access, it provides the same set of database functionality with only a few limitations (which I’ll discuss in a moment). Developers gain the ability to use the deeply embedded MySQL system on a wide variety of platforms through a broad spectrum of development languages (as I explained earlier). Furthermore, it provides developers with a code-level solution that few if any relational database systems provide.
The biggest advantage of using a deeply embedded MySQL system is that it provides an almost completely isolated MySQL system that serves the purpose of the embedded application alone.
One example of a deeply embedded MySQL application is Adobe Bridge by Adobe (www.adobe.com/products/bridge.html). Adobe Bridge is part of the larger Adobe Creative Suite and is used for managing aspects of the data supported by the Creative Suite all while the end user is blissfully unaware they are running a dedicated MySQL system.1 Most deeply embedded systems are desktop applications that users install on their local computers.
Resource Requirements
The requirements for running an embedded server depend on the type of embedding. If you are using bundled embedding, the requirements are the same as those for a stand-alone installation. A deeply embedded MySQL system is different, however. A deeply embedded system should require approximately 2MB of memory to run in addition to the needs of the application. The compiled embedded server adds quite a bit more space to the executable memory size, but it isn’t onerous or unmanageable.
Disk space is the most unpredictable resource to consider. This is true because it really depends on how much data the embedded system is using. Disk space and time are also concerns for high-throughput systems or systems that process a large number of changes to the data. Processing large numbers of changes to the data can often impact response time more than the space that is used. In these cases, the maintenance of the database may require special access to the server or special interfaces to allow administrator access to the data. This is an excellent case in which having access to the database server in bundled embedding forms would be easier than that of one using deep embedding.
Security Concerns
Security is another area that depends on the type of embedding performed. If the system is built using server embedding, addressing security concerns can be quite challenging. This is true because the MySQL system is still accessible from the local server using the normal set of tools. It may be very difficult to lock this type of embedded system down completely.
Bundled embedding is a lot easier, because the embedded stand-alone MySQL system is accessible only through the embedded application. Unless the embedded-application developers have a maladjusted ethical compass, they will have taken steps to ensure proper credentials are necessary to access the administration capabilities.
Deeply embedded systems present the most difficult case for protecting the data. The embedded MySQL system may not have any password set for it (they typically do not), because, like bundled embedding, they require the user to use the interface provided to access the data. Unfortunately, it isn’t that simple. In many cases, the data is placed in directories that are accessible by the user. Indeed, the data needs to be accessible to the user; otherwise, how would she be able to read the data?
That’s the problem. The data files are unprotected and could be copied and accessed using another MySQL installation. This isn’t limited to just the embedded server; it is also a problem for the stand-alone server. Is that shocking? It could be, if your organization has a limitation of tight control on the use of open-source software. Imagine the look on your information-assurance officer’s face when he finds out. OK, so you might want to break it to him gently. Therefore, it may require additional security features included in the embedded application to protect the embedded MySQL system and its data appropriately.
Advantages of MySQL Embedding
The MySQL embedded API enables developers to use a full-featured MySQL server inside another application. The most important benefits are increased speed of data access (since the server is either part of or runs on the same hardware as the application), built-in database management tools, and a very flexible storage and retrieval mechanism. These benefits allow developers the opportunity to incorporate all of the benefits of using MySQL while hiding its implementation from the users. This means that developers can increase the capabilities of their own products by leveraging the features of MySQL.
Limitations of MySQL Embedding
There are some limitations of using the embedded MySQL server. Fortunately, it is a short list. Most of the limitations make sense and are not normally an issue for system integrators. Table 6-1 lists the known limitations of using an embedded MySQL system. Included with each is a brief description.
Table 6-1. Limitations of Using Embedded MySQL
|
Limitation |
Description |
|
Security |
Access control is turned off by default. The privilege system is inactive. |
|
Replication |
No replication or logging facilities. |
|
External Access |
No external network communications permitted (unless you build them). |
|
Installation |
Deeply embedded applications (such as libmysqld) may require additional libraries for deployment. |
|
Events |
Event scheduler is not available. |
|
Data |
The embedded server stores data just like the stand-alone server, using a folder for each database and set of files for each table. |
|
Version |
The embedded server does not work with some releases of MySQL 5.1. |
|
UDF |
No user-defined functions are permitted. |
|
Debug/Trace |
No stack trace is generated with the core dump. |
|
Connectivity |
You cannot connect to an embedded server from network protocols. Note that you can provide this external access via your embedded application. |
|
Resources |
May be heavy if using bundled embedding and supporting large amounts of data and/or many simultaneous connections. |
The MySQL C API
A first glance at the MySQL C API documentation (a chapter entitled “APIs and Libraries” in the MySQL Reference Manual) may seem intimidating. Well, it is. The C API is designed to encapsulate all of the functionality of the stand-alone server. That’s not a simple or easy task. Fortunately, Oracle provides ready access to the MySQL documentation online at http://dev.mysql.com/doc. Look for the online reference manual for the subsection “libmysqld, the Embedded MySQL Server Library”.
![]() Note The documentation available online is usually the most up-to-date version available. If you have downloaded a copy for convenience, you may want to check the online documentation periodically. I’ve found answers to several stumbling blocks by re-examining the documentation online.
Note The documentation available online is usually the most up-to-date version available. If you have downloaded a copy for convenience, you may want to check the online documentation periodically. I’ve found answers to several stumbling blocks by re-examining the documentation online.
Ironically, perhaps the most intimidating aspect of the C API is the documentation itself. Simply stated, it is a bit terse and requires reading through several times before the concepts become clear. It is my goal to provide you a look into the C API in the form of a short tutorial and a couple of examples to help jumpstart your embedded application project.
Getting Started
The first recommendation I make to developers who want to learn how to build embedded applications is to read the documentation. Present text and chapter notwithstanding, it is always a good idea to read through the product documentation before you begin using an API, even if you don’t take to the information right away. I often find tidbits of information in the MySQL documentation that on the surface seem insignificant but that later turn out to be the missing key between a successful compilation and a frustrating search for the source of the error.
I also recommend logging on to the MySQL Web site and looking through the Forum (there is a dedicated embedded forum at http://forums.mysql.com) and Mailing List (http://lists.mysql.com) repositories. You don’t have to read everything, but chances are some of your questions can be answered by reading the entries in these repositories. I also sometimes check out the MySQL blogs (www.planetmysql.org). Various authors have posted information about the embedded server and many other items of interest. There is so much interesting information out there that sometimes I find myself reading for over an hour at a time. Many MySQL experts consider this tactic the key to becoming a MySQL guru. Information is power.
The online documentation and the various lists and blogs are definitely the best source of the very latest about MySQL. The most important reading you should do is contained in the following sections. I’ll present the major C API functions and walk through a simple example of an embedded application. Later, I’ll demonstrate a more complex embedded application, complete with an abstracted data access class and written in .NET.
The best way to learn how to create an embedded application is by coding one yourself. Feel free to open your favorite source code editor and follow along with me as I demonstrate a couple of examples. I first walk through each function you need to call in the order it needs to be called. Then, in a later section, I show you how to build the library and write your first embedded-server application.
Most Commonly Used Functions
A quick glance at the documentation shows the C API supports more than 65 functions. Some of these have been deprecated, but Oracle is very good at pointing this out in the documentation (another good reason to read it). Only a few functions are used frequently.
Most of the functions in the library provide connection and server-manipulation functions. Some are dedicated to gathering information about the server and the data, while others are designed to provide calls to perform queries and other manipulations of the data. There are also functions for retrieving error information.
Table 6-2 lists the most commonly used functions. Included are the names of the functions, a brief description, and the source file where it is defined. The functions are listed in roughly the order they would be called in a simple embedded-server example.
Table 6-2. Most Commonly Used Functions
|
Function |
Description |
Source |
|
mysql_server_init() |
Initializes the embedded server library. |
libmysql.c |
|
mysql_init() |
Starts the server. |
client.c |
|
mysql_options() |
Allows you to change or set the server options. |
client.c |
|
mysql_debug() |
Turns the debugging trace file on (DBUG). |
libmysql.c |
|
mysql_real_connect() |
Establishes connection to the embedded server. |
client.c |
|
mysql_query() |
Issues a query statement (SQL). Statement is passed as a null terminated string. |
libmysql.c |
|
mysql_store_result() |
Retrieves the results from the last query. |
client.c |
|
mysql_fetch_row() |
Returns a single row from the result set. |
client.c |
|
mysql_num_fields() |
Returns the number of fields in the result set. |
client.c |
|
mysql_num_rows() |
Returns the number of rows (records) in the result set. |
client.c |
|
mysql_error() |
Returns a formatted error message (string) describing the last error. |
client.c |
|
mysql_errno() |
Returns the error number of the last error. |
client.c |
|
mysql_free_result() |
Frees the memory allocated to the result set. Note: don’t forget to use this function often. It will not generate an error to call this on an empty result set. |
client.c |
|
mysql_close() |
Closes the connection to the server. |
client.c |
|
mysql_server_end() |
Finalizes the embedded server library and shuts down the server. |
libmysql.c |
![]() Note I encourage you to take some time, after you have read through this chapter and understand the examples, to read through the list of functions in the C API portion of the MySQL reference manual. You may find some interesting functions that meet your special database needs.
Note I encourage you to take some time, after you have read through this chapter and understand the examples, to read through the list of functions in the C API portion of the MySQL reference manual. You may find some interesting functions that meet your special database needs.
For a complete description of these functions, including the return values and usage, see the MySQL reference manual.
Creating an Embedded Server
The embedded server is established as an instance during the initialization function calls. Most of the functions require a pointer to the instance of the server as a required parameter. When you create an embedded MySQL application, you need to create a pointer to the MYSQL object. You also need to create instances for a result set and a row from the result set (known as a record). Fortunately, the definition of the server and the major structures are defined in the MySQL header files. The header files you need to use (for most applications) are:
#include <stdio.h>
#include <stdlib.h>
#include <stdarg.h>
#include <mysql.h>
Creating pointer variables to the embedded server and the result set and record structure can be done by using the statements:
MYSQL *mysql; // the embedded server class
MYSQL_RES *results; // stores results from queries
MYSQL_ROW record; // a single row in a result set
These statements allow you to have access to the embedded server (MYSQL), a result structure (MYSQL_RES), and a record (MYSQL_ROW). You can use global variables to define these pointers. Some of you may not like to use global variables, and there’s no reason you have to. The result set and record can be created and destroyed however you like. Just be sure to keep the MYSQL pointer variable the same instance throughout your application.
We’re not done with the setup. We still need to establish some strings to use during connection. I’ve seen many different ways to accomplish this, but the most popular method is to create an array of character strings. At a minimum, you need to create character strings for the location of themy.cnf (my.ini in Windows) file and the location of the data. A typical set of initialization character strings is:
static char *server_options[] = {"mysql_test",
"--defaults-file=c:\\mysql_embedded\\my.ini",
"--datadir=c:\\mysql_embedded\\data", NULL };
The examples in this chapter depict the server options for a Windows compilation. If you use Linux, you will need to use the appropriate paths and change the my.ini to my.cnf. In this example, I use the label "mysql_test" (which is ignored by mysql_server_init()), the location of my.cnf (my.ini) file to the normal installation directory, and the data directory to the normal MySQL installation. If you want to establish both a stand-alone and an embedded server, you should use a different data location for each server. You would also want to use a different configuration file just to keep things tidy.
To help keep errors to a minimum, I also use an integer variable to identify the number of elements in my array of strings (I’ll discuss this in a moment). This allows me to write bounds-checking code without having to remember how many elements are permitted. I can allow the number of elements to change at runtime, thereby allowing the bounds-checking code to adapt to changes as necessary.
int num_elements=(sizeof(server_options) / sizeof(char *)) - 1;
The last setup step is to create another array of character strings that identify the server groups that contain any additional server options in my configuration file (my.cnf). This defines the sections that will be read when the server is started.
static char *server_groups[] = {"libmysqld_server", "libmysqld_client", NULL };
Initializing the Server
The embedded server must be initialized, or started, before you can connect to it. This usually involves two initialization calls followed by any number of calls to set additional options. The first initialization function you need to call to start an embedded server ismysql_server_init()2. This function is defined as:
int mysql_server_init(int argc, char **argv, char **groups)
The function is called only once before calling any other function. It takes as parameters argc and argv, much the same as the normal arguments for a program (the same as the main function). In addition, the group labels from the configuration are passed to allow the server to read runtime server options. The return values are either a 0 for success or 1 for failure. This allows you to call the function inside a conditional statement and act if a failure occurs. Here’s an example call of this function using the declarations from the startup section:
mysql_server_init(num_elements, server_options, server_groups);
![]() Note In order to keep the example short and easily understood, I refrain from using error handling in the example source code. I revisit error handling in a later example.
Note In order to keep the example short and easily understood, I refrain from using error handling in the example source code. I revisit error handling in a later example.
The second initialization function you need to call is mysql_init(). This function allocates the MYSQL object for you in connecting to the server. This function is defined as;
MYSQL *mysql_init(MYSQL *mysql)
Here is an example call of this function using the global variable defined earlier:
mysql = mysql_init(NULL);
Notice I use NULL to pass into the function. This is because it is the first call of the function requesting a new instance of the MYSQL object. In this case, a new object is allocated and initialized. If you called the function passing in an existing instance of the object, the function just initializes the object.
The function returns NULL if there was an error or the address of the object if successful. This means you can place this call in a conditional statement to process errors on failure or simply interrogate the MYSQL pointer variable to detect NULL.
![]() Tip Almost all of the mysql_XXX functions return 0 for success and non-zero for failure. Only those that return pointers return non-zero for success and 0 (NULL) for failure.
Tip Almost all of the mysql_XXX functions return 0 for success and non-zero for failure. Only those that return pointers return non-zero for success and 0 (NULL) for failure.
Setting Options
The embedded server allows you to set additional connection options prior to connecting to the server. The function you use to set connection options is defined as:
int mysql_options(MYSQL *mysql, enum mysql_option, const char *arg)
The first parameter is the instance of the embedded-server object. The second parameter is an enumerated value from the possible options, and the last parameter is used to pass in a parameter value for the option selected using an optional character string. There is a long list of possible values for the option list. Some of the more commonly used options and their values are shown in Table 6-3. The complete set of options is listed in the MySQL reference manual.
Table 6-3. Partial List of Connection Options
|
Option |
Value |
Description |
|
MYSQL_OPT_USE_REMOTE_CONNECTION |
N/A |
Forces the connection to use a remote server to connect to |
|
MYSQL_OPT_USE_EMBEDDED_CONNECTION |
N/A |
Forces the connection to the embedded server |
|
MYSQL_READ_DEFAULT_GROUP |
Group |
Instructs the server to read server configuration options from the specified group in the configuration file |
|
MYSQL_SET_CLIENT_IP |
IP address |
Provides the IP address for embedded servers configuredto use authentication |
The following example calls to this function instruct the server to read configuration options from the [libmysqld_client] section of the configuration file and tell the server to use an embedded connection:
mysql_options(mysql, MYSQL_READ_DEFAULT_GROUP, "libmysqld_client");
mysql_options(mysql, MYSQL_OPT_USE_EMBEDDED_CONNECTION, NULL);
The return values are 0 for success and non-zero for any option that is invalid or has an invalid value.
Connecting to the Server
Now that the server is initialized and all of the options are set, you can connect to the server. The function you use to do this is called mysql_real_connect(). It has a large number of parameters that allow for fine-tuning of the connection. The function is declared as;
MYSQL *mysql_real_connect(MYSQL *mysql, const char *host, const char *user, const
char *passwd, const char *db, unsigned int port, const char *unix_socket,
unsigned long client_flag)
This function must complete without errors. If it fails (in fact, if any of the previous functions fail), you cannot use the server and should either reattempt to connect to the server or gracefully abort the operation.
The parameters for the function include the MYSQL instance, a character string that defines the hostname (either an IP address or fully qualified name), a username, a password, the name of the initial database to use, the port number you want to use, the Unix socket number you want to use, and finally, a flag to enable special client behavior. See the MySQL reference manual for more details on the client flags. Any parameter value specified as NULL will signal the function to use the default value for that parameter. Here is an example call to this function that connects using all defaults except the database:
mysql_real_connect(mysql, NULL, NULL, NULL, "information_schema", 0, NULL, 0);
The function returns a connection handle if successful and NULL if there is a failure. Most applications do not trap the connection handle. Rather, they check the return value for NULL. Notice that I do not use any of the authentication parameters. This is because the authentication is turned off by default. If I had compiled the embedded server with the authentication switch on, these parameters would have to be provided. Last, the fourth parameter is the name of the default database you want to connect to. This database must exist or you may encounter errors.
At this point, you should have all of the code necessary to set up variables to call the embedded server, initialize, set options, and connect to the embedded server. The following shows these operations as represented by the previous code samples:
#include <stdio.h>
#include <stdlib.h>
#include <stdarg.h>
#include "mysql.h"
MYSQL *mysql; //the embedded server class
MYSQL_RES *results; //stores results from queries
MYSQL_ROW record; //a single row in a result set
static char *server_options[] = {"mysql_test",
"--defaults-file=c:\\mysql_embedded\\my.ini",
"--datadir=c:\\mysql_embedded\\data", NULL };
int num_elements = (sizeof(server_options) / sizeof(char *)) - 1;
static char *server_groups[] = {"libmysqld_server", "libmysqld_client", NULL };
int main(void)
{
mysql_server_init(num_elements, server_options, server_groups);
mysql = mysql_init(NULL);
mysql_options(mysql, MYSQL_READ_DEFAULT_GROUP, "libmysqld_client");
mysql_options(mysql, MYSQL_OPT_USE_EMBEDDED_CONNECTION, NULL);
mysql_real_connect(mysql, NULL, NULL, NULL, "INFORMATION_SCHEMA",
0, NULL, 0);
...
return 0;
}
Running Queries
At last, we get to the good stuff—the meat of what makes a database system a database system: the processing of ad hoc queries. The function that permits you to issue a query is the mysql_query() function. The function is declared as;
int mysql_query(MYSQL *mysql, const char *query)
The parameters for the function are the MYSQL object instance and a character string containing the SQL statement (null terminated). The SQL statement can be any valid query, including data-manipulation statements (SELECT, INSERT, UPDATE, DELETE, DROP, etc.). If the query produces results, the results can be bound to a pointer variable for access by using the methods mysql_store_result() and mysql_fetch_row(). If no results are returned, the result set will be NULL.
An example call to this function to retrieve the list of databases on the server is:
mysql_query(mysql, " SELECT SCHEMA_NAME FROM INFORMATION_SCHEMA.SCHEMATA;")
The return value for this function is 0 if successful and non-zero if there is a failure.
Retrieving Results
Once you have issued a query, the next steps are to fetch the result set and store a reference to it in the result pointers’ variable. You can then fetch the next row (record) and store it in the record structure (which happens to be a named array). The functions to accomplish this process aremysql_store_result() and mysql_fetch_row(), which are defined as;
MYSQL_RES *mysql_store_result(MYSQL *mysql)
MYSQL_ROW mysql_fetch_row(MYSQL_RES *result)
The mysql_store_result() function accepts the MYSQL object as its parameter and returns an instance of the result set for the most recently run query. The function returns NULL if either an error has occurred or the last query did not return any results. You have to take care at this point to check for errors by calling the mysql_errno() function. If there was an error, you will have to call the error functions and compare the result to the list of known errors. The known error values generated from this function are CR_OUT_OF_MEMORY (no memory available to store the results), CR_SERVER_GONE_ERROR or CR_SERVER_LOST (the connection was lost to the server), and CR_UNKNOWN_ERR (a catchall error indicating the server is in an unpredictable state).
![]() Note There are a number of possible conditions for using the mysql_store_result() function. The most common uses are described here. To explore the function usage in more detail, or if you have problems diagnosing a problem with using the function, see the MySQL reference manual for more details.
Note There are a number of possible conditions for using the mysql_store_result() function. The most common uses are described here. To explore the function usage in more detail, or if you have problems diagnosing a problem with using the function, see the MySQL reference manual for more details.
The mysql_fetch_row() function accepts the result set as the only parameter. The function returns NULL if there are no more rows in the result set. This is handy, because it allows you to use this feature in your loops or iterators. If this function fails, the return value of NULL is still set. It is up to you to check the mysql_errno() function to see if any of the defined errors have occurred. These errors include CR_SERVER_LOST, which indicates the connection has failed, and CR_UNKOWN_ERROR, which is a ubiquitous “something is wrong” error indicator.
Examples of these calls used together to query a table and print the results to the console are:
mysql_query(mysql, "SELECT ItemNum, Description FROM tblTest");
results = mysql_store_result(mysql);
while(record=mysql_fetch_row(results))
{
printf("%s\t%s\n", record[0], record[1]);
}
Notice that after the query is run, I call the mysql_store_result() function to get the results; then I placed the mysql_fetch_row() function inside my loop evaluation. Since mysql_fetch_row() returns NULL when no more rows are available (at the end of the record set), the loop will terminate at that point. While there are rows, I access each of the columns in the row using the array subscripts (starting at 0).
This example demonstrates the basic structure for all queries made to the embedded server. You can wrap this process and include it inside a class or abstracted set of functions. I demonstrate this in the second example embedded application.
Cleanup
The data returned from the query and placed into the result set required the allocation of resources. Since we are good programmers, we strive to free up the memory no longer needed to avoid memory leaks.3 Oracle provides the mysql_free_result() function to help free those resources. This function is defined as:
void mysql_free_result(MYSQL_RES *result)
This function is call-safe, meaning that you can call it using a result set that has already been freed without producing an error. That’s just in case you get happy and start flinging “free” code everywhere. Don’t laugh—I’ve seen programs with more “free” than “new” calls. Most of the time this isn’t a problem, but if the free calls are not used properly, having too many of them could result in freeing something you don’t want freed. As with the new operation, you should use the free operation with deliberate purpose and caution.
Here is an example call to this function to free a result set:
mysql_free_result(results);
Disconnecting from and Finalizing the Server
When you are finished with the embedded server, you need to disconnect and shut it down. This can be accomplished by using the mysql_close() and mysql_server_end()4 functions. The close function closes the connection and the other finalizes the server and deallocates memory. These functions are defined as:
void mysql_close(MYSQL *mysql);
void mysql_server_end();
Example calls for these functions are shown here. Note that these are the last function calls you need to make, and they are normally called when shutting down your application.
mysql_close(mysql);
mysql_server_end();
Putting It All Together
Now, let’s see all of this code together. Listing 6-1 shows a completed embedded server that lists the databases accessible from the given data directory. I go through the process of building and running this example in a later section.
![]() Note The following example is written for Windows. A Linux example is discussed in a later section.
Note The following example is written for Windows. A Linux example is discussed in a later section.
Listing 6-1. An Example Embedded Server Application
#include <stdio.h>
#include <stdlib.h>
#include <stdarg.h>
#include "mysql.h"
MYSQL *mysql; //the embedded server class
MYSQL_RES *results; //stores results from queries
MYSQL_ROW record; //a single row in a result set
static char *server_options[] = {"mysql_test",
"--defaults-file=c:\\mysql_embedded\\my.ini",
"--datadir=c:\\mysql_embedded\\data", NULL };
int num_elements = (sizeof(server_options) / sizeof(char *)) - 1;
static char *server_groups[] = {"libmysqld_server", "libmysqld_client", NULL };
int main(void)
{
mysql_server_init(num_elements, server_options, server_groups);
mysql = mysql_init(NULL);
mysql_options(mysql, MYSQL_READ_DEFAULT_GROUP, "libmysqld_client");
mysql_options(mysql, MYSQL_OPT_USE_EMBEDDED_CONNECTION, NULL);
mysql_real_connect(mysql, NULL, NULL, NULL, "information_schema",
0, NULL, 0);
mysql_query(mysql, "SHOW DATABASES"); // issue query
results = mysql_store_result(mysql); // get results
printf("The following are the databases supported:\n");
while(record=mysql_fetch_row(results)) // fetch row
{
printf("%s\n", record[0]); // process row
}
mysql_query(mysql, "CREATE DATABASE testdb1;");
mysql_query(mysql, "SHOW DATABASES;"); // issue query
results = mysql_store_result(mysql); // get results
printf("The following are the databases supported:\n");
while(record=mysql_fetch_row(results)) // fetch row
{
printf("%s\n", record[0]); // process row
}
mysql_free_result(results);
mysql_query(mysql, "DROP DATABASE testdb1;"); // issue query
mysql_close(mysql);
mysql_server_end();
return 0;
}
Error Handling
You may be wondering what happened to all of the error handling that you read about in a previous chapter. Well, the facilities are there in the C API. Oracle has provided for error handling using two functions. The first, msyql_errno(), retrieves the error number from the most recent error. The second, mysql_error(), retrieves the associated error message for the most recent error. These functions are defined as:
unsigned int mysql_errno(MYSQL *mysql)
const char *mysql_error(MYSQL *mysql)
The parameter passed for both functions is the MYSQL object. Since these methods are error handlers, they are not expected to fail. If they are called when no error has occurred, however, mysql_errno() returns 0 and mysql_error() returns an empty character string.
Here are some example calls to these functions:
if(somethinggoeshinkyhere)
{
printf("There was an error! Error number : %d = $s\n",
mysql_errno(&mysql), mysql_error(&mysql));
}
Whew! That’s all there is to it. I hope that my explanations clear the fog from the reference manual. I wrote this section primarily because I feel that there aren’t any decent examples out there that help you learn how to use the embedded server—at least none that capture what is needed in a few short pages.
Building Embedded MySQL Applications
The previous sections walked you through the basic functions used in an embedded MySQL application. This section will show you how to actually build one. I begin by showing you how to compile the application and move on to discuss methods of constructing the embedded library calls. I also present two example applications for you to use to experiment with your own system.
I’ve also included a brief foray into modifying the core MySQL source code. Yes, I know that may be a bit scary, but I show you all the details step by step. Fortunately, it is an easy modification that requires changing only two files.
I encourage you to read the source code that I’ve included. I know there is a lot of it, but I’ve trimmed it down to what I think is a manageable hunk. I’ve learned a lot of interesting things about the MySQL source code simply from reading through it. It is my goal that you gain additional insight into building your own embedded MySQL applications by studying the source code for these examples.
Compiling the Library (libmysqld)
Before you can work with the embedded library (libmysqld), you need to compile it. Some distributions of the MySQL binaries may not include a precompiled embedded library. The embedded library is included in most source-code distributions and can be found in the /libmysqlddirectory off the root of the source tree. The library is usually built without debug information. You will want to have a debug-enabled version for your development.
Compiling libmysqld on Linux
To compile the library under Linux, set the configuration using the configure script and then perform a normal make and make install step. The configuration parameters that you will need are --with-debug and --with-embedded-server. The following shows the complete process. Run this from the root of your source-code directory. The compilation process can take a while, so feel free to start that now while you read ahead. You can expect the compilation to take anywhere from a few minutes to about an hour, depending on the speed of your machine and whether you have built the system previously with debug information.
![]() Note The following commands build the server and install it into the default location. These operations require root privileges.
Note The following commands build the server and install it into the default location. These operations require root privileges.
cmake . -DWITH_EMBEDDED_SERVER=ON -DWITH_DEBUG=ON
make
sudo make install
![]() Tip You can also use the cmake-gui . command to set the parameters using the graphical interface. Once the options are set, click Configure and then Generate.
Tip You can also use the cmake-gui . command to set the parameters using the graphical interface. Once the options are set, click Configure and then Generate.
Compiling libmysqld on Windows
To compile the library under Windows, launch Visual Studio and open the main solution file in the root source-code directory (mysql.sln). Turning debug on is simply a matter of selecting the libmysqld project and setting the build configuration to Debug Win32. You can compile the library in the usual manner by first clicking on the project to select it at the current project then selecting Build ![]() Build or by building the complete solution. Any dependent projects will be built as needed. The compilation process can take a while, so feel free to start that now while you read ahead. You can expect the compilation to take anywhere from a few minutes to about half an hour depending on the speed of your machine and whether you have built the system previously with debug information.
Build or by building the complete solution. Any dependent projects will be built as needed. The compilation process can take a while, so feel free to start that now while you read ahead. You can expect the compilation to take anywhere from a few minutes to about half an hour depending on the speed of your machine and whether you have built the system previously with debug information.
What About Debugging?
You may be wondering if debugging in the embedded library works the same as in the stand-alone server. Well, it does! In fact, you can use the same debugging methods. Debugging the embedded server at runtime is a bit of a challenge, but since the server is supposed to be embedded, you are not likely to need to debug down to that level. You may need to create a trace file in order to help debug your application.
I explained several debugging techniques in the last chapter. One of the most powerful and simple to use is the DBUG package. While the embedded server has all of that plumbing hooked up and indeed follows the same debugging practice of marking all entries and exits of functions, the DBUG package is not exposed via the embedded library.
You could create your own instance of the DBUG package and use that to write your own trace file. You may opt to do this for large applications using the embedded server. Most applications are small enough so that the added work isn’t helpful. In this case, it would be really cool if the embedded library offered a debugging option.
The DBUG package can be turned on either via the configuration file or through a direct call to the embedded library. This assumes, of course, that your embedded library was compiled with debug enabled.
Turning on the trace file at runtime requires a call to the embedded library. The method is mysql_debug(), and it takes one character string parameter that specifies the debug options. The following example turns the trace file on at runtime, specifying the more popular options and directing the library to write the trace file to the root directory. This method should be called before you have connected to the server.
mysql_debug("debug=d:t:i:O,\\mysqld_embedded.trace");
![]() Tip Use a different filename for your embedded-server trace. This will help distinguish the embedded-server trace from any other stand-alone server you may have running.
Tip Use a different filename for your embedded-server trace. This will help distinguish the embedded-server trace from any other stand-alone server you may have running.
You can also turn debugging on using the configuration file. Simply place the string from the previous example into the my.cnf (my.ini) file that your source code specifies at startup (more on that in a moment).
What if you want to use the DBUG package from your embedded application but don’t want to include the DBUG package in your own code? Are you simply out of luck? The embedded library doesn’t expose the DBUG methods, but it could! The following paragraphs explain the procedure to modify the embedded server to include a simple DBUG method. I’m using a simple example, because I do not want to throw you into the deep end just yet.
The first thing you need to do is to make a backup of the original source code. If you downloaded a tarred or zipped file, you’re fine. If you do find yourself struggling with getting the server to compile after you’ve added some code, returning to the original copy can have profound effects on your stress level (and sanity). This is especially true if you’ve removed your changes and it still doesn’t compile!
Adding a new method is really easy. Edit the mysql.h file in the /include directory and add the definition. I chose to create a method that exposes the DBUG_PRINT function. I named it simply mysql_dbug_print(). Listing 6-2 shows the function definition for this method. Note that the function accepts a single character pointer. I use this to pass in a string I’ve defined in my embedded application. This allows me to write a string to the trace file as sort of a marker for where my embedded application synchronizes with the trace from the embedded server.
Listing 6-2. Modifications to mysql.h
/* BEGIN CAB MODIFICATION */
/* Reason for Modification: */
/* Adds a method to permit embedded applications to call DBUG_PRINT */
void STDCALL mysql_dbug_print(const char *a);
/* END CAB MODIFICATION */
To create the function, edit the /libmysqld/libmysqld.c and add the function to the rest of the source code. The location doesn’t matter as long as it is in the main body of the source code somewhere. I chose to locate it near the other exposed library functions (near line number 89).Listing 6-3 shows the code for this method. Notice that the code simply echoes the string to the DBUG_PRINT method. Notice that I also add a string to the end of the string passed. This helps me locate all of the trace lines that came from my application regardless of what I pass in to be printed.
Listing 6-3. Modifications to libmysqld.c
/* BEGIN CAB MODIFICATION */
/* Reason for Modification: */
/* Adds a method to permit embedded applications to call DBUG_PRINT */
void STDCALL mysql_dbug_print(const char *a)
{
DBUG_PRINT(a, (" -- Embedded application."));
}
/* END CAB MODIFICATION */
To add a method to the embedded library in Windows, you also must modify the libmysqld_exports.def file to include the new method. Listing 6-4 shows an abbreviated listing as an example. Here, I’ve added the mysql_dbug_print() statement to the file. Note that the file is maintained in alphabetical order.
Listing 6-4. Modifications to libmysqld_exports.def
LIBRARY LIBMYSQLD
DESCRIPTION 'MySQL 5.6 Embedded Server Library'
VERSION 5.6
EXPORTS
_dig_vec_upper
_dig_vec_lower
...
mysql_dbug_print
mysql_debug
mysql_dump_debug_info
mysql_eof
...
That’s it! Now just recompile the embedded server, and your new method can be used in your application. I’ve done this to my installation of the embedded server. The examples that follow use this method to write a string to the trace file. This helps me greatly in finding the synchronization points in the trace file with my source code.
![]() Tip In the previous listings, I use the same commenting strategy that I presented in Chapter 3. This will help you identify any differences with the source code whenever you need to migrate to a newer version.
Tip In the previous listings, I use the same commenting strategy that I presented in Chapter 3. This will help you identify any differences with the source code whenever you need to migrate to a newer version.
What About the Data?
Before you launch into creating and running your first embedded MySQL application, consider the data that you want to use. If you plan to create an embedded application that provides an administration interface that allows you to create tables and populate them, you’re all set. If you have not planned such an interface or similar facilities, you will need to get the database configured using other tools.
Fortunately, as long as you use the simpler table types (like MyISAM), you can use a stand-alone server and your favorite utilities to create the database and tables and populate them. If you use InnoDB, you should either start the server with the --innodb_file_per_table option or create a clean installation of MySQL, add your data, then copy the data directory and the InnoDB files to the new location. Once the data have been created, you can copy the directories from the data directory of the stand-alone server installation to another location. Remember, it is important that you separate the embedded server data locations from that of the stand-alone server. Take note of where you place the data, as you will need that for your embedded application.
I use this technique with all of my examples and my own embedded applications. It gives me the ability to shape and populate the data I want to use first without having to worry about creating an administration interface. Most embedded MySQL applications are built this way.
Creating a Basic Embedded Server
The previous sections showed you all the necessary functions needed to use the embedded library. I show you a simple example using all of the functions I’ve described. I’ve included both a Linux and Windows example. While they are nearly identical, there are some minor differences in the source code. The biggest difference is in how the programs are compiled. The examples in this chapter assume that you are using an embedded library that has been compiled with debug information.
The example program reads the list of databases in the data directory for the embedded server printing the list to the console, creates a new database called testdb1, reads the list of databases again printing the list to the console, and, finally, deletes the database testdb1. While not very complicated, all the example function calls are exercised. I’ve also included the calls to turn the trace file on (DBUG) and to print information to the trace file using the new mysql_dbug_print() function in the embedded library.
Linux Example
The first file you need to create is the configuration file (my.cnf). You can use an existing configuration file, but I recommend copying it to the location of your embedded server. For example, if you created a directory named /var/lib/mysql_embedded, you would place the configuration file there and copy all of your data directories (the database files and folders) to that directory as well. Those are the only files that need to be in that directory. The only exception is if you wanted to use a different language for your embedded server. In this case, I recommend copying the appropriate files from a stand-alone installation to your embedded-server directory and referencing them from the configuration file. Listing 6-5 shows the configuration file for the example program.
Listing 6-5. Sample my.cnf File for Linux
[libmysqld_server]
basedir=/var/lib/mysql_embedded
datadir=/var/lib/mysql_embedded
#slow query log#=
#tmpdir#=
#port=3306
#set-variable=key_buffer=16M
[libmysqld_client]
#debug=d:t:i:O,\\mysqld_embedded.trace
Notice that I’ve disabled most of the options (by using the symbol at the start of the line). I usually do this so that I can easily and quickly turn them on should I need to. Debugging is turned off so that I can show you how to turn it on programmatically.
The next file you need to create is the source code for the application. If you have followed along with the tutorial on the C API from earlier, it should look very familiar. Listing 6-6 shows the complete source code for a simple embedded MySQL application.
Listing 6-6. Embedded Example 1 (Linux: example1_linux.c)
#include <stdio.h>
#include <stdlib.h>
#include <stdarg.h>
#include "mysql.h"
MYSQL *mysql; //the embedded server class
MYSQL_RES *results; //stores results from queries
MYSQL_ROW record; //a single row in a result set
/*
These variables set the location of the ini file and data stores.
*/
static char *server_options[] = {"mysql_test",
"--defaults-file=/var/lib/mysql_embedded/my.cnf",
"--datadir=/var/lib/mysql_embedded", NULL };
int num_elements = (sizeof(server_options) / sizeof(char *)) - 1;
static char *server_groups[] = {"libmysqld_server", "libmysqld_client", NULL };
int main(void)
{
/*
This section initializes the server and sets server options.
*/
mysql_server_init(num_elements, server_options, server_groups);
mysql = mysql_init(NULL);
mysql_options(mysql, MYSQL_READ_DEFAULT_GROUP, "libmysqld_client");
mysql_options(mysql, MYSQL_OPT_USE_EMBEDDED_CONNECTION, NULL);
/*
The following call turns debugging on programmatically.
Comment out to turn off debugging.
*/
//mysql_debug("d:t:i:O,\\mysqld_embedded.trace");
/*
Connect to embedded server.
*/
mysql_real_connect(mysql, NULL, NULL, NULL, "information_schema",
0, NULL, 0);
/*
This section executes the following commands and demonstrates
how to retrieve results from a query.
SHOW DATABASES;
CREATE DATABASE testdb1;
SHOW DATABASES;
DROP DATABASE testdb1;
*/
mysql_dbug_print("Showing databases."); //record trace
mysql_query(mysql, "SHOW DATABASES;"); //issue query
results = mysql_store_result(mysql); //get results
printf("The following are the databases supported:\n");
while(record=mysql_fetch_row(results)) //fetch row
{
printf("%s\n", record[0]); //process row
}
mysql_dbug_print("Creating the database testdb1."); //record trace
mysql_query(mysql, "CREATE DATABASE testdb1;");
mysql_dbug_print("Showing databases.");
mysql_query(mysql, "SHOW DATABASES;"); //issue query
results = mysql_store_result(mysql); //get results
printf("The following are the databases supported:\n");
while(record=mysql_fetch_row(results)) //fetch row
{
printf("%s\n", record[0]); //process row
}
mysql_free_result(results);
mysql_dbug_print("Dropping database testdb1."); //record trace
mysql_query(mysql, "DROP DATABASE testdb1;"); //issue query
/*
Now close the server connection and tell server we're done (shutdown).
*/
mysql_close(mysql);
mysql_server_end();
return 0;
}
I’ve added comments (some would say overkill) to help you follow along in the code. The first thing I do is create my global variables and set up my initialization arrays. I then initialize the server with the array options, set a few more options, and connect to the server. The body of the example application reads data from the database and prints it out. The last portion of the example closes and finalizes the server.
When compiling the example, you can use the mysql_config script to identify the location of the libraries. The script returns to the command line the actual path each of the options passed to it. You can also run the script from a command line and see all of the options and their values. A sample command to compile the example is:
gcc example1_linux.c -g -o example1_linux -lstdc++ -I./include -L./lib -lmysqld -lpthread -ldl -lcrypt -lm -lrt
This command should work for most Linux systems, but in some cases this could be a problem. If your MySQL installation is at another location, you may need to alter the phrase with the mysql_config script. If you have multiple installations of MySQL on your system or you have installed the embedded library in another location, you may not be able to use the mysql_config script, because it will return the wrong library paths. This is also true for cases in which you have multiple versions of the MySQL source code installed. You certainly want to avoid the case of using the include files from one version of the server to compile an embedded library from another. You could also run into problems if you do not have the earlier glibc libraries.
![]() Note If you are compiling the embedded server from a source tree and you are using mysql_config, you must set the cmake option -DCMAKE_INSTALL_PREFIX=ON.
Note If you are compiling the embedded server from a source tree and you are using mysql_config, you must set the cmake option -DCMAKE_INSTALL_PREFIX=ON.
To correct these problems, first run the mysql_config script from the command line and note the paths for the libraries. You should also locate the correct paths to the libraries and header files you want to use. An example of how I overcame these problems is shown here (I have all of these situations on my SUSE machine):
g++ example1_linux.c -g -o example1_linux -lz -I/usr/include/mysql
-L/usr/lib/mysql -lmysqld -lz -lpthread -lcrypt -lnsl -lm -lpthread -lc
-lnss_files -lnss_dns -lresolv -lc -lnss_files -lnss_dns -lresolv -lrt
Notice that I used the newer g++ compiler instead of the normal gcc. This is because my system has the latest GNU libraries and does not have the older ones. I could, of course, have loaded the older libraries and fixed this problem but typing g++ is much easier. OK, so we programmers are lazy.
Listing 6-7 shows the sample output of running this example under a typical installation of MySQL. In this case, I copied all of the data from the stand-alone server directory to my embedded-server directory.
Listing 6-7. Sample Output
linux:/home/Chuck/source/Embedded # ./example1_linux
The following are the databases supported:
information_schema
mysql
test
The following are the databases supported:
information_schema
mysql
test
testdb1
linux:/home/Chuck/source/Embedded #
Please take some time and explore this example application on your own machine. I recommend that you experiment with the body of the application and run a few queries of your own to get a feel for how you might write your own embedded MySQL application. If you implemented themysql_dbug_print() function in your embedded library, try it out with the example by either removing the comments on the mysql_debug() function call or by removing the comments for the debug option in the configuration file.
The next example will show you how to encapsulate the embedded library calls; it demonstrates their use in a more realistic application.
Windows Example
The first file you need to create is the configuration file (my.ini). You can use an existing configuration file, but I recommend copying it to the location of your embedded server. For example, if you created a directory named c:/mysql_embedded, you would place the configuration file there and copy all of your data directories to that directory as well. Those are the only files that need to be in that directory. The only exception is if you wanted to use a different language for your embedded server. In this case, I suggest copying the appropriate files from a stand-alone installation to your embedded-server directory and referencing them from the configuration file. Listing 6-8 shows the configuration file for the example program. Included are the most commonly used options and where they are specified in the file.
Listing 6-8. Sample my.ini File for Windows
[mysqld]
basedir=C:/mysql_embedded
datadir=C:/mysql_embedded/data
language=C:/mysql_embedded/share/english
[libmysqld_client]
#debug=d:t:i:O,\\mysqld_embedded.trace
Creating the project file is a little trickier. To get the most out of using Visual Studio, I recommend opening the master solution file (mysql.sln) from the root of the source-code directory and adding your new application as a new project to that solution. You do not have to store your source code in the same source tree, but you should store it in such a way as to know what version of the source code it applies to.
You can create the project using the project wizard. You should select the C++ ![]() Win32 Console project template (Templates
Win32 Console project template (Templates ![]() Visual C++
Visual C++ ![]() Win32 in Visual Studio 2012) and name the project. This creates a new folder under the root of the folder specified in the wizard with the same name as the project. You should create an empty project and add your own source files.
Win32 in Visual Studio 2012) and name the project. This creates a new folder under the root of the folder specified in the wizard with the same name as the project. You should create an empty project and add your own source files.
Creating a project file as a subproject of the solution gives you some really cool advantages. To take advantage of the automated build process (no make files—yippee!), add the libmysqld project to your projects dependencies. You can open the project dependencies tool from the Project ![]() Project Dependencies menu. Set the build configuration to Active(Debug) by using the solution’s Configuration drop-down box and setting the platform to Active(Win32) using the solution’s Platform drop-down box on the standard toolbar.
Project Dependencies menu. Set the build configuration to Active(Debug) by using the solution’s Configuration drop-down box and setting the platform to Active(Win32) using the solution’s Platform drop-down box on the standard toolbar.
You also need to set some switches in the project properties. Open the project-properties dialog box by selecting Project ![]() Properties or by right-clicking on the project and choosing Properties. The first item you want to check is the runtime library generation. Set this switch to Multi-threaded Debug DLL (/MDd) by expanding the C/C++ label in the tree and clicking on the Code Generation label in the tree and selecting it from the Runtime Library drop-down list. This option causes your application to use the debug multithread- and DLL-specific version of the runtime library. Figure 6-1 shows the project properties dialog box and the location of this option.
Properties or by right-clicking on the project and choosing Properties. The first item you want to check is the runtime library generation. Set this switch to Multi-threaded Debug DLL (/MDd) by expanding the C/C++ label in the tree and clicking on the Code Generation label in the tree and selecting it from the Runtime Library drop-down list. This option causes your application to use the debug multithread- and DLL-specific version of the runtime library. Figure 6-1 shows the project properties dialog box and the location of this option.
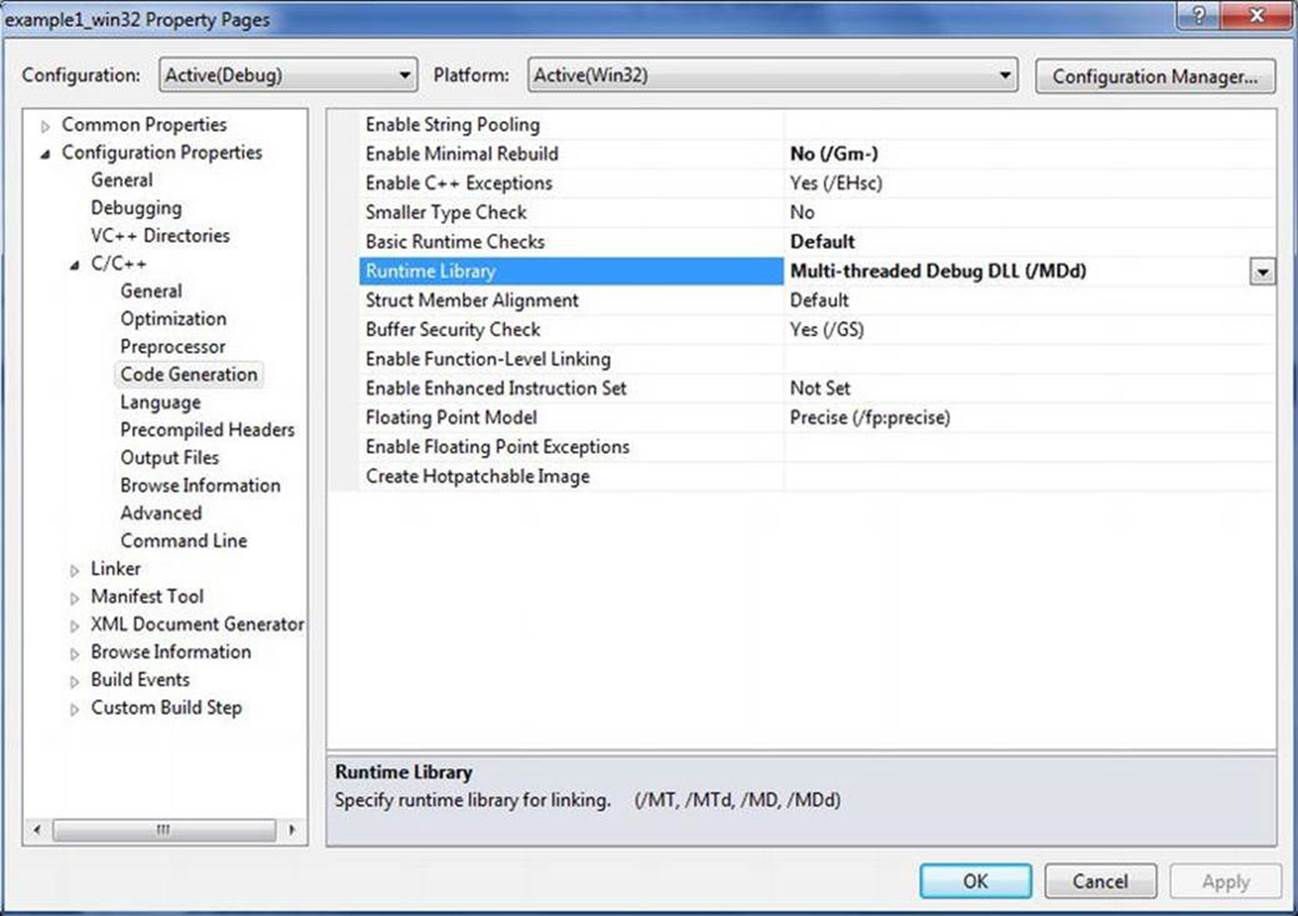
Figure 6-1. Project properties dialog box, with the Code Generation page displayed
Next, add the MySQL include directory to your project properties. The easiest way to do this is to expand the C/C++ label and click on the Command Line label. This will display the command-line parameters. To add a new parameter, type it in the Additional Options text box. In this case, you need to add an option such as:
/I ../include.
If you located your project somewhere other than under the MySQL source tree, you may need to alter the parameter accordingly. Figure 6-2 shows the project properties dialog box and the location of this option.
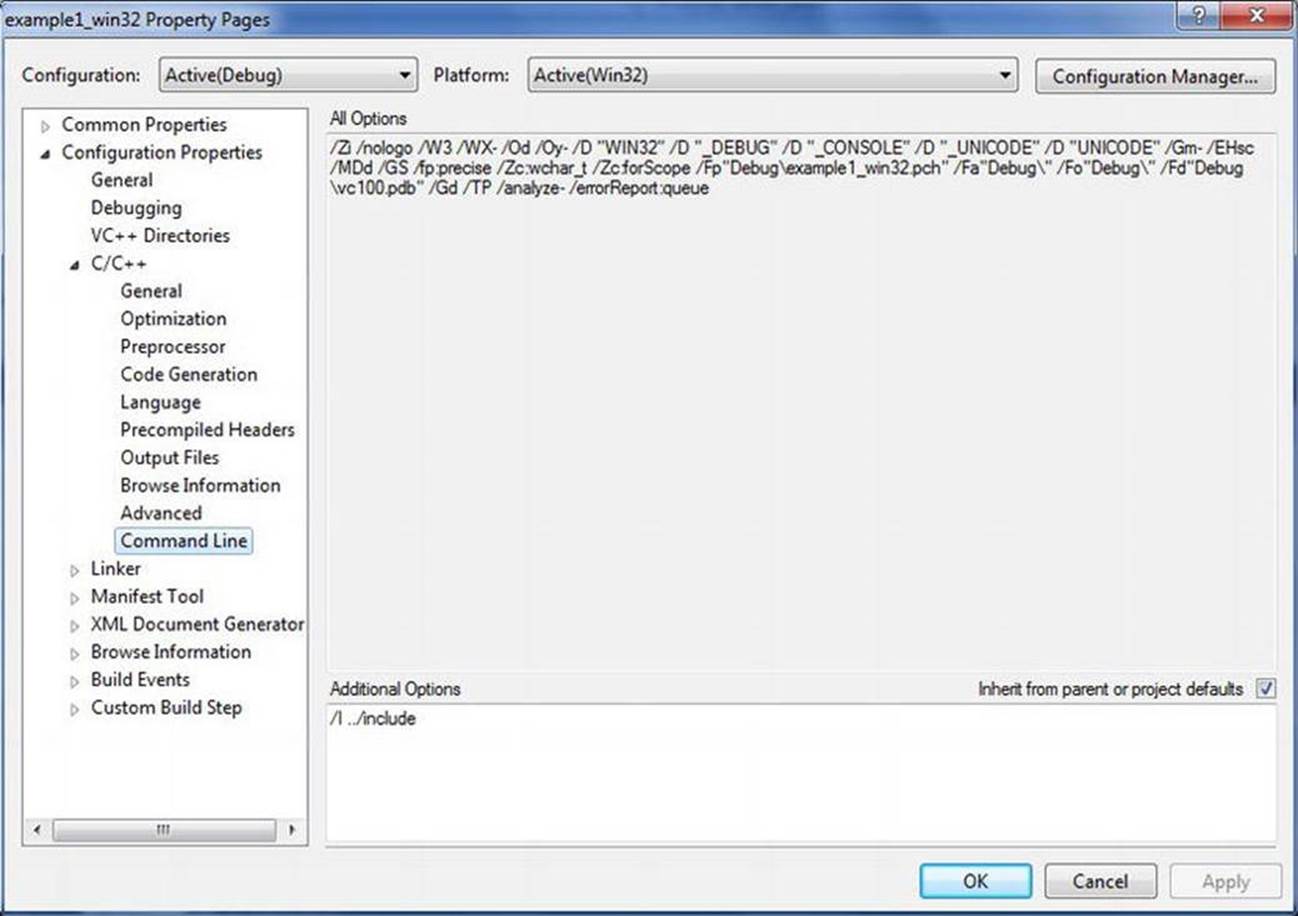
Figure 6-2. Project properties dialog box: Command Line page
You can also remove the precompiled header option if you do not want (or need) to use precompiled headers. This option is on the C/C++ Precompile Headers page in the project properties dialog box.
Add the libmysqld project to the example1_win32 project using the Project ![]() Add Reference menu selection. A dialog will open (shown in Figure 6-3) allowing you to choose a project among the solutions to use as a reference. Choose the libmysqld project. Figure 6-4 shows the resulting project-properties dialog with the libmysqld project reference added. Failure to do this step will result in numerous undefined symbol errors when you compile.
Add Reference menu selection. A dialog will open (shown in Figure 6-3) allowing you to choose a project among the solutions to use as a reference. Choose the libmysqld project. Figure 6-4 shows the resulting project-properties dialog with the libmysqld project reference added. Failure to do this step will result in numerous undefined symbol errors when you compile.

Figure 6-3. Choose a project reference
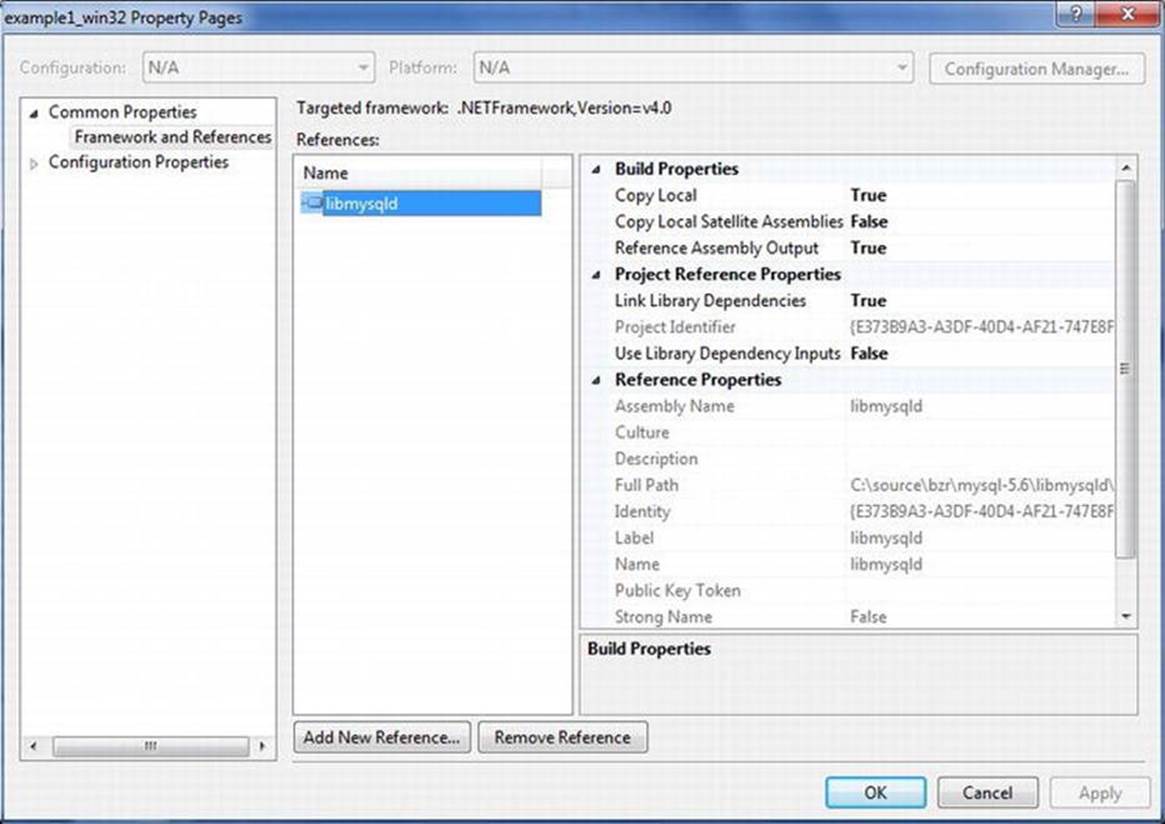
Figure 6-4. Project properties dialog box: reference
Now that you have the project configured correctly, add your source file or paste in the example code if you chose to create the base project files when you created the project. Listing 6-9 shows the complete Windows version.
Listing 6-9. Embedded Example 1 (Windows: example1_win32.cpp)
#include <stdio.h>
#include <stdlib.h>
#include <stdarg.h>
#include "mysql.h"
MYSQL *mysql; //the embedded server class
MYSQL_RES *results; //stores results from queries
MYSQL_ROW record; //a single row in a result set
/*
These variables set the location of the ini file and data stores.
*/
static char *server_options[] = {"mysql_test",
"--defaults-file=c:\\mysql_embedded\\my.ini",
"--datadir=c:\\mysql_embedded\\data", NULL };
int num_elements = (sizeof(server_options) / sizeof(char *)) - 1;
static char *server_groups[] = {"libmysqld_server", "libmysqld_client", NULL };
int main(void)
{
/*
This section initializes the server and sets server options.
*/
mysql_server_init(num_elements, server_options, server_groups);
mysql = mysql_init(NULL);
mysql_options(mysql, MYSQL_READ_DEFAULT_GROUP, "libmysqld_client");
mysql_options(mysql, MYSQL_OPT_USE_EMBEDDED_CONNECTION, NULL);
/*
The following call turns debugging on programmatically.
Comment out to turn off debugging.
*/
mysql_debug("d:t:i:O,\\mysqld_embedded.trace");
/*
Connect to embedded server.
*/
mysql_real_connect(mysql, NULL, NULL, NULL, "information_schema",
0, NULL, 0);
/*
This section executes the following commands and demonstrates
how to retrieve results from a query.
SHOW DATABASES;
CREATE DATABASE testdb1;
SHOW DATABASES;
DROP DATABASE testdb1;
*/
mysql_dbug_print("Showing databases."); //record trace
mysql_query(mysql, "SHOW DATABASES;"); //issue query
results = mysql_store_result(mysql); //get results
printf("The following are the databases supported:\n");
while(record=mysql_fetch_row(results)) //fetch row
{
printf("%s\n", record[0]); //process row
}
mysql_dbug_print("Creating the database testdb1."); //record trace
mysql_query(mysql, "CREATE DATABASE testdb1;");
mysql_dbug_print("Showing databases.");
mysql_query(mysql, "SHOW DATABASES;"); //issue query
results = mysql_store_result(mysql); //get results
printf("The following are the databases supported:\n");
while(record=mysql_fetch_row(results)) //fetch row
{
printf("%s\n", record[0]); //process row
}
mysql_free_result(results);
mysql_dbug_print("Dropping database testdb1."); //record trace
mysql_query(mysql, "DROP DATABASE testdb1;"); //issue query
/*
Now close the server connection and tell server we’re done (shutdown).
*/
mysql_close(mysql);
mysql_server_end();
return 0;
}
I’ve added comments (some would say overkill) to help you follow along in the code. The first thing I do is create my global variables and set up my initialization arrays. I then initialize the server with the array options, set a few more options if necessary, and connect to the server. The body of the example application reads data from the database and prints them out. The last portion of the example closes and finalizes the server.
Compiling the example is really easy. Just select the project, then choose Project ![]() Build, or right-click on the project and choose build. If you have already compiled the libmysqld project, all you should see is the compilation of the example. If for some reason the object files are out of date for libmysqld or any of its dependencies, Visual Studio will compile those as well.
Build, or right-click on the project and choose build. If you have already compiled the libmysqld project, all you should see is the compilation of the example. If for some reason the object files are out of date for libmysqld or any of its dependencies, Visual Studio will compile those as well.
![]() Caution You may encounter some really strange errors found in the mysql_com.h or similar header files. The most likely cause of this may be an optimization strategy. Microsoft automatically includes the #define WIN32_LEAN_AND_MEAN statement in the stdafx.h file. If you have that turned on, it tells the compiler to ignore a host of includes and links that are not needed (normally). You will want to delete that line altogether (or comment it out). Your program should now compile without errors. If you opted to not use the stdafx files, you should not encounter this problem.
Caution You may encounter some really strange errors found in the mysql_com.h or similar header files. The most likely cause of this may be an optimization strategy. Microsoft automatically includes the #define WIN32_LEAN_AND_MEAN statement in the stdafx.h file. If you have that turned on, it tells the compiler to ignore a host of includes and links that are not needed (normally). You will want to delete that line altogether (or comment it out). Your program should now compile without errors. If you opted to not use the stdafx files, you should not encounter this problem.
When the compilation is complete, you can either run the program from the debug menu commands or open a command window and run it from the command line. If this is your first time, you should see an error message such as:
This application has failed to start because LIBMYSQLD.dll was not found.
Re-installing the application may fix this problem.
The reason for this error has nothing to do with the second sentence in the error message. It means that the embedded library isn’t in the search path. If you have worked with .NET or COM applications and never used C libraries, you may never have encountered the error. Unlike .NET and COM, C libraries are not registered in a Global Assembly Cache (GAC) or registry. These libraries (DLLs) should be collocated with applications that call them or at least on an execution path. Most developers place a copy of the DLL in the execution directory.
To fix this problem, copy the libmysqld.dll file from the lib_debug directory to the directory where the example1_win32.exe file resides (or add lib_debug to the execution path). Once you get past that hurdle, you should see an output like that shown in Listing 6-10.
Listing 6-10. Example Output
c:\source\mysql-5.6\example1_win32\Debug>example1_win32
The following are the databases supported:
information_schema
cluster
mysql
test
The following are the databases supported:
information_schema
cluster
mysql
test
testdb1
Please take some time and explore this example application on your own machine. I recommend you experiment with the body of the application and run a few queries of your own to get a feel for how you might write your own embedded MySQL application. If you implemented themysql_dbug_print() function in your embedded library, try it out with the example by either removing the comments on the mysql_debug() function call or by removing the comments for the debug option in the configuration file.
What About Error Handling?
Some of you may be wondering about error handling. Specifically, how can you detect problems with the embedded server and handle them gracefully? A number of the embedded library calls have error codes that you can interrogate and act on. The previous sections described the return values for the functions I’ll be using. Although I didn’t include much error handling in the first embedded MySQL examples, I will in the next example. Note how I capture the errors and handle sending the errors to the client.
Embedded Server Application
The previous examples showed how to create a basic embedded MySQL application. While the examples showed how to connect and read data from a dedicated MySQL installation, they aren’t good models for building your own embedded application, because they lack enough coverage for all but the most trivial requirements. Oh, and they don’t have any error handling! The example in this chapter, while fictional, is all about providing you with the tools you need to build a real embedded application.
This application, called the Book Vending Machine (BVM), is an embedded system designed to run on a dedicated Microsoft Windows–based PC with a touch screen. The system and its other input devices are housed in a specialized mechanical vending machine designed to dispense books. The idea behind the BVM is to allow publishers to offer their most popular titles in a semi-mobile package that the vendor can configure and replenish as needed. The BVM would allow publishers to install their vending machine in areas where space is at a premium, such as trade shows, airports, and shopping malls. These areas usually have high traffic consisting of customers interested in purchasing printed books. The BVM saves publishers money by reducing the need for a storefront and personnel to staff it.
![]() Note I’ve often found myself wondering if this idea has ever been given consideration. I’ve read several articles predicting the continued rise of print-on-demand, but seldom have I seen anything written about how a book-vending machine would work. I understand there are a few prototype installations by some publishers, but these trials have not generated much enthusiasm. I chose to use this example as a means to add some realism. I, too, read technical books and often find myself bored with unrealistic or trivial examples. Here is an example that I hope you agree is at least plausible.
Note I’ve often found myself wondering if this idea has ever been given consideration. I’ve read several articles predicting the continued rise of print-on-demand, but seldom have I seen anything written about how a book-vending machine would work. I understand there are a few prototype installations by some publishers, but these trials have not generated much enthusiasm. I chose to use this example as a means to add some realism. I, too, read technical books and often find myself bored with unrealistic or trivial examples. Here is an example that I hope you agree is at least plausible.
The Interface
This application has a need for a dual interface; one for the normal vending-machine activity and one to allow vendors to restock the vending machine, adjusting the information as needed. The vending-machine interface is designed to provide the customer with an array of buttons that provide a thumbnail of books for specific slots in the vending machine. Since most modern vending machines use product buttons that are illuminated when the product is available and dimmed or turned off when the product is depleted, the BVM interface enables the button when the product in that slot is available and disables it when the product is depleted.
When the customer clicks a product button, the screen changes to a short, detailed display that describes the book and gives its price. If the customer wants to purchase the book, she can click Purchase and is prompted for payment. This application is written to simulate those activities. A real implementation would call the appropriate hardware-control library to receive payment, validate the payment, and engage the mechanical part of the vending machine to disperse the product from the indicated slot. Figure 6-5 shows the main interface for the book vending machine.Figure 6-6 shows the effect of low quantity for some of the books.
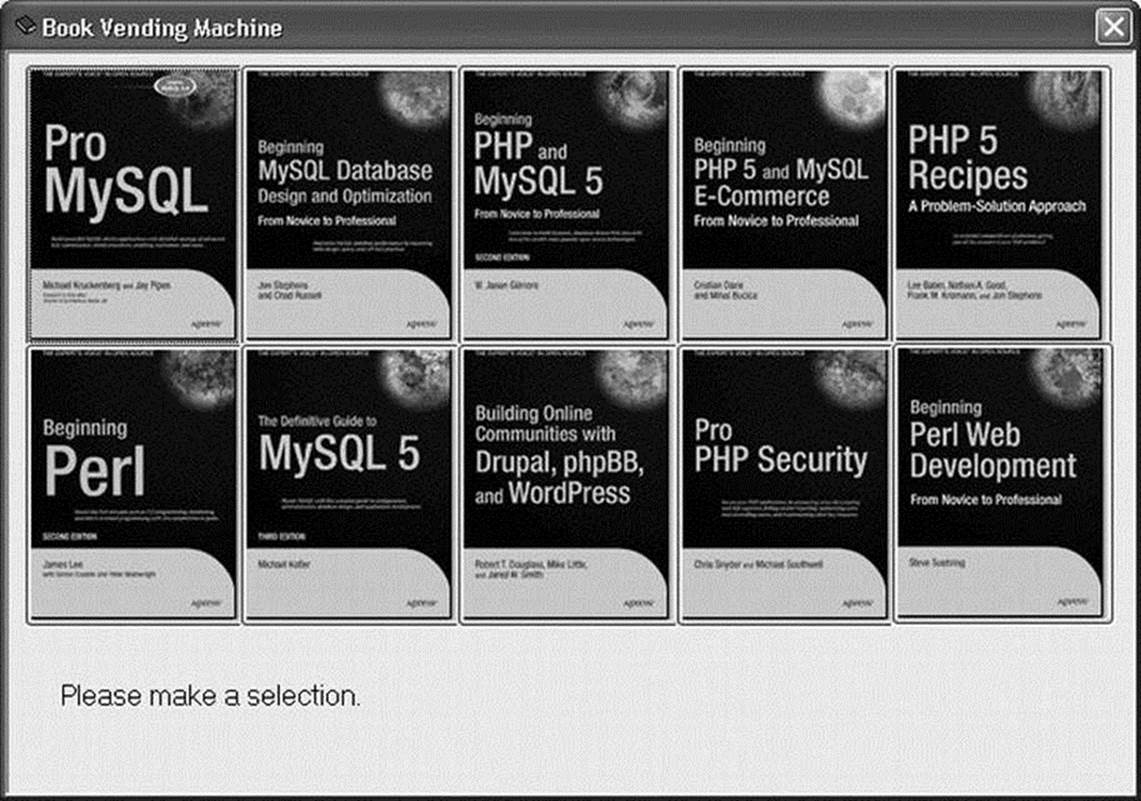
Figure 6-5. Book vending machine customer interface
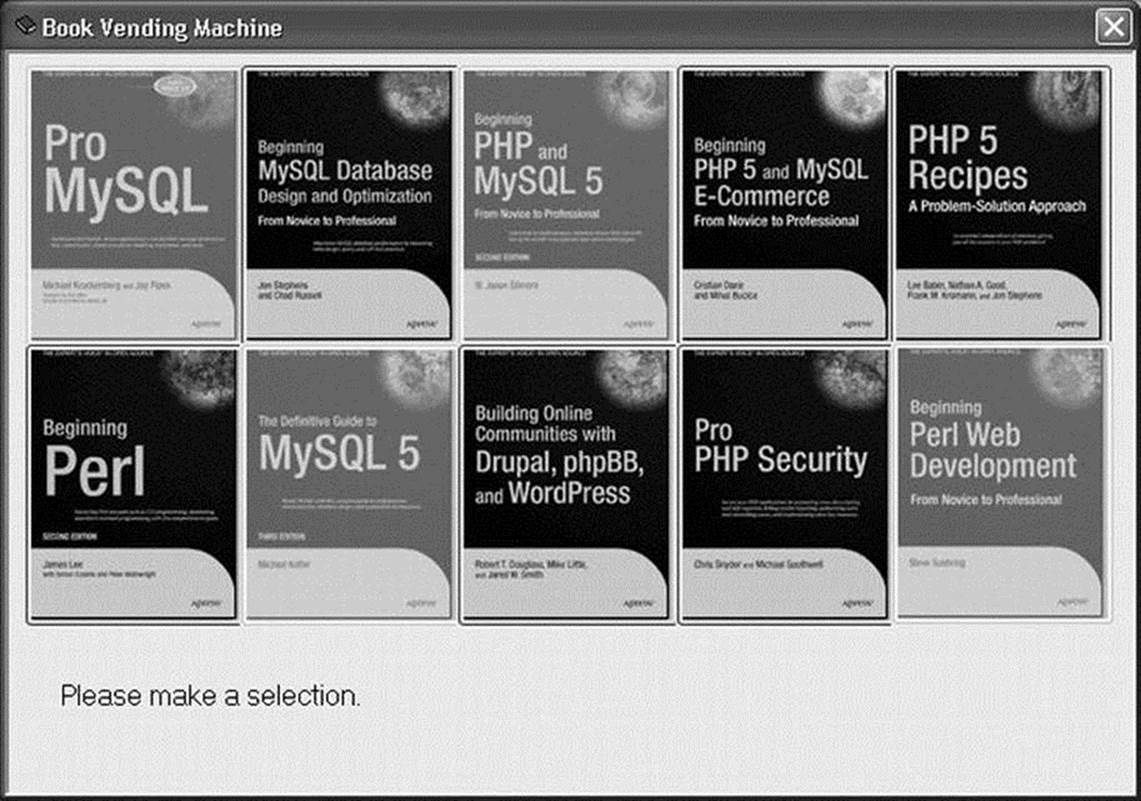
Figure 6-6. Resulting “Product Depleted” view of the customer interface
Figure 6-7 shows a sample of the details for one of the books.
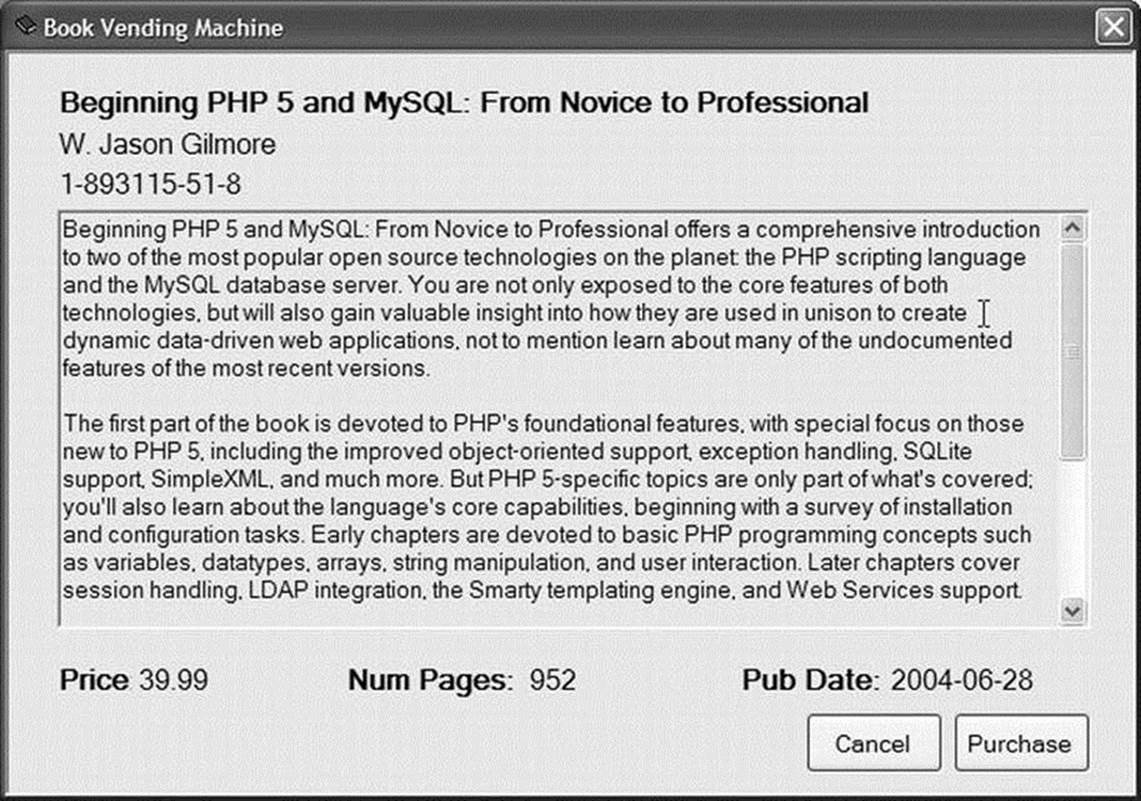
Figure 6-7. Book details interface
A vending machine wouldn’t be very useful if there were not any way to replenish the product. The BVM provides this via an administration interface. When the vendor needs to replenish the books or change the details to match a different set of books, the vendor opens the machine and closes the embedded application (this feature would have to be added to the example). The vendor would then restart the application, providing the administrator switch on the command line, like this:
C:\>Books BookVendingMachine -admin
The administration interface allows the vendor to enter an ad hoc query and execute it. Figure 6-8 shows the administration interface. The example shows a typical update operation to reset the quantity of the products. This interface allows the vendor to enter any query she needs to reset the data for the embedded application.
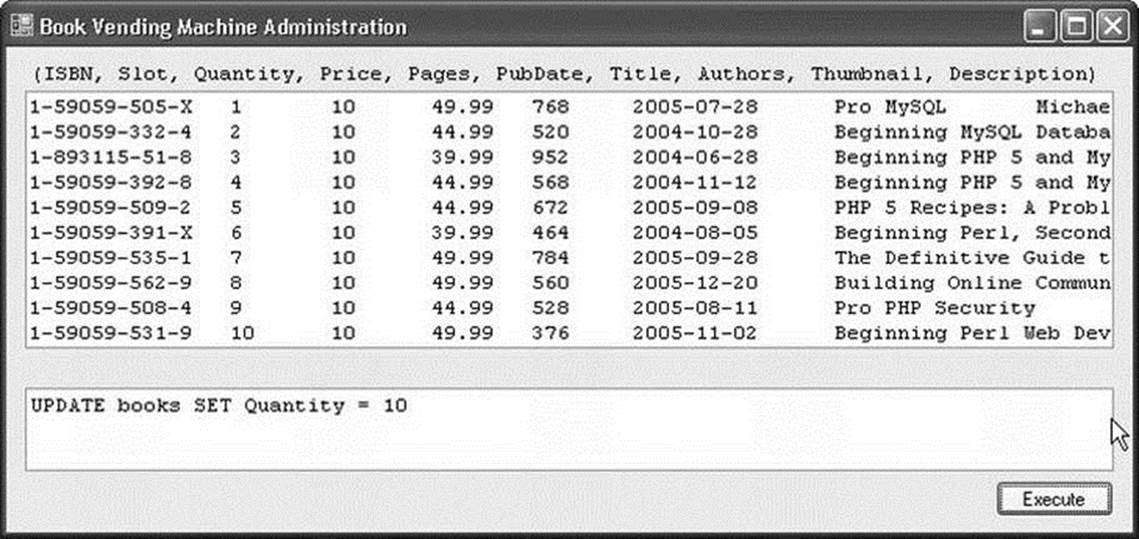
Figure 6-8. Administration interface
The Data and Database
Thedata for this example was created on a stand-alone MySQL server and copied to the embedded MySQL directory. When I created this application, I designed the data structures and the database to hold the data first. This is always a good idea.
![]() Note Some developers may disagree, believing it is better to start with the user-interface design and allow the data requirements to evolve. Neither practice is better than the other. The important point is that the data must be a focus of your design.
Note Some developers may disagree, believing it is better to start with the user-interface design and allow the data requirements to evolve. Neither practice is better than the other. The important point is that the data must be a focus of your design.
Most of your projects will come with either requirements for the data or actual data in existing repositories. For new applications, such as this example, always design the database by designing the tables in such a way as to represent the items and the relationships among them. This is usually a single step in a small project, but it may be an iterative process in which you use the initial tables and relationships as input to the design and planning of the user interfaces using UML drawings and modeling techniques. Changes to the database (the organization of the data) are often discovered during the later steps, which you then use as the starting point for going through the process again.
The data for this example consists of a short list of descriptive fields about the books in the machine. This includes the title, author, price, and description. I added the ISBN to use as a key for the table (since it is unique by definition and used by the publishing industry as a primary means of identifying the book). I also added some other fields that I would want to see before I decide to purchase a book. These include publication date and number of pages. I also needed to store a thumbnail image. (I chose an external method, storing the path and filename to the file and reading it from the file system. I could have used a binary large object (BLOB) to store the thumbnail, but this is easier—although admittedly error prone.) Last, I projected what I would need to run the user interface and decided to add a field to record the slot number where the book is located and dispensed, and a field to measure the quantity on hand. I named the table books and placed it in a database named bvm. The CREATE SQL statement for the table is shown here. Listing 6-11 shows the layout of the table using the EXPLAIN command.
CREATE DATABASE BVM;
CREATE TABLE Books (
ISBN varchar(15) NOT NULL,
Title varchar(125) NOT NULL,
Authors varchar(100) NOT NULL,
Price float NOT NULL,
Pages int NOT NULL,
PubDate date NOT NULL,
Quantity int DEFAULT 0,
Slot int NOT NULL,
Thumbnail varchar(100) NOT NULL,
Description text NOT NULL
);
Listing 6-11. Table Structure
mysql> USE bvm
mysql> explain Books;
+-----------------+------------------+--------+-----+--- -----+--------+
| Field | Type | Null | Key | Default | Extra |
+-----------------+------------------+--------+-----+---------+--------+
| ISBN | varchar(15) | NO | | | |
| Title | varchar(125) | NO | | | |
| Authors | varchar(100) | NO | | | |
| Price | float | NO | | | |
| Pages | int(11) | NO | | | |
| PubDate | date | NO | | | |
| Quantity | int(11) | YES | | 0 | |
| Slot | int(11) | NO | | | |
| Thumbnail | varchar(100) | NO | | | |
| Description | text | NO | | | |
+-----------------+------------------+--------+-----+---------+--------+
10 rows in set (0.08 sec)
To manage the thumbnail images, I stored the thumbnail filename in the thumbnail field and use a system-level option for the path. One way to do this is to create a command-line switch. Another is to place it in the MySQL configuration file and read it from there. You can also read it from the database. I used a database table named settings that contains only two fields: FieldName, which stores the name of the option (e.g., "ImagePath"), and Value, which store its value (e.g., "c:\images\mypic.tif"). This method allows me to create any number of system options and control them externally. The CREATE SQL command for the settings table is shown here, followed by a sample INSERT command to set the ImagePath option for the example application:
CREATE TABLE settings (FieldName varchar(20), Value varchar(255));
INSERT INTO settings VALUES ("ImagePath", "c:\\mysql_embedded\\images\\");
Creating the Project
The best way to create the project is to use the wizard to create a new Windows project. I recommend opening the master-solution file from the root of the source-code directory and adding your new application as a new project to that solution. You don’t have to store your source code in the same source tree, but you should store it in such a way as to know what version of the source code it applies to.
You can create the project using the project wizard. Select the CLR Windows Forms Application project template and name the project. This creates a new folder under the root of the folder specified in the wizard with the same name as the project.
Creating a project file as a subproject of the solution gives you some really cool advantages. To take advantage of the automated build process (no make files—yippee!), you need to add the libmysqld project to your project’s dependencies. You can open the project dependencies tool from the Project ![]() Project Dependencies menu. Set the build configuration to Active(Debug) by using the solution’s Configuration drop-down box and set the platform to Active(Win32) using the solution’s Platform drop-down box on the standard toolbar.
Project Dependencies menu. Set the build configuration to Active(Debug) by using the solution’s Configuration drop-down box and set the platform to Active(Win32) using the solution’s Platform drop-down box on the standard toolbar.
You also need to set some switches in the project properties. Open the project-properties dialog box. The first item to check is the runtime library generation. Set this switch to Multi-threaded Debug DLL (/MDd) by expanding the C/C++ label in the tree and clicking on the Code Generation label in the tree and selecting it from the Runtime Library drop-down list. Figure 6-1 earlier in this chapter shows the project properties dialog box and the location of this option.
Then, add the MySQL include directory to your project properties. The easiest way to do this is to expand the C/C++ label and click on the Command Line label. This will display the command-line parameters. To add a new parameter, type it in the Additional Options text box. In this case, you need to add something like /I ../include. If you located your project somewhere other than under the MySQL source tree, you may need to alter the parameter accordingly. Figure 6-2 earlier in this chapter shows the project properties dialog box and the location of this option.
You can also remove the precompiled header option if you do not want (or need) to use precompiled headers. This option is on the C/C++ Precompile Headers page in the project-properties dialog box.
As in the previous example, you also need to add the libmysqld project as a reference using the Project->Add Reference menu item. Figures 6-3 and 6-4 depict the dialogs for this operation.
Last, set the common language-runtime setting to /clr. You can set this in the project-properties dialog box by clicking on General in the tree and selecting Common Language Runtime Support (/clr) from the Common Language Runtime support option. Figure 6-9 shows the project dialog box and the location of this option.
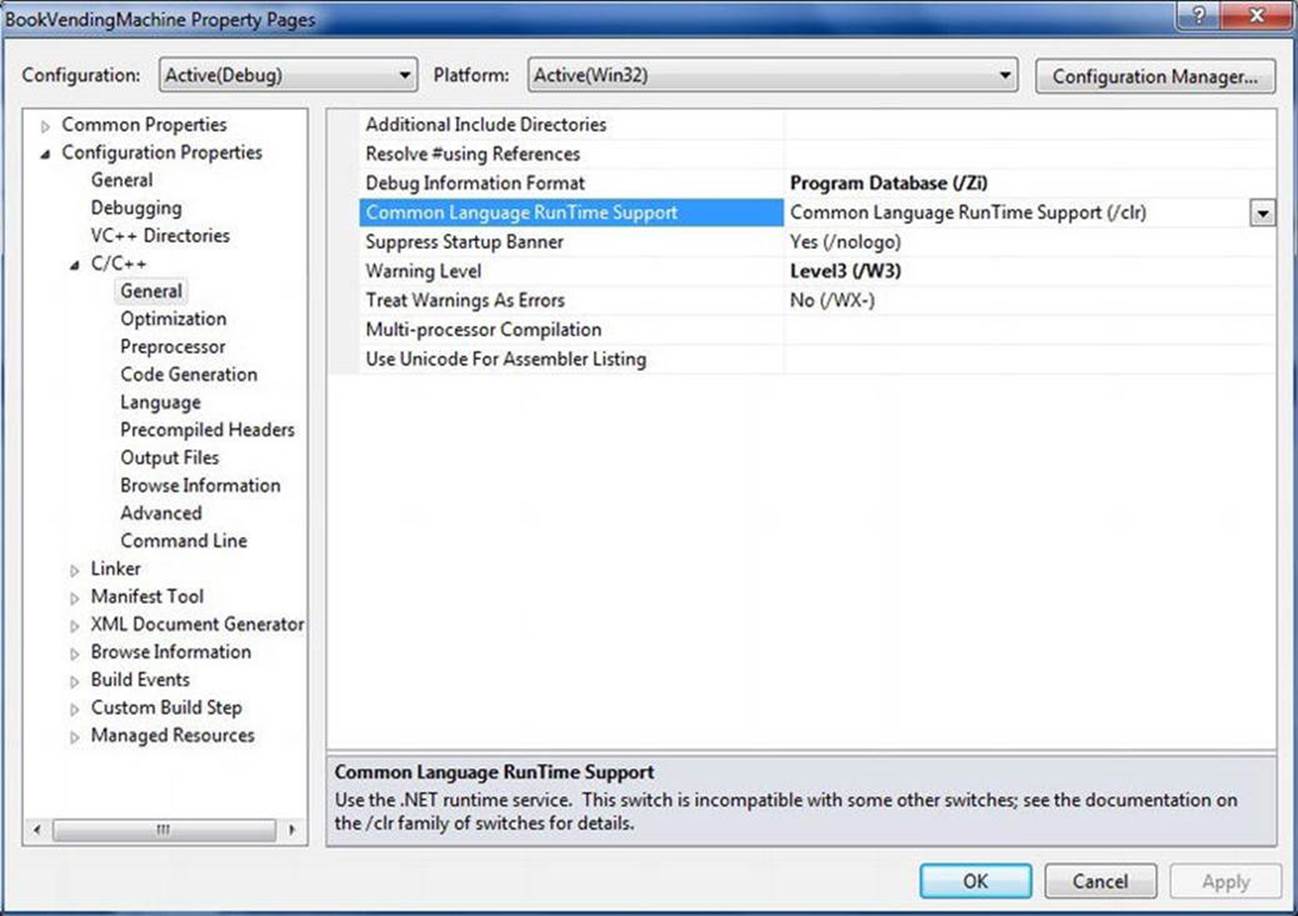
Figure 6-9. Project properties dialog box: General page
Design
I had to meet two important requirements to design the application. Not only did I need to design a user interface that is easy to use and free from errors, I also needed to be able to call a C API from a .NET application. If you do some searching in the MySQL forums and lists, you will see that several poor souls have struggled with getting this to work. If you follow along with my example, you should not encounter those problems. The main cause of the problems seems to be the inability to call the C API functions in the embedded library. I get around this by writing my application in C++ using managed C++ code. You cannot use C API calls in a managed application, but C++ allows you to temporarily turn that off and back on by using the #pragma unmanaged and #pragma managed directives.
The need to call unmanaged code is also a great motivator for encapsulation of the library calls. Unmanaged code enables the developer to write a DLL that can be used in programs that are not written in .NET. For this example, I use a C++ class to encapsulate the C API calls wrapped in the #pragma unmanaged directive. This allows me to show you an example of a .NET application that calls the embedded library C API directly. Cool, eh?
I also wanted to keep the user interface completely separate from anything to do with the embedded library. I wanted to do this so that I can provide you with an encapsulated database access class that you can reuse as the basis for your own applications. It also permits me to present to you one example (Windows) of a realistic application without long lists of source code for you to read through. The data-access design for this example is therefore a single unmanaged C++ class that encapsulates the embedded library C API calls. The design also includes two forms: one for each of the user interfaces (Customer and Administrator).
Managed vs. unmanaged code
Managed code is .NET applications that run under the control of the common language runtime (CLR). These applications can take advantage of all the features of the CLR, specifically garbage collection and better program-execution control. Unmanaged code is Windows applications that do not run under the CLR and therefore do not benefit from the .NET enhancements.
Database Engine Class
I began by designing the database engine class using just pen and paper. I could have used a UML drawing application, but since the class is small, I just listed the methods that I needed. For example, I needed methods to initialize, connect to, and shut down the embedded MySQL server. These methods are easy to encapsulate, because they don’t need any parameters from the form.
One of the first challenges I encountered was error handling. How can I communicate the errors to the client form without requiring the client to know anything about the embedded library? There are probably dozens of ways to do this, but I chose to implement an error-check method that allows the client to check for the presence of errors after an operation, and then another method to retrieve the error message. This allows me to once again separate the database access from the forms.
The class methods having to do with issuing queries and retrieving results are a design from a choice of implementations. I chose to implement an access iterator that permits the client to issue the query and then iterate through the results. I also needed a method that tells the database that a book has been vended, so that the database can reduce the quantity on hand value for that book.
Data retrieval is accomplished using three methods that return a character string, an integer, or a large text field. I also added helper methods for getting a setting from the settings table, getting a field from the database (for the administrator interface), and a quick method to retrieve the quantity on hand.
Listing 6-12 shows the complete source code for the database class header. I named the class DBEngine. Table 6-4 includes a description and use for each method in the class.
Listing 6-12. Database Engine Class Header (DBEngine.h)
#pragma once
#pragma unmanaged
#include <stdio.h>
class DBEngine
{
private:
bool mysqlError;
public:
DBEngine(void);
const char *GetError();
bool Error();
void Initialize();
void Shutdown();
char *GetSetting(char *Field);
char *GetBookFieldStr(int Slot, char *Field);
char *GetBookFieldText(int Slot, char *Field);
int GetBookFieldInt(int Slot, char *Field);
int GetQty(int Slot);
void VendBook(char *ISBN);
void StartQuery(char *QueryStatement);
void RunQuery(char *QueryStatement);
int GetNext();
char *GetField(int fldNum);
∼DBEngine(void);
};
#pragma managed
Table 6-4. Database Engine Class Methods
|
Method |
Return |
Description |
|
GetError() |
char * |
Returns the error message for the last error generated. |
|
Error() |
int |
Returns 1 if the server has detected an error condition. |
|
Initialize() |
void |
Encapsulates the embedded-server initialization and connection operations. |
|
Shutdown() |
void |
Encapsulates the embedded-server finalization and shutdown operations. |
|
GetSetting() |
char * |
Returns the value for the setting named. Looks up information in the settings table. |
|
GetBookFieldStr() |
char * |
Returns a character-string value from the books table for the field passed in the specified slot. |
|
GetBookFieldText() |
char * |
Returns a character-string value from the books table for the field passed in the specified slot. |
|
GetBookFieldInt() |
int |
Returns an integer value from the books table for the field passed in the specified slot. |
|
GetQty() |
int |
Returns the quantity on hand for the book in the specified slot. |
|
VendBook() |
void |
Reduces the quantity on hand for the book in the specified slot. |
|
StartQuery() |
void |
Initializes the query iterator by executing the query and retrieving the result set. |
|
RunQuery() |
void |
A helper method designed to run a query that does not return results. |
|
GetNext() |
int |
Retrieves the next record in the result set. Returns 0 if there are no more records in result set or non-zero for success. |
|
GetField |
char * |
Returns the field name for the field number passed. |
Defining the class was the easy part. Completing the code for all of these methods is a little harder. Instead of starting from scratch, I used the code from the first example and changed it into the database-class source code. Listing 6-13 shows the complete source code for the database class. Notice that I’ve used the same global (well, local to this source) variables and arrays of characters for the initialization and startup options. This part should look very familiar to you. Take some time to read through this code. When you are done, I explain some of the grittier details.
Listing 6-13. Database Engine Class (DBEngine.cpp)
#pragma unmanaged
#include "DBEngine.h"
#include <stdio.h>
#include <stdlib.h>
#include <stdarg.h>
#include "mysql.h"
MYSQL *mysql; //the embedded server class
MYSQL_RES *results; //stores results from queries
MYSQL_ROW record; //a single row in a result set
bool IteratorStarted; //used to control iterator
MYSQL_RES *ExecQuery(char *Query);
/*
These variables set the location of the ini file and data stores.
*/
static char *server_options[] = {"mysql_test",
"--defaults-file=c:\\mysql_embedded\\my.ini",
"--datadir=c:\\mysql_embedded\\data", NULL };
int num_elements = (sizeof(server_options) / sizeof(char *)) - 1;
static char *server_groups[] = {"libmysqld_server", "libmysqld_client", NULL };
DBEngine::DBEngine(void)
{
mysqlError = false;
}
DBEngine::∼DBEngine(void)
{
}
const char *DBEngine::GetError()
{
return (mysql_error(mysql));
mysqlError = false;
}
bool DBEngine::Error()
{
return(mysqlError);
}
char *DBEngine::GetBookFieldStr(int Slot, char *Field)
{
char *istr = new char[10];
char *str = new char[128];
_itoa_s(Slot, istr, 10, 10);
strcpy_s(str, 128, "SELECT ");
strcat_s(str, 128, Field);
strcat_s(str, 128, " FROM books WHERE Slot = ");
strcat_s(str, 128, istr);
mysqlError = false;
results=ExecQuery(str);
strcpy_s(str, 128, "");
if (results)
{
mysqlError = false;
record=mysql_fetch_row(results);
if(record)
{
strcpy_s(str, 128, record[0]);
}
else
{
mysqlError = true;
}
}
return (str);
}
char *DBEngine::GetBookFieldText(int Slot, char *Field)
{
char *istr = new char[10];
char *str = new char[128];
_itoa_s(Slot, istr, 10, 10);
strcpy_s(str, 128, "SELECT ");
strcat_s(str, 128, Field);
strcat_s(str, 128, " FROM books WHERE Slot = ");
strcat_s(str, 128, istr);
mysqlError = false;
results=ExecQuery(str);
delete str;
if (results)
{
mysqlError = false;
record=mysql_fetch_row(results);
if(record)
{
return (record[0]);
}
else
{
mysqlError = true;
}
}
return ("");
}
int DBEngine::GetBookFieldInt(int Slot, char *Field)
{
char *istr = new char[10];
char *str = new char[128];
int qty = 0;
_itoa_s(Slot, istr, 10, 10);
strcpy_s(str, 128, "SELECT ");
strcat_s(str, 128, Field);
strcat_s(str, 128, " FROM books WHERE Slot = ");
strcat_s(str, 128, istr);
results=ExecQuery(str);
if (results)
{
record=mysql_fetch_row(results);
if(record)
{
qty = atoi(record[0]);
}
else
{
mysqlError = true;
}
}
delete str;
return (qty);
}
void DBEngine::VendBook(char *ISBN)
{
char *str = new char[128];
char *istr = new char[10];
int qty = 0;
strcpy_s(str, 128, "SELECT Quantity FROM books WHERE ISBN = '");
strcat_s(str, 128, ISBN);
strcat_s(str, 128, "'");
results=ExecQuery(str);
record=mysql_fetch_row(results);
if (record)
{
qty = atoi(record[0]);
if (qty >= 1)
{
_itoa_s(qty - 1, istr, 10, 10);
strcpy_s(str, 128, "UPDATE books SET Quantity = ");
strcat_s(str, 128, istr);
strcat_s(str, 128, " WHERE ISBN = '");
strcat_s(str, 128, ISBN);
strcat_s(str, 128, "'");
results=ExecQuery(str);
}
}
else
{
mysqlError = true;
}
}
void DBEngine::Initialize()
{
/*
This section initializes the server and sets server options.
*/
mysql_server_init(num_elements, server_options, server_groups);
mysql = mysql_init(NULL);
if (mysql)
{
mysql_options(mysql, MYSQL_READ_DEFAULT_GROUP, "libmysqld_client");
mysql_options(mysql, MYSQL_OPT_USE_EMBEDDED_CONNECTION, NULL);
/*
The following call turns debugging on programmatically.
Comment out to turn off debugging.
*/
//mysql_debug("d:t:i:O,\\mysqld_embedded.trace");
/*
Connect to embedded server.
*/
if(mysql_real_connect(mysql, NULL, NULL, NULL, "INFORMATION_SCHEMA",
0, NULL, 0) == NULL)
{
mysqlError = true;
}
else
{
mysql_query(mysql, "use bvm");
}
}
else
{
mysqlError = true;
}
IteratorStarted = false;
}
void DBEngine::Shutdown()
{
/*
Now close the server connection and tell server we're done (shutdown).
*/
mysql_close(mysql);
mysql_server_end();
}
char *DBEngine::GetSetting(char *Field)
{
char *str = new char[128];
strcpy_s(str, 128, "SELECT * FROM settings WHERE FieldName = '");
strcat_s(str, 128, Field);
strcat_s(str, 128, "'");
results=ExecQuery(str);
strcpy_s(str, 128, "");
if (results)
{
record=mysql_fetch_row(results);
if (record)
{
strcpy_s(str, 128, record[1]);
}
}
else
{
mysqlError = true;
}
return (str);
}
void DBEngine::StartQuery(char *QueryStatement)
{
if (!IteratorStarted)
{
results=ExecQuery(QueryStatement);
if (results)
{
record=mysql_fetch_row(results);
}
}
IteratorStarted=true;
}
void DBEngine::RunQuery(char *QueryStatement)
{
results=ExecQuery(QueryStatement);
if (results)
{
record=mysql_fetch_row(results);
if(!record)
{
mysqlError = true;
}
}
}
int DBEngine::GetNext()
{
//if EOF then no more records
IteratorStarted=false;
record=mysql_fetch_row(results);
if (record)
{
return (1);
}
else
{
return (0);
}
}
char *DBEngine::GetField(int fldNum)
{
if (record)
{
return (record[fldNum]);
}
else
{
return ("");
}
}
MYSQL_RES *ExecQuery(char *Query)
{
mysql_dbug_print("ExecQuery.");
mysql_free_result(results);
mysql_query(mysql, Query);
return (mysql_store_result(mysql));
}
#pragma managed
One thing you should notice about this code is all of the error handling that I’ve added to make the code more robust, or hardened. While I do not have all possible error handlers implemented, the most important ones are.
The get methods are all implemented using the same process. I first generate the appropriate query (and thereby hide the SQL statement from the client), execute the query, retrieve the result set and then the record from the query, and return the value.
One method of interest is VendBook(). Take a moment and look through that one again. You’ll see that I’ve followed a similar method of generating the query, but this time I don’t get the results, because there aren’t any. Actually, there is a result—it is the number of records affected. This could be handy if you want to do some additional process or rule checking in your application.
The rest of the methods should look familiar to you, because they are all copies of the original example I showed you, except this time they have error handling included. Now, let’s take a look at how the user-interface code calls the database class.
Customer Interface (Main Form)
The source code for the customer interface is very large. This is because of the auto-generated code that Microsoft places in the form.h file. I’m including only those portions that I wrote. I’ve included this section to show you how you can write your own .NET (or other) user interfaces. Aside from the code in the button events, I use only four additional methods that I need to complete the user interface. The first method, DisplayError(), is defined as:
void DisplayError()
I use this function to detect errors in the database class and to present the error message to the user. The implementation of the method is a typical call to the MessageBox::Show() function.
The second method is a helper method that completes the detail view of the book selected. The function is named LoadDetails(). I abstracted this method because I realized I would be repeating the code for all ten buttons.5 Abstracting in this manner minimizes the code and permits easier debugging. This method is defined as:
void LoadDetails(int Slot)
The method takes as a parameter the slot number (which corresponds to the button number). It queries the database using the database-class methods and populates the detail-interface elements. This is where most of the heavy lifting of communicating with the database-engine class occurs.
![]() Note You may be wondering what all that gnarly code is surrounding the character strings. It turns out that the .NET string class is not compatible with the C-style character strings. The extra code I included is designed to marshal the strings between these formats.
Note You may be wondering what all that gnarly code is surrounding the character strings. It turns out that the .NET string class is not compatible with the C-style character strings. The extra code I included is designed to marshal the strings between these formats.
The third method, a helper method named Delay(), is defined as:
void Delay(int secs)
The function causes a delay in processing for the number of seconds passed as a parameter. While not something you would want to include in your own application, I added it to simulate the vending process. This is an excellent example of how you can use stubbed functionality to demonstrate an application. This can be especially helpful in prototyping a new interface.
The fourth method, CheckAvailability(), is used to turn the buttons on the interface on or off depending on whether there is sufficient quantity of the product available. This method is defined as:
void CheckAvailability()
The function makes a series of calls to the database engine to check the quantity for each slot. If the slot is empty (quantity == 0), the button is disabled.
Listing 6-14 shows an excerpt of the source code for the customer interface. I’ve omitted a great deal of the auto-generated code (represented as . . .). Notice that at the top of the file I reference the database-engine header using the #include "DBEngine.h" directive. Also notice that I’ve defined a variable of type DBEngine. I use this object throughout the code. Since it is local to the form, I can use it in any event or method. I use the . . . to indicate portions of the auto-generated code and comments omitted from the listing.
Listing 6-14. Main Form Source Code (MainForm.h)
#include <stdio.h>
#include <stdlib.h>
#include <string>
#include "vcclr.h"
#include <time.h>
#include "DBEngine.h"
namespace BookVendingMachine {
const char GREETING[] = "Please make a selection.";
DBEngine *Database = new DBEngine();
. . .
#pragma endregion
void DisplayError()
{
String ^str = gcnew String("There was an error with the database system.\n" \
"Please contact product support.\nError = ");
str = str + gcnew String(Database->GetError());
MessageBox::Show(str, "Internal System Error", MessageBoxButtons::OK,
MessageBoxIcon::Information);
}
void LoadDetails(int Slot)
{
int Qty = Database->GetBookFieldInt(Slot, "Quantity");
if (Database->Error()) DisplayError();
pnlButtons->Visible = false;
pnlDetail->Visible = true;
lblStatus->Visible = false;
lblTitle->Text = gcnew String(Database->GetBookFieldStr(Slot, "Title"));
if (Database->Error()) DisplayError();
lblAuthors->Text =
gcnew String(Database->GetBookFieldStr(Slot, "Authors"));
if (Database->Error()) DisplayError();
lblISBN->Text = gcnew String(Database->GetBookFieldStr(Slot, "ISBN"));
if (Database->Error()) DisplayError();
txtDescription->Text =
gcnew String(Database->GetBookFieldText(Slot, "Description"));
if (Database->Error()) DisplayError();
lblPrice->Text = gcnew String(Database->GetBookFieldStr(Slot, "Price"));
if (Database->Error()) DisplayError();
lblNumPages->Text =
gcnew String(Database->GetBookFieldStr(Slot, "Pages"));
if (Database->Error()) DisplayError();
lblPubDate->Text =
gcnew String(Database->GetBookFieldStr(Slot, "PubDate"));
if (Database->Error()) DisplayError();
if(Qty < 1)
{
btnPurchase->Enabled = false;
}
}
void CheckAvailability()
{
btnBook1->Enabled = (Database->GetBookFieldInt(1, "Quantity") >= 1);
if (Database->Error()) DisplayError();
btnBook2->Enabled = (Database->GetBookFieldInt(2, "Quantity") >= 1);
if (Database->Error()) DisplayError();
btnBook3->Enabled = (Database->GetBookFieldInt(3, "Quantity") >= 1);
if (Database->Error()) DisplayError();
btnBook4->Enabled = (Database->GetBookFieldInt(4, "Quantity") >= 1);
if (Database->Error()) DisplayError();
btnBook5->Enabled = (Database->GetBookFieldInt(5, "Quantity") >= 1);
if (Database->Error()) DisplayError();
btnBook6->Enabled = (Database->GetBookFieldInt(6, "Quantity") >= 1);
if (Database->Error()) DisplayError();
btnBook7->Enabled = (Database->GetBookFieldInt(7, "Quantity") >= 1);
if (Database->Error()) DisplayError();
btnBook8->Enabled = (Database->GetBookFieldInt(8, "Quantity") >= 1);
if (Database->Error()) DisplayError();
btnBook9->Enabled = (Database->GetBookFieldInt(9, "Quantity") >= 1);
if (Database->Error()) DisplayError();
btnBook10->Enabled = (Database->GetBookFieldInt(10, "Quantity") >= 1);
if (Database->Error()) DisplayError();
}
void Delay(int secs)
{
time_t start;
time_t current;
time(&start);
do
{
time(¤t);
} while(difftime(current,start) < secs);
}
private: System::Void btnCancel_Click(System::Object^ sender,
System::EventArgs^ e)
{
lblStatus->Visible = true;
pnlDetail->Visible = false;
pnlButtons->Visible = true;
btnPurchase->Enabled = true;
lblStatus->Text = gcnew String(GREETING);
}
private: System::Void btnPurchase_Click(System::Object^ sender,
System::EventArgs^ e)
{
String ^orig = gcnew String(lblISBN->Text->ToString());
pin_ptr<const wchar_t> wch = PtrToStringChars(orig);
// Convert to a char*
size_t origsize = wcslen(wch) + 1;
const size_t newsize = 100;
size_t convertedChars = 0;
char nstring[newsize];
wcstombs_s(&convertedChars, nstring, origsize, wch, _TRUNCATE);
lblStatus->Visible = true;
pnlDetail->Visible = false;
pnlButtons->Visible = true;
btnPurchase->Enabled = true;
Database->VendBook(nstring);
//
// Simulate buying the book.
//
lblStatus->Text = "Please Insert your credit card.";
this->Refresh();
Delay(3);
lblStatus->Text = "Thank you. Processing card number ending in 4-1234.";
this->Refresh();
Delay(3);
lblStatus->Text = "Vending....";
this->Refresh();
Delay(5);
this->Refresh();
CheckAvailability();
lblStatus->Text = gcnew String(GREETING);
}
private: System::Void MainForm_Load(System::Object^ sender,
System::EventArgs^ e)
{
String ^imageName;
String ^imagePath;
Database->Initialize();
if (Database->Error()) DisplayError();
//
//For each button, check to see if there are sufficient qty and load
//the thumbnail for each.
//
imagePath = gcnew String(Database->GetSetting("ImagePath"));
imageName = imagePath +
gcnew String(Database->GetBookFieldStr(1, "Thumbnail"));
if (Database->Error()) DisplayError();
btnBook1->Image = btnBook1->Image->FromFile(imageName);
imageName = imagePath +
gcnew String(Database->GetBookFieldStr(2, "Thumbnail"));
if (Database->Error()) DisplayError();
btnBook2->Image = btnBook2->Image->FromFile(imageName);
imageName = imagePath +
gcnew String(Database->GetBookFieldStr(3, "Thumbnail"));
if (Database->Error()) DisplayError();
btnBook3->Image = btnBook3->Image->FromFile(imageName);
imageName = imagePath +
gcnew String(Database->GetBookFieldStr(4, "Thumbnail"));
if (Database->Error()) DisplayError();
btnBook4->Image = btnBook4->Image->FromFile(imageName);
imageName = imagePath +
gcnew String(Database->GetBookFieldStr(5, "Thumbnail"));
if (Database->Error()) DisplayError();
btnBook5->Image = btnBook5->Image->FromFile(imageName);
imageName = imagePath +
gcnew String(Database->GetBookFieldStr(6, "Thumbnail"));
if (Database->Error()) DisplayError();
btnBook6->Image = btnBook6->Image->FromFile(imageName);
imageName = imagePath +
gcnew String(Database->GetBookFieldStr(7, "Thumbnail"));
if (Database->Error()) DisplayError();
btnBook7->Image = btnBook7->Image->FromFile(imageName);
imageName = imagePath +
gcnew String(Database->GetBookFieldStr(8, "Thumbnail"));
if (Database->Error()) DisplayError();
btnBook8->Image = btnBook8->Image->FromFile(imageName);
imageName = imagePath +
gcnew String(Database->GetBookFieldStr(9, "Thumbnail"));
if (Database->Error()) DisplayError();
btnBook9->Image = btnBook9->Image->FromFile(imageName);
imageName = imagePath +
gcnew String(Database->GetBookFieldStr(10, "Thumbnail"));
if (Database->Error()) DisplayError();
btnBook10->Image = btnBook10->Image->FromFile(imageName);
CheckAvailability();
}
private: System::Void btnBook1_Click(System::Object^ sender,
System::EventArgs^ e)
{
LoadDetails(1);
}
private: System::Void btnBook2_Click(System::Object^ sender,
System::EventArgs^ e)
{
LoadDetails(2);
}
private: System::Void btnBook3_Click(System::Object^ sender,
System::EventArgs^ e)
{
LoadDetails(3);
}
private: System::Void btnBook4_Click(System::Object^ sender,
System::EventArgs^ e)
{
LoadDetails(4);
}
private: System::Void btnBook5_Click(System::Object^ sender,
System::EventArgs^ e)
{
LoadDetails(5);
}
private: System::Void btnBook6_Click(System::Object^ sender,
System::EventArgs^ e)
{
LoadDetails(6);
}
private: System::Void btnBook7_Click(System::Object^ sender,
System::EventArgs^ e)
{
LoadDetails(7);
}
private: System::Void btnBook8_Click(System::Object^ sender,
System::EventArgs^ e)
{
LoadDetails(8);
}
private: System::Void btnBook9_Click(System::Object^ sender,
System::EventArgs^ e)
{
LoadDetails(9);
}
private: System::Void btnBook10_Click(System::Object^ sender,
System::EventArgs^ e)
{
LoadDetails(10);
}
private: System::Void MainForm_FormClosing(System::Object^ sender,
System::Windows::Forms::FormClosingEventArgs^ e)
{
Database->Shutdown();
}
};
}
The MainForm_Load() event is where the database engine is initialized and the buttons are loaded with the appropriate thumbnails. I follow each call to the database with the statement.
if (Database->Error()) DisplayError();
This statement allows me to detect when an error occurs and inform the user. Although I don’t act on the error in this event, I could and do act on it in other events. If a severe database error occurs here, the worst case is that the buttons will not be populated with the thumbnails. I use this concept throughout the source code.
The btnBook1_Click() through btnBook10_Click() events are implemented to call the LoadDetails() method and populate the details interface components with the proper data.As you can see, abstracting the loading of the details has saved me lots of code!
On the detail portion of the interface are two buttons. The btnCancel_Click() event returns the interface to the initial vending machine view. The btnPurchase_Click() event is a bit more interesting. It is here where the vending part occurs. Notice I first call the VendBook()method and then run the simulation for the vending process and return the interface to the vending view.
That’s it! The customer interface is very straightforward—as most vending machines are. Just a row of buttons and a mechanism for taking in the money (in this case I assume the machine accepts credit cards as payment but a real vending machine would probably take several forms of payment).
Administration Interface (Administration Form)
The customer interface is uncomplicated and easy to use. But what about maintaining the data? How can a vendor replenish the stock of the vending machine or even change the list of books offered? One way to do that is to use an administration interface that is separate from the customer interface. You could also create another separate embedded application to handle this, or possibly create the data on another machine and copy to the vending machine. I’ve chosen to build a simple administration form, as shown in Figure 6-10.

Figure 6-10. Example administration form
As with the customer interface, I need to create a helper function. This function, LoadList(),is used to populate a list that displays all the data in the books table. This is handy because it allows the vendor to see what the database contains.
Listing 6-15 shows an excerpt of the administration-form source code. I’ve omitted the auto-generated Windows form code (represented as . . .). At the top of the source code, I’ve defined the pointer variable as AdminDatabase instead of Database. This is mainly for clarity and isn’t meant to distract you from the usage of the database-engine class. I use the . . . to indicate portions of the auto-generated code and comments omitted from the listing.
Listing 6-15. Administration Form Source Code (AdminForm.h)
#pragma once
#include "DBEngine.h"
using namespace System;
using namespace System::ComponentModel;
using namespace System::Collections;
using namespace System::Windows::Forms;
using namespace System::Data;
using namespace System::Drawing;
namespace BookVendingMachine {
DBEngine *AdminDatabase = new DBEngine();
. . .
#pragma endregion
void LoadList()
{
int i = 0;
int j = 0;
String^ str;
lstData->Items->Clear();
AdminDatabase->StartQuery("SELECT ISBN, Slot, Quantity, Price," \
" Pages, PubDate, Title, Authors, Thumbnail," \
" Description FROM books");
do
{
str = gcnew String("");
for (i = 0; i < 10; i++)
{
if (i != 0)
{
str = str + "\t";
}
str = str + gcnew String(AdminDatabase->GetField(i));
}
lstData->Items->Add(str);
j++;
}while(AdminDatabase->GetNext());
}
private: System::Void btnExecute_Click(System::Object^ sender,
System::EventArgs^ e)
{
String ^orig = gcnew String(txtQuery->Text->ToString());
pin_ptr<const wchar_t> wch = PtrToStringChars(orig);
// Convert to a char*
size_t origsize = wcslen(wch) + 1;
const size_t newsize = 100;
size_t convertedChars = 0;
char nstring[newsize];
wcstombs_s(&convertedChars, nstring, origsize, wch, _TRUNCATE);
AdminDatabase->RunQuery(nstring);
LoadList();
}
private: System::Void Admin_Load(System::Object^ sender,
System::EventArgs^ e)
{
AdminDatabase->Initialize();
LoadList();
}
private: System::Void AdminForm_FormClosing(System::Object^ sender,
System::Windows::Forms::FormClosingEventArgs^ e)
{
AdminDatabase->Shutdown();
}
};
}
I’ve included the usual initialize and shutdown method calls to the database engine in the form load and closing events.
This interface is designed to accept an ad hoc query and execute it when the Execute button is clicked. Thus, the btnExecute_Click() is the only other method in this source code. The method calls the database engine and requests that the query be run, but it is not checking for any results. That is because this interface is used to adjust things in the database, not select data. The last call in this method is the LoadList() helper method, which repopulates the list.
Detecting Interface Requests
You might be wondering how I plan to detect which interface to execute. The answer is, I use a command-line parameter to tell the code which interface to run. The switch is implemented in the main() function in the BookVendingMachine.cpp source file. The source code for processing command-line parameters is self-explanatory. Listing 6-16 contains the entire source code for the main() function for the embedded application.
Listing 6-16. The BookVendingMachine Main Function (BookVendingMachine.cpp)
// BookVendingMachine.cpp : main project file.
#include "MainForm.h"
#include "AdminForm.h"
using namespace BookVendingMachine;
[STAThreadAttribute]
int main(array<System::String ^> ^args)
{
// Enabling Windows XP visual effects before any controls are created
Application::EnableVisualStyles();
Application::SetCompatibleTextRenderingDefault(false);
// Create the main window and run it
if ((args->Length == 1) && (args[0] == "-admin"))
{
Application::Run(gcnew AdminForm());
}
else
{
Application::Run(gcnew MainForm());
}
return 0;
}
You should now be able to re-create this example from this text or by downloading the information from the book Web site. I encourage you to become comfortable with the client source code (the forms) so that you can see and understand how the database engine is used. When you’re ready, you can compile and run the example.
Compiling and Running
Compiling this example is just a matter of clicking on Build ![]() Build BookVendingMachine. If you have already compiled the libmysqld project, all you should see is the compilation of the example. If for some reason the object files are out of date for libmysqld or any of its dependencies, Visual Studio will compile those as well.
Build BookVendingMachine. If you have already compiled the libmysqld project, all you should see is the compilation of the example. If for some reason the object files are out of date for libmysqld or any of its dependencies, Visual Studio will compile those as well.
![]() Note I used Visual Studio 2010 for the following examples. Newer versions of Visual Studio may change the location of some of the menu commands. All the changes described can be set in the newer version.
Note I used Visual Studio 2010 for the following examples. Newer versions of Visual Studio may change the location of some of the menu commands. All the changes described can be set in the newer version.
When the compilation is complete, you can either run the program from the debug menu commands or open a command window and run it from the command line by entering the command debug\BookVendingMachine from the project directory. If this is your first time, you should see an error message like:
This application has failed to start because LIBMYSQLD.dll was not found.
Re-installing the application may fix this problem.
The reason for this error has nothing to do with the second sentence in the error message. It means that the embedded library isn’t in the search path. If you have worked with .NET or COM applications and never used C libraries, you may have never encountered the error. Unlike .NET and COM, C libraries are not registered in a GAC or registry. These libraries (DLLs) should be collocated with application that calls them, or at least on an execution path. Most developers place a copy of the DLL in the execution directory.
To fix this problem, copy the libmysqld.dll file from the lib_debug directory to the directory where the bookvendingmachine.exe file resides (or add lib_debug to the execution path). Once you have copied the library to the execution directory, you should see the application run as shown in Figures 6-3, 6-4, and 6-5.
Take some time and play around with the interface. If the time delay is too annoying, you can reduce the number of seconds in the delay or comment out the delay method calls.
If you want to access the administration interface, run the program using the -admin command-line switch. If you are running the example from the command line, you can enter the command:
BookVendingMarchine -admin
If you want to run the example from Visual Studio using the debugger, set the command-line switch in the project properties. Open the dialog box by selecting Project ![]() Project Properties and click on the Debugging label in the tree. You can add any number of command-line parameters by typing them into the Command Arguments option. Figure 6-11 shows the location of this option in the project properties.
Project Properties and click on the Debugging label in the tree. You can add any number of command-line parameters by typing them into the Command Arguments option. Figure 6-11 shows the location of this option in the project properties.
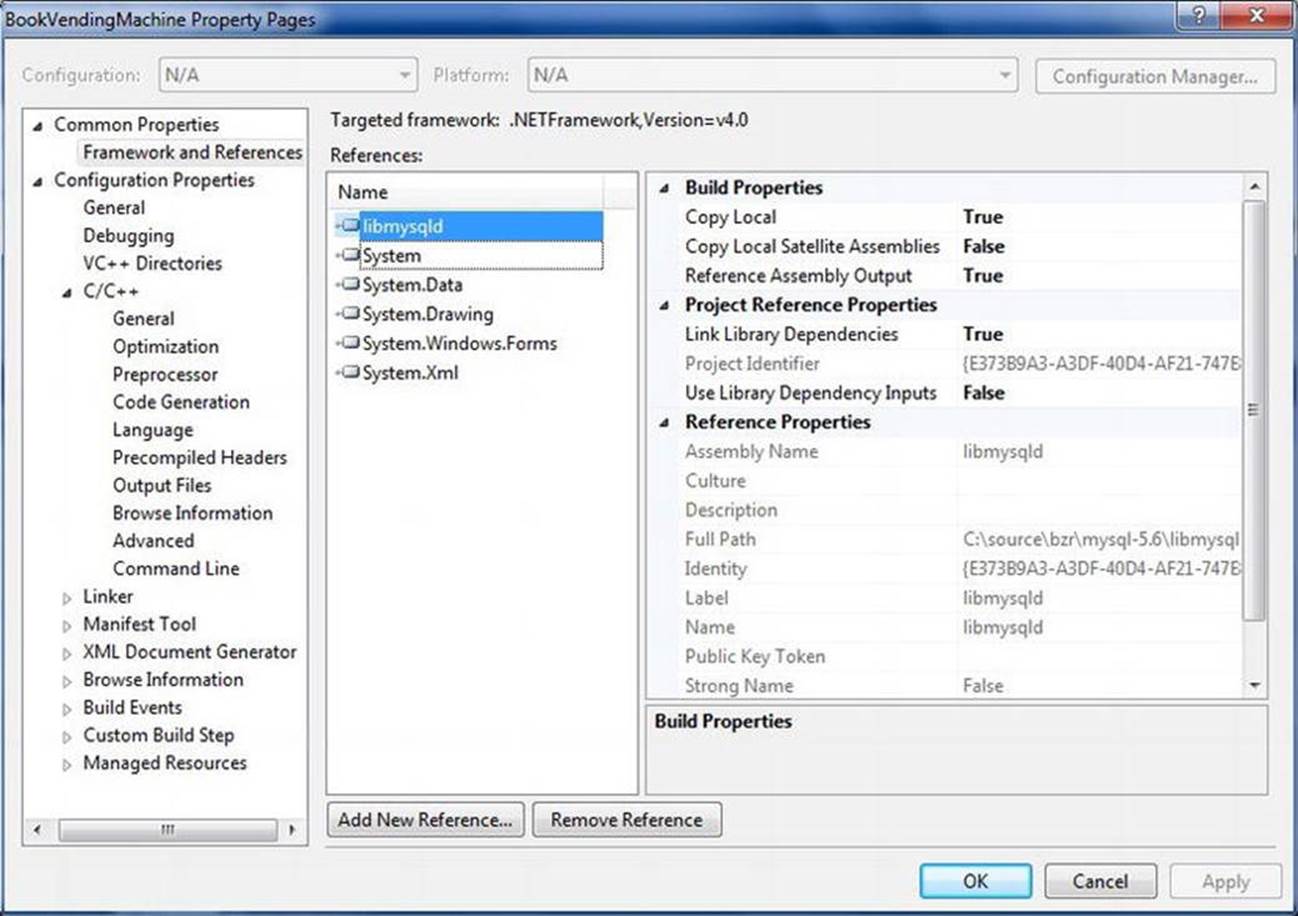
Figure 6-11. Setting command-line arguments from Visual Studio
I encourage you to try out the example. If you are not running Windows, you can still use the database-engine class and provide your own interface for the application. This shouldn’t be difficult now that you have seen one example of how that interface works with the abstractedlibmysqld system calls. If you find yourself building unique vending machines using an embedded MySQL system, send me a photo!
Summary
In this chapter, you learned how to create embedded MySQL applications. The MySQL embedded library is often overlooked, but it has been highly successful in permitting systems integrators to add robust data-management facilities to their enterprise applications and products.
Perhaps the most intriguing aspect of this chapter is your guided tour of the MySQL embedded library C API. I hope that by following the examples in this chapter, you can appreciate the power of embedded MySQL applications. I also hope that you haven’t tossed the book down in frustration if you’ve encountered issues with compiling the source code. Much of what makes a good open-source developer is her ability to systematically diagnose and adapt her environment to the needs of the current project. Do not despair if you had issues come up. Solving issues is a natural part of the learning cycle.
You also explored the concepts of turning on debug tracing for your embedded applications. I also took you on a brief journey into modifying the MySQL server source code by exposing a DBUG method through the embedded library that allows you to add your own strings to the DBUG trace output. You saw some interesting error-handling situations and how to handle them. Finally, I showed you an encapsulated database-access class that you can use in your own embedded applications.
In the next chapter, I’ll examine one of the more popular extensions of the MySQL system. This includes adding your own user-defined functions (UDFs), extending an existing SQL command, and adding your own SQL commands to the server. These techniques permit the MySQL system to evolve even further to meet your specific needs for your environment.
1 Well, until now it seems.
2 This function may be changed to mysql_library_init(). At the time of this writing, both functions are supported.
3 It isn’t actually leaking as much as it is no longer referenced but still allocated, making that portion of memory unusable.
4 This may be changed to mysql_library_end() in later releases of MySQL. At the time of this writing, both functions are supported.
5 There was only one feature of Visual Basic I found really cool: control arrays. Alas, they are a thing of the past.
All materials on the site are licensed Creative Commons Attribution-Sharealike 3.0 Unported CC BY-SA 3.0 & GNU Free Documentation License (GFDL)
If you are the copyright holder of any material contained on our site and intend to remove it, please contact our site administrator for approval.
© 2016-2026 All site design rights belong to S.Y.A.