Modern PHP (2015)
Appendix A. Installing PHP
Linux
Linux is my favorite development environment. I own a Macbook Pro with OS X, but my development happens in a Linux virtual machine. PHP is easy to install on Linux with a package manager such as aptitude on Ubuntu Server or yum on CentOS.
For now, we’re concerned only with PHP for command-line usage. We discuss how to setup PHP-FPM and the nginx web server in Chapter 7.
Package Managers
Most Linux distributions provide their own package manager. For example, Ubuntu uses the aptitude package manager. CentOS and Red Hat Enterprise Linux (RHEL) use the yum package manager. Package managers are the simplest way to find, install, update, and remove software on our Linux operating system.
WARNING
Sometimes Linux package managers install out-of-date software. For example, Ubuntu 14.04 LTS provides PHP 5.5.9; this is already behind the latest release—PHP 5.6.3 (as of December 2014).
Fortunately, we can supplement our Linux package manager’s default software sources with third-party repositories that contain more up-to-date, community-maintained software packages. We’ll use a custom software repository for both Ubuntu and CentOS to install the most recent PHP version. Before we go any further, make sure you are the system root user or a user with sudo power. This is required to install software with a Linux package manager.
Ubuntu 14.04 LTS
Ubuntu does not provide the latest PHP version in its default software repositories. We’ll need to add a community-maintained Personal Package Archive (PPA) instead. The term PPA is unique to Ubuntu, but the concept remains the same: we are using a third-party software repository to expand Ubuntu’s default software selection. Ondřej Surý maintains an excellent PPA that provides nightly builds for the latest stable PHP release. This PPA is named ppa:ondrej/php5-5.6.
1. Add software dependencies
Before we add Ondřej Surý’s PPA, we must make sure the add-apt-repository binary is available on our operating system. This binary is included in the python-software-properties Ubuntu package. Type this command into your terminal application and press Enter. Enter your account password if prompted:
sudo apt-get install python-software-properties
This command installs the Python Software Properties package that includes the add-apt-repository binary. Now we can add the custom PPA.
2. Add ppa:ondrej/php5-5.6 PPA
This PPA expands Ubuntu’s available software selection beyond the default Ubuntu software repositories. Type this command into your terminal application and press Enter. Enter your account password if prompted:
sudo add-apt-repository ppa:ondrej/php5-5.6
This command adds the Ondřej Surý PPA to Ubuntu’s list of software sources. It also downloads the PPA’s GPG public key and appends it to our local GPG keyring. The GPG public key enables Ubuntu to verify that the packages in the PPA have not been tampered with since they were built and signed by their original author.
Ubuntu caches the list of all available software. When we add new software sources, we need to refresh Ubuntu’s cache. Type this command in your terminal application and press Enter. Enter your account password if prompted:
sudo apt-get update
3. Install PHP
We can now use Ubuntu’s aptitude package manager to install the latest PHP stable release from the Ondřej Surý PPA. Before we do, it is important to know which PHP packages are available and what they do. PHP is distributed in two forms. One form is a CLI package that enables you to use PHP on the command line (we will use this one). There are several other PHP packages that integrate PHP with the Apache or nginx web servers (we discuss these in Chapter 7). For now, we’ll stick with the PHP CLI package.
First, let’s install the PHP CLI package. Type this command in your terminal application and press Enter. Enter your account password if prompted:
sudo apt-get install php5-cli
The Linux package manager also contains packages for individual PHP extensions that can be installed separately. Let’s install a few of those now. Type this command in your terminal application and press Enter. Enter your account password if prompted:
sudo apt-get install php5-curl php5-gd php5-json php5-mcrypt php5-mysqlnd
Verify PHP was installed successfully with this terminal command:
php -v
This command should output something similar to:
PHP 5.5.11-3+deb.sury.org~trusty+1 (cli) (built: Apr 23 2014 12:15:16)
Copyright (c) 1997-2014 The PHP Group
Zend Engine v2.5.0, Copyright (c) 1998-2014 Zend Technologies
with Zend OPcache v7.0.4-dev, Copyright (c) 1999-2014, by Zend Technologies
CentOS 7
Like Ubuntu, CentOS and RHEL do not provide the latest stable version of PHP in their default software repositories. RHEL is very particular about which software packages are included in its official distribution because it prides itself on superior security and stability; software updates are added slowly for the sake of safety.
We’re not a Fortune 500 company, so we can afford to install the latest PHP stable release in our CentOS/RHEL Linux distribution. To do so, we’ll use the EPEL (Extra Packages for Enterprise Linux) repository. The EPEL describes itself as:
…a Fedora Special Interest Group that creates, maintains, and manages a high quality set of additional packages for Enterprise Linux, including, but not limited to, Red Hat Enterprise Linux (RHEL), CentOS, Scientific Linux (SL), and Oracle Enterprise Linux(OEL).
The EPEL repository is unrelated to the official CentOS/RHEL Linux distributions, but it can still supplement the default CentOS/RHEL software repositories. And that’s exactly what we’re going to do.
1. Add the EPEL repository
Let’s tell our CentOS/RHEL system to use the EPEL software repository. Type these commands into your terminal application one-by-one, and press Enter after each command. Enter your account password if prompted:
sudo rpm -Uvh \
http://dl.fedoraproject.org/pub/epel/7/x86_64/e/epel-release-7-5.noarch.rpm;
sudo rpm -Uvh \
http://rpms.famillecollet.com/enterprise/remi-release-7.rpm;
These commands add the third-party EPEL and remi software repositories to our CentOS/RHEL system. You should now see epel.repo and remi.repo files in the /etc/yum.repos.d directory.
2. Install PHP
Now we’ll install the latest PHP version from the EPEL and remi repositories. As I mentioned earlier in the Ubuntu PHP installation, PHP is distributed in two forms. One form is a CLI package that enables you to use PHP on the command line. For now, we’ll stick with the PHP CLI package.
First, let’s install the PHP CLI package. Type this command in your terminal application and press Enter. Enter your account password if prompted.
sudo yum -y --enablerepo=epel,remi,remi-php56 install php-cli
Next, let’s install a few additional PHP extensions. You can search for a complete list of PHP extensions with the yum package manager. Type this command into your terminal application and press Enter:
yum search php
Once you find a list of PHP extensions, install them as I do in this example. Your package names might be different:
sudo yum -y --enablerepo=epel,remi,remi-php56 \
install php-gd php-mbstring php-mcrypt php-mysqlnd php-opcache php-pdo
The important takeaway from this command is the --enablerepo option. This option tells yum to install the specified software packages from the EPEL, remi, and remi-php56 repositories. Without this option, yum only references its default software sources.
Verify that PHP was installed successfully. Type this command in your terminal application and press Enter:
php -v
This command should output something similar to:
PHP 5.6.3 (cli) (built: Nov 16 2014 08:32:30)
Copyright (c) 1997-2014 The PHP Group
Zend Engine v2.6.0, Copyright (c) 1998-2014 Zend Technologies
with Zend OPcache v7.0.4-dev, Copyright (c) 1999-2014, by Zend Technologies
OS X
OS X includes PHP out of the box, but it’s probably not the latest version and it may not have the PHP extensions you need. I recommend you ignore the PHP that comes with OS X and use a custom PHP build instead. There are many ways to install PHP on OS X, but I recommend two methods: MAMP and Homebrew.
MAMP
MAMP is the best way to install PHP on OS X if you cringe at the mere thought of the command-line terminal. MAMP (which stands for Mac, Apache, MySQL, and PHP) provides a traditional web-development software stack that includes an Apache web server, a MySQL database server, and PHP. MAMP is an OS X application with a GUI. Many users prefer the familiar GUI interface because it provides a nice point-and-click interface for installing and configuring the MAMP software (Figure A-1). MAMP lives in your /Applications folder, and you double-click its application icon to launch it. It has a simple OS X package (.pkg) installer that makes it dead simple to install and use. You can even drag it into your OS X Dock for quick access.
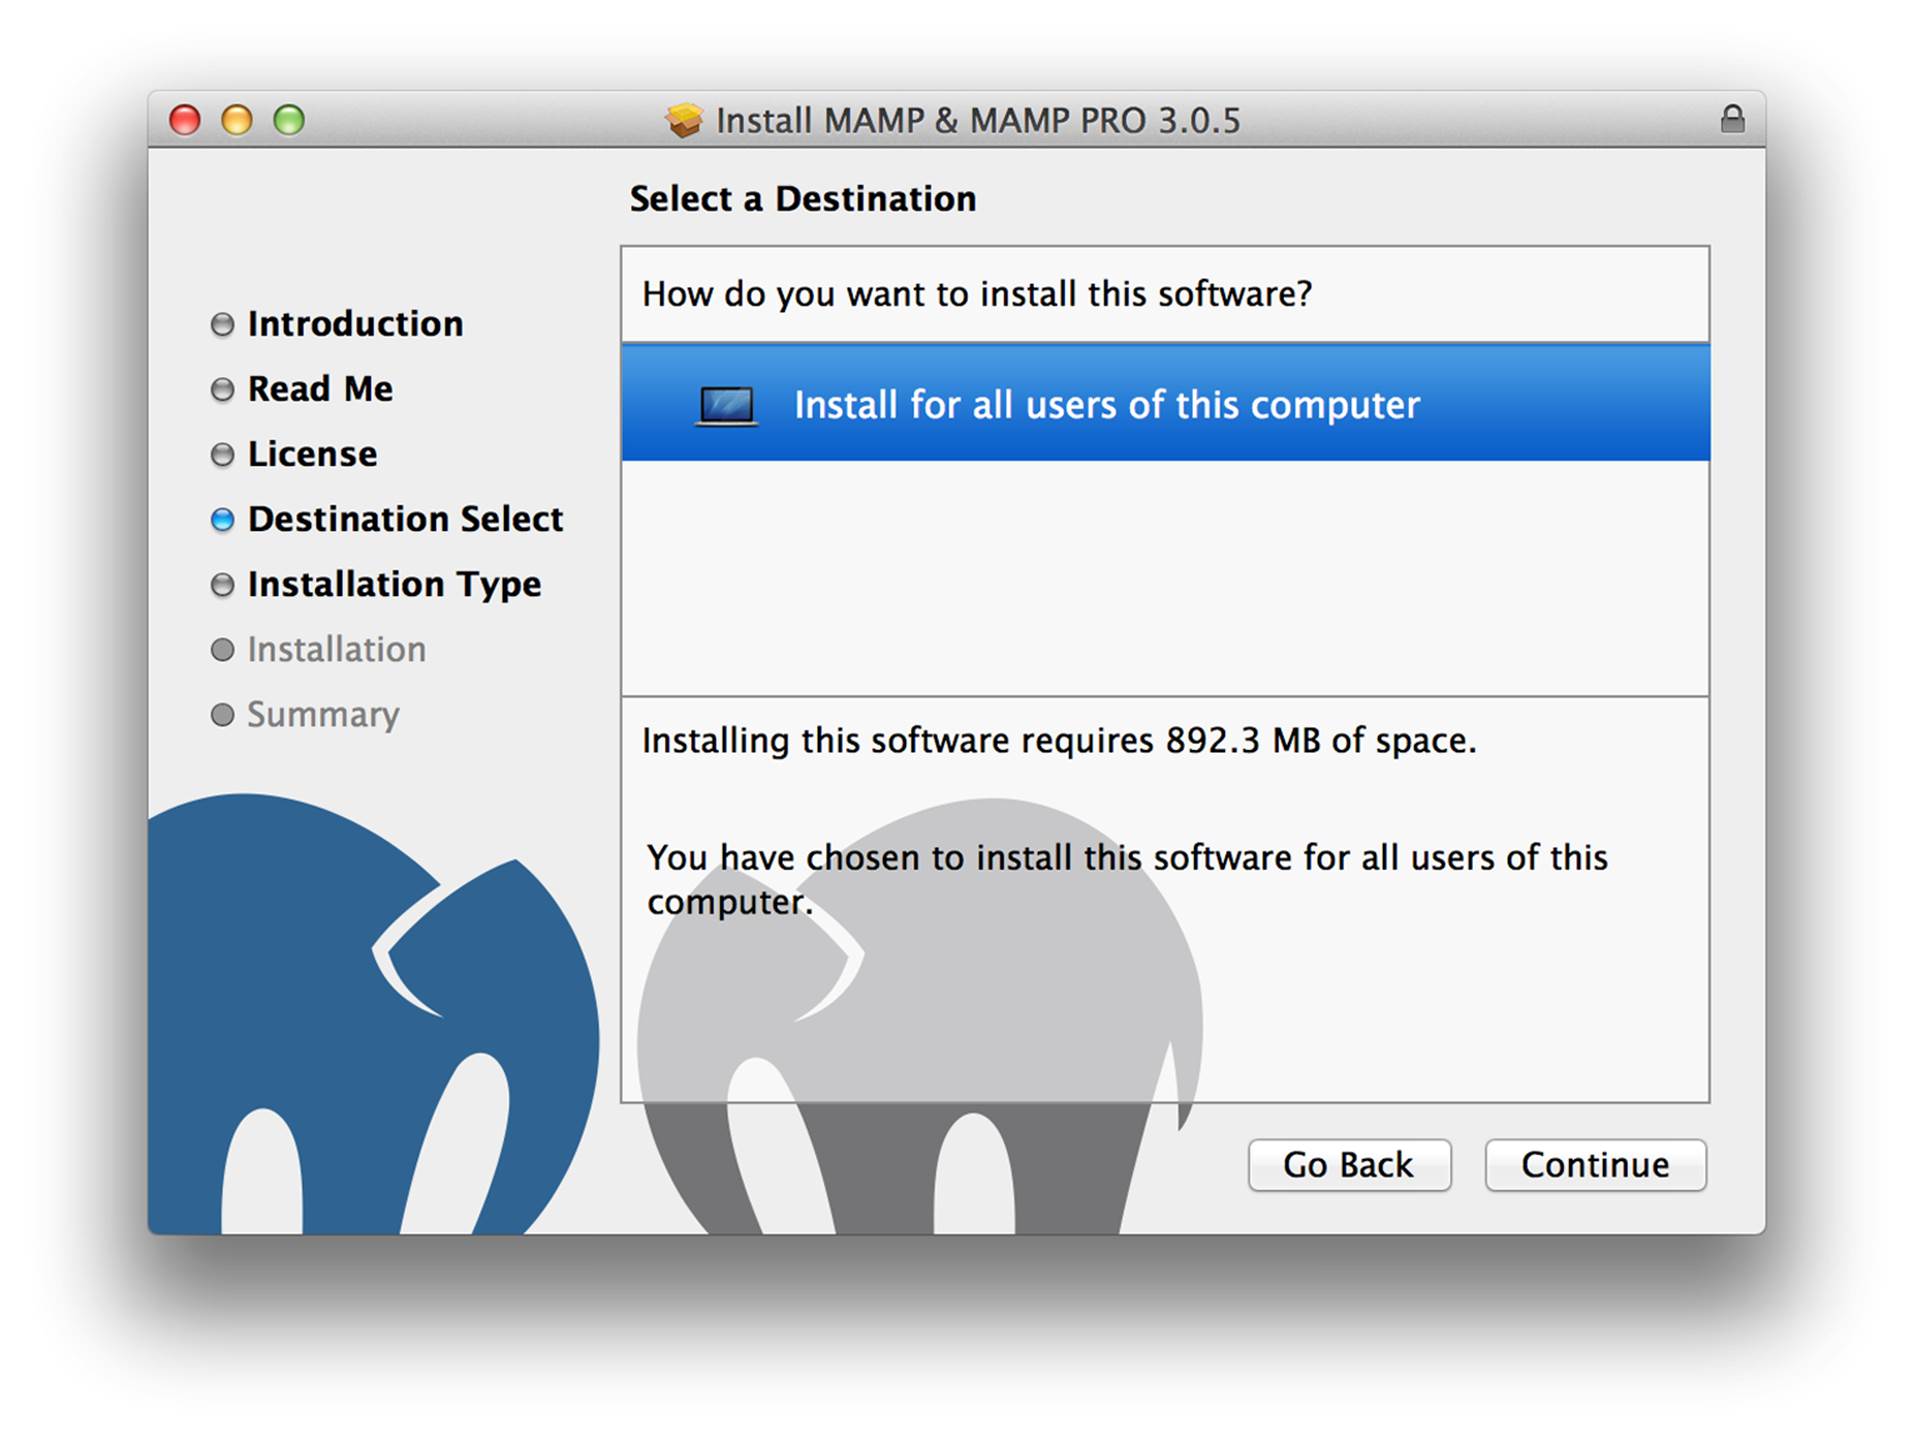
Figure A-1. Installing MAMP
Install
Download the MAMP package (.pkg) installer from http://www.mamp.info, and double-click the MAMP package installer. Follow the on-screen instructions.
When the MAMP installer finishes, find the MAMP application in your /Applications folder and launch it by double-clicking its application icon. After MAMP opens, click the Start Servers button to start the Apache and MySQL servers (Figure A-2). It’s really that simple.
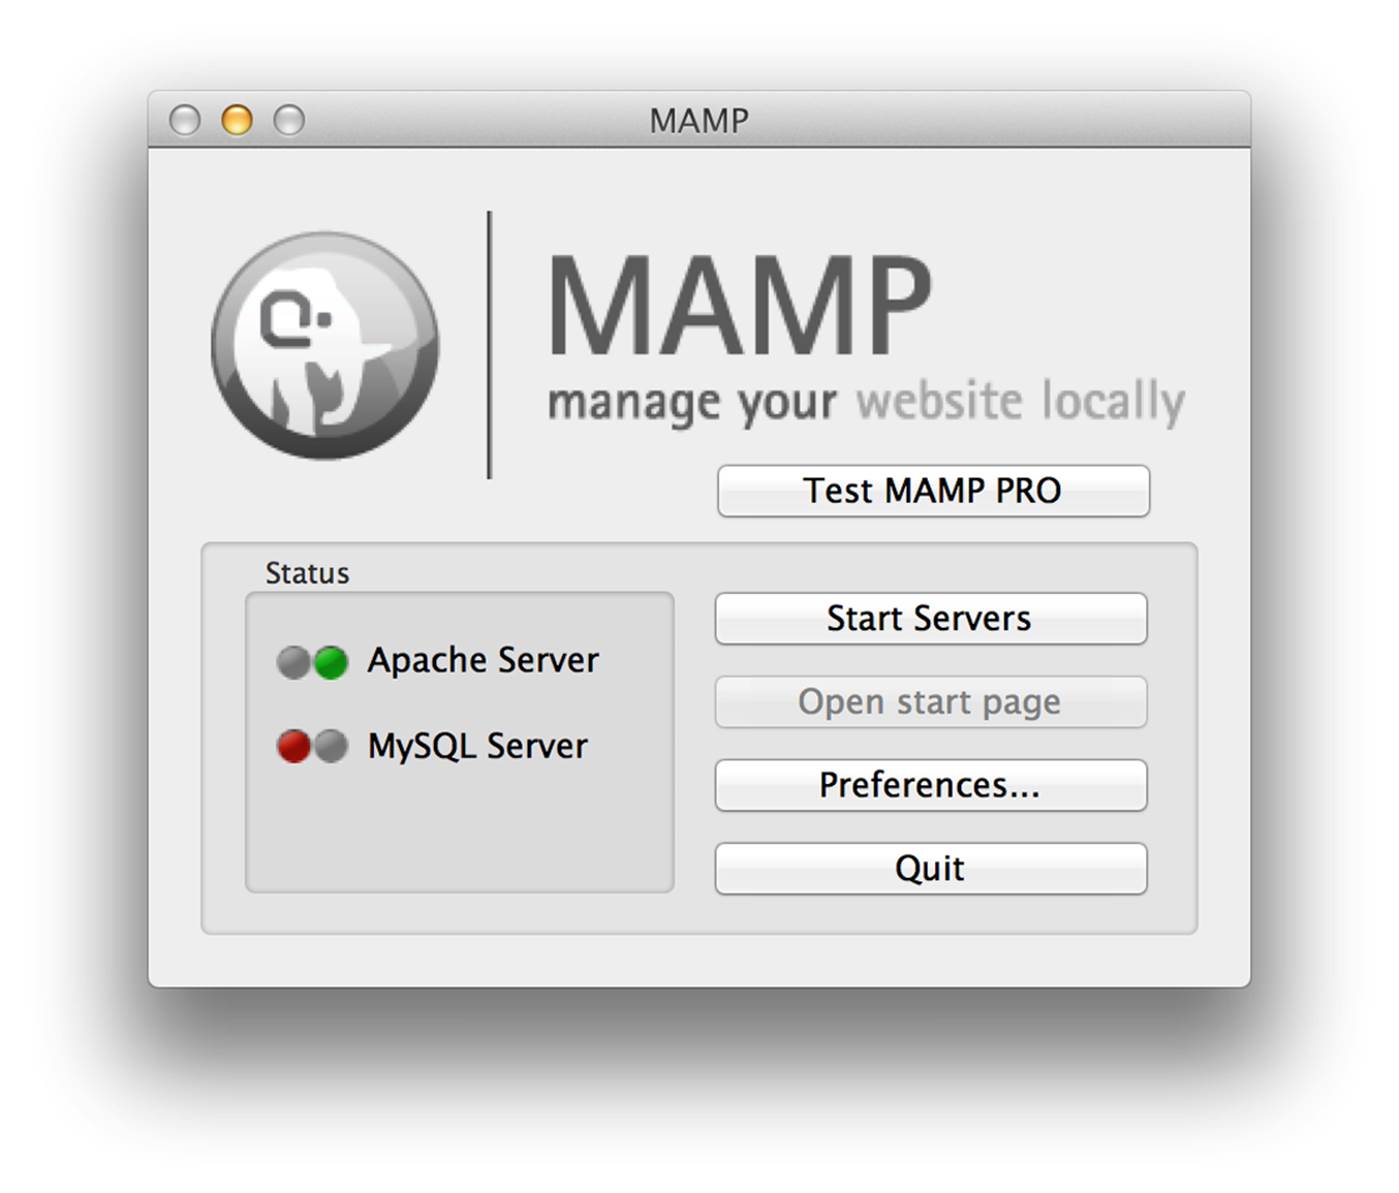
Figure A-2. MAMP interface
What about PHP?, you ask. MAMP embeds PHP inside of the Apache web server using the mod_php Apache module. Without getting into too much detail, you can use PHP if the Apache web server is running. We discuss PHP deployment strategies in Chapter 7.
After you start the Apache and MySQL servers, open your web browser and go to http://localhost:8888. You should see a MAMP welcome page if MAMP is successfully installed.
The Apache web server typically listens for connections on port 80. MAMP, however, runs Apache on port 8888. Likewise, MySQL typically listens for connections on port 3306. MAMP, however, runs MySQL on port 8889. You can change MAMPs default ports in the MAMP application preferences. MAMP’s Apache web server document root is /Applications/MAMP/htdocs. Any PHP files in this directory can be accessed in a web browser at http://localhost:8888.
If you will use MAMP a lot, go into the MAMP application preferences (Figure A-3) and make sure Start Servers when starting MAMP is checked. Then add the MAMP application to your OS X account’s Login Items. This will start MAMP’s Apache and MySQL servers automatically when you log in to OS X.
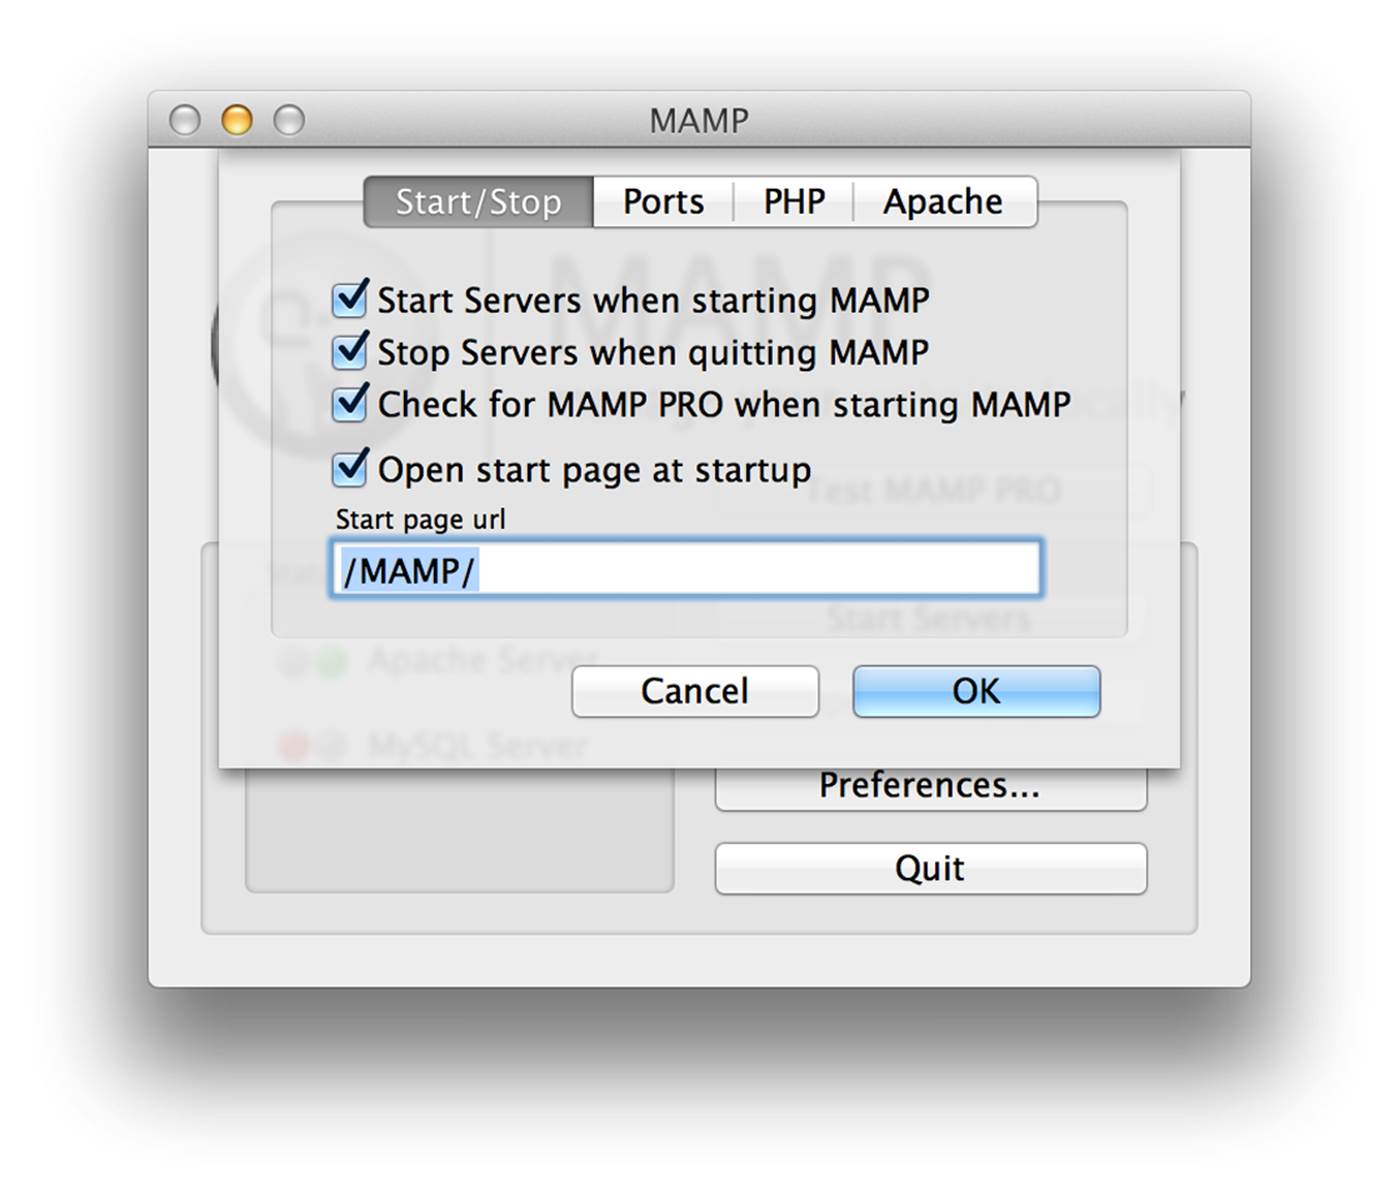
Figure A-3. MAMP application preferences
Extend
It is possible to download MAMP add-ons that provide different PHP versions for your local MAMP installation. MAMP is updated frequently and most likely comes bundled with the latest PHP version. But if for whatever reason it doesn’t, or if you need an older PHP version, go to the MAMP website and download the PHP version you need.
Limitations
The MAMP free version provides only one Apache virtual host, and it does not let you easily modify PHP’s configuration or extensions. MAMP is very basic and provides only the bare necessities for PHP development on OS X.
MAMP provides a paid “Pro” version that lets you create multiple Apache virtual hosts, easily edit your php.ini configuration file, and fine-tune PHP extensions. MAMP Pro is nice, don’t get me wrong. But instead of forking out a good bit of money for MAMP Pro, you’re better off learning a few command-line fundamentals so you can use the excellent Homebrew package manager instead.
Homebrew
Homebrew is an OS X package manager comparable to Ubuntu’s aptitude and RHEL’s yum package managers. Homebrew lets you easily browse, find, install, update, and remove any number of custom software packages on OS X. However, Homebrew is a command-line application. If you are not familiar with the OS X command line, you will be more comfortable with MAMP.
Homebrew uses formulae to install software packages on your computer. Homebrew provides default formulae for lots of software that’s not provided out of the box with OS X. For example, there are Homebrew formulae for wget, phploc, phpmd, and php-code-sniffer (to name just a few). If Homebrew’s default formulae are insufficient, you can tap into third-party formulae repositories to expand your available Homebrew software selection. Homebrew is, without exception, my favorite way to install PHP on OS X.
XCode command-line tools
Before we can install Homebrew, we must first install the XCode Command-Line Tools provided (for free) by Apple, Inc. These command-line tools include the gcc compiler (among other tools) needed by Homebrew to build and install software packages. If you are running OS X Mavericks 10.9.2 or newer, open the OS X Terminal application, type this command, and press Enter:
xcode-select --install
This command opens this modal window shown in Figure A-4.
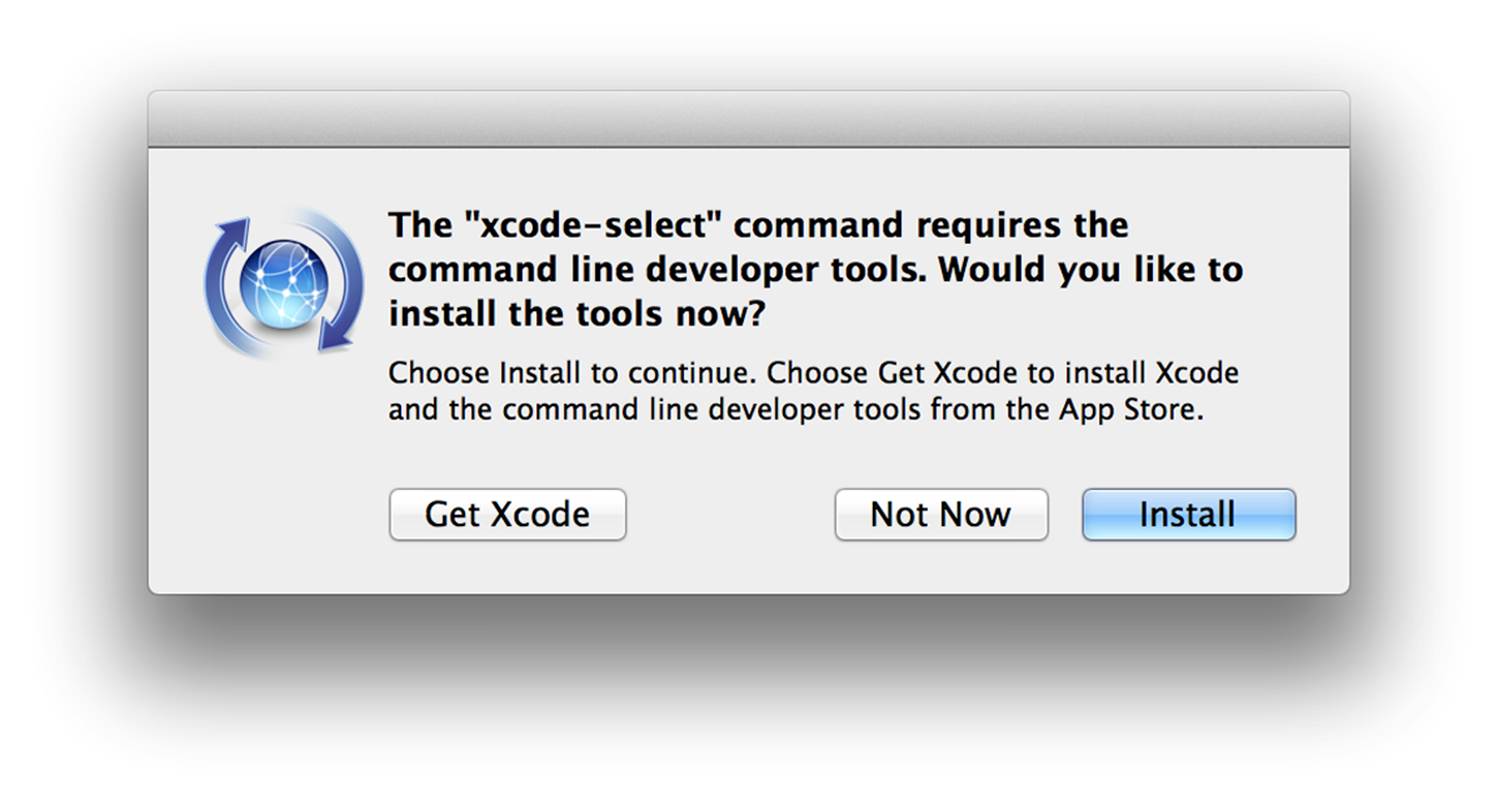
Figure A-4. Installing XCode command-line tools
Click Install to begin installing the XCode Command-Line Tools. Click Agree when the software license agreement appears. After the XCode Command-Line Tools software is installed, click Done and continue to the next step.
If you are using an older version of OS X, you must log into the Apple Developer Portal to download and run a standalone XCode Command-Line Tools package (.pkg) installer.
Install
After you install the XCode Command-Line Tools, type this command in the OS X Terminal application and press Enter:
ruby -e "$(curl -fsSL https://raw.github.com/Homebrew/homebrew/go/install)"
WARNING
This command executes Ruby code that is downloaded from a remote URL. You should always inspect the remote code before you execute it, no matter how legitimate the source may be.
Directory permissions
Homebrew downloads and ferments software in the /usr/local/Cellar directory. It symlinks installed software binaries to the /usr/local directory. Your OS X user account must be able to access the /usr/local directory to use software installed with the Homebrew package manager.
Let’s make sure your OS X user account owns the /usr/local directory. Type this command into the OS X Terminal application and press Enter. Enter your administrator password if prompted:
sudo chown -R `whoami` /usr/local
The chown command means “change the owner” of the specified directory, the -R command flag means “make this change recursively to all subdirectories” of the specified directory, and the whoami argument is dynamically substituted with your OS X user account name. After you run this command, your OS X user account will own (and therefore have access to) the /usr/local directory.
Environment PATH
Next, add the /usr/local directory to your OS X environment PATH. The environment PATH is a list of directories to be searched when you execute software using only the software’s name instead of the software’s absolute filesystem path. For example, if I execute wget, OS X will search all directories on my environment PATH for the wget software. Otherwise, I’d have to type /usr/local/wget every time I want to use wget. Type this command into the OS X Terminal application and press Enter:
echo 'export PATH="/usr/local/bin:$PATH"' >> ~/.bash_profile
Tap formulae repositories
Before we install PHP with Homebrew, we must tap additional repositories that contain PHP-related formulae that do not exist in the default Homebrew repository.
First, we’ll tap the homebrew/dupes repository. This repository contains formulae for software that already exists on OS X. This repository, however, contains newer software versions than OS X. Type this command in the OS X Terminal application and press Enter:
brew tap homebrew/dupes
Next, we’ll tap the homebrew/versions repository. This repository contains multiple versions of existing OS X software. Type this command in the OS X Terminal application and press Enter:
brew tap homebrew/versions
Finally, we’ll tap the homebrew/php repository. This repository contains PHP-related formulae that might not be included in the default Homebrew repositories. The default Homebrew software repository is not maintained by PHP developers. This repository is, and it includes software appropriate for PHP developers. Type this command in the OS X Terminal application and press Enter:
brew tap homebrew/php
Install PHP
So far, we’ve installed the Homebrew package manager, configured filesystem permissions, updated the environment PATH, and tapped into additional formulae repositories. Now it’s time to install PHP. There are Homebrew formulae for each PHP version and each PHP version’s extensions. Homebrew provides a very simple way to search for available formulae. Type this command in the OS X Terminal application and press Enter:
brew search php
You should see a lengthy list of Homebrew PHP formulae. Find the latest stable PHP version in the formulae list (PHP 5.5.x will be named php55, PHP 5.6.x will be named php56, and so on). I’ll pick php56 since PHP 5.6.x is the latest stable version (as of December 2014). Type this command in the OS X Terminal application and press Enter:
brew install php56
Installation may take a while, so feel free to grab a coffee and check back in a few minutes. After the PHP software package is installed, you can confirm the installation by executing php -v in the OS X Terminal application; this command outputs the full name and version number of the PHP interpreter installed by Homebrew.
Install PHP extensions
Homebrew lets you install PHP extensions separately from the PHP interpreter. You can search for PHP extensions just as you searched for PHP previously. Assuming you chose php56, type this command in the OS X Terminal application and press Enter:
brew search php56
You should see a lengthy list of PHP 5.6 extensions prefixed with php56-. After you find the extensions you want, type this command in the OS X Terminal application and press Enter. Swap the formulae in this example with the extension formulae you want to install:
brew install php56-intl php56-mcrypt php56-xhprof
The Homebrew package manager is much more powerful than what I’ve shown here. Type brew into the OS X Terminal application and press Enter to see a complete list of Homebrew commands. You can also read the complete Homebrew documentation online at http://brew.sh.
Build from Source
The precompiled PHP binary provided by your operating system’s package manager may not always be up-to-date or exactly what you want. If this is true, you’re better off building PHP from source code. Yes, this sounds scary. It took me a long time to build up enough confidence before I compiled PHP for the first time. I can assure you, it’s less scary than it sounds.
The build process is simple. We’ll download and extract the PHP source code. We’ll configure the source code and make sure all of its software dependencies are installed. And then we’ll make the actual PHP binaries. Download. Configure. Make. Three simple steps.
Compiling PHP from source code gives you the flexibility to tweak the PHP build to your exact specifications. Although there are many ways to configure PHP, for the sake of time I’ll show you how I prefer to build PHP for my own projects. In addition to PHP’s default features, I typically want PHP to support:
§ OpenSSL
§ Bytecode caching
§ FPM (FastCGI process management)
§ PDO database abstraction
§ Encryption
§ Multibyte strings
§ Image manipulation
§ Network sockets
§ Curl
With this list in mind, let’s start building PHP. Try to follow along on your own computer. If this is your first time building PHP from source code, I strongly encourage you to do this on a virtual machine. You can set up a local virtual machine with VMware, Parallels, or VirtualBox. You can also fire up a dirt-cheap remote virtual machine with DigitalOcean, Linode, and other web hosts that bill by the hour. If you mess up, you can destroy the virtual machine, rebuild it, and try again without consequence.
Now take a deep breath, open your terminal application, and (most important) don’t be afraid to make mistakes.
Get the Source Code
First, let’s download the PHP source code. Locate the latest stable version of the PHP source code at http://www.php.net/downloads.php. For me, the latest stable release happens to be version 5.6.3, but this may be different for you. Type the following commands into your Terminal application and press Enter after each command.
The src/ directory
First, we create a src/ directory in our home folder. This folder will contain the source code that we download from PHP.net. We cd into the src/ directory so that it becomes our current working directory:
mkdir ~/src;
cd ~/src;
Download the source code
Next, we use wget to download the PHP source code as a tar.gz archive. The downloaded file will be located at ~/src/php.tar.gz:
wget -O php.tar.gz http://www.php.net/get/php-5.6.3.tar.gz/from/this/mirror
Extract the PHP source code archive with the tar command, and cd into the unarchived source code directory:
tar -xzvf php.tar.gz;
cd php-*;
Configure PHP
We’ve downloaded the PHP source code. Now we need to configure it. Before we do, we must install a few software dependencies. How do I know what dependencies to install? I run the ./configure command (see the next subsection) until it works. When the ./configure command fails due to a missing software dependency, it indicates what software is missing. Install the missing dependency and rerun the ./configure command. Rinse and repeat until it works.
Luckily for you, I’ve already figured out what software dependencies are needed for the PHP ./configure command we’ll be using. Let’s install these software dependencies now. I use commands for both Ubuntu/Debian and CentOS/RHEL Linux distributions; use the commands appropriate for your Linux distribution.
NOTE
If for whatever reason the ./configure command reports additional missing dependencies, you can search for the missing dependency software packages online at http://packages.ubuntu.com/ (for Ubuntu) or at https://fedoraproject.org/wiki/EPEL (for CentOS).
Build essentials
We’ll need these fundamental software binaries to build PHP on your operating system. These binaries include gcc, automake, and other fundamental development software:
# Ubuntu
sudo apt-get install build-essential;
# CentOS
sudo yum groupinstall "Development Tools";
libxml2
We’ll need the libxml2 library. This is used by PHP’s XML-related functions:
# Ubuntu
sudo apt-get install libxml2-dev;
# CentOS
sudo yum install libxml2-devel;
OpenSSL
We’ll need the openssl library. This is required to enable HTTPS stream wrappers in PHP, which is kind of important, right?
# Ubuntu
sudo apt-get install libssl-dev;
# CentOS
sudo yum install openssl-devel;
Curl
We’ll need the libcurl library. This is required by PHP’s Curl functions:
# Ubuntu
sudo apt-get install libcurl4-dev;
# CentOS
sudo yum install libcurl-devel;
Image manipulation
We’ll need the GD, JPEG, PNG, and other image-related system libraries. Fortunately, all of these are bundled into a single package. These are required to manipulate images with PHP:
# Ubuntu
sudo apt-get install libgd-dev;
# CentOS
sudo yum install gd-devel;
Mcrypt
We’ll need the mcrypt system library to enable PHP’s Mcrypt encryption and decryption functions. For whatever reason, there is no default CentOS Mcrypt package. We’ll need to supplement the default CentOS packages with the third-party EPEL package repository to install Mcrypt:
# Ubuntu
sudo apt-get install libmcrypt-dev;
# CentOS
wget http://dl.fedoraproject.org/pub/epel/6/x86_64/epel-release-6-8.noarch.rpm;
sudo rpm -Uvh epel-release-6*.rpm;
sudo yum install libmcrypt-devel;
The ./configure command
Now that our software dependencies are installed, let’s configure PHP. Type the following ./configure command in your Terminal application and press Enter:
./configure
--prefix=/usr/local/php5.6.3
--enable-opcache
--enable-fpm
--with-gd
--with-zlib
--with-jpeg-dir=/usr
--with-png-dir=/usr
--with-pdo-mysql=mysqlnd
--enable-mbstring
--enable-sockets
--with-curl
--with-mcrypt
--with-openssl;
This is a lengthy command with a lot of options. Don’t be overwhelmed. Each command option has a specific purpose. You can find a list of all available options with ./configure --help. We’ll go through this ./configure command line by line so you know exactly what it does:
--prefix=/usr/local/php5.6.3
The --prefix option defines the path to a filesystem directory that will contain the compiled PHP binaries, includes, libraries, and configuration files. I prefer to keep my custom PHP build and related files together in a single parent directory for the sake of organization. Your user account will need permission to write to this directory. If you don’t have write permission to /usr/local, you can set the --prefix to a directory in your user account’s home folder instead (e.g., ~/local/php-5.5.13). Regardless, make sure the --prefix directory exists before you run the./configure command.
--enable-opcache
The --enable-opcache option enables PHP’s built-in bytecode caching system. You will most always want to enable this. The performance benefits are tremendous.
--enable-fpm
The --enable-fpm option enables the built-in PHP FastCGI Process Manager. This lets you run PHP as a FastCGI process that is accessible via a TCP port or a local Unix socket. FPM is fast becoming the preferred way to run PHP (especially with the nginx web server). If in doubt, I recommend you enable this option.
--with-gd
The --with-gd option lets PHP interface with your operating system’s GD image-manipulation library. You will want to enable this option if you plan on using PHP to manipulate images.
--with-zlib
The --with-zlib option lets PHP interface with your operating system’s Zlib library. Zlib is a data-compression library that is needed by the GD image library to create and manipulate PNG image data. This option is required if you use the --with-gd option.
--with-jpeg-dir
The --with-jpeg-dir option specifies the path to the filesystem directory that contains the JPEG libraries. This option is required if you use the --with-gd option.
--with-png-dir
The --with-png-dir option specifies the path to the filesystem directory that contains the PNG libraries. This option is required if you use the --with-gd option.
--with-pdo-mysql=mysqlnd
The --with-pdo-mysql option instructs PHP to enable the PDO database abstraction API for the MySQL database using PHP’s own native MySQL driver. If you use MySQL, you’ll want to enable this option.
--enable-mbstring
The --enable-mbstring option instructs PHP to enable multibyte (read “Unicode”) string support. You’ll most always want to enable this option.
--enable-sockets
The --enable-sockets option instructs PHP to enable network socket support so that you can talk with remote machines via TCP sockets. You’ll most always want to enable this option.
--with-curl
The --with-curl option lets PHP interface with your operating system’s curl library. This lets you use PHP’s curl functions to send and receive HTTP requests. You’ll most always want to enable this option.
--with-mcrypt
The --with-mcrypt option lets PHP interface with your operating system’s mcrypt library for data encryption and decryption. Although this option is by no means required, it is used by a growing number of PHP components. I strongly recommend you enable this option.
--with-openssl
The --with-openssl option lets PHP interface with your operating system’s openssl library. This is required to use PHP’s HTTPS stream wrapper. Although this option is technically optional, it’s really not. Make Edward Snowden proud. Enable this option.
Make and install PHP
Configuring PHP and installing its software dependencies was the hard part. It’s all downhill from here. Assuming the ./configure command executed successfully, type this command in your terminal application and press Enter:
make && make install
This will compile PHP and may take a while. Now is a good time to grab a coffee or two. Eventually the command will finish and PHP will be installed. That wasn’t too bad, right?
The compiled PHP binaries are available in the bin/ directory beneath your --prefix directory. The php-fpm binary is available in the sbin/ directory beneath your --prefix directory. Be sure the bin/ and sbin/ directories are added to your system’s environment PATH so you can reference the php binary by name instead of absolute path.
Create the php.ini file
Let’s not forget about our php.ini file. This may not be created automatically. The PHP GitHub repository has a php.ini preconfigured for local development. Our php.ini file should exist in the lib/ directory beneath your --prefix directory. Let’s create it now. Type the following commands into your terminal application and press Enter after each command.
First, cd into our PHP installation’s lib/ directory. This path may be different if you used a different --prefix path in your ./configure command:
cd /usr/local/php5.6.3/lib
Next, download the PHP.ini file from PHP’s GitHub repository into a file named php.ini:
curl -o php.ini \
https://raw.githubusercontent.com/php/php-src/master/php.ini-development
That’s it. We’re all set to execute PHP files with the newly installed php interpreter. We talked more about the php-fpm binary when we discussed PHP deployment strategies in Chapter 7.
Windows
Yes, you can run PHP on Windows. However, I encourage you to use a Linux virtual machine instead. It is very likely that your production server will be running a Linux distribution, and you should set up your local development environment to closely match your production environment. But if you must use Windows locally, here’s how.
Binaries
The fine folks over at PHP.net provide prebuilt PHP binaries for Windows at http://php.net/windows. Download the appropriate PHP release (provided as a ZIP archive) and unpack it to a directory of your choice. I’ll unpack it to C:\PHP\. Copy the php.ini-production file to php.ini in the same folder. No other changes are required to use PHP on the Windows command line. You can execute a custom PHP script with optional arguments like this:
C:\PHP\php.exe -f "C:\path\to\script.php" -- -arg1 -arg2 -arg3
TIP
You should add the PHP executable to your Windows PATH variable and append the .php extension to your Windows PATHEXT variable to save your future self from a lot of extra typing.
WAMP
You can also download and install WAMP to set up a quick and dirty local PHP development environment. Like its OS X counterpart, MAMP, WAMP is an all-in-one software package that provides a traditional web-development stack out-of-the-box. It includes an Apache web server, a MySQL database server, and PHP. It has a Windows software installer that will guide you through every step of the install process. WAMP also provides a configuration menu in the Windows Taskbar notification area where you can quickly and easily start, stop, or restart your Apache and MySQL servers. Like MAMP, WAMP embeds PHP in the Apache web server using the mod_php Apache module. If your Apache server is running, you can use PHP.
WAMP is your best bet for quickly installing a local PHP development stack on your Windows machine. However, just as with MAMP, you are limited to the software and extensions provided with WAMP. You can download additional PHP versions separately on the WAMP website. Learn more at http://www.wampserver.com/.
Zend Server
Another all-in-one solution is Zend Server. It is available in both free and paid versions. Like WAMP, it provides an Apache web server, the latest PHP interpreter and popular PHP extensions, a MySQL database server, and Zend’s own debugging tools in one easy-to-install package. Just download the installer (.exe) file, run it, and follow the on-screen instructions. Learn more at http://www.zend.com/en/products/server/.
All materials on the site are licensed Creative Commons Attribution-Sharealike 3.0 Unported CC BY-SA 3.0 & GNU Free Documentation License (GFDL)
If you are the copyright holder of any material contained on our site and intend to remove it, please contact our site administrator for approval.
© 2016-2026 All site design rights belong to S.Y.A.